10 Kitchen Ideas Marble Details Can Make Feel Luxe
Marble has a way of making any kitchen feel instantly more refined. But you don't need a full renovation or a massive budget to bring that look home.
A few well-placed marble details can shift the whole vibe of your space, especially when they double as smart storage solutions. Whether you're working with a compact galley or an open-plan layout, these ideas focus on blending beauty with everyday function.
Think marble that works as hard as you do, from countertops with hidden compartments to backsplashes that keep essentials within reach. Let's explore ten ways to weave marble into your kitchen while keeping things organized and clutter-free.
1. Marble Backsplash with Built-In Shelving

A marble backsplash that flows directly into floating shelves is one of those details that makes a kitchen feel both expensive and intentional. Instead of stopping at the counter, the slab extends upward and then bends into narrow ledges—perfect for holding everyday essentials like olive oil, salt, or a few small plants. The result is a seamless look that ties the whole cooking zone together without adding visual clutter.
This idea works especially well in galley kitchens or smaller layouts where every inch of vertical space matters. By using the same marble for both the backsplash and the shelves, you create a continuous surface that tricks the eye into seeing a larger, more open space. The shelves themselves should be kept shallow—just deep enough for a spice jar or a small vase—so they don't overwhelm the wall or collect dust.
Pair this with under-shelf LED strips to highlight the marble's natural veining and give the whole area a warm, gallery-like glow.
Best Materials
Choose a marble with subtle veining, like Carrara or Calacatta, so the pattern doesn't compete with the items on the shelves. For a more budget-friendly option, large-format marble-look porcelain slabs offer the same visual effect without the upkeep. The shelves should be cut from the same slab to ensure a perfect color and pattern match.
Storage Tip
- Keep the shelves intentionally sparse. Reserve them for your most-used cooking oils, spices, and a few decorative jars. This prevents the area from looking busy while still keeping essentials within arm's reach.
- A small herb plant or a sleek salt cellar adds a touch of life without overwhelming the marble.
Lighting Tip
Install slim LED strip lights underneath each shelf. Warm white light (2700K-3000K) brings out the creamy tones in the marble and makes the space feel cozy. Position the lights toward the back of the shelf so they illuminate the wall rather than glare into your eyes while you're cooking.
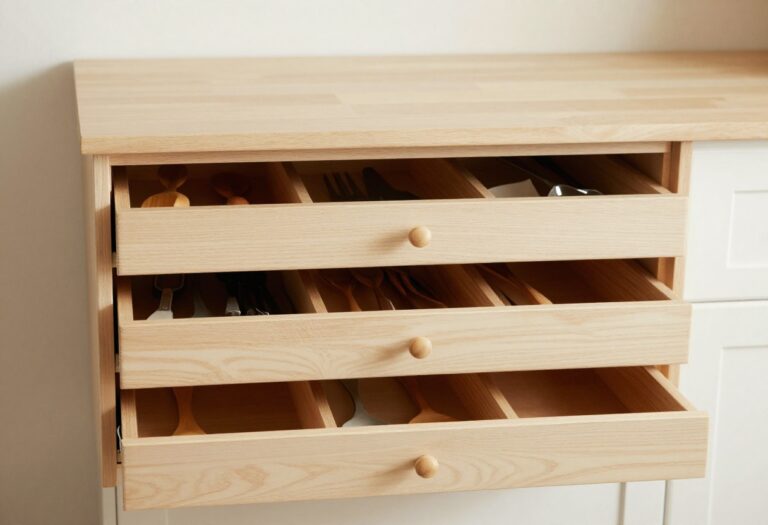
2. Marble Island with Drawer Dividers
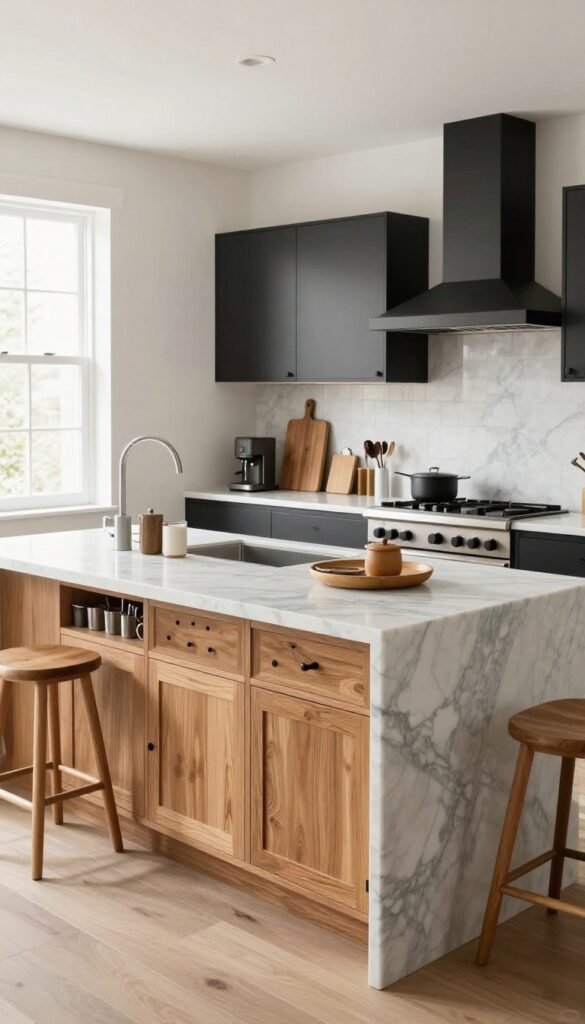
A marble-topped kitchen island is a classic luxury, but adding custom drawer dividers underneath turns it into a storage powerhouse. Use them for utensils, cutting boards, or even a dedicated coffee station. The cool stone surface contrasts nicely with warm wood or matte black hardware.
Your kitchen island can do double duty as both a stunning centerpiece and an organizational hub. When you pair a slab of marble with thoughtfully planned drawer dividers, you get a surface that wows guests and a workspace that keeps your daily essentials neatly sorted. The natural veining in marble adds movement and elegance, while the dividers below keep everything from spatulas to spice jars in their place.
This idea works especially well in open-concept kitchens where the island is visible from the living area—it becomes a focal point that’s both beautiful and functional.
Best Materials
Choose Carrara or Calacatta marble for a classic look, or opt for a honed finish to reduce fingerprints and etching. Pair with warm oak or walnut drawer fronts to soften the stone’s coolness, or go with matte black hardware for a modern edge. The dividers themselves can be solid wood or acrylic for a lighter feel.
Storage Tip
Customize drawer depths to fit your most-used items: shallow dividers for utensils and gadgets, deeper ones for cutting boards and baking sheets. Add a built-in knife block or a spice drawer insert to maximize efficiency. Consider a dedicated coffee station drawer with slots for pods, mugs, and stir sticks.
Finishing Touch
Install under-island lighting to highlight the marble’s veining and make the drawers glow. A pair of sleek bar stools with brushed brass legs completes the look, creating a welcoming spot for quick meals or morning coffee.
3. Marble Countertop with Integrated Knife Block
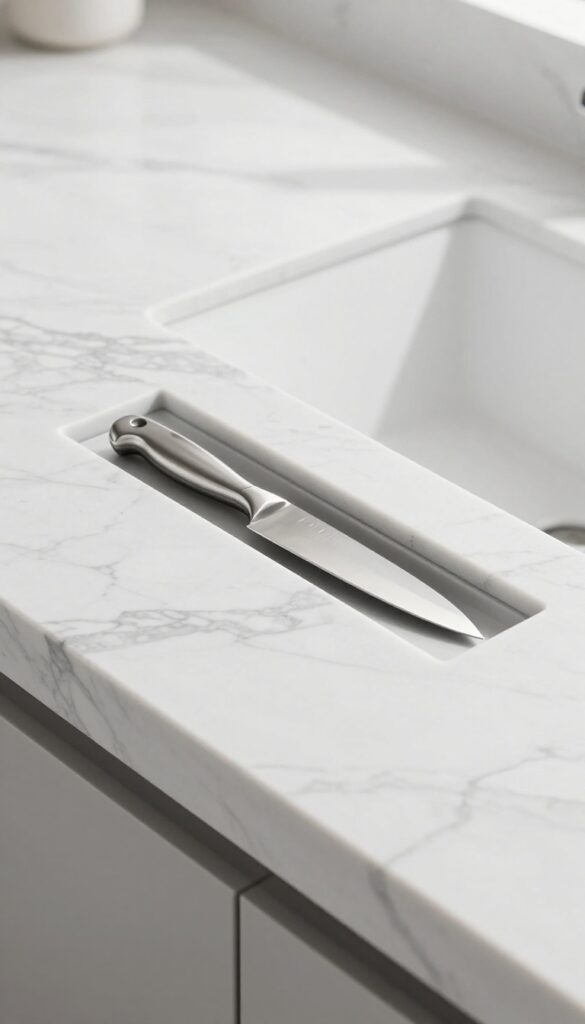
Knife blocks take up valuable counter space and can feel cluttered, especially in a kitchen that aims for a clean, luxurious look. An integrated knife slot or magnetic strip built directly into a marble countertop solves that problem beautifully. The result is a streamlined prep area where your most-used tools are always within reach, and the stone itself becomes a design statement.
Instead of a bulky countertop knife block, opt for a marble slab with a narrow slot or magnetic strip built into the stone. This keeps knives accessible yet out of the way, and the marble adds a sleek, upscale touch to your prep area. The integrated design works especially well on a kitchen island or along a run of countertop where you frequently chop and slice.
It’s a small detail that makes a big difference in both function and visual appeal.
Best Materials
- Choose a dense, durable marble like Carrara or Calacatta for the countertop. The knife slot should be precision-cut and polished to match the surrounding stone. For the magnetic strip, opt for a high-strength neodymium magnet embedded in a stainless steel housing that sits flush with the marble surface.
- This combination ensures longevity and a seamless look.
Layout Tip
Position the integrated knife block on the side of the island or countertop that faces your main work zone. If you’re right-handed, place it to the right of your cutting board; left-handed cooks should mirror that. This keeps your knives within a natural reach without crossing your body, making prep work more efficient.
Finishing Touch
Pair the marble with under-cabinet lighting to highlight the stone’s veining and the sleek knife slot. Soft warm LED strips create a subtle glow that makes the countertop feel even more luxurious. Add a simple wooden cutting board and a few ceramic canisters to balance the cool stone with natural warmth.
4. Marble Backsplash with Magnetic Spice Rack
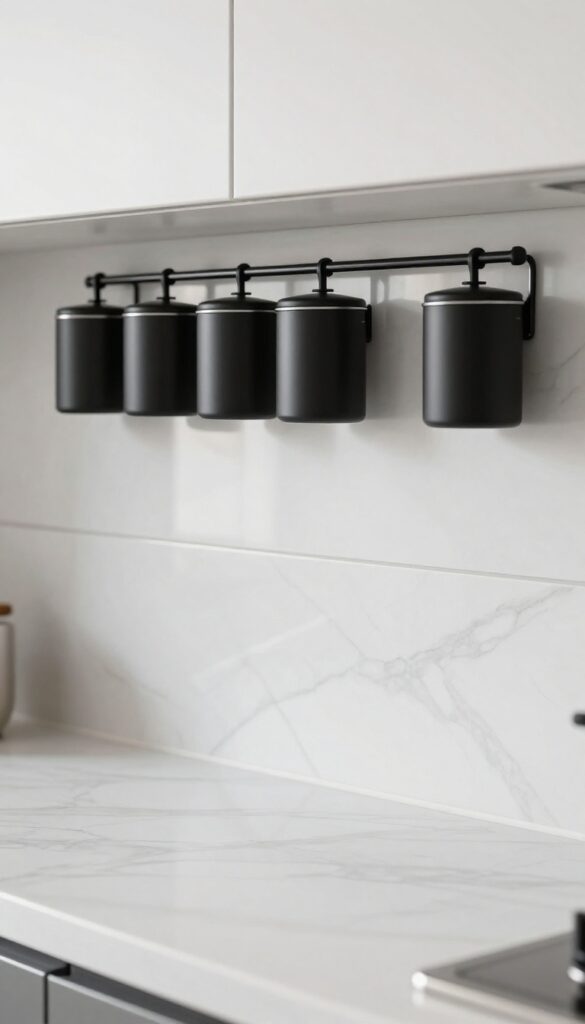
A marble backsplash already brings elegance, but adding a magnetic spice rack takes it from pretty to brilliantly functional. By embedding a thin magnetic strip into the marble, you can hold metal tins of your most-used spices right where you cook. The spices become part of the visual design—like little art pieces lined up on the wall—while freeing up precious cabinet space.
It's a clever storage trick that doesn't sacrifice the clean, luxurious feel of marble.
This idea works best with a full-height marble backsplash behind the stove or prep area. The magnetic strip should be installed during backsplash installation, set flush with the marble surface so it's nearly invisible when not in use. Choose uniform, sleek tins (matte black, brass, or white) for a curated look that feels intentional rather than cluttered.
The result is a highly practical, visually pleasing setup that makes cooking more efficient and your kitchen look effortlessly organized.
Best Colors And Finishes
- Stick with a simple marble slab—white Carrara or Calacatta with subtle veining works beautifully. The magnetic strip should be stainless steel or painted to match the grout. For the spice tins, go with a single metal finish like brushed brass or matte black to keep the look cohesive.
- Avoid mixing too many colors; the goal is a streamlined, almost gallery-like display.
Layout And Placement Tip
Install the strip horizontally about 12 inches above the countertop, centered over the cooktop or main prep zone. Keep the tins arranged by frequency of use—salt, pepper, and oil closest to the stove. Leave a few inches of space between tins so they don't crowd each other, and consider a small shelf above for less-used jars to keep the magnetic area minimal.
Storage And Styling Note
Use identical small tins with clear labels on top (so you can see them from above) or simple engraved fronts. Group spices by cuisine or color for an extra layer of order. The magnetic strip can also hold small metal tools like measuring spoons or a kitchen timer, but keep it sparse—overloading defeats the clean marble aesthetic.
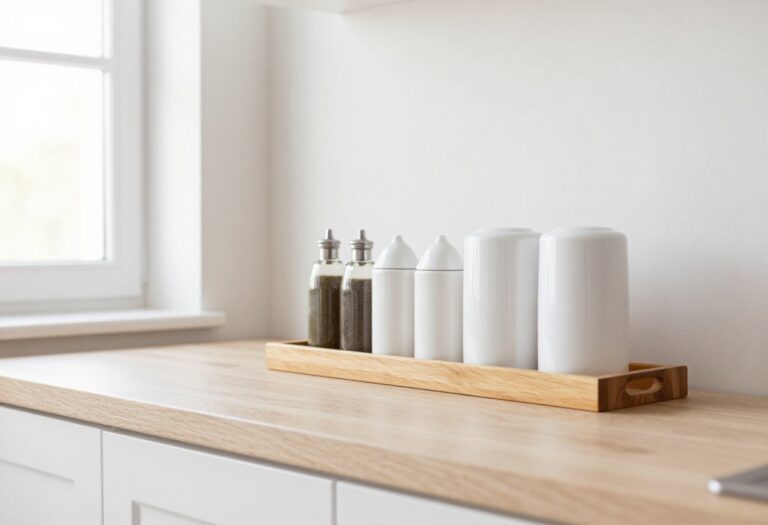
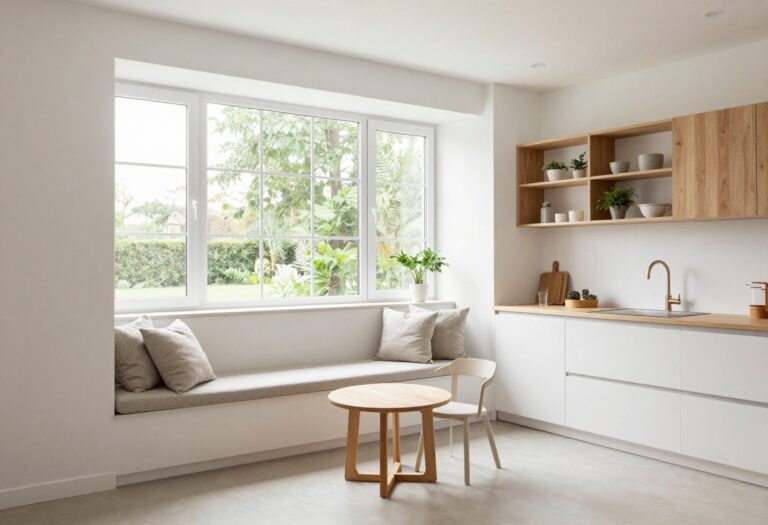
5. Marble Window Sill with Herb Planter
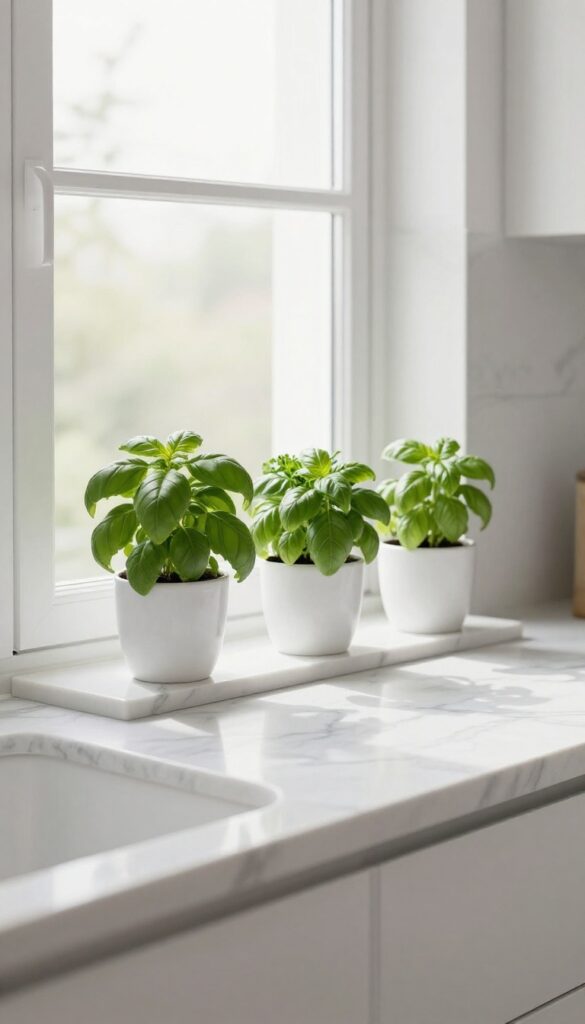
A windowsill might seem like an afterthought, but swapping it for a marble slab turns a tiny ledge into a design feature. The cool stone catches the light and makes small herb pots look like they belong in a fancy kitchen. Plus, having basil and mint within arm's reach feels both practical and indulgent.
This upgrade is surprisingly simple: replace your standard wooden or tile sill with a polished marble piece that extends a few inches beyond the window frame. The extra depth gives you room for three or four small herb pots without cluttering the counter. Marble's natural veining adds visual interest, and its reflective surface helps brighten the whole window area.
For a cohesive look, choose a marble with subtle gray or white tones that complements your countertops or backsplash. The herbs add a pop of green, so you get a mini indoor garden that's both beautiful and useful.
Best Marble Finish
A honed (matte) finish works best here because it hides water spots and fingerprints better than polished marble. Carrara or Calacatta marble in white or light gray keeps the look airy. If you're on a budget, a marble-look quartz slab offers similar elegance with less maintenance.
Storage Tip
- Use the sill as a landing strip for small kitchen tools you use daily. Keep a tiny ceramic dish for salt or a wooden spoon holder next to the herbs. This keeps the area functional without feeling cluttered.
- Just leave enough space for the pots to get sunlight.
Plant Styling Tip
- Stick to compact herbs like thyme, chives, and dwarf basil. Use uniform pots—white ceramic or matte black—to keep the look streamlined. Group them in odd numbers (three is ideal) and place the tallest herb at the back.
- Rotate pots weekly so all plants get even light.
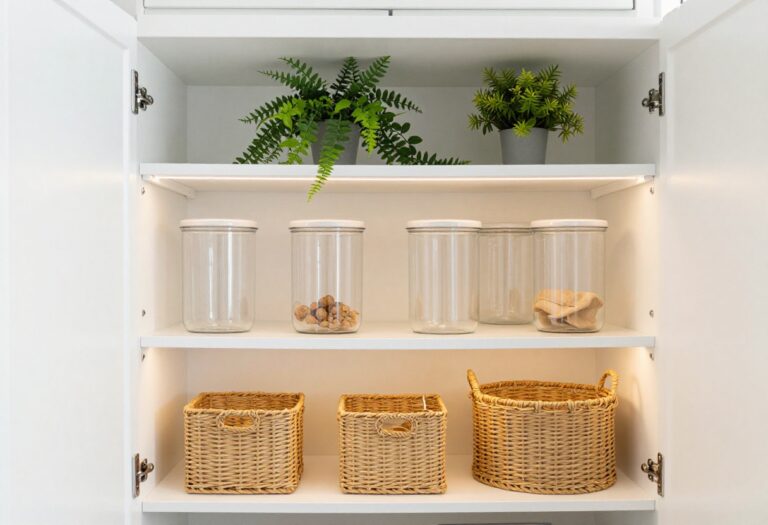
6. Marble Shelf Above Sink for Drying
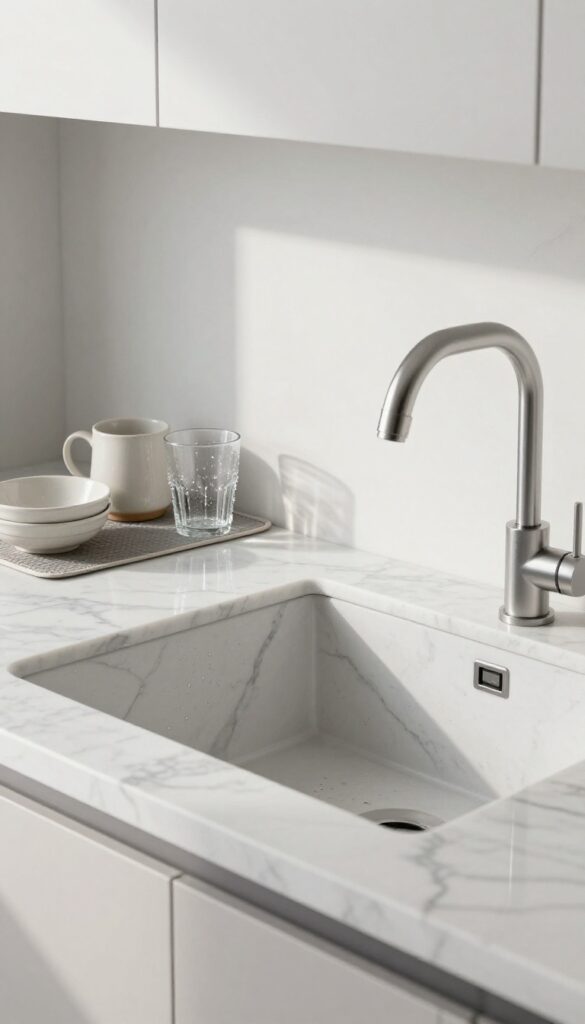
Above the sink is often wasted vertical space, but a marble shelf turns it into a functional drying zone. The stone's natural water resistance makes it ideal for holding just-washed dishes, and it keeps your counters clear for prep work. It's a storage-smart move that also adds a sleek, luxurious focal point right where you need it most.
A marble shelf above the sink isn't just pretty—it's a practical upgrade for any kitchen. By installing a sturdy slab of marble just above the faucet, you create an instant drying rack that's both elegant and efficient. The cool, smooth surface complements the sink area, and because marble is naturally resistant to water, it holds up well to daily use.
Pair it with a slim, absorbent mat to catch drips, and you'll have a stylish spot for glasses, mugs, and small bowls to air-dry without cluttering the counter. This idea works especially well in smaller kitchens where every inch counts, but it also adds a touch of luxury to larger spaces. The key is choosing a marble finish that matches your countertops or backsplash for a cohesive look—honed marble offers a matte, understated elegance, while polished marble brings extra shine.
Either way, you're getting a storage-smart solution that feels intentional and upscale.
Best Marble Finishes For This Spot
- For a shelf above the sink, honed marble is a top choice because it hides water spots better than polished finishes. Carrara marble offers a classic white-gray veining that brightens the area, while darker marbles like Nero Marquina create a striking contrast against light sinks. If you prefer a warmer tone, Emperador marble brings brown veins that pair beautifully with brass or gold fixtures.
- Whatever you choose, make sure the slab is sealed properly to prevent staining from soap or acidic foods.
Installation And Layout Tip
- Mount the shelf at least 6 inches above the faucet to leave room for filling pots and washing large items. Use sturdy brackets rated for the weight of marble and wet dishes—hidden brackets give a floating look that feels modern and clean. If your sink is in a corner, consider a corner shelf to maximize space.
- For a seamless look, extend the shelf slightly beyond the sink width to create extra landing space for sponges or a soap dispenser.
Styling And Finishing Touch
- Keep the shelf uncluttered to maintain its airy feel. Stack a few everyday dishes—like white ceramic plates or clear glass tumblers—for a curated look. Add a small plant or a slender vase with a single stem to soften the stone's coolness.
- A slim bamboo or silicone drying mat in a neutral tone catches drips without distracting from the marble. This setup not only saves space but also turns a chore zone into a design feature.
7. Marble Backsplash with Hidden Outlet Covers
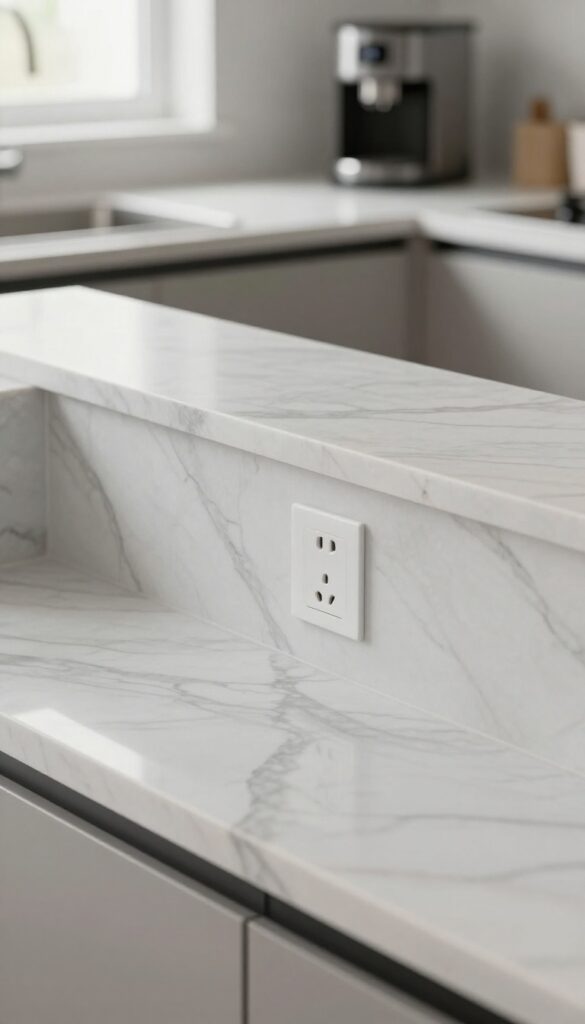
A marble backsplash is already a showstopper, but those standard outlet plates can break the visual flow. The solution? Hidden outlet covers that blend right into the stone.
Small flush doors or sliding panels keep the surface seamless, so the marble's natural veining takes center stage. It's a detail that feels custom and considered without requiring a full renovation.
This approach works especially well in kitchens where the backsplash is a focal point, like behind a range or along a long counter. The hidden covers are typically made from the same marble slab, cut to fit precisely. When closed, they're nearly invisible—the veining helps disguise the seams.
For everyday use, you simply slide or flip the cover open to plug in a mixer or coffee maker. It's one of those upgrades that surprises guests and makes your kitchen feel both luxurious and practical.
Best Materials
Choose a marble with strong, varied veining—like Carrara or Calacatta—to help mask the panel edges. Thicker slabs (at least 2 cm) hold the hinge or sliding mechanism better. For a budget-friendly twist, use marble-look porcelain tile with a matte finish; it's easier to cut and still looks high-end.
Installation Tip
Work with a skilled fabricator who can cut the outlet openings precisely and install the hidden covers. The mechanism can be a simple push-to-open latch or a magnetic catch. Make sure the outlet box is recessed enough so the cover sits flush with the backsplash surface.
Styling Note
Keep the area around the outlets clutter-free to let the marble shine. Use a sleek, low-profile power strip under the cabinet for extra outlets, so you rarely need to open the hidden covers. This maintains the clean look while still being functional.
8. Marble Countertop with Pull-Out Cutting Board
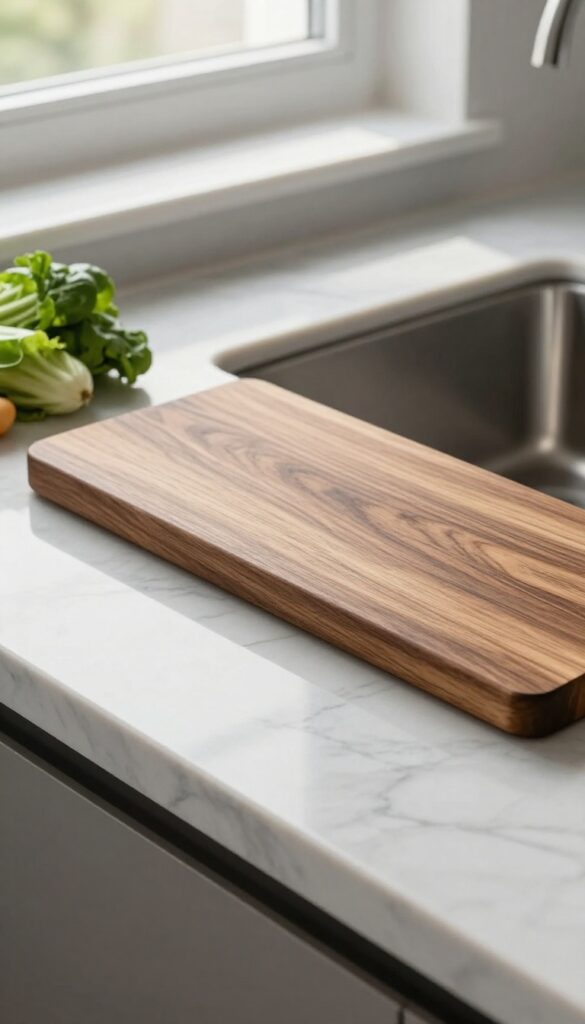
A marble countertop is already a statement, but adding a pull-out wooden cutting board underneath makes it even more functional. This clever design keeps your prep surface hidden until you need it, freeing up counter space and adding a warm, natural contrast to the cool stone. It's a practical upgrade that feels custom and luxurious without being over the top.
The idea is simple: install a thin wooden cutting board that slides out from under your marble countertop. When not in use, it tucks away seamlessly, maintaining the clean lines of the stone. The marble handles hot pots and spills, while the wood provides a gentle surface for chopping.
This combo works especially well in smaller kitchens where every inch counts. The visual contrast between the smooth, veined marble and the warm wood grain adds depth and interest, making the kitchen feel both sophisticated and inviting.
Best Materials
- Choose a honed marble for the countertop—it's less slippery and hides fingerprints better than polished. For the cutting board, opt for a durable hardwood like maple or walnut. Maple is light and classic, while walnut adds a rich, dark contrast.
- Make sure the board is thin enough to slide easily but thick enough to stay sturdy—about 1/2 inch works well.
Storage Tip
Position the pull-out cutting board near your main prep zone, ideally next to the sink or stove. This way, you can chop vegetables, then slide the board back in place without moving around the kitchen. You can also add a small groove or juice channel on one side of the board for collecting liquids—perfect for slicing tomatoes or carving meat.
Finishing Touch
To keep the marble looking its best, seal it regularly and wipe up acidic spills like lemon juice or wine quickly. For the cutting board, treat it with mineral oil every few weeks to prevent drying and cracking. A small tray or drawer underneath can store knives or prep tools, making the setup even more efficient.
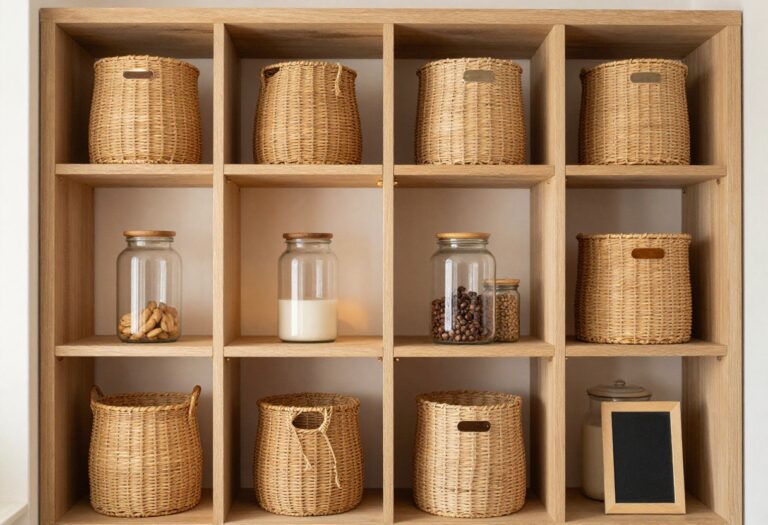
9. Marble Bar Cart with Storage Baskets
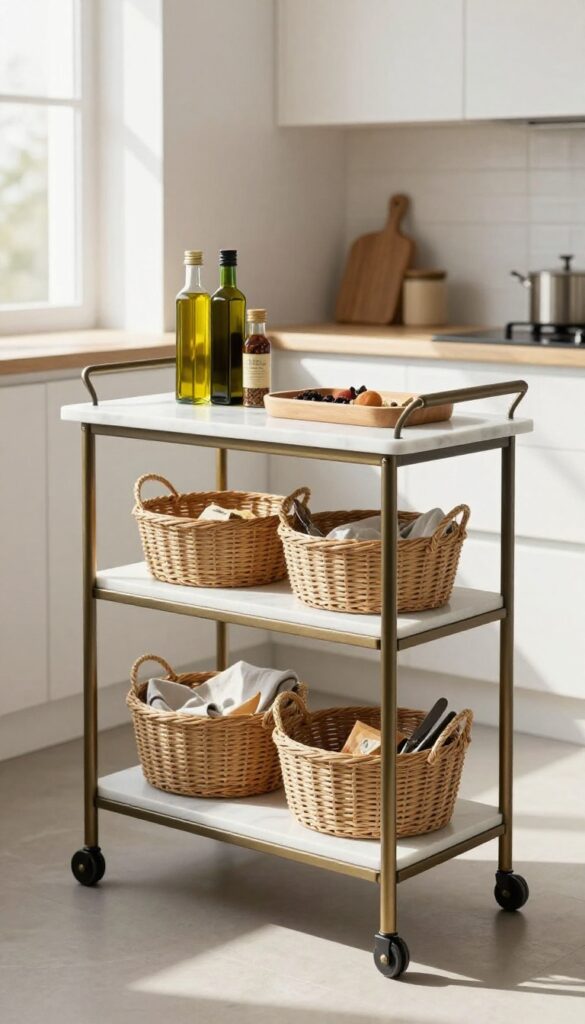
A marble-topped bar cart is one of those pieces that instantly upgrades a kitchen without needing a full renovation. It's mobile, so you can wheel it right next to the stove for extra prep space or tuck it against a wall as a dedicated coffee or cocktail station. The woven baskets on the lower shelves add practical storage while keeping the look airy and intentional.
This idea works especially well in smaller kitchens where counter space is limited. The marble top provides a durable, easy-to-clean surface that feels luxurious, while the open shelving below keeps everyday items accessible. Choose a cart with a slim profile so it doesn't crowd the room, and opt for baskets in natural rattan or seagrass to warm up the cool stone.
Use the top for a tray with frequently used oils and spices, and fill the baskets with linens, snacks, or extra utensils. The wheels let you roll it to the dining area for serving, making it as functional as it is stylish.
Best Materials
Look for a cart with a genuine marble or high-quality marble-look laminate top. A metal frame in brass or matte black adds contrast and durability. Woven baskets should be tightly woven and sturdy enough to hold heavier items like bottles or canned goods.
Layout Tip
Position the cart near your main prep zone so you can easily grab tools or ingredients. If you entertain often, keep it close to the dining area for quick access to glassware and mixers. In a galley kitchen, tuck it against an empty wall to avoid blocking traffic flow.
Storage Tip
Use the baskets to corral loose items that tend to clutter counters. Assign one basket for kitchen linens, another for snacks, and a third for utensils or small gadgets. Labeling the baskets with chalkboard tags keeps everything organized and adds a personal touch.
10. Marble Accent Wall with Pegboard
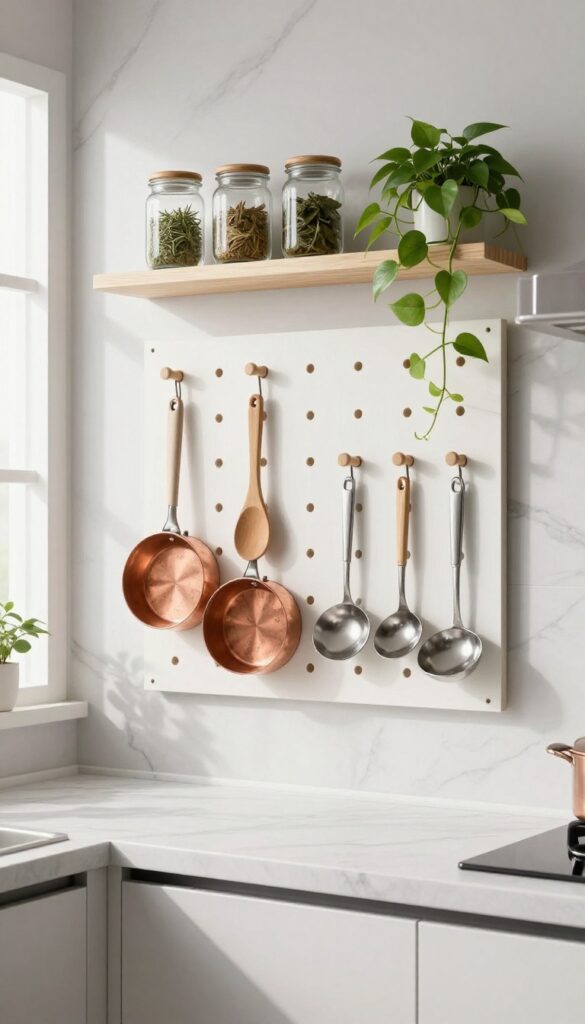
A marble accent wall instantly elevates a kitchen, but pairing it with a pegboard adds a layer of practicality that feels both smart and stylish. The cool, veined surface becomes a backdrop for your most-used tools, turning everyday items into decor. It’s a mix of luxury and function that works especially well in kitchens where counter space is precious.
Cover one wall or a section with marble-look tiles or a thin marble slab, then mount a pegboard over it. The marble adds texture and elegance, while the pegboard holds pots, pans, and tools. This keeps your most-used items visible and organized without cluttering the counter.
Best Marble Look
Choose large-format marble-look porcelain tiles for a seamless appearance without the high maintenance of real marble. Carrara or Calacatta styles with subtle gray veining work well in most kitchens. The matte finish reduces glare and feels more grounded.
Pegboard Placement
Mount the pegboard slightly away from the wall using spacers so tools don't scratch the marble. Opt for a wooden pegboard painted to match your cabinetry or a metal one for an industrial contrast. Keep it between the counter and upper cabinets for easy reach.
Styling The Tools
Group similar items—copper pots, wooden spoons, stainless steel ladles—for a curated look. Add a small shelf above the pegboard for a few jars of dried herbs or a trailing plant to soften the hard edges. The marble will reflect light and make the whole setup feel airy.
FAQ
Is marble practical for a kitchen countertop?
Marble is durable but porous, so it requires sealing to resist stains. For a low-maintenance option, consider marble-look quartz or porcelain. If you love real marble, use it on surfaces that see less direct contact with acidic foods, like a baking station or island.
How can I add marble details without a full renovation?
Start small with marble accessories like a cutting board, trivet, or canisters. You can also install a marble backsplash or a marble shelf without redoing the entire kitchen. Peel-and-stick marble-look tiles are another budget-friendly option.
Does marble work in a small kitchen?
Absolutely. Marble's light color and reflective surface can make a small kitchen feel larger and brighter. Use it on a backsplash or a single countertop section to avoid overwhelming the space.
Pair with open shelving to maintain an airy feel.
How do I keep marble looking clean and organized?
Wipe up spills immediately to prevent staining. Use coasters and trivets for hot items. For storage, incorporate marble with built-in organizers like drawer dividers or magnetic strips to reduce clutter.
Regular sealing helps maintain its appearance.
Can I mix marble with other materials?
Yes, marble pairs beautifully with wood, brass, black metal, and even concrete. The key is to balance textures: warm wood tones soften the cool stone, while matte black hardware adds contrast. Stick to a cohesive color palette for a harmonious look.
Conclusion
Marble doesn't have to be reserved for grand, expensive kitchens. With a little creativity, you can introduce it in ways that enhance both style and storage. Whether you go for a full slab or a few accent pieces, these ideas prove that luxury and practicality can coexist beautifully.
Start with one or two changes that fit your space and routine. You might be surprised how a touch of marble transforms not just your kitchen, but how you feel in it every day.