15 Simple DIY Outdoor Shower Ideas for a Fresh, Refined Look
An outdoor shower can turn an ordinary backyard into a personal retreat, but it doesn't have to cost a fortune or require a contractor. With a few basic materials and a weekend of work, you can build something that looks intentional and refined, not thrown together.
The best part is that each design solves a specific problem—privacy, drainage, or style—so you can pick the one that fits your space and skill level. From rustic wood to sleek copper, these 15 DIY ideas are practical, budget-friendly, and easy to customize.
Whether you're rinsing off after a swim or just want a spa-like escape, there's a build here that's worth trying.
1. Rustic Wood Privacy Shower
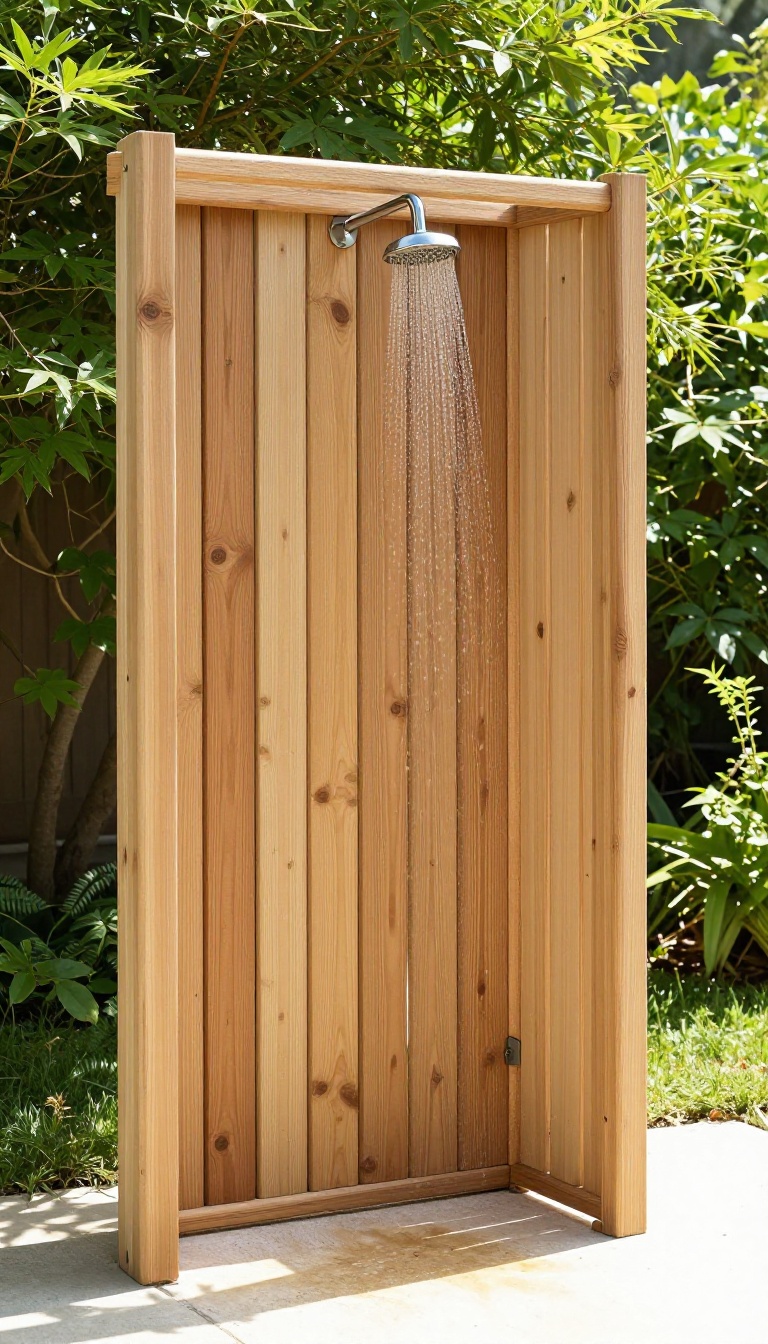
If you want a shower that feels like a natural extension of your backyard, cedar or teak planks are a great place to start. These woods resist moisture and insects, so they hold up well outdoors while developing a lovely silver-gray patina over time. Building a freestanding enclosure with them gives you privacy without blocking the breeze or the view of your garden.
Start by choosing a spot with good drainage and access to a water source. You'll need four posts, horizontal rails, and planks for the walls. Set the posts in concrete for stability, then attach the rails and planks, leaving small gaps between boards for airflow and light.
Add a simple door or leave one side open, depending on your preference. Finish with a showerhead mounted on a crossbeam or a nearby wall, and you're ready to rinse off in style.
Choosing The Right Wood
Cedar and teak are the top choices because they're naturally rot-resistant and handle wet conditions well. Cedar is lighter and more affordable, while teak is denser and more durable. Both can be left unfinished to weather naturally, or you can apply a sealant to maintain their original color.
Avoid pressure-treated lumber if you want a more refined look, as it can have a greenish tint and may not age as gracefully.
Building The Frame
Use 4×4 posts for the corners and 2×4 rails for support. Dig holes about 2 feet deep, set the posts, and fill with concrete. Make sure the posts are plumb and level before the concrete sets.
Attach the rails horizontally between the posts, then screw the planks vertically to the rails. Leave a 1/4-inch gap between planks to allow for expansion and drainage.
Adding Privacy And Style
For extra privacy, extend the planks higher than head height or add a louvered top. You can also plant tall grasses or shrubs around the base to blend the shower into the landscape. A simple hook for a towel and a small shelf for soap complete the setup.
The natural wood tones will complement any outdoor setting, from a beach house to a suburban backyard.
2. Modern Copper Pipe Shower
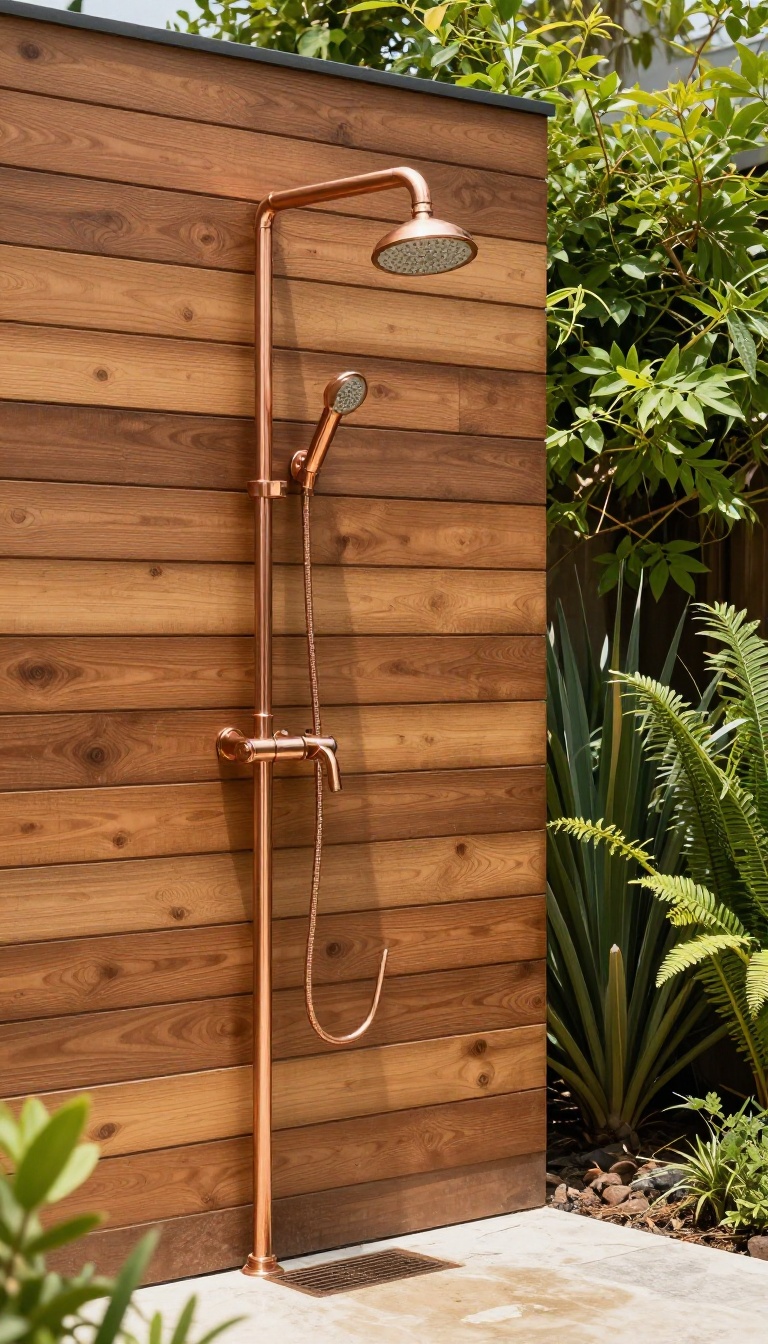
Copper pipes bring a warm, industrial feel that stands out from the usual plastic or galvanized fittings. The natural metal ages beautifully, developing a rich patina that makes your shower look like it’s been there for years. This design is surprisingly straightforward to assemble, and you can adjust the layout to fit your wall or corner space.
Building a copper pipe shower is mostly about measuring, cutting, and soldering—or using compression fittings if you want to skip the torch. The exposed pipes become the visual centerpiece, so keep the lines clean and symmetrical. You’ll need a reliable water source and a drain, but the rest is just pipe, a showerhead, and a few elbows.
What You’ll Need
Gather 1/2-inch copper pipes, elbows, T-junctions, a wall flange, a showerhead, and a shut-off valve. You’ll also need a pipe cutter, emery cloth, flux, solder, and a propane torch if you’re soldering. For a simpler route, use push-fit fittings that don’t require heat.
Assembly Tips
Start by mapping out the pipe route on your wall, marking where the water line comes in and where the showerhead will sit. Dry-fit all the pieces first to check alignment, then solder or press them together. Attach the wall flanges securely to studs, and make sure the showerhead is angled slightly downward for a comfortable spray.
Finishing And Care
Leave the copper bare for a bright, shiny look, or apply a clear lacquer to slow down the patina. If you like the aged green-blue effect, just let nature take its course. Wipe down the pipes occasionally with a soft cloth to remove water spots, and check the fittings for leaks after the first few uses.
3. Pallet Wood Shower with Hanging Plants
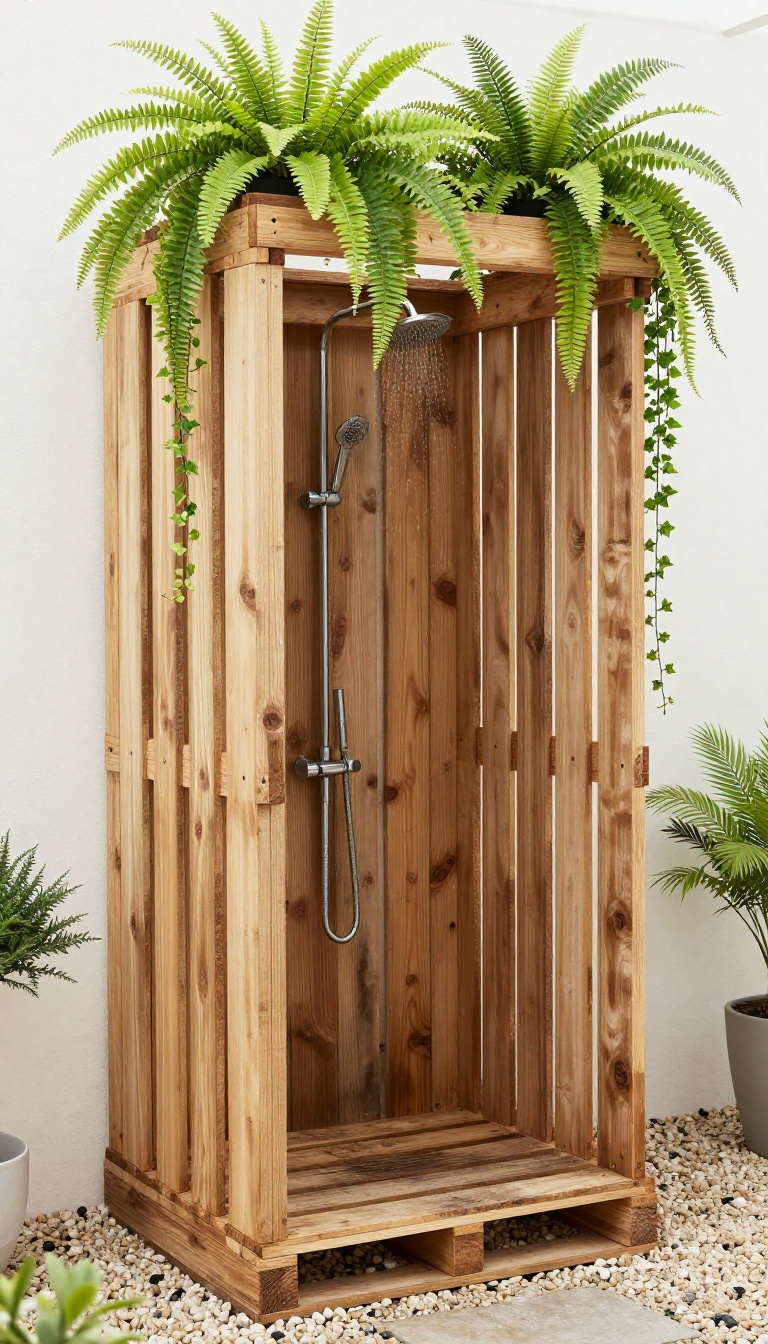
If you love the rustic look but want to keep costs down, pallets are your best friend. They’re often free or very cheap, and with a little sanding and sealing, they can look surprisingly polished. This design also brings in greenery, which softens the wood and makes the whole setup feel like a natural hideaway.
Building this shower is straightforward. You’ll need a few pallets, some basic tools, and a way to hang plants. The result is a warm, organic space that blends into your backyard.
Choosing And Prepping Pallets
Look for heat-treated pallets (marked with HT) rather than chemically treated ones, especially if they’ll be near plants or food. Sand them well to avoid splinters, and use an outdoor sealant to protect against moisture. You can leave them natural for a weathered look or stain them for a richer tone.
Building The Frame And Plumbing
Stand three pallets upright to form a U-shape, securing them with screws or brackets. Attach a shower head to a vertical pipe that runs along one pallet, and connect it to your water source. Make sure the floor has good drainage—gravel or a simple drain works well.
Add a shower curtain or leave it open for a more open-air feel.
Adding Hanging Plants For A Lush Feel
Use sturdy hooks or a wooden beam across the top to hang potted trailing plants like ivy, ferns, or pothos. These plants thrive in humid environments and will create a natural canopy. Water them regularly, and they’ll grow to frame the shower beautifully.
4. Corner Shower with Pebble Floor
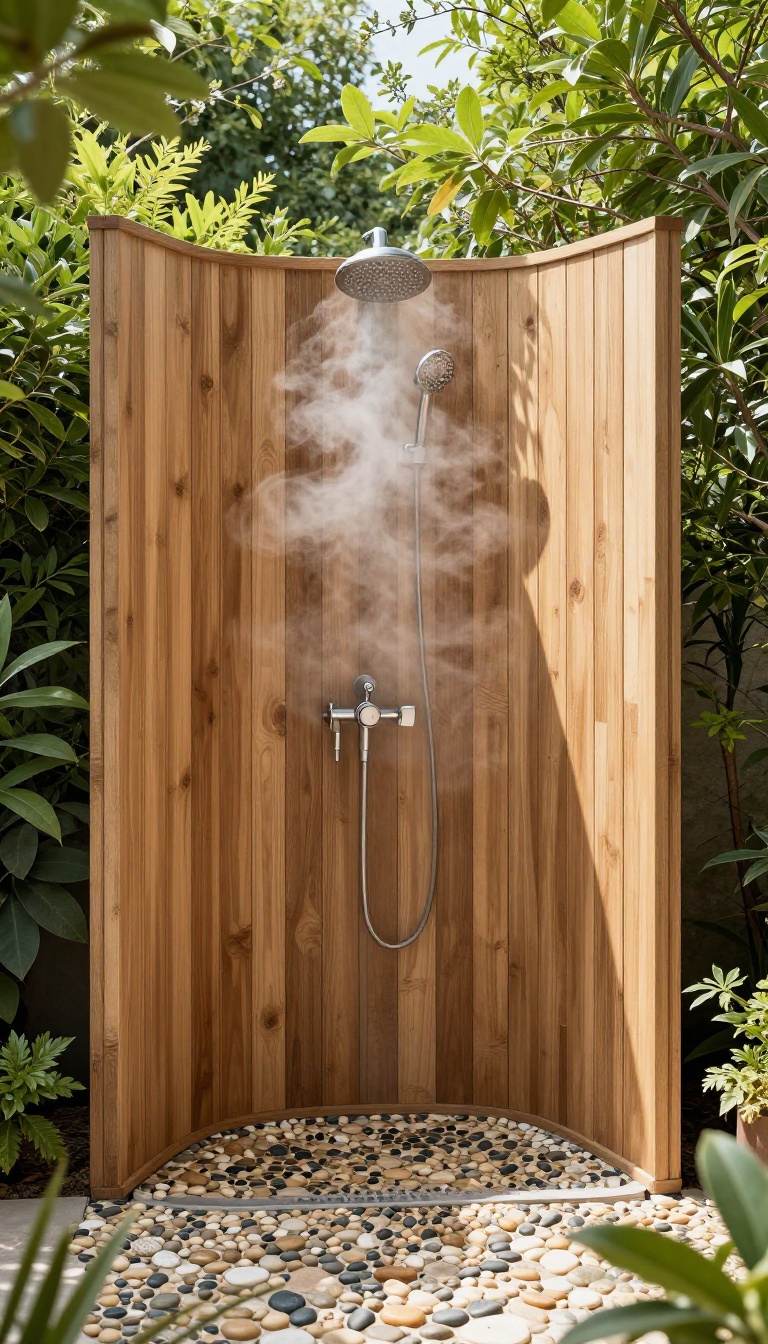
Tight on space? A corner shower is the smartest way to use what you have. It tucks neatly into an unused nook, and with a pebble floor, it feels like a natural spring underfoot.
This design is all about making a small area feel intentional and calming, not cramped.
Start by marking off a corner that's about three feet wide on each side. You'll need a showerhead that mounts on the wall at a comfortable height, plus a simple mixing valve. The real star here is the floor: pebble tiles come in mesh-backed sheets, so you can lay them quickly without setting each stone by hand.
They also provide gentle traction, which is perfect for bare feet.
Why Pebbles Work So Well
Pebble tiles aren't just pretty—they're practical. The rounded stones feel great underfoot and help water drain faster because there are natural gaps between them. Plus, they hide soap scum and mineral deposits better than smooth tile, so maintenance is a breeze.
Choose river stones in earthy tones for a natural look, or go with polished pebbles for a more refined finish.
Building The Frame And Walls
For the walls, use pressure-treated lumber or cedar to withstand moisture. You can build a simple open frame with crossbars, then attach corrugated metal or composite panels for privacy. If you want it to feel more open, leave one side exposed and let the corner walls do the work.
Just make sure everything is sealed and sloped slightly so water runs toward the drain.
Drainage And Plumbing Tips
The key to a corner shower is getting the drain in the right spot. If you're working with an existing concrete slab, you might need to cut a channel for the pipe. Otherwise, position the drain at the center of the pebble floor and slope the mortar bed slightly toward it.
Use a linear drain for a modern touch, or a round grate that blends with the stones. Test the water flow before sealing everything up.
5. Bamboo Screen Shower
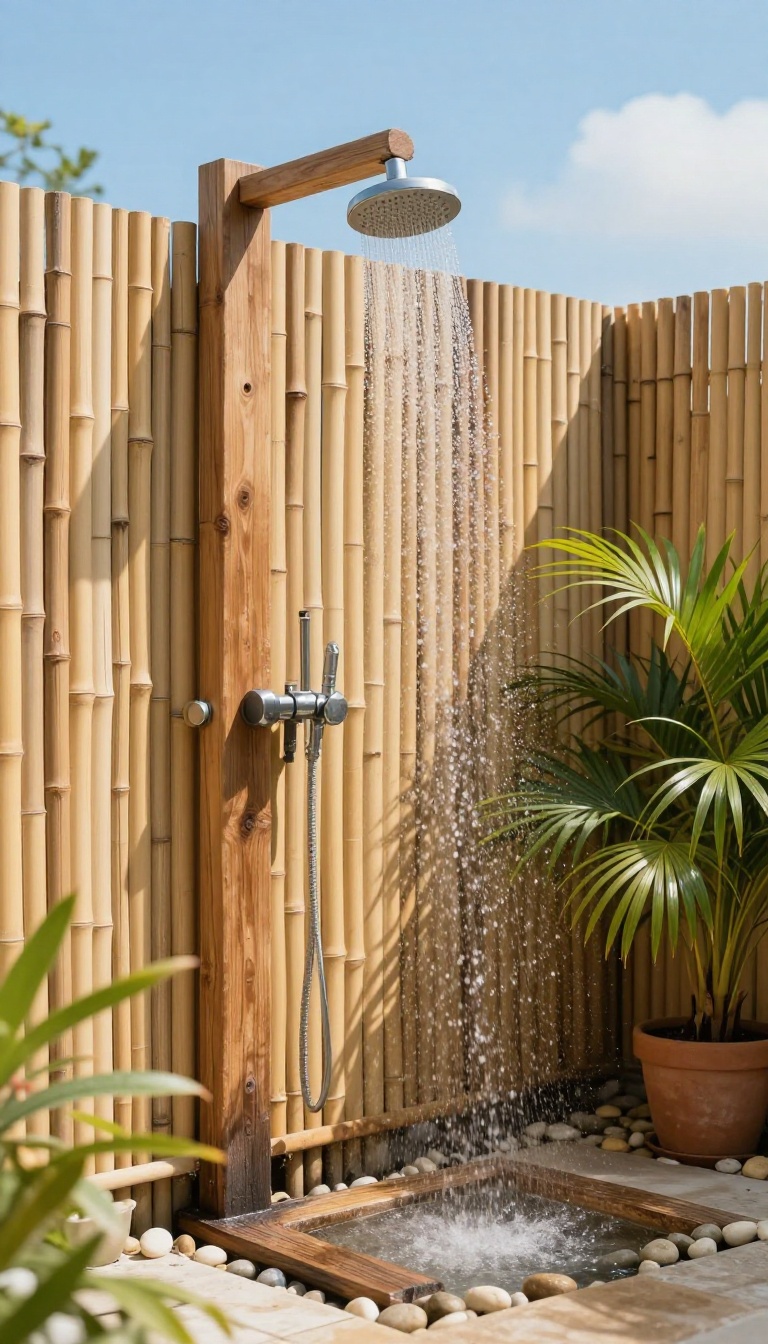
Bamboo rolls bring a tropical, lightweight privacy screen that’s surprisingly easy to install and swap out when needed. Unlike permanent walls, bamboo lets you adjust the layout or take it down for winter storage without much fuss. It’s a fresh, airy look that feels resort-like without the heavy construction.
Why Bamboo Works
Bamboo is naturally water-resistant, so it holds up well in damp shower areas. It’s also lighter than wood or metal, making it a breeze to handle. The natural texture adds warmth and a relaxed vibe that blends with most backyard styles.
Plus, it’s an affordable option that doesn’t skimp on looks.
How To Set It Up
Start by choosing a spot with good drainage and some sun to help the bamboo dry. Install two or three sturdy posts or hooks to hang the bamboo rolls, leaving a few inches of gap at the bottom for airflow. Secure the rolls with zip ties or outdoor screws, and you’re ready.
You can also add a simple showerhead on a nearby tree or a freestanding stand.
Customizing Your Screen
Mix bamboo rolls with other natural elements like river stones or potted palms to enhance the tropical feel. If you want more privacy, layer two rolls or add a fabric liner behind. For a refined touch, stain the bamboo with a clear sealer to protect it from moisture and extend its life.
The flexibility is perfect for renters or anyone who likes to change things up.
6. Galvanized Tub Shower
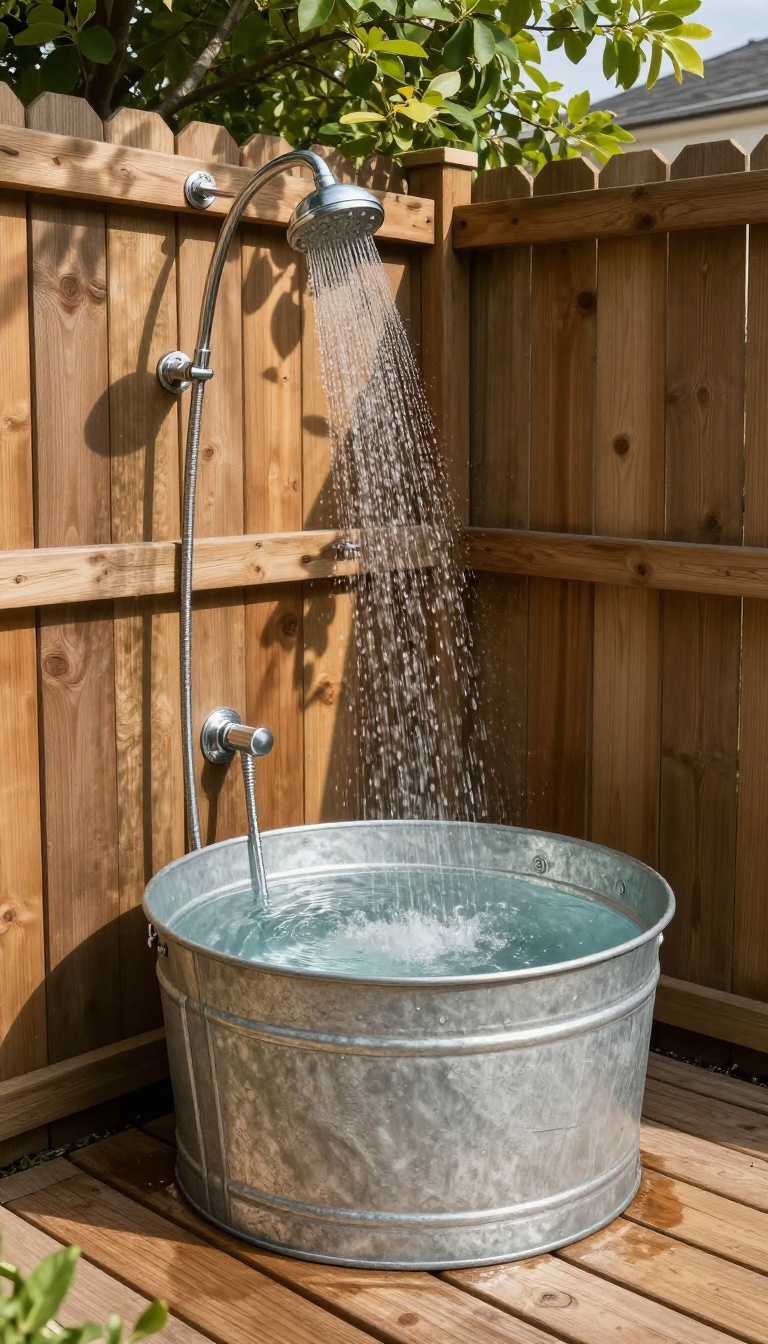
If you're drawn to the farmhouse aesthetic, a galvanized tub shower brings that rugged, practical charm straight to your backyard. The metal tub acts as both the basin and the visual anchor, so you don't need to build a separate shower floor. It's a straightforward build that looks like it's been there for decades.
Start by choosing a large galvanized tub—think stock tank or trough—that's deep enough to contain splashes but wide enough to stand in comfortably. Mount a showerhead on a nearby wall or a freestanding post, and position the tub directly underneath. For drainage, you can either let the water flow into a gravel pit or connect a hose to the tub's drain if it has one.
Picking The Right Tub
Look for a tub with smooth, rounded edges to avoid any sharp corners. A 2-foot by 4-foot stock tank works well for most people. If you plan to use it often, consider adding a wooden slat floor inside to keep your feet off the cold metal.
Mounting The Showerhead
You can attach a wall-mounted shower arm to an existing fence or build a simple wooden post. Make sure the pipe is securely fastened and the showerhead sits high enough—around 6 to 7 feet from the tub floor—so you don't have to duck.
Drainage And Maintenance
The easiest way to handle water is to drill a hole in the bottom of the tub and attach a drain fitting that connects to a garden hose. Route the hose to a designated drainage area. To keep the tub looking great, rinse it after each use and occasionally scrub with a mild soap to prevent mineral buildup.
7. Outdoor Shower with Curtain
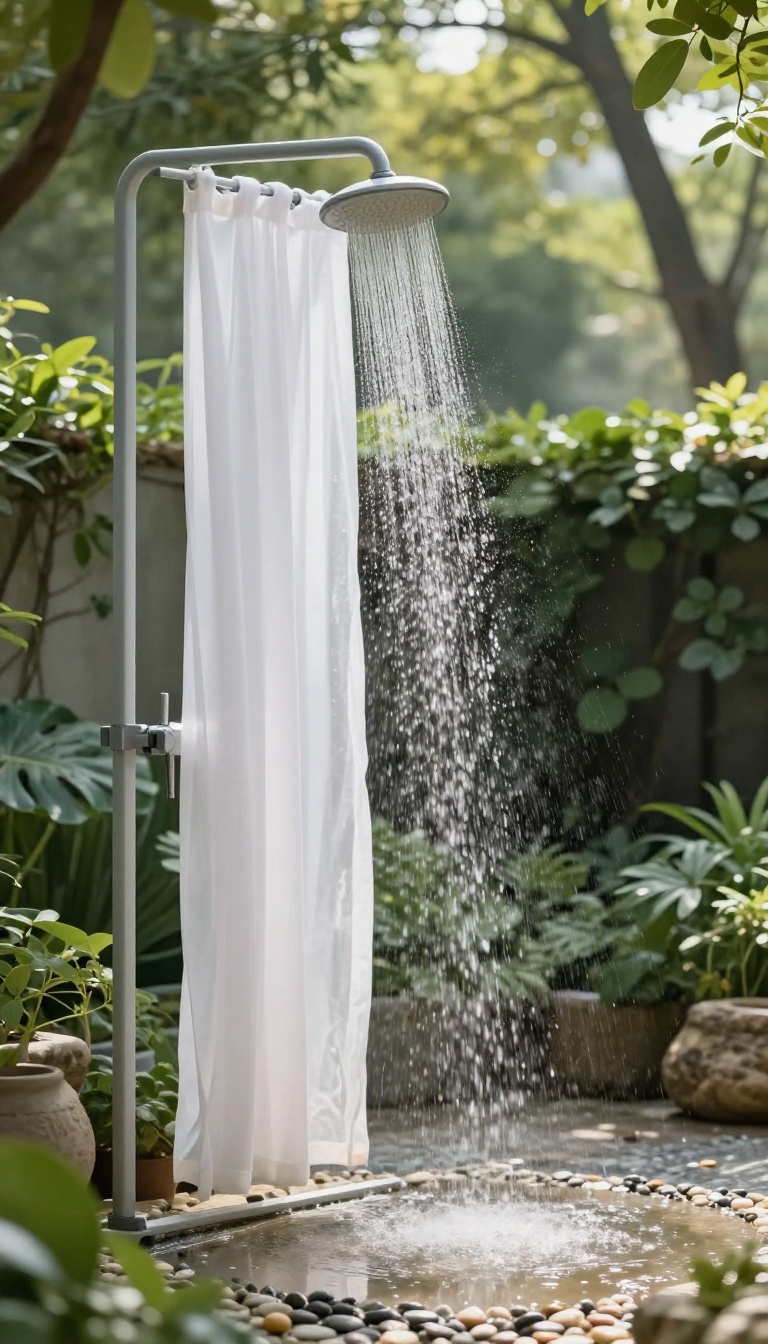
A curtain might seem like the simplest option, but it’s also one of the most flexible. You can change the look in minutes, swap it for a new pattern, or take it down entirely when winter arrives. Plus, the soft fabric adds a gentle, airy feel that hard panels just can’t match.
The key is to build a sturdy frame that can handle wind and weather, then hang a curtain that’s made for outdoor use. With a few basic tools, you can have this up in an afternoon, and it’s perfect for renters or anyone who wants a temporary setup without permanent changes.
Choosing The Right Frame
You can use a simple metal or PVC pipe frame, or even a wooden post structure. Make sure it’s anchored well—either in concrete or with heavy-duty stakes. The frame should be tall enough to give you headroom (usually 7 to 8 feet) and wide enough to feel roomy.
If you’re using a freestanding frame, consider adding crossbars or guy wires for stability.
Picking A Weatherproof Curtain
Not all curtains are created equal. Look for outdoor-rated fabric that’s water-resistant and UV-protected, like polyester or acrylic. You can also use a shower curtain liner underneath for extra protection.
Choose a light color to keep the space bright, or go bold for a pop of personality. Make sure the curtain has grommets or loops that slide easily on your rod or wire.
Adding Privacy And Style
The curtain is your main privacy shield, but you can enhance it with a second layer or a decorative valance. For a more refined look, add a tension rod or a curved rod that gives you extra elbow room. You can also tie the curtain back when not in use to keep it open and airy.
Add a small shelf or hook inside for your toiletries, and you’re ready to enjoy your outdoor shower.
8. Stone Wall Shower
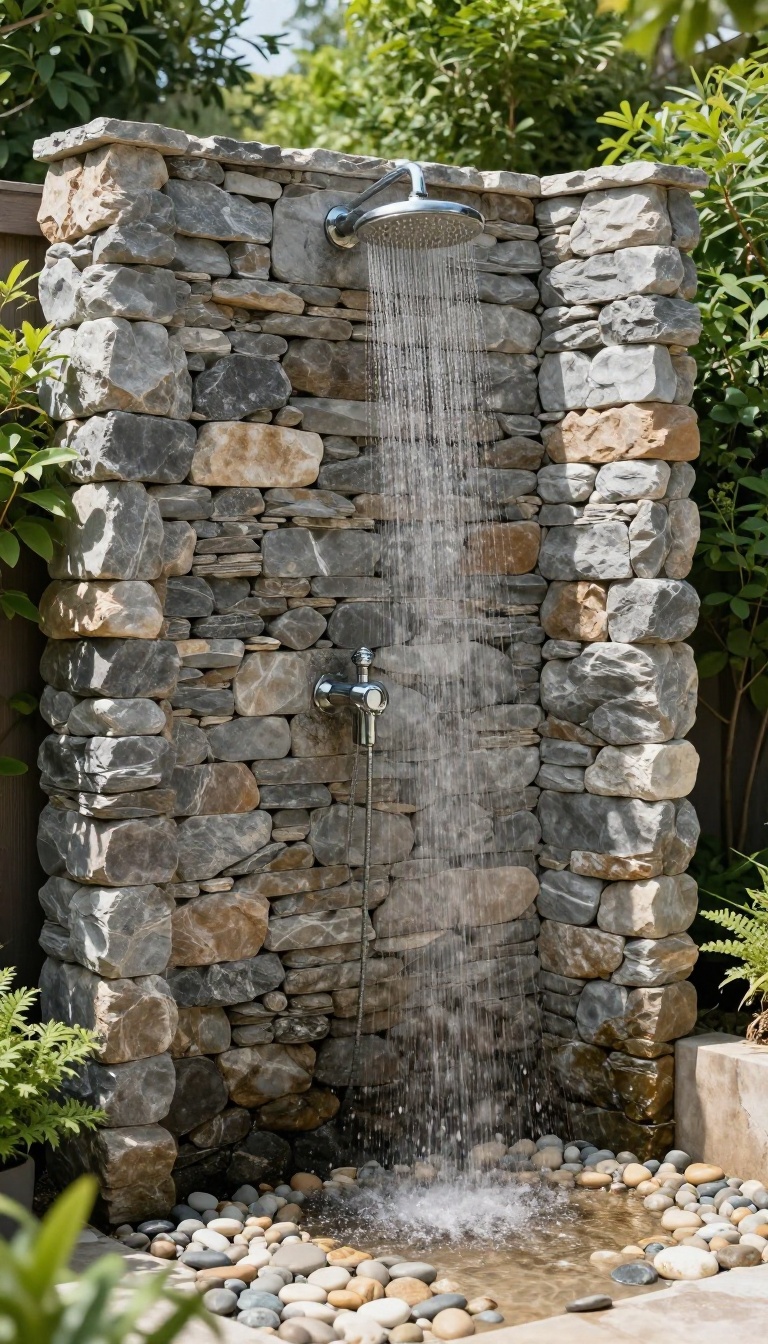
If you want your outdoor shower to feel like a permanent, upscale feature rather than a temporary setup, a stacked stone wall is a bold way to go. The texture and weight of natural stone instantly elevate the space, making it look like a custom addition to your home. Paired with a rainfall showerhead, it creates a serene, spa-like atmosphere that’s both practical and visually striking.
Building a stone wall shower is more involved than some other DIY options, but the payoff is a durable, weather-resistant structure that adds real value to your backyard. The key is to use a sturdy base and proper waterproofing behind the stone to prevent moisture damage. You can go with a full wall or a partial panel that acts as a privacy screen while still letting in light and air.
Choosing The Right Stone
For a natural look, consider using stacked stone veneer panels, which are lighter and easier to install than full stones. They come in various colors—from warm earth tones to cool grays—so you can match your existing landscape. If you prefer a more rustic feel, you can collect your own fieldstones, but that requires more time and mortar work.
Either way, make sure the stone is suitable for outdoor use and can handle constant water exposure.
Waterproofing And Drainage
Before you start stacking, apply a waterproof membrane to the wall surface behind the stone. This protects the underlying structure from moisture and mold. Also, plan for proper drainage at the base of the wall—a slight slope away from your home and a gravel or pebble catch basin will keep water from pooling.
A simple linear drain or a DIY gravel pit works well.
Installing The Rainfall Showerhead
The rainfall showerhead is the centerpiece of this design. Mount it high on the wall, directly above where you’ll stand, and make sure the plumbing is properly insulated for outdoor use. If you’re not comfortable running the water lines yourself, you can hire a plumber for that part.
The result is a gentle, even flow that mimics a natural rain shower, making every rinse feel like a mini escape.
9. Minimalist Freestanding Shower
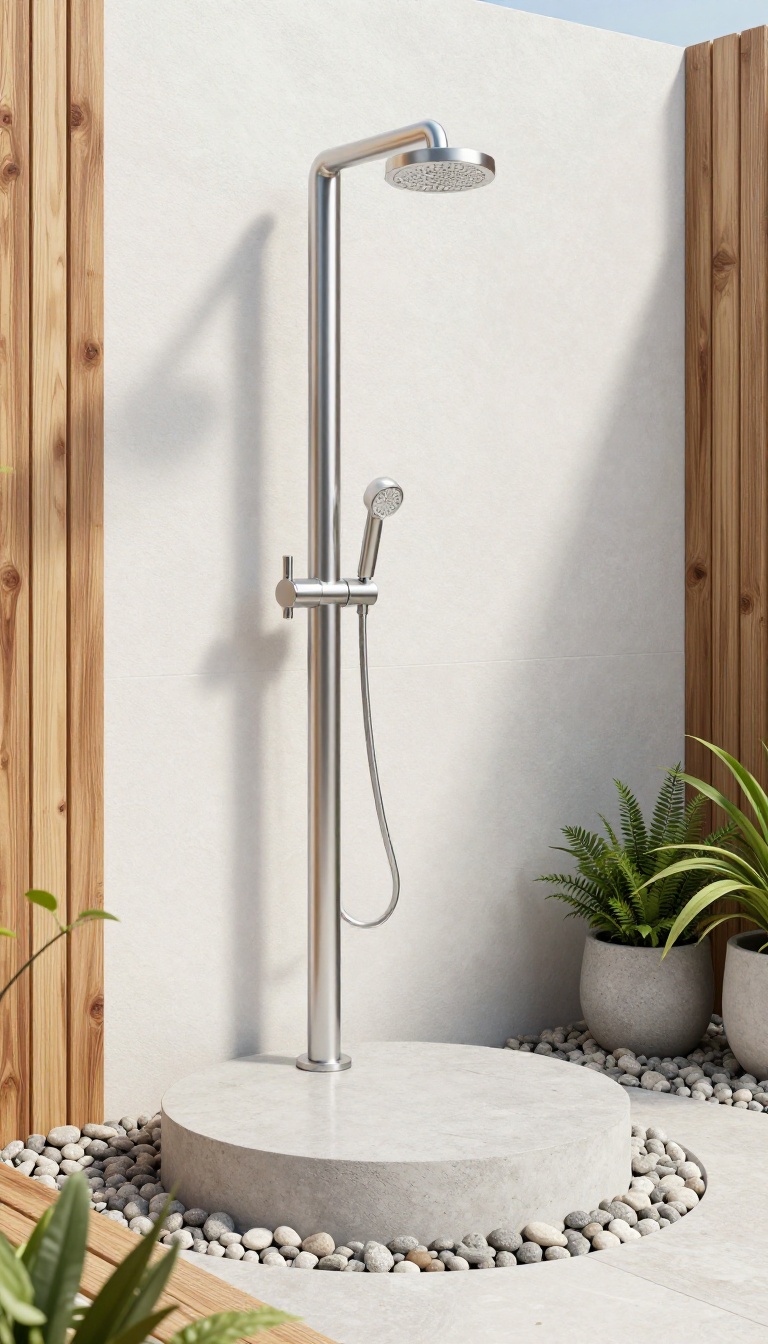
Sometimes the simplest design is the most striking. A single vertical pipe with a handheld sprayer keeps the shower clean, unobtrusive, and surprisingly functional. This freestanding setup works especially well in modern or minimalist backyards where every element counts.
Why It Works
The beauty of this design lies in its simplicity. With no walls or enclosure, it takes up minimal visual space and lets the surrounding landscape shine. It's also one of the quickest builds—just a pipe, a base, and a showerhead.
Plus, the open design makes cleaning a breeze.
How To Build It
Start by choosing a spot with good drainage. Sink a vertical pipe into a concrete footing, then attach a handheld showerhead with a flexible hose. For a polished look, use stainless steel or matte black fixtures.
Add a simple floor grate or pebble pad to keep the area tidy.
Privacy Options
Even without walls, you can create privacy with strategic placement. Tuck the shower behind a tall hedge, a fence, or a freestanding screen. Alternatively, embrace the openness if your yard is already secluded—it feels liberating and spa-like.
Styling Tips
Keep the area around the shower clean and uncluttered. Use natural materials like teak or stone for the floor. Add a small hook for towels and a shelf for shampoo.
A few potted plants nearby soften the look and make it feel more integrated.
10. Repurposed Ladder Shower
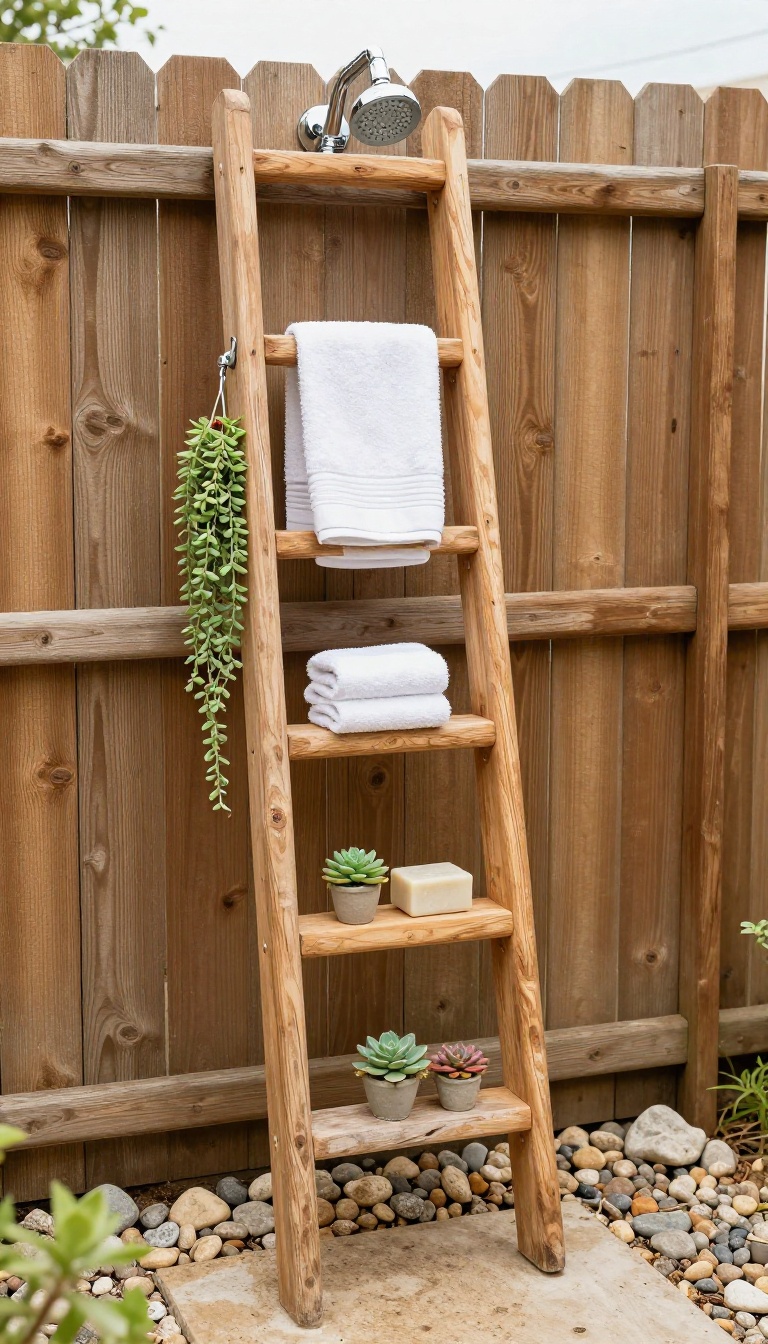
An old wooden ladder can become the backbone of a charming outdoor shower with minimal effort. This idea leans into a rustic, farmhouse feel while keeping the build simple and affordable. You probably already have a ladder lying around or can pick one up cheaply at a flea market.
The ladder serves as both a structural support and a decorative element. It holds the showerhead at the top, while the rungs offer a natural place to hang towels, plants, or toiletries. This design works especially well against a wooden fence or an exterior wall, where the ladder can be securely anchored.
Choosing The Right Ladder
Look for a sturdy wooden ladder with thick rails and solid rungs. Avoid ones with cracks or rot. A step ladder or a straight ladder both work, but a straight ladder gives you more vertical space for the showerhead.
Sand it down and apply a weatherproof sealant to protect it from moisture.
Setting Up The Plumbing
You can attach a showerhead to the top rung using pipe clamps or a simple bracket. Run a garden hose from your outdoor spigot to the showerhead, or connect it to a permanent plumbing line if you prefer. Make sure the ladder is tilted slightly toward the drain area so water flows away naturally.
Styling And Finishing Touches
Hang towels from the rungs, add a small shelf for soap, and drape a few potted plants from the sides. A wooden ladder pairs beautifully with natural stone or pebble flooring. You can also paint the ladder to match your outdoor decor or leave it weathered for a more rustic look.
11. Cinder Block and Wood Shower
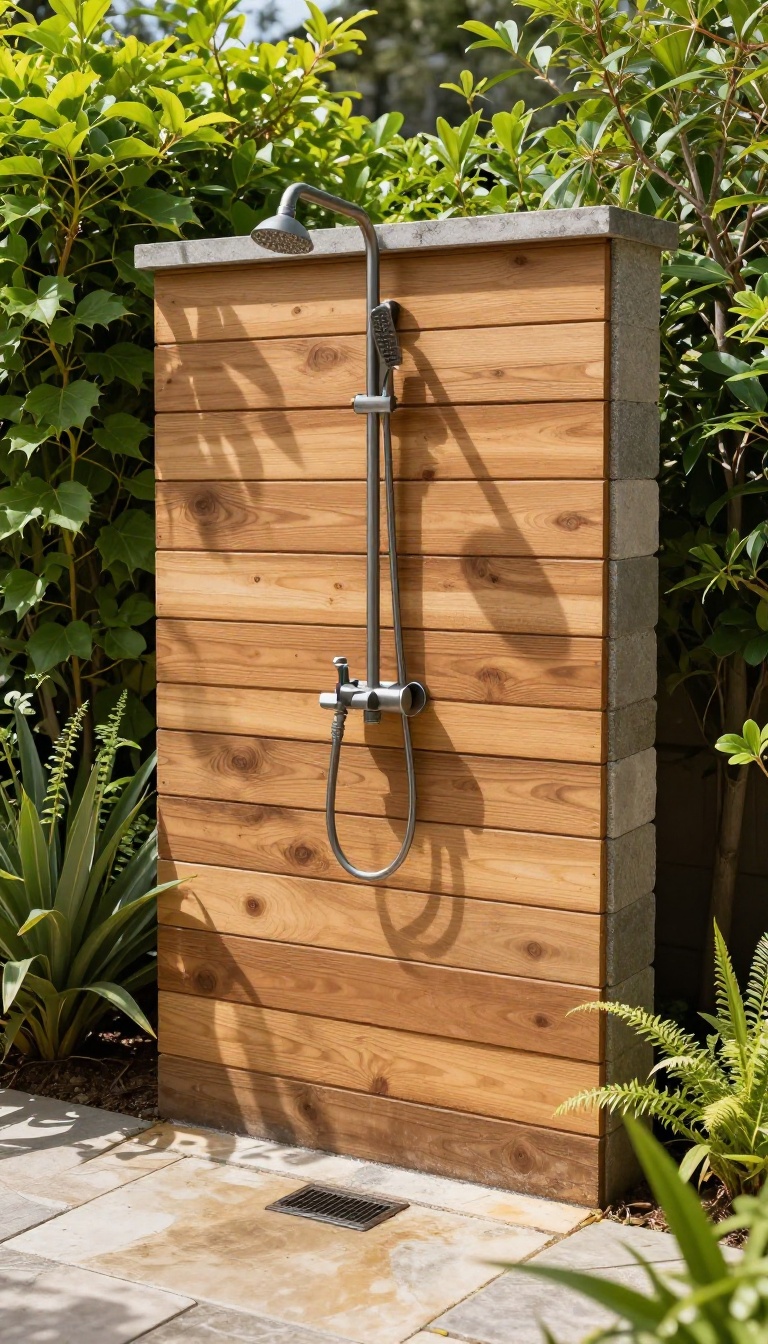
If you like a bit of industrial edge, this cinder block and wood combo delivers a sturdy, modern look that’s surprisingly simple to put together. The contrast between raw concrete and warm wood slats creates a refined, almost architectural feel, while the materials are cheap and easy to work with. You can customize the height, width, and layout to fit your yard perfectly.
This design is all about mixing tough, durable materials with a softer touch. Cinder blocks form the main structure, giving you a solid frame that feels permanent and secure. Wood slats add warmth and a natural texture, making the space feel inviting rather than cold.
The best part? You don’t need any special skills—just basic masonry and simple carpentry.
Why This Combo Works
Cinder blocks are heavy, cheap, and stack easily, so you can build walls without mortar if you want a temporary setup, or use a bit of adhesive for a more permanent structure. Wood slats, on the other hand, soften the harsh concrete and provide a comfortable surface to lean against or place your soap and shampoo. The combination gives you the best of both worlds: durability and comfort.
Building The Structure
Start by laying out your shower area and leveling the ground. Stack cinder blocks to form the back and side walls, leaving an opening for the entrance. You can use standard 8x8x16 blocks and stagger them like bricks for stability.
For the wood slats, attach them to a simple frame made of treated lumber, then screw the frame to the cinder blocks using masonry anchors. This creates a sturdy enclosure that won't wobble.
Customizing Your Shower
You can leave the cinder blocks as-is for a raw industrial look, or paint them to match your outdoor decor. For the wood, choose a rot-resistant species like cedar or redwood, and apply a waterproof sealant to keep it looking fresh. Add a showerhead attached to a vertical pipe, and consider a gravel or pebble floor for natural drainage.
You can also hang a curtain on the open side for extra privacy.
12. Rain Can Shower
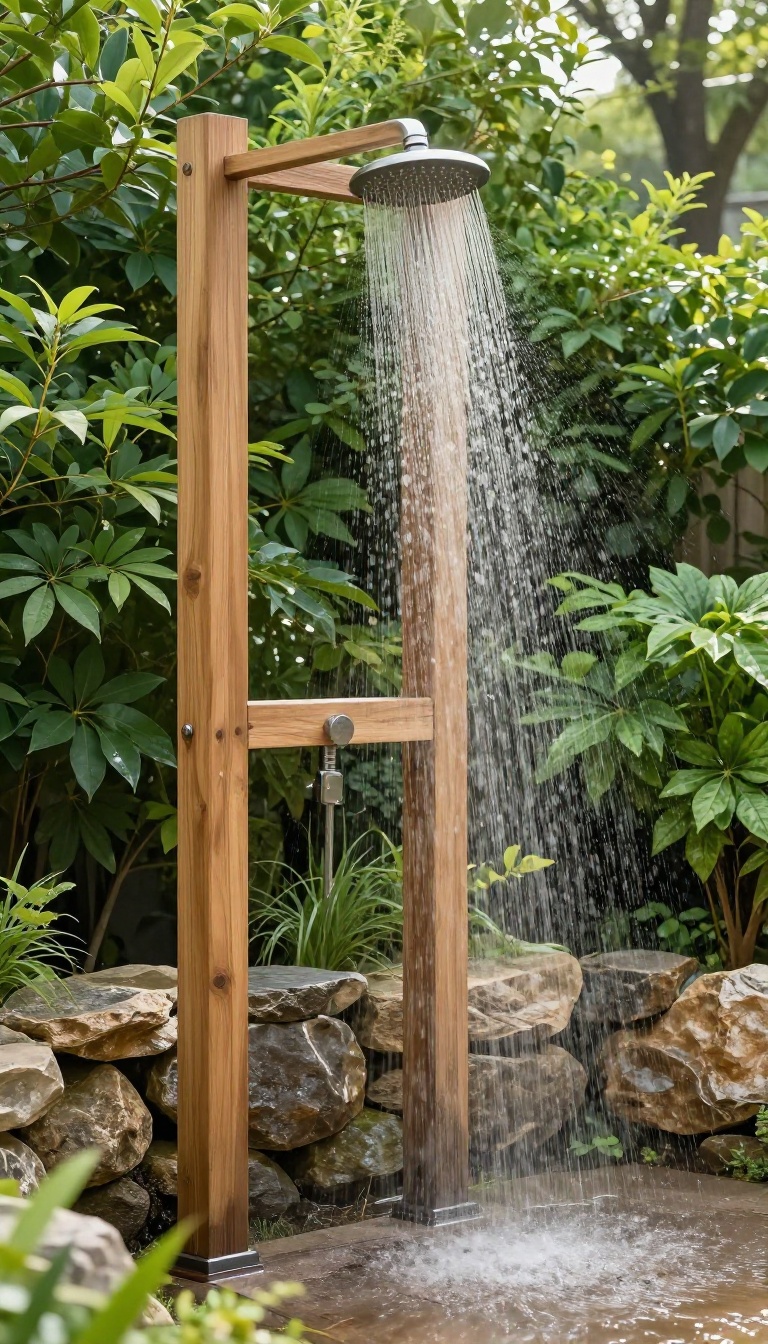
A rain can shower head delivers a soft, wide spray that feels like standing in a warm summer downpour. It’s a simple upgrade that instantly makes an outdoor shower feel more luxurious, and you can build the entire setup with a few plumbing parts and a sturdy frame. The gentle pressure is perfect for rinsing off without the harsh blast of a regular nozzle, and the look is clean and modern.
This design uses a large, flat rain can—typically 8 to 12 inches in diameter—mounted overhead. The water falls straight down, covering your shoulders and head evenly. You can buy a ready-made rain can or repurpose a shallow metal pan by drilling small holes, but for safety and consistent flow, a purpose-built shower head is the better choice.
The frame can be as simple as two vertical posts with a crossbar, or you can attach the rain can to an existing wall or pergola.
Choosing The Right Rain Can
Look for a rain can with a 1/2-inch or 3/4-inch inlet thread that matches your water supply. Brass or stainless steel resists corrosion and looks great outdoors. The diameter matters—larger cans give a wider spray but need more water pressure.
If your water pressure is low, stick with a 8-inch model to keep the droplets from becoming too weak.
Building A Simple Frame
Two 4×4 pressure-treated posts set in concrete form a solid base. Attach a horizontal crossbar at the top, then mount the rain can to the crossbar using a shower arm or a threaded pipe. Make sure the height is right—about 7 feet from the ground to the can’s face works well for most people.
Add a shut-off valve on the supply line so you can control the flow easily.
Water Pressure And Plumbing Tips
A rain can needs at least 20 PSI to produce a nice shower. If your outdoor faucet has low pressure, consider installing a small booster pump. Use flexible hose or PEX for the supply line, and add a union fitting so you can detach the shower head for winter storage.
Also, install a vacuum breaker to prevent backflow and keep your water safe.
13. Shower with Built-In Bench
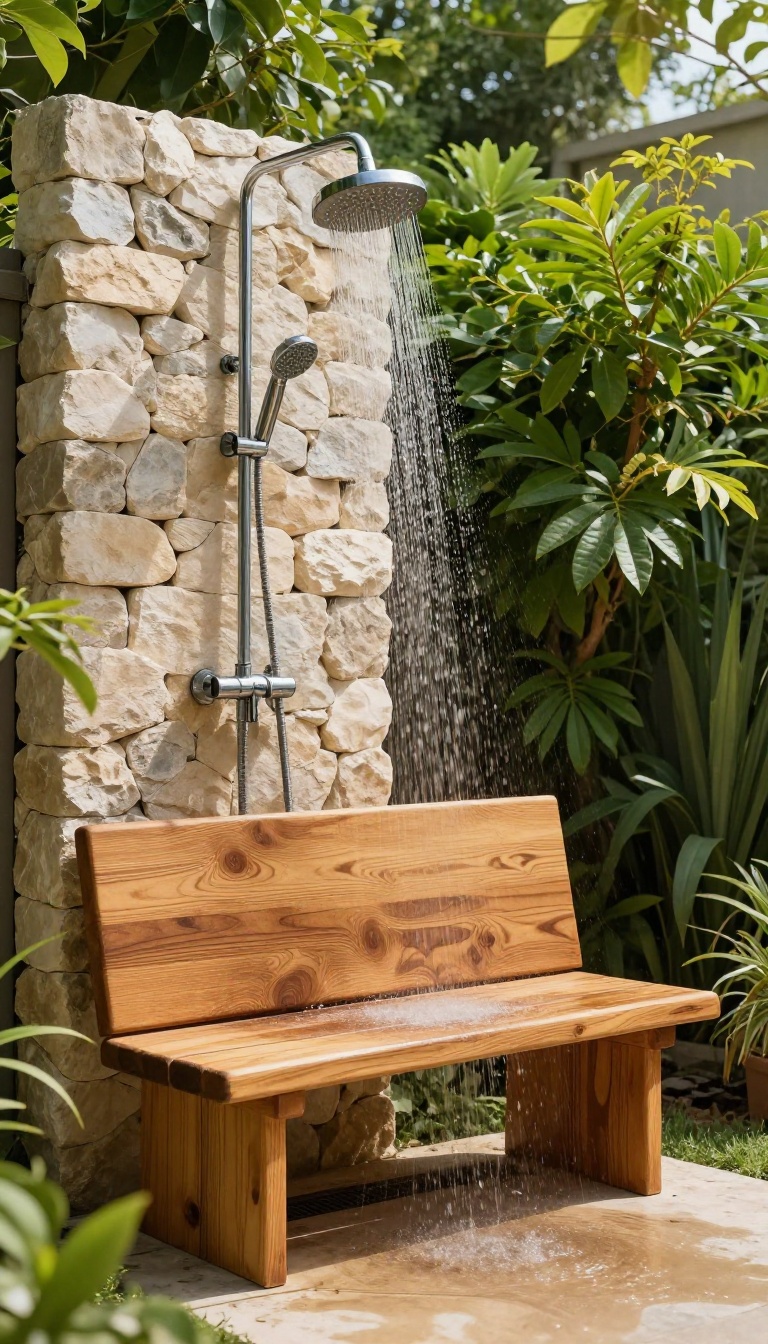
A built-in bench is one of those upgrades that instantly makes an outdoor shower feel more intentional. It gives you a spot to sit while scrubbing your feet, resting a shampoo bottle, or just enjoying the warm water after a long day. The best part?
You don't need to be a master carpenter to add one—it's a straightforward addition that pays off in comfort and style.
Adding a bench to your outdoor shower isn't just about convenience; it changes the whole vibe. Whether you choose warm teak or sleek concrete, a bench anchors the space and gives it a spa-like quality. Plus, it's practical—you'll have a secure place to set your toiletries or sit and shave your legs without balancing on one foot.
Choosing The Right Material
Teak is the classic choice because it resists water and looks beautiful as it ages. Concrete offers a modern, durable option that can be cast to fit any space. If you're on a budget, pressure-treated pine works but needs regular sealing.
Think about how much maintenance you're willing to do and what matches your existing outdoor decor.
Placement And Size Tips
Place the bench against a wall or in a corner to save space and create a natural seating nook. Aim for a seat height of about 18 inches and a depth of 16–18 inches—comfortable for most people. If your shower is small, a fold-down bench can be a smart space-saver.
Installation Basics
For a wooden bench, build a simple frame with 2x4s and attach slats on top, leaving small gaps for water to drain. For concrete, you can use precast blocks or pour your own with a mold. Make sure the bench is level and securely anchored to prevent wobbling.
Add a slight slope to the seat so water doesn't pool.
14. Mosaic Tile Accent Shower
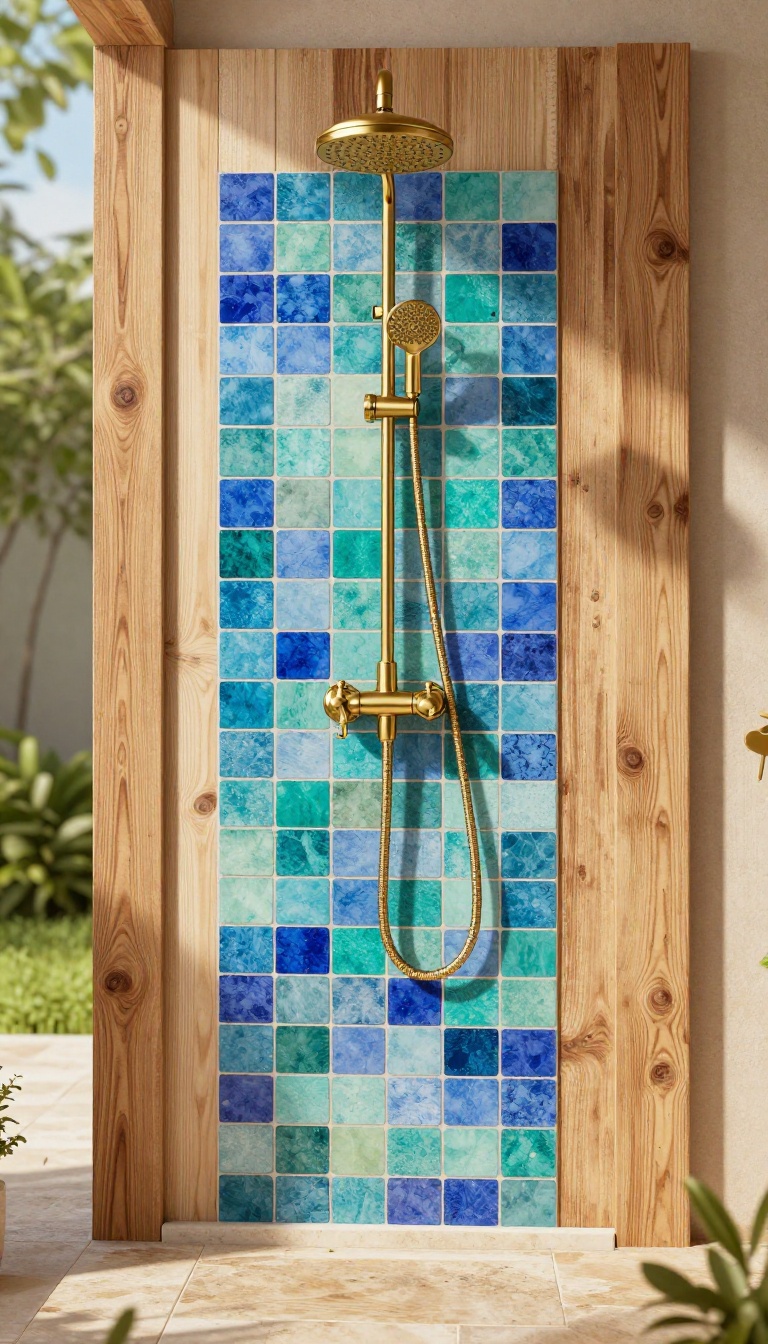
A wall of plain wood or concrete can feel a little flat. Adding a strip of colorful mosaic tile behind the showerhead gives the space a custom, artistic touch while also protecting the wall from constant water exposure. This is a great project for anyone who wants a pop of color without committing to a full tile installation.
You can choose a pattern that matches your outdoor decor or go bold with something unexpected.
The key to making this work is choosing a tile that can handle the outdoors. Porcelain or ceramic mosaic sheets are ideal because they resist moisture and temperature changes. Glass tiles also work well, but they can be slippery underfoot, so keep them on the wall rather than the floor.
Start by marking the area behind the showerhead—usually a strip about 12 to 18 inches wide and running from the top of the shower to about chest height. Use a waterproof backer board or apply a waterproof membrane to the wall before tiling. This prevents moisture from seeping into the structure behind the tile.
Apply thin-set mortar with a notched trowel, press the mosaic sheets into place, and let them set for 24 hours. Then, grout the joints with a sanded grout that’s mixed with a sealer. After the grout cures, apply a clear waterproof sealant to the entire tiled area for extra protection.
This project takes a couple of days because of the drying times, but the result is a shower that feels more like a spa feature than a simple outdoor utility.
Choose The Right Tile
Pick tiles that are rated for exterior use and have a high slip resistance if they’ll be anywhere near the floor. Porcelain and quarry tile are tough and come in many colors. Glass tiles add shimmer but can be more expensive.
Avoid unglazed ceramic because it will absorb water and crack in freezing temperatures.
Install A Waterproof Backer
You don’t want water to reach the studs or framing. Use cement backer board or a waterproof membrane like Schluter-Kerdi. Cut the backer to fit the area, screw it into the wall, and tape the seams with alkali-resistant tape and thin-set.
This creates a solid base that won’t rot or warp.
Seal For Longevity
Even with waterproof backer, grout and tile need a good sealant. Use a penetrating sealer on the grout and a topical sealer on the tile if recommended. Reapply the sealant once a year or as directed by the manufacturer.
This keeps the colors bright and prevents staining from hard water or soap scum.
15. Solar Heated Outdoor Shower
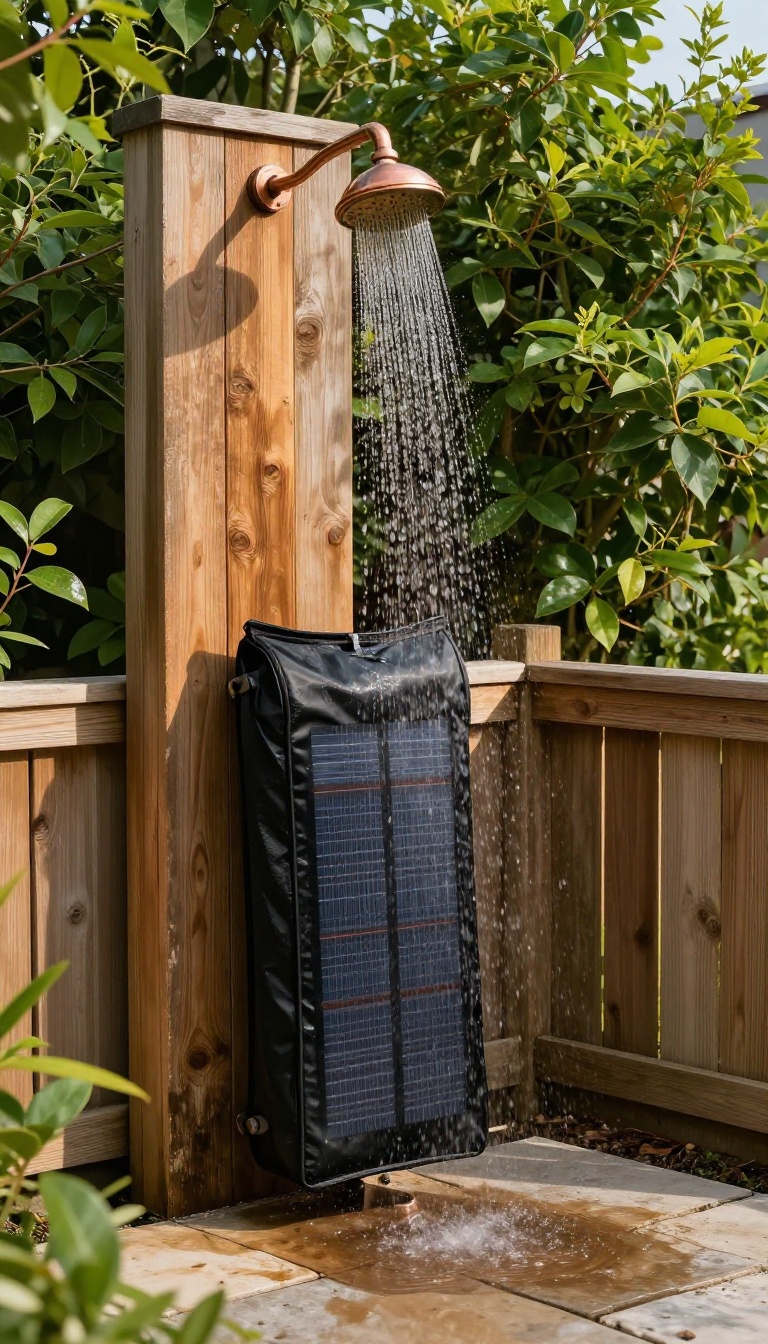
Who says you need a plumber to enjoy a warm shower outdoors? With a little help from the sun, you can have a cozy rinse even when the air has a chill. This idea is all about harnessing solar energy to heat your water naturally, making your outdoor shower more versatile and comfortable.
It’s a smart, eco-friendly upgrade that’s surprisingly easy to build and budget-friendly.
A solar-heated outdoor shower is a brilliant way to extend your outdoor bathing season. Instead of relying on electricity or gas, you use the sun’s free energy to warm your water. The most common DIY approach involves a black hose or a solar bag that absorbs heat and transfers it to the water.
This not only saves money but also reduces your carbon footprint. Plus, it adds a touch of ingenuity to your backyard setup that’s sure to impress.
How Solar Heating Works
Solar heating for an outdoor shower is simpler than you might think. The basic principle is that dark surfaces absorb heat from the sun. By running water through a black hose or a solar bag, you expose it to direct sunlight, warming it up before it reaches your showerhead.
The water can be heated by as much as 20-30 degrees Fahrenheit on a sunny day, making it perfect for a refreshing yet comfortable rinse.
Diy Solar Bag Setup
One of the easiest ways to add solar heating is with a portable solar bag. These are essentially heavy-duty plastic bags with a hose attachment. You fill them with water, lay them in a sunny spot, and let the sun do its work.
After a few hours, you have warm water ready to go. You can hang the bag from a sturdy hook or a tree branch above your shower area, and gravity provides the pressure. It’s a zero-electricity, zero-plumbing solution that’s perfect for temporary setups or camping-style showers.
Black Hose Coil Method
For a more permanent solution, consider a black hose coil. You can purchase a solar shower kit that includes a length of black hose and a showerhead. Coil the hose in a sunny location, such as on a roof or a south-facing wall, and connect it to your water source.
As water flows through the hose, it heats up before reaching the showerhead. This method can provide a steady supply of warm water for a longer shower, and it’s relatively easy to install with basic fittings.
Tips For Maximizing Heat
To get the most out of your solar shower, place the heating element in the sunniest spot you can find, ideally south-facing and free from shade. Use a dark-colored hose or bag, as black absorbs the most heat. Keep the water flow slow to give it more time to warm up.
And don’t forget to consider the weather—solar heating works best on clear, sunny days. On cooler or overcast days, you might need a backup plan, but for most of the summer, this setup will serve you well.
FAQ
Do I need a permit to build an outdoor shower?
It depends on your local codes. Many simple DIY showers don’t require a permit, but if you’re connecting to the main water supply or adding drainage, check with your municipality first.
How do I drain the water from an outdoor shower?
You can let it run onto gravel, grass, or a garden bed, or install a simple drain connected to your sewer or septic system. Ensure proper drainage to avoid puddles.
What is the best material for an outdoor shower floor?
Slip-resistant materials like teak, pebble tile, or textured concrete are ideal. They dry quickly and handle moisture well.
How can I get hot water for my outdoor shower?
You can connect to your home’s hot water line, use a tankless water heater, or go solar with a black hose or solar bag. Each has pros and cons depending on your climate.
How do I winterize my outdoor shower?
Drain all water from pipes and fixtures, shut off the supply, and cover or store removable parts. Use frost-proof valves or disconnect hoses to prevent freezing damage.
Conclusion
Building your own outdoor shower is one of those weekend projects that pays off every single time you use it. You don't need a huge budget or a contractor—just a clear plan and a few materials that match your style.
Start with one or two ideas that fit your space, whether that's a simple wooden frame or a sleek copper pipe setup. The best part is that each addition makes your backyard feel more like a personal retreat.