25 Kitchen Cleaning Hacks for Faster Mess Free Days
Nobody enjoys spending hours scrubbing the kitchen after a long day. But a few clever shortcuts can cut your cleaning time in half and leave your space looking great. The best part?
Most of these hacks use items you already have at home. Forget about expensive specialty cleaners or complicated routines. These 25 kitchen cleaning hacks focus on real-world solutions that actually work.
Whether you're dealing with greasy stovetops, cloudy glassware, or a smelly sink, there's a trick here for you. Let's dive into the tips that will transform your kitchen cleaning from a dreaded chore into a quick, satisfying task.
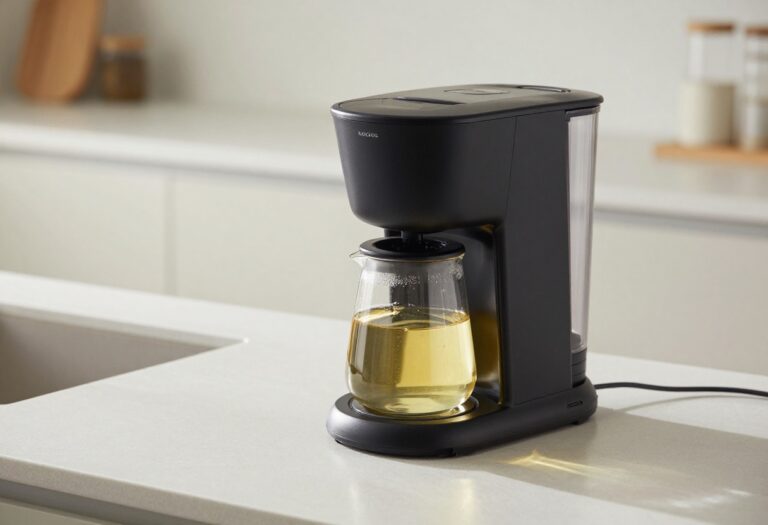
1. Microwave Steam Clean
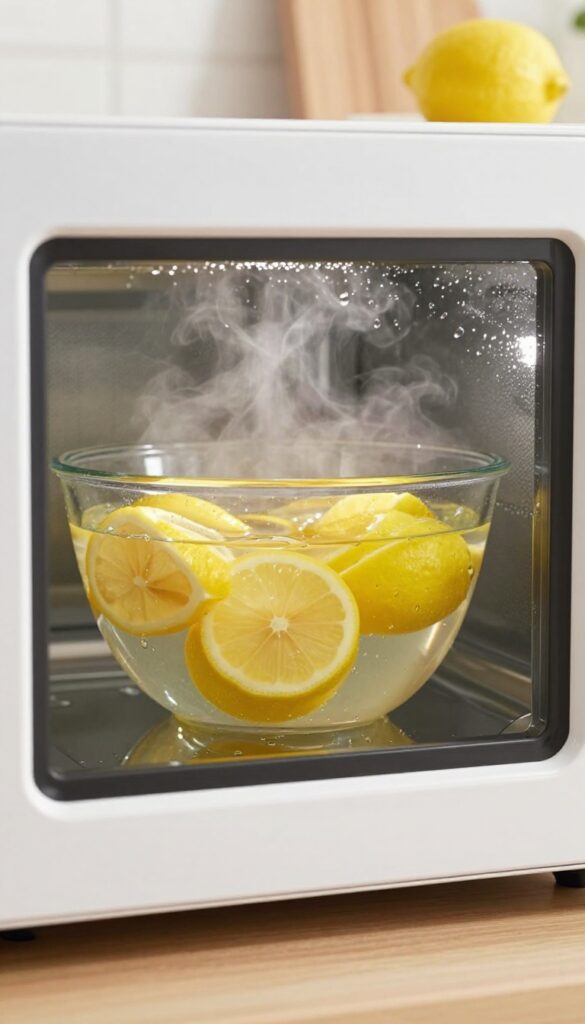
Your microwave can go from crusty to clean in minutes without harsh scrubbing. Steam is a natural degreaser and sanitizer, and you already have everything you need. This hack works because the steam loosens dried-on food and grease, making cleanup effortless.
Place a microwave-safe bowl filled with 1 cup of water and a few slices of lemon (or 2 tablespoons of vinegar) inside. Microwave on high for 3 minutes until the mixture boils and steams up the interior. Let it sit for 2 more minutes so the steam can penetrate stubborn spots.
Then carefully remove the bowl—it will be hot—and wipe down the interior with a damp cloth or sponge. The grime will come off with almost no effort. The lemon leaves a fresh scent, while vinegar helps deodorize.
Why Steam Works Best
Heat and moisture are a powerful combination. The steam softens dried food particles and grease, so you don't have to scrub hard. It also reaches corners and vents that are hard to clean by hand.
Lemon Vs. Vinegar
Both work well, but lemon adds a pleasant citrus smell. Vinegar is better if you need extra deodorizing power. Either way, avoid using harsh chemicals—steam alone does the heavy lifting.
Safety Tip
Let the bowl cool for a minute before removing it to avoid burns. Use oven mitts if needed. Also, never microwave metal or aluminum foil.
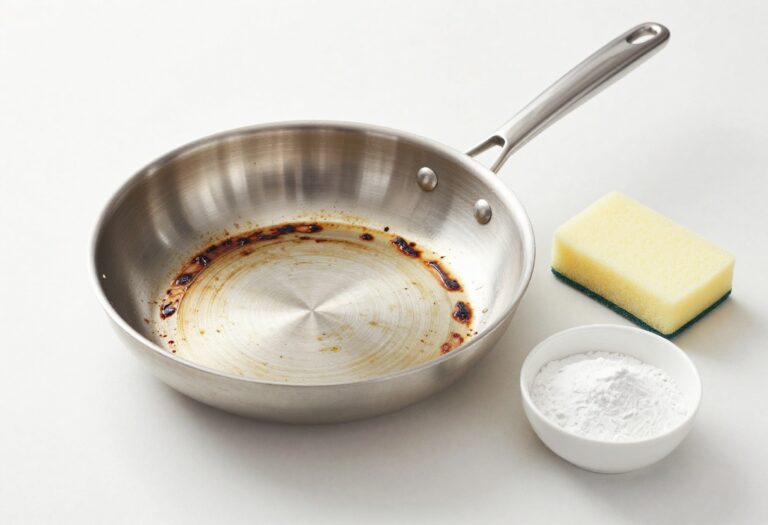
2. Baking Soda Scrub for Stovetops
Burnt-on food on stovetops can feel impossible to remove without scratching the surface. But a simple paste of baking soda and water tackles even the toughest residue gently. This hack works on glass, ceramic, and stainless steel stovetops without damaging the finish.
You probably already have everything you need in your pantry.
How To Make The Paste
Mix three parts baking soda with one part water in a small bowl. Stir until it forms a thick, spreadable paste. Adjust the ratio if needed—too runny won't cling, too thick won't spread.
Aim for a consistency similar to toothpaste.
Application Tips
Apply the paste directly to the burnt-on spots using a soft sponge or cloth. Let it sit for 10–15 minutes to loosen the grime. Then gently scrub in circular motions.
For stubborn areas, add a splash of white vinegar to create a fizzing action that helps lift residue.
Rinse And Buff
Wipe away the paste with a damp cloth. Rinse thoroughly to remove any baking soda residue. Buff the stovetop dry with a microfiber cloth for a streak-free shine.
This method leaves your stovetop clean without scratches or chemical fumes.
3. Vinegar Soak for Cloudy Glassware
Cloudy glassware can make even the cleanest kitchen look a little sad. Hard water stains and mineral deposits build up over time, leaving glasses with that foggy film that just won't budge. But before you toss them or switch to plastic cups, try this simple vinegar soak.
It's cheap, fast, and uses something you already have in your pantry.
White vinegar is a mild acid that dissolves mineral deposits without harsh scrubbing. For best results, fill your sink or a large basin with equal parts white vinegar and warm water. Submerge the cloudy glasses completely and let them soak for 15 minutes.
After soaking, remove each glass and scrub gently with a non-abrasive sponge or a soft cloth. Rinse thoroughly with warm water and dry with a lint-free towel. For stubborn spots, make a paste of baking soda and vinegar and rub it on before rinsing.
Why Vinegar Works
Hard water contains calcium and magnesium that leave white deposits on glass. Vinegar's acetic acid reacts with these minerals, breaking them down so they rinse away easily. Unlike harsh chemical cleaners, vinegar is nontoxic and safe for dishware, making it a go-to for everyday use.
Soaking Tips For Best Results
Use a plastic or glass container—avoid metal, as vinegar can react with it. Make sure glasses are fully submerged; if they float, weigh them down with a cup. For extra cloudy pieces, extend soak time up to 30 minutes.
Rinse well after soaking to remove any vinegar smell.
Preventing Future Cloudiness
After cleaning, dry glasses immediately with a soft cloth to prevent water spots. Consider using a rinse aid in your dishwasher to reduce mineral buildup. For hand washing, avoid hard water by using a filtered rinse or adding a splash of vinegar to your final rinse water.
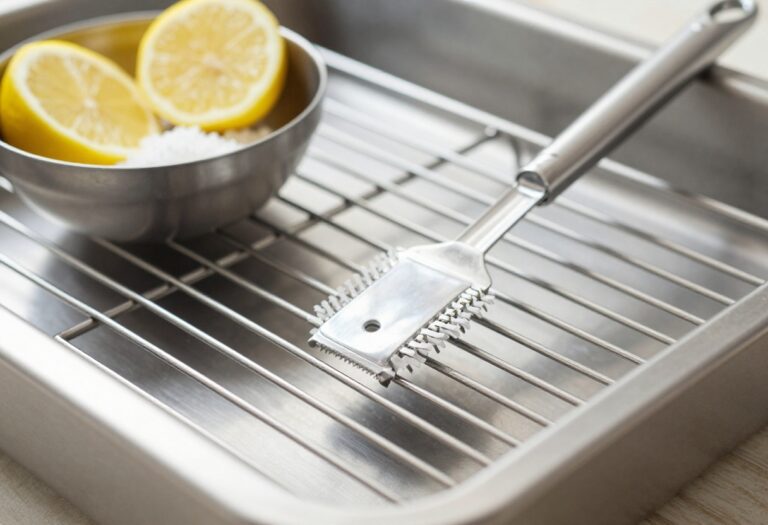
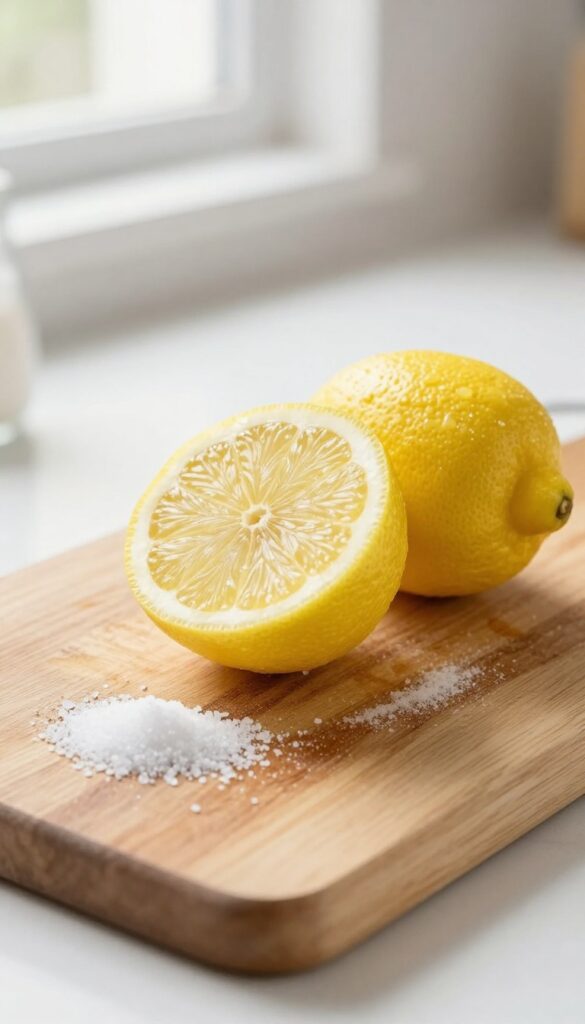
4. Lemon and Salt Cutting Board Cleaner
Cutting boards take a beating. Between raw meat juices, garlic oils, and berry stains, they can quickly become a breeding ground for bacteria and odors. But you don't need harsh chemicals to get them fresh again.
A simple lemon and salt combo works like magic.
This hack is almost too easy. Cut a lemon in half, sprinkle a generous layer of coarse salt onto the cut surface, and scrub the cutting board in a circular motion. The salt acts as a gentle abrasive to lift stains and stuck-on bits, while the lemon's acidity cuts through grease and kills bacteria.
Let it sit for five minutes, then rinse with warm water. Your board will look and smell like new.
Why It Works
Salt is a natural scrubber that won't scratch wood or plastic. Lemon juice contains citric acid, which breaks down fats and neutralizes odors. Together, they create a powerful yet gentle cleaner that's safe for food surfaces.
Best For Wooden Boards
Wooden cutting boards are porous, so they trap smells and stains more than plastic. This method deep-cleans the grain without drying out the wood. Avoid using it on unsealed bamboo boards, as the acid can damage the finish.
When To Skip It
If your board has deep cuts or cracks, skip the lemon—acid can seep into the grooves and cause warping. For plastic boards, this hack works fine, but use a lighter scrub to avoid creating micro-scratches where bacteria can hide.
5. Dishwasher Pod for Garbage Disposal
Your garbage disposal works hard, but it can get pretty nasty over time. Food particles, grease, and bacteria build up, leading to smells that just won't quit. Instead of reaching for harsh chemical cleaners, grab a dishwasher pod—it's a surprisingly effective trick.
Dishwasher pods are designed to break down grease and food residue, making them perfect for cleaning your disposal. They're gentler than bleach-based cleaners but tough enough to tackle grime. Plus, you probably already have one under your sink.
How To Do It
Drop one dishwasher pod into the disposal. Run hot water for about 30 seconds, then turn on the disposal. Let it run for a full cycle (about 30 seconds) with the water still running.
The pod will dissolve and foam up, scrubbing the blades and inner walls. Finally, let the water run for another 15 seconds to rinse everything away.
Why It Works
Dishwasher pods contain surfactants and enzymes that target grease and food particles. The hot water activates the cleaning agents, and the mechanical action of the disposal spreads the solution everywhere. It's a deep clean without scrubbing.
Pro Tips
Use this method once a week to keep odors at bay. For extra freshness, toss in lemon peels or a splash of vinegar after the pod cycle. Never use bleach or ammonia-based cleaners, as they can damage the disposal and create harmful fumes.
6. Coffee Filter for Streak-Free Windows
Windows and mirrors in the kitchen seem to attract every fingerprint and grease splatter. You wipe them down, only to be left with lint, streaks, or both. That's where a simple coffee filter comes in—it's lint-free, absorbent, and leaves glass crystal clear without any chemical residue.
Coffee filters are made from dense paper fibers that don't shed lint or leave streaks. They're also super absorbent, so they pick up moisture without smearing. Plus, they're disposable, so you can toss them after each use.
Why Coffee Filters Work
Unlike paper towels or cloth rags, coffee filters have a tight weave that traps dirt and absorbs liquid evenly. They don't leave behind fibers or tiny scratches, making them perfect for glass surfaces.
How To Use Them
Simply spray your glass cleaner onto the window or mirror, then wipe with a dry coffee filter. Use a second filter if needed to buff away any remaining moisture. For extra shine, finish with a circular motion.
Bonus Uses In The Kitchen
Coffee filters aren't just for windows. Use them to polish stainless steel appliances, dust delicate electronics, or even strain cooking oils. They're a versatile cleaning tool worth keeping in your drawer.
7. Ketchup for Copper and Stainless Steel
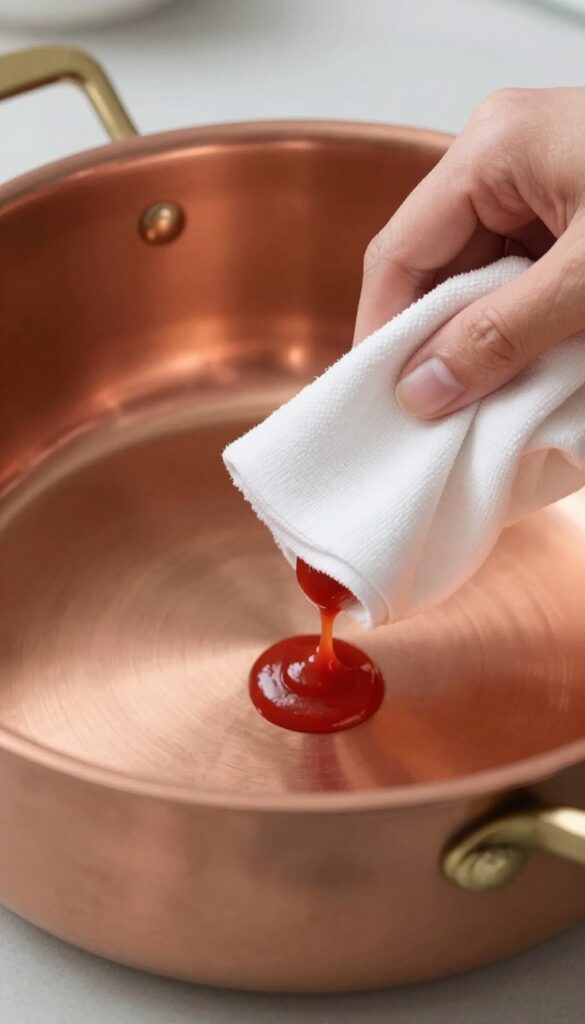
Ketchup isn't just for fries. Its acidity and mild abrasiveness make it a surprisingly effective polish for tarnished copper and stainless steel. Instead of buying a specialty cleaner, you can grab that bottle from the fridge and get your pots shining again.
Apply a thin layer of ketchup to the tarnished areas of your cookware. Let it sit for about 10 minutes so the acids can break down the oxidation. Then, buff with a soft cloth or sponge, rinse with warm water, and dry thoroughly.
The result is a brilliant shine without harsh chemicals.
Why Ketchup Works
Ketchup contains vinegar and tomato acids, which react with the tarnish (copper oxide) to dissolve it. The tomato paste also acts as a gentle abrasive, helping to lift the residue without scratching the metal.
Best For Copper And Stainless
This hack is especially effective on copper-bottomed pots and stainless steel pans. It can also be used on brass or silver items, but test on a small area first. Avoid using on aluminum or non-stick surfaces, as the acidity may cause damage.
Tips For Best Results
For heavy tarnish, let the ketchup sit longer—up to 20 minutes. You can also add a pinch of salt for extra scrubbing power. Rinse thoroughly to avoid any sticky residue, and dry immediately to prevent water spots.
8. Dryer Sheet for Caked-On Grease
That greasy film on your stovetop and range hood can feel impossible to shift. But a humble used dryer sheet might be the secret weapon you've been overlooking. The anti-static agents in dryer sheets help loosen baked-on grime, making it wipe away without harsh scrubbing.
Used dryer sheets are perfect for tackling tough grease because they're slightly abrasive yet gentle. Grab a sheet that's already been through the dryer—no need for a fresh one. Lightly dampen it with warm water and wipe down the greasy surface.
The sheet picks up residue, and you'll see immediate results. Follow up with a clean, damp cloth to remove any leftover film.
Why It Works
Dryer sheets contain softening agents and lubricants that break down grease bonds. The texture also provides just enough friction to lift stubborn residue without scratching metal or glass surfaces.
Best Surfaces To Use It On
This hack works wonders on stainless steel stovetops, glass cooktops, range hoods, and even greasy cabinet doors. Avoid using it on non-stick coatings or delicate finishes, as the chemicals might cause damage.
Pro Tips For Maximum Effect
For extra-caked-on spots, let the damp dryer sheet sit on the area for a few minutes before wiping. If you don't have used sheets, a new one works too—just rinse it first to reduce lint. Always test on an inconspicuous area first.
9. Ice Cubes for Garbage Disposal Blades
Your garbage disposal takes a beating, grinding up food scraps day after day. Over time, blades can dull and gunk can build up, leading to odors and sluggish performance. A simple trick using ice cubes and salt can fix both problems in under a minute.
Drop a handful of ice cubes into the disposal, add a tablespoon of coarse salt, and run cold water. Turn on the disposal and let it grind everything up. The ice helps knock off stuck-on debris while the salt acts as a gentle abrasive to sharpen the blades.
Finish by running a few lemon or orange peels through for a fresh citrus scent.
Why It Works
Ice cubes are hard enough to dislodge caked-on food particles without damaging the blades. The salt provides extra friction that hones the metal edges, keeping them sharp. This combination cleans and maintains your disposal without any harsh chemicals.
Step-by-step
Fill an ice cube tray with white vinegar instead of water for extra deodorizing power. Freeze until solid, then toss a few cubes into the disposal along with a tablespoon of kosher salt. Run cold water and turn on the disposal for about 30 seconds.
Repeat once a month.
Pro Tips
Never use bleach or drain cleaners in your disposal—they can damage the rubber seals. Stick to ice, salt, and citrus peels for regular maintenance. If your disposal is already clogged, use tongs to remove any visible debris before trying this hack.
10. Hydrogen Peroxide for Grout
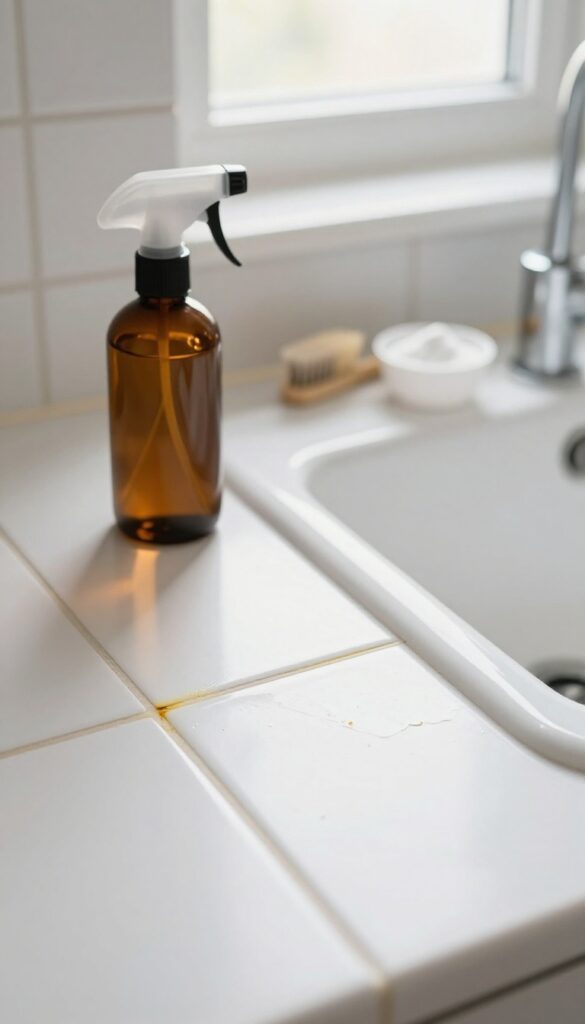
Grout lines in the kitchen take a beating. Spills, grease, and general grime turn them from light to dingy fast. Instead of reaching for harsh bleach or spending money on specialty grout cleaners, grab the brown bottle from your medicine cabinet.
Hydrogen peroxide is a gentle but effective cleaner that lifts stains and kills bacteria without the strong fumes.
Hydrogen peroxide works by releasing oxygen bubbles that help lift dirt and stains from porous surfaces like grout. It's especially good for light-colored grout that has yellowed or darkened over time. The fizzing action does some of the mechanical work for you, so you don't have to scrub as hard.
Plus, it's safe for most tile types and won't damage the finish.
How To Apply It
Pour 3% hydrogen peroxide directly onto the grout lines or spray it on with a spray bottle. Let it sit for about 5 to 10 minutes. You'll see it start to bubble and fizz as it breaks down the grime.
Then take an old toothbrush or a small scrub brush and work the peroxide into the grout. Rinse with water and wipe dry. For extra stubborn spots, make a paste with baking soda and hydrogen peroxide.
Why It Works So Well
Hydrogen peroxide is an oxidizer, which means it chemically breaks down organic stains like food residue, mold, and mildew. Unlike bleach, it doesn't produce toxic fumes when mixed with water, and it breaks down into oxygen and water, so it's environmentally friendly. It's also much gentler on your tile and grout than chlorine bleach, which can weaken grout over time.
When To Avoid It
Don't use hydrogen peroxide on dark or colored grout because it can lighten the color. Test it on a small hidden area first if you're unsure. Also avoid using it on natural stone tiles like marble or granite, as it can etch the surface.
Stick to ceramic, porcelain, or other non-porous tiles.
11. Toothbrush for Faucet Crevices
Faucet bases and handles are notorious for collecting grime, but they're also a pain to clean with a regular sponge. An old toothbrush is the perfect tool to reach those tight spots. Dip it in vinegar and get scrubbing.
Why Vinegar Works Best
Vinegar cuts through mineral deposits and soap scum without harsh chemicals. It's safe for most faucet finishes, but avoid it on unsealed brass or natural stone. For tough buildup, let the vinegar sit for a few minutes before scrubbing.
Target The Trouble Zones
Focus on the area where the faucet meets the counter, around the base of the handle, and any crevices in the spout. These spots collect the most gunk. A toothbrush's bristles can dislodge dirt that a cloth would just smear around.
Don't Forget The Aerator
While you're at it, unscrew the faucet aerator and soak it in vinegar overnight. This removes hidden buildup that can reduce water pressure. A quick scrub with the toothbrush afterward gets it sparkling clean.
12. Olive Oil for Stainless Steel Appliances
Stainless steel looks sleek but shows every fingerprint and smudge. You can spend a fortune on specialty sprays, or you can grab a bottle of olive oil from your pantry. This kitchen staple leaves a streak-free shine and repels new fingerprints for days.
The trick is simple: dab a tiny amount of olive oil onto a soft microfiber cloth and buff it into the surface. Use a clean part of the cloth to remove any excess. The oil fills microscopic pores, creating a smooth barrier that hides prints and adds a subtle sheen.
Why Olive Oil Works
Olive oil is a natural polish that bonds to metal without leaving harsh residue. Unlike water-based cleaners, it doesn't evaporate quickly, so it lasts longer. Plus, it's food-safe, so you don't have to worry about chemicals near your countertop.
How To Apply It Right
Start with a clean surface. Wipe away any loose dust or grease first. Then put a few drops of oil on your cloth—less is more.
Work in small circular motions, then buff with a dry section. Avoid using too much oil, or it'll look greasy.
Pro Tips For Best Results
Use light olive oil or regular cooking oil, not extra-virgin, which can be too sticky. Reapply every week or after deep cleaning. For a quick touch-up, keep a dedicated microfiber cloth lightly oiled in a sealed bag.
13. Rice for Narrow Bottles
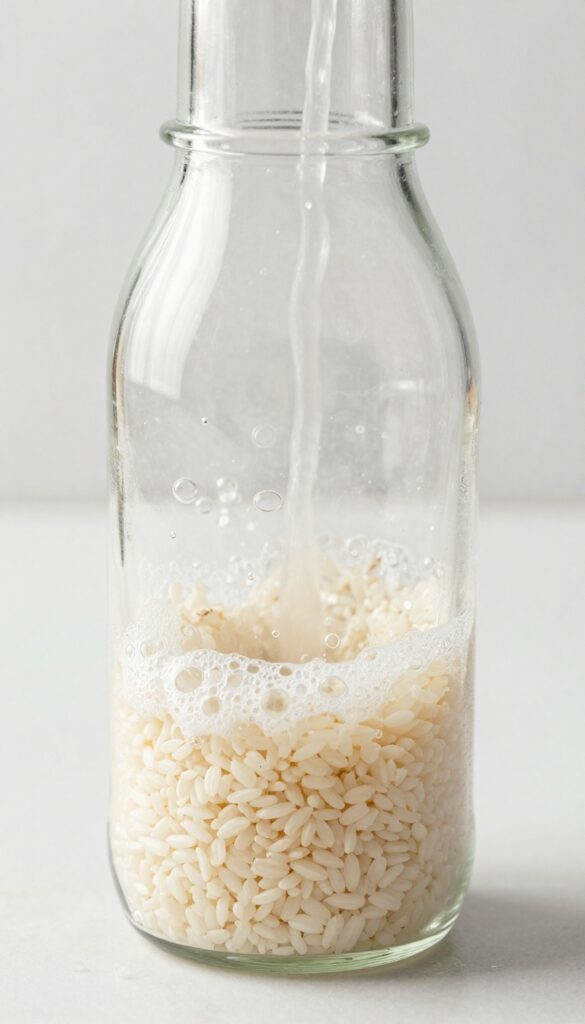
Narrow bottles and vases are a nightmare to clean. Your hand barely fits inside, and sponges just push grime around. But a handful of uncooked rice changes everything.
Combined with soap and warm water, the rice acts like tiny scrubbers that reach every nook and cranny.
This hack is perfect for reusable water bottles, narrow-neck carafes, and even small-neck vases. The rice grains are hard enough to loosen stuck-on residue but gentle enough not to scratch glass or plastic. Plus, you probably already have rice in your pantry, so there's no need for special brushes or expensive cleaning tools.
How It Works
Fill the bottle about one-quarter full with uncooked rice. Add a few drops of dish soap and enough warm water to fill it halfway. Screw on the lid or cover the opening with your hand, then shake vigorously for 30 to 60 seconds.
The rice sloshes around, scrubbing the interior walls and dislodging any buildup. Rinse thoroughly with clean water, and you're done.
Best Uses
This method works wonders on protein shakers that have that sour smell no matter how much you wash them. It also tackles coffee and tea stains in glass carafes. For extra stubborn residue, let the rice mixture sit for 15 minutes before shaking.
You can even reuse the rice a couple of times if you rinse and dry it, but fresh rice works best.
Variations
No rice? Try coarse salt or small dried beans instead. Salt is especially good for cutting through grease.
For a deeper clean, add a splash of white vinegar to the mix. The vinegar helps dissolve mineral deposits while the rice scrubs. Just be sure to rinse well afterward so no vinegar taste lingers.
14. Pantyhose for Dusting Blinds
Blinds are dust magnets, and wiping each slat individually is tedious. Pantyhose offer a surprisingly effective solution. The nylon material creates static electricity that attracts dust like a magnet, trapping it instead of sending it into the air.
Slip a clean pair of pantyhose over your hand like a glove. Run your hand along each slat, and the dust will cling to the fabric. When one side gets dirty, just turn the pantyhose inside out or switch hands.
No need for sprays or dusters—this hack is fast, reusable, and mess-free.
Why It Works So Well
The static charge from the nylon pulls dust off surfaces and holds it, unlike feather dusters that just scatter particles. Plus, the soft fabric won't scratch or damage blind slats, making it safe for wood, metal, or vinyl.
Pro Tip For Best Results
Use a worn-out pair of pantyhose—they're softer and generate more static. For vertical blinds, wrap the pantyhose around a ruler or yardstick to reach high spots without stretching. Wash the pantyhose after each use and reuse them multiple times.
15. Club Soda for Carpet Stains
Spilled red wine or coffee on the kitchen carpet? Don't panic. Club soda is your secret weapon for lifting fresh stains out of carpet fibers.
The carbonation helps dissolve and lift the stain, while the salt in the soda water aids in absorption. It's a simple, chemical-free solution that works wonders on most organic stains.
Act fast for best results. Blot the stain with a clean cloth to remove excess liquid, then pour a small amount of club soda directly onto the stain. Let it fizz for a few seconds, then blot again with a dry cloth.
Repeat until the stain lifts. For stubborn stains, add a pinch of salt to the club soda before applying. Always test on an inconspicuous area first, especially on delicate or dark carpets.
Why Club Soda Works
Club soda contains carbonic acid, which creates bubbles that help break the bond between the stain and the carpet fibers. The sodium and potassium salts in club soda also act as mild cleaning agents, lifting dirt without harsh chemicals. Unlike white vinegar or hydrogen peroxide, club soda is gentle and won't discolor most carpets.
Step-by-step Application
Start by blotting the stain with a paper towel to soak up as much liquid as possible. Don't rub—that spreads the stain. Pour a small stream of club soda over the stain, just enough to saturate it.
Let it sit for 2-3 minutes. Blot with a clean, dry cloth, pressing firmly to absorb the liquid and stain. Repeat if needed.
Finish by blotting with a damp cloth to remove any residue, then let air dry.
When To Call It Quits
Club soda works best on fresh stains. If the stain has set or is oil-based, you may need a stronger cleaner. For old or dried stains, try a carpet stain remover or a mixture of dish soap and hydrogen peroxide.
Always vacuum the area once dry to restore carpet texture.
16. Wax Paper for Stovetop Drip Pans
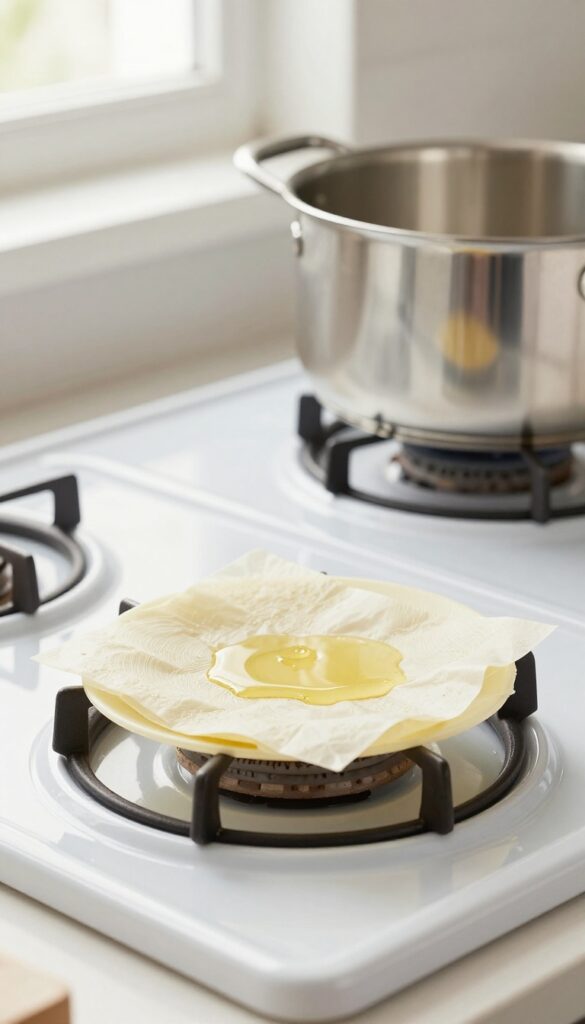
Stovetop drip pans are magnets for burnt-on spills and grease splatters. Scrubbing them clean can be a frustrating chore, but there's a simple trick that changes everything. A sheet of wax paper placed under the burner grates catches drips before they bake onto the metal.
Wax paper acts as a heat-resistant barrier that withstands normal cooking temperatures without melting or catching fire. When spills happen, the wax paper catches them, so your drip pans stay clean. After cooking, just let the stovetop cool, remove the grates, and lift out the wax paper.
Any mess goes straight into the trash, leaving your drip pans spotless. This hack works best with electric coil or gas stoves where the drip pans are removable. For glass-top stoves, skip this method since wax paper can slide and cause uneven heating.
How To Set It Up
Start with a clean, cool stovetop. Cut a sheet of wax paper to fit each drip pan, leaving a little overhang so it stays in place. Place the paper directly on the drip pan, then put the burner grate back on top.
Make sure the paper doesn't touch the heating element directly—it should sit flat on the pan below the grate.
When To Replace
Swap out the wax paper after every few uses or whenever you notice a significant spill. For everyday cooking, a single sheet can last a week if you're careful. But if you boil over a pot of pasta or fry something greasy, change it right away to avoid smoke or sticking.
Safety Tips
Always use standard wax paper, not parchment or foil. Wax paper is designed for low to medium heat and won't ignite under normal stovetop conditions. Never leave the stove unattended with wax paper in place, and avoid using it under high heat settings for extended periods.
If you see any browning or scorching, remove the paper immediately.
17. Salt for Cast Iron Cleaning
Cast iron is a kitchen workhorse, but cleaning it can feel tricky. You don't want to strip the seasoning, yet stuck-on food has to go. Coarse salt is the perfect gentle abrasive that lifts residue without damaging that nonstick surface.
Sprinkle a generous amount of coarse salt (kosher or sea salt works great) onto the still-warm pan. Use a paper towel or a soft brush to scrub in a circular motion. The salt acts like a scrubby sponge, grabbing food particles and grease.
Rinse with hot water and dry immediately. No soap needed, and your seasoning stays intact.
Why Salt Works
Salt is hard enough to scrape off burnt bits but soft enough not to scratch the seasoned layer. It also absorbs moisture, helping to prevent rust. Plus, it's cheap and always in your pantry.
When To Use This Method
This hack is ideal for everyday cleaning after cooking. For heavy buildup, try a salt and oil paste. For deep cleaning, you might need to reseason, but for regular maintenance, salt is your go-to.
Tips For Best Results
Always clean your cast iron while it's still warm (not hot). Avoid soap unless absolutely necessary. After rinsing, dry on the stove over low heat to evaporate all moisture.
Rub a thin layer of oil to keep it seasoned.
18. Dish Soap and Vinegar for Showerheads
A clogged showerhead in the kitchen? It happens more often than you think, especially if you use a sprayer for rinsing dishes. Mineral deposits from hard water can slow the flow and leave unsightly white buildup.
But you don't need a plumber or harsh chemicals to fix it.
This simple hack uses two common kitchen staples—dish soap and vinegar—to dissolve mineral deposits and restore your showerhead's performance. The combination breaks down calcium and lime scale while the soap helps loosen grime. Best of all, it requires almost no scrubbing.
The Soak Method
Fill a plastic bag with equal parts white vinegar and warm water, then add a few squirts of dish soap. Submerge the showerhead in the bag and secure it with a rubber band or twist tie. Let it soak for at least an hour—overnight for heavy buildup.
Rinse And Wipe
Remove the bag and run the water for a minute to flush out loosened deposits. Use a soft cloth or old toothbrush to gently wipe away any remaining residue. Your showerhead should now flow freely and look nearly new.
When To Repeat
If you have hard water, repeat this process every few months to prevent buildup from returning. You can also use this method on faucet aerators and other removable fixtures around the kitchen.
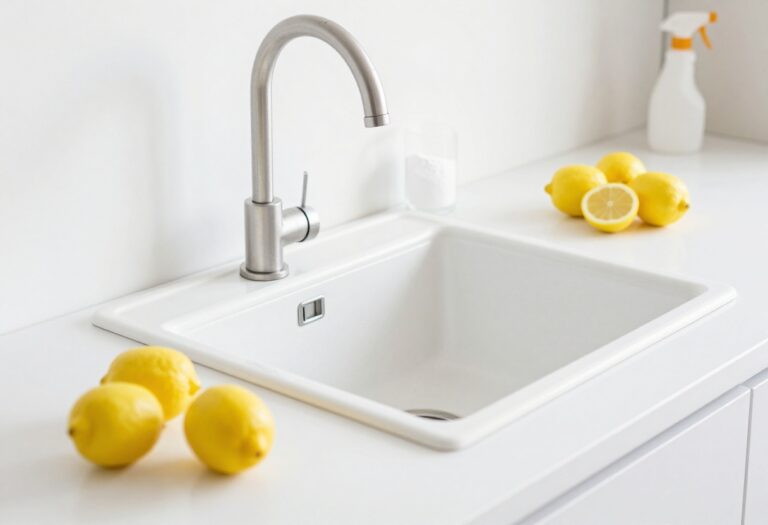
19. Baby Oil for Stainless Steel Sinks
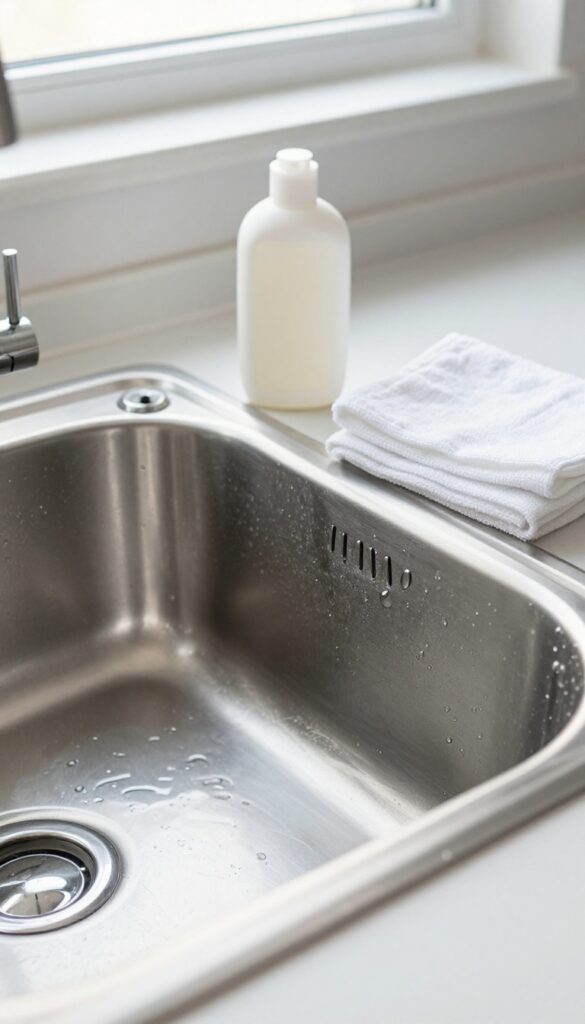
Stainless steel sinks look great when they're clean, but water spots and streaks can make them look dull fast. Baby oil is a surprising fix that leaves the surface shiny and protected without harsh chemicals.
After cleaning your sink as usual, dry it thoroughly. Then put a few drops of baby oil on a soft cloth and wipe it over the entire sink, following the grain of the steel. The oil fills in tiny scratches and repels water, so spots don't form as easily.
Buff lightly with a clean cloth to remove any excess. The result is a mirror-like shine that lasts for days. This trick also works on stainless steel appliances and faucets.
Why Baby Oil Works
Baby oil is mostly mineral oil, which is non-toxic and safe for food-contact surfaces. It creates a thin, invisible barrier that water beads up on instead of drying into spots. It also helps hide minor scratches and fingerprints, so your sink stays looking cleaner longer.
How To Apply It Right
Start with a clean, dry sink. Use a microfiber cloth to avoid lint. Apply just a few drops—too much can feel greasy.
Work in small sections, rubbing along the grain. Let it sit for a minute, then buff off any excess with a fresh cloth. For best results, do this once a week.
A Few Cautions
Avoid using baby oil on non-stick or coated sinks, as it may leave a residue. If your sink is very scratched, the oil might make scratches more visible at first. Test on a small hidden area first.
Also, keep the sink dry after use—standing water can still cause spots over time.
20. Bread for Broken Glass
Dropping a glass on the kitchen floor is bad enough. The real headache starts when you try to pick up those tiny, invisible shards that scatter everywhere. Even after sweeping and vacuuming, you might still find a stray piece with your bare foot later.
That is where a simple slice of bread comes in to save the day.
This hack is almost too simple to believe, but it works like a charm. Instead of risking cuts by using your fingers or a damp paper towel, grab a slice of soft bread from your pantry. Gently press it over the area where the glass broke.
The bread acts like a sponge, lifting up even the tiniest slivers that your broom or vacuum might miss. Once you have patted down the entire zone, carefully fold the bread over itself to trap the shards inside and toss it directly into the trash. Follow up with a quick damp wipe of the floor for extra safety, and you are done.
Why Bread Works So Well
Soft bread is porous and slightly moist, which makes it perfect for grabbing tiny glass fragments. The bread's texture creates enough friction to lift shards off hard floors without pushing them deeper into cracks. Plus, it is thick enough that you won't accidentally poke a shard through to your hand.
It is basically a disposable, edible sponge that you already have in your kitchen.
Best Bread Types For The Job
Not all breads are equally effective. White sandwich bread or soft wheat bread works best because they are pliable and have a fine, even crumb. Avoid crusty breads like sourdough or baguettes, as their hard crusts won't mold to the floor.
If you only have crusty bread, you can peel off the crust and use the soft interior. Stale bread is fine too, just soften it slightly with a drop of water.
Safety Tips To Keep In Mind
Always wear shoes when cleaning broken glass, even with this hack. After using the bread, do a thorough check with a flashlight at a low angle to spot any remaining glints. If the glass broke on carpet, press the bread firmly but avoid rubbing, which can push glass deeper.
For large spills, sweep up big pieces first, then use bread for the fine fragments.
21. Rubbing Alcohol for Stainless Steel Fingerprints
Fingerprints and smudges on stainless steel appliances are inevitable, especially in a busy kitchen. They seem to appear the moment you wipe them away. But there's a simple solution hiding in your medicine cabinet: rubbing alcohol.
It cuts through the oils from your skin instantly, leaving surfaces streak-free and shiny.
Rubbing alcohol evaporates quickly and doesn't leave residue, making it perfect for stainless steel. It's also cheap and non-toxic compared to commercial stainless steel cleaners. Just remember to test a small spot first, especially on appliances with protective coatings.
How To Use It
Pour a small amount of 70% or 90% isopropyl alcohol onto a soft microfiber cloth. Never spray directly onto the appliance, as it can seep into edges. Wipe in the direction of the grain, then buff dry with a clean cloth for a brilliant shine.
Bonus Tip For Heavy Grime
If fingerprints have built up over time, mix equal parts rubbing alcohol and water. Add a drop of dish soap to cut through any greasy residue. This solution works wonders on refrigerator doors and dishwasher panels.
What To Avoid
Stay away from paper towels or rough sponges—they can scratch the surface. Also, avoid using rubbing alcohol on painted or colored stainless steel, as it might strip the finish. Stick to bare stainless steel for best results.
22. Freezer for Sponges
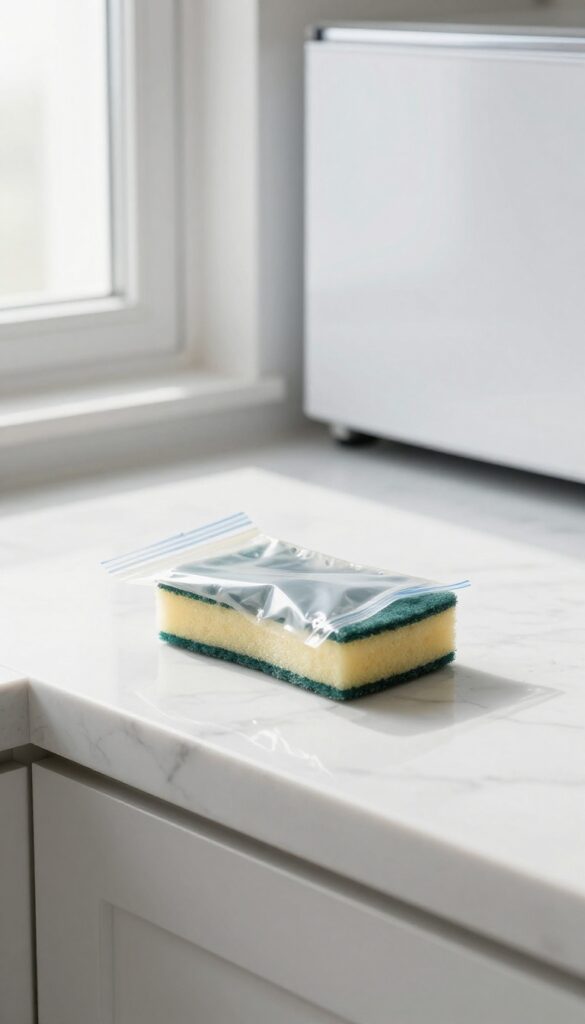
Kitchen sponges are breeding grounds for bacteria, especially when they stay damp between uses. You can toss them in the dishwasher or microwave, but there's an even simpler trick that requires zero effort: the freezer. Freezing damp sponges overnight kills most bacteria and keeps them fresh longer, so you don't have to replace them as often.
The science is straightforward: freezing temperatures cause water inside bacterial cells to expand and rupture, effectively killing many common germs. While it won't eliminate every single microbe, it's a highly effective maintenance step that extends your sponge's usable life. Plus, it's completely chemical-free and takes almost no time.
How To Freeze Your Sponge
Start by rinsing your sponge thoroughly to remove food particles. Wring it out until it's just damp, not soaking wet. Place it in a resealable plastic bag or wrap it in plastic wrap to prevent freezer odors from clinging to it.
Pop it in the freezer overnight, and in the morning, you'll have a fresh-smelling, mostly sanitized sponge ready to use.
When To Replace Instead
Freezing is great for regular maintenance, but it's not a miracle cure. If your sponge starts to smell musty even after freezing, or if it's visibly worn with torn edges, it's time to toss it. Aim to replace sponges every two to four weeks, and use the freezer trick to stretch that window a bit longer without risking hygiene.
Other Freezer Hacks For The Kitchen
The freezer isn't just for sponges. You can also freeze dish brushes, scrub pads, and even microfiber cloths to keep them fresh. Just make sure they're clean and damp before freezing.
This method works especially well for items that can't go in the dishwasher or microwave, giving you a low-effort way to keep your cleaning tools in better shape.
23. Vinegar and Baking Soda for Drain Clogs
Slow drains are one of those kitchen annoyances that can quickly turn into a full-blown problem. Before you reach for harsh chemical drain cleaners, try this simple, non-toxic combo you probably have in your pantry. It’s gentle on your pipes but tough on gunk.
This classic method works wonders on minor clogs caused by grease, soap scum, or food debris. The fizzy reaction helps break up buildup, and the hot water flush washes it all away. It’s cheap, safe, and surprisingly effective.
Why It Works
Baking soda is a mild alkali that reacts with the acid in vinegar to create carbon dioxide gas. This bubbling action helps dislodge grime and grease clinging to pipe walls. The hot water rinse then melts away any remaining residue, leaving your drain clear.
Step-by-step Instructions
Start by pouring a pot of boiling water down the drain. Then dump in 1/2 cup of baking soda and let it sit for a few minutes. Follow with 1 cup of white vinegar and immediately cover the drain with a plug or cloth to contain the fizz.
Wait 15 minutes, then flush with another pot of hot water.
When To Use And When To Skip
This hack is perfect for slow drains or mild clogs. For completely blocked drains or tough clogs deeper in the pipes, you may need a plumber’s snake or professional help. Also, avoid this method if you’ve already used a chemical drain cleaner—mixing can cause dangerous fumes.
24. Lemon Juice for Microwave Odors
Microwaves can trap odors from last night's fish dinner or that forgotten bowl of chili. Instead of masking smells with sprays, use lemon juice to neutralize them naturally. This simple trick takes just a few minutes and leaves your microwave smelling fresh without any chemical residue.
Lemon juice is a natural deodorizer that cuts through grease and absorbs odors. When heated, the steam carries citrus compounds throughout the microwave, breaking down odor molecules and leaving a clean scent. It's safe, cheap, and works better than most store-bought deodorizers.
How To Do It
Mix 2 tablespoons of lemon juice with 1 cup of water in a microwave-safe bowl. Microwave on high for 3–5 minutes until the mixture boils and steam fogs the interior. Let it sit for 5 minutes without opening the door, then wipe down the inside with a damp cloth.
The steam loosens stuck-on food, so you get a double benefit.
Why It Works
Lemon contains citric acid, which breaks down alkaline odor molecules. The heat accelerates this reaction, and the steam distributes the acid evenly. Unlike baking soda, which absorbs odors passively, lemon juice actively neutralizes them.
Plus, the fresh scent lingers longer than artificial sprays.
Pro Tips
Use fresh lemon juice for the best results, but bottled works in a pinch. Add a few lemon slices or a cinnamon stick for a spa-like aroma. Don't skip the wipe-down—residual moisture can cause mold if left.
For stubborn odors, repeat with a fresh batch.
25. Organize with Drawer Dividers
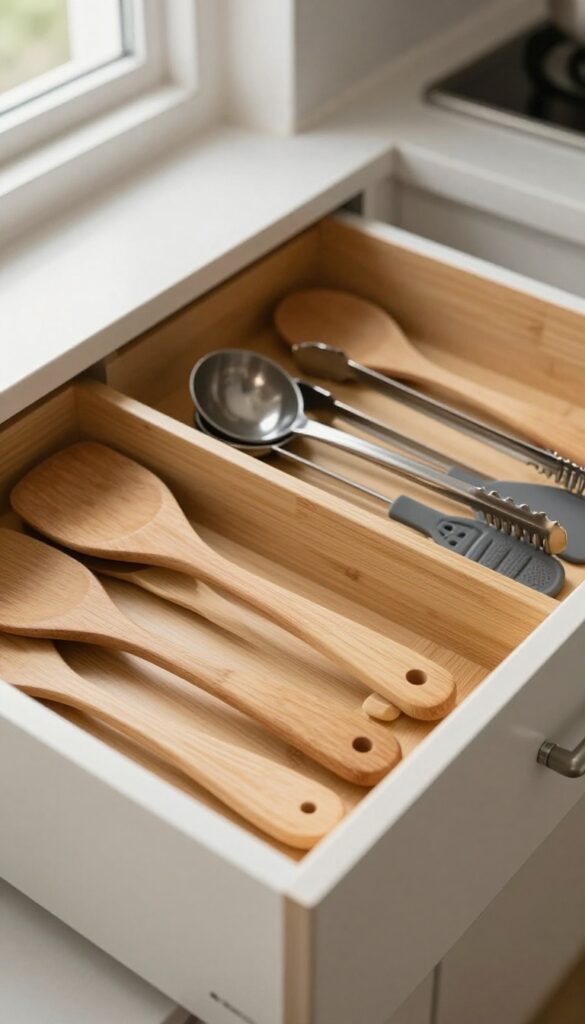
A messy drawer is a time thief. Every time you dig for a spatula or measuring spoon, precious seconds add up. Drawer dividers stop the chaos before it starts, keeping everything in its place and within easy reach.
Adjustable dividers are the unsung heroes of an organized kitchen. They transform jumbled catch-all drawers into tidy, functional spaces. By separating utensils, gadgets, and tools, you eliminate the frustration of hunting for what you need.
Plus, a clean drawer is easier to wipe down, cutting your cleaning time in half.
Choose The Right Dividers
Not all dividers are created equal. Look for adjustable bamboo or plastic sets that expand to fit your drawer width. Bamboo adds a warm, natural look, while plastic is lightweight and easy to clean.
Measure your drawer depth before buying to ensure a snug fit.
Sort By Frequency Of Use
Place everyday items like spatulas, tongs, and peelers in the front sections. Reserve the back for less-used tools like pastry brushes or corn holders. This logical layout saves time and keeps your most-used gear at your fingertips.
Maintain The System
Once your dividers are in place, make it a habit to return each item to its designated spot. A quick weekly check prevents clutter from creeping back. If you notice items drifting, adjust the divider layout to better suit your workflow.
FAQ
Are these kitchen cleaning hacks safe for all surfaces?
Most hacks use gentle ingredients like vinegar, baking soda, and lemon, but always test on a small hidden area first, especially on natural stone or delicate finishes.
How often should I deep clean my kitchen?
Aim for a deep clean every 1-2 weeks, but daily quick wipes and spot cleaning help maintain a mess-free kitchen with less effort.
Can I use these hacks if I have pets or kids?
Yes, many hacks use non-toxic ingredients. However, keep pets and children away during cleaning and rinse surfaces thoroughly after use.
What's the best way to remove stubborn grease from cabinets?
Mix equal parts vinegar and warm water with a drop of dish soap. Wipe cabinets with a microfiber cloth, then rinse with plain water.
How do I prevent my kitchen from getting messy quickly?
Adopt a 'clean as you go' habit: wipe spills immediately, wash dishes after meals, and do a quick 5-minute tidy before bed.
Conclusion
A cleaner kitchen doesn't require fancy products or hours of scrubbing—just smarter methods that work with your schedule. Pick two or three hacks from this list that target your biggest pain points and try them this week.
Once those become habits, add a few more. Before long, you'll spend less time cleaning and more time enjoying your space.