17 Cleaning Oven Tips for Burnt Food and Grease
Burnt-on grease and crusted spills can turn your oven into a stubborn mess that resists regular scrubbing. But you don't need harsh chemicals or endless elbow grease to restore it.
These 17 cleaning tips use everyday ingredients and clever techniques to break down even the toughest residue. From a simple baking soda paste to the surprising power of steam, each method targets specific problem areas like glass doors, racks, and burnt-on spills.
No more scrubbing for hours—just practical solutions that actually work. Let's get your oven looking like new again.
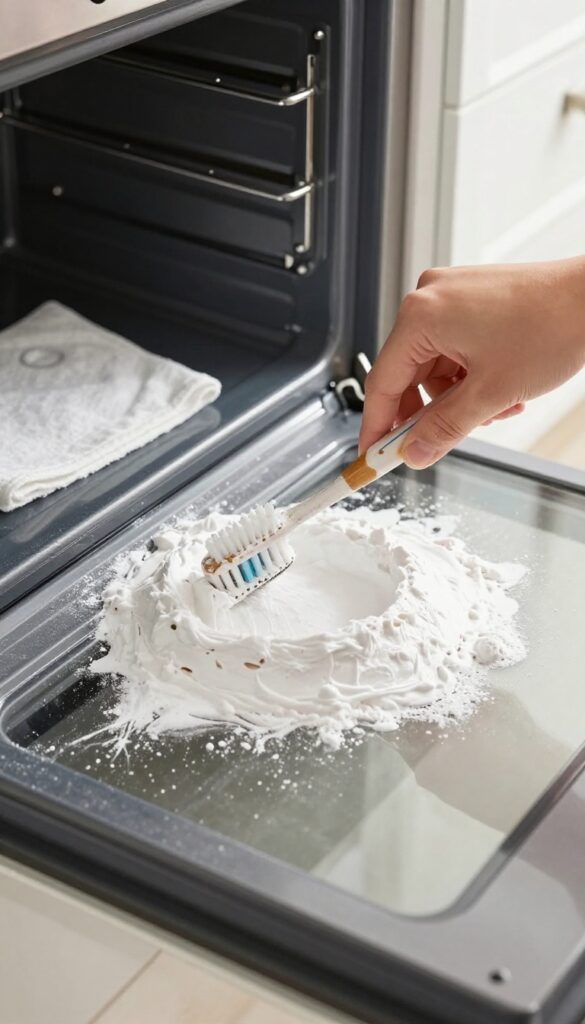
1. Baking Soda and Water Paste for General Grime
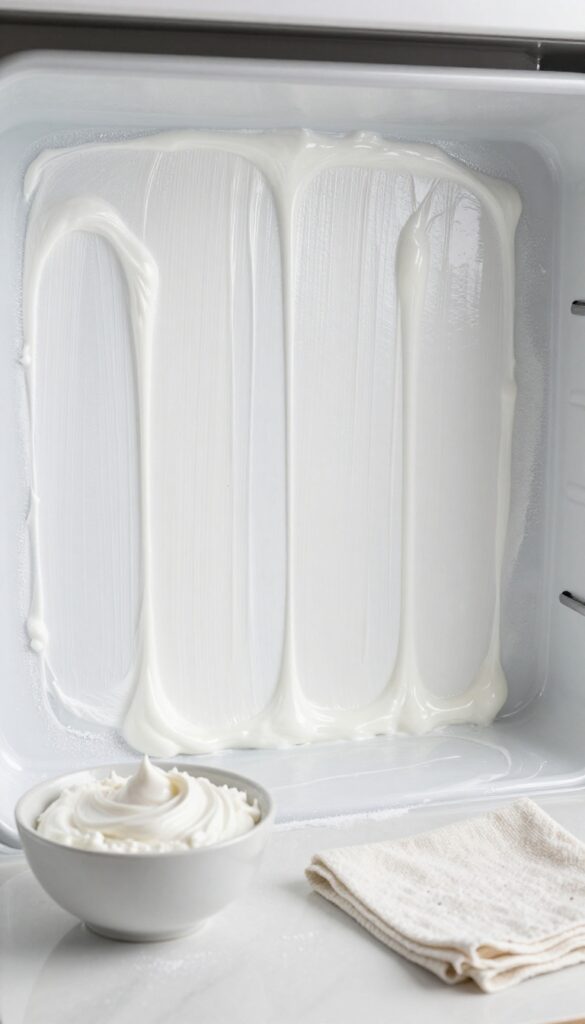
Baking soda is a gentle abrasive that cuts through grease without scratching surfaces. When mixed with water, it forms a paste that clings to vertical oven walls and caked-on spills. This method works best on cool surfaces and requires minimal effort—just some patience while the paste does its job.
Start by removing oven racks and any loose debris. In a small bowl, combine half a cup of baking soda with a few tablespoons of water until you get a spreadable paste. Apply the paste generously to all interior surfaces, avoiding heating elements.
Let it sit for at least 12 hours or overnight. The baking soda will slowly break down carbonized grease and food residue. The next day, wipe away the paste with a damp cloth.
For stubborn spots, spray a little white vinegar to create a fizzing reaction that lifts remaining grime. Rinse with clean water and dry with a microfiber towel.
Why Baking Soda Works So Well
Baking soda is alkaline, which helps dissolve acidic grease and burnt food. Its fine particles provide gentle scrubbing power without scratching enamel or glass. Unlike harsh chemical cleaners, it's non-toxic and safe for food-contact surfaces.
Tips For Maximum Effectiveness
For thick buildup, apply a thicker paste and let it sit longer. Cover the paste with a damp cloth to prevent it from drying out. Avoid using metal scrubbers that could damage the oven's interior finish.
What To Avoid
Never use baking soda paste on self-cleaning oven liners or near heating elements while the oven is hot. Always ensure the oven is completely cool before applying. Test a small area first if your oven has a special coating.
2. Vinegar Spray to Neutralize Residue
After the baking soda paste has done its heavy lifting, vinegar steps in to finish the job. White vinegar reacts with the alkaline baking soda, creating a fizzy reaction that helps lift stubborn bits of grease and food. Plus, it neutralizes odors, leaving your oven smelling fresh without any chemical residue.
Once you've scrubbed off the bulk of the baking soda paste, grab a spray bottle filled with undiluted white vinegar. Mist the remaining residue generously—you'll see it fizz and bubble as it reacts with any leftover baking soda. Let it sit for a few minutes, then wipe with a damp cloth.
For tough spots, spray directly and scrub gently with a non-abrasive sponge. The vinegar also cuts through any greasy film, leaving surfaces clean and streak-free.
Why Vinegar Works
White vinegar is acidic, which helps dissolve mineral deposits, grease, and baked-on food. When it meets baking soda, the fizzing action physically loosens debris, making it easier to wipe away. It's also a natural deodorizer, so it eliminates lingering smells from burnt spills.
How To Apply For Best Results
Fill a spray bottle with white vinegar (no need to dilute). After removing the bulk of the baking soda paste, spray the vinegar over the oven interior. Focus on areas with visible residue.
Let the fizzing do its work for 2–3 minutes, then wipe with a microfiber cloth or sponge. Repeat if necessary for stubborn spots.
Safety Tips
Always ensure the oven is cool before spraying vinegar. Avoid spraying on heating elements or electrical components. Vinegar fumes can be strong, so keep the kitchen ventilated.
If you have a self-cleaning oven, check the manual—some coatings may react with vinegar.
3. Lemon Juice Steam for Light Cleaning
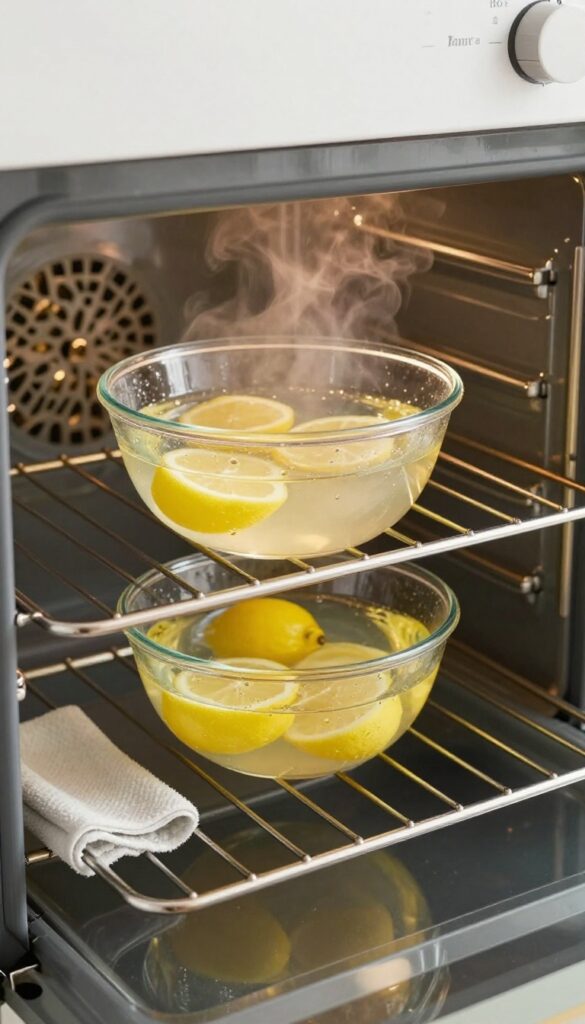
If your oven only has a thin layer of grease or some dried-on spills, skip the heavy scrubbing and try steam cleaning with lemon juice. The combination of heat and citrus cuts through grime naturally, leaving your oven smelling fresh instead of like chemicals. It's a quick, low-effort method that works best for maintenance cleaning between deep scrubs.
How The Lemon Steam Works
Fill an oven-safe bowl with about 2 cups of water and the juice of one lemon. Place it on the middle rack and heat your oven to 250°F (120°C). Let it run for 20 minutes.
The steam softens stuck-on food and grease, while the lemon's acidity helps break down grime. After turning off the oven, let it cool slightly, then wipe the interior with a damp cloth. Most of the residue should come off easily.
Best Uses For This Method
This technique is ideal for light to moderate buildup—think splatters from roasting vegetables or a few baked-on drips. It's not strong enough for thick, burnt-on crusts or years of neglect. Use it monthly as a preventative measure to keep your oven looking clean without harsh scrubbing.
You can also substitute vinegar for lemon juice if you prefer a different scent.
Tips For Better Results
For extra cleaning power, add a tablespoon of baking soda to the lemon water. Make sure the bowl is heat-safe and stable to avoid tipping. After steaming, use a non-abrasive sponge or microfiber cloth to wipe down surfaces.
If any spots remain, let the oven cool completely and spot-clean with a baking soda paste. Always rinse with a damp cloth afterward to remove any citrus residue.
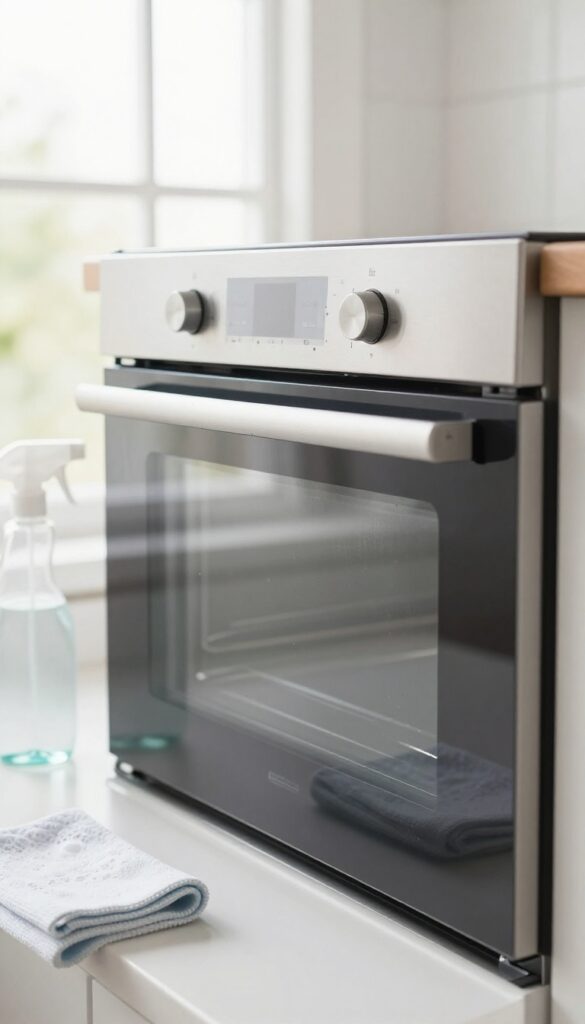
4. Commercial Oven Cleaner for Stubborn Spots
When natural methods fall short against years of baked-on grease, it's time to bring in the big guns. Commercial oven cleaners are formulated to dissolve the toughest carbonized grime with minimal scrubbing. Just be sure to treat them with respect—these products contain strong chemicals that require careful handling.
Choosing The Right Cleaner
Look for a cleaner labeled "heavy-duty" or "for self-cleaning ovens" if your oven has that feature. Aerosol foams cling to vertical surfaces better than liquids, making them ideal for walls and the top of the oven. Avoid abrasive formulas that can damage enamel.
Safety First
Always wear rubber gloves and safety goggles. Work in a well-ventilated area—open windows and turn on the exhaust fan. Remove all racks and any plastic or aluminum parts, as the chemicals can corrode them.
Cover nearby countertops and floors with newspaper or drop cloths.
Application And Wait Time
Spray the cleaner evenly on the soiled areas, avoiding heating elements and the oven light. Close the door and let it sit for the time recommended on the label—usually 15 to 30 minutes. For extra stubborn spots, you can leave it on longer, but don't let it dry completely.
Wipe And Rinse Thoroughly
After the dwell time, wipe away the loosened grime with a damp sponge or cloth. Rinse repeatedly with clean water to remove all chemical residue. A final wipe with a vinegar-water solution neutralizes any remaining alkalinity and prevents streaks.
5. Self-Cleaning Cycle for Maintenance
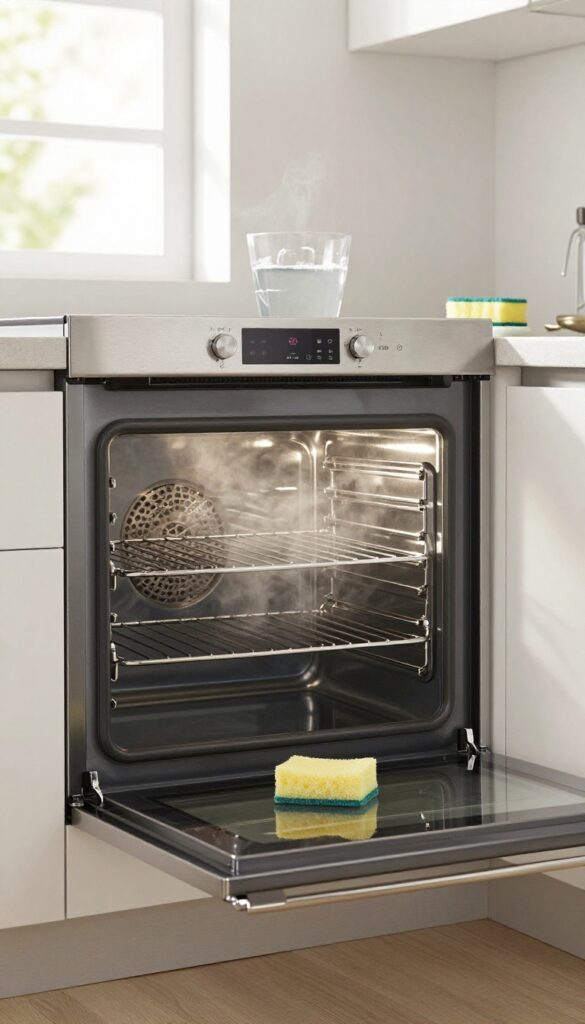
Your oven’s self-cleaning cycle can be a lifesaver, but only if you use it the right way. Many people run it on a heavily soiled oven, which creates smoke, smells, and can even damage the appliance. When used sparingly and with a bit of prep, it keeps your oven fresh between deep cleans.
The self-cleaning cycle heats the oven to extremely high temperatures to burn off food residue, turning it into ash that you can wipe away. It’s a powerful tool, but it’s not meant for everyday messes. Overusing it can wear down the oven’s components and create a lot of smoke.
Reserve it for maintenance every few months, and only when the oven is moderately dirty—not caked with grease.
Remove Racks First
Oven racks can discolor or warp under the intense heat of the self-cleaning cycle. Take them out and wash them separately with warm, soapy water. If they’re greasy, a paste of baking soda and vinegar works well.
This also prevents the racks from getting stuck on the slides afterward.
Wipe Up Loose Debris
Before starting the cycle, use a damp cloth or paper towel to remove any loose crumbs, burnt bits, or large spills. This reduces smoke and prevents the debris from burning onto the oven floor. A quick wipe-down makes the whole process cleaner and more effective.
Run The Cycle When The Oven Isn’t Too Dirty
The self-cleaning cycle works best on light to moderate grime. If your oven has heavy baked-on grease, the high heat can cause it to smoke excessively and may not fully burn it off. For heavily soiled ovens, use a natural cleaner first, then run the cycle for maintenance afterward.
6. Salt and Cinnamon for Burnt Spills
Fresh spills in the oven can turn into rock-hard crusts if you ignore them. But if you catch a spill while it's still warm, salt and cinnamon make a surprisingly effective team. Salt absorbs grease and moisture, while cinnamon masks the burnt smell—no harsh fumes needed.
Why Salt Works On Grease
Salt is a natural desiccant that draws out moisture and grease from spills. When you sprinkle it over a fresh, warm spill, it soaks up the liquid fat before it bakes onto the surface. This makes the spill much easier to wipe away once it cools, without scraping or scrubbing.
Cinnamon’s Odor-fighting Role
Burnt spills often leave a lingering smoky smell. Cinnamon doesn't just mask the odor—its compounds help neutralize some of the volatile molecules responsible for that burnt scent. Plus, it leaves your oven smelling warm and inviting instead of like a kitchen disaster.
How To Apply The Combo
As soon as you notice a spill, turn off the oven and let it cool slightly—but keep it warm enough that the spill is still liquid. Generously cover the spill with salt, then sprinkle a light layer of cinnamon on top. Let it sit for 10–15 minutes.
Once the spill has cooled and solidified, scrape up the salt-crust mixture with a spatula and wipe the area clean with a damp cloth.
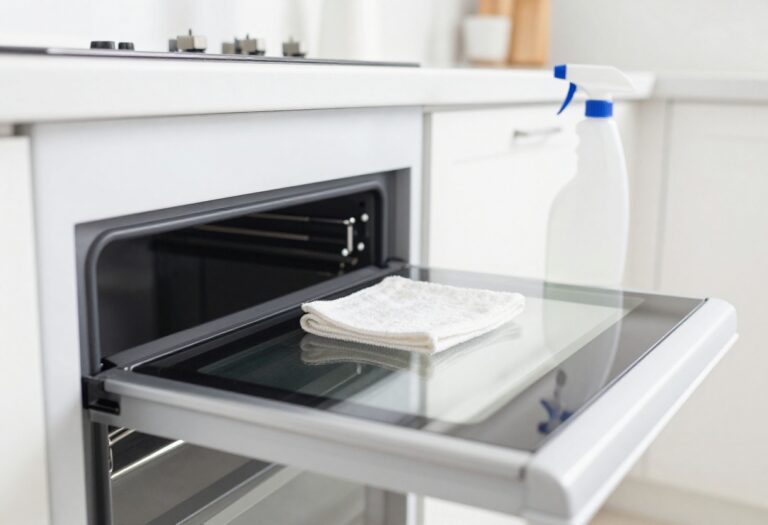
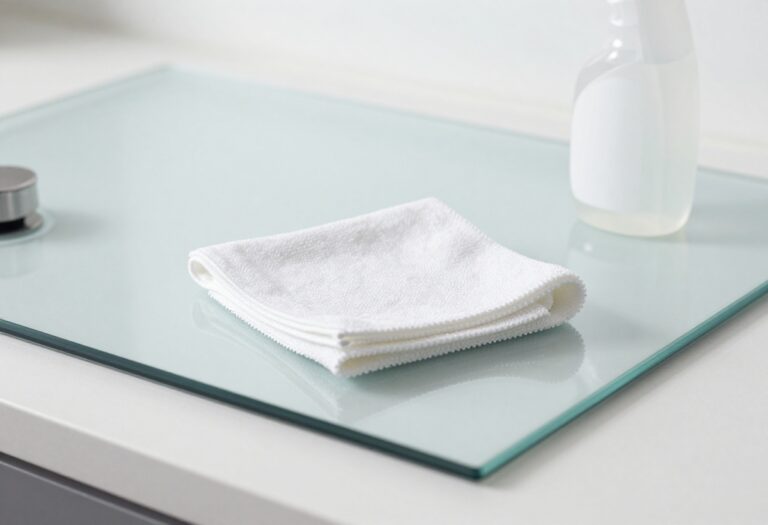
7. Dish Soap and Warm Water for Glass Doors
The oven door glass often gets overlooked during cleaning, but it's one of the first things people notice. Grease splatters and baked-on residue can make it look hazy and dirty. Fortunately, you don't need special cleaners—just dish soap and warm water work wonders.
This simple solution cuts through grease without scratching the glass. It's safe, cheap, and effective. Plus, it takes just a few minutes to get that crystal-clear finish back.
Mix a few drops of dish soap with warm water in a spray bottle or bowl. Use a non-abrasive sponge or microfiber cloth to gently scrub the glass in circular motions. Avoid steel wool or harsh scrubbers that can leave scratches.
Rinse with clean water and wipe dry with a lint-free cloth for a streak-free shine. For stubborn spots, let the soapy water sit on the glass for a few minutes before scrubbing. This loosens the grease so it wipes away easily.
Repeat if needed, but usually one pass does the trick.
Why Dish Soap Works So Well
Dish soap is designed to break down grease and food residues. Its surfactants lift grime from the glass surface, making it easy to wipe away. Unlike harsh chemical cleaners, it's gentle on the glass and won't damage the seal or frame.
Tips For A Streak-free Finish
Use a microfiber cloth for drying—it absorbs moisture without leaving lint. Wipe in one direction (top to bottom) to avoid streaks. If you see residue, a final wipe with a mixture of equal parts water and white vinegar can help.
When To Avoid This Method
If your oven door has a self-cleaning coating or is made of special treated glass, check the manual first. Some manufacturers recommend specific cleaners. Dish soap is generally safe, but it's always smart to confirm.
8. Pumice Stone for Baked-On Crust
When you've got a crusty, burnt-on layer that refuses to budge, a pumice stone can be a game-changer. This volcanic rock is abrasive enough to scrub away tough residue but gentle on your oven's surfaces when used correctly. It's a favorite among professional cleaners for tackling those stubborn spots without harsh chemicals.
How It Works
Pumice stone is a porous, lightweight abrasive that scrapes off burnt-on food without scratching most oven interiors. When wet, the stone becomes slightly softer, allowing it to glide over enamel and ceramic surfaces while still removing gunk. The key is to keep it wet—dry pumice can be too harsh.
Step-by-step Guide
First, wet the pumice stone thoroughly with water. Gently rub the burnt-on crust in a circular motion with light pressure. You'll see the residue start to powder away.
Rinse the stone frequently to clear debris. After cleaning, wipe the area with a damp cloth and dry. Always test in a hidden spot first to ensure compatibility.
Safety Tips
Never use a pumice stone on glass, stainless steel, or non-stick surfaces—it can cause scratches. Stick to ceramic or enamel oven liners. If you feel resistance, stop and rewet the stone.
Wear gloves to protect your hands. For extra stubborn spots, combine with a baking soda paste.
9. Steam Cleaning with a Microwave-Safe Bowl
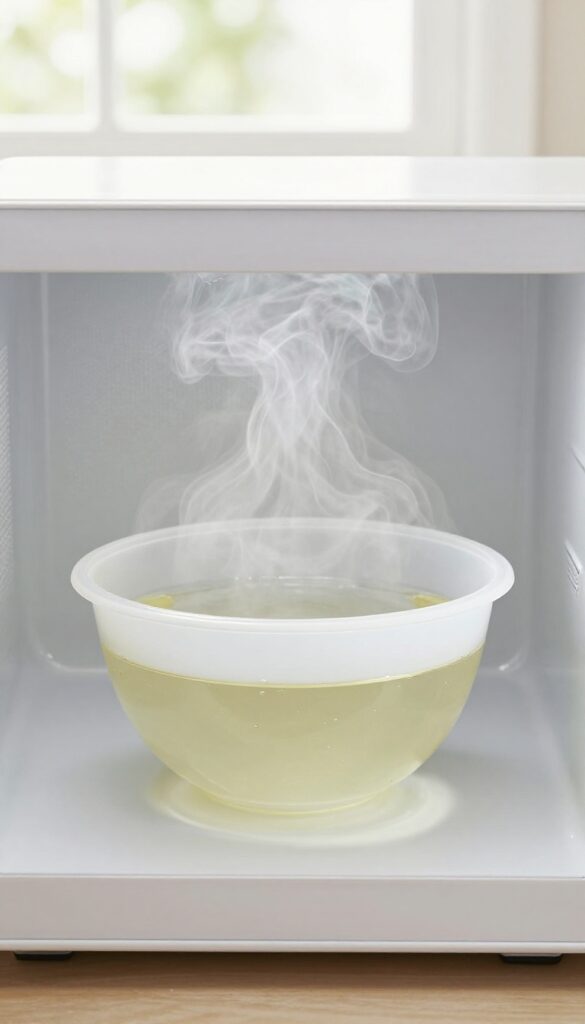
Steam is one of the most underrated tools for loosening burnt-on grime without any scrubbing. A simple bowl of water and vinegar in the microwave creates a gentle steam bath that softens grease and food residue, making it easy to wipe away. This method is especially handy for quick touch-ups between deep cleans.
Fill a microwave-safe bowl with one cup of water and a splash of white vinegar. Place it in the center of the microwave and run it on high for 5 minutes. The steam will condense on the interior surfaces, softening any stuck-on bits.
Let it sit for a couple of minutes after the cycle ends to let the steam work its magic, then open the door and wipe down the walls, ceiling, and floor with a damp cloth or sponge. For stubborn spots, use a non-abrasive scrubber. This method is safe for most microwaves and leaves behind a fresh, clean scent.
Why Vinegar Works
Vinegar is a mild acid that cuts through grease and helps dissolve mineral deposits. When heated, it turns into steam that penetrates dried-on food particles, loosening their grip on the microwave surfaces. Plus, it neutralizes odors, so your microwave smells fresh after cleaning.
Step-by-step Steam Clean
- Fill a microwave-safe bowl with 1 cup water and 2 tablespoons white vinegar. 2.
Microwave on high for 5 minutes. 3. Let the bowl sit inside for 2–3 minutes after the timer ends.
- Carefully remove the bowl (it will be hot). 5.
Wipe down the interior with a soft cloth or sponge. For extra stubborn spots, dip the cloth in the leftover vinegar water.
When To Use This Method
This steam cleaning trick is perfect for weekly maintenance or after a spill that hasn't had time to bake on. It's not meant for heavy, burnt-on crusts that have been there for months—those might need a more intensive approach. But for everyday messes, it's a quick, chemical-free solution.
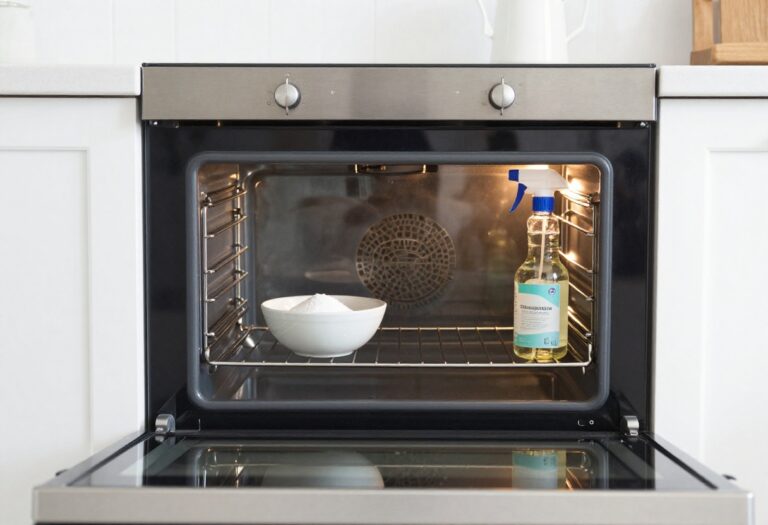
10. Cream of Tartar for Tough Grease
Cream of tartar isn't just for baking – it's a surprisingly effective cleaner for tough, baked-on grease. When mixed with water, it forms a gentle abrasive paste that cuts through residue without scratching your oven's surfaces. This natural acid helps break down stubborn grease that other cleaners might leave behind.
For those really stuck-on spots that laugh at regular cleaners, cream of tartar steps up. It's especially good on oven doors and interior walls where grease has carbonized into a hard, dark layer. The paste works by gently abrading the grime while the acidic properties help dissolve the grease bonds.
Best of all, it's non-toxic and safe to use around food.
Making The Paste
Mix equal parts cream of tartar and water – start with about 2 tablespoons of each. Stir until you get a thick, spreadable paste. If it's too runny, add more cream of tartar; if too thick, add a few more drops of water.
The consistency should be like toothpaste.
Applying And Waiting
Spread the paste generously over the greasy areas using a sponge or your fingers (wear gloves if you prefer). Let it sit for 15 minutes – this gives the acid time to work on the grease. Don't let it dry completely; if it starts to dry, spritz a little water on it.
Scrubbing And Rinsing
After the wait, scrub gently with a non-abrasive sponge or soft brush. The grease should lift off easily. Rinse thoroughly with a damp cloth to remove all residue.
For extra-stubborn spots, repeat the process or let the paste sit a bit longer.
11. Hydrogen Peroxide for Stubborn Stains
When burnt-on stains refuse to budge, hydrogen peroxide can be your secret weapon. This common household item works as a mild bleach and oxidizer, breaking down tough organic residue without harsh fumes. It's especially effective on light-colored enamel surfaces where stains stand out most.
Hydrogen peroxide is a gentle but powerful cleaner that tackles burnt-on food and grease stains. Its bubbling action helps lift debris from surfaces, making wiping easier. Always test on a small hidden area first, as it can lighten some materials.
How To Apply
Pour 3% hydrogen peroxide directly onto the stain or spray it on. Let it sit for about 10 minutes—you'll see it bubble as it works. Wipe clean with a damp cloth, then rinse with water to remove any residue.
Best Uses
This method works wonders on oven walls and the floor, especially for light-colored interiors. It's also great for removing baked-on spills on racks. For extra stubborn spots, sprinkle baking soda on the stain first, then spray hydrogen peroxide for a fizzing action.
Safety Tips
Wear gloves to protect your skin, as hydrogen peroxide can cause mild irritation. Avoid mixing with vinegar or bleach, as this creates harmful gases. Rinse thoroughly after cleaning to prevent any residue from affecting food.
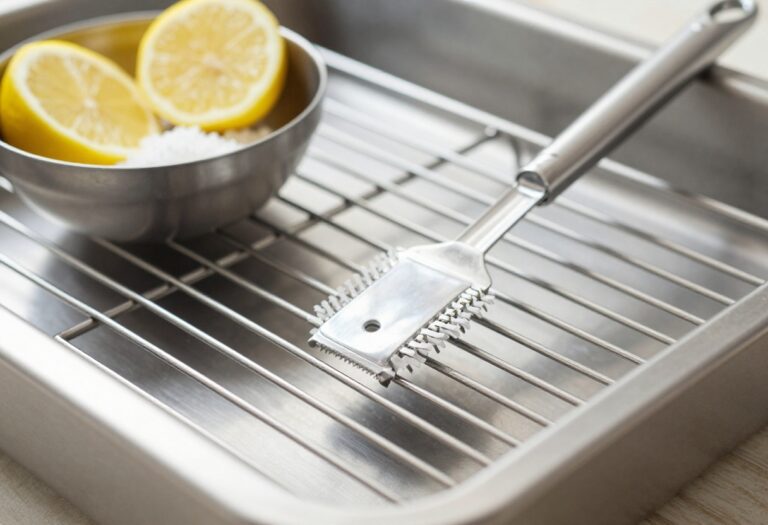
12. Rack Soak in Hot Soapy Water
Oven racks take the brunt of spills and splatters, and scrubbing them in place is a workout you don't need. Instead, let the hot water and soap do the heavy lifting. A long soak loosens baked-on grease so you can wipe it away with minimal effort.
Pull the racks out and place them in a bathtub or large utility sink. Cover them with the hottest tap water you can get, then add a generous squirt of dish soap. For extra degreasing power, toss in a dryer sheet—the fabric softener helps break down stubborn residue.
Let everything sit for at least an hour, or overnight for really caked-on grime. After the soak, scrub with a stiff brush or non-scratch pad, rinse thoroughly, and dry before sliding them back into the oven.
Why This Works
Heat and soap work together to dissolve grease and food particles. The dryer sheet adds surfactants that lift burnt-on bits, making them easier to rinse away.
Best Soaking Setup
Use a bathtub or large plastic bin if your sink is too small. Protect surfaces with an old towel, and make sure the water fully covers the racks.
After The Soak
Scrub with a nylon brush or a non-abrasive pad. Avoid steel wool on coated racks—it can scratch the finish. Rinse well and dry completely to prevent rust.
13. Dryer Sheets for Lifting Grease
If you've got a box of dryer sheets in your laundry room, you're already holding a surprisingly effective oven cleaner. Those soft sheets are designed to trap and lift oils and static cling, which makes them perfect for dissolving greasy oven grime. And the best part?
They work with almost no scrubbing on your end.
Here's how to put those dryer sheets to work on your oven's toughest grease spots.
How It Works
Dryer sheets contain surfactants and softening agents that break down grease on contact. When combined with warm water, they create a gentle cleaning solution that loosens baked-on oils without harsh chemicals. The fabric texture also acts as a mild abrasive, helping to lift residue as you wipe.
Step-by-step Method
Start by removing any loose debris from the oven floor. Fill a bowl or small pan with warm water and drop in two or three unused dryer sheets. Let them soak for a minute, then place the wet sheets directly on the greasy spots.
Let them sit for 20 minutes—the heat from the water helps soften the grime. After that, use the same sheets to wipe away the loosened grease. Rinse with a damp cloth and repeat if needed.
Best Use Cases
This trick works wonders on fresh spills and moderate grease buildup, especially on the oven floor and lower walls. It's less effective on heavily carbonized crust, but for everyday maintenance, it's a quick and easy solution. Avoid using scented sheets if you're sensitive to fragrances—unscented varieties work just as well.
14. Ammonia Fumes for Deep Cleaning
Ammonia might sound like a heavy-duty chemical, but it's actually a gentle way to dissolve baked-on grease without scrubbing. The trick is to let the fumes do the work while you sit back. This method is perfect for when your oven has layers of burnt-on grime that resist regular cleaners.
Place a small bowl of ammonia on the top rack of a cold oven. Then heat the oven to 150°F (65°C) for about 10 minutes, then turn it off. Leave the bowl inside overnight with the door closed.
The ammonia vapors will soften the grease and carbon deposits. In the morning, open the oven and let it air out for 30 minutes. Wipe down the interior with a damp cloth—the grime should come off easily.
Remember to wear gloves and avoid mixing ammonia with bleach or other cleaners.
Why It Works
Ammonia is a strong alkaline compound that breaks down fats and proteins. When heated, it releases fumes that penetrate baked-on residue, loosening it from surfaces. This chemical reaction makes scrubbing almost unnecessary.
Safety First
Always work in a well-ventilated area. Open windows or use a fan. Never mix ammonia with bleach, as it creates toxic chloramine gas.
Wear rubber gloves and avoid inhaling fumes directly. Keep children and pets away.
After The Fume Treatment
Once you've wiped away the loosened grime, rinse the oven interior with a mixture of water and vinegar to neutralize any ammonia residue. Dry with a clean cloth. Your oven will be spotless and ready for use.
15. Toothbrush for Crevices and Seals
The oven door seal and those tight crevices around hinges collect grease and burnt food that a sponge can't reach. A toothbrush is the perfect tool for these spots because its small head and stiff bristles can dig into narrow gaps without scratching the surface. Pair it with a baking soda paste for gentle abrasion that lifts grime without damaging the rubber seal.
This method is cheap, precise, and saves you from having to scrub the whole oven again just because you missed the edges.
Mix a thick paste of baking soda and water. Dip an old toothbrush into the paste and scrub along the door seal, paying special attention to folds and corners where grease hides. Work in small circles to push the paste into the crevices.
Let it sit for 10 minutes, then wipe with a damp cloth. For stubborn buildup, add a few drops of dish soap to the paste. Rinse the toothbrush frequently to avoid spreading grease around.
Why The Toothbrush Works Best
Standard sponges and cloths can't reach into the narrow channel where the oven door seal sits. A toothbrush's angled bristles slide right in, dislodging baked-on grease without damaging the rubber. It's also gentle enough for delicate areas like the hinge mechanism.
Step-by-step For The Seal
Start by removing loose debris with a dry brush. Dip the toothbrush in baking soda paste and scrub the entire seal, focusing on the bottom edge where spills collect. Let the paste sit for 5–10 minutes to break down grease, then wipe with a damp microfiber cloth.
Repeat if needed.
Tackling Crevices And Hinges
Use the toothbrush tip to reach into hinge gaps and corner seams. Apply paste directly to the bristles and work it into the grime. For tight spots, bend the toothbrush handle slightly (if it's plastic) to get a better angle.
Finish by wiping with a damp cloth and drying the area to prevent rust.
16. Razor Blade Scraper for Glass
The glass door on your oven often takes the worst of the splatter, and burnt-on residue can make it impossible to see inside. A razor blade scraper is a surprisingly effective tool for removing that stubborn crust without damaging the glass.
Why It Works
A razor blade's sharp edge can physically lift burnt-on food and grease that sponges and scrubbers can't touch. When held at the right angle, it slices under the residue rather than scraping across the surface, minimizing the risk of scratches.
How To Do It Safely
Spray the glass with a mixture of vinegar and water or a gentle glass cleaner to keep it wet. Hold the razor blade at a 45-degree angle and push it in short, gentle strokes. Rinse the blade frequently to avoid dragging debris across the glass.
Never use a dry blade or scrape at a steep angle, as that can cause scratches.
When To Skip This Method
This technique is best for smooth glass doors. Avoid using it on textured glass, ceramic surfaces, or any glass with a decorative coating. If you're unsure, test on a small corner first.
17. Regular Wipe-Downs to Prevent Build-Up
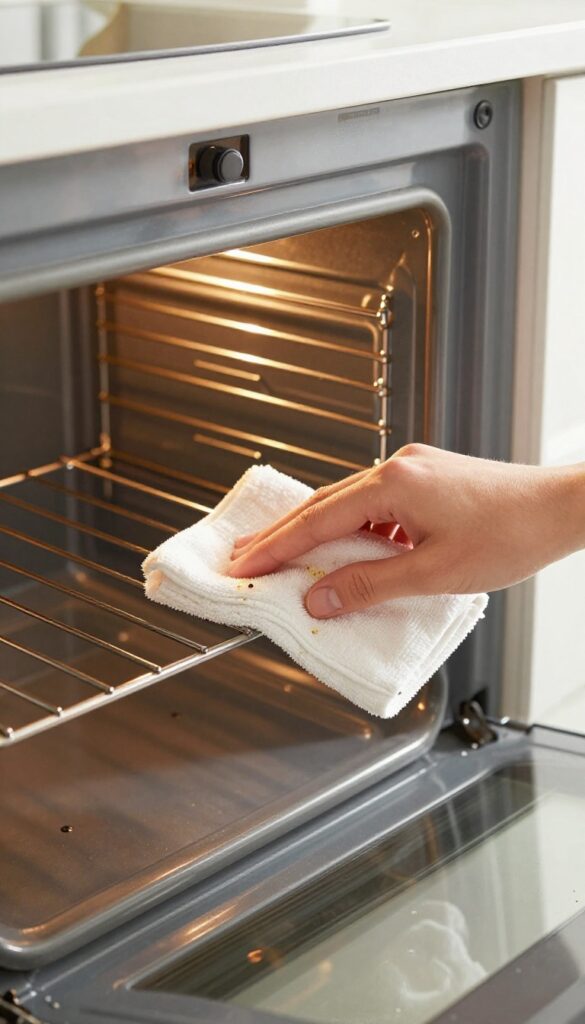
You don't need to deep clean your oven every week to keep it looking good. A quick wipe-down after each use stops grease from baking on and turning into a crusty nightmare. This simple habit saves you hours of scrubbing later.
Make it a routine to wipe the oven interior while it's still warm—not hot—so residue comes off easily. Use a damp microfiber cloth or a sponge with a drop of dish soap. Focus on the bottom, walls, and door.
This takes less than two minutes and prevents the need for harsh chemicals. Over time, you'll notice your oven stays cleaner and your deep cleaning sessions become far less frequent.
Best Time To Wipe
Right after you take out your food, let the oven cool for about 10 minutes. The warmth softens grease but the surface won't burn you. Grab a damp cloth and give the interior a quick once-over.
Doing this consistently keeps buildup from ever starting.
What To Use For Different Surfaces
For glass doors, a vinegar-water mix works wonders without streaks. For enamel walls, stick to mild dish soap and water. Avoid abrasive scrubbers that can damage the finish.
A soft sponge is all you need.
Don't Forget The Racks And Door Seal
Grease loves to hide in the door seal and rack edges. Wipe those areas gently with a cloth dampened in soapy water. If you catch spills early, they won't harden into stubborn stains.
A quick check of these spots keeps your oven in top shape.
FAQ
Can I use baking soda and vinegar together to clean my oven?
Yes, but use them separately. Apply a baking soda paste first, let it sit, then spray vinegar to create a fizzing reaction that lifts grime. Avoid mixing them in a closed container.
How often should I deep clean my oven?
Deep clean every 3 to 6 months, depending on usage. Wipe up spills immediately to reduce buildup.
Is it safe to use commercial oven cleaner on a self-cleaning oven?
Check your oven manual. Many manufacturers advise against using chemical cleaners on self-cleaning ovens as they can damage the coating.
What should I do if my oven smokes during cleaning?
Turn off the oven and let it cool. Remove any large food debris. Smoking often indicates leftover grease or food particles burning off.
Can I clean the oven while it's still warm?
No, always let the oven cool completely to avoid burns and prevent cleaning solutions from evaporating too quickly.
Conclusion
Cleaning your oven doesn't have to be a weekend project. With these 17 tips, you can tackle burnt food and grease using items you already have at home. Start with the gentlest method and work your way up for tough spots.
A little regular maintenance goes a long way in keeping your oven looking and smelling fresh. Pick the tip that fits your current mess and get your oven back to its former glory.