15 Cleaning Microwave Tips for Smells, Stains, and Steam
Microwave odors and stains can linger long after your meal is done, but you don't need harsh chemicals to fix them. A few simple ingredients from your pantry—like lemon, vinegar, or baking soda—can tackle everything from burnt popcorn smells to dried-on splatters.
These 15 tips focus on practical, low-effort methods that keep your microwave fresh and clean without scrubbing for hours. Whether you're dealing with stubborn stains or just want to prevent future messes, each tip is designed to fit into your routine easily.
Let's jump into the solutions that actually work.
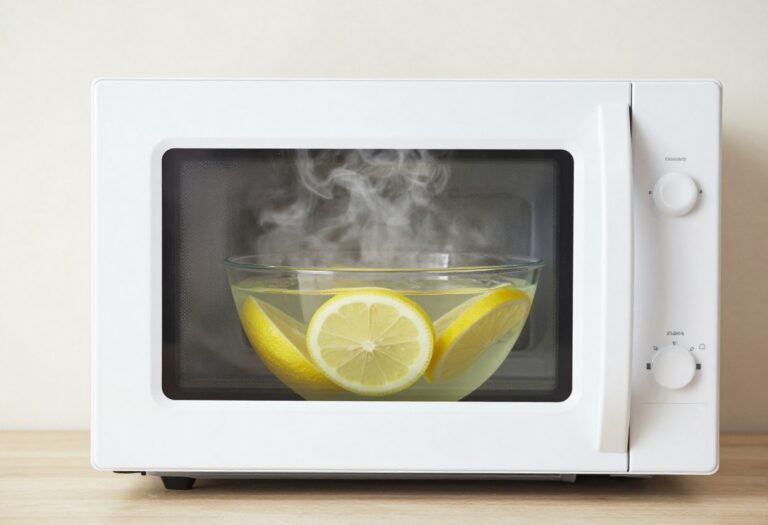
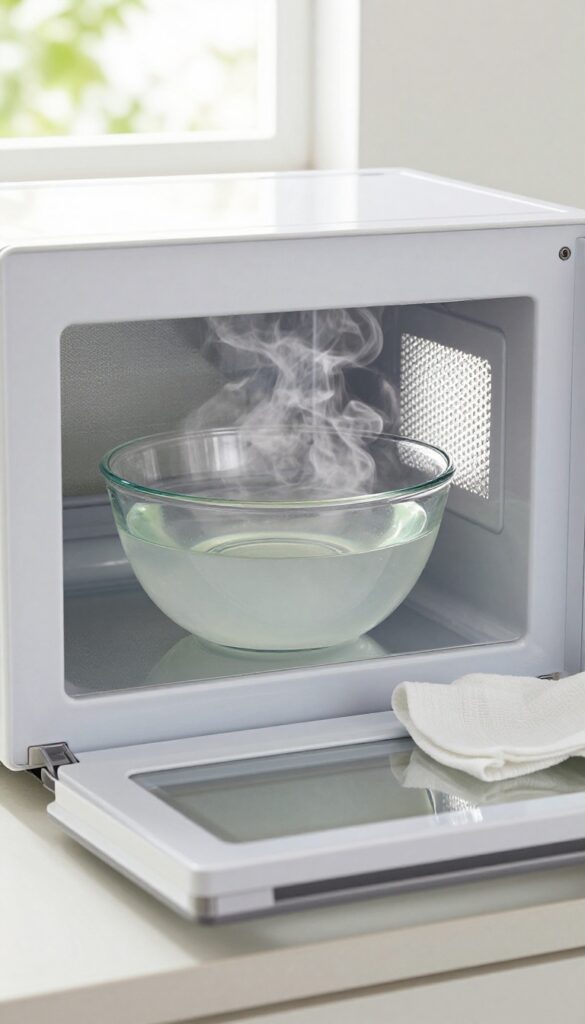
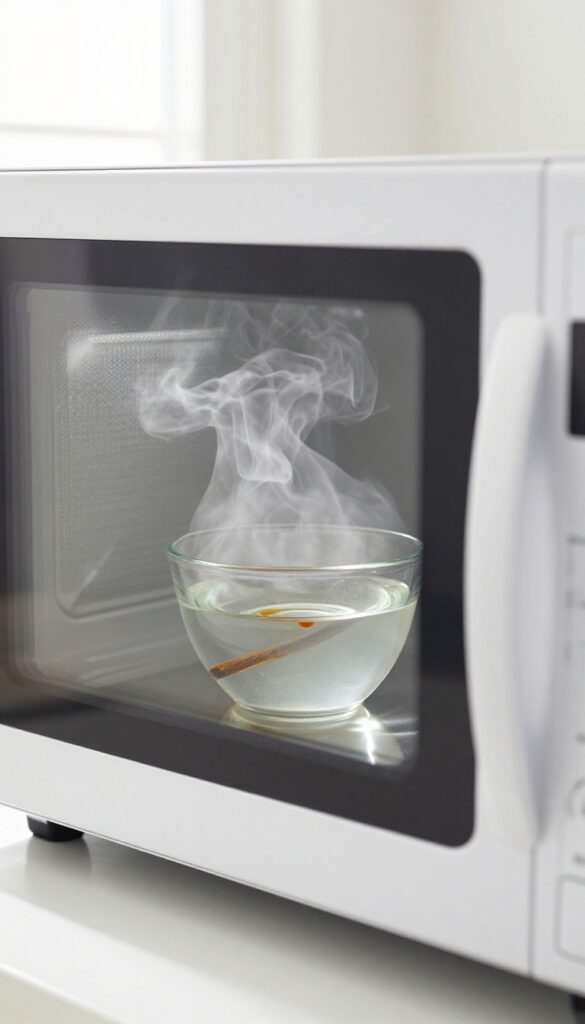
1. Steam Clean with Lemon Water
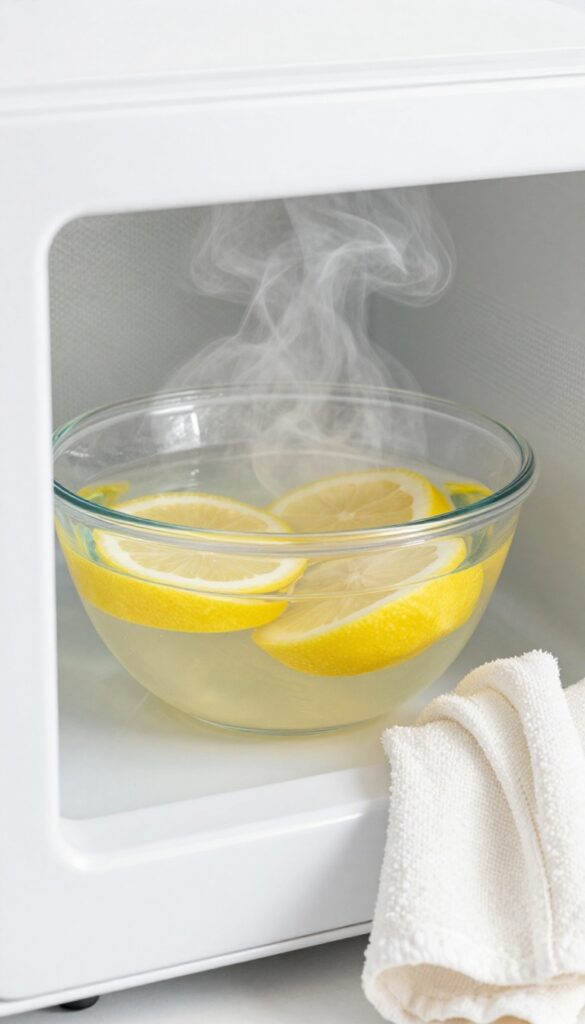
Lemon water is one of the easiest ways to tackle microwave grime and odors at the same time. The steam loosens stuck-on food while the citrus cuts through grease and leaves a fresh, clean smell. You probably have a lemon in your fridge right now, so there's no reason not to try this.
Slice a lemon into a bowl of water and microwave on high for 3–5 minutes. Let it sit for a couple of minutes after the timer goes off so the steam can really work. Then carefully remove the bowl—it will be hot—and wipe down the interior with a damp cloth.
The grime should come off easily without scrubbing.
Why Lemon Works So Well
Lemon contains citric acid, which breaks down grease and mineral deposits. The steam carries the acid into every corner of the microwave, softening dried food and neutralizing odors. Plus, the fresh scent is a bonus that lingers for hours.
Best Way To Use This Method
Use a microwave-safe bowl and add about a cup of water. Cut a lemon in half or into slices and drop it in. Microwave on high for 3 minutes for light cleaning, or 5 minutes for tougher messes.
Let it sit for 2 minutes before opening the door to avoid steam burns.
When To Repeat This Trick
Do this once a week to keep your microwave fresh and prevent buildup. It's especially useful after cooking strong-smelling foods like fish or curry. You can also use leftover lemon peels if you don't have a whole lemon.
2. Baking Soda Paste for Stubborn Stains
Dried-on sauce splatters and crusty food bits can feel impossible to remove, but baking soda paste makes it easy. This gentle abrasive lifts stains without scratching the microwave interior. It's a go-to method for those tough spots that don't budge with a simple wipe.
Baking soda is a mild alkali that reacts with acids and fats, breaking down stubborn residues. When mixed with water, it forms a paste that clings to vertical surfaces and stays put long enough to soften grime. Unlike harsh chemical sprays, it's safe for food surfaces and won't leave toxic fumes.
How To Make The Paste
In a small bowl, combine 2 tablespoons of baking soda with 1 tablespoon of water. Stir until it forms a thick, spreadable paste. Add a few more drops of water if it's too dry, or more baking soda if it's too runny.
Application And Wait Time
Use a sponge or your finger to apply the paste directly onto the stains. Spread it evenly, covering the entire spot. Let it sit for 5 minutes—this gives the baking soda time to work on the dried-on food without drying out completely.
Wiping Away The Grime
After 5 minutes, take a damp microfiber cloth and gently scrub the area in circular motions. The paste will loosen the stains, so they come off easily. Rinse the cloth and wipe again to remove any residue.
Your microwave will look spotless.
3. Vinegar Steam to Eliminate Strong Odors
When your microwave smells like last night's fish or burnt popcorn, vinegar steam is your best friend. It's cheap, natural, and surprisingly effective at neutralizing even the toughest odors. The best part?
You probably already have a bottle in your pantry.
How It Works
White vinegar is acidic, which means it bonds with odor molecules and neutralizes them rather than just masking the smell. When heated, the steam carries vinegar particles throughout the microwave, reaching every nook and cranny. This makes it far more effective than simply wiping down surfaces.
Step-by-step Instructions
Fill a microwave-safe bowl with equal parts water and white vinegar—about 1 cup each works well. Place the bowl in the microwave and heat on high for 5 minutes. Let it sit inside with the door closed for another 2 minutes to let the steam do its work.
Then carefully remove the bowl (it will be hot) and wipe down the interior with a damp cloth.
Tips For Best Results
For extra-stubborn smells, you can increase the vinegar-to-water ratio slightly, but avoid going over 50% vinegar to prevent strong fumes. If your microwave has a turntable, remove it and wipe it separately. For lingering odors, repeat the process or follow up with a lemon steam for a fresh scent.
4. Coffee Grounds to Absorb Lingering Smells
If your microwave still smells after a deep clean, coffee grounds can finish the job. They act like a natural sponge for odors, pulling in unwanted smells without any scrubbing or spraying. This trick is especially handy for musty microwaves or after reheating fish, garlic, or curry.
Coffee grounds are a natural deodorizer because they contain nitrogen, which helps neutralize odors chemically. Unlike air fresheners that just mask smells, coffee grounds actually absorb them. For best results, use fresh, unused grounds—they have more surface area and active compounds than used ones.
Place a small bowl of grounds in the center of the microwave, leave the door closed overnight, and wake up to a fresh-smelling appliance.
Why Coffee Works So Well
The porous structure of coffee grounds traps odor molecules, while the nitrogen in coffee helps convert them into less smelly compounds. This is the same reason coffee shops often have bowls of beans on the counter—they're actively cleaning the air.
How To Use This Trick
Fill a small, microwave-safe bowl with about half a cup of fresh coffee grounds. Place it in the center of the microwave and close the door. Let it sit for at least 6 hours, but overnight is ideal.
In the morning, discard the grounds and wipe down the interior if any residue remains.
When To Use This Method
This is perfect for stubborn smells that won't budge after steam cleaning or vinegar sprays. It's also great for microwaves that sit unused for long periods and develop a stale odor. Avoid using this method if you dislike the smell of coffee—it will leave a faint coffee scent behind.
5. Quick Wipe After Every Use
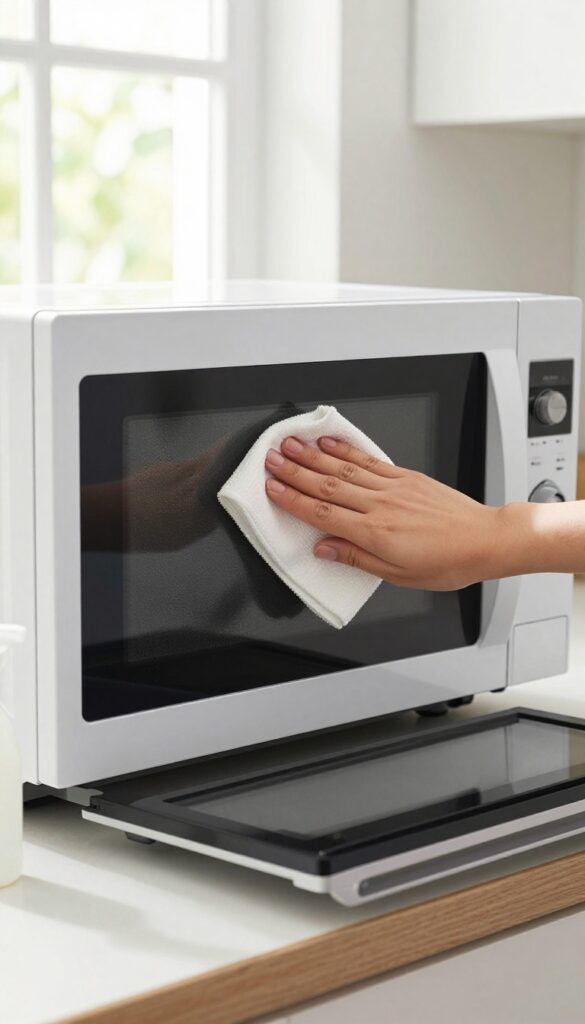
The easiest way to prevent stains and smells is to stop them before they start. A quick wipe right after you finish heating something takes seconds but saves you from scrubbing later. It's the kind of habit that makes a noticeable difference without any extra effort.
Why Immediate Wiping Works
When food splatters or boils over, the residue is still wet and loose right after the microwave stops. If you let it dry and bake on, it becomes much harder to remove. A quick pass with a damp cloth lifts everything away while it's still easy, preventing both stains and the odors that come from burnt-on bits.
What To Keep Handy
Stash a microfiber cloth or a sponge near your microwave so you can grab it without hunting. Some people keep a small spray bottle with water or a drop of dish soap nearby. You don't need anything fancy—just something damp enough to wipe down the interior walls, turntable, and door seal.
The 30-second Routine
After you take your food out, give the inside a quick once-over while it's still warm. Start with the ceiling where steam often condenses, then the walls, and finally the floor and turntable. If you do this every time, you'll rarely need a deep clean, and your microwave will stay fresh with minimal effort.
6. Microwave a Bowl of Water with Cinnamon
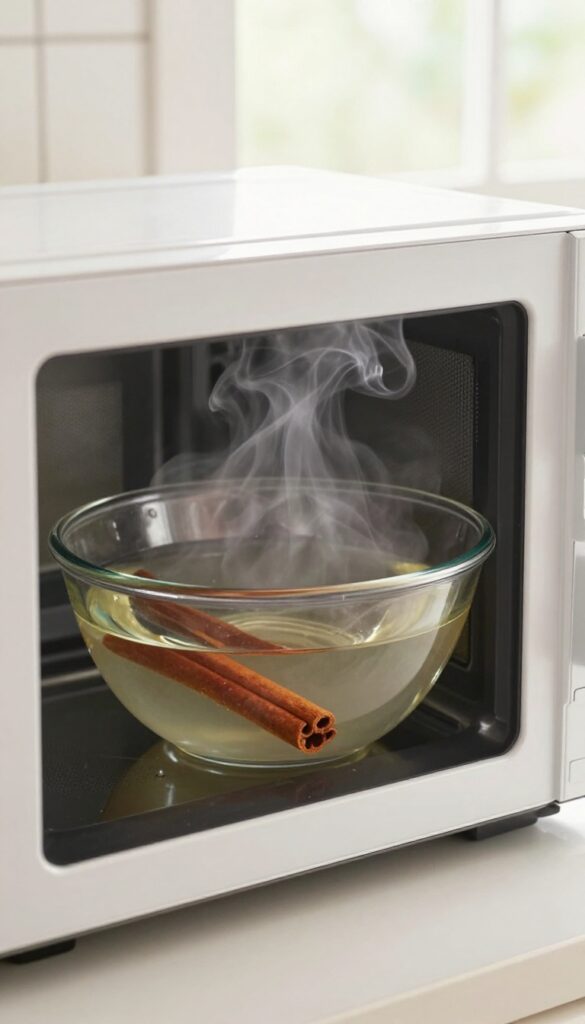
Cinnamon isn't just for baking—it's a powerful natural deodorizer that leaves your microwave smelling warm and inviting. A quick steam with cinnamon can neutralize stubborn odors without any chemical sprays. This method is especially handy after cooking fish or spicy dishes.
Fill a microwave-safe bowl with 1 cup of water. Add a cinnamon stick or 1 teaspoon of ground cinnamon. Microwave on high for 2 minutes, then let the bowl sit inside for another 2 minutes before opening the door.
The steam will loosen any stuck-on food particles, and the cinnamon aroma will replace unpleasant smells. Afterward, simply wipe down the interior with a damp cloth.
Why Cinnamon Works So Well
Cinnamon contains eugenol, a natural compound with antimicrobial properties that help kill odor-causing bacteria. The steam carries the scent throughout the microwave, effectively masking and neutralizing lingering smells. Plus, it's completely safe and non-toxic.
Tips For Best Results
Use a cinnamon stick for a milder scent or ground cinnamon for a stronger punch. If using ground cinnamon, stir it into the water before microwaving to prevent clumping. For extra freshness, add a few drops of vanilla extract or a slice of orange peel along with the cinnamon.
When To Use This Method
This technique is perfect for everyday freshening after cooking strong-smelling foods like fish, broccoli, or curry. It's also great as a quick refresh between deep cleans. Use it once a week to keep your microwave smelling pleasant without any effort.
7. Use a Microwave Cover to Prevent Splatters
Splatters are the main reason microwaves get grimy and smelly. When food pops and bubbles, it leaves behind stains that bake on during the next use. A simple cover stops most of that mess before it starts.
Using a microwave cover is one of the easiest ways to keep your microwave clean. It catches grease, sauce, and moisture, so you don't have to scrub later. Plus, it helps food heat more evenly by trapping steam.
Choose The Right Cover
Look for a vented microwave-safe lid that fits over your bowls. Glass or BPA-free plastic covers work well. You can also use a paper towel or wax paper as a quick substitute—just make sure it doesn't touch the food.
How It Prevents Odors
When food splatters, it burns onto the microwave walls and creates lingering smells. A cover keeps those particles contained. Less mess means fewer odors, and you won't need to deep-clean as often.
Bonus: Faster, Even Heating
Covers trap steam, which helps food cook more consistently. You'll avoid cold spots and overheated edges. Just leave a small gap for steam to escape, so your food doesn't get soggy.
8. Clean the Turntable Separately
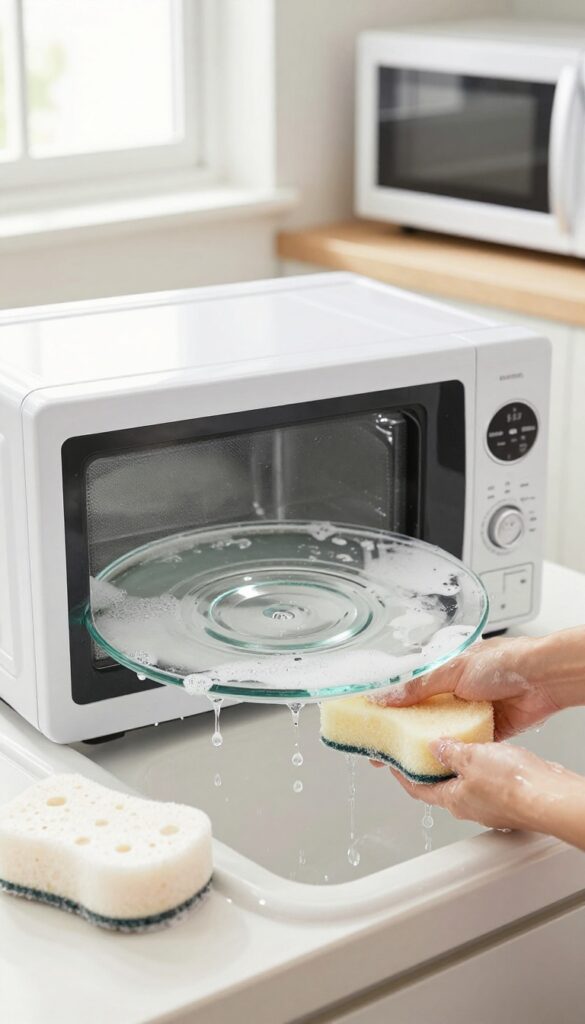
The glass turntable is often overlooked during routine cleaning, yet it collects drips, spills, and odors just like the interior walls. Removing it and washing it separately ensures every surface is truly clean. A quick soak in warm soapy water loosens baked-on residue, while a gentle scrub with a non-abrasive sponge removes any lingering grime.
This simple step prevents hidden smells from returning after you've cleaned the rest of the microwave.
Why The Turntable Needs Its Own Cleaning
Food particles and grease can get trapped under the turntable or along its edges, especially if you frequently reheat saucy dishes. Over time, these residues can cause unpleasant odors and even affect the turntable's rotation. Cleaning it separately gives you access to the area underneath, which is often a hotspot for hidden grime.
How To Wash It Right
Remove the glass turntable and the plastic roller ring. Wash both in warm water with a few drops of dish soap. For stubborn spots, let them soak for 10–15 minutes, then scrub gently with a soft sponge.
Rinse thoroughly and dry completely before placing them back in the microwave. Avoid harsh scouring pads that could scratch the glass.
Bonus: Clean The Support Area
While the turntable is out, wipe down the circular support area and the roller guides with a damp cloth or a mild cleaning solution. This prevents any debris from interfering with the turntable's motion and keeps the entire mechanism odor-free.
9. Wipe Down the Door Seal and Edges
The rubber seal around your microwave door is a prime hiding spot for crumbs and sticky residue. Over time, trapped food particles can start to smell and even affect how well your microwave seals and operates. Giving this area some attention is quick and makes a big difference.
Grab an old toothbrush or a few cotton swabs and dip them in white vinegar. Gently scrub along the rubber gasket and into the crevices where the door meets the microwave frame. Pay extra attention to any spots that look discolored or feel tacky.
Once you've loosened the grime, wipe everything down with a damp cloth. This simple habit prevents odors from building up and keeps your microwave working efficiently.
Why The Door Seal Matters
The rubber gasket creates a tight seal that keeps steam and heat inside your microwave. When food bits get lodged there, the seal can weaken, leading to longer cook times and energy waste. Plus, those trapped particles are a breeding ground for bacteria and bad smells.
Tools That Work Best
A soft-bristled toothbrush is perfect for scrubbing the gasket without damaging it. For tight corners and the tiny grooves where the seal meets the metal, cotton swabs give you precision. Vinegar is ideal because it cuts through grease and deodorizes naturally.
How Often To Clean This Area
Aim to wipe down the door seal and edges once a week, especially if you cook messy foods like spaghetti sauce or popcorn. If you notice a lingering odor even after cleaning the interior, check the seal first—it's often the culprit.
10. Deodorize with Vanilla Extract
Vanilla extract does more than flavor your cookies—it can also freshen up your microwave in minutes. The sweet, warm scent neutralizes lingering food odors without any harsh chemicals. This trick is especially handy when you want a quick refresh between deep cleans.
Why Vanilla Works So Well
Vanilla extract contains natural compounds that bind to odor molecules and neutralize them, rather than just masking smells. The steam carries the vanilla aroma throughout the microwave, leaving behind a pleasant, bakery-like scent. It’s a simple, chemical-free alternative to commercial deodorizers.
How To Do It Right
Fill a microwave-safe bowl with 1 cup of water and stir in 1 teaspoon of pure vanilla extract (avoid imitation vanilla, which may leave a sticky residue). Place the bowl in the microwave and heat on high for 2 minutes. Let the steam sit inside for another minute before opening the door.
Wipe down the interior with a soft cloth to remove any loosened grime.
When To Use This Method
This vanilla steam treatment is perfect after cooking strong-smelling foods like fish, broccoli, or curry. It’s also great as a weekly maintenance step to keep odors from building up. For extra stubborn smells, you can repeat the process or combine it with a quick vinegar wipe beforehand.
11. Remove Burnt Smells with Salt
Burnt popcorn or a forgotten casserole can leave your microwave smelling like a campfire for days. Before you reach for air fresheners, try a simple salt treatment that tackles the odor at its source.
Salt is a natural odor absorber, and when combined with steam, it works double duty to eliminate burnt smells and loosen stuck-on residue. This method is quick, cheap, and requires no harsh chemicals.
How It Works
Salt absorbs odors like a sponge, while steam from the water softens burnt-on food particles. Together, they lift the smell and make cleanup easier. Plus, salt is gentle on your microwave's interior.
Step-by-step
First, sprinkle a thin layer of salt directly over any burnt spill or stain. Then, place a microwave-safe bowl filled with 1 cup of water inside. Microwave on high for 3 minutes, then let it sit for 5 minutes without opening the door.
The steam will loosen grime, and the salt will have absorbed the burnt odor.
Aftercare Tips
Once the time is up, carefully remove the bowl (it will be hot! ). Wipe down the interior with a damp cloth—the residue should come off easily. If any burnt smell remains, repeat the process or leave a bowl of salt water inside overnight.
12. Clean the Exterior and Control Panel
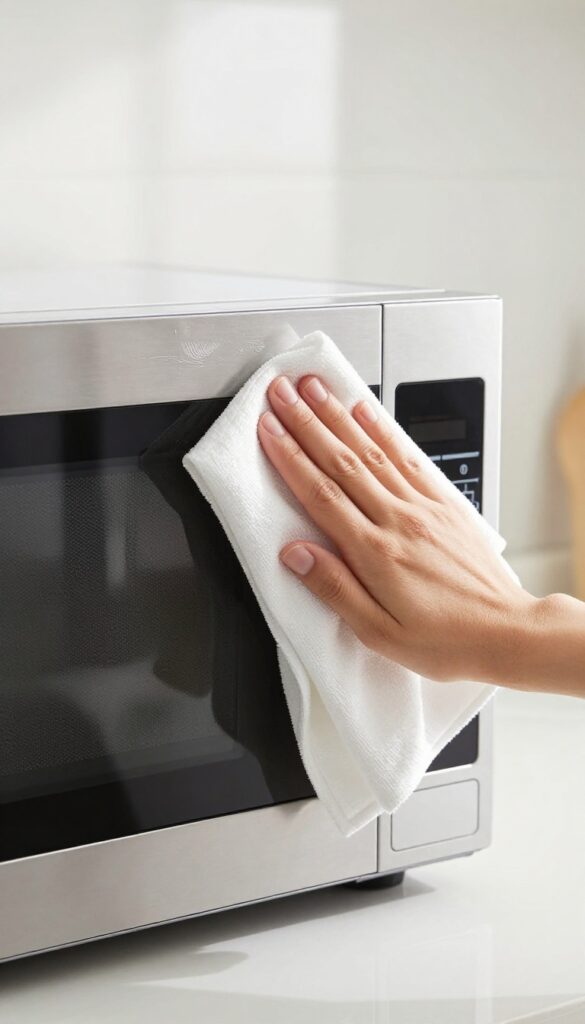
The outside of your microwave gets just as grimy as the inside, especially the control panel where fingers constantly tap and swipe. Grease splatters from cooking and everyday dust build up quickly, making the surface look dull and feel sticky. A quick wipe-down keeps it looking new and prevents bacteria from accumulating on buttons you touch daily.
Grab a microfiber cloth and dampen it with warm water and a drop of mild dish soap. Wring it out well so no excess water drips into vents or buttons. Gently wipe the entire exterior, including the top, sides, and door handle.
For the control panel, use a soft, slightly damp cloth and avoid spraying cleaner directly onto the buttons—moisture can seep in and damage electronics. Dry everything with a clean cloth to prevent streaks. For stubborn fingerprints or greasy spots, a 50/50 mix of water and white vinegar works wonders.
Why The Control Panel Needs Extra Care
The control panel is a magnet for bacteria because it's touched frequently, often with food residue on hands. Grease and dirt can also make buttons less responsive over time. Use a gentle touch and avoid abrasive cleaners or scrub pads that can scratch the surface.
Quick Daily Maintenance
Keep a microfiber cloth near your microwave and give the exterior a quick wipe after each use. This takes just seconds and prevents buildup from hardening. For the control panel, a weekly wipe with a disinfectant wipe (check it's safe for electronics) keeps germs at bay.
Dealing With Stubborn Grease
If grease has dried on, make a paste of baking soda and water. Apply it with a soft cloth, let it sit for a minute, then wipe away. Follow with a damp cloth to remove any residue.
This method is safe for stainless steel and plastic surfaces.
13. Use a Lemon and Baking Soda Combo for Tough Stains
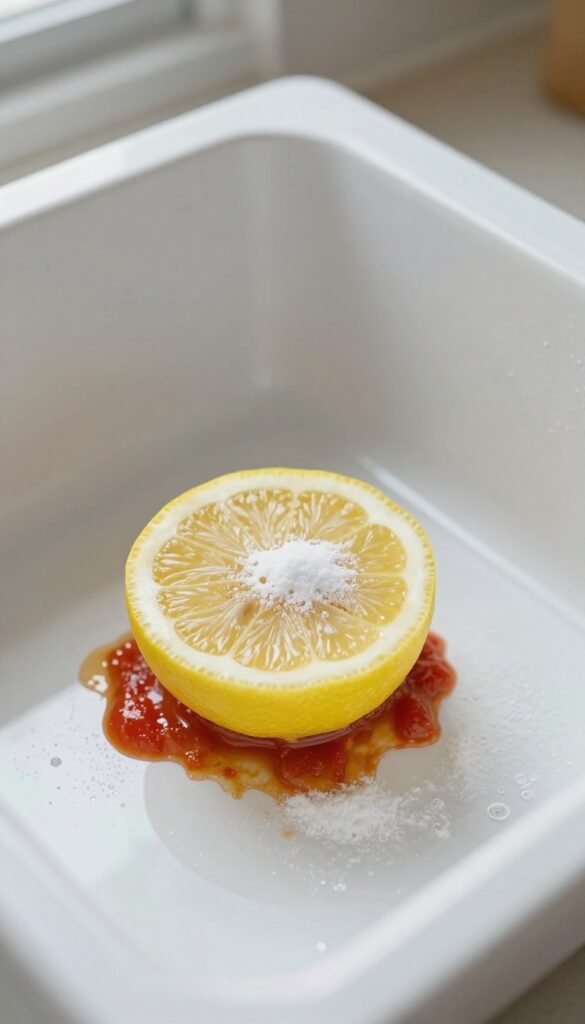
When dried-on splatters refuse to budge, a lemon and baking soda duo can work wonders. The citric acid breaks down grease while the gentle abrasiveness of baking soda lifts stubborn marks without scratching the surface. This natural combination is especially effective on baked-on cheese, tomato sauce, or caramelized spills that have been reheated multiple times.
Start by cutting a lemon in half and squeezing a bit of juice onto the cut side. Dip the exposed flesh into a small dish of baking soda so it forms a paste. Scrub the stained areas in a circular motion, applying light pressure.
The fizzing action helps loosen debris, and the lemon's acidity cuts through grease. Rinse with a damp cloth and wipe dry. If stains persist, let the paste sit for a few minutes before scrubbing again.
Why This Combo Works So Well
Lemon juice contains citric acid, a natural degreaser that dissolves tough residues. Baking soda is mildly abrasive, making it ideal for scrubbing without scratching the microwave's interior. Together, they create a fizzy reaction that helps lift stuck-on food particles.
Plus, the lemon leaves a fresh, clean scent behind.
Best Practices For Stubborn Spots
For extra stubborn stains, microwave the lemon halves in a bowl of water for 30 seconds before scrubbing. The steam softens the residue, making it easier to remove. After scrubbing, wipe the interior with a damp cloth to remove any baking soda residue.
Avoid using too much pressure on painted or plastic surfaces.
When To Avoid This Method
Do not use this method on aluminum or other metal surfaces inside the microwave, as the acid can cause discoloration. Also, avoid using on the microwave's glass turntable if it has a painted rim—stick to a mild soap solution instead. Always test a small hidden area first if you're unsure.
14. Prevent Steam Buildup with Proper Ventilation
Steam is a major culprit behind lingering smells and moisture in your microwave. When steam can't escape, it condenses on walls and ceilings, trapping odors and creating a breeding ground for bacteria. The fix is simpler than you think: keep the vents clear and let the air flow.
Many people overlook the microwave's ventilation system until something goes wrong. But regular maintenance of vents and grilles can prevent steam buildup before it starts. A few minutes of attention each week keeps your microwave smelling fresh and working efficiently.
Check The Vents Weekly
Make it a habit to inspect the vent openings on the top, back, or sides of your microwave. Use a flashlight to spot any dust, grease, or food debris that might be blocking airflow. A quick wipe with a damp cloth or a vacuum with a brush attachment can clear most obstructions.
Clean The Grease Filter
If your microwave has a removable grease filter (common in over-the-range models), wash it every month. Soak it in hot, soapy water or a degreasing solution, scrub gently, and let it dry completely before reinstalling. A clogged filter traps steam and odors, making your microwave work harder.
Use The Exhaust Fan
When cooking foods that produce a lot of steam—like vegetables, soups, or rice—turn on the microwave's exhaust fan. This pulls moisture out of the cavity and vents it outside or through the filter. If your microwave doesn't have a fan, crack the door slightly after cooking to release steam.
15. Monthly Deep Clean with a Steam Cycle
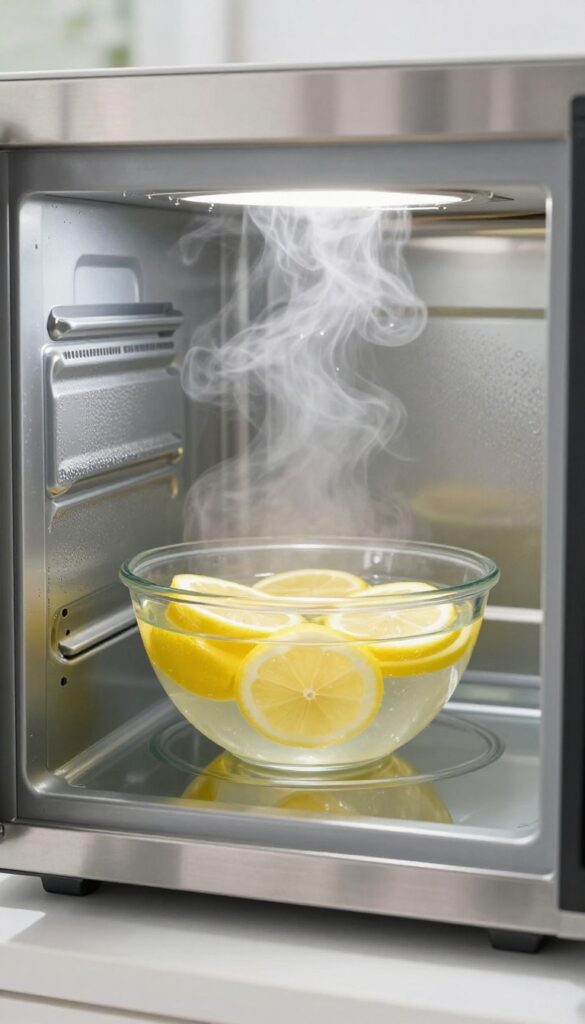
Even with regular wipe-downs, grease and odors can build up over time. A monthly steam cycle is a low-effort way to reset your microwave's interior, loosening grime and neutralizing smells without harsh scrubbing. All you need is water and a few lemon slices.
This deep-clean method uses steam to soften stuck-on food and absorb odors. It's a set-and-forget approach that takes about 5 minutes of active time and leaves your microwave smelling fresh.
Why Steam Works
Steam penetrates baked-on residue, making it easy to wipe away. The heat also helps release trapped odors, while lemon adds a natural fresh scent. Unlike vinegar, lemon leaves a pleasant citrus aroma.
How To Do It
Fill a microwave-safe bowl with 2 cups of water and add 3-4 lemon slices. Microwave on high for 5 minutes, then let the steam sit for another 2-3 minutes without opening the door. Carefully remove the bowl (it will be hot) and wipe the interior with a damp cloth.
When To Steam Clean
Aim for once a month, or more often if you cook frequently. This routine prevents stubborn stains and keeps your microwave smelling neutral between regular cleanings.
FAQ
How often should I clean my microwave?
For best results, do a quick wipe after each use and a deeper clean once a week. Monthly steam cycles help maintain freshness.
Can I use bleach to clean my microwave?
It's not recommended. Bleach can leave harmful residues and damage the interior. Stick to natural cleaners like vinegar, lemon, and baking soda.
Why does my microwave smell even after cleaning?
Odors can linger in the vent, door seal, or turntable. Clean these areas separately and try an overnight deodorizer like coffee grounds.
Is it safe to microwave vinegar?
Yes, as long as you dilute it with water. The smell will dissipate quickly, and it's safe for the microwave and your health.
How do I prevent steam from damaging my microwave?
Always use a microwave cover to reduce splatters, and ensure the vent is clean and unobstructed. Wipe down moisture after each use.
Conclusion
Keeping your microwave fresh doesn't have to be a chore. With these 15 tips, you can tackle smells, stains, and steam using everyday items you already have.
Start with the quickest fix for your biggest problem, then build a simple routine that keeps your microwave looking and smelling clean. A few minutes of regular care makes a big difference, so pick a tip and give it a try today.