13 Cleaning Stove Burners Tips for Grease and Clogs
You turn on the burner, but the flame is weak or uneven. Grease and food debris have clogged the ports, and the burner cap looks like a science experiment. It's a common kitchen frustration, but fixing it doesn't require harsh chemicals or expensive products.
Most stove burners can be restored with items you already have: baking soda, vinegar, and a little elbow grease. Whether you have gas or electric coils, the right technique makes all the difference.
These 13 tips cover everything from daily maintenance to deep cleaning stubborn clogs. You'll learn how to keep your burners working efficiently and looking spotless without the hassle.
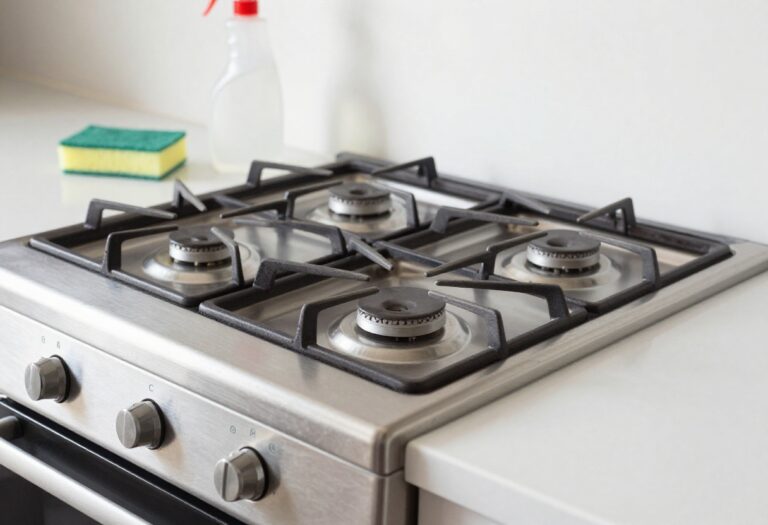
1. Remove Burner Caps and Grates First
Before you grab any cleaner, take a moment to lift off the burner caps and grates. These parts are designed to be removable, and taking them off gives you clear access to the burner base where most of the grease and clogs hide. It also protects the cooktop from scratches and cleaner drips.
Start by making sure the stove is completely cool. Then, simply lift off each burner cap and set the grates aside. For gas stoves, you might also need to unscrew a small ring or lift the burner head.
Electric coil burners usually have drip pans that pull out. Once everything is off, you can see exactly what you're dealing with.
Why This Step Matters
Skipping this step is a common mistake. Cleaning around the caps or grates just pushes grease deeper into the burner ports. Removing them first lets you soak and scrub each piece separately, which is far more effective.
What To Do With The Removed Parts
Place the caps and grates in a sink or basin filled with hot, soapy water. Let them soak while you work on the burner base. This loosens baked-on grease and makes the final cleanup much easier.
A Quick Safety Check
While the parts are off, take a second to inspect the burner base for any loose debris or signs of damage. If you see rust or cracks, now is the time to replace the part before it causes bigger problems.
2. Soak in Hot, Soapy Water
Let the water do the heavy lifting. Submerging your burner caps and grates in hot, soapy water is one of the easiest ways to break down stubborn grease. No scrubbing required upfront—just patience.
Fill your sink or a large basin with the hottest water your tap can handle. Add a generous squirt of dish soap—Dawn or any grease-cutting brand works great. Place the burner caps and grates in the water, making sure they're fully submerged.
Let them soak for at least 15 minutes, but an hour is even better for caked-on grime. The heat and soap will loosen the grease, making the next step much easier.
Why Hot Water Works
Heat melts grease, and soap traps it so it doesn't redeposit. Hot water also expands metal slightly, which helps dislodge particles stuck in burner ports. The combination is a one-two punch against buildup.
Don't Rush The Soak
Fifteen minutes is the minimum. If your burners look like they've been through a decade of spaghetti dinners, let them soak for 30 to 60 minutes. Check the water halfway—if it's cooled down, swap it with fresh hot water to keep the process going.
What About Electric Coils?
Never submerge electric coil burners. For those, use a damp cloth or sponge with soapy water, then dry immediately. This soak method is for removable gas burner caps and grates only.
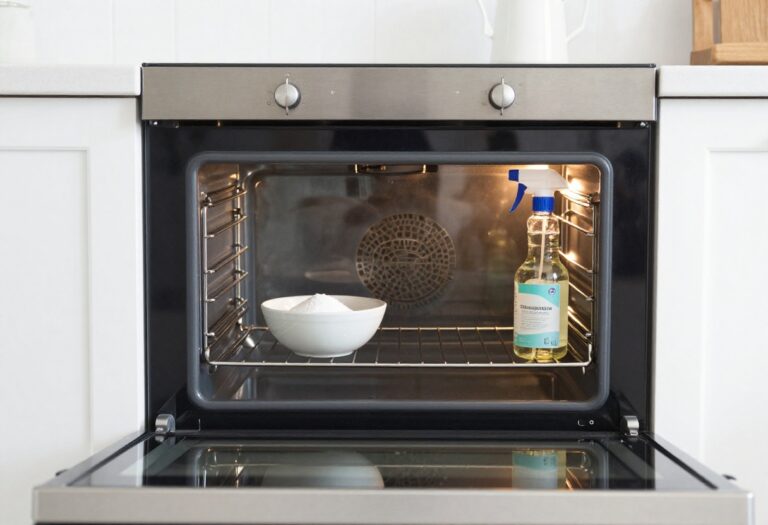
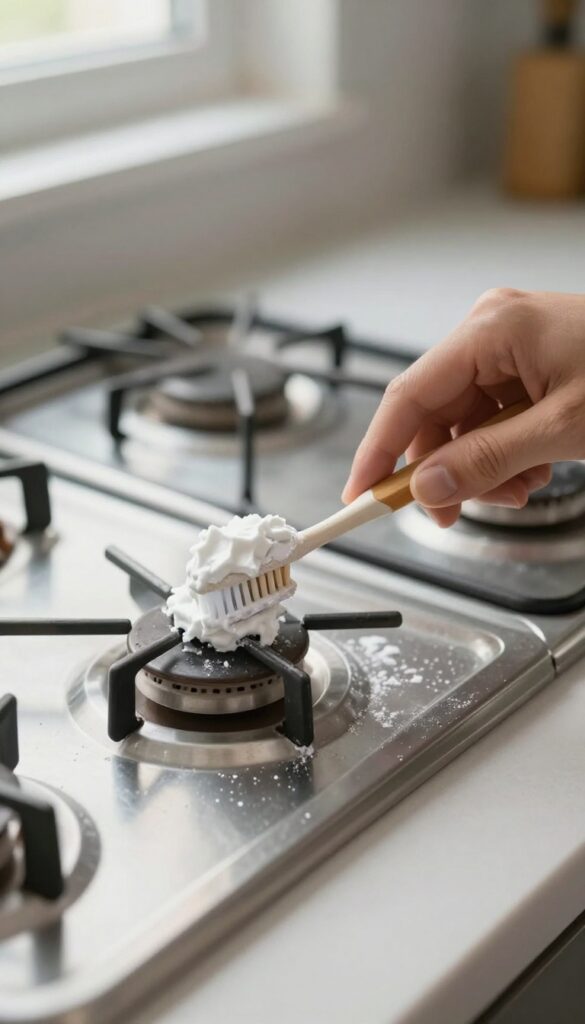
3. Use Baking Soda Paste for Stubborn Grease
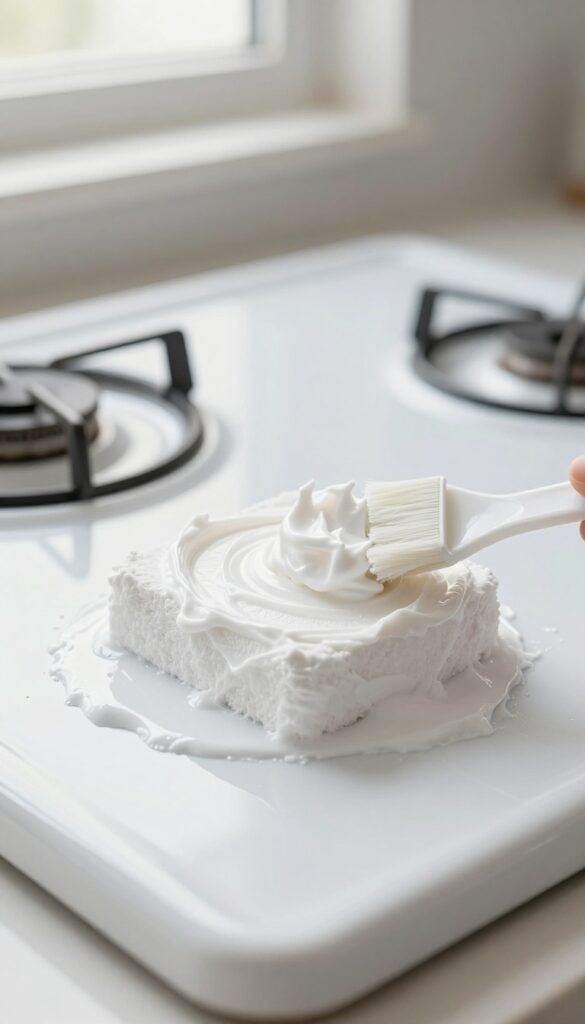
Sometimes a quick wipe just doesn't cut it. Thick, baked-on grease needs a little more time and a gentle abrasive. Baking soda is perfect for this job because it's tough on grime but won't scratch your burners.
Mix three parts baking soda with one part water to create a spreadable paste. Apply a thick layer over the greasy areas, especially around burner ports and caps. Let it sit for 10 to 15 minutes so the paste can break down the grease.
Then scrub with a soft brush or sponge. Rinse thoroughly and dry before reassembling.
Why Baking Soda Works So Well
Baking soda is mildly alkaline, which helps dissolve acidic grease and food residues. Its fine grit provides gentle scouring without damaging porcelain or metal finishes. Plus, it's non-toxic and safe to use around food.
How To Apply The Paste Effectively
Use an old toothbrush or a small silicone brush to work the paste into crevices and burner holes. For vertical surfaces, make the paste slightly thicker so it stays put. Cover the area completely and don't rush the soak time.
Rinsing And Drying Tips
After scrubbing, wipe off the paste with a damp cloth. Rinse with clean water to remove any residue. Dry everything completely with a microfiber towel before putting the burners back.
Moisture left behind can cause rust or affect ignition.
4. Unclog Gas Ports with a Pin or Paperclip
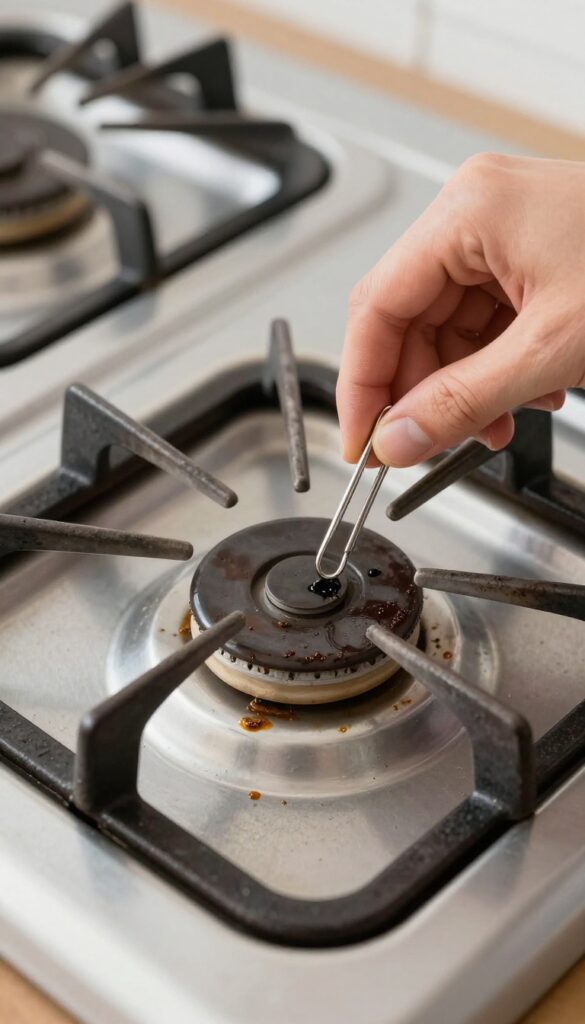
Gas burners rely on tiny ports to deliver a steady flame. When those ports get clogged with grease or food residue, you end up with weak, uneven flames or burners that won't light at all. The fix is simpler than you think and doesn't require any special tools.
Grab a straight pin, sewing needle, or an unfolded paperclip. Gently insert the tip into each gas port and work it back and forth to dislodge any debris. Avoid using toothpicks—they can break off inside the port and make the clog worse.
After clearing all ports, give the burner cap a quick rinse and dry it thoroughly before reassembling.
Why Toothpicks Are A Bad Idea
Toothpicks might seem harmless, but they're brittle. If a piece snaps off inside the port, it can block gas flow completely. You'd then need to remove the burner and soak it to extract the broken wood.
Stick with metal—it's safer and more effective.
Check For Stubborn Clogs
If the flame is still uneven after clearing ports, the clog might be deeper. Use a can of compressed air to blow out any remaining debris. Hold the can upright and give each port a short burst.
This works especially well for burners that haven't been cleaned in a while.
Prevent Future Clogs
Make it a habit to wipe down burner caps after each use. Spills happen, but letting grease sit gives it time to harden and clog ports. A quick wipe with a damp cloth keeps them clear and reduces the need for deep cleaning.
5. Vinegar Spray for Tough Residue
White vinegar is a powerhouse for cutting through stubborn grease and mineral buildup. After you've soaked burner caps and grates, a targeted spray can break down what's left. The acidity works fast, so you don't need to scrub hard.
Spray white vinegar directly onto burner caps and grates after soaking. Let it sit for 5–10 minutes to dissolve mineral deposits and leftover grease. Rinse thoroughly with warm water and dry completely before reassembling.
Why Vinegar Works So Well
Vinegar's acetic acid reacts with alkaline grease and mineral scale, turning them into soluble compounds that rinse away easily. It's gentle enough for most stove finishes but tough on grime.
How To Apply For Best Results
Use a spray bottle for even coverage. After soaking, spray generously and let the vinegar sit. For extra stubborn spots, scrub with a soft brush or sponge before rinsing.
Rinsing And Drying Tips
Rinse with clean water to remove any vinegar residue, which can smell or attract dust if left on. Dry with a microfiber cloth to prevent water spots and ensure no moisture gets into gas ports.
6. Clean Electric Coil Burners Carefully
Electric coil burners need a gentler touch than their gas counterparts. Unlike gas burners, you can't just soak them in water. Submerging the coils can damage the electrical connections and create a safety hazard.
The good news is that cleaning them is still straightforward if you follow the right steps.
Wipe Down The Coils
Start by making sure the burner is completely cool and unplugged from the stove. Dampen a soft cloth with warm water and a drop of dish soap. Gently wipe the entire coil, including the spiral part, to remove grease and food residue.
Avoid using abrasive scrubbers that can scratch the surface. For stubborn spots, let the damp cloth sit on the coil for a few minutes to loosen the grime before wiping again.
Clean The Drip Pans
The drip pans underneath the coils collect a lot of grease and debris. Remove them from the stove and wash them in warm, soapy water. For baked-on messes, make a paste of baking soda and water, apply it to the pans, and let it sit for 15 minutes before scrubbing with a non-abrasive sponge.
Rinse thoroughly and dry completely before putting them back. If the pans are heavily rusted or burned, consider replacing them.
Brush Away Debris
Use a soft-bristled brush, like an old toothbrush, to gently remove any crumbs or debris from the crevices of the coil and the drip pan. Pay special attention to the area where the coil connects to the stove. A clean connection ensures better electrical contact and more even heating.
Avoid using metal brushes that could damage the coil's insulation.
7. Scrub with an Old Toothbrush
A toothbrush is one of the best tools for cleaning stove burners because it can reach the tiny crevices and burner ports that sponges and cloths miss. The bristles are stiff enough to dislodge baked-on grease but soft enough to avoid scratching the surface. Pair it with a simple cleaning paste for a deep, thorough clean.
Grab an old toothbrush (or a cheap new one) and dip it into a baking soda paste or a bit of dish soap. Scrub the burner cap, focusing on the small holes where gas or air flows through. For gas burners, pay extra attention to the ports—those tiny openings clog easily.
A few minutes of scrubbing can restore an uneven flame. Rinse with water and dry completely before reassembling.
Why A Toothbrush Works Best
The narrow head and angled bristles let you get into tight spaces around the burner base and between grates. Unlike a scrub brush, a toothbrush won't scratch porcelain or enamel finishes. It's also small enough to maneuver around knobs and control panels without causing damage.
Best Cleaning Pastes To Use
Mix baking soda with a little water to form a thick paste. This mild abrasive lifts grease without scratching. For tougher grime, add a drop of dish soap to the paste.
You can also use a store-bought cleaner like Bar Keepers Friend, but test on a small area first to ensure it's safe for your stove's finish.
How To Clean Burner Ports Thoroughly
For gas burners with clogged ports, dip the toothbrush in vinegar or rubbing alcohol to dissolve mineral deposits. Scrub each port individually, then use a pin or needle to gently poke out any remaining debris. Avoid using anything too sharp that could widen the holes and affect flame size.
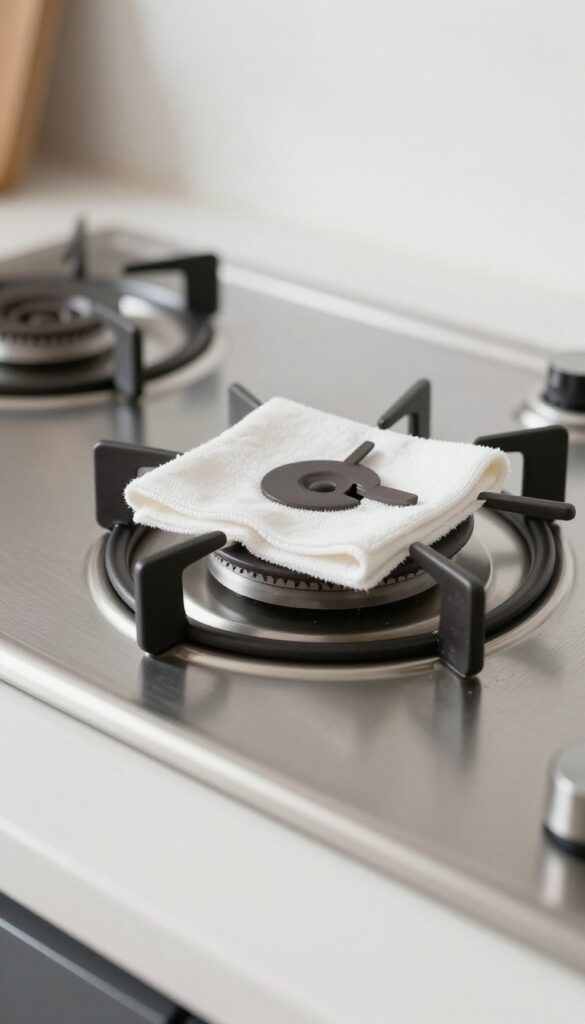
8. Dry Completely Before Reassembling
You’ve scrubbed, soaked, and rinsed every part of your burner. Now comes a step that’s easy to rush: drying. Moisture left behind can lead to rust on metal components or cause gas burners to sputter and struggle to ignite.
Taking a few extra minutes to dry everything thoroughly ensures your burners perform like new and last longer.
After cleaning, place all burner parts—caps, rings, and bases—on a clean towel and let them air dry for at least an hour. If you’re in a hurry, use a lint-free cloth to wipe each piece dry, paying extra attention to crevices and burner ports. For gas burners, make sure the gas openings are completely clear of water before reassembling.
A quick blast of compressed air can help blow out any trapped moisture. Once everything is bone dry, put the burners back together and test them. You’ll notice a steady, even flame and no annoying clicking or sputtering.
Why Moisture Is The Enemy
Water trapped inside burner parts can cause rust over time, especially on cast iron or steel components. Rust not only looks bad but can also flake off and clog burner ports. For electric coil burners, moisture can lead to short circuits or corrosion on the connectors.
Even a few drops can delay ignition or cause uneven heating. Drying thoroughly prevents these issues and keeps your stove safe.
Best Drying Methods
Air drying is the safest bet—just leave parts on a dish rack or towel for a few hours. For faster results, use a clean microfiber cloth to wipe down every surface. You can also place burner caps in a low-temperature oven (around 200°F) for 10–15 minutes to speed things up.
Never reassemble wet parts and immediately turn on the burner; the heat can cause trapped water to steam and crack components.
9. Use a Steam Cleaner for Deep Grease
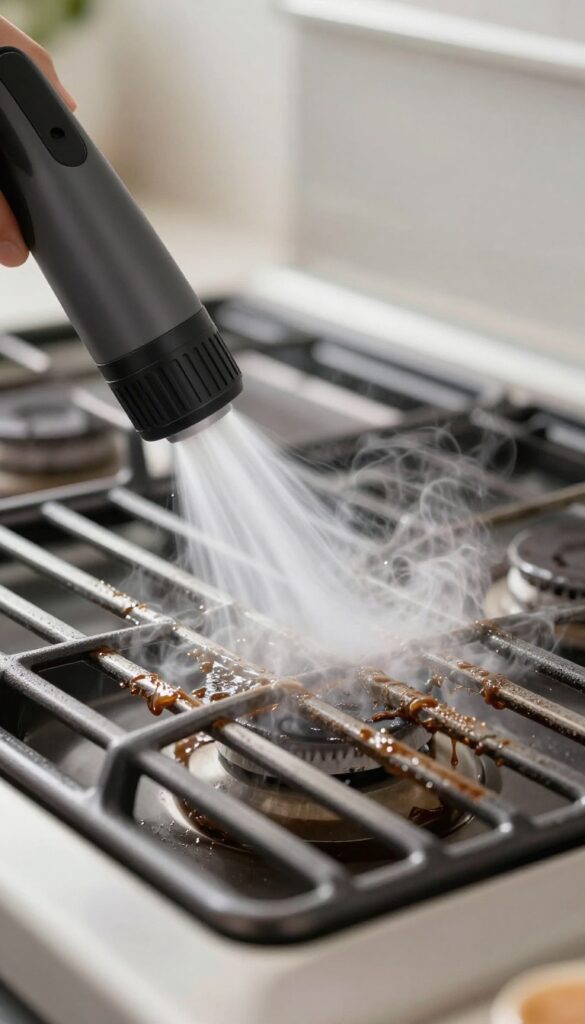
If you've ever battled with burner grates that look like they've been through a grease war, a handheld steam cleaner might be your new best friend. It uses only water, heated to a high temperature, to loosen and blast away caked-on grime without any chemicals. This method is especially effective for those hard-to-reach areas around the cooktop where grease loves to hide.
A steam cleaner is a game-changer for deep cleaning stove burners, especially if you have gas burner grates or electric coil drip pans. The high-pressure steam penetrates crevices and dissolves stubborn grease on contact, making it easy to wipe away. Plus, it sanitizes as it cleans, killing bacteria without harsh chemicals.
How It Works On Burner Grates
Steam cleaners come with various attachments, but a small brush nozzle works best for burner grates. Simply fill the reservoir with water, heat it up (most models take 30 seconds to a minute), and direct the steam at the greasy areas. The heat and moisture loosen the grease, and you can wipe it off with a cloth.
For heavily caked-on grime, you may need to steam and wipe a few times.
Reaching Tight Spots Around The Cooktop
One of the biggest advantages of a steam cleaner is its ability to reach narrow gaps between burners and the cooktop surface. Use a narrow nozzle or a steam brush to target those corners where grease accumulates. The steam will lift the grime without you having to scrub hard, which is great for delicate ceramic or glass cooktops.
Safety And Maintenance Tips
Always let the burner parts cool completely before steaming. While steam cleaners are safe on most surfaces, avoid using them on unsealed wood or areas with loose electrical connections. After steaming, wipe down the surfaces with a dry cloth to prevent water spots.
Regularly descale your steam cleaner according to the manufacturer's instructions to keep it working effectively.
10. Try a Degreasing Dishwasher Tablet Soak
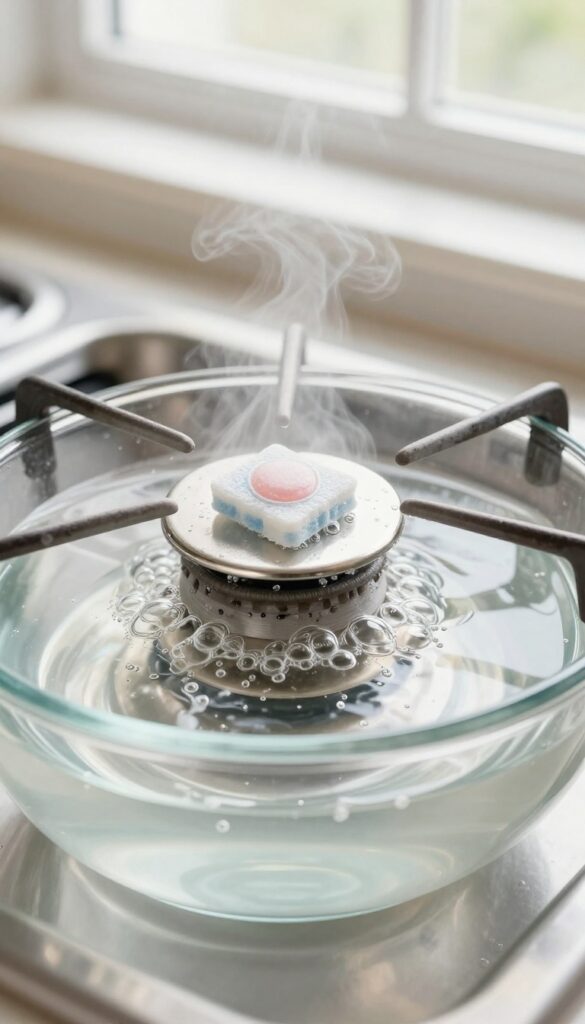
Dishwasher tablets aren't just for dishes. Drop one into a basin of hot water, add your burner grates and caps, and let the enzymes do the heavy lifting. The soak breaks down baked-on grease and loosens stubborn clogs without scrubbing.
Just rinse thoroughly afterward to avoid any soapy residue.
Why It Works
Dishwasher tablets contain powerful enzymes and surfactants designed to dissolve grease and food particles. When dissolved in hot water, they create an active cleaning solution that penetrates the tiny burner ports and crevices. This method is especially effective for gas burner caps and grates that have layers of carbonized grease.
How To Do It Right
Fill a large bowl or sink with very hot water and drop in one dishwasher tablet. Let it dissolve completely, then submerge the burner parts. Soak for 30 minutes.
After soaking, scrub gently with a soft brush to remove any remaining debris, then rinse thoroughly with clean water. Dry completely before reassembling.
Avoid This Mistake
Don't soak aluminum burner parts for too long, as the alkaline solution can cause discoloration. Also, never use this method on electric coil burners or any parts with electrical components. Stick to gas burner caps, grates, and drip pans that are fully removable.
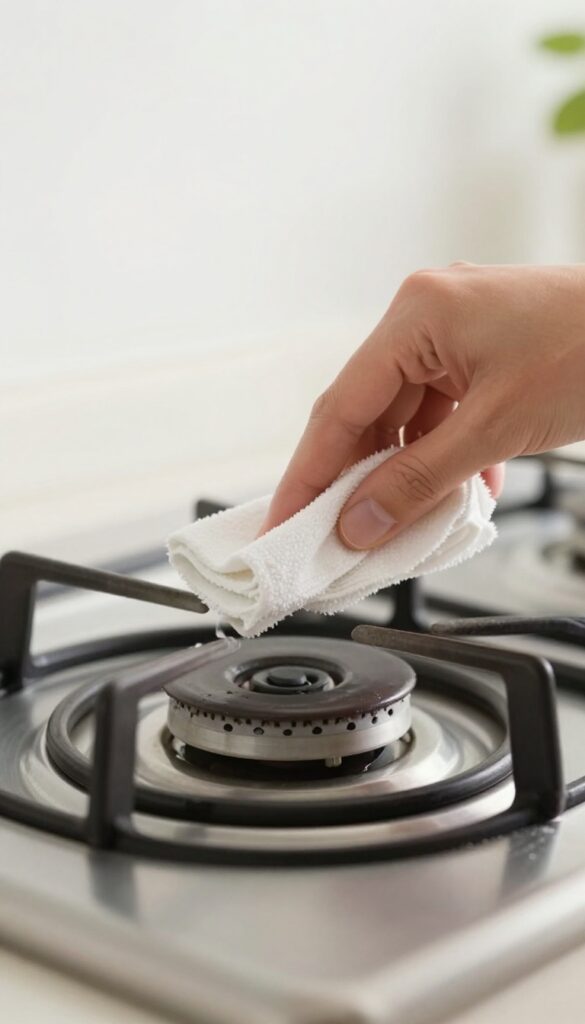
11. Wipe Burner Bases with Rubbing Alcohol
You've scrubbed and rinsed, but there's still a faint greasy film on the burner base. That leftover residue attracts dust and grime, making future cleaning harder. Rubbing alcohol cuts through that film fast and leaves the surface squeaky clean.
After your burners are fully dry from their deep clean, grab a clean cloth and some rubbing alcohol (isopropyl alcohol works best). Dampen the cloth—don't soak it—and wipe down the entire burner base, including any nooks and crannies. The alcohol evaporates in seconds, so there's no need to rinse or wait.
This final step removes any lingering oily film that soap and water might have missed. It also sanitizes the surface, killing bacteria that can thrive in greasy areas. For gas stoves, pay extra attention to the area around the gas ports to ensure no alcohol drips inside.
For electric coils, make sure the burner is completely cool and disconnected before wiping. This quick wipe-down after each deep clean keeps your burner bases looking like new and reduces the frequency of heavy scrubbing.
Why Alcohol Works So Well
Rubbing alcohol is a solvent, meaning it dissolves oils and grease on contact. Unlike water-based cleaners that can leave behind a residue, alcohol evaporates completely, taking the grime with it. It's also non-toxic and safe for most stove surfaces, including stainless steel, enamel, and ceramic glass.
Just avoid using it on painted or decaled surfaces, as it may strip the finish.
How To Apply It Safely
Always use a lint-free microfiber cloth to avoid leaving fibers behind. Pour a small amount of alcohol onto the cloth, not directly on the stove, to control the application. Work in a well-ventilated area and keep the alcohol away from open flames.
For gas stoves, ensure all burners are off and cool. Wipe gently but thoroughly, and let the alcohol air-dry for a few seconds before reassembling the burner caps and grates.
When To Skip This Step
If your burner base has a non-stick coating or is made of plastic, skip the alcohol. It can damage these materials. Also, avoid using alcohol on burner bases that are still warm, as the alcohol can ignite.
Stick to warm soapy water for those cases. For most metal and ceramic bases, though, alcohol is a game-changer.
12. Prevent Clogs with Regular Wipe-Downs
A little maintenance after each use goes a long way. Once your burners cool down, a quick wipe with a damp cloth prevents grease from hardening and food particles from baking on. This simple habit reduces the need for deep cleaning and keeps the burner ports clear.
Why It Works
Grease and food residue are the main culprits behind clogged burner ports. When they cool and harden, they block the flow of gas or electricity. A quick wipe removes them before they have a chance to set.
This is especially important for gas burners, where even a thin layer of grease can cause uneven flames.
What To Use
A soft, lint-free cloth or a microfiber towel works best. Dampen it with warm water—no soap needed for daily wipes. For electric coil burners, make sure the cloth is only slightly damp to avoid water seeping into the electrical connections.
Avoid abrasive sponges that can scratch the surface.
When To Do It
Wait until the burners are completely cool to avoid burns. Then, take 30 seconds to wipe down the burner caps, grates, and the area around the ports. For gas burners, pay extra attention to the small holes where the flame comes out.
Doing this after every meal keeps your stove looking clean and functioning well.
13. Replace Drip Pans When Needed
Drip pans take a beating. Over time, they get rusted, stained, or warped from repeated heating and grease buildup. No amount of scrubbing can bring them back to life.
When that happens, it's time to let go and buy new ones.
Replacing drip pans is one of the easiest upgrades for your stove. New pans instantly improve the look of your cooktop and make future cleaning much simpler. Plus, they're inexpensive and widely available at hardware stores or online.
Don't wait until the rust flakes off onto your burners.
Signs It's Time To Replace
Look for rust, deep stains that won't come off, or warping that causes the pan to sit unevenly. If the finish is peeling or the metal is pitted, replace them. Also, if you notice the burner flame is uneven or the pan is hard to remove, a new pan can solve that.
How To Choose The Right Drip Pans
Measure your burner size first. Most stoves use 6-inch or 8-inch pans, but check your model. You can buy standard chrome or black porcelain pans.
Chrome is easier to clean, while black hides stains better. Some brands offer nonstick coatings, which are worth considering.
Installation And Care Tips
Simply remove the old pans and drop in the new ones. No tools needed. To keep them looking new, wipe spills immediately and avoid using abrasive cleaners.
For routine cleaning, a damp cloth with mild soap works fine. Replace them again when they start to show wear.
FAQ
Can I use bleach to clean stove burners?
Bleach is not recommended for most burner parts as it can cause discoloration and damage. Stick to mild dish soap, baking soda, or vinegar for safe cleaning.
How often should I clean my stove burners?
For best performance, wipe burners after each use and do a deep clean every 1-2 months, depending on usage. Heavy cooking may require more frequent cleaning.
Why is my gas burner flame yellow instead of blue?
A yellow flame often indicates clogged ports or improper air mixture. Cleaning the burner thoroughly usually restores the blue flame. If not, check for gas line issues.
Can I put burner grates in the dishwasher?
Check your manufacturer's instructions. Many metal grates are dishwasher-safe, but some may discolor or rust. Hand washing is often safer for longevity.
What if my electric burner won't heat evenly?
Uneven heating can be due to a warped coil or dirty drip pan. Clean the coil and pan, and ensure the coil sits flat. If the problem persists, the coil may need replacement.
Conclusion
Greasy, clogged burners don't stand a chance once you know these tricks. Pick the method that matches your mess—whether it's a quick vinegar soak or a deep baking soda scrub—and you'll see results fast.
Keep this list handy for regular maintenance, and your stove will stay clean and efficient without constant scrubbing. A little routine care goes a long way toward preventing stubborn buildup in the first place.