17 Cleaning Glass Stove Top Hacks for Burnt Spots
Burnt spots on a glass stove top can make your kitchen look neglected, no matter how clean the rest of the space is. Scrubbing with regular cleaner often fails against those stubborn, baked-on marks.
You need targeted methods that break down the char without scratching the surface. From pantry staples like baking soda to heavy-duty options like Bar Keepers Friend, these 17 hacks tackle every level of burn.
Each technique is practical, tested, and designed to restore your cooktop without harsh scrubbing. Say goodbye to those ugly spots and hello to a gleaming stove.
1. Baking Soda Paste for Light Burnt Spots
When the burn is fresh or just a light discoloration, you don't need heavy chemicals. A simple paste of baking soda and water often does the trick. It's gentle enough to use regularly without worrying about scratches.
Mix three parts baking soda with one part water to form a spreadable paste. Apply a thick layer directly over the burnt spot and let it sit for 15 minutes. This gives the baking soda time to break down the residue.
Then, using a non-abrasive sponge or microfiber cloth, gently scrub in circular motions. Rinse with a damp cloth and wipe dry. For stubborn spots, let the paste sit longer or add a few drops of dish soap.
Why Baking Soda Works
Baking soda is mildly alkaline, which helps dissolve organic burnt-on food. Its fine grit provides gentle abrasion without scratching glass. It's also non-toxic and cheap, making it a go-to for routine cleaning.
Pro Tips For Best Results
Use a dedicated glass stovetop sponge or a soft cloth—avoid scrub pads with hard bristles. Always test on a small hidden area first. If the paste dries out, spritz with a little water to reactivate.
When To Skip This Method
For deep, dark, or old burnt spots, baking soda alone may not cut it. In those cases, move on to stronger options like vinegar or a commercial cleaner. But for light marks, this is your safest first attempt.
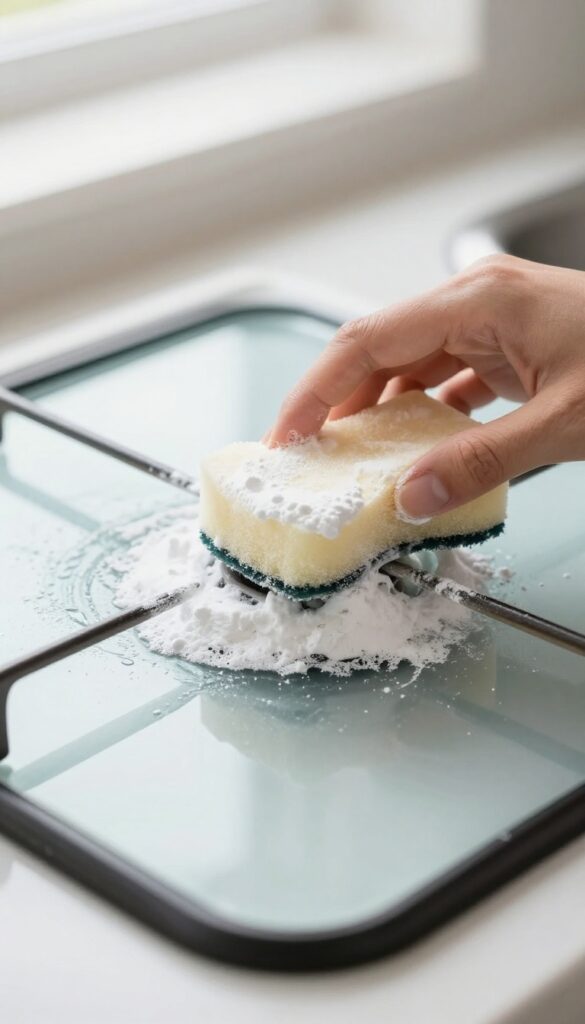
2. Vinegar and Baking Soda Fizz for Stubborn Stains
For those burnt spots that just won't budge, the classic baking soda and vinegar combo is a powerhouse. The fizzy reaction helps lift charred residue without scratching the glass. It's cheap, non-toxic, and you probably already have both ingredients in your kitchen.
This method works best on moderate to heavy burns that haven't been baked on for weeks. The chemical reaction creates carbon dioxide bubbles that push the burnt gunk away from the surface. A little patience goes a long way here—don't rush the fizzing time.
Step-by-step Application
Start by sprinkling a generous layer of baking soda over the burnt spot. Make sure it completely covers the discolored area. Then, fill a spray bottle with white vinegar and spritz it over the baking soda until it's saturated.
You'll see it foam up immediately. Let it sit for 5 minutes—set a timer so you don't forget.
Scrubbing And Rinsing
After the fizzing settles, use a soft microfiber cloth or a non-abrasive sponge to gently scrub in circular motions. The burnt residue should come off easily. Wipe away the paste with a damp cloth, then dry the area.
If any stain remains, repeat the process. For extra stubborn spots, let the paste sit for 10 minutes instead of 5.
Why It Works Without Scratching
Baking soda is mildly abrasive, but it's much softer than glass, so it won't leave micro-scratches. The vinegar's acidity helps dissolve the burnt-on oils and sugars. Together, they create a gentle yet effective cleaner that's safe for regular use.
Just avoid using metal scrubbers or harsh pads with this method.
3. Lemon Juice and Cream of Tartar for Tough Burns
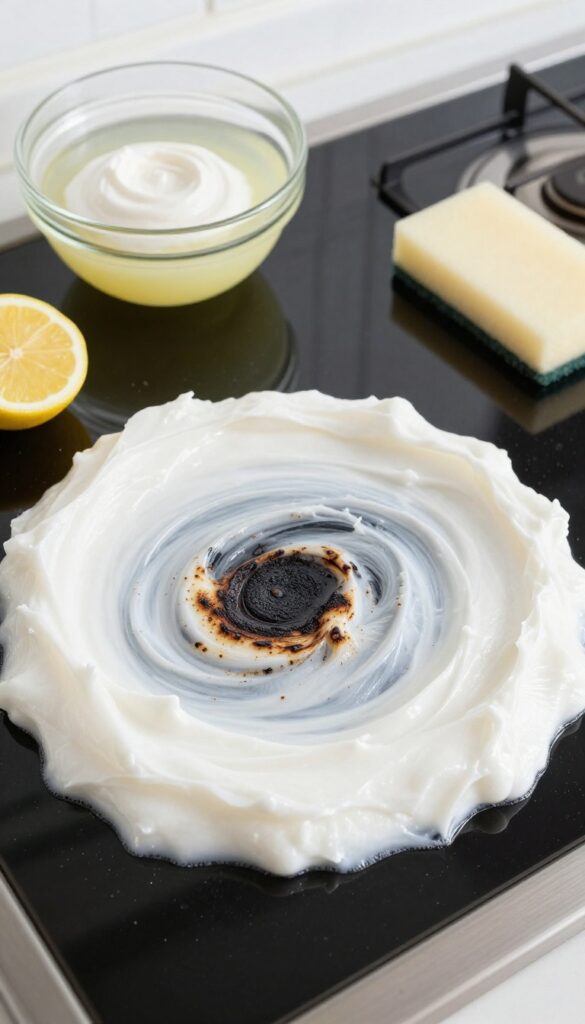
When baking soda and vinegar fall short, it's time to bring out the big guns from your pantry. Lemon juice and cream of tartar team up to form a powerful acidic paste that eats through even the most stubborn burnt-on gunk. This duo works wonders on dark, crusty spots that have been baked on for weeks.
Why This Combo Works So Well
Cream of tartar is a mild acid that, when mixed with lemon juice, creates a gentle but effective abrasive paste. The acidity helps dissolve burnt food particles while the fine powder provides just enough grit to lift residue without scratching glass. It's a safe, non-toxic alternative to harsh chemical cleaners.
Step-by-step Application
Start by mixing two tablespoons of cream of tartar with enough lemon juice to form a thick paste. Spread it over the burnt spots, making sure to cover them completely. Let it sit for 20 minutes—this gives the acids time to break down the char.
Then, using a soft sponge or cloth, scrub gently in circular motions. Rinse with water and buff dry with a clean towel.
Tips For Maximum Effectiveness
For extra stubborn burns, let the paste sit for up to 30 minutes, or cover it with plastic wrap to keep it from drying out. If the paste dries, simply reapply a little lemon juice to reactivate it. Avoid using metal scrubbers or abrasive pads, as they can scratch the glass.
Always test on a small, inconspicuous area first if you're worried about etching.
4. Hydrogen Peroxide and Baking Soda for Set-In Stains
Some burnt spots have been there so long they feel like part of the stove. Regular scrubbing won't touch them, but a paste of hydrogen peroxide and baking soda can lift even those stubborn, set-in stains. The peroxide acts as a mild bleach while the baking soda provides gentle abrasion.
Mix hydrogen peroxide with baking soda to form a thick paste that spreads easily without dripping. Apply a generous layer over the burnt area, then cover with plastic wrap to keep the paste moist and active. Let it sit for 30 minutes—the longer contact time allows the peroxide to penetrate and break down the carbonized residue.
Remove the wrap, scrub with a non-abrasive sponge, and rinse thoroughly. Repeat if needed for extra stubborn spots.
Why This Combo Works
Hydrogen peroxide releases oxygen bubbles that help lift burnt-on food without harsh chemicals. Baking soda provides just enough grit to scrub away softened residue without scratching the glass. Together, they create a chemical reaction that targets set-in stains more effectively than either ingredient alone.
Application Tips
Use 3% hydrogen peroxide from the drugstore—it's strong enough for cleaning but safe for your stove top. Mix equal parts until you get a toothpaste-like consistency. Covering with plastic wrap is key: it prevents the paste from drying out and gives the peroxide time to work.
For vertical surfaces, use a thicker paste so it stays put.
Safety And Rinsing
Always test on a small, hidden area first to ensure no discoloration. After scrubbing, wipe away all residue with a damp cloth—leftover baking soda can scratch if moved around dry. Follow with a glass cleaner for a streak-free shine.
5. Dish Soap and Baking Soda for Greasy Burnt Spots
Greasy burnt spots need a different approach. Plain baking soda paste works, but it struggles to cut through the oily film that traps the char. Adding a few drops of dish soap changes everything.
The soap breaks down grease while the baking soda provides gentle abrasion. Together, they lift burnt food without scratching the glass. This combo is perfect for spots where oil splattered and then burned on.
Mix baking soda with just enough water to form a thick paste, then add 2-3 drops of dish soap. Apply to the burnt area and scrub gently in circular motions with a soft sponge or microfiber cloth. Let it sit for 5 minutes if the spot is stubborn.
Wipe clean with a damp cloth, then buff dry. For extra grease-cutting power, use a degreasing dish soap like Dawn.
Why This Combo Works So Well
Baking soda is mildly abrasive, so it physically lifts burnt food without scratching. Dish soap contains surfactants that break the surface tension of grease, allowing the paste to penetrate the burnt layer. Together, they tackle both the carbonized food and the oily residue that binds it to the glass.
Best Technique For Stubborn Spots
For spots that have been baked on multiple times, apply the paste and cover with a damp paper towel for 10 minutes. This rehydrates the burnt residue, making it easier to scrub off. Then use a non-scratch scrubbing pad in small circles.
Rinse and repeat if needed.
What To Avoid
Never use abrasive pads like steel wool or scrubby sponges with this method—they can scratch the glass. Also, avoid letting the paste dry completely on the surface, as it can leave a hazy residue. Wipe it off while still damp.
6. Magic Eraser for Light Scorch Marks
For light scorch marks that haven't had time to bake in, a melamine foam eraser works like magic. These white sponges are slightly abrasive on a microscopic level, so they lift stains without scratching glass. Just dampen it, squeeze out excess water, and gently rub the burnt area in small circles.
You'll see the mark fade quickly without any harsh chemicals.
The magic eraser is perfect for everyday light burns or spots from spills that got too hot. It's not strong enough for thick, crusty burns, but for surface-level discoloration, it's a quick fix. Use a light touch—the foam will wear down as you rub, which is normal.
Rinse the stove top with water and dry with a microfiber cloth after.
How To Use It Properly
Cut a small piece of the eraser and wet it until it's damp but not dripping. Gently rub the scorch mark in circular motions—no need to press hard. The foam will crumble slightly as it works, so wipe away any residue with a damp cloth.
For best results, use it while the stove top is cool.
When To Skip This Method
Avoid using a magic eraser on deep, dark burns or if the glass has any cracks or chips. It's not designed for heavy-duty cleaning and won't remove thick carbonized layers. Stick to light marks only, and always test on a small hidden area first.
7. Razor Blade Scraper for Baked-On Layers
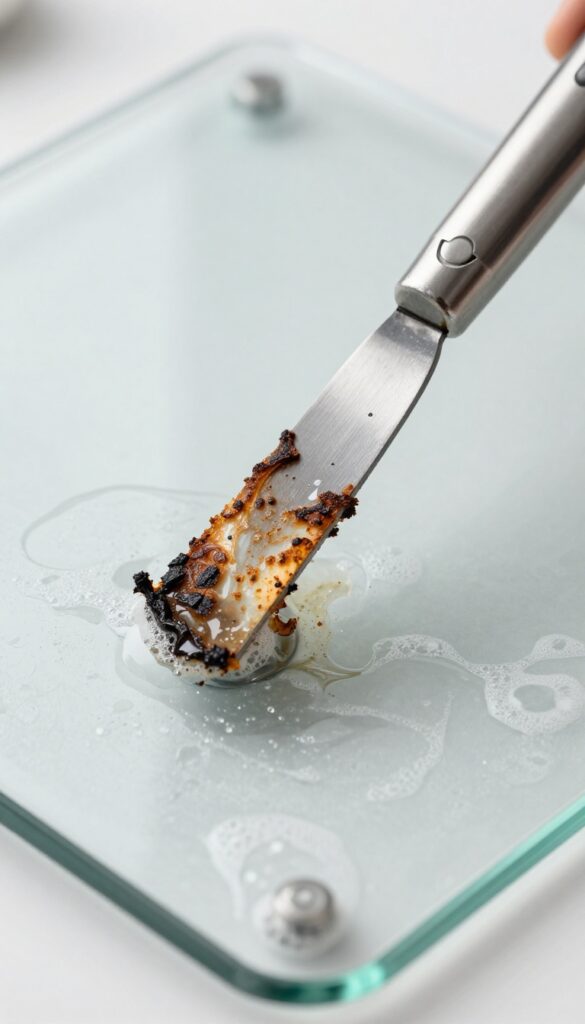
When burnt food has turned into a hard, crusty layer that won't come off with scrubbing, a razor blade scraper can be your best friend. This tool is designed to lift thick deposits without damaging the glass—if used correctly. The key is keeping the blade at a shallow angle and the surface wet to prevent scratches.
A single-edge razor blade scraper is perfect for tackling those stubborn, baked-on layers that other methods can't touch. The thin, sharp blade slides under the burnt residue and lifts it away cleanly. Always use a new blade to ensure it's sharp and free of nicks.
Work in small sections, and keep the glass wet with a mixture of dish soap and water or a dedicated glass stove top cleaner. The moisture acts as a lubricant, reducing friction and preventing scratches.
How To Use It Safely
Hold the scraper at a 45-degree angle to the glass. Apply gentle, even pressure and push the blade forward in short strokes. Never use a back-and-forth sawing motion, as that can create micro-scratches.
Rinse the blade frequently to remove debris, and replace it if it becomes dull or chipped.
When To Avoid This Method
Avoid using a razor blade on ceramic or glass stove tops with decorative patterns or coatings, as it can strip them. If your stove top has any cracks or chips, skip this method—the blade can worsen the damage. Also, never use it on a hot surface; wait until the stove is completely cool.
Follow-up Cleaning
After scraping, wipe the area with a damp cloth to remove any residue. Then, apply a glass stove top cleaner and buff with a microfiber cloth to restore shine. This two-step process ensures you get a smooth, spotless finish without any leftover grit.
8. White Vinegar Soak for Dried-On Spills
Some spills sit for days before you notice them, turning into a stubborn crust that resists regular cleaning. White vinegar’s acidity cuts through that baked-on grime without any harsh scrubbing. It’s a gentle but effective way to break down burnt spots without damaging the glass.
How The Soak Works
White vinegar contains acetic acid, which dissolves alkaline residues and loosens burnt food. When you soak a paper towel in vinegar and lay it over the stain, the liquid seeps into the crust, softening it from the inside out. After 30 minutes, most of the residue wipes away with minimal effort.
Step-by-step Application
Start by making sure the stove top is cool. Fold a few paper towels to cover the burnt spot, then saturate them with undiluted white vinegar. Lay the towels directly over the stain and let them sit for 30 minutes.
Check periodically to keep the towels damp. After the soak, remove the towels and wipe the area with a damp cloth. For stubborn spots, repeat or follow up with a gentle scrub of baking soda.
When To Use This Method
This hack works best on dried-on spills that haven’t been repeatedly burned. It’s ideal for sugary spills, milk, or sauces that have caramelized into a hard layer. Avoid using vinegar on hot glass or letting it pool near the edges where it could seep into the stove’s electronics.
9. Bar Keepers Friend for Heavy-Duty Cleaning

When burnt spots have baked into a dark, stubborn layer, it's time to bring out the big guns. Bar Keepers Friend is a powerful cleaner that uses oxalic acid to dissolve burnt-on residue without damaging the glass. It's perfect for those tough stains that laugh at baking soda and vinegar.
Bar Keepers Friend comes in a powder form that you mix into a paste. This method is ideal for heavy-duty cleaning because the paste stays put on vertical surfaces and gives the acid time to work. Always test on a small hidden area first, as some cooktops have coatings that may react.
How To Make And Apply The Paste
Sprinkle a small amount of Bar Keepers Friend powder directly onto the burnt spot. Add a few drops of water to form a thick paste, about the consistency of toothpaste. Spread it evenly over the stain using a soft sponge or cloth.
Let it sit for 10 minutes—don't let it dry completely, as that can make rinsing harder.
Scrubbing And Rinsing
After the paste has sat, gently scrub the area with a soft, non-abrasive sponge in circular motions. You'll see the stain start to lift. Rinse thoroughly with a damp cloth to remove all residue.
Wipe dry with a clean towel to prevent streaks. If the stain persists, repeat the process or try a slightly longer dwell time.
When To Use This Method
This hack works best on dark, baked-on spills that have been there for days or weeks. It's also effective for removing rainbow-like heat stains that sometimes appear after high-heat cooking. Avoid using Bar Keepers Friend on aluminum or copper trim, as it can cause discoloration.
10. Club Soda for Fresh Spills That Burned
If you catch a spill soon after it burned but before it has fully cooled, club soda can be a surprising hero. The carbonation and mild acidity work together to loosen fresh residue without any scrubbing. This trick is best for spots that are still warm and haven't had time to turn into a hard crust.
Pour club soda directly onto the burnt spot while the stove is still warm (but off). Let it fizz for a few minutes, then wipe clean. The carbonation helps lift residue.
Why Club Soda Works
Club soda contains carbonic acid, which creates bubbles that help dislodge burnt particles from the glass surface. The slight acidity also helps break down the bonds between the residue and the cooktop. Unlike plain water, the fizz provides a gentle mechanical action that lifts the gunk away.
Best Time To Use This Method
This hack works best on spills that just happened and are still warm to the touch. If the spill has cooled completely or has been there for hours, the fizz may not be enough. Use club soda as a first line of defense right after cooking.
Step-by-step Instructions
Turn off the stove and let it cool slightly so it's warm but not hot. Pour a generous amount of club soda directly onto the burnt spot. Let it sit for 2-3 minutes while it fizzes.
Wipe with a soft cloth or sponge. Repeat if necessary, then dry the surface.
What To Avoid
Don't use club soda on a hot stove, as the rapid temperature change could damage the glass. Also, avoid scrubbing aggressively during the fizzing stage; let the bubbles do the work. If the spot doesn't come off after two tries, move on to a stronger method.
11. Toothpaste for Small Burnt Rings

Toothpaste isn't just for your teeth. The mild abrasive in white, non-gel toothpaste can gently buff away those small burnt rings that appear after a pot boils over. It's a quick fix that uses something you already have in your bathroom cabinet.
Apply a small dab of white toothpaste directly onto the burnt ring. Spread it to cover the stain, then let it sit for about 10 minutes. The abrasives in the toothpaste work to loosen the burnt residue.
After the wait, take a damp microfiber cloth and scrub in circular motions. You'll see the mark lift away. Rinse the area with a clean damp cloth and dry.
This method is best for light to medium burnt rings, not thick, caked-on spills.
Why Toothpaste Works
White toothpaste contains mild abrasives like calcium carbonate or silica. These are gentle enough not to scratch glass but effective enough to polish away burnt stains. The paste also has detergents that help break down grease, making it a dual-action cleaner.
Which Toothpaste To Use
Stick with plain white toothpaste—avoid gels, whitening strips, or those with sparkly bits. Gel toothpaste lacks the abrasive quality needed for scrubbing, and added particles can scratch the surface. A basic brand like Colgate or Crest works perfectly.
When To Skip This Hack
Toothpaste is not for large, thick burnt patches or if you have a ceramic cooktop with a rough texture. It's best reserved for small, isolated rings. If the stain is deeply baked, you might need a stronger method like a razor scraper or baking soda paste.
12. Ammonia Overnight for Extreme Burns
For those burnt-on spots that have been baked in over and over, a gentle soak won't cut it. Ammonia is a powerful degreaser that breaks down the toughest carbonized grime without you having to scrub.
When other methods fail, ammonia works overnight to soften the burnt layer. The key is to let it sit long enough to penetrate without evaporating. This method requires patience and proper ventilation, but the results are worth it.
Why It Works
Ammonia is alkaline and reacts with the acidic burnt residue, breaking it down chemically. The plastic wrap traps the fumes, keeping the area moist and active all night.
Safety First
Always wear rubber gloves and work in a well-ventilated area—open a window or turn on the exhaust fan. Never mix ammonia with bleach or other cleaners.
Step-by-step
Soak a clean cloth in household ammonia, wring it slightly so it's damp not dripping, and place it directly over the burnt spot. Cover with plastic wrap, pressing the edges to seal. Let it sit 8–12 hours.
In the morning, remove the wrap and cloth, then wipe the area with a damp sponge. Rinse thoroughly with water and dry.
13. Glass Cooktop Cleaner and Pad Kit
Sometimes the simplest solution is the most effective. A dedicated glass cooktop cleaner paired with a non-scratch pad is designed specifically for this job. These products are formulated to break down burnt-on residue without harming the smooth surface, making them a reliable choice for regular maintenance and tough spots alike.
Why A Dedicated Kit Works Best
General-purpose cleaners often lack the right chemistry to dissolve burnt food without leaving streaks or causing micro-scratches. Glass cooktop cleaners contain mild abrasives and solvents that target carbonized stains while being gentle on the ceramic glass. The included non-scratch pad (often a blue or white scrubby) provides just enough texture to lift grime without etching the surface.
How To Use It For Burnt Spots
Start by ensuring the cooktop is cool. Squirt a small amount of cleaner directly onto the burnt area. Using the non-scratch pad in a circular motion, apply light to medium pressure.
Let the cleaner sit for a minute if the spot is stubborn, then buff it off with a dry microfiber cloth. Repeat if necessary. Always follow the product's specific instructions for best results.
Top Brands To Consider
Weiman, Cerama Bryte, and Affresh are popular choices that consistently deliver good results. They come in starter kits with the pad, or you can buy the cleaner separately. Avoid using the pad on other surfaces—it's best to keep it dedicated to the cooktop to prevent cross-contamination from greasy pans.
14. Onion Cut for Stubborn Burnt Sugar
Burnt sugar on a glass stove top can feel impossible to remove. It bakes into a hard, sticky layer that resists regular cleaners. An onion might seem like an odd choice, but its natural enzymes are surprisingly effective at breaking down sugar-based stains.
This hack is especially useful for spills from syrups, jams, or caramel that have charred onto the surface.
This method works best on fresh to moderately set burnt sugar stains. The onion's enzymes help loosen the sugar, making it easier to wipe away without harsh scrubbing or chemicals. It's a gentle yet effective approach that won't damage the glass.
How It Works
Onions contain sulfur compounds and enzymes that can break down complex sugars. When you rub the cut side over the burnt spot, these compounds interact with the caramelized sugar, softening it. This makes the stain easier to lift off with a damp cloth.
Step-by-step
Cut a yellow or red onion in half. Rub the cut side firmly over the burnt sugar stain for about 30 seconds. Let the onion juice sit on the spot for 2-3 minutes.
Rinse with warm water and wipe clean with a soft sponge. Repeat if necessary.
When To Use This Hack
This trick is best for sugar-based spills that haven't been baked on for days. For older, thicker stains, you might need to combine it with a baking soda paste or a razor scraper. Avoid using this method if you have a strong aversion to onion smell on your hands.
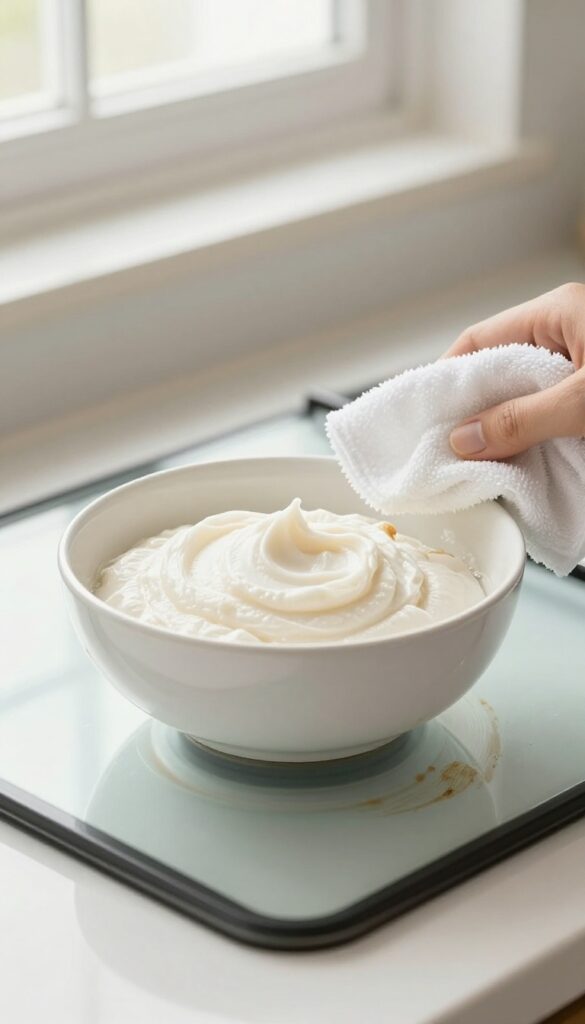
15. Mayonnaise for Dried-On Grease Spots

Mayonnaise is more than just a sandwich spread. Its oil and egg yolk base makes it a surprisingly effective cleaner for dried-on grease spots on your glass stove top. The oils help loosen the baked-on residue without scratching the surface.
When you have a stubborn grease spot that won't budge, grab the mayo from your fridge. Spread a thin layer directly over the burnt area and let it sit for about 15 minutes. The mayonnaise breaks down the grease, allowing you to wipe it away easily with a soft cloth.
For extra stubborn spots, let it sit longer or apply a thicker layer. Finish with a glass cleaner for a streak-free shine.
Why Mayonnaise Works
Mayonnaise contains oil, egg yolks, and vinegar or lemon juice. The oil dissolves grease, while the egg yolks act as a mild emulsifier to lift the residue. The acidity helps cut through burnt-on gunk without harsh chemicals.
Step-by-step Application
First, ensure the stove top is cool. Apply a thin, even layer of mayonnaise over the burnt grease spot. Let it sit for 15 minutes.
Then, using a soft cloth or paper towel, wipe away the mayonnaise and loosened residue. If needed, repeat or let it sit longer. Finally, clean the area with a glass stove top cleaner to remove any oily film.
Tips For Best Results
Use full-fat mayonnaise for better oil content. Avoid low-fat versions as they may not work as well. For large spots, cover the area with plastic wrap to keep the mayonnaise from drying out.
Always test on a small, inconspicuous area first, especially if your stove top has a special coating.
16. Salt and Ice for Hardened Burnt Food
When burnt food has been sitting on the stove top for days, it can feel like it's fused to the glass. A simple combination of salt and ice can break that bond without any scrubbing force. The ice chills the residue, making it brittle, while the salt acts as a gentle abrasive to lift it away.
This hack works best on thick, crusty spills that have hardened into a solid layer. The temperature shock from the ice helps crack the burnt material, and the salt provides the friction needed to dislodge it. It's a low-effort method that saves your arms and your cooktop.
Why Salt And Ice Work
Salt is a mild abrasive that won't scratch glass, and ice creates a thermal shock that weakens the bond between the burnt food and the stove top. Together, they loosen even stubborn residue without harsh chemicals.
Step-by-step Application
Sprinkle a generous layer of table salt over the burnt spot. Take an ice cube (or a few) and rub it directly over the salted area in small circles. The ice will melt slightly, creating a slushy paste.
Let it sit for 2–3 minutes, then wipe with a damp cloth. Repeat if needed.
When To Use This Method
Ideal for dried-on food spills like pasta sauce, rice, or scrambled eggs that have been baked on. Avoid using on large, greasy burns or melted plastic—those require different approaches.
17. Professional Ceramic Cooktop Cleaner for Final Shine
After you've scrubbed off the burnt spot, your stove top might still look a bit dull or streaky. That's where a dedicated ceramic cooktop cleaner comes in. These products are specially formulated to remove micro-scratches and restore that glossy, like-new finish.
They also leave behind a protective layer that makes future cleaning easier.
Using a professional cleaner is the final step to make your stove top look its absolute best. It's not just about appearance—the protective coating helps prevent future burnt spots from bonding as strongly to the glass. For best results, choose a cleaner specifically designed for ceramic or glass cooktops, such as Weiman or Cerama Bryte.
Apply a small amount to a clean, dry microfiber cloth and buff in a circular motion. Then use a second clean cloth to buff away any residue for a streak-free shine.
Why A Dedicated Cleaner Matters
Generic glass cleaners often contain ammonia or vinegar, which can leave a dull film or even damage the cooktop's seal. Ceramic cooktop cleaners contain mild abrasives that polish the glass without scratching. They also fill in tiny scratches, making the surface look smoother and more reflective.
How To Apply For Best Results
Start with a completely cool stove top. Squirt a dime-sized amount of cleaner onto the surface, not directly onto the cloth. Using a clean microfiber cloth, spread the cleaner in small circular motions, working one section at a time.
Let it dry to a haze, then buff off with a fresh microfiber cloth. For extra shine, repeat the buffing step.
Maintaining That New Look
To keep your stove top shining, wipe it down after every use with a soft cloth and a bit of ceramic cooktop cleaner. Avoid using abrasive sponges or harsh chemicals. A quick daily wipe prevents buildup and reduces the need for deep cleaning.
Your stove will stay glossy and spot-free for longer.
FAQ
Can I use steel wool on a glass stove top?
No, steel wool can scratch the glass surface. Always use non-abrasive sponges or soft cloths.
How often should I clean my glass stove top?
Wipe it down after each use to prevent buildup. Deep clean burnt spots as soon as they appear for easier removal.
Is it safe to use vinegar on a glass cooktop?
Yes, white vinegar is safe and effective for removing burnt spots. Just avoid letting it sit too long on the surface.
What should I avoid when cleaning a glass stove top?
Avoid abrasive cleaners, harsh scouring pads, and acidic cleaners like lemon juice if left for extended periods. Always test a small area first.
Can I use a razor blade on a glass stove top?
Yes, but only a single-edge razor blade scraper designed for cooktops. Keep the glass wet and use a 45-degree angle to avoid scratches.
Conclusion
Burnt spots on a glass stove top don't have to be permanent. With these 17 hacks, you can tackle everything from light scorch marks to stubborn, baked-on spills using items you probably already have at home. Start with the gentlest method and work your way up.
Regular maintenance and quick action on spills will keep your cooktop looking its best. A little effort goes a long way toward a sparkling, like-new stove top.