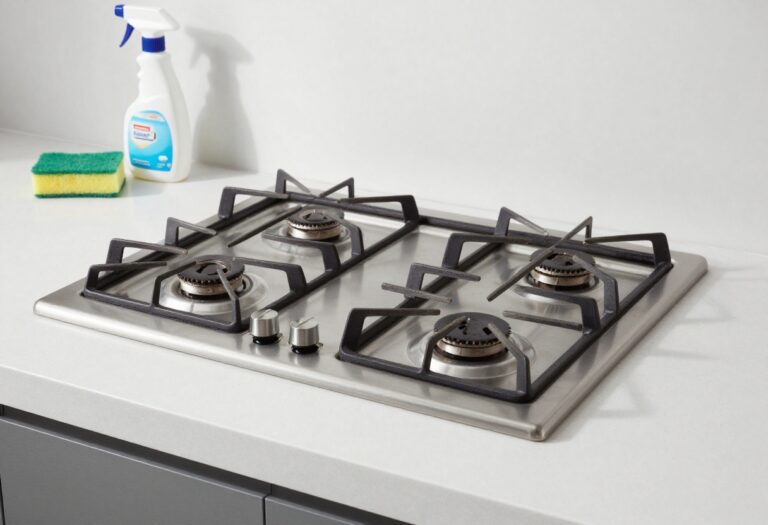
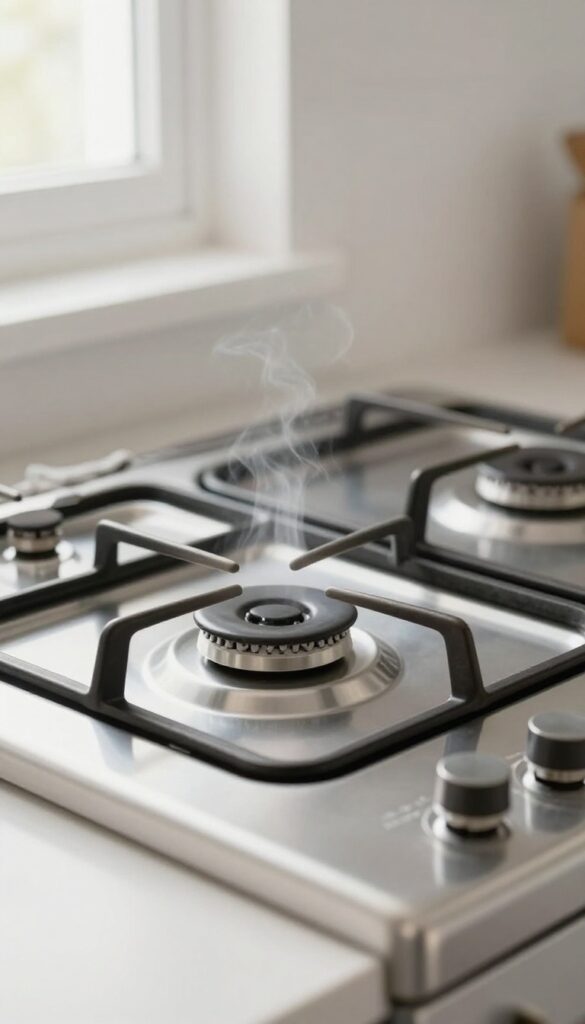
17 Gas Stove Cleaning Tips for Burners, Grates, and Grease
You don't need a cabinet full of specialty sprays to make your gas stove look brand new. With a few clever tricks and common household items, you can cut through baked-on grease and restore your burners and grates to their former glory.
These 17 tips cover everything from daily wipe-downs to deep-cleaning sessions. Whether you're dealing with clogged burner holes or crusty drip pans, there's a solution here that won't leave you scrubbing for hours.
Let's turn that greasy stovetop into a showpiece without the elbow grease. Each tip is designed to save you time and effort while delivering real results.
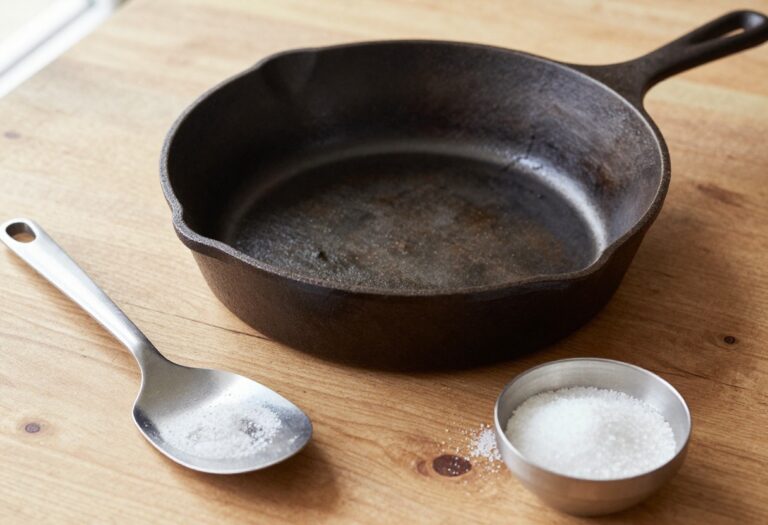
1. Soak Grates in Dish Soap and Hot Water Overnight
Your stove grates take the brunt of every spill and splatter. Over time, grease and food bits bake into a tough crust that scrubbing alone can't fix. The easiest way to break that down is a long, hot soak.
Remove the grates and place them in a sink or large basin. Fill with hot water and add a few drops of dish soap. Let them sit overnight—the heat and soap work together to soften the gunk.
In the morning, scrub gently with a non-abrasive sponge. Rinse and dry thoroughly before putting them back.
Why Overnight Soaking Works
Heat and detergent are a powerful combo. Hot water melts grease, while dish soap lifts it away from the metal. Giving it hours to penetrate means you barely have to scrub.
What To Avoid
Skip steel wool or harsh scouring pads—they'll scratch the finish. Stick with a soft sponge or a nylon brush. Also, make sure your grates are cool before soaking to avoid warping.
When To Add A Degreaser Boost
If your grates are extra greasy, add a half cup of white vinegar or a sprinkle of baking soda to the soak. This helps cut through stubborn buildup without damaging the metal.
2. Use a Baking Soda Paste for Stubborn Grease
Baking soda is a gentle abrasive that works wonders on cooked-on grease without scratching your stovetop. When mixed with water, it forms a paste that clings to vertical surfaces and breaks down grime with minimal effort. This method is especially useful for the area around burners and control knobs where grease tends to build up.
It's cheap, non-toxic, and you probably already have both ingredients in your kitchen.
Mix three parts baking soda with one part water to create a thick, spreadable paste. Apply it generously to greasy spots using a soft sponge or your fingers. Let it sit for 15 minutes—longer if the grime is really stubborn.
The baking soda will start to lift the grease. Then, wipe away the paste with a damp cloth. For extra stubborn areas, gently scrub with a non-abrasive sponge.
Rinse with clean water and dry with a microfiber towel.
Why It Works So Well
Baking soda is mildly alkaline, which helps saponify fats, turning them into soap that rinses away easily. Its fine particles provide just enough abrasion to dislodge burnt-on food without scratching glass, ceramic, or enamel surfaces. Plus, it's safe to use around food prep areas.
When To Use This Method
This paste is ideal for the flat surfaces of your stovetop, including the area between burners and around the control panel. It's also great for cleaning the outside of drip pans. Avoid using it on aluminum or soft metals, as it can cause discoloration.
For burner caps and grates, a different approach works better.
Pro Tip For Extra Power
Add a few drops of dish soap to the paste for an extra grease-cutting boost. Or, if the grease is really baked on, sprinkle a little dry baking soda over the paste and let it sit for another 10 minutes. The combination creates a deeper clean without harsh chemicals.
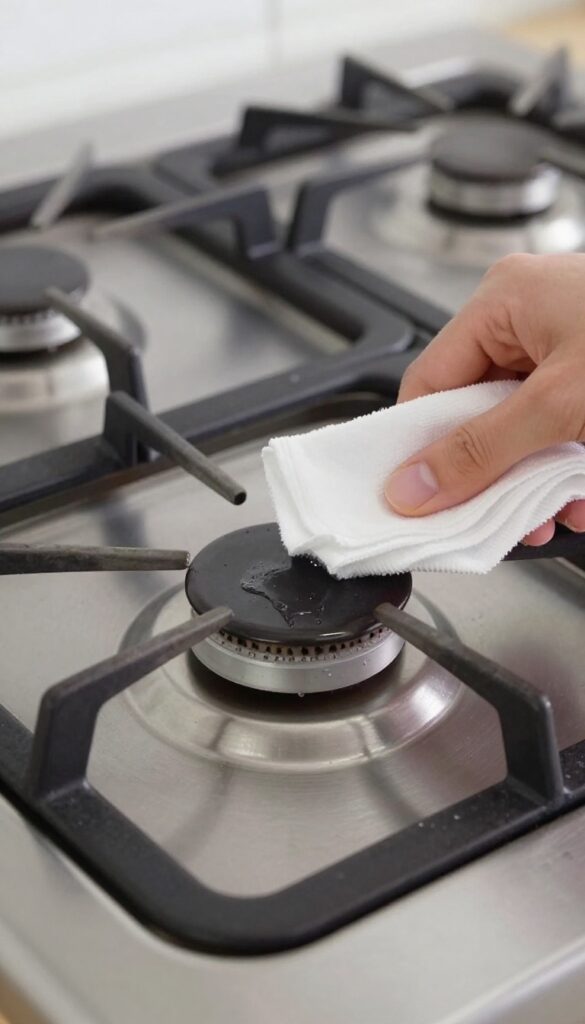
3. Clean Burner Caps with Vinegar and Water
Burner caps take a beating from direct flame and food splatters, often developing a stubborn layer of carbon and mineral deposits. Vinegar's mild acidity cuts through that gunk without any harsh scrubbing. A simple soak in a vinegar-water solution can make them look nearly new again.
Why Vinegar Works So Well
White vinegar contains acetic acid, which dissolves alkaline mineral deposits and breaks down grease molecules. Unlike abrasive cleaners, it won't scratch the metal finish. The 50/50 dilution is strong enough to tackle buildup but gentle enough for regular use.
Step-by-step Soaking Process
Remove the burner caps and place them in a bowl or sink. Cover with equal parts white vinegar and warm water. Let them soak for 20 minutes—longer if they're heavily soiled.
After soaking, scrub gently with a soft brush or sponge to lift any remaining residue.
Rinsing And Drying Tips
Rinse each cap thoroughly under running water to remove vinegar smell and loosened debris. Dry completely with a clean towel or let them air-dry on a rack. Moisture left behind can cause rust or interfere with burner performance, so make sure they're bone-dry before putting them back.
4. Unclog Burner Holes with a Toothpick
Uneven flames or yellow tips are a clear sign that your burner holes are clogged. Food debris, grease, and dust can block the tiny openings, causing weak or lopsided flames. The fix is simple and doesn't require any special tools.
Before you start, make sure the burner is completely cool and the gas supply is turned off. Remove the burner cap and look for any visible blockages. A wooden toothpick is perfect for gently clearing each hole—it's soft enough not to scratch or damage the metal.
Avoid using metal pins or needles, which can enlarge the holes or cause permanent damage. Work slowly and carefully, poking each hole until you feel the debris give way. Once done, use a vacuum with a brush attachment to suck up any loose particles, then reassemble and test the flame.
Why Toothpicks Work Best
Wooden toothpicks are the ideal tool because they're firm yet gentle. They can dislodge stubborn gunk without scratching the burner surface. Metal objects, like paperclips or needles, are too hard and can widen the holes, leading to uneven gas flow.
Plus, toothpicks are disposable—just toss them after use.
Step-by-step Cleaning
Start by removing the burner cap and inspecting the holes. Use a toothpick to gently poke each hole, working from both sides if possible. For extra-stubborn clogs, dip the toothpick in vinegar or rubbing alcohol to help dissolve grease.
After clearing all holes, wipe the burner with a damp cloth and let it dry completely before reattaching.
When To Call It Quits
If a toothpick doesn't do the trick, the blockage might be deeper. In that case, soak the burner cap in hot, soapy water for 15 minutes, then scrub with a soft brush. Avoid using abrasive pads or harsh chemicals that could damage the finish.
If flames remain uneven after cleaning, it may be time to replace the burner.
5. Degrease the Stovetop with Lemon Juice
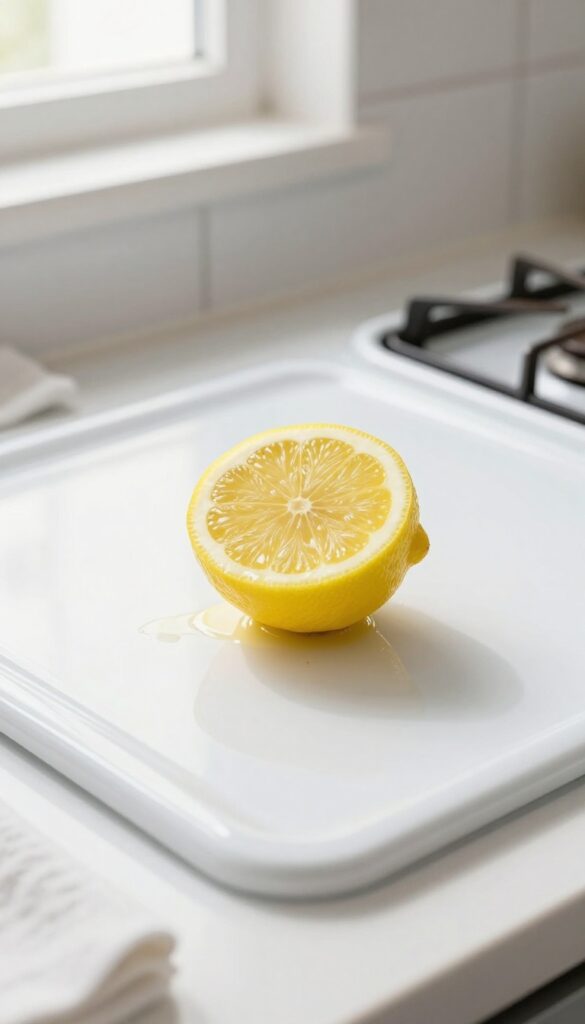
Lemons aren't just for lemonade. Their natural acidity makes them a powerful degreaser that can tackle even the greasiest stovetop messes. Plus, you get a fresh citrus scent without any harsh chemical fumes.
Here's how to put that lemon to work.
Cut a lemon in half and rub it directly over greasy spots. The natural acid cuts through grease and leaves a fresh scent. Wipe with a damp cloth afterward.
Why Lemon Juice Works So Well
The citric acid in lemons breaks down grease molecules, making them easier to wipe away. Unlike some commercial cleaners, lemon juice is gentle on most stovetop surfaces and won't leave behind a sticky residue. It also has antibacterial properties, so you're cleaning and sanitizing at the same time.
How To Use Lemon Juice On Your Stovetop
Start by squeezing a lemon into a small bowl and removing any seeds. Dip a soft cloth or sponge into the juice and apply it to the greasy areas. Let it sit for a minute or two to break down the grime, then wipe clean.
For stubborn spots, sprinkle a little baking soda on the lemon half and scrub gently. Rinse with a damp cloth and dry.
Tips For Best Results
Use fresh lemons for maximum acidity. Avoid using lemon juice on unsealed cast iron or aluminum surfaces, as the acid can cause discoloration. Always test on a small, hidden area first.
For a stronger degreasing solution, mix lemon juice with equal parts white vinegar.
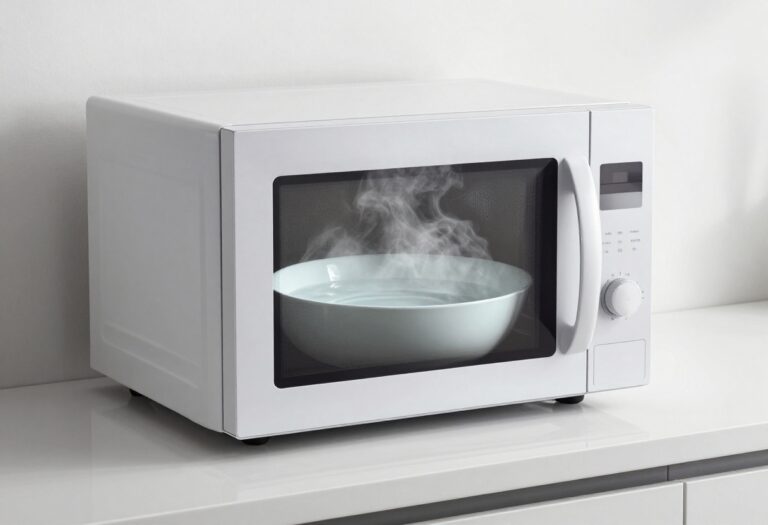
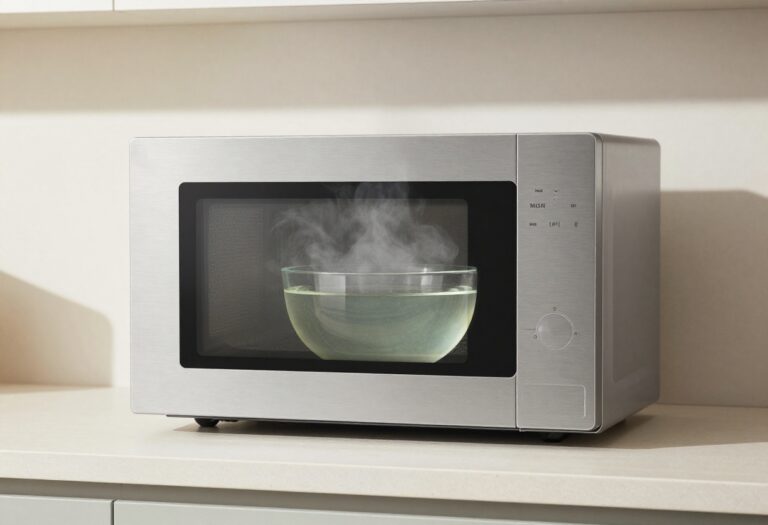
6. Use a Steam Cleaner for Deep Grime
If you've been scrubbing with elbow grease and still see stubborn residue, it's time to bring out the big guns. A handheld steam cleaner uses high-temperature steam to dissolve baked-on grease without any chemicals. The heat penetrates cracks and crevices, making it especially effective around burners and control knobs where grime hides.
Steam cleaning is a game-changer for deep grime. It's fast, chemical-free, and reaches places a sponge can't. Focus on the areas that get the most buildup: burner bases, grate supports, and the space between knobs.
The steam loosens grease so it wipes away easily with a microfiber cloth. Just be careful not to direct steam at electrical components or pilot lights.
Why Steam Works On Grease
Grease doesn't dissolve in water alone, but steam's heat breaks down its molecular structure. The high temperature (around 212°F) liquefies hardened grease, turning it into a runny liquid that you can wipe off. Plus, steam kills bacteria and sanitizes the surface without harsh fumes.
Steam Cleaning Burners And Grates
Remove grates and burner caps, then steam them directly. Hold the nozzle a few inches away and move in slow passes. For burner heads, aim steam into the holes to dislodge clogs.
Let the metal cool slightly, then wipe with a dry cloth. Repeat if needed – stubborn spots may require a second pass.
Safety Tips For Steam Cleaning
Always unplug the stove and let it cool before steaming. Avoid electrical parts like igniters, spark modules, and wiring. Use distilled water to prevent mineral buildup in the steamer.
Wear gloves to protect from hot steam and residue. After cleaning, dry all surfaces thoroughly to prevent rust.
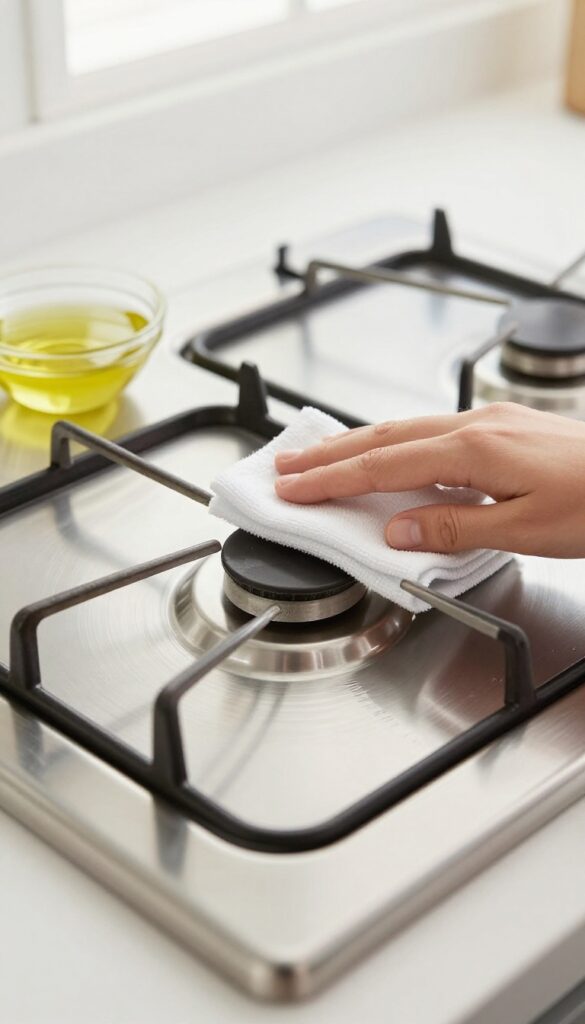
7. Wipe Down After Every Use
The easiest way to keep your gas stove looking great is to clean as you go. A quick post-cooking wipe-down takes less than a minute and stops grease from hardening into a stubborn mess. This simple habit can cut your deep-cleaning time in half.
Let the stovetop cool slightly, then grab a damp microfiber cloth. Microfiber traps grease and dirt without scratching the surface. Wipe the entire cooktop, including the area around the burners and knobs.
For stuck-on bits, a little dish soap on the cloth does the trick. Dry with a separate cloth to prevent water spots. That's it—your stove stays fresh, and you avoid the dreaded scrubbing session later.
Why Microfiber Works Best
Paper towels can leave lint and often just push grease around. Microfiber cloths have tiny fibers that grab oil and food particles, lifting them away instead of smearing. They're also reusable—just toss them in the wash.
Keep a dedicated stove-cleaning cloth under the sink so it's always handy.
The Right Timing Matters
Wipe while the stove is warm but not hot. If it's too hot, you risk burns or streaking. Too cold, and grease may have already started to set.
Aim for about 5 to 10 minutes after you turn off the burners. That sweet spot makes the job effortless.
Don't Forget The Knobs And Control Panel
Grease splatters love to collect around knobs and the control panel. Wipe these down too with a slightly damp cloth. For stubborn grime, use a cotton swab dipped in soapy water.
Keeping these areas clean prevents sticky buildup and keeps your stove looking polished.
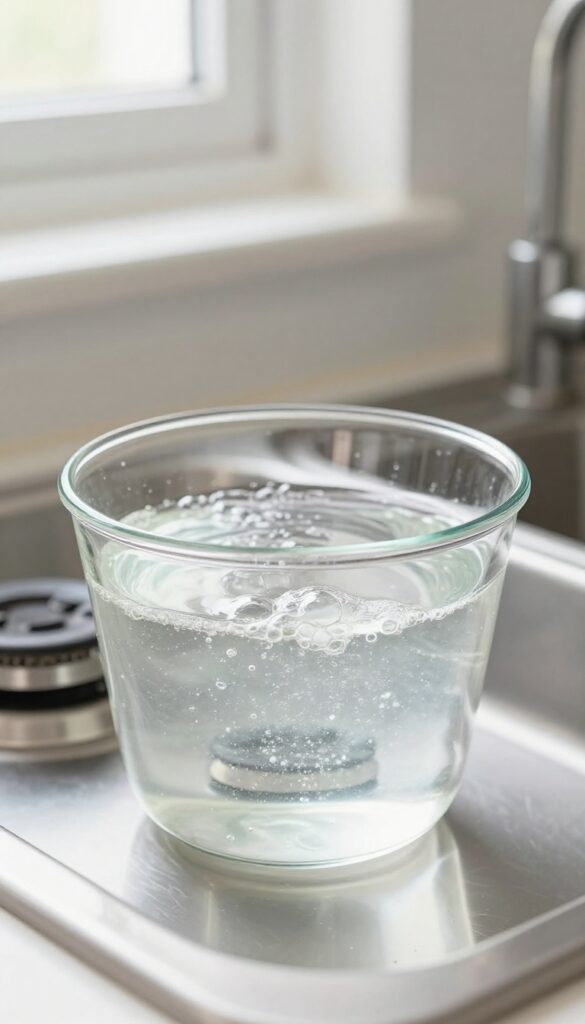
8. Clean Drip Pans with Ammonia
Drip pans catch spills and grease, but they can get caked with burnt-on grime. Scrubbing them by hand is tedious and often ineffective. Ammonia offers a chemical-free shortcut that does the hard work for you.
Set Up The Overnight Soak
Place your drip pans in a heavy-duty zip-top plastic bag. Pour in about a quarter cup of household ammonia, then seal the bag. Make sure the pans are spread out so the fumes can circulate.
Let the bag sit overnight in a well-ventilated area, away from pets and kids.
Rinse And Reveal Clean Pans
The next day, open the bag outside or near an open window. The fumes will be strong, so avoid inhaling them. Remove the pans and rinse thoroughly with hot water.
Most grease will have softened or dissolved. For any remaining residue, a quick wipe with a sponge should finish the job.
Safety And Alternatives
Never mix ammonia with bleach or other cleaners. If you're sensitive to strong odors, try this method in a sealed container with a lid instead of a bag. You can also use a commercial degreaser, but ammonia is cheaper and often more effective for baked-on grease.
9. Scrub Grates with a Dryer Sheet
Used dryer sheets are great for more than just softening laundry. The anti-static agents in them actually help loosen baked-on grease from stove grates. It's a simple trick that cuts through grime without harsh chemicals.
Grab a used dryer sheet and lightly wet it. Scrub the grates in a circular motion—the texture and anti-static properties work together to lift grease. For tough spots, let the sheet sit on the grime for a few minutes before scrubbing.
Rinse the grates with warm soapy water afterward to remove any residue. This method is especially effective on porcelain-coated grates, but it works on cast iron too (just dry them thoroughly to prevent rust).
Why Dryer Sheets Work
Dryer sheets contain softening agents and surfactants that break down grease. The anti-static properties reduce cling, so grime lifts off rather than sticking back. It's a gentle abrasive that won't scratch most finishes.
Best Practices For Best Results
Always use a used sheet—new ones are too waxy and may leave residue. Wet the sheet slightly to activate the cleaning agents. Scrub with the grain of the grate if it has a textured surface.
Rinse thoroughly and dry immediately to avoid water spots.
10. Use a Magic Eraser on Stubborn Stains
Sometimes gentle cleaners just don't cut it. When you're staring down a discolored patch or a crusty spot that won't budge, a melamine sponge—commonly known as a Magic Eraser—can be a game-changer. It works like a super-fine sandpaper, lifting stains without scratching most surfaces.
Just dampen the sponge and squeeze out excess water, then gently rub the stained area. You'll see the grime lift away almost instantly. No harsh chemicals needed, just a little water and some light pressure.
Magic Erasers are perfect for tackling those mysterious dark marks that appear on the stovetop after a high-heat cooking session. They're also great for cleaning around the burner caps and control knobs where grease tends to hide. The key is to use a light touch—too much pressure can damage the finish on some stoves.
Always test on a small, hidden area first, especially if your stove has a glossy or coated surface. And remember, melamine sponges are abrasive, so they're best reserved for tough spots rather than daily cleaning.
How To Use A Magic Eraser On Your Stove
Start by wetting the sponge until it's damp but not dripping. Squeeze out any excess water. Then, gently rub the stained area in small circular motions.
Watch the stain disappear as you go. For extra stubborn spots, let the sponge sit on the stain for a minute before rubbing. Rinse the area with a damp cloth afterward to remove any residue.
Where To Use It (and Where Not To)
Melamine sponges work well on ceramic glass cooktops, stainless steel, and enamel surfaces. Avoid using them on non-stick coatings, polished aluminum, or any surface with a matte finish, as they can cause dullness. Stick to the metal parts of your gas stove—like the burner caps and grates—and the smooth areas of the stovetop.
Safety And Storage Tips
Always wear gloves if you have sensitive skin, as the sponge can be mildly abrasive. Keep the sponge away from heat sources and never use it on a hot stove. After use, rinse the sponge thoroughly and let it air dry.
You can reuse it several times until it starts to crumble.
11. Remove Grease with Rubbing Alcohol
Rubbing alcohol isn't just for first aid kits—it's a surprisingly effective degreaser. The high alcohol content breaks down sticky grease on contact, and because it evaporates quickly, there's no need to rinse or worry about residue. It's especially handy for those greasy spots that seem to resist soap and water.
Dab a clean cloth with isopropyl alcohol (70% or higher works well) and gently wipe the greasy areas. You'll see the grime dissolve almost instantly. For tougher buildup, let the alcohol sit for a minute before wiping.
Always test on a small, hidden area first, especially if your stove has a painted or coated surface, to ensure it doesn't damage the finish.
Why Alcohol Works So Well
Isopropyl alcohol is a solvent that dissolves oils and greases on a molecular level. Unlike water-based cleaners, it doesn't just push grease around—it breaks it down so you can wipe it away effortlessly. Plus, its rapid evaporation means no streaks or dampness left behind.
Best Spots To Use This Method
This trick works wonders on stainless steel surfaces, control knobs, and the area around burner caps. It's also great for cleaning the glass top of a gas stove (if yours has one) without leaving smudges. Just avoid using it on painted or plastic parts unless you've tested it first.
Safety Tips When Using Rubbing Alcohol
Always work in a well-ventilated area because alcohol fumes can be strong. Keep it away from open flames—never use it near a lit burner or pilot light. Store the bottle out of reach of kids and pets, and don't mix it with bleach or other cleaners.
12. Protect the Stovetop with a Silicone Mat
Spills and splatters are inevitable when you're cooking, but they don't have to end up baked onto your burner grates. A silicone mat placed under your pots and pans acts as a shield, catching drips before they hit the stovetop. It's a simple, low-effort way to keep grease from turning into a crusty mess.
Silicone mats are heat-resistant, non-stick, and easy to clean. Just lay one over the burner area before you start cooking, and any overflow lands on the mat instead of your stove. After you're done, let it cool, then wipe it down or toss it in the dishwasher.
This one change can cut your deep-cleaning frequency in half.
Choosing The Right Mat
Look for mats specifically designed for gas stoves—they should have cutouts or slits for the burner flames to pass through. Avoid solid mats that block airflow, as they can affect flame performance. Measure your stovetop to ensure a good fit, and opt for mats that are at least 500°F heat-resistant.
Daily Use And Care
Use the mat every time you cook something that might splatter—frying, boiling, or simmering. After each use, wipe it with a damp cloth and mild soap. For stuck-on residue, soak it in warm soapy water for a few minutes.
Most silicone mats are dishwasher-safe, making cleanup effortless.
When To Replace
Over time, silicone mats can develop stains or a greasy film that doesn't wash off completely. If the mat becomes sticky or starts to smell, it's time for a new one. Typically, a good mat lasts 6 to 12 months with regular use.
Replace it sooner if you notice any melting or warping.
13. Clean Control Knobs with a Toothbrush
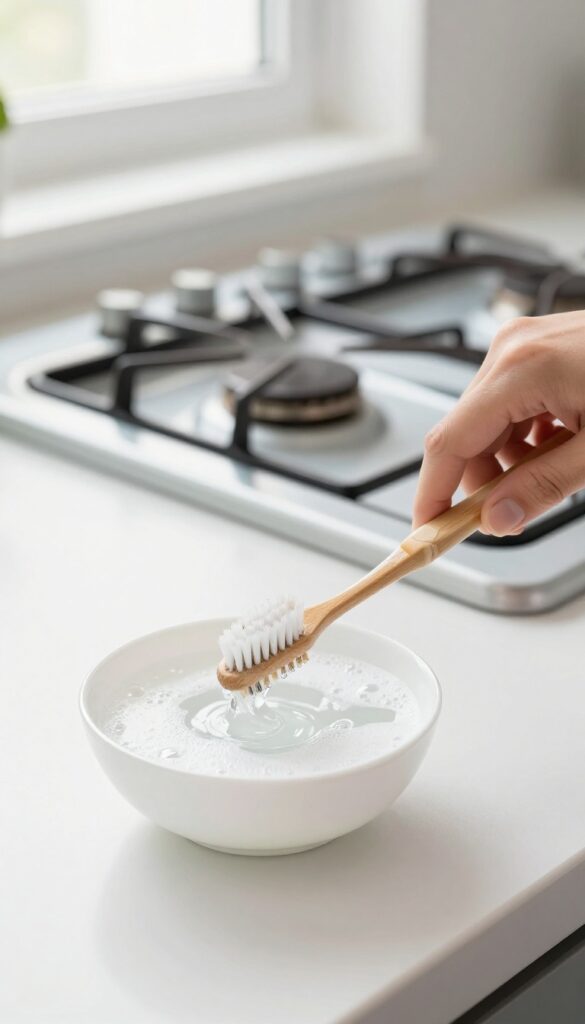
Control knobs collect more grime than you might think. Grease and food residue build up in the tiny crevices around the base and between the ridges, making them sticky and unpleasant to touch. A quick wipe with a cloth won't reach those hidden spots, so it's time to bring in a toothbrush.
Removing the knobs is the first step to a thorough clean. Most gas stove knobs pull straight off, though some may have a small set screw. Once they're off, you can scrub every surface without worrying about damaging the stove.
An old toothbrush with firm bristles works perfectly for this job.
Soapy Water Works Best
Dip the toothbrush in warm, soapy water and scrub the knobs vigorously. Focus on the grooves and the area around the shaft where grease tends to hide. For stubborn buildup, let the knobs soak in the soapy water for a few minutes before scrubbing.
Don't Forget The Stove Base
While the knobs are off, take a moment to clean the control panel area. Use the same toothbrush to scrub the spots where the knobs attach. Wipe away any loosened grime with a damp cloth.
This prevents residue from transferring back onto the clean knobs.
Dry Thoroughly Before Reattaching
After scrubbing, rinse the knobs with clean water and dry them completely with a soft towel. Any moisture left behind can seep into the knob's interior or cause corrosion over time. Give them a few minutes to air dry if needed, then snap them back into place.
14. Use a Commercial Degreaser for Heavy Build-Up
When your stove has gone weeks (or months) without a proper cleaning, a gentle soap and water routine just won't cut it. That's where a heavy-duty commercial degreaser steps in. Products like Simple Green, Krud Kutter, or Zep are formulated to dissolve tough, baked-on grease quickly.
They save you from hours of scrubbing and make the job feel almost effortless.
Spray the degreaser generously over the grates, burner caps, and any greasy surfaces. Let it sit for the time recommended on the label—usually five to ten minutes. The chemicals break down the grease so it wipes away easily.
Rinse thoroughly with warm water to remove all residue, then dry completely before reassembling. Always wear gloves and work in a well-ventilated area, as these products are strong.
Choose The Right Degreaser
Not all degreasers are created equal. Simple Green is a popular all-purpose cleaner that works well on moderate grease. For really stubborn build-up, Krud Kutter or Zep Heavy-Duty Degreaser are better choices.
If you prefer something more natural, look for citrus-based degreasers that are still tough on grease but gentler on your hands and the environment.
Application Tips For Best Results
Apply the degreaser to a cool stove—heat can cause the product to evaporate too quickly. Use a spray bottle to coat the surfaces evenly, paying extra attention to crevices and corners. Let it dwell for the full recommended time; don't rush this step.
Then scrub with a non-abrasive sponge or brush if needed, and rinse thoroughly. Any leftover residue can affect the taste of your food or cause discoloration.
Safety First: Ventilation And Gloves
Commercial degreasers contain strong chemicals that can irritate your skin and lungs. Open a window or turn on the range hood while you work. Wear rubber gloves to protect your hands, and avoid breathing in the fumes.
If you have a gas stove, make sure the gas is turned off and all burner knobs are in the off position before spraying.
15. Polish Stainless Steel with Olive Oil
A little olive oil goes a long way when it comes to stainless steel. After you've scrubbed and dried your stove's surfaces, a quick buff with oil removes water spots and fingerprints. It also leaves behind a subtle, protective sheen that makes future cleaning easier.
Olive oil works because it fills microscopic pores in the metal, creating a smooth, hydrophobic layer. This means grime and grease have a harder time sticking. Plus, it's non-toxic and already in your kitchen.
Just use a tiny amount—a few drops on a microfiber cloth is plenty. Buff in circular motions, then wipe away excess with a dry section of the cloth. The result is a streak-free, restaurant-quality shine.
Why Olive Oil Works So Well
Stainless steel is prone to smudges and water marks because of its porous surface at a microscopic level. Olive oil fills those tiny gaps, creating a barrier that repels moisture and fingerprints. It's also a natural polish that won't leave behind harmful residues, unlike some commercial sprays.
How To Apply It The Right Way
Start with a clean, dry surface—any leftover grime will get trapped under the oil. Put a drop or two of olive oil on a soft, lint-free cloth. Buff the stainless steel in small circles, covering the entire area.
Then, use a clean part of the cloth to wipe off any excess oil. You want a thin, even layer, not a greasy film.
When To Skip This Trick
Olive oil is great for flat surfaces like the stove top and backsplash, but avoid it near burner openings or control knobs where it could attract dust or become sticky. It's also not ideal for surfaces that get very hot, as the oil can smoke or leave a residue. Stick to cool areas only.
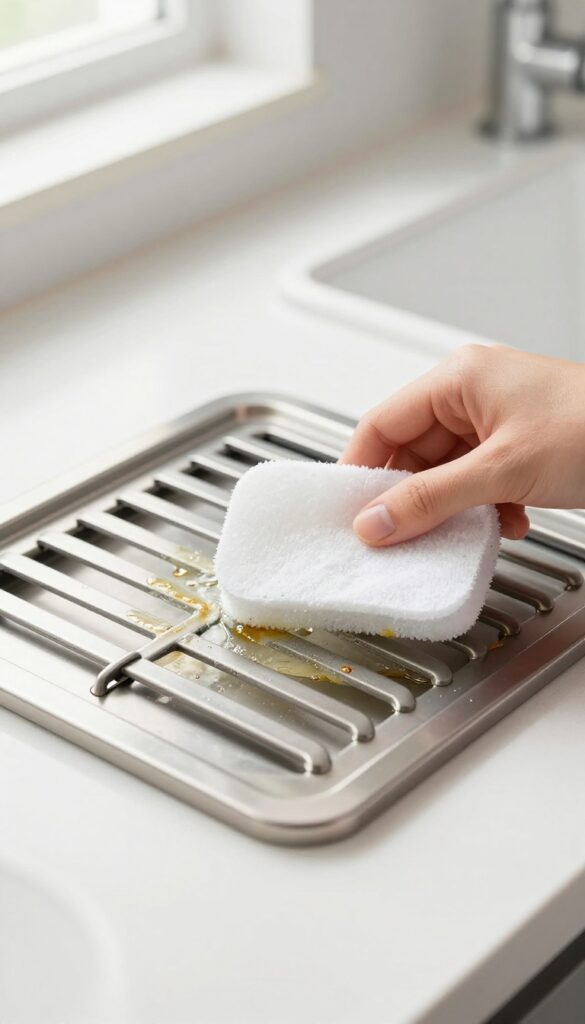
16. Clean Burner Bases with a Vacuum
Crumbs and debris love to hide around burner bases, and over time they can clog gas ports or create a fire hazard. A vacuum with a brush attachment makes quick work of these stubborn bits without any scrubbing. This simple step keeps your burners functioning properly and your stovetop looking tidy between deep cleans.
Grab your vacuum's brush attachment—the soft bristle type works best—and gently run it around each burner base. Focus on the crevices where crumbs tend to accumulate, especially near the gas outlets. Do this weekly or after any particularly messy cooking session to prevent buildup.
Why Vacuuming Works Better Than Wiping
Wiping with a cloth often pushes crumbs deeper into crevices or leaves behind residue. A vacuum sucks up dry debris without spreading it around, and the brush attachment loosens stuck-on particles. It's also faster than pulling out each burner for a deep clean.
Best Vacuum Attachments For Stove Cleaning
A narrow crevice tool reaches tight spaces between burners, while a soft brush attachment protects delicate surfaces. If your vacuum has a mini motorized brush, it can agitate stubborn crumbs. Avoid stiff bristles that might scratch your stove's finish.
When To Vacuum Vs. When To Deep Clean
Vacuuming is ideal for daily or weekly maintenance to remove loose debris. For baked-on grease or charred bits, you'll still need to remove the burners and soak them. Use the vacuum first to clear the area, then tackle stubborn grime with a degreaser.
17. Schedule a Monthly Deep Clean
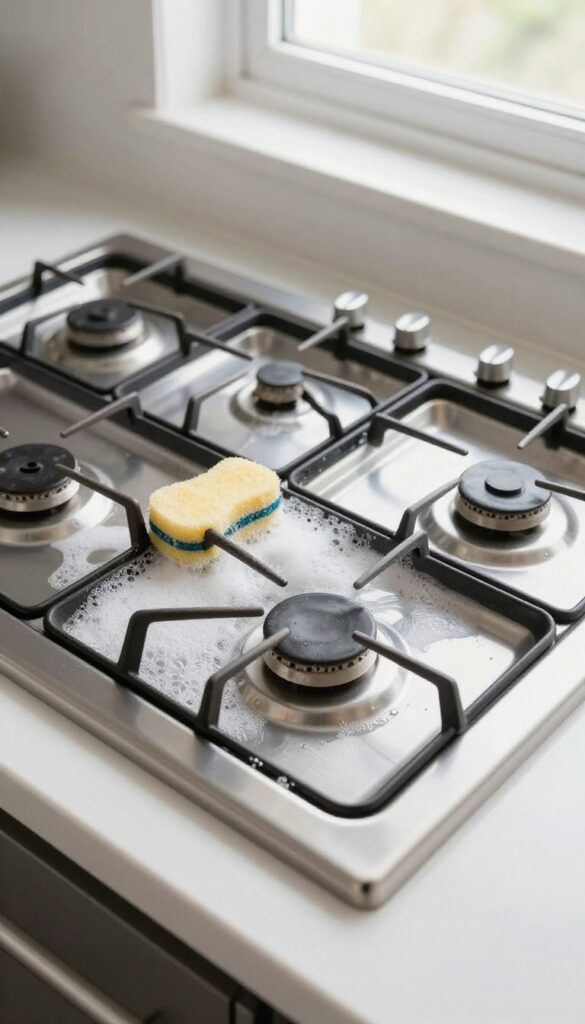
A quick wipe-down after cooking is great, but it won't tackle the grease that builds up over time. Setting aside one hour each month for a deep clean keeps your stove in top shape and prevents grime from becoming a stubborn, baked-on mess. Think of it as a reset for your stovetop—your future self will thank you.
Monthly deep cleaning doesn't have to be a chore. By making it a regular habit, you'll spend less time scrubbing and more time cooking. Here's how to make it efficient and effective.
Remove Everything First
Take off all removable parts: burner caps, grates, drip pans, and knobs. Soak them in hot, soapy water while you work on the stove surface. This gives the grease time to loosen, making scrubbing much easier later.
Focus On Hidden Areas
Use a toothbrush or small brush to clean around burner bases, gas ports, and crevices where crumbs hide. A vacuum with a crevice tool can suck up loose debris before you wipe down. Don't forget the back edge and underneath the control panel.
Finish With A Protective Coat
After everything is dry, apply a thin layer of cooking oil to stainless steel surfaces to repel future smudges. For enamel surfaces, a glass cleaner can leave a streak-free shine that resists new spills.
FAQ
Can I use bleach to clean my gas stove?
Bleach is not recommended as it can damage the finish and leave harmful residues. Stick to mild dish soap, vinegar, or baking soda for safe cleaning.
How often should I clean my gas stove burners?
Wipe down after each use and do a deep clean of burners and grates at least once a month to prevent grease buildup and ensure even flames.
Why are my gas stove flames yellow instead of blue?
Yellow flames often indicate clogged burner holes or improper air mixture. Clean the burner holes with a toothpick and ensure the burner cap is properly seated.
Can I put gas stove grates in the dishwasher?
Check the manufacturer's instructions. Some grates are dishwasher-safe, but others may discolor or rust. Hand washing is generally safer for longevity.
What is the best way to remove burnt-on food from a gas stove?
Apply a baking soda paste and let it sit for 15 minutes, then scrub with a non-abrasive sponge. For stubborn spots, use a steam cleaner or a Magic Eraser.
Conclusion
Keeping your gas stove clean doesn't have to be a weekend battle. With these 17 tips, you can tackle grease, burnt-on food, and tricky burner parts using simple household items and a little know-how. Start with the grates or the burners—whatever feels most manageable—and build a routine that sticks.
Your stove will look better, perform more efficiently, and last longer with regular care. Pick a couple of tips to try this week, and you'll see how small efforts add up to a noticeably cleaner kitchen.