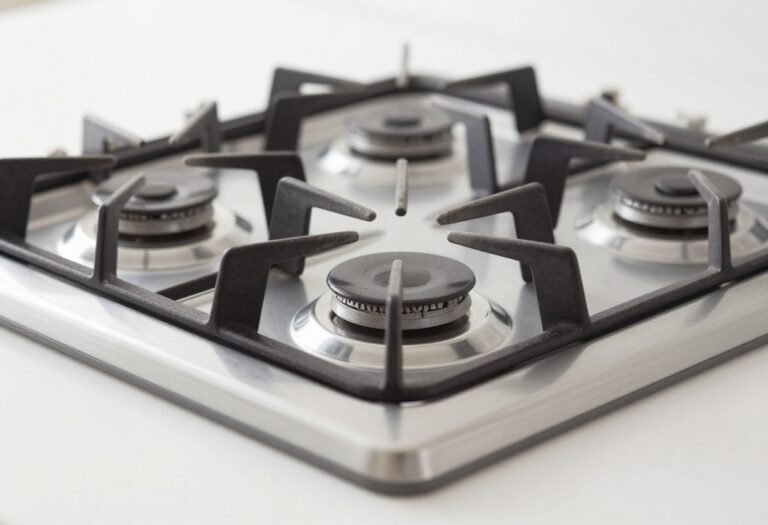
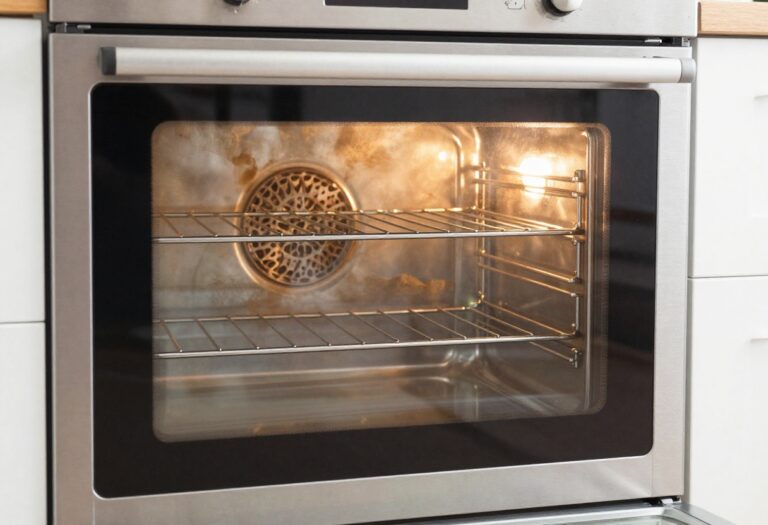
13 Cleaning Stove Tips for Grease and Burnt Food
Grease and burnt-on food can turn your stove into a sticky, stubborn mess that feels impossible to clean. You don't need expensive specialty sprays or hours of scrubbing to get it looking new again.
Most of the solutions are already sitting in your pantry or under the sink. From baking soda pastes to steam tricks, these 13 tips target every type of grime without breaking your budget.
Some methods work in minutes, while others do the hard work overnight. Pick the ones that fit your schedule and watch that baked-on grease disappear.
1. The Baking Soda and Vinegar Paste
When grease and burnt food have baked into a hard, dark crust, you need something that cuts through without damaging the surface. A simple paste made from baking soda and vinegar does exactly that. It's cheap, non-toxic, and surprisingly effective on even the toughest spots.
Mix three parts baking soda with one part vinegar until it forms a thick paste. Spread it over the burnt areas and let it sit for 15 minutes. The chemical reaction helps lift carbonized food.
Then scrub gently with a soft sponge or cloth. For extra-stubborn spots, let it sit longer or add a little more vinegar to reactivate the fizz.
Why This Combo Works So Well
Baking soda is a mild abrasive that physically scrubs away grime without scratching. Vinegar is a weak acid that dissolves grease and reacts with baking soda to create bubbles that help dislodge stuck-on food. Together, they form a powerful but gentle cleaning team.
Best Surfaces To Use It On
This paste works great on ceramic, glass, and enamel stovetops. Avoid using it on aluminum or unsealed cast iron, as the acidity can damage the finish. Always test on a small hidden area first if you're unsure.
Pro Tips For Better Results
For extra tough burnt-on food, let the paste sit for up to 30 minutes. If it dries out, spritz a little vinegar on top to reactivate. Use a non-scratch scrub pad or a soft brush to avoid leaving swirl marks on your stove.
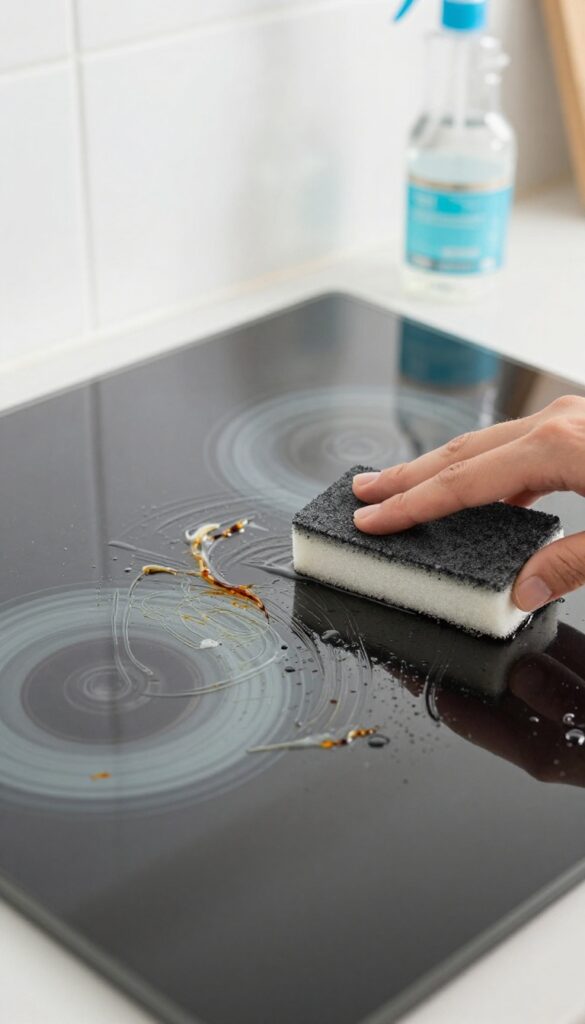
2. Degrease with Dish Soap and Hot Water Soak
Stove grates and burner caps are magnets for baked-on grease and food splatter. Scrubbing them in place is tedious and often misses the nooks and crannies. A hot soapy soak does the heavy lifting for you, breaking down grease so you can wipe it away with almost no effort.
Removing the grates and burner caps is the first step. Fill your sink or a large basin with the hottest tap water you can stand and add a generous squirt of dish soap. Submerge the parts completely and let them soak for at least 20 minutes.
For extra-stubborn buildup, let them sit for an hour or even overnight. The hot water loosens the grease, and the soap helps lift it away from the metal. After soaking, scrub gently with a non-abrasive sponge or a soft brush.
Rinse thoroughly and dry before putting them back on the stove.
Why This Method Works So Well
Heat is a natural degreaser. Hot water softens hardened grease, making it much easier to remove without harsh chemicals. Dish soap contains surfactants that surround and lift grease molecules, so they rinse away cleanly.
Together, they tackle the kind of sticky residue that scrubbing alone often leaves behind.
What To Do For Really Stubborn Spots
If a 20-minute soak isn't enough, don't rush. Let the parts sit longer—an hour or even overnight works wonders. For burnt-on bits that resist, make a paste of baking soda and a little water, apply it to the spots, and let it sit for 10 minutes before scrubbing.
Rinse well afterward.
Drying And Reassembling
After rinsing, dry each piece completely with a clean towel. Moisture left on the metal can cause rust or water spots over time. Make sure the burner caps and grates are fully dry before placing them back on the stove to avoid any issues with the burners.
3. Use a Pumice Stone on Ceramic Cooktops
If you have a glass or ceramic stove, you know how burnt-on spills can leave a rough, stubborn crust. A pumice stone is a surprisingly effective tool for this job. It's a natural volcanic rock that gently abrades the residue without scratching the surface when used correctly.
The key is to keep the cooktop wet and use light, circular motions. The stone wears down slightly as you work, exposing fresh abrasive material. This method works best on baked-on food and light grease stains.
Avoid using it on painted or coated surfaces.
Prep The Surface
Start by wiping away any loose debris. Spray the cooktop with water or a glass cleaner so it's thoroughly wet. The water acts as a lubricant and helps the pumice stone glide smoothly.
Buff Gently
Dip the pumice stone in water and rub it over the burnt area with light pressure. Let the stone do the work—don't press hard. You'll see the residue lift off as a fine paste.
Wipe away the paste with a damp cloth and check your progress.
Finish And Protect
Once the cooktop is clean, rinse it with water and dry it with a soft towel. For extra shine, apply a ceramic cooktop polish or a tiny amount of vinegar. This also helps prevent future sticking.
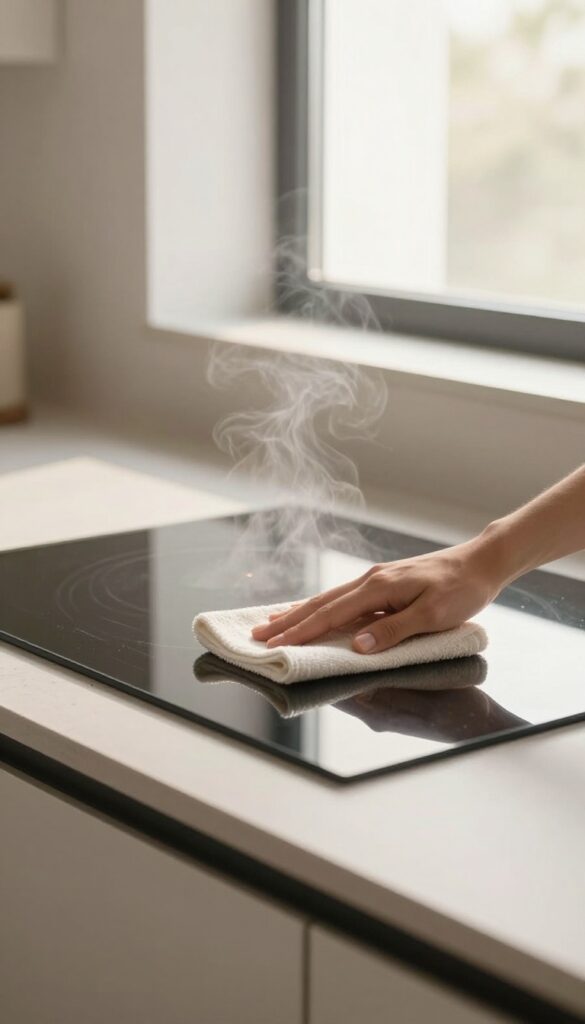
4. Steam Clean with a Damp Towel

Steam is one of the simplest ways to loosen burnt-on food without scrubbing. A damp towel and a warm burner create gentle vapor that softens crusty residue in minutes. This method works especially well on ceramic, glass, and sealed burner stoves where you can't use abrasive tools.
Place a damp microfiber cloth on a warm (not hot) burner for a few minutes. The steam softens dried-on food, making it easy to wipe away. This technique is safe for most stove surfaces and requires no chemicals.
Why Steam Works So Well
Heat and moisture combine to rehydrate burnt food particles, breaking their bond with the stove surface. Unlike scrubbing, steam reaches into tiny crevices without scratching. It's also gentle on your hands and doesn't leave chemical residue.
Step-by-step Guide
Turn the burner to low heat. Wet a clean microfiber cloth with water and wring it out so it's damp, not dripping. Lay it flat over the soiled area and let it sit for 3–5 minutes.
Lift the cloth and wipe away the softened grime. Repeat if needed.
Safety Tips To Remember
Never use this method on a burner that's still hot from cooking—wait until it's warm to the touch. Keep the cloth away from open flames or electric coils that could scorch it. Use only microfiber or cotton; synthetic fabrics might melt.
5. Lemon and Salt for Stainless Steel
Stainless steel stoves look sleek, but they show every fingerprint, grease smear, and burnt-on splatter. Commercial stainless steel cleaners work, but they often leave streaks or a chemical smell. A simple lemon and salt scrub cuts through grease naturally and leaves a streak-free shine.
Cut a lemon in half and dip the cut side into a small dish of table salt. Scrub the stainless steel surface using firm circular motions, focusing on greasy or burnt areas. The citric acid breaks down grease while the salt acts as a gentle abrasive.
Rinse with a damp cloth and buff dry with a soft towel for a bright, polished finish.
Why It Works So Well
Lemon juice contains citric acid, a natural degreaser that dissolves sticky residue without harsh chemicals. Salt provides just enough grit to lift burnt-on food without scratching stainless steel. Together, they create a paste-like scrub that's effective yet gentle enough for daily use.
Best Areas To Use This On
This method works great on stainless steel stove tops, backsplashes, and hoods. It's also safe for stainless steel pots and pans that have burnt-on stains. Avoid using it on aluminum, copper, or non-stick surfaces, as the acid can damage those materials.
Pro Tips For Best Results
Use a fresh lemon half for each section to keep the acid active. For tough burnt spots, let the lemon-salt mixture sit for 5 minutes before scrubbing. Always rinse thoroughly and dry immediately to prevent water spots.
If you don't have a lemon, white vinegar mixed with baking soda works as a backup.
6. Bar Keepers Friend for Tough Stains
Burnt-on food that laughs at regular scrubbing needs a heavier hitter. Bar Keepers Friend is a powdered cleaner that works like magic on those dark, crusty spots. It's cheap, easy to find, and surprisingly gentle on most surfaces when used correctly.
This powdered cleaner works wonders on burnt-on food. Make a paste with water, apply to stains, let it sit for a minute, then scrub and rinse.
How To Make The Paste
Mix a tablespoon of Bar Keepers Friend with just enough water to form a thick paste. It should be spreadable but not runny. Use an old spoon or a small spatula to stir it together right in a bowl.
Where To Apply It
Focus on the worst spots on your stove top—those dark rings around burners or the baked-on drips on the back. Spread the paste over each stain in a thin, even layer. Let it sit for about a minute.
Don't let it dry completely.
Scrubbing And Rinsing Tips
Use a soft sponge or a non-abrasive scrub pad to work the paste into the stain. You'll see the grime lift almost immediately. Rinse thoroughly with water and wipe dry.
Repeat if needed for really stubborn layers.
7. Razor Blade Scraper for Glass Tops
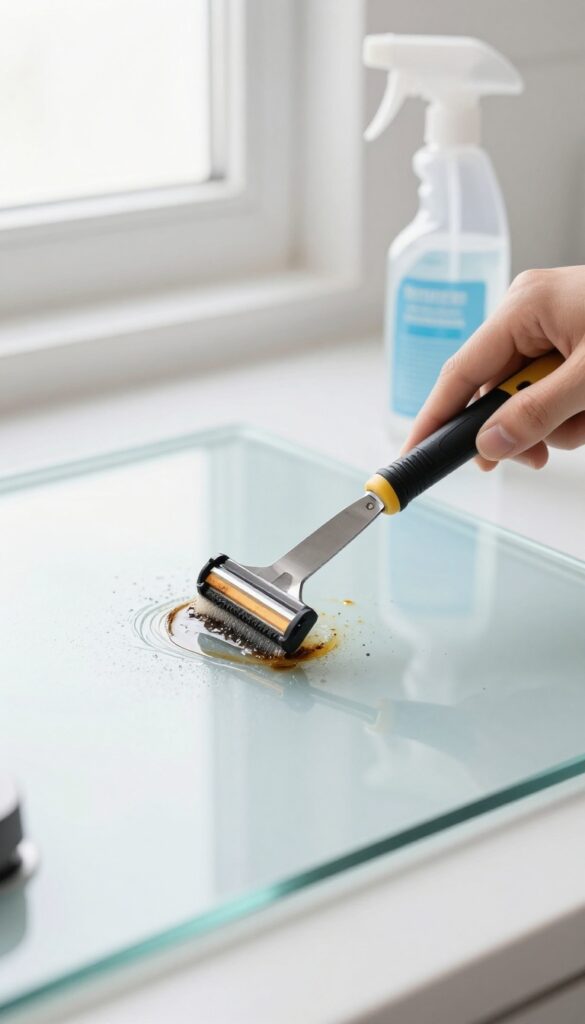
Glass cooktops are sleek, but they show every bit of burnt-on food. A razor blade scraper is one of the fastest ways to lift that crusty residue without harsh chemicals. The trick is using it correctly to avoid scratching the surface.
A flat razor blade scraper works wonders on glass stovetops when used with a lubricant. Hold the blade at a 45-degree angle and gently push it across the burnt area. The angle prevents gouging, and the lubricant (like glass cleaner or a dedicated cooktop cleaner) reduces friction.
Never use a dry blade—it can leave fine scratches. This method is ideal for tough, baked-on spills that resist scrubbing. For best results, apply the cleaner first, let it sit for a minute, then scrape.
Wipe away residue with a damp cloth afterward.
Choose The Right Blade
Use a single-edge razor blade designed for cooktops. Avoid utility knife blades—they're thicker and can scratch. Look for blades with a protective coating or those sold specifically for glass stove cleaning.
Replace blades often; a dull blade is more likely to scratch.
Lubrication Is Key
Always spray the surface with a cleaner or soapy water before scraping. The liquid acts as a cushion, allowing the blade to glide over the glass. Never scrape a dry stove—this is the number one cause of scratches.
A mixture of water and dish soap works in a pinch.
Technique Matters
Hold the scraper at a 45-degree angle to the glass. Use short, gentle strokes, pushing away from you. Don't apply too much pressure; let the blade do the work.
For circular burnt spots, scrape from the edges inward. After scraping, wipe the area with a clean cloth to remove any debris.
When To Avoid This Method
Skip the razor blade on textured or ceramic glass surfaces that aren't perfectly flat. Also avoid it on painted or coated stoves. If you're unsure, test in an inconspicuous spot first.
For everyday light spills, a soft sponge is safer.
8. Ammonia Fume Trick for Baked-On Grease
When scrubbing and soaking just aren't cutting it, the ammonia fume trick is a game-changer for those grates and drip pans that look like they've been through a grease fire. This method uses the power of ammonia vapors to break down the toughest baked-on residue without any elbow grease. Just a little patience and a sealed bag are all you need.
This trick works because ammonia fumes are alkaline and react with the fatty acids in grease, turning them into a soap-like substance that rinses away easily. It's especially effective for oven grates, burner caps, and any metal parts that have layers of carbonized grime. The key is to let the fumes do the work overnight—no scrubbing required.
What You'll Need
Gather a large, heavy-duty trash bag (or a sealable plastic container big enough for your grates), a small bowl, and regular household ammonia. Make sure the bag or container is airtight so the fumes don't escape. You'll also want to do this in a well-ventilated area or outdoors, as ammonia fumes are strong.
Step-by-step Instructions
Place your greasy grates inside the bag. Pour about 1/2 cup of ammonia into the small bowl and set it in the bag next to the grates, being careful not to spill. Seal the bag tightly and let it sit overnight, or for at least 8 hours.
The next morning, open the bag (again, in a ventilated area) and remove the grates. Rinse them thoroughly with warm water and a mild dish soap. You'll see the grease slide right off.
Safety Precautions
Never mix ammonia with bleach or any other cleaners, as this can create toxic fumes. Wear gloves and avoid inhaling the fumes directly. Keep the bag away from children and pets.
After rinsing, wash the grates with soapy water to remove any ammonia residue before putting them back on the stove.
9. Hydrogen Peroxide and Baking Soda
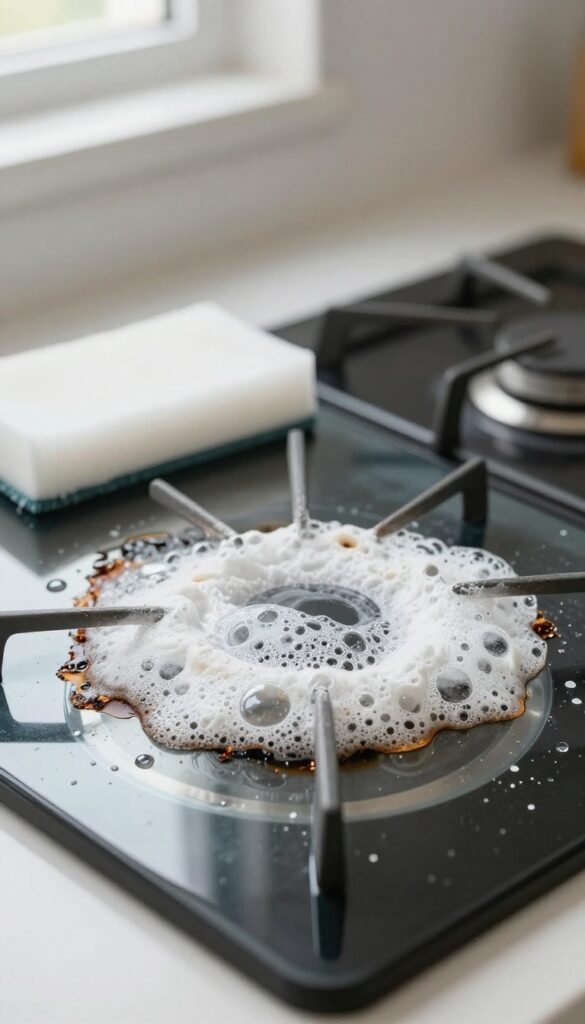
When burnt-on spills have dried into a hard, crusty layer, regular scrubbing just pushes the mess around. Hydrogen peroxide and baking soda create a fizzy reaction that lifts grime from below, making it easy to wipe away. This combo works especially well on glass cooktops and ceramic stovetops where you can see every bit of residue.
Sprinkle a generous layer of baking soda over the burnt area, covering it completely. Pour or spray hydrogen peroxide (3% solution) directly onto the baking soda until it forms a thick paste. Let it sit and fizz for about 10 minutes.
The bubbling action helps break down the burnt-on food. Then scrub gently with a non-abrasive sponge or soft brush. Wipe clean with a damp cloth.
For stubborn spots, let the paste sit longer—up to 30 minutes—before scrubbing.
Why This Combo Works
Baking soda is a mild abrasive that gently scrubs without scratching, while hydrogen peroxide acts as an oxidizing agent that softens and lifts burnt residue. When mixed, they release oxygen bubbles that help dislodge grime from tiny crevices. This chemical reaction is safe for most stovetop surfaces, including glass, ceramic, and enamel.
Best For Dried-on Spills
This method is ideal for spills that have baked on over multiple cooking sessions—like caramelized sugar, dried sauce, or burnt milk. It's less effective on fresh spills, which are easier to wipe with soap and water. For extra tough spots, cover the paste with plastic wrap to keep it from drying out and let it sit overnight.
Safety Notes
Always test on a small hidden area first, especially on coated or colored surfaces. Avoid using hydrogen peroxide on aluminum or copper, as it can cause discoloration. Rinse thoroughly after cleaning to remove any residue, and dry the surface to prevent streaks.
10. Magic Eraser for Everyday Grime
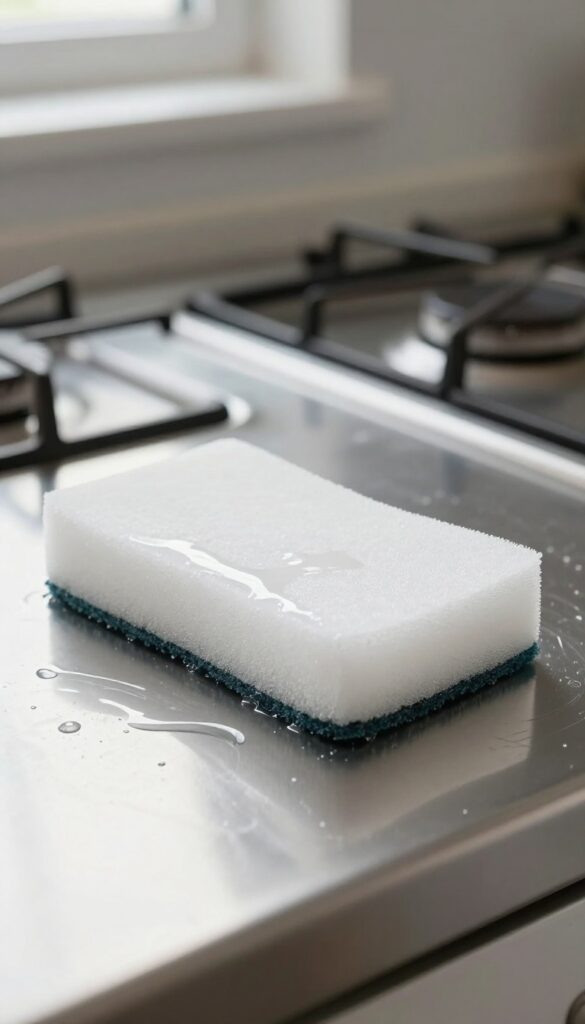
Not every stove mess needs a heavy-duty paste or a chemical soak. For the daily buildup of light grease, fingerprints, and splatters, a simple damp melamine sponge—often sold as a Magic Eraser—works like a charm. It's quick, requires no extra products, and leaves surfaces looking fresh without much effort.
A Magic Eraser is essentially a very fine abrasive sponge that lifts grime with just water. It's perfect for stainless steel, ceramic, and enamel stove tops, but you should use it gently to avoid dulling glossy finishes. Always test on a small hidden area first, and never use it on non-stick coatings or delicate glass.
How It Works
The sponge's micro-abrasive texture acts like super-fine sandpaper, physically lifting dirt and grease without the need for chemical cleaners. Just wet it, squeeze out excess water, and gently wipe the surface. The grime comes off with minimal pressure, and the sponge breaks down as you use it.
Best Uses On A Stove
Magic Erasers excel on smooth cooktops, stainless steel backsplashes, and control knobs. They remove fingerprint smudges, light oil splatters, and dried food bits that haven't baked on too hard. For burnt-on crust, you'll still want a stronger method, but for everyday tidying, this is your fastest tool.
What To Avoid
Skip the Magic Eraser on matte finishes, painted surfaces, and non-stick coatings—it can scratch or wear them down. Also avoid using it on hot surfaces; always let the stove cool completely. And because it's abrasive, don't scrub hard on glossy stainless steel; a light touch is all you need.
11. Boil Vinegar Water in a Pot
Steam is a powerful, chemical-free way to loosen baked-on grease and burnt food from your stove top. The acidity of vinegar breaks down grime while the steam reaches into crevices that scrubbing alone can't touch. This method works especially well for gas burners and the area around them.
Fill a large pot with equal parts water and white vinegar—about 2 cups each works for most stoves. Place it on the burner you want to clean and bring it to a rolling boil. Let it boil for 5 to 10 minutes, allowing the steam to billow across the stove surface.
The heat and acid combination softens grease and burnt residue, making it easy to wipe away with a sponge or cloth once the burner cools down.
Why Vinegar Steam Works
The acetic acid in vinegar dissolves the bonds in grease and burnt food, while the steam carries that acid into tight spaces around burner caps, grates, and drip pans. Unlike harsh chemicals, vinegar is safe for most stove surfaces and won't leave toxic fumes behind.
Best Practices For Best Results
Use a pot wide enough to cover multiple burners if possible. After boiling, let the stove cool for a few minutes, then wipe with a damp cloth. For stubborn spots, dip a sponge in the hot vinegar water and scrub gently.
Avoid using this method on sealed burners or electric coils unless the manufacturer approves.
When To Skip This Method
Do not boil vinegar on a glass cooktop—the heat can damage the surface. Also avoid if your stove has sensitive electronic controls nearby, as steam might seep in. Stick to this trick for gas burners and standard electric coils.
12. Toothbrush for Crevices and Knobs
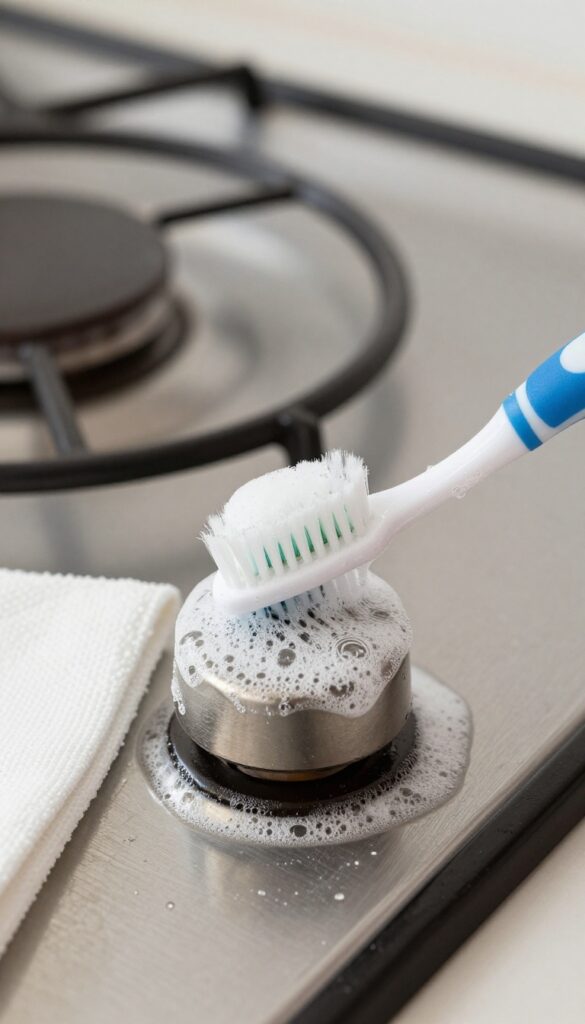
Stove knobs, burner bases, and control panels are full of tiny crevices where grease hides. A regular sponge can't reach those narrow gaps, and a cloth just pushes grime around. That's where an old toothbrush comes in handy.
An old toothbrush dipped in soapy water reaches tight spots around knobs, burner bases, and control panels. It's perfect for detailed cleaning.
Why A Toothbrush Works
The small head and stiff bristles let you scrub into grooves and around raised edges without scratching surfaces. It's especially good for the area under and around knobs, where grease builds up over time.
How To Use It
Dip the toothbrush in warm, soapy water or a mixture of vinegar and water. Scrub gently in circular motions, then wipe away loosened grime with a damp cloth. For stubborn buildup, let the soap sit for a minute before scrubbing.
Don't Forget The Knobs Themselves
If your knobs are removable, pop them off and soak them in hot, soapy water. Use the toothbrush to clean the stem underneath, then scrub the knobs themselves. Rinse and dry before reattaching.
13. Preventative Wipe-Down After Each Use
A quick wipe with a damp cloth after cooking prevents grease from baking on. This habit cuts down on deep-cleaning frequency and keeps your stove looking good. It's the simplest tip on this list, but it makes the biggest difference over time.
Why It Works
Grease and food residue are easiest to remove when they're still warm and wet. Once they cool and harden, they bond to the surface and require more effort. A 30-second wipe saves you from scrubbing later.
What To Use
A soft microfiber cloth and warm water are usually enough. For stubborn spots, add a drop of dish soap. Avoid abrasive sponges that can scratch the surface, especially on glass or ceramic stoves.
Make It A Habit
Keep a dedicated cloth near the stove so it's easy to grab. Wipe down the cooktop, knobs, and any splattered areas right after turning off the heat. It becomes second nature after a few days.
FAQ
Can I use bleach to clean my stove?
Bleach is not recommended for most stoves as it can damage finishes and is harsh on skin. Stick to mild abrasives like baking soda or gentle cleaners.
How often should I deep clean my stove?
A deep clean every 2-4 weeks is ideal, depending on usage. Daily wipe-downs help reduce the need for heavy scrubbing.
Will baking soda scratch my glass cooktop?
Baking soda is mildly abrasive but safe for glass when used with water. Avoid scrubbing with too much pressure, and always rinse thoroughly.
What's the best way to clean stove grates?
Soak grates in hot soapy water or use the ammonia bag method. For cast iron, avoid soaking; instead, scrub with a stiff brush and dry immediately.
How do I remove burnt sugar from a ceramic stove?
Let the stove cool completely, then apply a baking soda paste or use a razor scraper. Sugar hardens quickly, so act fast after spills.
Conclusion
Grease and burnt food don't stand a chance once you've got these 13 tips in your cleaning toolkit. Most methods rely on everyday items like baking soda or vinegar, so you can start right away without a special trip to the store. Pick the tip that matches your stove's biggest trouble spot and give it a try.
A little elbow grease and the right technique will have your stove looking like new. Keep at it, and future cleanings will get easier every time.