25 Kitchen Cleaning Tips for a Cleaner Cooking Space
A clean kitchen doesn't require a cabinet full of specialty sprays or hours of scrubbing. Most messes can be handled with items you already have at home and a bit of smart strategy.
Whether you're dealing with greasy stovetops, cloudy glassware, or a smelly sink, small changes in your routine can make a big difference. The key is knowing which methods actually work without wasting time or money.
These 25 tips focus on real-world solutions that respect your budget and effort. No fluff, no gimmicks—just practical advice for a cleaner, more enjoyable cooking space.
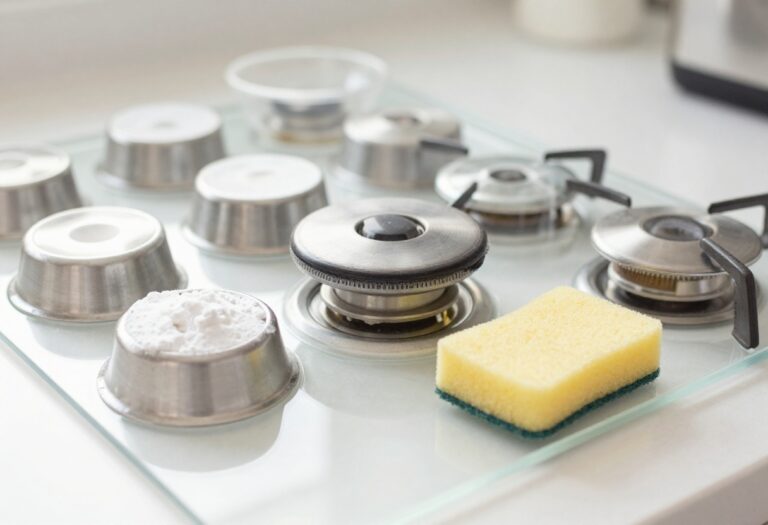
1. Degrease Stovetop Grates with Dishwasher Tablets
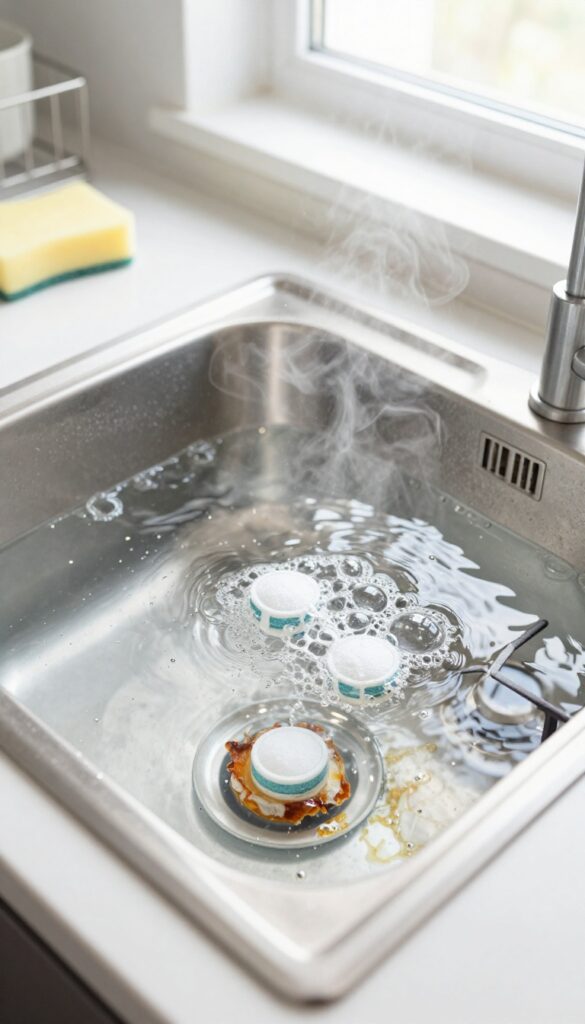
Gas stove grates accumulate baked-on grease that resists regular scrubbing. Instead of reaching for harsh chemicals or steel wool, try a simple soak with dishwasher tablets. The enzymes and surfactants in the tablets break down grease without damaging the metal finish.
Dishwasher tablets are designed to dissolve tough food residue, making them perfect for greasy grates. Drop the grates into a sink or large basin filled with hot water and two dishwasher tablets. Let them soak for 30 minutes, then rinse with clean water.
The grease will slide off with minimal effort. This method works on both cast iron and stainless steel grates, though you should avoid soaking enamel-coated grates for too long.
Why Dishwasher Tablets Work So Well
Dishwasher tablets contain powerful degreasers like surfactants and enzymes that target protein and fat molecules. When dissolved in hot water, they create an active cleaning solution that penetrates baked-on grease. Unlike dish soap, which mainly lifts surface grease, these tablets break down the chemical bonds in tough residue.
Step-by-step Soaking Process
Fill your sink with the hottest tap water available. Drop in two dishwasher tablets and stir until mostly dissolved. Submerge the grates completely, ensuring no air pockets.
Let them sit for 30 minutes—no longer, as prolonged soaking may dull some finishes. After soaking, lift the grates out and rinse under running water. Use a soft sponge to remove any remaining bits, then dry thoroughly before putting them back on the stove.
Tips For Extra Stubborn Grease
If your grates have years of buildup, add a third tablet or extend the soak to 45 minutes. For localized tough spots, make a paste with a crushed tablet and a little water, apply it directly, and let it sit for 10 minutes before scrubbing gently. Avoid using abrasive pads, as they can scratch the surface.
After cleaning, apply a thin layer of cooking oil to cast iron grates to prevent rust.
2. Use a Pumice Stone on Glass Cooktops
Glass cooktops look sleek, but they show every bit of burnt-on food. That crusty residue from a boil-over or a spilled sauce can feel impossible to remove without scratching the surface. A pumice stone offers a surprisingly simple solution—just wet it and rub gently.
Why Pumice Works
Pumice is a lightweight volcanic rock with abrasive properties. When wet, it becomes gentle enough to lift burnt-on gunk without damaging the glass. The key is to keep the stone and the cooktop wet—dry friction can cause scratches.
How To Use It Safely
Start by wetting both the pumice stone and the cooktop surface. Rub the stone in a circular motion over the burnt area, applying light pressure. Rinse and check your progress frequently.
Once the residue is gone, wipe the area clean with a damp cloth and dry it.
What To Avoid
Never use a dry pumice stone—it will scratch. Also, avoid using it on ceramic or induction cooktops unless the manufacturer approves. Stick to glass cooktops only, and always test on a small hidden spot first.
3. Clean the Microwave with Lemon Steam
Microwave messes don't have to be a headache. A quick steam with lemon water loosens stuck-on food and deodorizes in one go. It's a simple trick that makes wiping down the interior effortless.
Why It Works
The steam created by heating water softens dried food particles, making them easy to wipe away. Lemon adds a natural fresh scent and helps cut through grease without harsh chemicals.
Step-by-step
Fill a microwave-safe bowl with 1 cup of water. Add a few lemon slices or a tablespoon of lemon juice. Microwave on high for 3 to 5 minutes until the door is steamy.
Let it sit for 2 minutes, then carefully remove the bowl. Wipe the interior with a damp cloth.
Extra Tips
For stubborn spots, leave the bowl inside for a few extra minutes. You can also use vinegar instead of lemon if you prefer. Just avoid metal or foil in the microwave.
4. Wipe Down the Fridge Gasket with Toothpaste
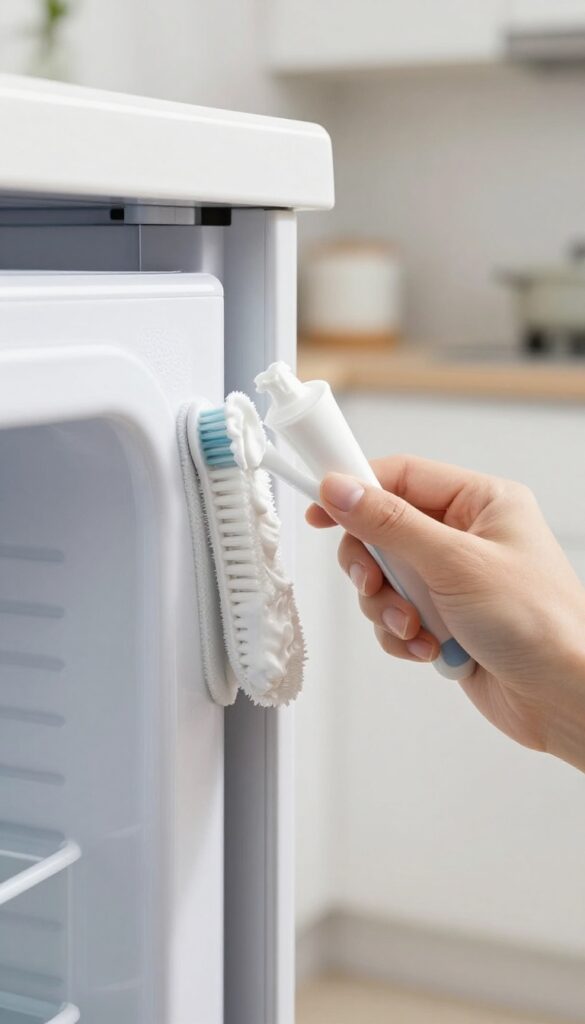
The rubber gasket around your fridge door is a magnet for grime, mold, and sticky residue. Over time, this buildup can compromise the seal, making your fridge work harder and increasing your energy bill. A simple tube of white toothpaste can fix that without harsh chemicals.
Toothpaste contains mild abrasives and cleaning agents that break down mildew and grime without damaging the rubber. Apply a pea-sized amount to an old toothbrush and scrub the gasket thoroughly. Wipe away the residue with a damp cloth, and you'll notice a cleaner seal and a fresher smell.
Why Toothpaste Works
White toothpaste (not gel) has fine abrasives that gently scrub away stuck-on dirt and mildew. It also contains mild detergents that cut through grease, leaving the rubber clean and flexible. Unlike bleach, it won't dry out or crack the gasket over time.
Step-by-step Cleaning
Mix a small amount of toothpaste with a little water to create a paste. Dip an old toothbrush into the mixture and scrub the gasket in a circular motion, focusing on crevices where mold hides. Let it sit for a minute, then wipe clean with a damp cloth.
Dry with a soft towel to prevent moisture buildup.
How Often To Do This
Aim to clean the gasket every three to four months, or whenever you notice dark spots or a musty odor. Regular maintenance keeps the seal tight and prevents energy loss. If you see heavy mold, repeat the process or use a diluted vinegar solution afterward.
5. Descale the Coffee Maker with Vinegar
If your morning coffee has started tasting bitter or flat, mineral buildup inside your coffee maker might be the culprit. Hard water leaves calcium deposits that affect both flavor and machine performance. A simple vinegar rinse can fix it without any harsh chemicals.
Why Vinegar Works
White vinegar is mildly acidic, which dissolves the alkaline mineral deposits (mostly calcium carbonate) that accumulate in your coffee maker's water reservoir and internal tubing. It's cheap, non-toxic, and leaves no chemical residue when rinsed properly.
Step-by-step Descaling
Fill the reservoir with equal parts white vinegar and water. Run a full brew cycle, then pause halfway through and let it sit for 30 minutes to allow the vinegar to break down stubborn scale. Finish the cycle, then discard the vinegar solution.
Run two full cycles with fresh water to rinse out any vinegar taste.
How Often To Descale
If you have hard water, descale every one to three months. For soft water, every six months is enough. A good rule: if your coffee starts tasting off or the brew cycle takes longer than usual, it's time to descale.
6. Shine Stainless Steel with Olive Oil
Stainless steel appliances look great when they're clean, but they show every smudge and fingerprint. Commercial polishes can be expensive and full of chemicals. A simple kitchen staple—olive oil—can give you that same streak-free shine without the cost or hassle.
A few drops of olive oil on a microfiber cloth is all you need to buff away fingerprints and restore the luster of your fridge, dishwasher, or range hood. The oil fills in microscopic scratches and leaves a protective barrier that repels new marks. It's quick, cheap, and surprisingly effective.
Why It Works
Olive oil is a natural emollient that smooths out the tiny imperfections on stainless steel surfaces. When you buff it in, the oil creates an even, reflective layer that hides smudges and adds a subtle sheen. Unlike water-based cleaners, it doesn't evaporate instantly, so you have time to work it into the surface.
How To Apply
Start with a clean, dry surface. Put 2-3 drops of olive oil onto a clean microfiber cloth—not directly on the appliance. Rub the oil into the stainless steel in the direction of the grain (usually vertical or horizontal lines).
Use a second dry cloth to buff away any excess until the surface shines.
Pro Tips For Best Results
Use a light hand; too much oil can look greasy or attract dust. Stick with regular olive oil—extra virgin can be too thick and leave residue. For a streak-free finish, always buff with a dry section of the cloth.
This method works on refrigerators, dishwashers, range hoods, and even stainless steel sinks.
7. Deodorize the Garbage Disposal with Citrus Peels
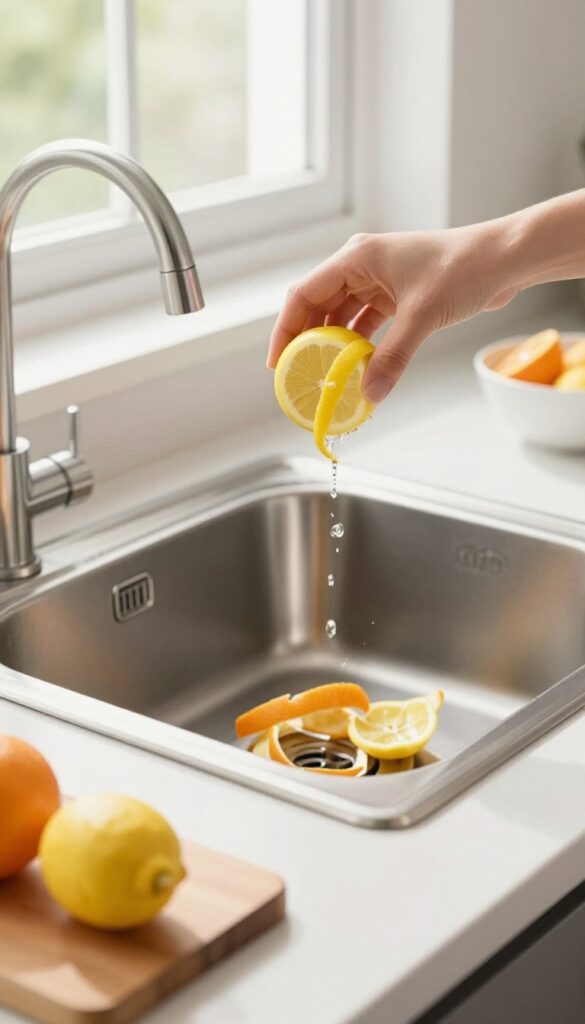
Garbage disposals can get pretty funky over time, thanks to food particles that linger in the blades and drain. Instead of reaching for harsh chemical cleaners, try a natural solution that leaves your kitchen smelling fresh. Citrus peels are a simple, effective way to tackle odors and keep your disposal running smoothly.
The natural oils in lemon and orange peels help break down grease and residue while leaving a bright, clean scent. Plus, the abrasive texture of the peels helps scrub the blades as they grind. It's a two-in-one trick that costs nothing if you already eat citrus fruit.
How To Do It
Save your lemon, lime, or orange peels after juicing or eating the fruit. Cut them into strips about an inch wide. Drop a few strips into the disposal, turn on the cold water, and run the disposal for about 30 seconds.
Follow up with a few ice cubes to further dislodge any stuck-on bits.
Why It Works
Citrus peels contain d-limonene, a natural solvent that cuts through grease and helps deodorize. The cold water keeps any fats from solidifying, while the grinding action releases the oils and scrubs the interior. It's a safe, pleasant alternative to bleach or commercial drain cleaners.
Extra Tips
Avoid using too many peels at once—just a few strips per session is plenty. You can also freeze leftover peels in a bag and use them as needed. For a deeper clean, toss in a handful of ice cubes and a tablespoon of baking soda before the peels.
8. Remove Cutting Board Stains with Salt and Lemon
Cutting boards take a beating, especially when you chop beets, berries, or turmeric-heavy ingredients. Those stubborn stains can make even a clean board look grimy. Instead of reaching for bleach, try a simple duo: salt and lemon.
The coarse salt acts as a gentle abrasive, while lemon's acidity helps lift discoloration naturally.
This method works on both wooden and plastic cutting boards, though plastic boards tend to stain more easily. For best results, use a sturdy half-lemon and a generous sprinkle of coarse salt—kosher or sea salt works well. The lemon also leaves behind a fresh, clean scent.
How To Do It
Sprinkle a thick layer of coarse salt over the stained area. Cut a lemon in half and rub the cut side firmly into the salt, working in circular motions. Apply a little pressure to work the salt into the grain or scratches.
Let the mixture sit for about 10 minutes—this gives the lemon juice time to break down the stain. Rinse thoroughly with warm water and dry with a clean towel.
When To Use This Method
This technique is ideal for surface-level stains from fruits, vegetables, and some spices. It's gentle enough for weekly maintenance without damaging the board. For deep-set stains or odors, you might need to repeat the process or follow up with a baking soda paste.
What To Avoid
Don't use this method on unsealed wooden boards that are cracked or heavily worn, as the moisture can seep in and cause warping. Also, avoid letting the lemon sit too long—more than 15 minutes—since the acid can dull the finish on some plastic boards. Always rinse and dry thoroughly after treatment.
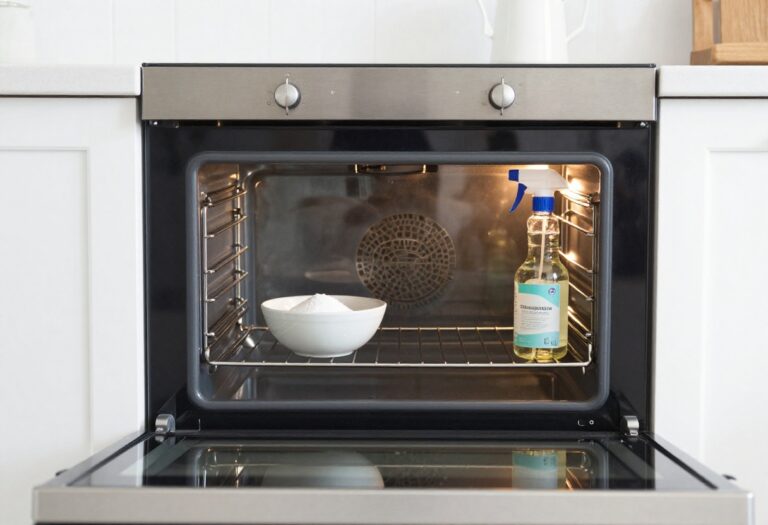
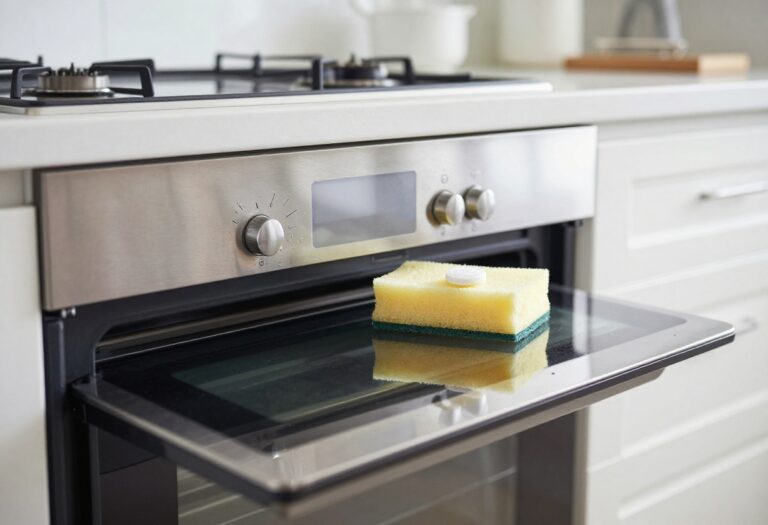
9. Clean Oven Racks with Dryer Sheets
Oven racks take the brunt of baked-on grease and burnt food, making them a pain to scrub. But there's a surprisingly easy trick that uses dryer sheets to loosen all that grime without elbow grease. It's almost magical—and it works every time.
This method is cheap, requires almost no effort, and leaves your racks looking like new. The dryer sheets help break down grease while the warm water and overnight soak do the heavy lifting. You'll be amazed at how easily the gunk wipes away.
What You'll Need
Grab a large heavy-duty trash bag, a few dryer sheets (any brand works), and enough warm water to submerge the racks. You'll also need a bathtub or outdoor space for the bag, since it can get messy.
Step-by-step Instructions
Place the oven racks inside the trash bag, add 4-6 dryer sheets, and fill with warm water until racks are covered. Seal the bag tightly and let it sit overnight. The next morning, open the bag carefully (watch for spills) and wipe each rack with a sponge or cloth.
Rinse thoroughly and dry.
Why It Works So Well
Dryer sheets contain surfactants and softening agents that help dissolve grease and baked-on food. The warm water activates these ingredients, and the long soak gives them time to penetrate tough layers. It's a chemical reaction that saves you scrubbing time.
10. Unclog the Sink with Baking Soda and Vinegar
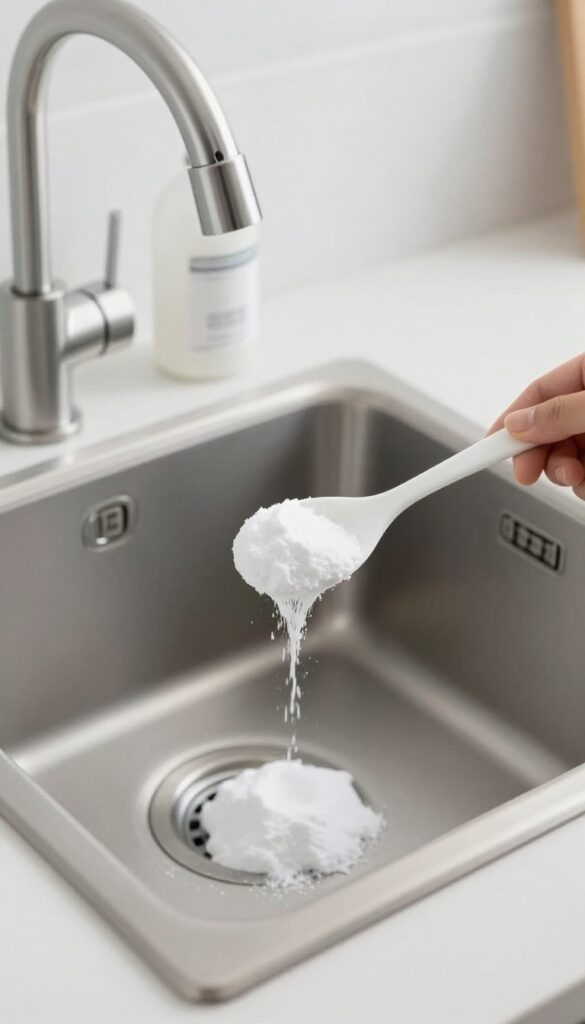
A slow-draining kitchen sink is one of those annoyances that can quickly ruin your cooking flow. Before you reach for harsh chemical drain cleaners, try a simple, natural remedy that uses two pantry staples: baking soda and vinegar. This fizzing combo works wonders on minor clogs caused by grease, soap scum, and food debris.
Pour 1/2 cup baking soda down the drain, followed by 1/2 cup vinegar. Cover the drain with a plug or a damp cloth for 15 minutes to let the reaction work. Then flush with a pot of boiling water.
For stubborn clogs, repeat the process or follow up with a plunger. This method is safe for most pipes and leaves your drain smelling fresh.
Why It Works
The chemical reaction between baking soda (a base) and vinegar (an acid) produces carbon dioxide gas, which creates pressure that helps dislodge gunk. The fizzing action breaks down grease and soap scum, while the hot water rinse washes away the loosened debris.
When To Use It
This method is best for slow drains, not completely blocked ones. Use it as a weekly maintenance trick to prevent buildup. If the drain is fully clogged, try a plunger first or call a plumber for deep blockages.
Pro Tips For Best Results
Always use boiling water—hot tap water isn't hot enough. If you have a garbage disposal, run it with cold water before and after to clear any food particles. For extra cleaning power, add a few drops of lemon essential oil to the mixture for a fresh scent.
11. Polish Faucets with Rubbing Alcohol
Kitchen faucets take a beating—water spots, fingerprints, and grime build up fast. But you don't need a special cleaner to get them gleaming again. Rubbing alcohol cuts through mineral deposits and grease without leaving streaks.
Grab a soft cloth and dampen it with rubbing alcohol. Wipe down the entire faucet, paying extra attention to the base and handle where gunk collects. The alcohol evaporates quickly, so there's no need to rinse or dry.
You'll see an instant shine that lasts.
Why It Works So Well
Rubbing alcohol is a solvent that dissolves both water spots and oily fingerprints. It's also safe for chrome and stainless steel finishes, unlike harsh chemicals that can damage the coating. Plus, it disinfects as it cleans.
Pro Tips For Best Results
Use a microfiber cloth to avoid lint. For stubborn spots, let the alcohol sit for a few seconds before wiping. If your faucet has a matte finish, test on a small area first to ensure it doesn't alter the texture.
12. Freshen the Dishwasher with a Bowl of Vinegar
Your dishwasher works hard to clean your dishes, but it can get pretty funky itself over time. Grease, food particles, and soap scum build up inside, leading to musty smells and less effective cleaning. A simple bowl of vinegar can reset everything without harsh chemicals.
Place a dishwasher-safe bowl filled with 1 cup of white vinegar on the top rack of an empty dishwasher. Run a hot water cycle (the hottest setting). The vinegar breaks down grease, dissolves mineral deposits, and neutralizes odors.
After the cycle, your dishwasher will smell fresh and look cleaner. For extra freshness, sprinkle a cup of baking soda on the bottom and run a short rinse cycle.
Why Vinegar Works
White vinegar is mildly acidic, which cuts through alkaline soap scum and hard water deposits. It also kills some bacteria and mold spores. Unlike bleach, it won't damage rubber seals or stainless steel interiors.
When To Do This
Aim for once a month or whenever you notice a sour smell. If your dishwasher has a filter, clean that first for best results. Avoid using vinegar if your dishwasher has a stainless steel interior with a protective coating—check the manual.
13. Clean Blender Blades with Soapy Water and a Spin
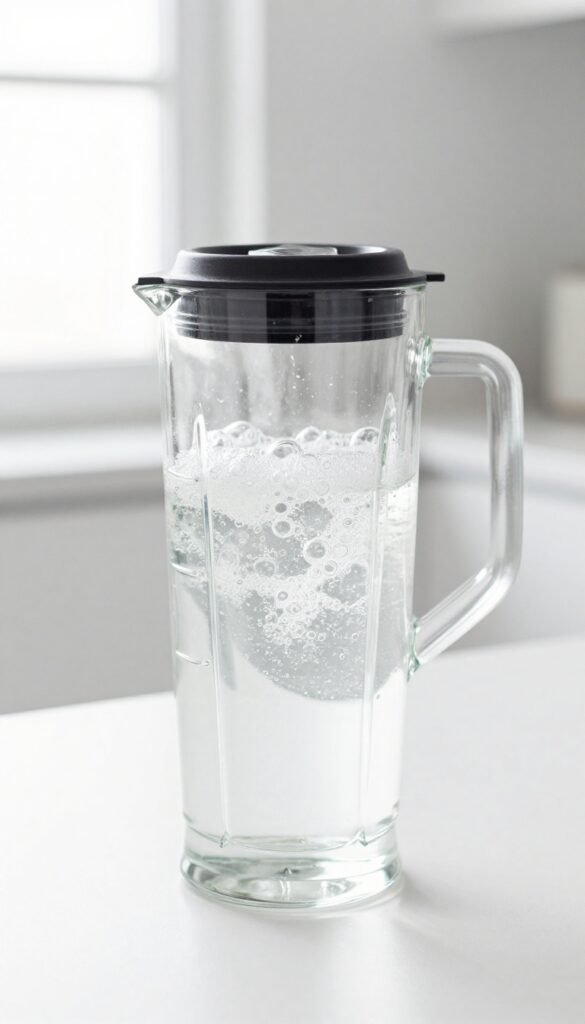
Blender blades can trap food residue in hard-to-reach spots, especially under the blade assembly. Touching them directly is risky and often unnecessary. A simple trick is to let the blender clean itself.
This method is fast, safe, and requires almost no effort.
The Self-cleaning Method
Fill the blender pitcher halfway with warm water and add a single drop of dish soap. Secure the lid and run the blender on high for 30 seconds. The spinning action creates a vortex that scrubs every surface, including the blade edges and the area beneath the blades.
Pour out the soapy water and rinse thoroughly with clean water.
Why This Works Better Than Scrubbing
Hand-washing blender blades is awkward and dangerous. You risk cutting your fingers on the sharp edges or missing hidden residue. The self-cleaning method uses centrifugal force to dislodge stuck-on bits without any physical contact.
It also reaches the rubber gasket and the underside of the blade assembly, which are common hiding spots for bacteria.
When To Add A Deeper Clean
For tough residue like nut butter or dried smoothie, add a pinch of baking soda or a teaspoon of white vinegar to the soapy water before blending. Let the mixture sit for a few minutes before running the cycle. After rinsing, inspect the blades—if any bits remain, repeat the process with fresh water and soap.
14. Remove Grease from Cabinet Doors with Dish Soap
Cabinet doors near the stove or countertops often collect a sticky layer of grease that regular wiping can't touch. Dish soap cuts through that grime without damaging the finish. This simple method restores the shine without harsh chemicals.
The Right Mix
Fill a bowl with warm water and add a few drops of mild dish soap. Avoid using too much soap—it can leave a residue. A microfiber cloth is best because it lifts grease without scratching.
Let It Sit
For stubborn spots, wet the cloth and press it against the greasy area for about a minute. This softens the grime so it wipes away easily. Don't scrub aggressively, especially on painted or laminate surfaces.
Rinse And Dry
After wiping, go over the doors with a clean damp cloth to remove any soap residue. Dry with a soft towel to prevent water spots and keep the finish looking fresh.
15. Whiten Grout with Hydrogen Peroxide and Baking Soda
Grout lines in the kitchen can quickly turn from light to dingy, especially near the sink or stovetop. Instead of harsh bleach, try a gentler DIY paste that lifts stains without damaging the tile. This method uses common pantry items and takes just a few minutes of active work.
Mix baking soda and hydrogen peroxide into a thick paste, then apply it to the grout lines. Let it sit for about 10 minutes to break down the grime. Scrub with an old toothbrush, then rinse with water.
For stubborn spots, add a few drops of dish soap to the paste.
Why This Combo Works
Hydrogen peroxide is a natural bleaching agent that breaks down organic stains, while baking soda provides gentle abrasion. Together, they create a fizzing action that lifts dirt from porous grout without the strong fumes of chlorine bleach.
Application Tips
Apply the paste with a small brush or your finger, pressing it into the grout lines. Cover a small area at a time so the paste doesn't dry out. For vertical surfaces, use a thicker paste to prevent dripping.
Aftercare And Prevention
Once the grout is clean, seal it with a grout sealer to repel future stains. Regular wiping with a mild cleaner can also keep grout looking fresh longer. Avoid using abrasive scrubbers on sealed grout to prevent wear.
16. Clean the Toaster Oven Crumb Tray with a Toothbrush
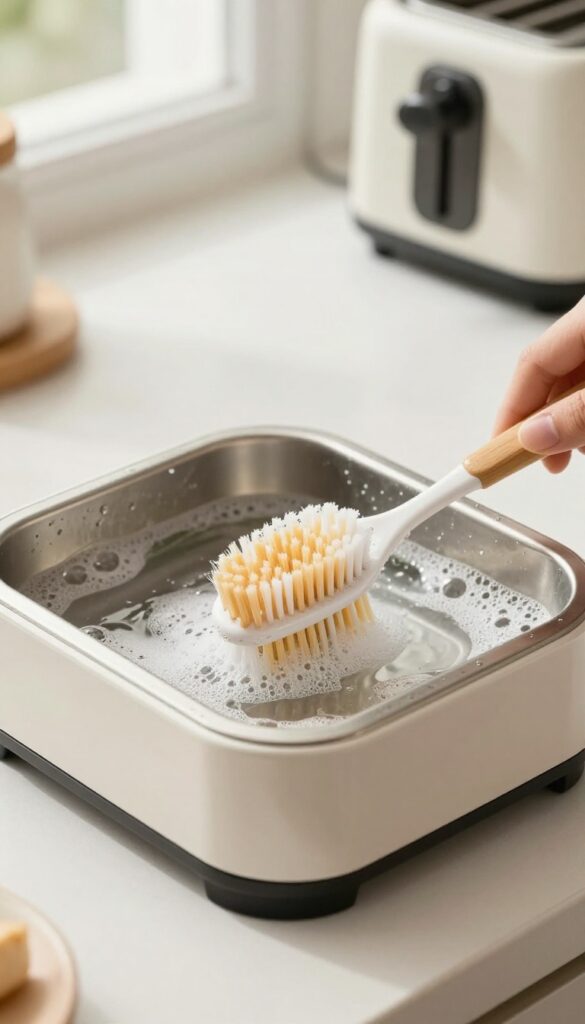
Toaster ovens are great for quick meals, but that crumb tray can get pretty gross. Crumbs get baked on, grease builds up, and before you know it, you're smelling burnt leftovers every time you toast. The good news is you don't need any fancy tools to get it sparkling clean.
Start by unplugging the toaster oven and letting it cool completely. Slide out the crumb tray—most models have a removable tray at the bottom. Give it a good shake over the trash to get rid of loose crumbs.
Then, grab an old toothbrush and some warm, soapy water. Scrub the tray thoroughly, paying extra attention to corners and edges where grime likes to hide. Rinse with clean water and dry it completely with a dish towel or let it air dry.
Moisture is the enemy here—any leftover water can cause rust, so make sure it's bone dry before sliding it back in. For stubborn baked-on spots, let the tray soak in hot soapy water for 10 minutes before scrubbing. Do this every couple of weeks, and your toaster oven will smell fresh and work better.
Why A Toothbrush Works Best
A toothbrush's small head and stiff bristles can reach into the nooks and crannies of the crumb tray that sponges and cloths miss. It's also gentle enough not to scratch the tray's surface. Plus, you're giving an old toothbrush a second life instead of tossing it.
Don't Forget The Inside
While the tray is out, take a moment to wipe down the inside of the toaster oven. Use a damp cloth to remove any crumbs or grease from the walls and heating elements. Be careful around the heating elements—don't scrub them directly, just gently wipe away debris.
This prevents smoke and odors the next time you use it.
How Often To Clean
Aim to clean the crumb tray every two to four weeks, depending on how often you use the toaster oven. If you cook greasy foods like bacon or cheese melts, you might need to do it weekly. Regular cleaning keeps your appliance running efficiently and prevents burnt smells from ruining your toast.
17. Deodorize the Fridge with Coffee Grounds
Even the cleanest fridge can develop funky smells over time. Leftovers, forgotten produce, and spills all contribute to odors that linger. Instead of masking them with baking soda or scented sprays, try used coffee grounds.
Coffee grounds are natural odor absorbers. They trap and neutralize smells rather than just covering them up. The best part?
You don't need fresh grounds—used ones work just as well. After brewing your morning coffee, save the damp grounds and let them dry out on a plate. Once dry, place them in a small open bowl or a jar with holes poked in the lid.
Set it on a shelf in the back of your fridge. Replace the grounds every month or so for continuous freshness.
Why Coffee Grounds Work
Coffee grounds have a porous structure that traps odor molecules. They also contain nitrogen, which helps neutralize sulfur-based smells common in fridges. Unlike baking soda, which only absorbs odors, coffee grounds actively break them down.
How To Prepare And Use Them
After brewing, spread the used grounds on a baking sheet and let them dry completely. This prevents mold. Then transfer them to a small container with ventilation.
Place it in an out-of-the-way spot, like the back of a shelf. Swap it out every three to four weeks.
A Note On Scent
Coffee grounds won't make your fridge smell like a café. They absorb odors without adding a strong coffee scent. If you prefer a hint of freshness, add a drop of vanilla extract to the grounds.
The result is a clean, neutral-smelling fridge.
18. Remove Water Rings from Wood Tables with Mayonnaise
That white ring left by a wet glass can feel permanent, but it's often just trapped moisture in the finish. Mayonnaise works as a gentle oil treatment to lift the mark without damaging the wood. It's a classic trick that really delivers.
Water rings form when moisture seeps into the finish and creates a cloudy haze. The oil in mayonnaise helps displace that moisture and restore the original look. This method works best on sealed wood surfaces, not raw or unfinished wood.
Why Mayonnaise Works
Mayonnaise contains oil and egg yolks that can penetrate the finish and push out trapped water. The oil acts as a lubricant, allowing the finish to re-level and become clear again. It's a safe, non-abrasive option for most sealed wood.
Step-by-step Application
Apply a small dab of full-fat mayonnaise to a soft, lint-free cloth. Gently rub it into the water ring in a circular motion, covering the entire mark. Let it sit for at least an hour—overnight for stubborn rings.
Wipe away the mayonnaise with a clean cloth and buff the area lightly.
When It Won't Work
Deep stains or damage that has penetrated the stain or varnish won't respond to mayonnaise. If the ring is dark or the wood feels rough, the finish may be compromised. In those cases, sanding and refinishing might be needed.
19. Clean the Exhaust Fan Filter with Baking Soda
Your range hood works hard to pull grease and smoke out of the air, but that filter traps a lot of the gunk. When it's clogged, the fan works less efficiently and can even become a fire hazard. The good news is you don't need harsh chemicals to get it sparkling clean.
Baking soda is a gentle abrasive that cuts through grease without damaging the metal filter. It's also cheap and non-toxic, so you won't have to worry about chemical residue near your cooking area. This method works on both mesh and baffle filters, and it takes just 20 minutes total.
The Soaking Method
Remove the filter from your range hood—most slide out or have a simple latch. Fill your sink or a large basin with hot water and add 1/4 cup of baking soda. Stir to dissolve, then submerge the filter completely.
Let it soak for 15 minutes. The baking soda helps loosen baked-on grease so you don't have to scrub hard.
Scrubbing And Rinsing
After soaking, use a soft brush or sponge to gently scrub both sides of the filter. Pay extra attention to corners and crevices where grease hides. Rinse thoroughly with warm water to remove all baking soda residue.
If any grease remains, repeat the soak or use a paste of baking soda and water for stubborn spots.
Drying And Reinstalling
Shake off excess water and let the filter air dry completely on a dish rack or towel. Don't put it back wet—moisture can lead to rust or mold. Once dry, slide it back into the hood.
You'll notice better airflow and a cleaner kitchen smell the next time you cook.
20. Sanitize Sponges in the Microwave
Your kitchen sponge might be the dirtiest item in the house. It collects food particles and moisture, making it a breeding ground for bacteria. A quick microwave session can fix that without any harsh chemicals.
Wet the sponge thoroughly and pop it in the microwave for one minute on high. The heat kills most germs and helps eliminate odors. Let it cool completely before handling to avoid burns.
This simple trick can extend your sponge's life and keep your kitchen more hygienic.
Why It Works
Microwaving creates steam inside the sponge, which reaches temperatures high enough to kill bacteria like E. coli and salmonella. The heat also dries out the sponge slightly, reducing the moisture that bacteria love. Just make sure the sponge is wet—a dry sponge can catch fire.
Sponge Safety Tips
Only microwave sponges that are 100% cellulose or have no metal scrubbers. Avoid sponges with metallic fibers—they can spark. Also, don't microwave a sponge that smells sour or has visible mold; it's better to replace it.
Aim to sanitize sponges every few days for best results.
Alternative Methods
If you don't have a microwave, you can run sponges through the dishwasher on a heated dry cycle or soak them in a bleach solution (1 part bleach to 9 parts water) for a few minutes. Both methods are effective, but microwaving is the quickest and most energy-efficient option.
21. Remove Labels from Jars with Cooking Oil
Reusing glass jars is a smart way to store pantry staples or leftovers, but stubborn label glue can be a pain. Instead of scraping and scratching, let cooking oil do the work. It breaks down the adhesive without harsh chemicals or damaging the glass.
Simply rub a small amount of vegetable or olive oil over the sticky residue and let it sit for about five minutes. The oil soaks into the glue, making it soft and easy to wipe away with a cloth or paper towel. For extra stubborn spots, add a sprinkle of baking soda to create a gentle abrasive paste.
Why Oil Works Best
Label adhesives are often oil-based, so applying oil dissolves them naturally. Unlike water or vinegar, oil doesn't evaporate quickly, giving it time to penetrate and loosen the glue. This method is safe for all glass types and leaves no chemical residue behind.
Step-by-step Guide
Peel off as much of the paper label as possible. Apply a thin layer of oil to the sticky area and let it sit for 5 minutes. Use a soft cloth or your fingertip to rub the residue in circular motions.
Rinse with warm soapy water to remove any oil film, then dry.
Alternative Oils And Tips
Any cooking oil works—olive, vegetable, canola, or even coconut oil (warmed to liquid). For tougher glue, let the oil sit longer or reapply. Avoid using metal scrapers that can scratch the glass; a plastic scraper or old credit card is a safer option.
22. Clean the Inside of the Dishwasher Filter

Your dishwasher works hard to keep dishes spotless, but it can't do its job if the filter is clogged with food debris. Many people forget this simple maintenance step, leading to poor cleaning results and funky smells. A quick filter rinse every few weeks makes a noticeable difference.
Most dishwasher filters are located at the bottom of the tub, under the bottom spray arm. They catch large food particles to prevent them from recirculating onto your dishes. Over time, that trapped gunk builds up and reduces water flow, leaving your dishes less clean.
The fix is simple: remove the filter, rinse it under hot water, and use a soft brush to dislodge any stuck-on bits. Replace it and run a rinse cycle for best results.
Where To Find The Filter
Open the dishwasher and pull out the bottom rack. Look for a cylindrical or flat mesh cover near the back or center of the tub floor. Twist or lift it off—consult your manual if it's stuck.
Some models have a two-part filter: a coarse mesh and a fine mesh. Both need cleaning.
How To Clean It Properly
Rinse the filter under hot running water to remove loose debris. For stubborn bits, use a soft-bristled brush or an old toothbrush. Avoid scrubbing too hard, especially on fine mesh, to prevent damage.
If there's grease buildup, soak the filter in warm soapy water for a few minutes before rinsing.
How Often To Do This
Aim to clean the filter every two to four weeks, depending on usage. If you run the dishwasher daily or often wash heavily soiled dishes, check it more frequently. A clean filter not only improves cleaning but also extends the life of your machine.
23. Brighten Cloudy Glassware with Vinegar Soak
Cloudy glassware can make your favorite drinking glasses look old and worn. The haze is usually caused by hard water mineral deposits or a buildup of dishwasher detergent. A simple vinegar soak can restore their clarity without harsh chemicals.
Fill a sink or large basin with equal parts white vinegar and warm water. Submerge the cloudy glasses completely and let them soak for about 15 minutes. The mild acid in the vinegar dissolves the mineral deposits that cause the cloudiness.
After soaking, remove each glass and rinse it thoroughly with clean water. Dry immediately with a lint-free cloth to prevent water spots. For stubborn haze, you can increase the vinegar ratio or let the glasses soak a bit longer.
This method works best on glass that has become cloudy over time, not etched glass which is permanently damaged.
Why Cloudiness Happens
Hard water contains minerals like calcium and magnesium that can leave a film on glassware. Over time, this film builds up and creates a cloudy appearance. Another common cause is using too much dishwasher detergent or rinse aid, which can leave a residue that etches the glass surface.
Understanding the cause helps you choose the right cleaning method.
Step-by-step Vinegar Soak
Start by mixing a 1: 1 ratio of white vinegar and warm water in a container large enough to hold your glasses. Place the glasses in the solution, making sure they are fully submerged. Let them soak for 15 minutes.
For extra stubborn cloudiness, you can soak for up to 30 minutes. After soaking, scrub gently with a soft sponge if needed, then rinse thoroughly with warm water. Dry with a lint-free cloth to avoid streaks.
Preventing Future Cloudiness
To keep your glassware clear, use a rinse aid in your dishwasher to help water sheet off. Reduce the amount of detergent you use, especially if you have soft water. Hand wash delicate glasses with a mild dish soap and dry them immediately.
Regularly cleaning your dishwasher filter can also prevent residue from redepositing on your glasses.
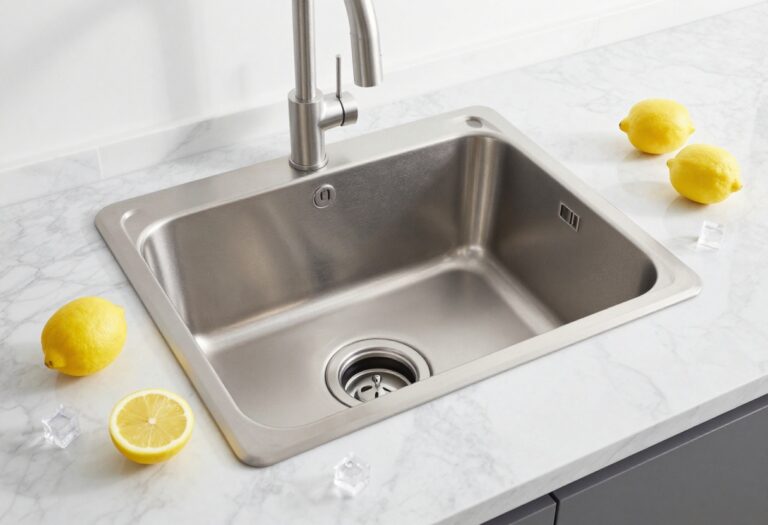
24. Keep the Kitchen Sink Smelling Fresh with Ice and Salt
A smelly sink can make the whole kitchen feel dirty, even when everything else is spotless. The culprit is usually food buildup in the garbage disposal or drain. Instead of reaching for harsh chemicals, try this simple trick that uses ice and salt to scrub away odor-causing residue naturally.
Toss a handful of ice cubes and a tablespoon of salt down the disposal. Run cold water and the disposal to scrub away odor-causing residue. The ice helps dislodge stuck-on food particles, while the salt acts as a gentle abrasive to clean the blades and interior.
This method is quick, chemical-free, and leaves your sink smelling fresh.
Why Ice And Salt Work
Ice cubes harden any grease or grime clinging to the disposal, making it easier to knock off. As the ice is ground up, it scours the rubber splash guard and inner walls. Salt adds extra scrubbing power and helps deodorize without the harshness of bleach.
How To Do It Right
Drop about a cup of ice cubes into the disposal, then add a tablespoon of coarse salt (kosher or sea salt works best). Turn on cold water and run the disposal for 10-15 seconds. The cold water keeps any grease solid so it gets flushed away instead of melting further down the drain.
Bonus Tip For Extra Freshness
After the ice and salt treatment, toss in a few lemon or orange peels. Run the disposal again with cold water for a burst of citrus scent. This leaves your sink smelling clean and bright without any artificial fragrances.
25. Wipe Down Countertops with a DIY All-Purpose Cleaner
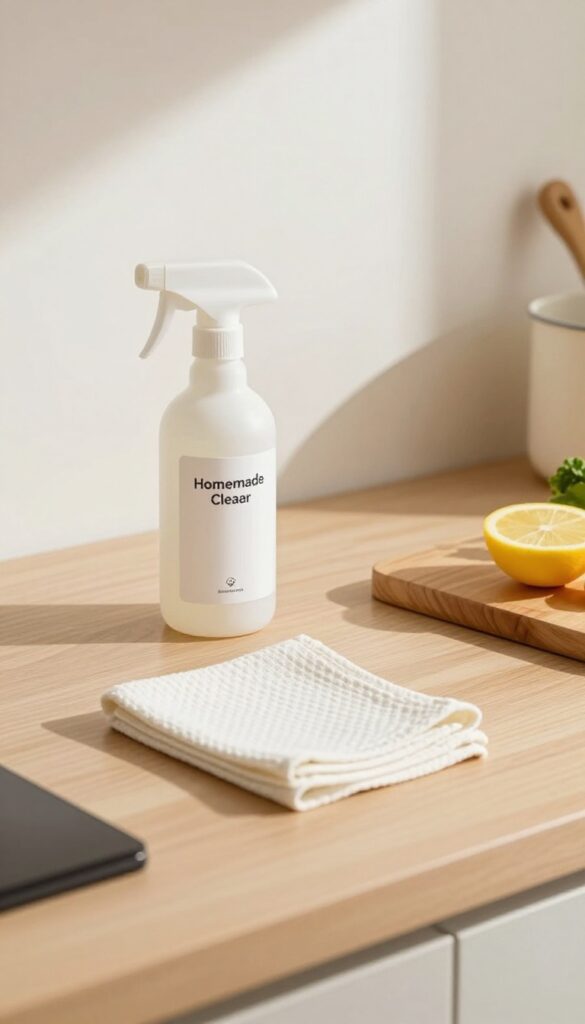
Store-bought cleaners can be pricey and full of harsh chemicals. A simple homemade spray works just as well, if not better, on everyday grime. You probably already have the ingredients in your pantry.
Mix equal parts water and white vinegar in a spray bottle, then add a few drops of dish soap. Shake gently to combine. Use it daily on counters to cut grease and disinfect.
The vinegar smell fades quickly, leaving a clean scent. This solution is safe for most surfaces, but avoid using it on natural stone like granite or marble, as the acid can etch the surface.
Why This Combo Works
Vinegar is a natural disinfectant and degreaser. Dish soap helps break down oily residues, making the mixture more effective on greasy countertops. Together, they tackle bacteria and grime without the need for harsh chemicals.
Best Practices For Daily Use
Spray the cleaner directly onto the counter, then wipe with a clean microfiber cloth. For stubborn spots, let the solution sit for a minute before wiping. Rinse the cloth often to avoid spreading dirt.
This quick routine keeps your counters fresh and food-safe.
When To Skip The Vinegar
Avoid this cleaner on unsealed stone, marble, or granite surfaces. The acid can dull the finish over time. For those surfaces, use a mild dish soap and water mix instead.
Also, keep it away from cast iron pans and wooden cutting boards, as vinegar can damage them.
FAQ
How often should I clean my kitchen thoroughly?
A deep clean every week is ideal for most kitchens, but high-traffic areas like the stovetop and sink may need attention every few days.
Can I use bleach on stainless steel?
No, bleach can damage the protective layer and cause discoloration. Stick to mild soap, vinegar, or specialized stainless steel cleaners.
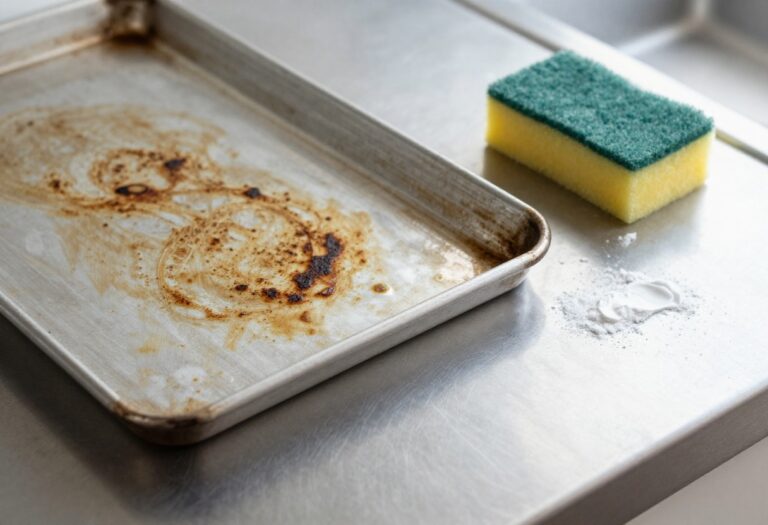
What's the best way to remove burnt food from a pan?
Fill the pan with water and a few tablespoons of baking soda, bring to a boil, then let it cool. Scrub with a non-abrasive sponge.
How do I prevent grease buildup on cabinets?
Wipe cabinets weekly with a mild degreaser or dish soap solution. Using a range hood while cooking also reduces airborne grease.
Is it safe to mix vinegar and baking soda in the sink?
Yes, the fizzing action helps dislodge debris, but always flush with plenty of hot water afterward to prevent clogs from residue.
Conclusion
A cleaner kitchen doesn't require fancy products or hours of scrubbing—just a few smart habits and the right techniques. These 25 tips prove that small, consistent efforts make the biggest difference in keeping your cooking space fresh and inviting.
Start with the ones that feel easiest, and build from there. Your kitchen will thank you.