13 Updated Shower Niche Ideas with Details That Draw the Eye
The shower niche used to be just a practical spot for shampoo bottles, but it's quietly become one of the most design-forward features in a modern bathroom. A well-placed niche can anchor the whole space, drawing the eye with texture, light, or unexpected materials.
That's why these 13 updated ideas go beyond the standard square cutout, turning a functional necessity into a genuine focal point. From backlit panels that cast a warm glow to wood slats that add natural warmth, each option brings its own personality.
Whether you're planning a full remodel or just refreshing an existing shower, these details will make your niche—and your daily rinse—feel anything but ordinary.
1. Backlit Niche for a Soft Glow
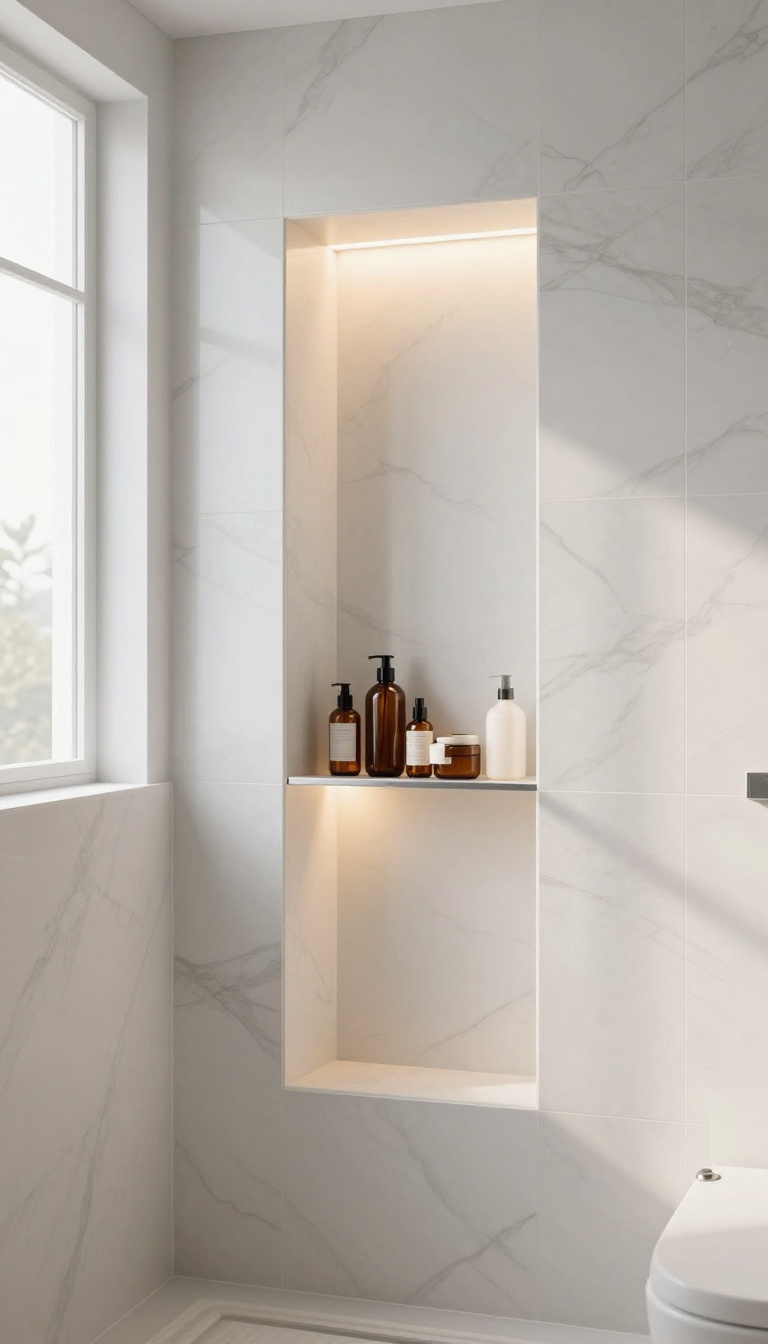
LED lighting behind your shower niche is a simple upgrade that changes the whole mood of the space. Instead of a dark recess that swallows your bottles, the niche becomes a warm, glowing feature that feels almost spa-like. The soft light not only makes products easier to find but also adds a layer of depth that flat tile walls just can't match.
Backlit niches work with nearly any tile style, from classic subway to large-format slabs. The key is to plan the lighting during the waterproofing stage, so the LED strip sits safely behind a translucent panel or frosted glass. You can choose warm white for a cozy feel or cool white for a crisper, more modern look.
Either way, the glow draws the eye naturally and makes your shower feel more inviting.
Choosing The Right Light Temperature
Warm white (around 2700K) creates a relaxing, amber-like glow that flatters skin tones and makes the niche feel cozy. Cool white (4000K or higher) gives a cleaner, more clinical look that works well in contemporary bathrooms. Consider the rest of your lighting—if you have warm sconces, stick with warm LED to keep the palette consistent.
Placement And Waterproofing Tips
For the best effect, position the niche at eye level or slightly above, so the light isn't hidden by your body. Work with a licensed electrician to run low-voltage wiring and use a waterproof LED strip rated for damp locations. The niche itself should have a slight slope toward the drain to prevent water pooling, and the light panel should be sealed with silicone to keep moisture out.
Design Variations To Try
You don't have to stick with a plain rectangle. Try a long horizontal niche with a backlit shelf for a dramatic strip of light, or add a colored LED that shifts between hues for a playful touch. For a minimalist look, use a thin glass shelf inside the niche so the light passes through and illuminates the tile behind it.
2. Floating Glass Shelves Inside the Niche
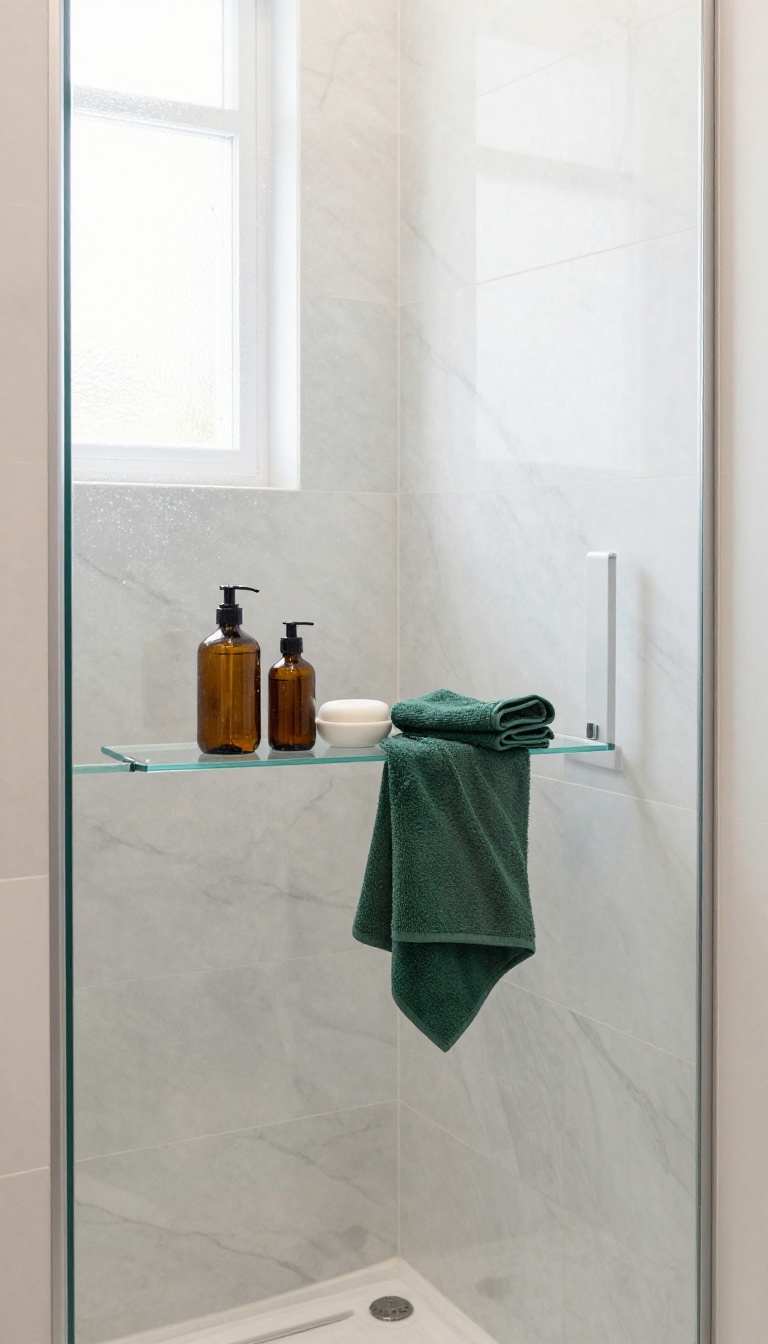
A single open cubby can feel a bit limiting, especially if you share the shower with a family or just have a lot of products. Floating glass shelves inside the niche solve that by turning one opening into several levels of storage. The glass keeps the view clear, so the niche still feels light and open rather than cluttered.
The beauty of floating glass shelves is that they add function without adding visual weight. Unlike wood or metal, glass lets light pass through, which keeps the niche looking airy. You can stack bottles, jars, and bar soap without the space feeling crowded.
Plus, the shelves are easy to wipe down, which is a win in a wet environment.
Why Glass Works So Well
Glass is non-porous, so it won't absorb water or harbor mold like wood might. It's also easy to clean with a squeegee or a quick wipe. And because it's transparent, it doesn't break up the tile pattern behind it, keeping the design cohesive.
How Many Shelves To Use
Two or three shelves usually work best, depending on the niche height. If you go with three, leave a little extra space between the top two for taller bottles. A good rule of thumb is to keep the bottom shelf about 12 inches from the niche floor so you can fit a large pump bottle if needed.
Installation Tips
The shelves need proper support, usually with small metal clips or drilled holes that hold the glass in place. Tempered glass is a must for safety and durability. Have a professional install the clips so the shelves sit level and can handle the weight of your products without sagging.
Styling The Shelves
Keep the look intentional by grouping items by height or color. Use matching bottles or decanters for a spa-like feel. Leave a little breathing room between items so the shelves don't look overcrowded.
A small plant or a natural sponge can add a touch of texture without taking up much space.
3. Mosaic Tile Accent Wall Behind the Niche
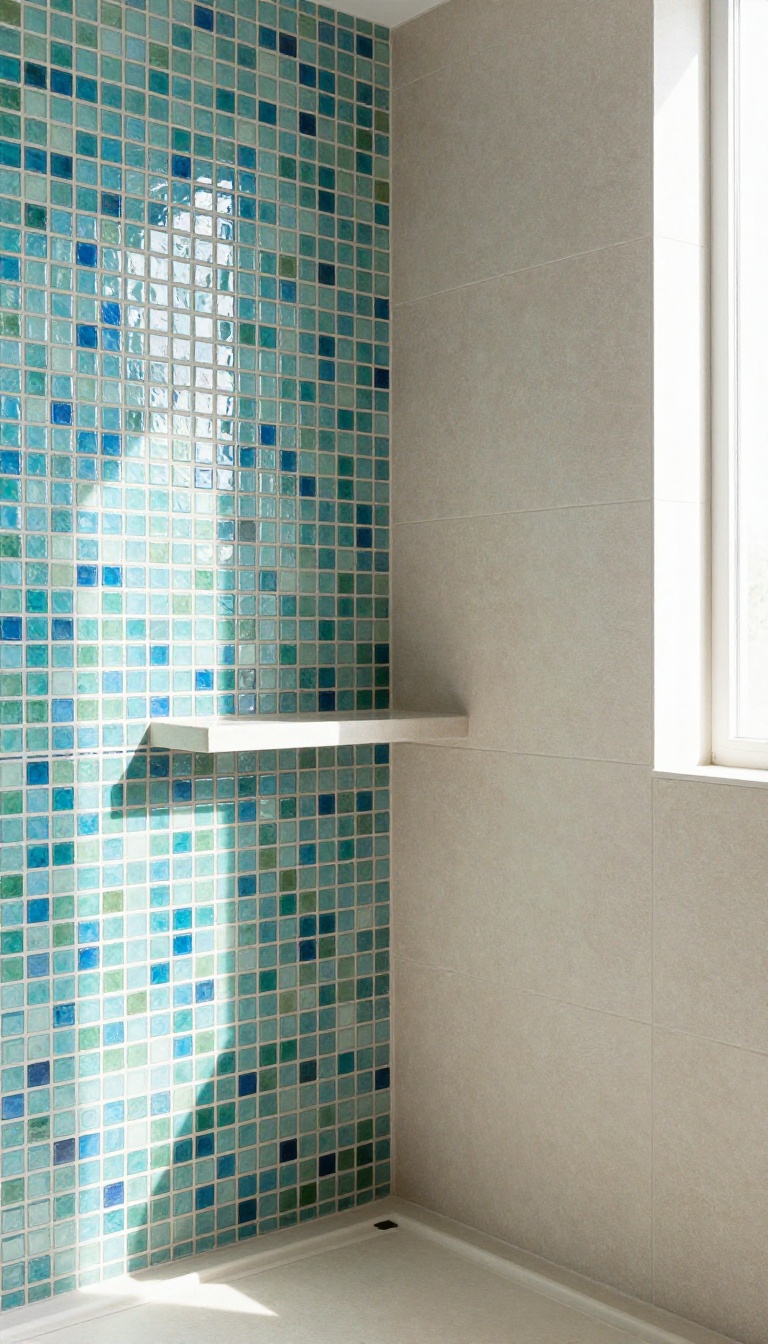
A mosaic tile accent wall behind the niche is a bold way to make the shower feel intentional and custom. Instead of blending into the background, the niche becomes a colorful centerpiece that catches the light and adds texture. The contrast between the mosaic and the surrounding tile draws the eye immediately, giving the space a touch of personality without overwhelming the room.
This approach works especially well in showers with neutral or monochrome tiles, where a burst of color or pattern can break up the monotony. It's a chance to experiment with materials like glass, stone, or ceramic in ways that feel fresh and modern.
The mosaic accent wall behind the niche is all about creating a visual anchor. By using a vibrant pattern, you turn a practical storage spot into a design feature that people notice. The key is to choose a mosaic that complements the overall bathroom style while adding a contrasting pop.
You don't need to cover the entire wall—just the recessed area behind the niche is enough to make a statement. This keeps the look focused and avoids overwhelming the space. Plus, it's a budget-friendly way to incorporate high-end materials like handmade tiles or iridescent glass without splurging on a full wall.
Choosing The Right Mosaic Pattern
The pattern you pick sets the tone. Geometric shapes like hexagons or arabesques add a contemporary edge, while subway tiles in a herringbone layout give a classic twist. For a more organic feel, consider pebble or stone mosaics that bring nature indoors.
Think about the scale of the tile too—smaller tiles create more intricate detail, while larger pieces feel bolder and simpler.
Color And Contrast Tips
High-contrast combinations, like navy blue with white grout or emerald green against light marble, really pop. If you prefer a subtler look, choose a mosaic in a similar color family but with a different finish, like matte versus glossy. The idea is to make the niche stand out without clashing with the rest of the shower.
Installation And Grout Considerations
Mosaic tiles come in mesh-backed sheets, which makes installation easier. Use a waterproof adhesive and apply grout that matches the mosaic or contrasts with it for a more defined look. Sealing the grout is essential to prevent moisture damage and staining, especially in a wet area like a shower.
4. Niche with a Built-In Bench
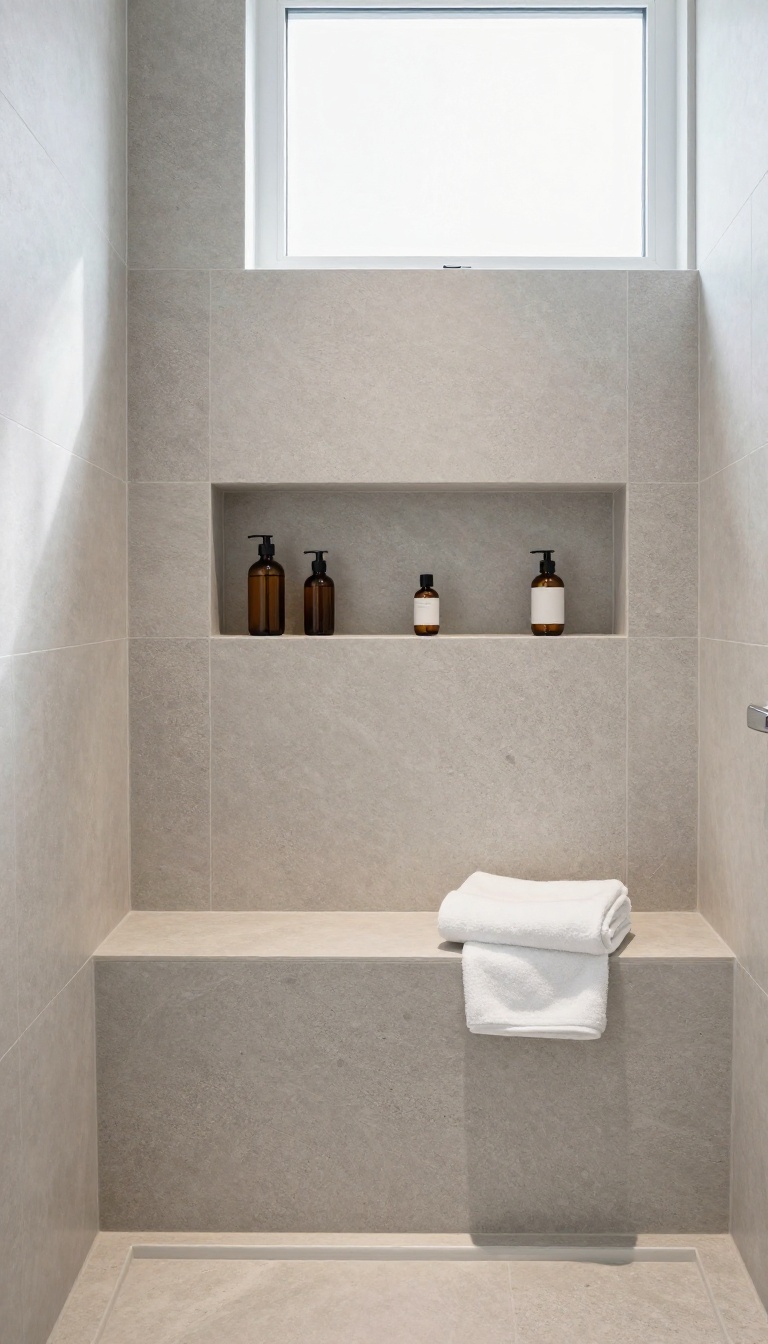
A shower niche doesn't have to be just a hole in the wall. Pair it with a built-in bench and you've got a spot that's both practical and indulgent. This combo turns an ordinary shower into a place where you can sit, breathe, and let the water work its magic.
The bench gives you a perch for shaving your legs or just resting while the niche keeps your bottles within arm's reach. It's a small change that makes the shower feel more like a personal retreat.
When you combine a niche with a bench, you're not just adding storage—you're creating a functional zone. The niche can be positioned right above the bench, so everything you need is close by. This setup is especially handy in smaller bathrooms where space is tight, because it merges two features into one footprint.
Think about how you'll use the bench. Maybe it's for sitting during a long soak, or for propping a foot up while you shave. The niche can hold shampoo, soap, and a loofah without cluttering the bench surface.
Together, they make the shower feel organized and calm.
Placement That Works
Put the niche right above the bench, about 12 to 18 inches from the seat. That way, you can grab a bottle without leaning forward awkwardly. If the bench is in a corner, wrap the niche around two walls for extra storage.
Keep the niche at a height that's comfortable whether you're sitting or standing.
Material And Finish Choices
Match the bench and niche materials to the rest of the shower for a seamless look. Use the same tile or stone on both surfaces to create a continuous line. If you want the niche to stand out, use a contrasting tile inside the niche, like a dark mosaic against light marble.
For a warmer feel, consider a wood-look tile on the bench and niche, but make sure it's rated for wet areas.
Adding Comfort And Safety
A built-in bench can be more than just a hard surface. Add a teak or cedar seat that sits on top for a spa-like touch—these woods resist moisture and feel nice underfoot. For safety, make sure the bench has a slight slope toward the drain so water doesn't pool.
You can also add a grab bar nearby, especially if the bench is for older family members.
5. Recessed Niche with a Wood Slat Back
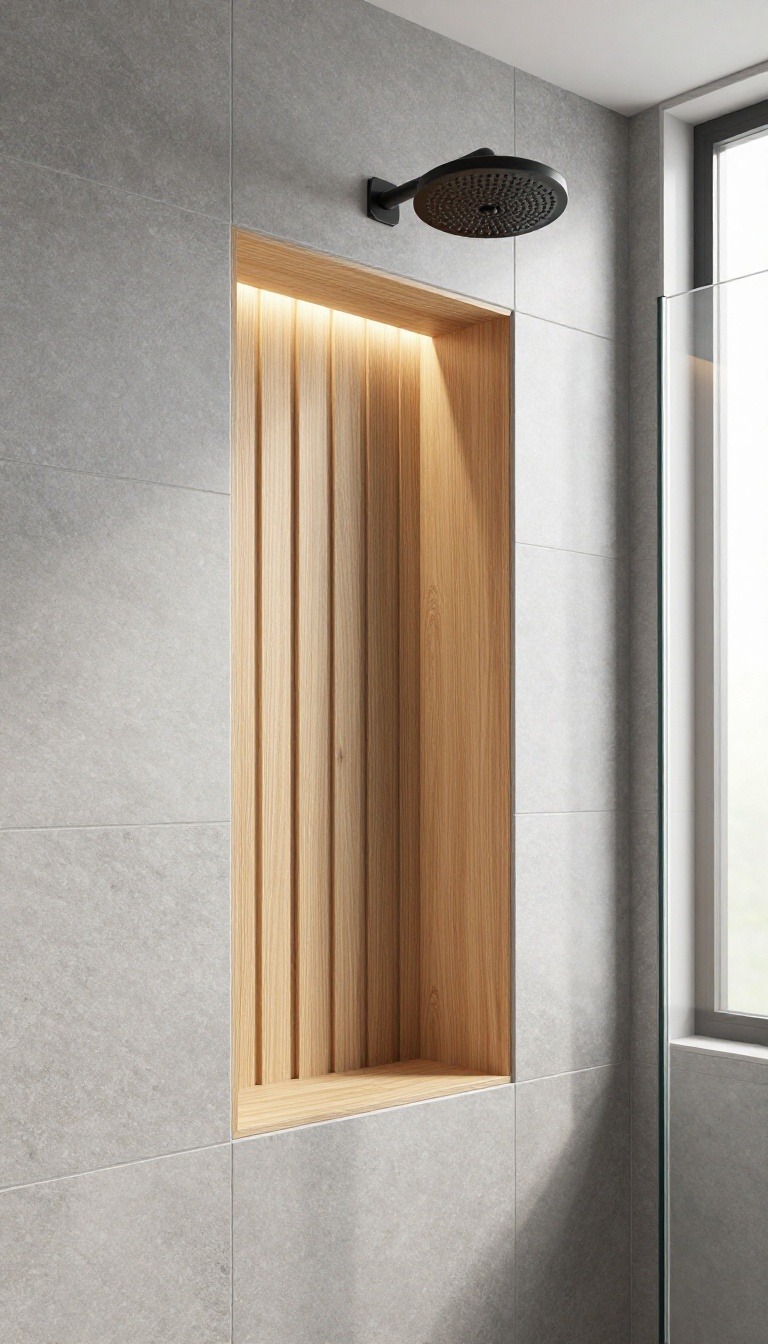
Wood slats inside a shower niche bring a surprising hit of warmth that tile alone can't match. The natural grain softens the hard edges of stone or concrete, making the whole shower feel more grounded and inviting. It's a small detail that reads as intentional and custom, without a big budget or complex build.
The contrast between cool tile and warm wood is what makes this idea work. Whether you choose a light oak for a Scandinavian feel or a rich walnut for drama, the wood slats create visual texture that draws the eye right into the niche. Plus, the vertical lines add a subtle sense of height, making the shower feel taller and more open.
For a seamless look, run the slats in the same direction as the tile pattern or use them to break up a large expanse of solid color. The wood can be installed as a removable panel, which makes cleaning and maintenance easier. Just make sure to use a high-quality waterproof sealant and opt for a species that handles moisture well, like teak or cedar.
Choosing The Right Wood
Not all wood is created equal when it comes to a wet environment. Teak is the classic choice because it's naturally resistant to water and mildew. Cedar also works well and brings a pleasant aroma.
If you prefer a lighter look, thermally modified ash or poplar can mimic the warmth of oak without the risk of warping. Always check that the wood is properly sealed, and consider a vented design so water doesn't pool behind the slats.
Installation And Waterproofing
The key to a long-lasting wood slat niche is proper waterproofing. Start with a waterproof membrane behind the niche, then build a frame that allows for drainage. The slats themselves should be spaced slightly apart to let water flow through and air circulate.
Use stainless steel screws or hidden clips to avoid rust, and seal all exposed edges with a marine-grade varnish. If you're not comfortable with DIY, a professional installer can ensure everything is done right.
Styling And Maintenance
Once your wood slat niche is in place, think about what you'll store there. Dark glass bottles and amber apothecary jars look stunning against the wood grain. Keep the niche from looking cluttered by limiting yourself to a few well-chosen items.
For cleaning, wipe the slats with a soft cloth and mild soap every couple of weeks. Avoid harsh chemicals that can strip the sealant. With a little care, your wood niche will stay beautiful for years.
6. Niche with a Marble Shelf and Brass Accents
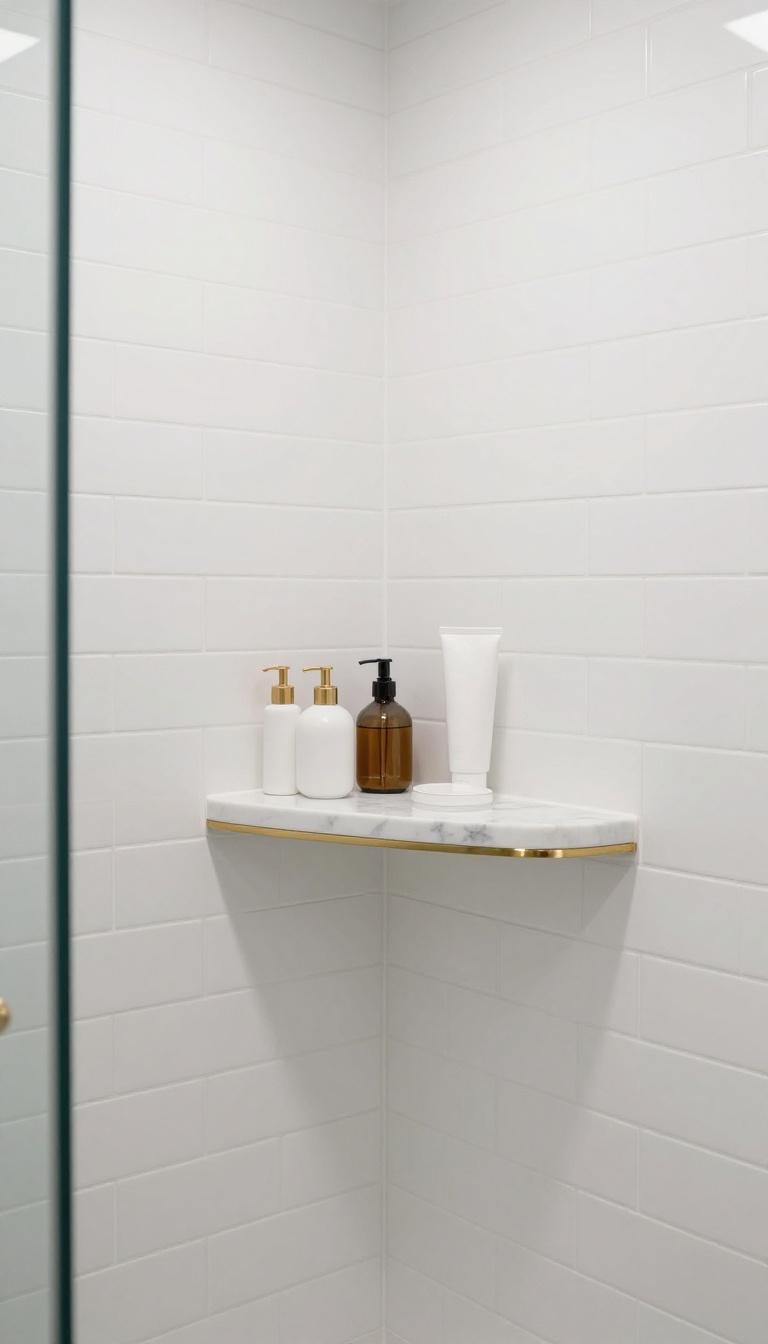
Pairing marble with brass is a classic move that never feels dated. The cool, veined stone contrasts beautifully with the warm metallic edge, giving the niche a refined, jewelry-like quality. It's a detail that reads as intentional and polished, even in a compact shower.
This niche design uses a solid marble shelf as the main surface, with thin brass edging along the front lip and sometimes the sides. The marble can be a matching slab from your countertop or a complementary tile, while the brass adds a subtle glow that catches the light. The result is a shelf that feels substantial and elegant, yet still practical for everyday toiletries.
Why Marble And Brass Work Together
Marble brings a cool, calm texture with its natural veining, while brass introduces warmth and a hint of luxury. The contrast creates visual interest without being loud. Brass also develops a patina over time, which adds character, but you can choose a lacquered finish to keep it shiny longer.
Choosing The Right Marble
Carrara, Calacatta, and Statuario are popular choices, each with different veining patterns. Carrara is more subtle and budget-friendly, while Calacatta has bolder, dramatic veins. For a seamless look, use the same marble as your shower walls or countertop.
If that's not possible, a complementary neutral tone works well.
Brass Edging Options
You can use brass trim pieces, like Schluter strips, to line the niche opening, or go with a custom brass shelf bracket. Some people prefer a thin brass frame around the entire niche for a more defined look. Whichever you choose, make sure the brass is sealed or lacquered to prevent water spots and tarnishing.
Practical Styling Tips
Keep the shelf uncluttered to let the materials shine. Use a small tray or dish for smaller items, and limit bottles to a few matching containers. Add a small green plant or a decorative stone to soften the look.
The marble and brass are the stars, so let them have the spotlight.
7. Corner Niche for Awkward Spaces
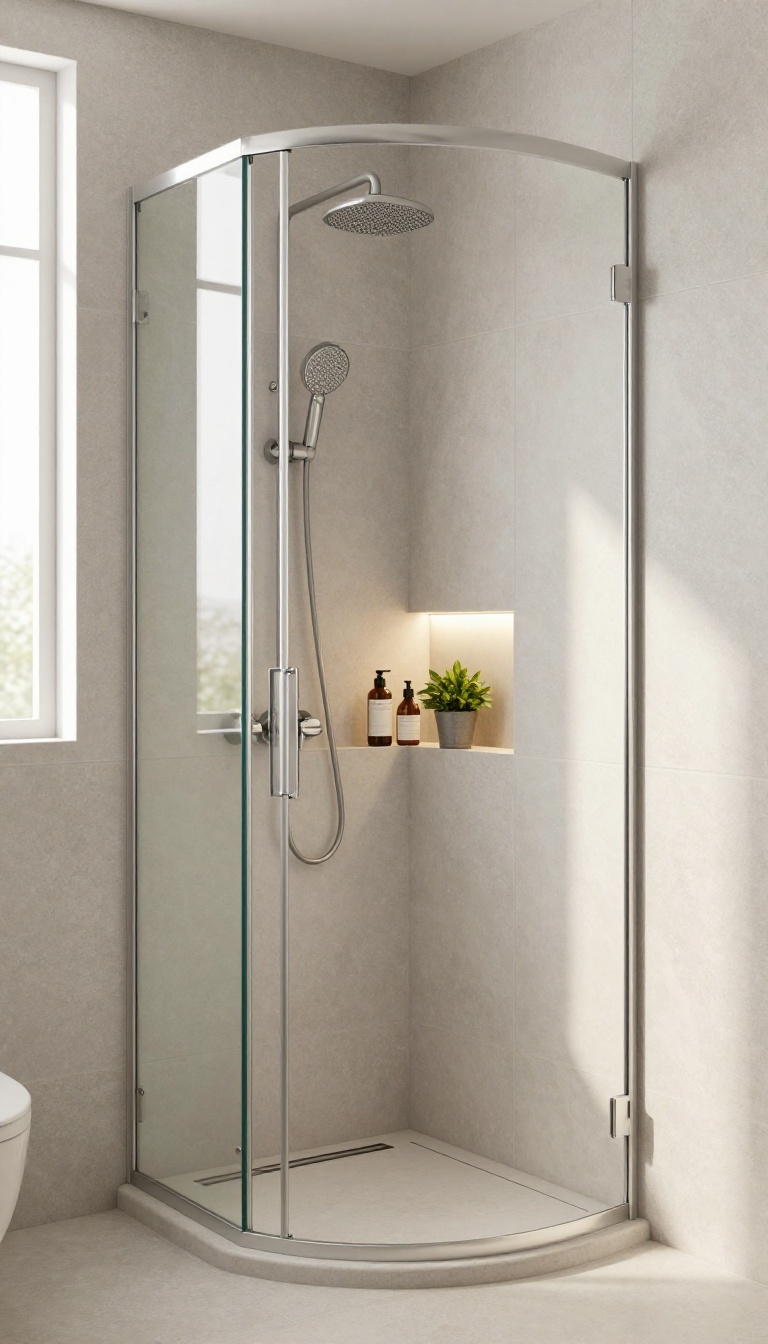
Corners often go unused in showers, especially in compact layouts where every inch counts. A corner niche turns that dead zone into a functional storage spot that also softens the room's geometry. Whether you choose a curved shelf or a triangular cutout, this approach feels intentional and clever.
Unlike a standard rectangular niche, a corner version can hold more products without intruding into the shower's walking space. It also adds a subtle architectural detail that makes the whole enclosure feel more custom. The best part?
It works in both small and large showers, adapting to whatever awkward angle you're dealing with.
When you're working with a corner, you have a few design directions to explore. A curved niche follows the natural arc of a corner seat or a curved glass enclosure, which feels fluid and modern. A triangular niche, on the other hand, offers a crisp, space-efficient shape that fits neatly into a 90-degree corner.
Both options free up wall space for other features like a handheld shower or a built-in bench. Think about how you'll use the niche day to day. If you need to store tall bottles, a taller triangular niche with a deep shelf works well.
For a more decorative look, a curved niche with a few floating glass shelves can display folded towels or a small plant. The key is to match the niche's shape to the shower's existing lines—curved for softness, angular for a more structured feel.
Curved Vs. Triangular: Which Fits Better?
A curved niche is a great choice if your shower has rounded elements, like a curved bench or a radius wall. It creates a smooth, continuous line that feels almost sculptural. Triangular niches are more straightforward and often easier to tile, especially if you're working with large-format tiles.
They also tend to hold more product because the back wall can be deeper. Consider the overall style of your bathroom: curved feels softer and more organic, while triangular leans modern and geometric.
Maximizing Storage In A Tight Corner
Even a small corner niche can hold a surprising amount if you plan the interior carefully. Add a second shelf to double the storage without taking up extra wall space. Use a recessed design so the niche doesn't protrude into the shower, keeping the walkway clear.
If you're short on depth, install a narrow shelf that runs the full height of the corner, giving you vertical storage for taller items. This way, you're using every inch of that awkward corner.
Styling Tips For A Corner Niche
Once the niche is built, styling it can make it stand out. Use a contrasting tile inside the niche, like a dark mosaic against light subway tile, to draw the eye. Add a small shelf for a candle or a bar of soap to create a spa-like vibe.
If the niche is visible from the bathroom, consider a backlit panel behind it for a soft glow. Keep the items inside organized and minimal—too many bottles can make the corner feel cluttered. A single plant or a rolled towel can add a touch of warmth without overwhelming the space.
8. Niche with a Built-In Soap Dish and Holder
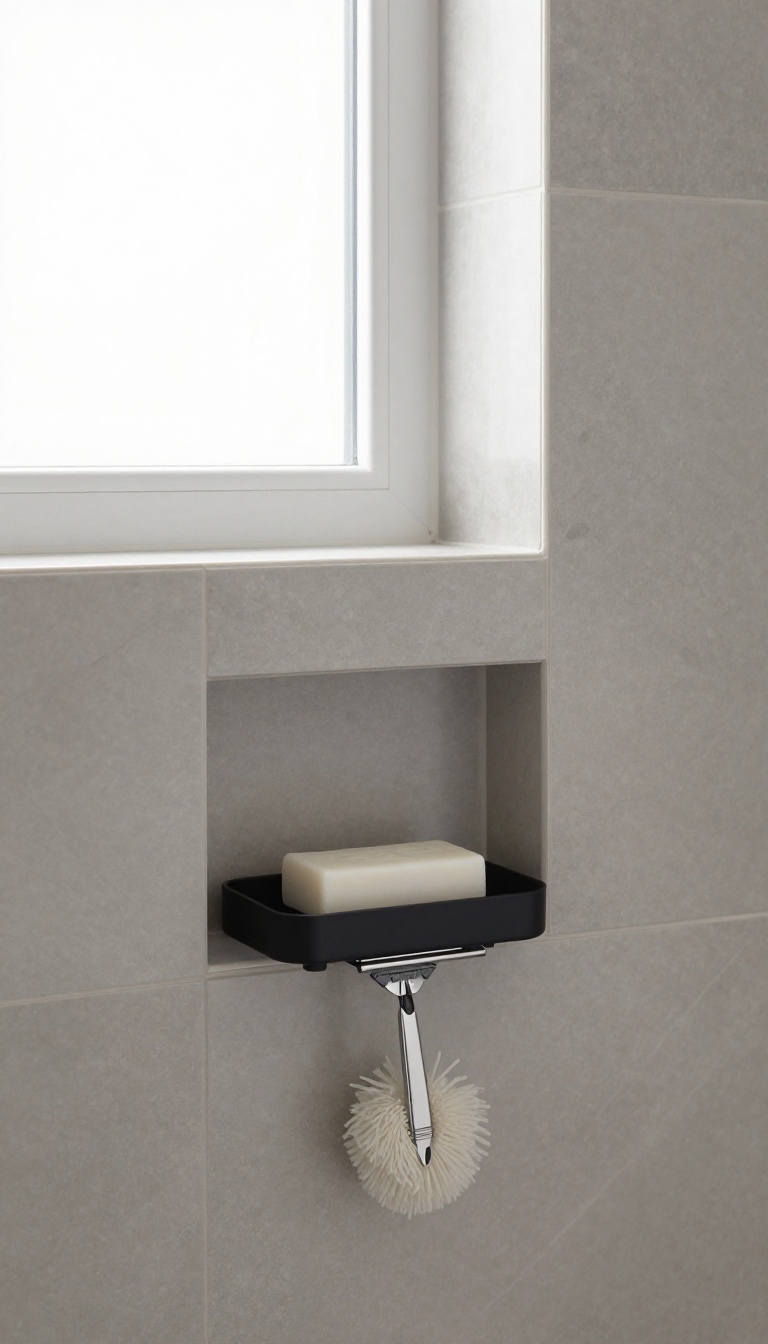
Tired of soap bars sliding around or razors cluttering the ledge? A niche with a built-in soap dish and a dedicated holder for razors or loofahs solves that in one clean move. It's a small addition that makes the shower feel more organized and intentional, without adding visual noise.
Adding a built-in soap dish and holder to your shower niche is a smart way to keep everyday essentials tidy and within arm's reach. Instead of juggling bottles or balancing a soap dish on the edge, everything has its own spot. This idea works especially well in family bathrooms or busy households where the shower gets a lot of use.
The built-in design also keeps the niche looking sleek and uncluttered, since there's no need for separate accessories that can rust or look out of place.
Design Options For The Soap Dish And Holder
You can choose from a few styles when integrating a soap dish and holder into your niche. A recessed soap dish sits flush with the tile, creating a seamless look. Or, opt for a shelf-style dish that extends slightly outward for easy access.
For the holder, consider a built-in ledge with small pegs or a recessed cubby designed specifically for razors or loofahs. Match the material to your tile or go with a contrasting accent like brushed nickel or matte black for a subtle pop.
Placement And Accessibility
Position the soap dish at a comfortable height—usually around waist level—so you can grab it without bending or stretching. The holder for razors or loofahs should be slightly higher, around shoulder height, to keep them out of the way but still easy to reach. If you're planning a custom niche, work with your contractor to place these elements where they feel most natural for your daily routine.
Drainage And Maintenance
One practical consideration is drainage. A slight slope on the soap dish or small drainage holes will let water run off, preventing soap from sitting in a puddle. For the holder, make sure it's designed to allow air circulation so loofahs can dry quickly and razors don't rust.
Choose materials that are easy to clean, like glazed ceramic or stainless steel, to keep maintenance simple.
9. Niche with a Contrasting Frame
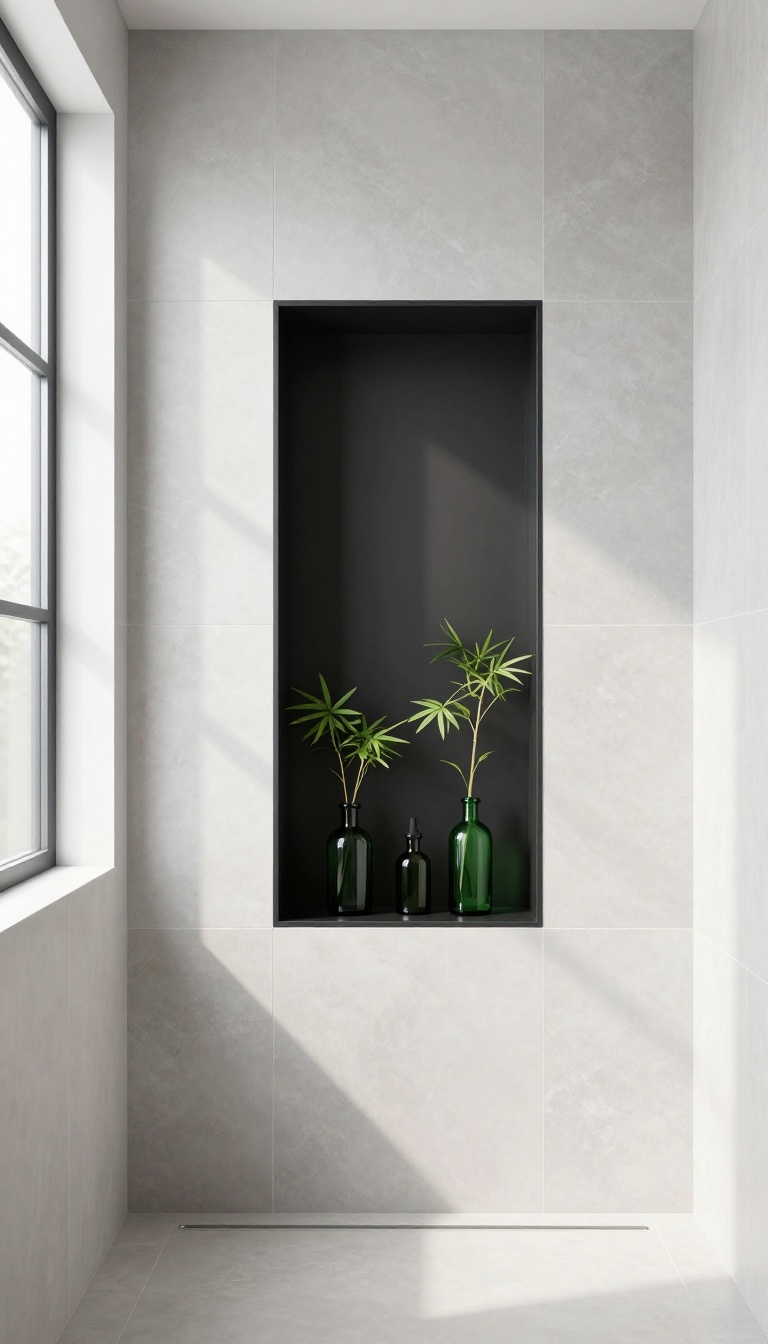
A frame around your shower niche might sound like a small detail, but it can completely change how the feature reads. Instead of letting the niche blend into the wall, a contrasting border draws the eye straight to it, giving the whole shower a more intentional, polished look. It’s a simple trick that works with almost any tile style, from classic subway to bold geometric patterns.
The idea is straightforward: use a different tile or trim to outline the niche, creating a crisp border that separates it from the surrounding wall. This frame can be as subtle or as bold as you like—a thin metal strip for a modern edge, or a row of contrasting mosaic tiles for a pop of color. The key is to choose a material that complements the main tile without competing with it, so the niche feels like a deliberate design element rather than an afterthought.
Choosing The Right Frame Material
The frame material sets the tone. For a sleek, contemporary look, consider brushed nickel or matte black metal trim—these add a clean line that works well with large-format tiles. If you prefer something warmer, a wood-look tile frame can bring a natural touch, especially when paired with earthy tones.
For a more traditional bathroom, marble or travertine trim in a slightly different shade creates an elegant, timeless border. The key is to keep the frame proportional to the niche size; a thin frame suits smaller niches, while a wider border can handle larger openings.
Color And Contrast Strategies
Contrast doesn’t always mean going dark against light. You can play with complementary colors, like a deep navy frame around a white subway tile niche, or stick to a monochromatic scheme with different shades of the same color for a subtle, sophisticated effect. If your shower tile is busy, a solid, neutral frame can help the niche stand out without adding visual noise.
On the other hand, if the wall tile is plain, a vibrant or patterned frame can become the focal point of the whole shower.
Installation Tips And Considerations
When installing a framed niche, precision matters. The frame pieces need to be cut neatly to fit around the niche opening, and the edges should be flush with the surrounding tile to avoid sharp corners. If you’re using metal trim, make sure it’s rated for wet areas to prevent corrosion.
Also, think about how the frame interacts with the niche’s interior—sometimes a contrasting frame looks best when it’s paired with a matching interior tile, while other times you might want the interior to blend with the wall and let the frame do all the talking. A little planning goes a long way in making the final result look seamless.
10. Niche with a Sloped Base for Water Drainage
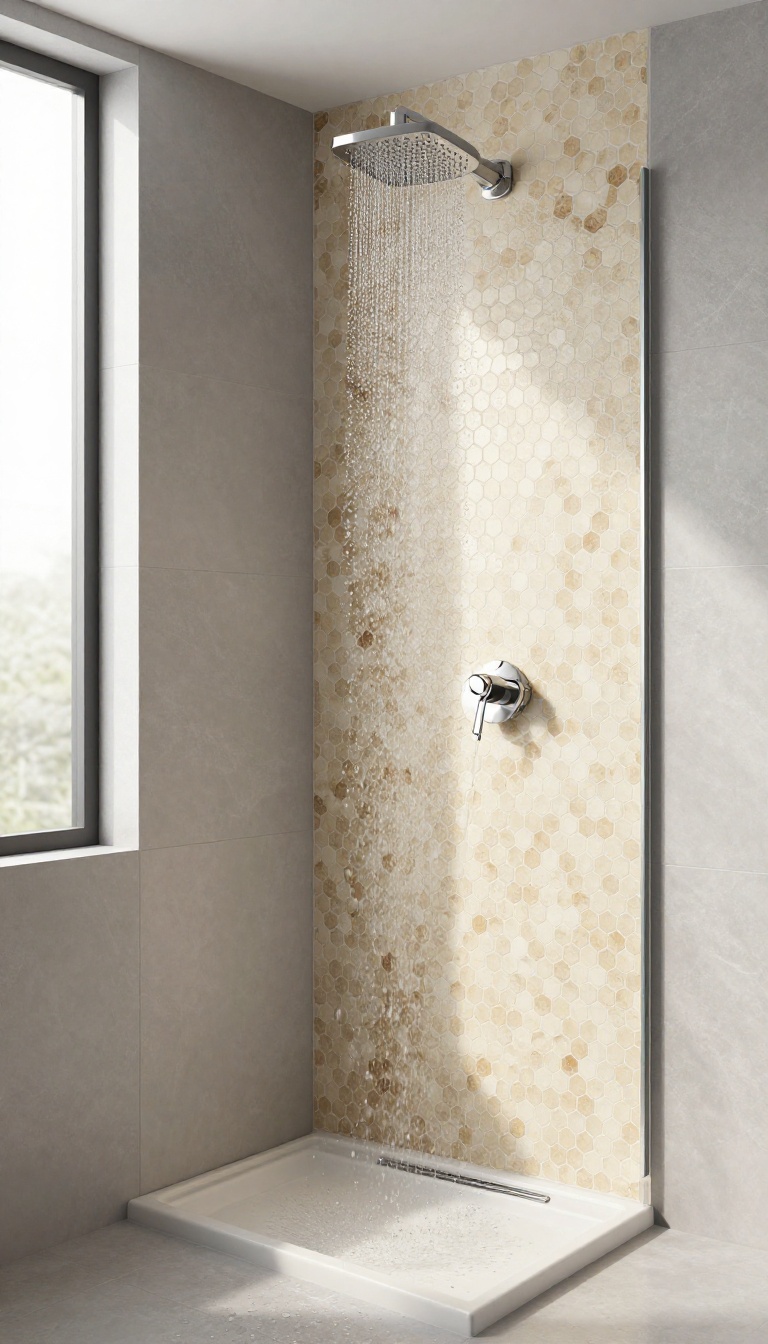
Water pooling is one of the most common complaints with shower niches, especially on tiled ledges where soap scum and grime love to linger. A simple fix is to slope the base of the niche slightly toward the shower floor, allowing water to run off naturally instead of sitting there. This practical detail not only keeps the niche cleaner but also reduces the risk of mold and mildew, making your shower healthier and easier to maintain.
A sloped base might seem like a minor tweak, but it makes a big difference in how your niche functions and looks. By directing water back into the shower, you avoid the constant wiping and scrubbing that flat ledges demand. Plus, the angled surface adds a subtle architectural detail that catches the eye without shouting for attention.
Here’s how to make it work in your bathroom.
Why Slope The Base?
Flat niche shelves are prone to water pooling, which leads to soap scum buildup, mineral stains, and even mold growth over time. A sloped base, usually pitched at a gentle angle of about 5 to 10 degrees, encourages water to run off immediately. This keeps the niche drier and reduces the need for harsh cleaning products.
It’s a small change that pays off in both hygiene and appearance.
How To Build A Sloped Base
During installation, your contractor can create a slope by setting the back of the niche slightly higher than the front, using thin-set mortar or a prefabricated foam insert. The tile is then laid on top, following the angle. For a seamless look, use the same tile as the rest of the shower, but consider a smaller format or mosaic to make the curve easier to achieve.
Make sure the slope is subtle enough that bottles don’t slide off—just enough to let water flow.
Design Options For A Sloped Niche
You don’t have to sacrifice style for function. Pair the sloped base with a contrasting accent tile on the back wall, or add a slim metal shelf insert that sits level while the base slopes beneath it. Another idea is to use a solid surface material like quartz or marble for the base, which can be fabricated with a precise slope and looks sleek.
The key is to keep the design clean and intentional, so the slope feels like a deliberate feature rather than a compromise.
Maintenance Tips For Sloped Niches
Even with a slope, regular maintenance keeps your niche looking fresh. After each shower, use a squeegee to remove excess water from the walls and niche. Once a week, wipe the niche with a mild cleaner to prevent soap scum.
If you notice any standing water, check that the slope hasn’t been compromised by grout or tile buildup. With a little care, your sloped niche will stay beautiful and functional for years.
11. Niche with a Plant Shelf
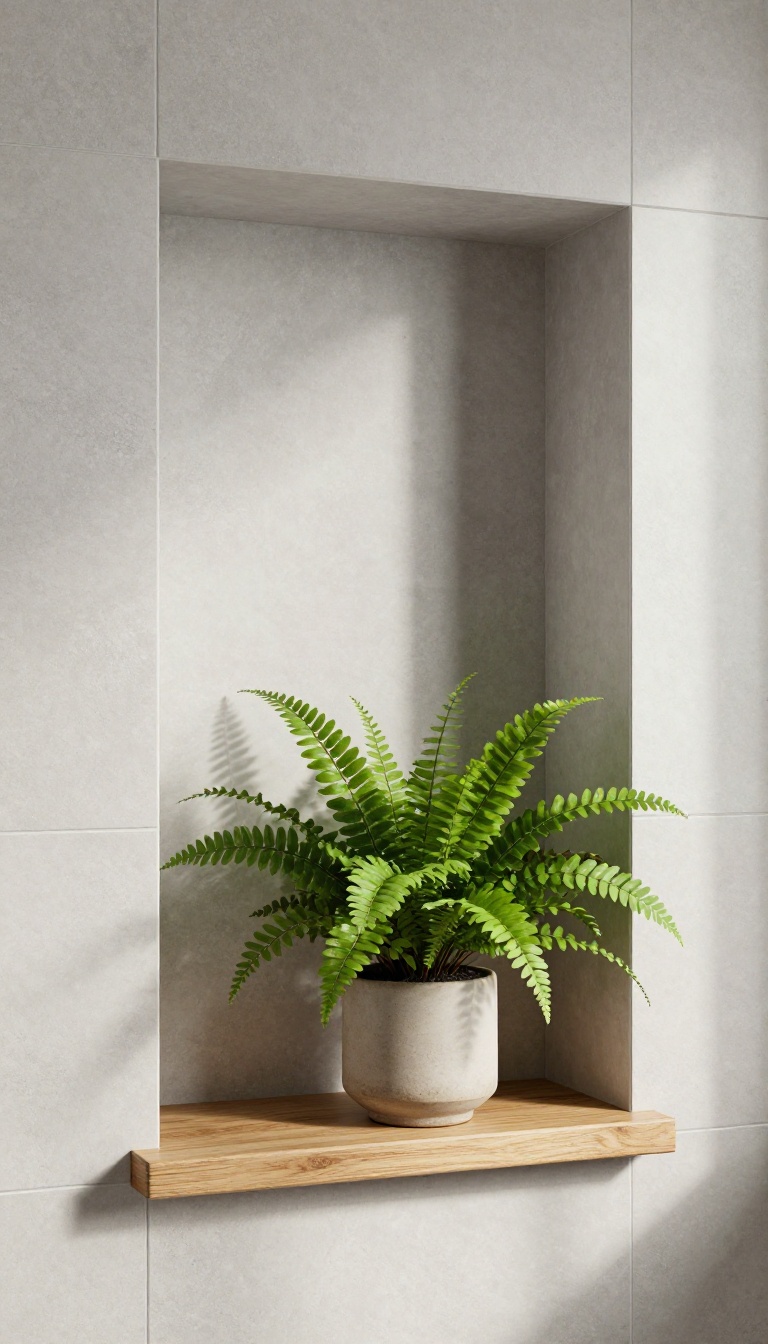
Adding a small shelf inside your shower niche is a simple way to bring a touch of nature into your daily routine. A humidity-loving plant not only adds a pop of green but also softens the hard edges of tile and stone, making the space feel more like a spa retreat. This idea works especially well if you have a niche that's deep enough to hold a plant without interfering with your shower essentials.
A plant shelf inside your niche is all about creating a living focal point. The key is choosing the right plant and placing it where it can thrive. Ferns, orchids, and pothos are excellent choices because they love the steamy environment.
You'll want to make sure the shelf is sturdy and has a slight lip to keep the pot from sliding. Also, consider the lighting—if your shower doesn't get much natural light, pick a low-light plant like a snake plant or ZZ plant.
Choosing The Right Plant
Not every plant will survive the constant humidity and occasional splashes. Go for varieties that thrive in tropical conditions, such as Boston ferns, spider plants, or philodendrons. These plants not only tolerate moisture but also help purify the air.
If you're worried about maintenance, opt for a faux plant that looks realistic but requires zero care.
Shelf Materials And Safety
The shelf itself should be made of materials that can handle water, like sealed teak, stainless steel, or tempered glass. Make sure it's installed securely and can hold the weight of a potted plant. Adding a small lip or edge prevents the pot from accidentally tipping over.
You might also consider a built-in ledge if you're planning a new niche, which can be tiled to match the rest of the shower.
Styling And Placement
Place the shelf at eye level or slightly below so the plant is easily visible. Keep the rest of the niche organized with matching bottles and a loofah, leaving the plant as the star. You can also add a small pebble tray beneath the pot to boost humidity and add a decorative touch.
The result is a shower that feels alive and refreshing.
12. Niche with a Hidden Storage Compartment
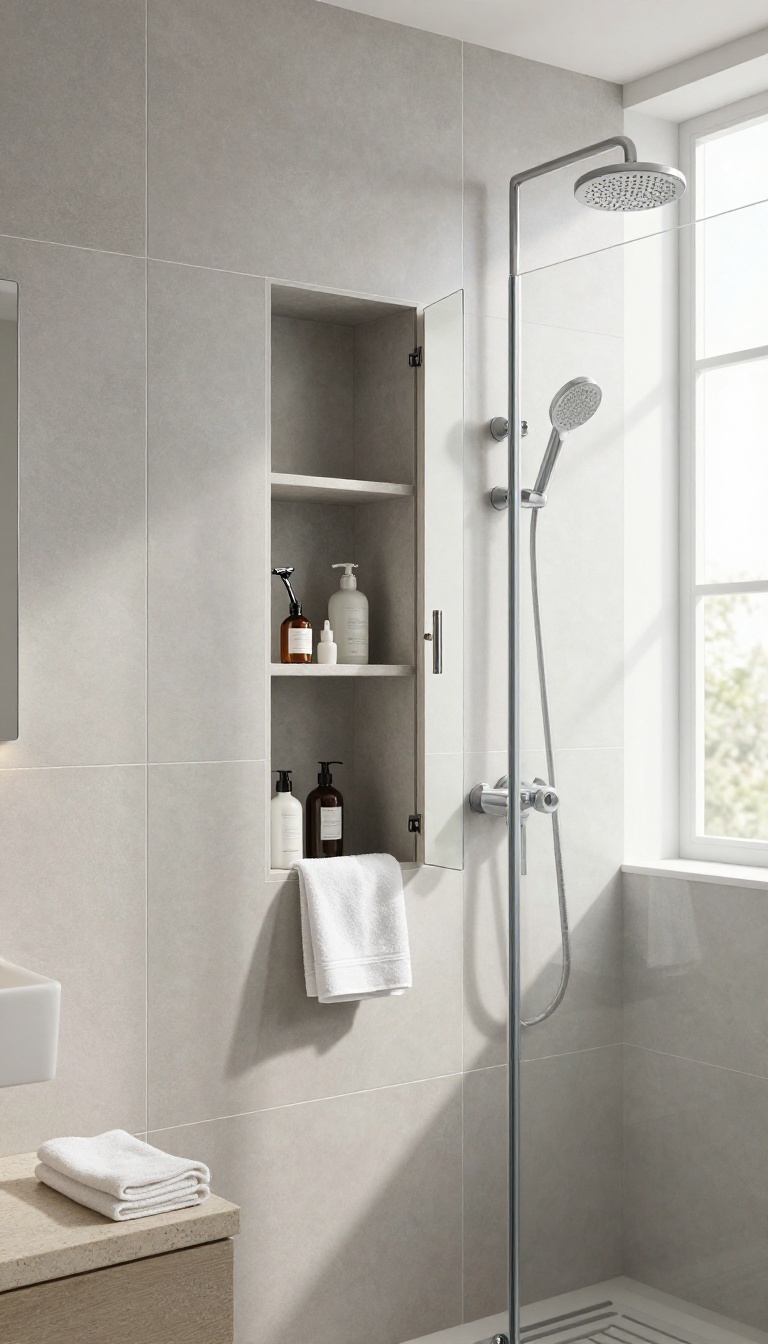
If you love the clean look of a minimalist shower but still need a place for razors, skincare, or other personal items, a hidden storage compartment inside your niche is a clever solution. It keeps the shelf looking tidy while giving you a private spot for things you don't want on display. This idea works especially well in shared bathrooms or when you want to maintain a spa-like aesthetic.
A hidden storage compartment is essentially a secret cabinet built into the niche. You can access it by pushing on a mirrored or tiled door that blends seamlessly with the surrounding surface. Inside, you'll find a waterproof box or shelf where you can stash items you'd rather keep out of sight.
This design adds a layer of functionality without compromising the sleek look of your shower.
Mirrored Door For A Sleek Look
A mirrored door is a popular choice because it reflects light and makes the shower feel larger. It also hides the compartment completely when closed. You can use a full-length mirror or a smaller panel, depending on the size of your niche.
Just make sure the mirror is treated for moisture resistance to prevent fogging or damage.
Tiled Door That Blends In
For a more seamless appearance, use a door covered with the same tile as the rest of the shower. The key is to align the grout lines so the door almost disappears when shut. This option requires careful planning during installation, but the result is a truly hidden storage space that looks like part of the wall.
You can add a small finger pull or a subtle recessed handle to make it easy to open.
Waterproofing And Ventilation
Since the compartment sits inside the shower, it's crucial to use waterproof materials and ensure proper sealing. A marine-grade plywood or a waterproof plastic liner will protect your items from moisture. Adding a small vent or drainage hole at the bottom helps air circulate and prevents mildew.
This way, your hidden storage stays fresh and functional for years.
13. Niche with a Linear Drain and Pebble Floor
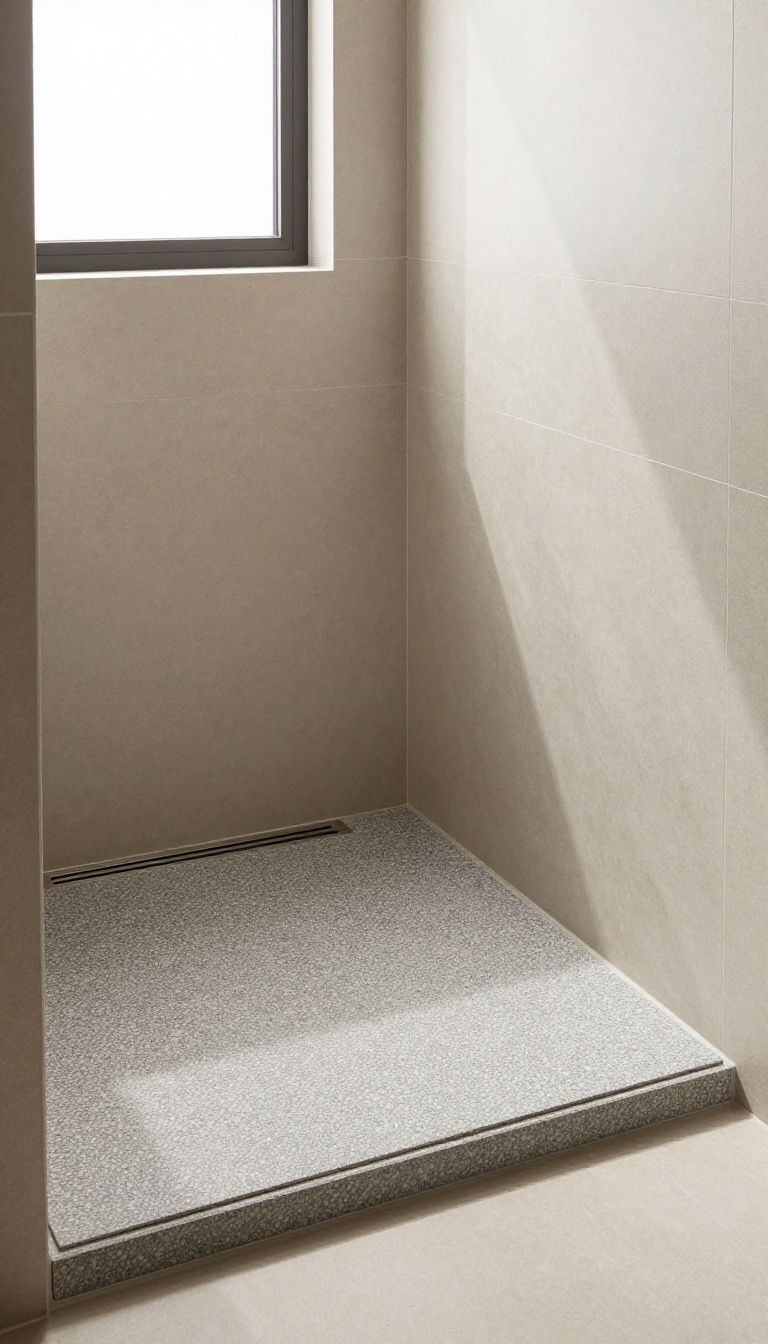
Pairing your niche with a linear drain and pebble floor creates a seamless, spa-like vibe that feels both natural and intentional. The pebble texture underfoot contrasts beautifully with the smooth tile often used in the niche, making the whole shower feel more organic. This combo works especially well in walk-in showers where the drain becomes a design element rather than an afterthought.
A linear drain isn't just practical—it changes the entire look of the shower floor. Instead of a traditional center drain, a linear drain sits flush against one wall, allowing the floor to slope gently in one direction. This creates a clean, minimalist line that echoes the horizontal lines of your niche.
When you add pebble tiles, the texture breaks up the smoothness and adds a tactile, natural element that's both slip-resistant and visually soothing. The niche itself can be tiled with the same pebbles for a fully integrated look, or you can keep it smooth and contrast the textures. Either way, the combination draws the eye because it feels cohesive and grounded—like a little piece of a natural hot spring right in your bathroom.
Why This Combo Works
The linear drain creates a strong horizontal line that anchors the shower floor, while the pebble floor adds organic texture. Together, they make the space feel larger and more open, especially if you use light-colored pebbles. The niche, when tiled with matching pebbles, becomes part of that continuous visual flow—no more jarring cutouts.
It's a subtle way to make the whole shower feel like one cohesive design element.
Installation Tips
For the best results, plan the niche placement before you set the drain. Ideally, the niche should align with the linear drain to reinforce the clean lines. Use a waterproofing membrane behind the pebble tiles, and make sure the pebbles are flat enough for comfortable standing.
Also, consider a slightly recessed niche shelf so bottles don't stick out and disrupt the smooth look.
Design Variations
You can play with pebble size and color to match your bathroom's palette. River stones in earthy tones create a warm, natural feel, while polished pebbles in gray or black give a more modern, dramatic look. For the niche, you could also mix pebble tiles with a smooth accent strip to add visual interest without overwhelming the space.
FAQ
What is the ideal size for a shower niche?
A standard shower niche is about 12 inches wide, 12 inches tall, and 3. 5 inches deep. But you can adjust based on your storage needs and the size of your shower.
How do I prevent mold in a shower niche?
Ensure the niche has a slight slope toward the drain, use waterproof materials, and properly seal all seams. Regular cleaning and ventilation also help.
Can I install a shower niche myself?
Yes, if you have basic tiling and framing skills. However, it's important to ensure proper waterproofing and structural support. If unsure, hire a professional.
What materials are best for a shower niche?
Porcelain or ceramic tile, natural stone, and tempered glass are popular choices. They are durable, water-resistant, and easy to clean.
How many niches should I have in a shower?
It depends on your needs. One niche is usually enough for most people, but you might want two if you have a large shower or need separate storage for different family members.
Conclusion
Your shower niche can be the focal point that ties the whole bathroom together—if you give it the right details. Start with one idea that excites you, whether it's a bold tile pattern or a sleek linear drain, and build from there. Even a single upgrade can change how the space feels every time you step in.
The best part? You don't need a full renovation to make it happen. Focus on materials, lighting, and proportions that suit your routine, and let the niche do the heavy lifting.