17 Cleaning Gutters Tips for Leaves, Clogs, and Drainage
Leaves pile up, downspouts clog, and water spills over the edges—gutter cleaning can feel like an endless chore. But you don't have to dread it or risk climbing a ladder with the wrong tools.
A few smart techniques make the job faster, safer, and more effective. From choosing the right scoop to flushing out stubborn blockages, these 17 tips cover everything you need to keep water flowing away from your home.
No fluff, just practical steps that actually work.
1. Gear Up with the Right Safety Equipment
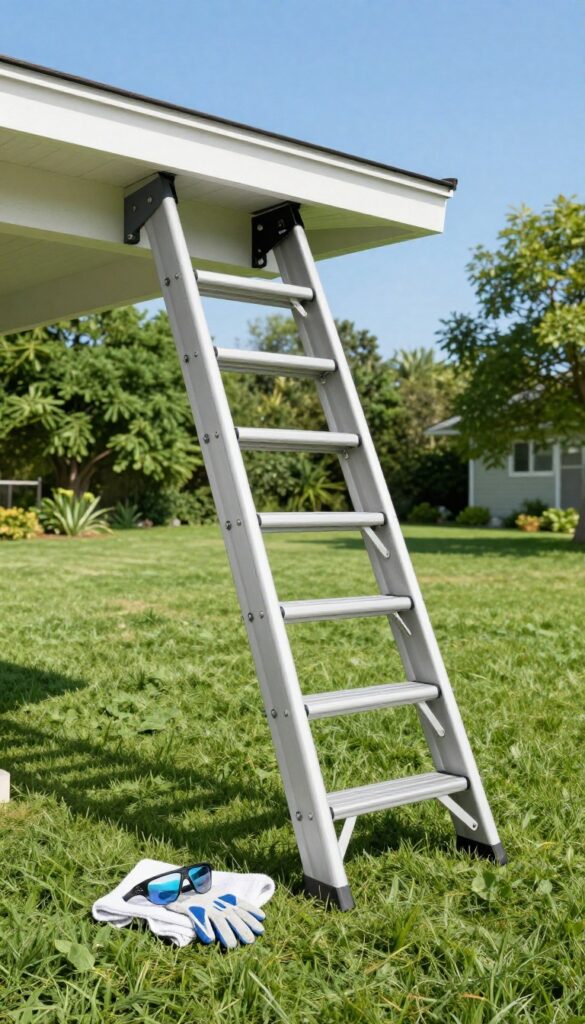
Gutter cleaning starts long before you grab a scoop. The right gear keeps you steady, protects your eyes and hands, and prevents accidents. Skipping safety might save a minute, but it's not worth a trip to the ER.
A sturdy ladder is non-negotiable. Fiberglass models resist electricity and weather better than aluminum. Add a ladder stabilizer or standoff—it keeps the ladder from damaging gutters and gives you a wider, more stable work area.
Wear gloves with good grip to handle debris and sharp edges, and safety glasses to shield against splashing grime and falling particles.
Choosing The Right Ladder
Pick a ladder that extends at least three feet above the roofline for safe access. An extension ladder with slip-resistant feet works best on uneven ground. Always set it on solid, level soil—never on soft dirt or mud.
Must-have Personal Protection
Heavy-duty rubber or nitrile gloves keep your hands dry and protected from sharp metal and bacteria. Safety glasses with side shields prevent dirty water and debris from hitting your eyes. Wear long sleeves and pants to avoid scrapes.
Ladder Stabilizers And Accessories
A ladder stabilizer or standoff attaches to the top of the ladder, creating a gap between the ladder and the gutter. This prevents the ladder from crushing gutters and gives you a more secure platform. Some models even let you work around corners.
2. Use a Trowel or Scoop for Heavy Debris
When leaves and muck have been sitting in your gutters for weeks, they turn into a dense, sludgy mess. Your hands or a simple brush won't cut it—you need something that can dig in and scoop out the gunk without damaging the gutter.
A plastic gutter scoop or a small trowel is the perfect tool for this job. Its curved edge fits the gutter profile, letting you scrape and lift compacted debris efficiently. Plus, plastic won't scratch or dent aluminum or vinyl gutters like a metal tool might.
Why Plastic Over Metal?
Metal trowels can leave scratches that lead to rust or corrosion over time. Plastic scoops are lightweight, durable, and gentle on gutter surfaces. They also won't conduct electricity if you're working near power lines—a nice safety bonus.
How To Use It Effectively
Start at the downspout end and work your way along. Scoop the debris into a bucket or onto a tarp below. For really packed muck, use a chopping motion to break it up before scooping.
This method saves time and keeps you from having to go back over the same section.
Where To Find A Good Scoop
Most hardware stores sell gutter scoops for a few dollars. You can also repurpose a plastic kitchen spatula or a small garden trowel with a rounded tip. Just make sure it's not too sharp to avoid gouging the gutter.
3. Flush Gutters with a Garden Hose
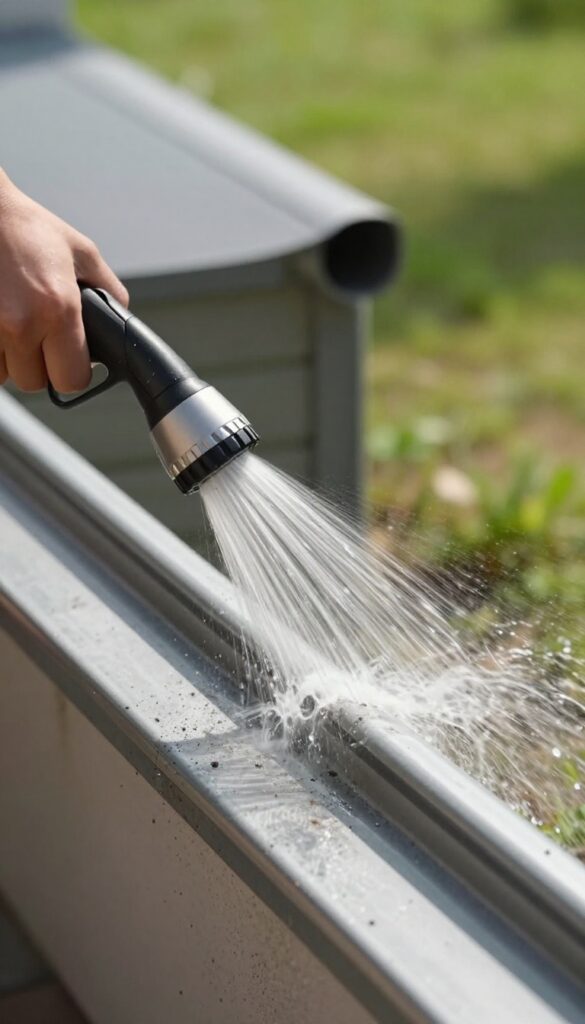
Scooping out leaves and sludge gets rid of the bulk, but it doesn't leave your gutters completely clean. A garden hose with a spray nozzle is the perfect tool for the final rinse. This step washes away the fine dirt and grit that can still cause clogs, and it gives you a chance to test how well your gutters drain.
After you've removed the big debris, grab a hose with a high-pressure nozzle. Start at the end opposite the downspout and work your way toward it. The water pressure will push remaining dirt and small particles along, clearing the path.
Watch the flow—if water pools or moves slowly, you've got a partial blockage that needs more attention.
Choose The Right Nozzle
A standard spray nozzle with a jet setting works best. Avoid wide spray patterns that waste water and don't provide enough force. A jet stream can dislodge stuck-on grime and push it toward the downspout without splashing water everywhere.
Work From The Far End
Always start flushing at the end of the gutter run farthest from the downspout. This lets the water carry debris along the entire length. If you start near the downspout, you'll just push muck into the corners and leave it there.
Check Downspout Flow
Once water reaches the downspout, watch how it exits at the ground. A strong, steady stream means the downspout is clear. If water trickles or backs up, you likely have a clog in the downspout itself.
In that case, use a plumber's snake or a high-pressure nozzle to break it up.
4. Clear Downspouts with a Plumber's Snake
Downspouts are the most common spot for clogs, and they can be tricky to clear without the right tool. A plumber's snake or a specialized gutter auger lets you break through blockages without taking the downspout apart. It's a simple, effective method that saves time and frustration.
When water backs up in your gutters, the problem is often a clog deep inside the downspout. Instead of dismantling the entire system, feed a plumber's snake or gutter auger into the downspout opening. Crank the handle to work the cable through the blockage, then pull it out—debris usually comes with it.
This technique works on most clogs, from leaf sludge to small twigs. For stubborn blockages, you can flush the downspout with a garden hose after snaking to clear remaining residue.
Choosing The Right Tool
A standard plumber's snake (about 25 feet) works fine for most residential downspouts. If you do this often, a gutter auger with a rubber bulb at the tip is better—it grabs debris and prevents scratching the downspout interior. Avoid using a drain snake with a sharp tip, as it can puncture aluminum downspouts.
Step-by-step Snaking
Start at the top of the downspout where it connects to the gutter. Insert the cable a few inches, then turn the crank clockwise while feeding it in. When you meet resistance, crank back and forth to break through.
Once the cable moves freely, retract it slowly. Repeat if needed, then flush with water to confirm the clog is gone.
When Snaking Isn't Enough
If the snake won't go past a certain point, the downspout may have a sharp bend or a compacted clog. Try accessing from the bottom of the downspout instead. If that fails, you may need to disconnect a section.
Snaking works best as a first attempt—it's quick and non-invasive.
5. Install Gutter Guards to Reduce Maintenance
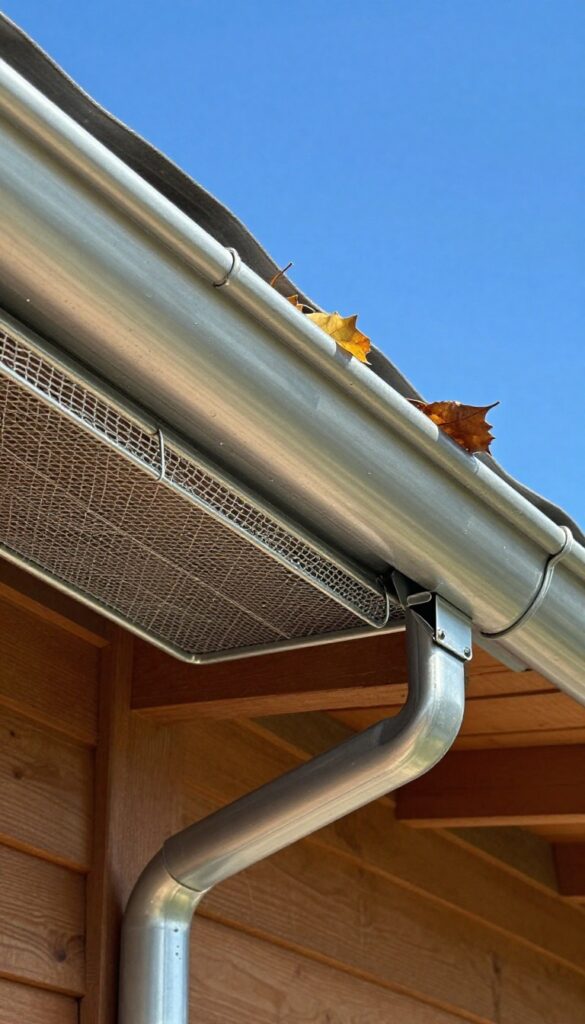
If you're tired of scooping leaves every few weeks, gutter guards can be a game-changer. These covers sit on top of your gutters and block debris while letting rainwater flow through. They're not a magic fix—some small particles and pine needles still get in—but they cut down the frequency of cleanings dramatically.
Types Of Gutter Guards
Mesh guards are the most popular—fine stainless steel or plastic mesh that stops leaves but lets water pass. Foam inserts sit inside the gutter and block debris while water soaks through. Brush guards look like giant pipe cleaners and catch leaves on top.
Each type has pros and cons, so pick based on your debris type and budget.
Installation Tips
Most guards snap or screw onto the front edge of your gutter. Make sure the pitch is correct so water doesn't pool on top. For mesh guards, overlap seams by at least an inch to prevent leaves from sneaking through.
Always test with a garden hose after installing to spot any leaks or overflow.
Maintenance Still Needed
Even with guards, you'll need to check gutters once or twice a year. Tiny debris like shingle grit and pollen can build up on top of mesh guards. Foam inserts can get moldy over time and need replacement every few years.
But overall, you'll spend way less time on the ladder.
6. Trim Overhanging Branches
Branches that hang over your roof are basically debris delivery systems. Every gust of wind shakes loose leaves, needles, and twigs straight into your gutters. Trimming them back is one of the easiest ways to cut down on cleaning frequency and prevent clogs before they start.
Overhanging branches are a major source of gutter debris, especially from trees like pines, oaks, and maples. By cutting them back at least 6 to 10 feet from your roofline, you reduce the amount of organic material that lands in your gutters. This also minimizes the risk of branches scraping or damaging your roof during storms.
Use a pole pruner or hire a professional for high or thick branches. Always prioritize safety—never trim near power lines yourself.
How Far To Cut Back
A good rule of thumb is to trim branches so they clear your roof by at least 6 feet. This gives enough buffer to account for wind and growth. For trees that shed heavily, like cottonwoods or pines, consider an 8- to 10-foot clearance.
Mark the branches before cutting to avoid over-trimming, which can harm the tree.
Best Time To Trim
Late winter or early spring is ideal for most trees, as they're dormant and you can see the branch structure clearly. Avoid trimming during nesting season (spring to early summer) if birds are present. For dead or damaged branches, trim them as soon as you notice them to prevent breakage.
Tools You'll Need
A pole pruner with an extendable handle works well for branches up to 15 feet high. For thicker branches, a pruning saw or chainsaw on a pole is better. Always wear safety glasses, gloves, and a hard hat if working near the house.
If branches are near power lines, call a professional.
7. Check and Adjust Gutter Slope
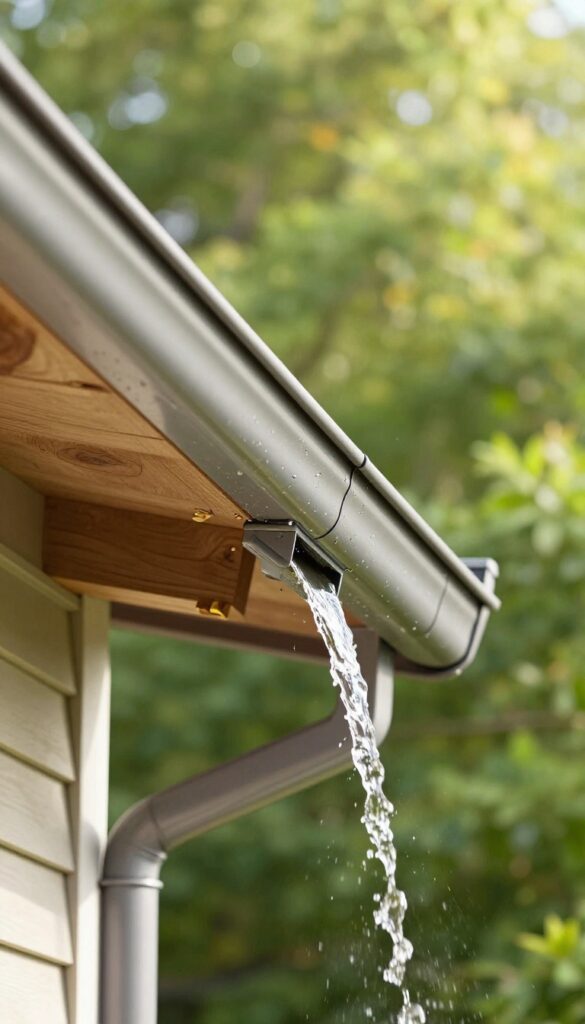
Even if your gutters are spotless, water can still pool or spill over if the slope isn't right. Gutters need a slight tilt toward the downspouts so water flows freely instead of sitting in place. A quick check and small adjustment can fix drainage issues without replacing anything.
Gutters should slope about 1/4 inch per 10 feet toward downspouts. If water pools, adjust hangers or rehang sections to fix drainage.
Why Slope Matters
Without the right slope, water sits in the gutter and can cause rust, sagging, or even damage to your fascia. Proper slope also helps prevent debris from settling, making future cleanings easier.
How To Check The Slope
Use a level on the gutter bottom after a rain, or spray water with a hose. If water pools more than an inch deep, the slope is off. Mark low spots with a pencil so you know where to adjust.
Adjusting Hangers And Brackets
Loosen the hangers near the low spots and gently raise the gutter using a pry bar or your hands. Tighten them back and test the flow again. For stubborn sections, you may need to rehang a short run with new screws.
8. Seal Leaks with Gutter Caulk
A tiny drip at a joint might not seem like a big deal, but over time it stains your siding and rots the fascia board behind the gutter. Fixing those small leaks is one of the easiest ways to extend the life of your gutter system.
Most leaks happen at the seams where gutter sections connect or at the end caps. Water seeps through gaps as small as a credit card's thickness, so a good sealant is all you need. Choose a waterproof gutter caulk that stays flexible in freezing weather—silicone-based or butyl rubber formulas work best.
Apply it on a dry day when temperatures are above 50°F for proper adhesion. Clean the area around the leak with a wire brush and let it dry completely before applying a thick bead of caulk. Smooth it with a putty knife or your finger (wear a glove) to ensure full coverage.
Let it cure for 24 hours before testing with a hose. For larger gaps, combine caulk with a patch of aluminum flashing for a permanent fix.
Where Leaks Usually Form
Check the end caps first—they pop loose over time as gutters expand and contract. Also inspect the joints where two gutter sections meet, especially if they were joined with rivets or screws. Downspout elbows and the connection between the gutter and downspout are other common spots.
Run a hose through the system while you watch for drips; even a slow weep will show up clearly.
Choosing The Right Caulk
Don't grab just any tube from the hardware store. Look for a sealant labeled as gutter and roof caulk that stays flexible down to -20°F. Silicone caulk adheres well to metal and vinyl, but butyl rubber is better for sealing against standing water.
Avoid acrylic caulks—they crack in cold weather. A tube costs around $5 and covers multiple small repairs.
Application Tips For A Lasting Seal
Work on a dry, warm day. Scrub the leak area with a stiff brush to remove dirt and oxidation. Wipe with a rag and rubbing alcohol to remove any oily residue.
Cut the caulk nozzle at a 45-degree angle to get a bead about ¼ inch wide. Press the caulk firmly into the gap, then smooth it so it bonds to both surfaces. Let it cure fully before exposing it to rain—check the tube for exact dry time, usually 24 hours.
9. Use a Leaf Blower for Dry Debris
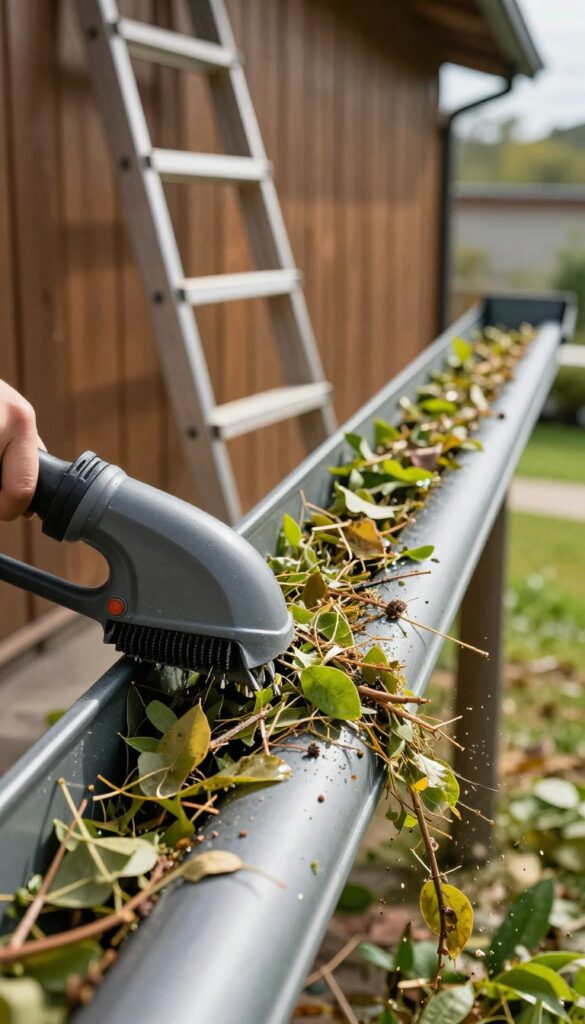
When the leaves are dry and crispy, a leaf blower can save you a ton of time. With the right attachment, you can blast out debris without ever touching the gunk. And if you add an extension kit, you might not even need a ladder.
A leaf blower with a gutter attachment turns a tedious job into a quick blast. The attachment directs the airflow into the gutter channel, pushing leaves and twigs out the downspout or over the edge. This works best when everything is bone-dry—wet leaves just stick and laugh at your efforts.
For hard-to-reach gutters, a gutter extension wand lets you stand on the ground and clear the first story. Just be ready for a cloud of dust and debris, and wear safety glasses.
Pick The Right Blower And Attachment
Not all leaf blowers are created equal for gutter work. A gas or high-end electric blower with at least 400 CFM (cubic feet per minute) gives you enough oomph. The gutter attachment is a curved tube that fits over the blower nozzle—some come with a kit, or you can buy one separately.
Look for one that swivels so you can adjust the angle without bending your wrist into a cramp.
Go Pro With An Extension Kit
If you have two-story gutters, a gutter extension kit is a game-changer. These are long, lightweight tubes that attach to your blower and let you reach the roofline from the ground. Some kits include a camera attachment so you can see inside the gutter on your phone.
It’s not cheap, but it beats climbing a ladder every time.
Know When To Skip This Method
Leaf blowers only work on dry debris. After a rain or in humid climates, leaves clump together and won’t budge. Also, if your gutters are packed with dirt or have standing water, the blower will just make a muddy mess.
In those cases, stick to a scoop or a wet/dry vacuum.
10. Install Downspout Extensions
Downspouts do their job of channeling water from the roof to the ground, but if that water dumps right next to your foundation, you're asking for trouble. Over time, that moisture can seep into your basement or crawl space, leading to mold, rot, or even structural damage. The fix is simple and cheap: add downspout extensions to push water at least four feet away from the house.
Downspout extensions are one of those low-effort, high-reward upgrades that every homeowner should consider. They redirect rainwater away from your foundation, preventing pooling and potential water damage. Most extensions are easy to install—just attach them to the bottom of your downspout with a few screws or a snap-on connector.
You can choose from rigid plastic, flexible vinyl, or even roll-up fabric extensions that lay flat when not in use. Whichever type you pick, make sure the water discharges onto a sloped area or into a drainage system, not onto a neighbor's yard or a walkway that could ice over in winter.
Measuring And Placement
Before buying extensions, measure the distance from your downspout outlet to the nearest safe discharge point. Aim for at least four feet, but if you have a basement, six feet is better. Also check that the ground slopes away from the foundation—if it doesn't, consider adding a small French drain or grading the soil.
Mark where each extension will go, and make sure it won't block foot traffic or create a tripping hazard.
Installation Tips
Most downspout extensions simply slide onto the existing elbow and are secured with a few self-tapping screws. For a cleaner look, you can bury the extension underground using a pop-up drain that emerges several feet away. If you go that route, use perforated pipe wrapped in landscape fabric to prevent clogs.
Always test the flow with a garden hose to make sure water moves freely and doesn't back up at the connection point.
Maintenance And Seasonal Checks
Extensions can get clogged with leaves or debris, especially at the outlet. Inspect them at least twice a year—during spring and fall gutter cleaning—and flush them out with a hose. In winter, disconnect flexible extensions that could freeze and crack, or switch to a rigid type that handles ice better.
Also check that the ground hasn't settled around the discharge area, creating a new low spot that could direct water back toward the foundation.
11. Clean Gutters After Heavy Storms

A heavy storm doesn't just dump rain—it also drops branches, leaves, and grit into your gutters. The wind can shift existing debris around, creating new blockages where there were none. Taking a few minutes to check your gutters after a storm can save you from dealing with overflow and water damage later.
Storms often deposit extra debris and can shift existing clogs. A quick post-storm check prevents minor issues from becoming major.
Why Post-storm Checks Matter
After a storm, gutters can be clogged with wet leaves, twigs, and silt that wash off the roof. Even if your gutters were clean before, the sudden influx of debris can create a dam. Water then backs up, spills over the edges, and can seep into your fascia or foundation.
A quick inspection helps you catch these problems early.
What To Look For
Start by walking around your house and looking for any visible debris on the roof or in the gutters. Check downspout openings for blockages—if water isn't flowing out freely, you likely have a clog. Also, look for sagging sections or separated joints that the storm may have loosened.
How To Clean Safely
Use a sturdy ladder on level ground, and have someone spot you if possible. Wear gloves to protect your hands from wet debris and sharp edges. Scoop out leaves and muck with a gutter scoop or trowel, then flush the gutters with a garden hose to clear remaining silt and confirm water flows through the downspouts.
12. Use a Wet/Dry Vacuum for Wet Clogs
When leaves and muck have been sitting in your gutters for weeks, they turn into a heavy, sludgy mess that a leaf blower just can't budge. That's where a wet/dry vacuum with a gutter cleaning kit comes in. It sucks up the wet debris quickly, and you don't have to touch the gunk with your hands.
A shop vac is a game-changer for those times when your gutters are packed with wet, compacted leaves and mud. The gutter cleaning kit usually includes curved attachments that let you reach into the gutter while standing on the ground, plus a long hose that connects to the vac. You simply move the attachment along the gutter, and the vacuum pulls everything into the collection drum.
This method works especially well after a heavy rain, when debris is saturated and heavy.
Choose The Right Attachment
Most gutter cleaning kits come with a curved wand that fits the shape of your gutter. Look for one with a wide mouth so it can handle clumps of wet leaves without clogging. Some kits also include a squeegee attachment that helps dislodge stuck-on sludge while you vacuum.
Work From The Downspout Outward
Start vacuuming near the downspout and work your way toward the end of the gutter run. This prevents pushing debris toward the downspout and causing a blockage. If you hit a stubborn clog, use the vacuum's reverse function (if available) to blow air and break it loose, then switch back to suction.
Empty The Vacuum Frequently
Wet debris fills up the drum fast. Stop every few minutes to empty it, especially if you're dealing with heavy sludge. A full drum reduces suction power and makes the job harder.
Keep a tarp or trash bag nearby to dump the muck directly into.
13. Inspect and Tighten Gutter Hangers
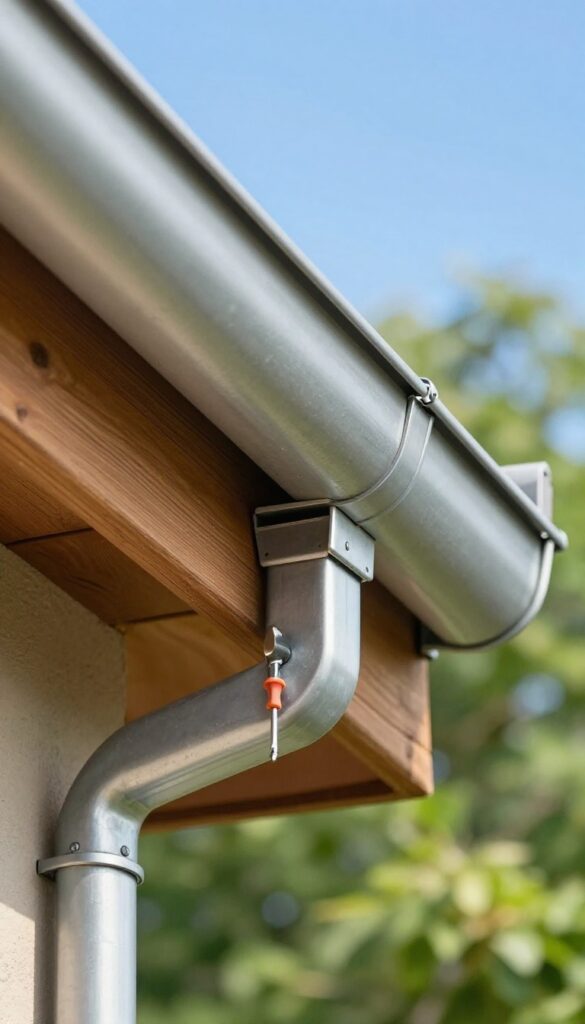
Gutters that sag or pull away from the house don't just look bad—they fail at directing water away from your foundation. The culprit is almost always loose or damaged hangers. Taking a few minutes to check and tighten them keeps your gutters aligned and working properly.
Gutter hangers are the brackets that attach your gutters to the fascia board. Over time, they can loosen due to weather, weight from debris, or simply age. When hangers pull away, the gutter dips, creating low spots where water pools instead of flowing toward downspouts.
This leads to overflow, rot, and even foundation issues. Regular inspection is key.
Spot The Signs Of Loose Hangers
After a heavy rain, look for areas where water spills over the front edge of the gutter. Also check for visible gaps between the gutter and fascia, or gutters that appear wavy. If you see any of these, it's time to tighten the hangers.
How To Tighten Or Replace Hangers
Most hangers are secured with screws or nails. Use a screwdriver or drill to tighten any loose screws. If a hanger is bent or broken, replace it with a new one—ideally the same type and size.
For gutters with hidden hangers, you may need to remove the gutter to access the brackets.
Prevent Future Loosening
Consider upgrading to hangers with longer screws that bite deeper into the fascia. Also, ensure gutters are cleaned regularly so heavy debris doesn't strain the hangers. A little maintenance now saves you from bigger repairs later.
14. Add a Downspout Filter or Strainer
Downspouts are the narrowest part of your gutter system, so they clog first. A simple wire basket or mesh strainer at the top of each downspout catches leaves and grit before they enter the pipe. This one addition can save you hours of wrestling with stubborn blockages later.
Installing a downspout filter is a quick, low-cost upgrade that pays off every time it rains. These devices sit right where the gutter meets the downspout, letting water flow through while trapping debris. You can find them at any hardware store for a few dollars each, and they pop in without tools.
Once they're in, you'll notice fewer clogs and less standing water in your gutters.
Types Of Downspout Filters
The most common options are wire mesh baskets that sit inside the downspout opening, plastic snap-in strainers, and foam inserts that block debris but let water pass. Mesh baskets are the easiest to clean—just lift them out and dump the debris. Foam inserts work well but can degrade over time in direct sunlight.
Where To Install Them
Place a filter at every downspout inlet, especially those under trees or near roof valleys where debris collects. If you have multiple downspouts, prioritize the ones that historically clog first. You can also add a secondary filter at the bottom of the downspout where it meets the ground drain, but the top is the most critical spot.
Maintenance Tips
Check your downspout filters after heavy storms or during seasonal gutter cleaning. They can fill up with wet leaves and need a quick rinse with a garden hose. If you notice water spilling over the gutter edge during rain, the filter might be clogged.
Clean it immediately to restore flow.
15. Consider Heated Cables for Ice Dams
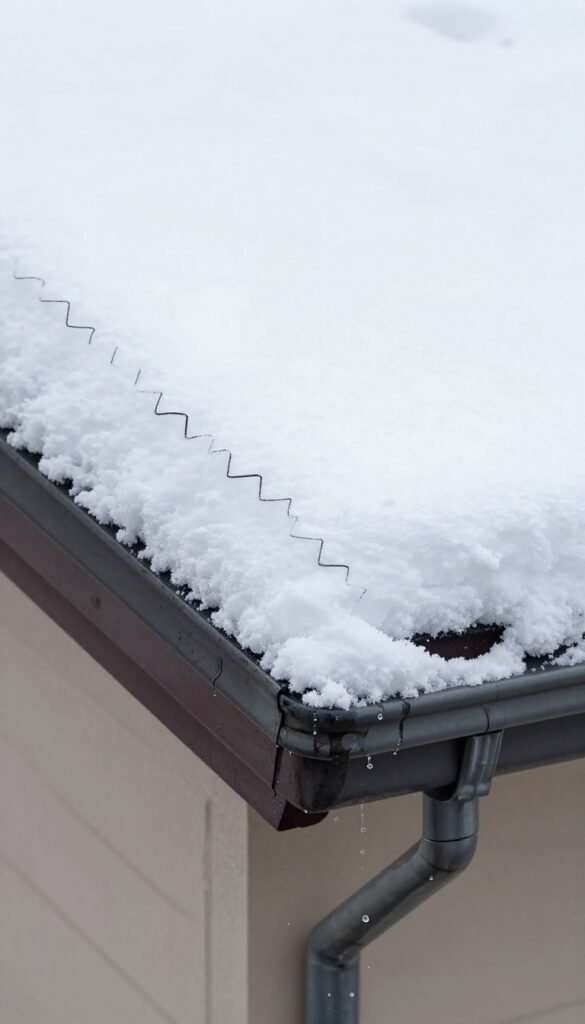
Winter brings a whole new set of gutter problems, especially if you live where snow and freezing temps are common. Ice dams form when snow on the roof melts and refreezes at the eaves, blocking drainage and forcing water under shingles. Heated cables are a simple, effective fix that prevents ice from building up in the first place.
Heated cables, also known as heat tape or roof de-icing cables, run along the roof edge and inside gutters and downspouts. They melt snow on contact, creating a clear path for water to flow off the roof and through the gutter system. This stops ice dams before they start and protects your roof, gutters, and foundation from water damage.
How Heated Cables Work
These cables contain a heating element that activates when temperatures drop near freezing. They're typically installed in a zigzag pattern along the roof edge, with loops hanging into gutters and downspouts. When snow or ice touches the cable, it melts and drains away, preventing buildup.
Installation Tips
For best results, install cables before winter arrives. Use clips to secure them to shingles without causing damage, and make sure the cable extends into downspouts to keep them clear. Plug the system into a GFCI outlet, and consider a timer or thermostat for automatic operation.
When To Use Heated Cables
Heated cables are ideal for homes in regions with prolonged freezing temperatures and heavy snowfall. They're especially useful on roofs with low slopes, valleys, or areas that stay shaded. If you've had ice dam problems before, this is a reliable long-term solution.
16. Schedule Regular Cleanings Twice a Year
Consistency beats crisis every time. Instead of waiting for a gutter overflow to grab your attention, put two cleaning dates on your calendar and stick to them. This simple habit turns a frantic chore into a quick, predictable task.
A twice-yearly schedule covers the two heaviest debris seasons. Late spring clears out the seeds, flowers, and twigs that fell during early growth, plus any leftover winter grit. Late fall removes the leaves and needles that pile up before snow and ice arrive.
If you live in a heavily wooded area or face frequent storms, you might need a third pass in mid-winter, but twice a year works for most homes.
Why Timing Matters
Cleaning too early means you miss the last wave of falling leaves. Cleaning too late means clogs have already formed and water may have damaged your fascia or foundation. Late spring and late fall hit the sweet spot—after most seasonal debris has dropped but before the next weather extreme sets in.
How To Make It Stick
Set a recurring reminder on your phone or write it on a physical calendar. Pair the task with something you already do, like changing smoke alarm batteries or switching out seasonal decorations. If you hire a pro, book both visits at once so they're locked in.
17. Know When to Call a Professional

Not every gutter job is a DIY win. Sometimes the smartest move is to step back and let someone with the right gear handle it. Knowing your limits isn't defeat—it's good judgment.
A pro can finish in a fraction of the time and often spots issues you'd miss from the ground.
If you have a steep roof, multi-story home, or physical limitations, hiring a pro is safer and often more efficient than DIY. Professionals bring commercial-grade ladders, safety harnesses, and powerful vacuums that make quick work of even the nastiest clogs. They also inspect for damage, loose fasteners, and improper pitch—things that lead to bigger problems down the road.
Costs vary, but expect $100–$250 for a typical single-story home. For two stories or complex rooflines, it can run $200–$400. Compare that to the risk of a fall or the time spent wrestling with a clogged downspout, and it often makes sense to outsource.
When The Roof Is Too Steep
Roofs with a pitch steeper than 6/12 (rising 6 inches for every 12 inches of run) become dangerous without proper safety equipment. Professionals use ladder stabilizers, roof jacks, and harnesses anchored to the ridge. If you're not comfortable walking on your roof, don't chance it.
Multi-story Homes Are A Different Game
A two-story house means a 20-foot or taller ladder. That's heavy, awkward, and requires a spotter and a level surface. Pros have telescoping ladders and extendable tools that let them clean from the ground or with minimal climbing.
For three stories, definitely call a pro.
Physical Limitations Matter
Balance issues, bad knees, back problems, or fear of heights are all valid reasons to hire help. Even if you're fit, repetitive ladder climbing strains your body. A pro can do in an hour what might take you all morning—and they're insured if something goes wrong.
FAQ
How often should I clean my gutters?
At least twice a year—once in late spring after seed drop and once in late fall after leaves fall. If you have many trees nearby, consider quarterly cleanings.
Can I clean gutters without a ladder?
Yes, using a leaf blower with a gutter attachment or a telescoping pole with a scoop tool allows ground-level cleaning, but they work best for light debris.
What's the best gutter guard?
It depends on your debris type. Micro-mesh guards are great for fine debris like pine needles, while foam inserts work well for leaves. No guard is maintenance-free.
How do I know if my gutters are clogged?
Signs include water overflowing during rain, plants growing in gutters, sagging sections, and water stains on fascia or siding. Also check for pooling near the foundation.
Is it safe to clean gutters myself?
It can be safe if you use a sturdy ladder, wear non-slip shoes, and have a helper. For steep roofs or heights over two stories, hire a professional.
Conclusion
Gutter cleaning doesn't have to be a dreaded weekend chore. By picking a few of these 17 tips that match your home's setup and your schedule, you can prevent clogs, protect your foundation, and save yourself from costly repairs. Start with the easiest tasks—like installing gutter guards or using a leaf blower—and build from there.
Even small steps make a big difference in keeping water flowing where it should. Your gutters will thank you, and so will your basement and landscaping.