23 Cleaning Air Vents Tips for Dust Free Healthier Airflow
Imagine walking into a room and taking a deep, clean breath. That's the feeling of truly clean air vents. Over time, vents collect dust, pet dander, and even mold, turning your HVAC system into a recirculator of pollutants.
Cleaning them isn't just about looks—it's about your health. Dirty vents can trigger allergies, reduce system efficiency, and even harbor pests. The good news?
You don't need professional help for most of it. This guide covers 23 practical tips to get your vents spotless. Whether you have floor registers, ceiling vents, or return grilles, you'll find actionable steps to boost airflow and breathe easier.
1. Turn Off the HVAC System First
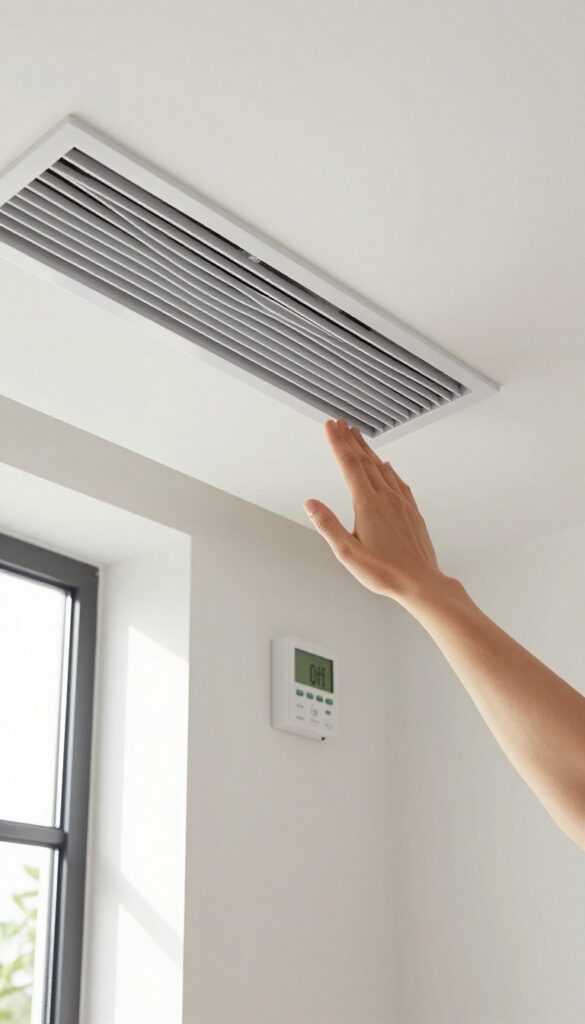
Before you grab a brush or vacuum, flip the switch. Running your HVAC while cleaning is like sweeping a dusty floor with the fan on—you're just stirring up trouble. Shutting it down keeps dust from blowing into other rooms and protects the blower motor from debris.
Turning off the system is a simple but critical first step. It prevents dislodged dust from being sucked into the ductwork or blown back into your living space. It also keeps the blower from pulling in loose particles, which can damage the motor over time.
Make sure to switch off both the heating and cooling modes at the thermostat, and if you're comfortable, cut power at the breaker for extra safety.
Why It Matters
When the system is on, air is constantly moving. That means any dust you knock loose gets carried away before you can catch it. Turning it off gives you control—you can vacuum or wipe debris directly without it scattering.
How To Do It Right
Go to your thermostat and set it to 'Off. ' Wait a few minutes for the system to fully stop. If you're working near the air handler, switch off the breaker to be absolutely sure. This also prevents the blower from accidentally kicking on while you're cleaning.
Safety Bonus
Cleaning vents often involves reaching into tight spaces or using tools near electrical components. Powering down eliminates the risk of electric shock or the fan starting unexpectedly. It's a small step that makes the whole job safer.
2. Remove Vent Covers Carefully
It might be tempting to yank off the vent cover and start cleaning right away, but rushing this step can lead to cracked drywall or chipped paint. Taking a few extra seconds to remove the cover properly saves you from having to do touch-ups later. Plus, you won't lose those tiny screws that always seem to disappear.
Check The Fasteners First
Most vent covers are held in place by screws, but some use clips or are simply snapped in. Before you apply any force, take a look at how your cover is attached. Screws are usually in the corners or along the edges.
If you see no screws, gently pry the cover with a flathead screwdriver wrapped in cloth to avoid scratching.
Go Slow To Avoid Damage
Once you've identified the fasteners, unscrew them slowly. Keep the drill or screwdriver straight to prevent stripping the screw head. If the cover feels stuck, don't force it—there might be paint sealing the edges.
Run a utility knife along the seam to break the paint seal, then try again.
Keep Screws Safe And Organized
It's frustrating to finish cleaning and realize you've misplaced a screw. Place all screws in a small container, like a jar lid or a magnetic tray. If you're cleaning multiple vents, label each container with a piece of tape so you know which screws go where.
This small step prevents mismatched hardware and frustration later.
3. Vacuum the Vent Opening
Now that you've turned off the system and removed the cover, it's time to tackle the opening itself. A quick vacuuming session here makes a huge difference. It pulls out the loose dust and debris that would otherwise get pushed deeper into the ducts.
Grab your vacuum with a hose attachment—preferably a crevice tool or a brush attachment. Insert the hose as far as it will go into the duct opening. Move it around gently to dislodge and suck up surface dust.
This step is fast but essential, as it prevents loose particles from becoming airborne later.
Choose The Right Attachment
A crevice tool works best for narrow gaps, while a brush attachment helps loosen stubborn dust from the sides. If your vacuum has variable suction, use a lower setting to avoid damaging flexible ductwork.
Work Methodically
Start at the farthest point from the opening and work your way back. This ensures you're pulling debris toward you rather than pushing it deeper. Overlap your passes to cover every inch.
Don't Forget The Edges
Dust often accumulates along the edges of the vent opening. Use the crevice tool to run along the perimeter. This catches the grime that a quick pass might miss.
4. Wash Vent Covers in Soapy Water
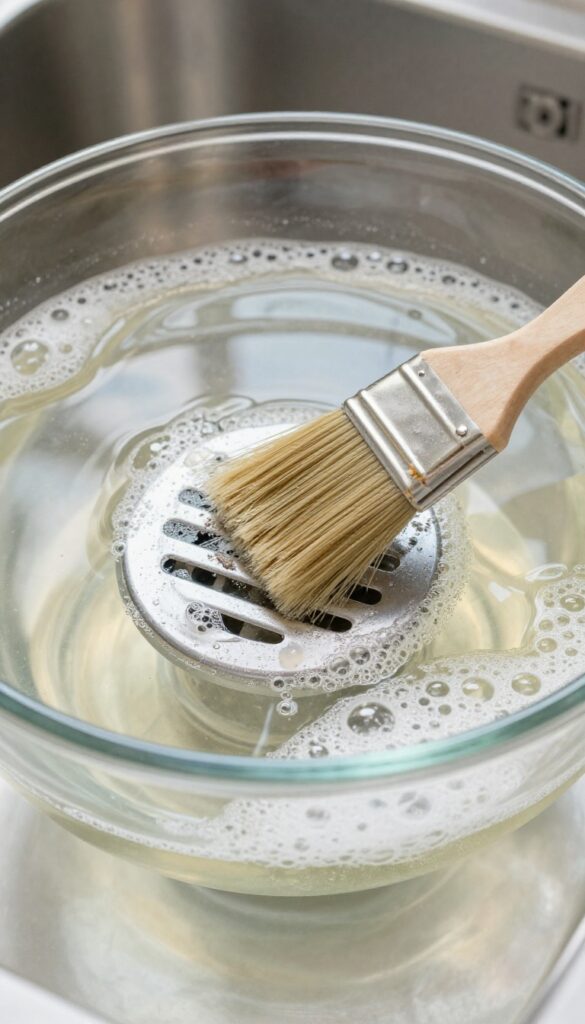
Once you've popped off the vent covers, don't just give them a quick wipe. They've been collecting grime for months, and a deep soak in warm, soapy water does wonders. This simple step loosens stubborn dust and sticky residues, making scrubbing effortless.
Plus, it sanitizes the covers, so you're not putting dirty metal or plastic back over your clean duct opening.
Fill your sink or a large tub with warm water and a few drops of mild dish soap. Submerge the covers completely and let them soak for about 15 minutes. This softens any caked-on dirt.
After soaking, use a soft-bristled brush or an old toothbrush to gently scrub every crevice. Rinse thoroughly with clean water and dry completely with a microfiber cloth before reinstalling. Avoid harsh chemicals that could damage the finish.
Why Soaking Beats Wiping
A quick wipe might remove surface dust, but it leaves behind oily grime and allergens. Soaking penetrates the buildup, especially on vent slats where dirt hides. It's also gentler on the cover's paint or coating compared to aggressive scrubbing dry.
Drying Is Non‑negotiable
Putting a wet cover back on invites rust (for metal) or mold growth (for plastic). After rinsing, pat dry with a towel, then let them air out for an hour. Make sure every drop is gone before snapping them back into place.
When To Replace Instead
If your covers are rusty, bent, or cracked, washing won't fix them. Old metal grilles can shed rust into your airflow, and warped plastic won't seal properly. In those cases, buy new covers—they're cheap and improve both looks and function.
5. Use a Microfiber Cloth for Stubborn Dust
Some vent covers just won't budge—they're painted over, screwed in tight, or simply not designed to be removed. That's okay. You can still get them clean without prying or damaging anything.
The trick is using the right tool for the job, and a damp microfiber cloth is your best friend here.
Microfiber cloths are engineered to trap dust rather than push it around. When you dampen one slightly, it becomes even more effective at grabbing onto particles that have bonded to the vent surface. This method works especially well on floor registers and wall vents that are painted or have a delicate finish.
Why Microfiber Works Better
Unlike cotton rags or paper towels, microfiber has split fibers that create a static charge, attracting dust like a magnet. The dampness adds capillary action, pulling dust into the cloth rather than letting it fly into the air. This means less dust resettling on your furniture or getting recirculated.
How To Do It Right
Start by turning off your HVAC system. Lightly mist a clean microfiber cloth with water—it should be damp, not soaking wet. Wipe the vent cover in one direction, then flip the cloth to a clean section for the next pass.
For grilles with slats, run the cloth between each slat to reach hidden dust.
When To Use A Dry Cloth First
If the vent has a thick layer of dust, wipe it first with a dry microfiber cloth to remove the loose stuff. Then go over it again with a damp cloth to pick up what's left. This two-step approach prevents the dust from turning into mud when wet.
6. Clean Ceiling Vents with a Long-Handled Duster
Ceiling vents often get ignored because they're hard to reach. But they collect just as much dust as floor registers. Using a long-handled duster with a microfiber head makes the job simple and safe.
No more balancing on a chair or risking a fall.
Start by extending the duster to reach the vent without stretching. Gently sweep the microfiber head across the vent surface, catching loose dust before it falls. Work from one side to the other, overlapping strokes to avoid missing spots.
After dusting, vacuum any debris that dropped to the floor or furniture. This two-step method prevents dust from settling elsewhere.
Choose The Right Duster
Not all dusters work well for ceiling vents. Look for an extendable handle that reaches at least 3 feet. A microfiber head traps dust better than feather or cotton.
Some models have a bendable neck to angle the head, which helps with vents close to walls.
Dust Before Vacuuming
Always dust the vent first. If you vacuum directly, you might push dust deeper into the duct or knock it loose onto furniture. By dusting first, you collect the majority of debris.
Then vacuum the area below to pick up any fallout.
Safety Tips For High Vents
Never stand on a rolling chair or an unstable surface. Use a sturdy step stool if needed. Keep the duster handle close to your body for better control.
If the vent is very high, consider using a ladder with a helper to steady it.
7. Check for Mold Growth
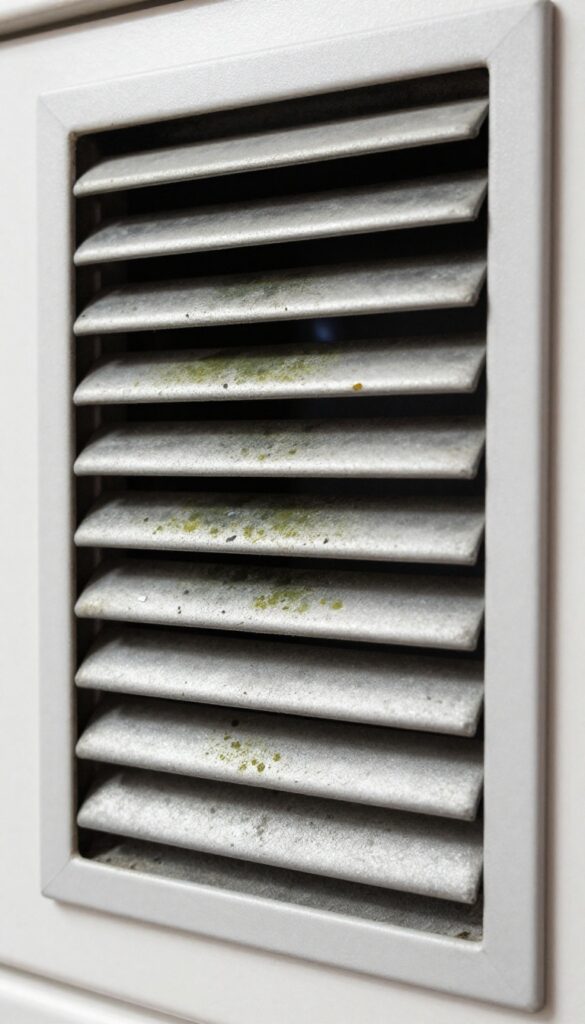
Mold in your vents is more than just an eyesore—it's a health hazard. Black or green spots near the grille or inside the ductwork signal that moisture has found a home. Ignoring it can spread spores throughout your home, triggering allergies or respiratory issues.
The fix is straightforward, but you need to act quickly and safely.
Inspect your vents regularly, especially in humid climates or after a flood. Shine a flashlight into the duct and look for discoloration. If you spot mold, mix equal parts water and white vinegar in a spray bottle.
Spray the affected area, let it sit for 10 minutes, then scrub with a stiff brush. Dry thoroughly with a clean cloth. For extensive mold, consider professional remediation.
Where Mold Hides
Mold loves dark, damp spots. Check around the vent edges, inside the duct near the grille, and on the blades of adjustable vents. Bathroom and kitchen vents are prime candidates because of high humidity.
Don't forget crawlspace or attic vents—they often go unnoticed.
Why Vinegar Works
White vinegar is a natural disinfectant that kills most mold species without harsh chemicals. It's safe for your HVAC system and won't release toxic fumes. Unlike bleach, vinegar penetrates porous surfaces, making it more effective on wood or drywall around vents.
When To Call A Pro
If the mold covers more than a few square feet, or if you smell a musty odor even after cleaning, you may have hidden growth inside the ductwork. Professionals use HEPA vacuums and antimicrobial treatments. Also call if you or your family have asthma or mold allergies—better safe than sorry.
8. Replace or Clean Air Filters Regularly
Your air filter is the first line of defense against dust, pollen, and other airborne junk. When it gets clogged, your HVAC system has to work overtime, and all that gunk gets blown right back into your living space. Swapping or cleaning filters on schedule is one of the simplest ways to keep airflow strong and your indoor air quality high.
How Often Should You Check?
Set a reminder to inspect your filter once a month. If it looks gray or dusty, it's time for a change. In general, cheap fiberglass filters need replacing every 30 days, while pleated filters can last up to 90 days.
Homes with pets or allergy sufferers should lean toward the shorter end of that range.
Know Your Filter Type
Not all filters are created equal. Disposable fiberglass filters are inexpensive but catch only larger particles. Pleated filters trap more dust and allergens but can restrict airflow if too thick.
Washable electrostatic filters are reusable—just rinse them with water and let dry completely before reinstalling. Check your system's manual for the recommended MERV rating.
The Right Way To Install
Always install the filter with the arrow pointing toward the furnace or air handler. That arrow indicates the direction of airflow. A backward filter won't work properly and can even damage your system.
Make sure the filter fits snugly in its slot with no gaps around the edges where unfiltered air can sneak through.
9. Use a Compressed Air Blower for Deep Duct Cleaning
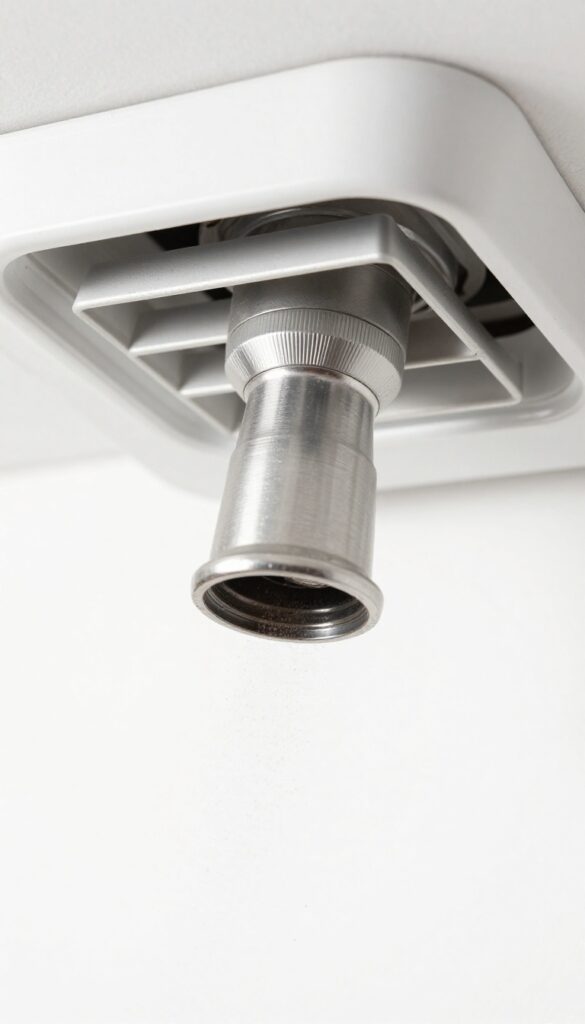
Sometimes dust and debris settle deep inside your ducts, beyond the reach of a vacuum hose. That's where a compressed air blower comes in handy. This tool blasts stubborn particles loose so you can capture them at the return vent.
It's a powerful technique for a thorough clean, but you need to do it right to avoid spreading dust everywhere.
Gear Up First
Before you start, put on safety goggles and a dust mask. Compressed air can send debris flying, and you don't want it in your eyes or lungs. Also, close off the room's supply vents and open a window for ventilation.
This setup keeps the dust contained and your breathing safe.
Work In Sections
Start at the farthest vent from the air handler. Remove the cover and insert the compressed air nozzle, pointing it toward the main trunk line. Give it short bursts while moving the nozzle around.
Have a helper vacuum at the return vent to catch the dislodged dust. Work your way back toward the return, one vent at a time.
Mind The Pressure
Don't crank the pressure too high—around 90–100 PSI is plenty. Too much force can damage ductwork or blow apart connections. Use a trigger nozzle so you can control the bursts.
If your ductwork is flexible or old, be extra gentle to avoid tears.
10. Seal Gaps Around Vent Covers
Even the cleanest vents can pull in dust if there's a gap around the cover. Air pressure differences cause unfiltered air to seep through cracks in the floor or wall, dragging dirt directly into your system. Sealing those gaps is a quick fix that makes a big difference.
Foam tape or caulk creates a tight seal between the vent cover and the surface. This stops dust from being sucked in around the edges and also improves energy efficiency by preventing air leaks. It's a simple step that complements your cleaning efforts.
Why Gaps Matter
Gaps as small as 1/8 inch can let in enough dust to coat your filter faster. Over time, this extra load reduces airflow and forces your HVAC to work harder. Sealing them is like closing a door on dust.
Choosing The Right Sealant
For metal or plastic vent covers, use foam tape with adhesive backing—it's easy to apply and remove. For permanent seals on wood or drywall, a small bead of silicone caulk works better. Avoid anything that could off-gas or attract mold.
How To Apply It
Remove the vent cover, clean the surface, then apply foam tape around the flange or run a thin bead of caulk along the edge. Press the cover back in place and let it set. For floor vents, make sure the seal doesn't interfere with the cover's hinge or screw holes.
11. Clean Return Air Grilles Thoroughly
Return air grilles are the unsung heroes of your HVAC system. While supply vents blow conditioned air into rooms, return vents pull air back to the system to be heated or cooled again. Because they're constantly sucking in air, they collect far more dust, hair, and debris than supply vents.
Neglecting them means all that gunk gets recirculated throughout your home.
Start by unscrewing the grille cover. Most return grilles are held in place by a few screws. Once removed, take the grille outside or to a sink.
Vacuum both sides with a brush attachment to remove loose dust. If the grille has a built-in filter, check if it's disposable or washable. Disposable filters should be replaced; washable ones can be rinsed with water and mild soap.
Let the grille dry completely before reinstalling. While the grille is off, vacuum the opening inside the wall or ceiling as well—debris often collects there.
Why Return Grilles Matter More
Return vents are the intake point for your entire HVAC system. They pull in air from every room, so they capture everything floating around: dust, pet dander, pollen, even cooking grease. If the grille or its filter is clogged, your system has to work harder to pull air, reducing efficiency and increasing wear.
A clean return grille means better airflow and cleaner air throughout your home.
How Often To Clean Return Grilles
Aim to clean return grilles every one to three months. If you have pets, live in a dusty area, or have allergies, do it monthly. During peak seasons like spring or fall, when pollen and dust are high, check them more often.
A quick visual inspection can tell you if it's time: if you see a visible layer of dust or the grille looks fuzzy, clean it.
Washable Vs. Disposable Filters
Many return grilles have a built-in filter. Disposable fiberglass filters are cheap but need replacing every month or two. Washable electrostatic filters cost more upfront but can be rinsed and reused for years.
To clean a washable filter, remove it from the grille, spray it with a hose or run it under tap water, and let it air dry completely. Never reinstall a wet filter—it can grow mold.
12. Use a Vacuum with a HEPA Filter
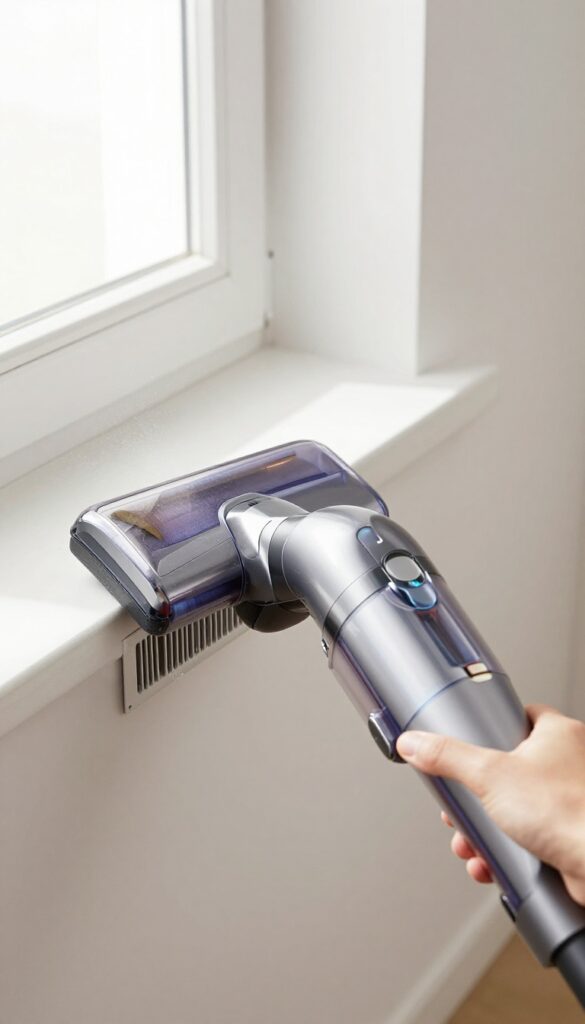
Not all vacuums are created equal when it comes to cleaning air vents. A standard vacuum might suck up visible dust but blow fine particles right back into the room. That's where a HEPA filter makes the difference.
HEPA stands for High-Efficiency Particulate Air, and these filters trap 99. 97% of particles as small as 0. 3 microns.
That includes pollen, pet dander, mold spores, and dust mites. When you're cleaning vents, you want those allergens gone for good, not just stirred up.
Using a HEPA vacuum is one of the most effective ways to clean vents without spreading dust. The sealed system ensures that everything you vacuum stays inside the machine. This is especially important for people with allergies or asthma.
You'll get a deeper clean and better indoor air quality with every use.
Why Hepa Matters For Vents
Vents collect a mix of dust, skin flakes, pet hair, and microscopic allergens. A regular vacuum bag or filter can let these tiny particles escape. HEPA filters capture them, so you're not just moving dirt around.
For vent cleaning, this means the air you breathe stays cleaner during and after the job.
Choosing The Right Hepa Vacuum
Look for a vacuum with a true HEPA filter, not just "HEPA-like" or "HEPA-type. " True HEPA filters are certified to meet the standard. Canister vacuums with a hose and brush attachment work well for vents.
Stick vacuums with a crevice tool can also do the job. Make sure the vacuum has good suction and a sealed system to prevent leaks.
Technique For Best Results
Start by removing the vent cover and vacuum the interior of the duct as far as you can reach. Use the brush attachment to loosen dust, then switch to the crevice tool to get into corners. Vacuum the cover separately, both sides.
Do this regularly to keep buildup from becoming a problem.
13. Don't Forget the Ventilation Fan Covers
Bathroom and kitchen exhaust fans work hard to remove moisture, smoke, and odors, but their covers often get overlooked. When those covers get caked with dust and grease, the fan struggles to do its job. Cleaning them is quick and makes a noticeable difference in airflow and freshness.
Exhaust fan covers are magnets for grime. In the bathroom, dust and humidity create a sticky film. In the kitchen, grease bonds with dust to form a stubborn layer.
A dirty cover restricts airflow, forcing the fan to work harder and reducing its ability to clear steam or smells. Cleaning them restores efficiency and prevents musty odors from lingering.
How To Remove And Wash Covers
Most fan covers are held by spring clips or screws. Gently pry or unscrew them off. Soak the cover in warm, soapy water for 10–15 minutes to loosen grime.
Scrub with a soft brush, rinse, and let it dry completely before reinstalling. For kitchen covers, a degreasing dish soap works best.
Don't Forget The Fan Blades And Housing
While the cover is off, use a vacuum with a brush attachment to remove dust from the fan blades and interior housing. You can also wipe blades with a damp cloth. This prevents dust from blowing back into the room when the fan runs.
How Often Should You Clean Them?
Bathroom fan covers should be cleaned every three months, kitchen exhaust covers every month due to grease buildup. If you cook often or have a large household, check them more frequently. A clean fan runs quieter and lasts longer.
14. Clean Around the Vent Area
Even after you've scrubbed every slat and grille, dust lurking on nearby surfaces can undo your hard work. Air currents from the vent will pull loose particles right back into the airflow. That's why cleaning the area around the vent is just as important as cleaning the vent itself.
Wiping down the walls, floors, and baseboards near your vents prevents dust from being recirculated. This step is often overlooked but makes a noticeable difference in air quality.
Start With The Floor
Vacuum or sweep the floor directly in front of and around the vent. Use a microfiber mop or damp cloth to pick up any remaining fine dust. For carpets, a thorough vacuum with a crevice tool works best.
Don't Forget The Walls And Baseboards
Dust settles on vertical surfaces too. Wipe down the wall above and around the vent with a microfiber cloth or a duster. Baseboards often collect a surprising amount of grime—give them a quick wipe with a damp cloth.
Check For Hidden Dust Traps
Look for ledges, window sills, or furniture near the vent that might be harboring dust. Move small items aside and clean those surfaces as well. This simple habit keeps the air cleaner for longer.
15. Use a Dryer Vent Brush for Narrow Ducts
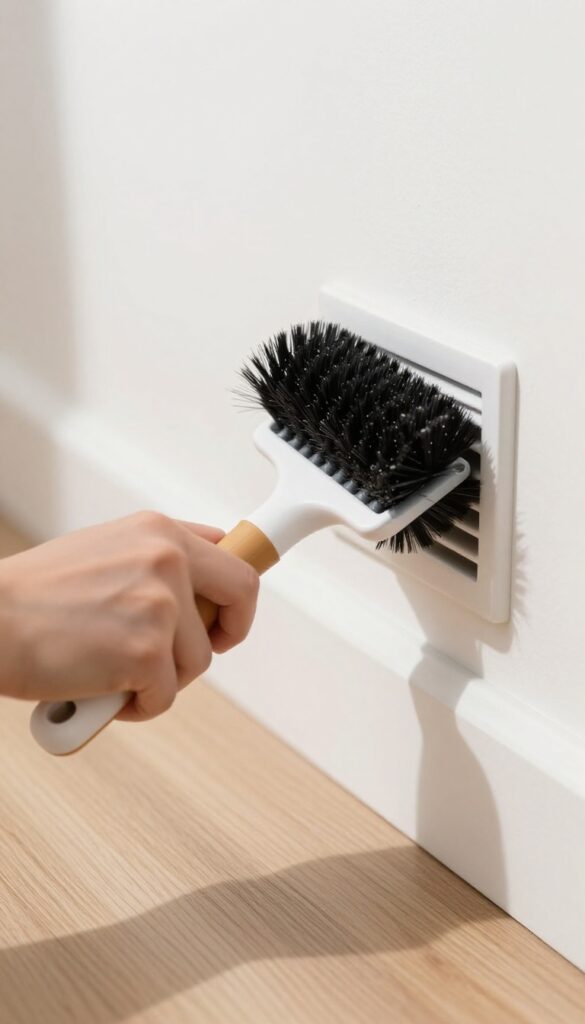
Standard brushes might not cut it when you're dealing with tight, narrow ductwork. That's where a dryer vent brush comes in handy. These flexible tools are designed to snake through confined spaces and dislodge stubborn dust and lint that regular brushes can't reach.
A dryer vent brush has a long, flexible shaft and stiff bristles that can scrub the interior of ducts without scratching them. To use it, insert the brush into the vent opening and push it in as far as it will go, then pull it back out while rotating it. Repeat several times to loosen debris.
This method is especially effective for floor registers and bathroom exhaust vents where lint accumulates.
Why A Dryer Vent Brush Works
Unlike standard cleaning brushes, dryer vent brushes are built to navigate bends and corners. Their flexibility allows them to reach deep into the duct system, while the bristles are stiff enough to scrape off caked-on dust. This makes them ideal for vents that are hard to access or have narrow diameters.
Step-by-step Usage Tips
Start by removing the vent cover. Insert the brush slowly to avoid damaging the duct. Once it's fully inserted, twist and pull it back out.
You'll see dust and lint come out with it. Vacuum up the debris after each pass. For best results, work from both ends of the duct if possible.
When To Use This Tool
Use a dryer vent brush when you notice reduced airflow from a specific vent, or if you see dust buildup around the edges. It's also great for annual deep cleaning. Avoid using it on flexible foil ducts, as they can tear easily.
16. Schedule Professional Duct Cleaning Every 3-5 Years
While regular DIY vent cleaning handles surface dust, the deeper ductwork often goes untouched. Over time, debris builds up inside the ducts, reducing airflow and circulating contaminants. That's where professional duct cleaning comes in—a deep clean that reaches every corner of your system.
Hiring a certified professional every 3 to 5 years ensures your entire duct system is thoroughly cleaned. This is especially important if you have pets, smokers, or family members with allergies. Professionals use high-powered vacuums and agitation tools to dislodge and remove built-up debris, improving indoor air quality and system efficiency.
When To Call The Pros
If you notice visible mold growth inside ducts, excessive dust coming from vents, or unexplained allergy flare-ups, it's time to schedule a professional cleaning. Also consider it after a home renovation or if you've had a pest infestation.
What To Expect During A Service
A typical professional duct cleaning includes inspecting the system, loosening debris with brushes or air whips, and vacuuming everything out with a HEPA-filtered truck-mounted vacuum. They'll also clean registers, grilles, and the air handler components.
Choosing A Certified Pro
Look for companies certified by NADCA (National Air Duct Cleaners Association). Ask for references, check online reviews, and ensure they use proper equipment. Avoid companies that offer extremely low prices or use chemical biocides without clear justification.
17. Install Vent Filters or Covers with Built-In Filters
Your standard vent cover does little more than hide the hole in the wall. Upgrade it to something that actually works. Magnetic vent filters and covers with integrated filters add an extra layer of defense, catching dust before it settles deep inside your ducts.
It's a small change that makes a big difference in air quality.
Magnetic Vent Filters: Easy On, Easy Off
These flexible filters attach directly to metal vent covers with magnets. They trap dust, pollen, and pet dander right at the source. Installation takes seconds, and you can remove them for cleaning or replacement.
They're especially useful for floor vents that collect debris from shoes and pets.
Built-in Filter Covers: A Permanent Upgrade
Some vent covers come with a built-in filter media that slides into a slot. These are more discreet than magnetic options and offer a cleaner look. The filter is replaceable, and you can choose different MERV ratings depending on your needs.
They work well for both supply and return vents.
Maintenance Tips For Maximum Efficiency
Check filters monthly and replace them every three months or sooner if they look dirty. A clogged filter restricts airflow and forces your HVAC system to work harder. Keep spare filters on hand so you can swap them out quickly.
This simple habit keeps your air clean and your energy bills lower.
18. Clean Vents After Renovation or Construction
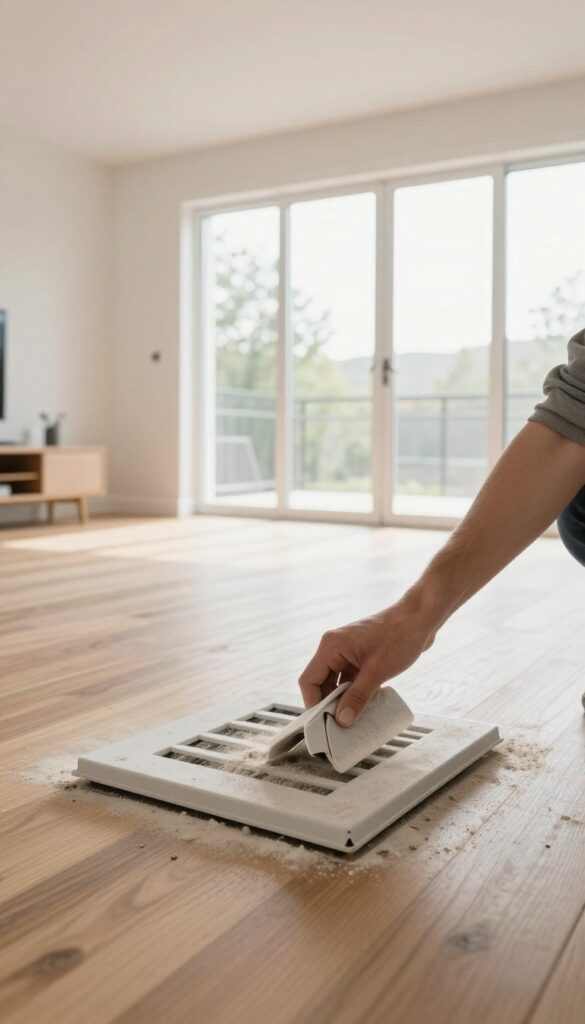
Renovation projects kick up a surprising amount of dust and debris, even if you try to contain the mess. Drywall sanding, sawing, and demolition create fine particles that settle everywhere—including inside your vents. If you skip a thorough cleaning afterward, that dust will circulate through your home for months.
After any construction work, your HVAC system acts like a vacuum, pulling in all that airborne debris. The result? Clogged filters, reduced airflow, and potential damage to your system.
A deep clean right after the project ends prevents long-term issues and keeps your air quality from taking a hit.
Why Post-renovation Cleaning Matters
Construction dust isn't just regular dust—it's heavier, more abrasive, and can contain chemicals from paints or adhesives. When it gets into your ductwork, it can settle on coils and fans, reducing efficiency and even causing mechanical failures. Plus, that fine drywall dust can irritate lungs and trigger allergies long after the work is done.
Step-by-step Vent Cleaning After Renovation
Start by turning off your HVAC system to prevent spreading dust. Remove all vent covers and vacuum them thoroughly with a brush attachment. Use a shop vac with a HEPA filter to clean the ducts themselves, reaching as far as you can.
Wipe down the interior of the vent openings with a damp microfiber cloth. Finally, replace or clean your air filters—they’re likely clogged with fine particles.
When To Call A Professional
If the renovation was extensive or if you notice dust still blowing out after your own cleaning, it's time to call in a duct cleaning service. They have specialized equipment like rotary brushes and high-powered vacuums to remove deeply embedded debris. This is especially important if you had any demolition work or if the ducts were left open during construction.
19. Use a Steam Cleaner for Greasy Kitchen Vents
Kitchen vents take a beating. Between frying, sautéing, and roasting, grease builds up on the fan blades and mesh filter until it turns into a sticky, stubborn layer. Regular dusting won't cut it.
You need heat and pressure to break down that grime. A steam cleaner or a heavy-duty degreasing spray can make the job much easier and leave your vent looking like new.
Start by removing the vent cover or filter. If it's metal and dishwasher-safe, run it through a cycle with a degreasing detergent. For the vent housing and fan, use a steam cleaner with a narrow nozzle to blast hot steam onto greasy surfaces.
The steam loosens the grease, and you can wipe it away with a microfiber cloth. If you don't have a steam cleaner, spray a commercial degreaser (or a DIY mix of vinegar and dish soap) onto the surfaces, let it sit for 10 minutes, then scrub with a stiff brush. Rinse with a damp cloth and dry thoroughly before reassembling.
Why Steam Works Best
Steam penetrates the grease layer without harsh chemicals. The high temperature melts the grease, making it easy to wipe off. It also sanitizes the vent, killing bacteria and mold that thrive in greasy environments.
Degreasing Spray Alternative
If you don't own a steam cleaner, a quality degreasing spray is your next best bet. Look for one labeled for kitchen use. Spray it on, let it sit, then scrub with a non-abrasive pad.
Avoid bleach or ammonia, which can damage metal finishes.
Safety First
Always unplug the vent hood or turn off the circuit breaker before cleaning. Avoid getting moisture into electrical components. Cover any exposed wiring with plastic wrap if needed.
20. Inspect for Pest Infestations
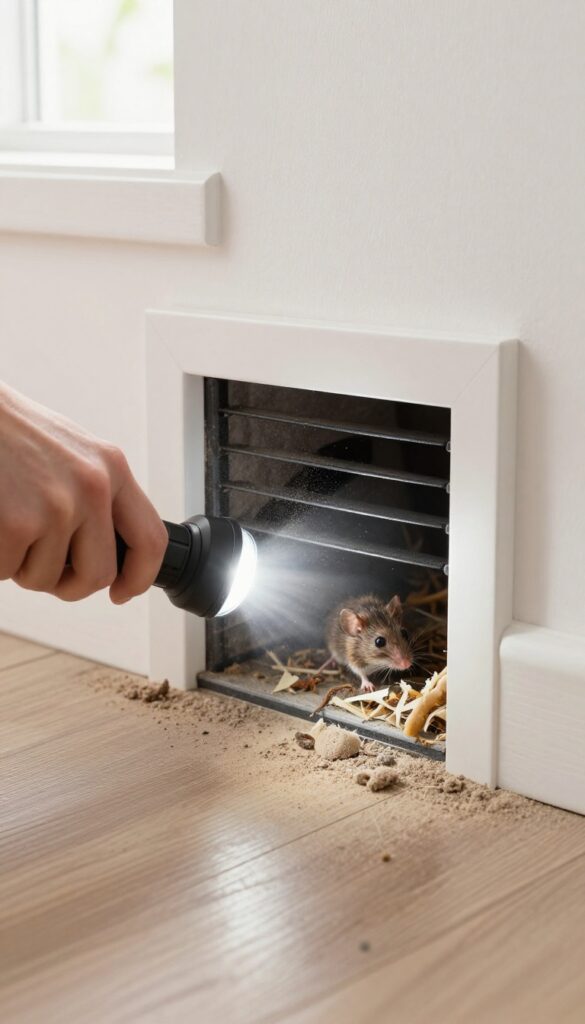
Pests love dark, undisturbed spaces—and your air vents are no exception. Mice, cockroaches, and insects can squeeze through tiny gaps, leaving droppings, nests, or even dead bodies inside the ductwork. Beyond being gross, these invaders spread allergens and bacteria that blow directly into your living space.
Regular inspection is key. Use a flashlight to peer into floor registers, return grilles, and any accessible duct openings. Look for dark droppings, shredded materials (nesting), or a musty odor that suggests decay.
If you spot signs, don't just vacuum them out—that won't solve the underlying problem.
Seal Entry Points
Once you've cleaned out the debris, find where pests are getting in. Check for gaps around vent collars where they meet the wall or floor, and seal them with caulk or metal tape. Don't use duct tape—it dries out and fails.
For larger holes, stuff in copper mesh before sealing.
Call In The Pros If Needed
If you keep finding new droppings after sealing, you likely have an active infestation behind the walls. That's a job for a pest control professional. They can treat the ducts safely without contaminating your air.
Never use bug bombs or sprays inside vents—they're flammable and leave toxic residue.
21. Clean Vents in Unused Rooms Too
It's easy to ignore rooms you rarely step into. But those closed-off spaces still connect to your HVAC system, and dust doesn't take a break just because nobody's around. Over time, vents in unused rooms collect just as much grime as the ones in high-traffic areas.
When your system kicks on, it can pull that settled dust right back into the airflow, spreading it throughout your home. Giving those forgotten vents a quick clean every few months keeps the whole system's air quality consistent.
Unused rooms often become storage zones for boxes, old furniture, or seasonal decorations. All that clutter traps dust, which then drifts toward the vent. Even if the door stays shut, air exchange happens through gaps and the ductwork itself.
A vent in a spare bedroom or basement can become a hidden source of allergens. Making a habit of checking and cleaning those vents prevents them from becoming a reservoir of debris that eventually reaches the rest of your house.
Set A Reminder For Forgotten Spaces
It's easy to forget about a guest room you only use twice a year. Add a recurring calendar reminder every three months to check vents in spare bedrooms, basements, attics, and home offices you rarely use. A quick visual inspection and a wipe-down with a microfiber cloth or vacuum attachment takes less than five minutes per vent.
Check For Blockages First
Before cleaning, look for anything blocking the vent—boxes, furniture, or even a forgotten rug. Blockages force air to find another path, which can stir up dust from other areas. Move items at least a few inches away from the vent to allow proper airflow and make cleaning easier.
Use The Same Method As Active Rooms
Don't treat unused vents differently. Remove the cover, vacuum inside the duct as far as you can reach, and wash the cover with warm soapy water. Dry it completely before reinstalling.
The same dusting and vacuuming routine applies—just because the room is empty doesn't mean the vent is clean.
22. Use a Flashlight to Check Duct Depth
You can't fix what you can't see. Before you start scrubbing or vacuuming your vents, grab a flashlight and take a good look inside the duct. This simple step reveals how far dust and debris have traveled, helping you decide whether a quick surface clean will do or if you need to call in reinforcements.
What The Light Reveals
A bright beam cuts through the darkness of your ductwork. If you see only a thin layer of dust near the opening, a standard vacuum attachment might be enough. But if the grime extends deep into the duct, you're dealing with buildup that requires a brush or professional service.
How To Inspect Properly
Use a high-lumen LED flashlight—the brighter, the better. Shine it at an angle to spot shadows and clumps. Move the light side to side to check for blockages like old debris, dead pests, or even dropped items.
If you can't see the end, note how far the dust reaches.
When To Call A Pro
If the flashlight reveals thick, caked-on dust or moldy spots more than a few inches in, it's time for a deep clean. Professionals have specialized tools like rotary brushes and high-powered vacuums that reach deep into the system. A quick peek with a flashlight saves you from underestimating the job.
23. Create a Regular Cleaning Schedule
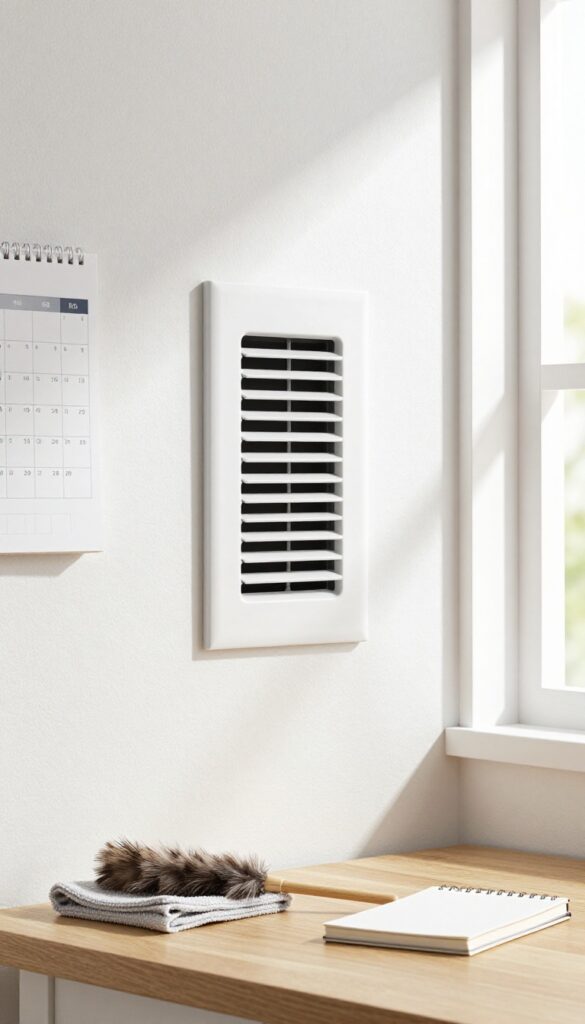
Consistency is the secret to dust-free vents. A one-time deep clean feels great, but without a schedule, the dust piles right back up. Setting a simple routine keeps your air quality high and your HVAC system running efficiently.
Pick Your Frequency
For most homes, every 3 to 6 months works well. If you have pets, allergies, or live in a dusty area, lean toward every 3 months. Mark it on your calendar or set a phone reminder so you never forget.
Tie It To Another Task
Link vent cleaning to something you already do regularly, like changing your HVAC filter. Every time you swap the filter, give the vents a quick once-over. This pairing makes the habit automatic.
Seasonal Deep Cleans
Use the change of seasons as your trigger. Clean vents in spring before allergy season hits, and again in fall before you start using the heater. This timing catches dust buildup at its worst.
Keep A Log
Jot down the date you cleaned each vent. A simple notebook or a note on your phone helps you track what's been done. Over time, you'll see patterns and know exactly when maintenance is due.
FAQ
How often should I clean my air vents?
Clean visible vent covers every 3-6 months. Schedule professional duct cleaning every 3-5 years, or more often if you have pets, allergies, or recent renovations.
Can I clean air vents without removing them?
Yes, you can vacuum and wipe covers in place, but removing them allows for a more thorough clean of both the cover and the duct opening.
What is the best way to clean air vents?
Start by turning off the HVAC system. Remove covers, wash them in soapy water, vacuum the duct opening, and use a microfiber cloth for final wipe-down.
Does cleaning air vents improve air quality?
Yes, removing dust, allergens, and mold from vents reduces the particles circulating in your home, leading to cleaner air and fewer allergy symptoms.
Should I use bleach to clean mold from vents?
Avoid bleach as it can damage metal and release fumes. Use white vinegar or a commercial mold cleaner designed for HVAC systems.
Conclusion
You don't need to overhaul your whole home to breathe cleaner air. Start with just a couple of these tips—maybe vacuuming your vents and swapping out that dusty filter—and you'll notice the difference in no time.
Small, consistent efforts add up to healthier airflow and a more efficient HVAC system. Pick the tips that fit your routine and watch your indoor air quality improve without the hassle.