15 Cleaning Cast Iron Tips Without Ruining the Seasoning
You've spent months building that perfect seasoning on your cast iron—only to watch it strip away after one aggressive scrub. It's a frustrating cycle that makes you wonder if nonstick was the easier choice all along.
But keeping that slick, black patina intact doesn't require delicate handling; it just demands the right techniques. From the coarse salt trick to knowing when to skip the soap, these 15 methods will help you clean cast iron without undoing all your hard work.
No more guessing, no more reseasoning marathons—just straightforward habits that preserve your pan's nonstick powers.
1. Scrub with Coarse Salt and a Paper Towel
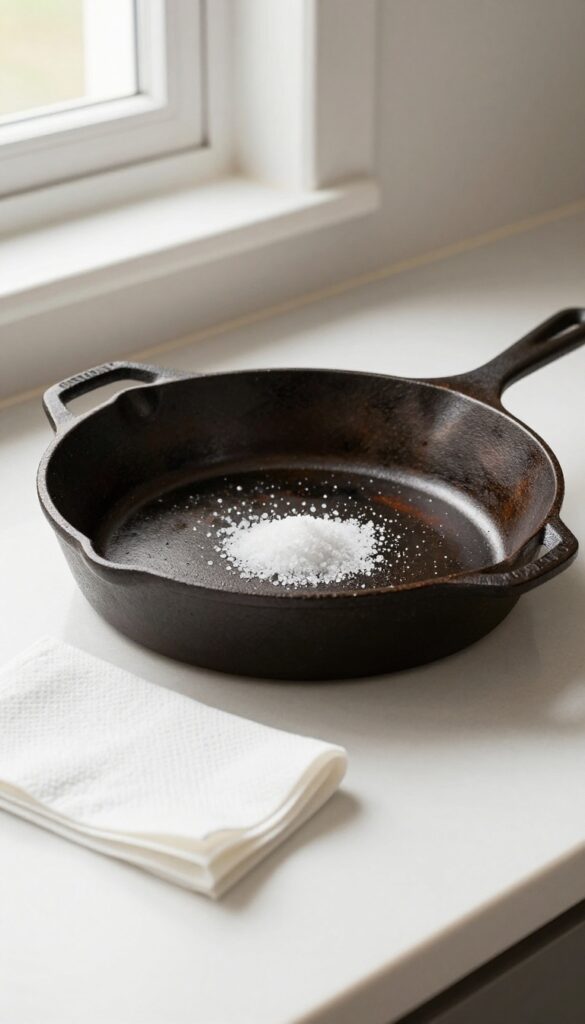
When food sticks to your cast iron, it's tempting to reach for a steel wool pad. But that's a one-way ticket to reseasoning city. A gentler, more effective method uses something you already have in your kitchen: coarse salt.
Salt acts as a mild abrasive that lifts stuck bits without scratching the seasoning. It's tough on grime but kind to your pan's hard-earned patina. Plus, it's cheap and chemical-free.
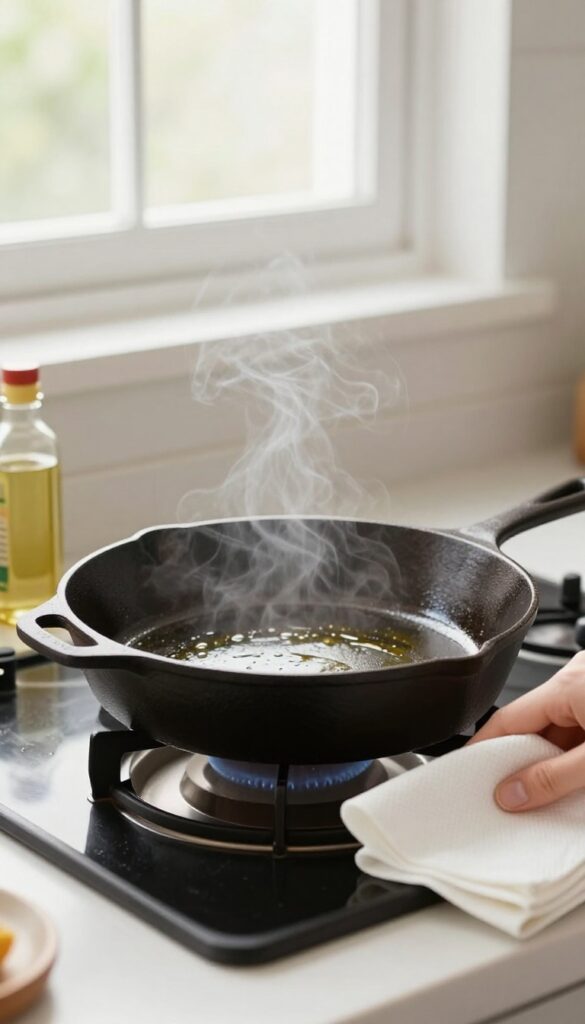
To use this method, pour a generous handful of coarse salt (kosher or sea salt works great) into the still-warm pan. Use a folded paper towel or a soft cloth to scrub in circular motions, focusing on any stubborn spots. The salt will absorb grease and loosen debris.
Once you're done, simply discard the salt and rinse the pan with hot water. Dry thoroughly and apply a thin layer of oil to maintain the seasoning.
Why Salt Works Without Damaging Seasoning
Coarse salt is hard enough to physically dislodge food particles but soft enough to leave your seasoning intact. Unlike metal scrubbers, salt crystals dissolve in water, so there's no risk of scratching the surface. The key is using coarse salt—table salt is too fine and can be less effective.
When To Use This Method
This technique is perfect for everyday cleaning after cooking foods that tend to stick, like eggs or fish. It's also great for removing baked-on cheese or caramelized bits. However, for heavy buildup or rust, you may need a more intensive approach.
Pro Tip: Combine With A Little Oil
For extra stubborn residue, add a splash of vegetable oil to the salt to create a paste. This enhances the scrubbing power and helps lift grime more easily. Just be sure to rinse thoroughly afterward to avoid a greasy residue.
2. Rinse with Hot Water Only (No Soap)
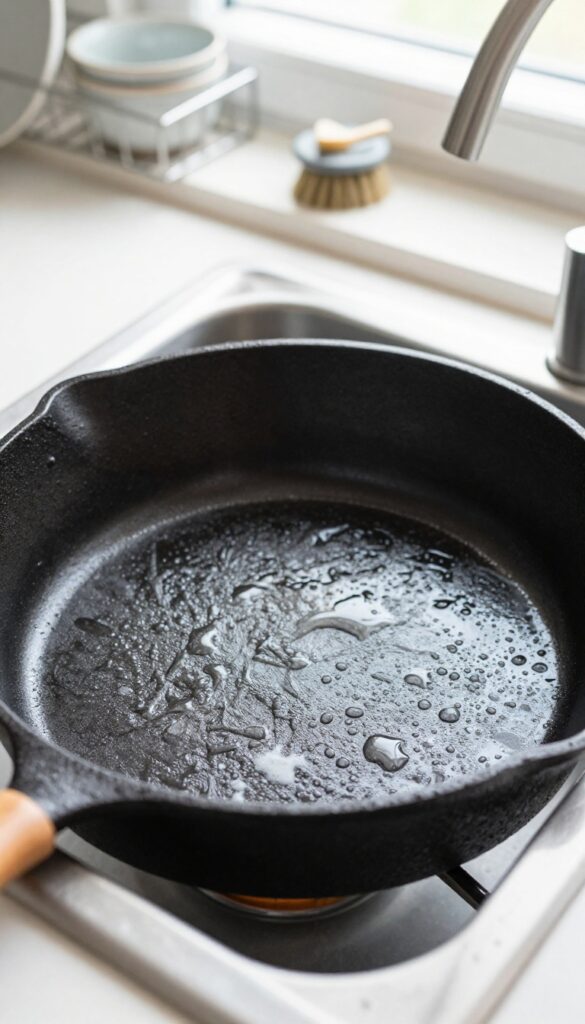
Hot water is your best friend when it comes to cleaning cast iron. Most stuck-on bits and grease will loosen up under a strong stream of hot tap water, no soap needed. This method is gentle on the seasoning and keeps your pan ready for the next meal.
Why Hot Water Works
Heat helps break down oils and food particles without the need for harsh detergents. When you rinse a still-warm pan under hot water, the thermal shock causes residue to release easily. Plus, hot water evaporates quickly, reducing the chance of rust if you dry the pan properly.
When To Skip The Soap
Soap is designed to cut through grease, but it can also strip the thin layers of polymerized oil that make up your seasoning. If you've built up a good patina, a hot water rinse is all you need for everyday cleaning. Reserve soap only for rare cases like removing rancid oil or cleaning a pan that's been used for fish.
How To Do It Right
After cooking, let the pan cool slightly but not completely. Run hot water from the tap and use a stiff brush or non-scratch scrub pad to gently dislodge any food bits. For stubborn spots, you can boil a little water in the pan to loosen them.
Then rinse, dry thoroughly with a towel, and apply a thin layer of oil.
3. Use a Chainmail Scrubber for Tough Bits
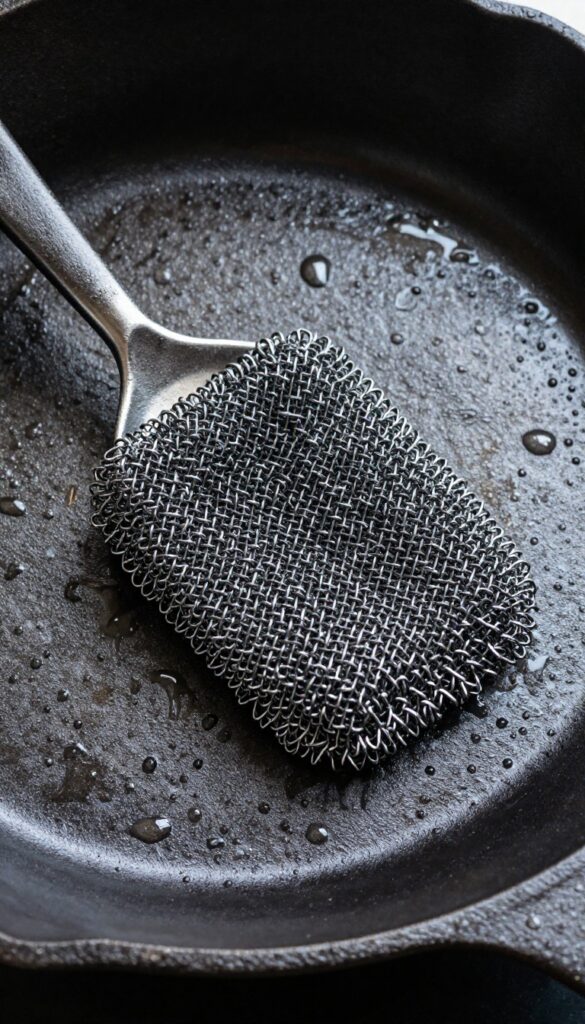
Stuck-on food can be a real pain, but steel wool and abrasive sponges will wreck your seasoning. A chainmail scrubber is the perfect middle ground—it's tough on crud but gentle on the patina. Made from interlinked stainless steel rings, it physically dislodges burnt bits without scraping away the seasoning.
Plus, it's easy to clean and lasts forever.
Chainmail scrubbers are a game-changer for cast iron care. Unlike scouring pads that shed or rust, these metal rings stay intact and won't harbor bacteria. They work best with hot water—the heat loosens the food particles, and the chainmail lifts them away.
Use gentle pressure; let the scrubber do the work. Afterward, rinse and dry the pan immediately, then apply a thin layer of oil to keep the seasoning happy.
Why Chainmail Works
The rings create a scraping action that targets stuck-on food without damaging the polymerized oil layer. Think of it like a gentle massage versus a harsh scrub. It's especially effective for carbonized bits that soap and water can't budge.
How To Use It Right
Always start with a hot pan—run it under hot tap water or heat it briefly. Add a splash of water and scrub in a circular motion. Avoid using soap with the chainmail; water alone is usually enough.
Rinse thoroughly and hand-dry.
Care For Your Scrubber
Rinse the scrubber after each use and let it air dry. Occasionally toss it in the dishwasher or boil it to sanitize. It won't rust, but keeping it clean prevents any metallic taste transfer.
4. Boil Water to Loosen Burnt-On Food
Burnt-on food can feel like a disaster, especially when it's cemented to the pan's surface. Before you reach for anything abrasive, try a gentler method that uses water and heat. Boiling water in the pan loosens even the most stubborn residue without harming your seasoning.
How It Works
When you bring water to a boil in a cast iron pan, the steam and heat penetrate the burnt layer, softening it from below. The water's thermal energy helps release the bond between the food and the seasoning, making it easy to wipe away with a soft sponge or cloth.
Step-by-step
Start by adding about half an inch of water to the pan. Place it on the stove over medium-high heat and bring it to a boil. Let it boil for 2–3 minutes, then use a wooden spatula to gently scrape the loosened bits.
Pour out the water, let the pan cool slightly, and wipe clean.
When To Use This Method
This technique is perfect for burnt-on sauces, stuck-on eggs, or any residue that doesn't come off with a simple rinse. It's also great for pans with delicate seasoning that you don't want to risk with salt scrubs or chainmail.
5. Dry Thoroughly on the Stove
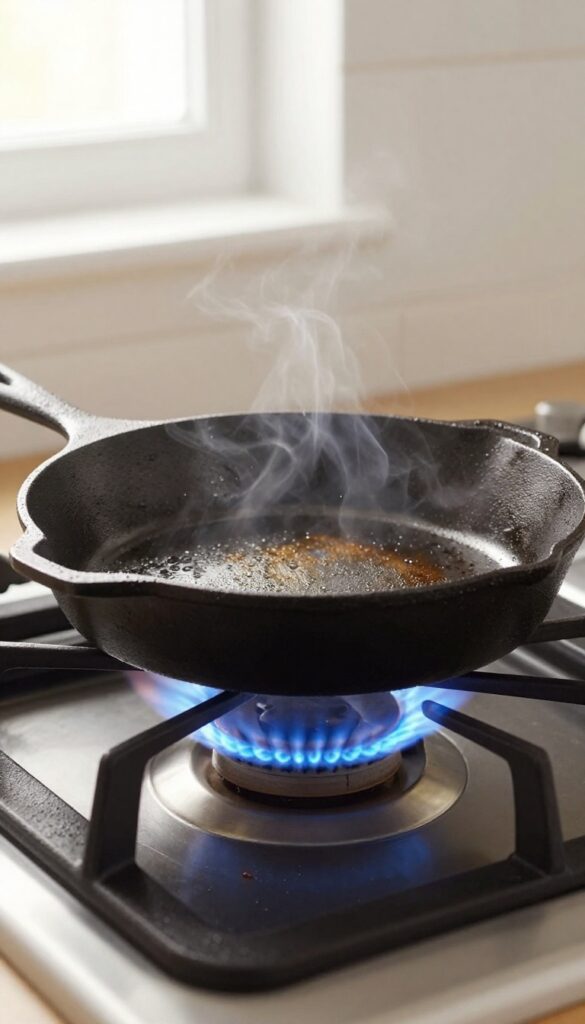
Water is the enemy of cast iron. Even a few droplets left behind can turn into rust spots overnight, undoing all your careful cleaning. That's why drying on the stove is a non-negotiable step for anyone serious about preserving their seasoning.
Skipping this step is like leaving a wet towel in a gym bag—eventually, you'll regret it. A quick heat dry not only evaporates every trace of moisture but also helps the seasoning bond more tightly to the pan's surface.
After washing, place the pan on a burner over low heat. Let it warm up gradually for a few minutes until any water sizzles away. You'll see the pan go from damp to bone-dry.
This method is far more reliable than towel drying, which can leave moisture in tiny pores or under the handle rivets. Once dry, you can optionally rub in a thin layer of oil while the pan is still warm—this is called "stovetop seasoning" and it keeps the patina in top shape. But even without oil, the heat dry alone is a powerful rust-prevention habit.
Why Stovetop Drying Beats Towel Drying
Paper towels or dishcloths can leave behind lint and never get the pan completely dry. Microscopic water pockets hide in the rough surface of cast iron, and only heat can fully eliminate them. Plus, the gentle heat opens up the metal's pores slightly, allowing any residual moisture to escape.
How To Avoid Warping Your Pan
Always start with low heat and let the pan warm gradually. Cranking the burner to high can cause thermal shock, which may warp the pan or crack the seasoning. A minute or two on low is plenty—you're not cooking, just evaporating water.
When To Add A Protective Oil Layer
If you notice the pan looking dull after drying, that's a perfect time to apply a tiny amount of oil. Use a paper towel to rub a drop of vegetable oil or flaxseed oil over the entire surface, then heat until it just starts to smoke. This reinforces the seasoning and gives the pan a fresh, glossy look.
6. Apply a Thin Layer of Oil After Each Wash
Once your pan is clean and dry, don't just toss it in the cabinet. A quick oil rubdown is the secret to keeping that seasoning strong and preventing rust. It only takes a few seconds, but it makes a huge difference over time.
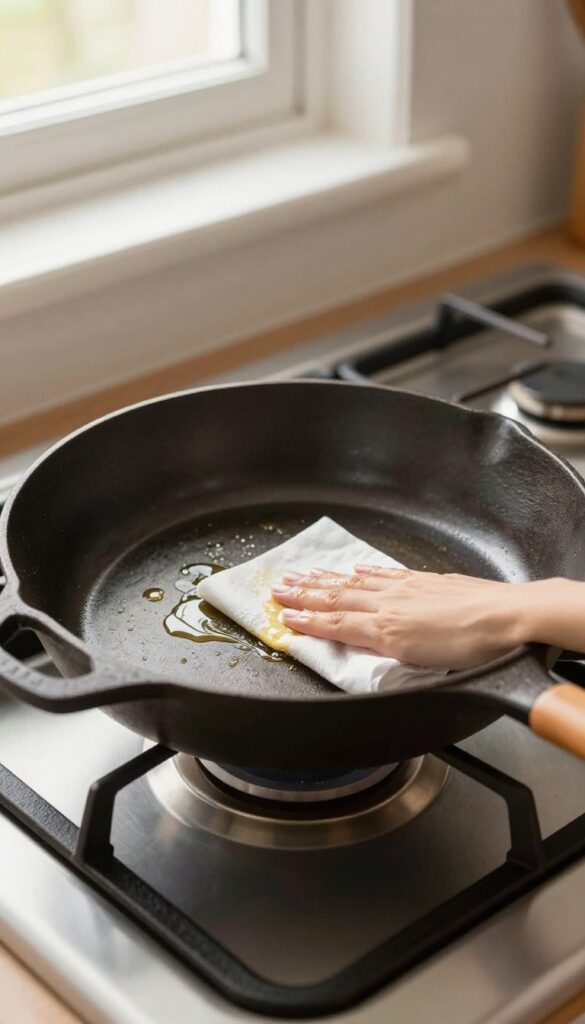
After washing and drying your cast iron, place it back on the stove over low heat for a minute or two to warm it up. Then, add a tiny drop of oil—about half a teaspoon—to the pan. Use a paper towel or a clean cloth to spread it evenly across the entire cooking surface, including the sides and handle.
The goal is a very thin, almost invisible layer. If it looks greasy or feels tacky, you've used too much. Wipe it down again with a dry paper towel until it's barely there.
This thin coating protects the pan from moisture and adds a subtle layer to your seasoning with each use.
Why Warm Pan Matters
Warming the pan opens up the pores of the metal, allowing the oil to absorb better and create a more even layer. Cold oil on a cold pan just sits on top and can turn sticky or rancid. A warm pan also helps the oil polymerize slightly, reinforcing the seasoning.
Choosing The Right Oil
Not all oils are equal for this step. Flaxseed oil is a favorite because it polymerizes into a hard, durable finish, but it can be pricey and has a short shelf life. Vegetable oil, canola oil, or grapeseed oil are excellent everyday choices.
Avoid olive oil—it has a low smoke point and can turn sticky. And never use butter or cooking sprays, as they contain additives that leave a gummy residue.
The Wipe-off Test
After applying the oil, grab a fresh paper towel and try to wipe the surface dry. If the towel picks up only a faint trace of oil, you've nailed it. If it comes away soaked, you've left too much.
Excess oil will create a sticky, uneven surface that attracts dust and can ruin your next meal. When in doubt, wipe more off.
7. Avoid Soaking the Pan
It's tempting to fill a dirty cast iron pan with soapy water and let it sit overnight. But that soak is one of the fastest ways to invite rust and ruin your seasoning. Water and cast iron don't mix well for long periods, and even a few hours can start to compromise that hard-earned patina.
When food is stubbornly stuck, soaking seems like the obvious fix. But the moisture seeps into the porous iron, causing rust spots and flaking seasoning. Instead of soaking, use the boiling method: fill the pan with water, bring it to a boil, and scrape gently with a wooden spatula.
The heat loosens debris without the damage.
Why Soaking Is Risky
Even a short soak can start to lift seasoning. The water penetrates tiny cracks in the oil layer, leading to bubbles and eventual peeling. Rust can appear within minutes if the pan isn't dried immediately.
It's just not worth the gamble.
The Boiling Method Works Better
Add about half an inch of water to the pan and bring it to a boil. Use a wooden spatula or a chainmail scrubber to gently dislodge stuck bits. The steam and heat do the work without stripping the seasoning.
Pour out the water, then dry the pan thoroughly over low heat.
What About Stubborn Burnt-on Food?
If boiling doesn't do the trick, try a paste of coarse salt and a little water. Scrub with a paper towel or a soft brush. The salt acts as an abrasive without damaging the seasoning.
Rinse quickly and dry immediately. No soaking required.
8. Use a Plastic Scraper for Delicate Jobs

Not every stuck bit needs a battle. Sometimes the gentlest touch does the trick, and that's where a simple plastic scraper shines. It's the tool you reach for when you want to lift off residue without scratching the seasoning or leaving metal marks.
A plastic scraper or spatula is a lifesaver for delicate jobs. It's rigid enough to dislodge food but soft enough to protect your seasoning. Use it on warm (not hot) pans for best results—heat softens the residue, making it easier to scrape away without pressure.
Keep one dedicated to cast iron so it stays clean and free of any melted plastic mishaps.
Why Plastic Over Metal?
Metal scrapers can gouge your seasoning, especially if you're too aggressive. Plastic flexes slightly and won't dig into the pan's surface. It's also non-abrasive, so you can use it daily without worrying about wearing down that hard-earned patina.
Best Techniques For Using A Scraper
Work at a shallow angle and push away from you. For rounded pans, use the curved edge of the scraper. If residue is stubborn, add a splash of water and let it steam for a minute—then scrape.
Rinse and repeat until the pan is smooth.
When To Skip The Scraper
If your pan has deep scratches or you see bare metal, avoid scraping altogether. Stick to gentle scrubbing with a soft sponge until you can reseason. A scraper is for maintenance, not for repairing damaged seasoning.
9. Clean Right After Cooking (While Warm)
Timing matters more than most people realize when it comes to cast iron care. If you wait until the pan has cooled completely, food residue hardens and bonds more stubbornly to the surface. Cleaning while the pan is still warm—not hot—makes the job quicker and gentler on your seasoning.
The moment you finish cooking, let the pan cool for a minute or two until it's warm to the touch but not scorching. Run hot water over it and use a stiff brush or non-scratch scrubber to loosen bits. The warmth helps release stuck food without needing harsh scrubbing or soap.
Just be careful not to burn yourself—use a handle cover or a towel if needed. This simple habit reduces wear on your seasoning and keeps your pan looking great.
Why Warm Is Better Than Hot Or Cold
Cleaning a piping hot pan can warp it or cause thermal shock if you run cold water over it. Cold pans, on the other hand, make food cling like cement. Warm is the sweet spot: the heat softens fats and loosens particles, but the pan is safe to handle and rinse without damage.
It's a small timing adjustment that pays off in easier cleaning and longer seasoning life.
The Warm Water Rinse Technique
Once the pan is warm, hold it under running hot water while scrubbing with a stiff brush. The combination of warm water and gentle friction lifts most residue instantly. For extra stubborn spots, add a pinch of coarse salt as a mild abrasive.
This method avoids soap entirely, which many cast iron purists prefer, but a drop of mild soap is fine if needed—just rinse thoroughly and dry immediately.
What To Avoid When Cleaning Warm
Never use cold water on a warm pan—the sudden temperature change can cause cracking or warping. Also, avoid metal scouring pads or harsh cleaners that can scratch the seasoning. Stick to nylon brushes, chainmail scrubbers, or soft sponges.
And always dry the pan thoroughly after washing, even if it's still a bit warm, to prevent rust.
10. Skip the Dishwasher Entirely
It might be tempting to toss your cast iron pan into the dishwasher after a messy meal, but resist the urge. Dishwashers use high heat, harsh detergents, and prolonged moisture—three things that will wreck your seasoning in one cycle. Even a single wash can leave your pan looking dull and rusty.
The dishwasher is a fast track to ruined seasoning and rust. The intense heat and caustic detergents strip away the polymerized oil layer you've worked hard to build. Plus, the long, wet cycle promotes rust formation on bare iron.
Stick to hand washing only.
Why Dishwashers Are So Damaging
Dishwasher detergents are alkaline and abrasive, designed to break down grease and food residue. That same power attacks the seasoning on your cast iron, causing it to flake or fade. The high heat of the drying cycle can also cause thermal shock if the pan isn't fully dry, leading to warping or cracking.
What To Do Instead
Hand wash your cast iron with hot water and a stiff brush. For stuck-on bits, use coarse salt as a gentle abrasive. Dry thoroughly with a towel and place on a low burner for a minute to evaporate any remaining moisture.
Then rub a thin layer of oil over the surface to protect it.
11. Use a Stiff Nylon Brush for Daily Cleaning
A stiff nylon brush is your best friend for everyday cast iron cleaning. Unlike steel wool or abrasive pads, nylon bristles are tough enough to dislodge food residue but gentle enough to leave your seasoning intact. Pair it with hot water, and you'll handle most messes in under a minute.
For daily maintenance, skip the soap and reach for a nylon brush with firm bristles. Run hot water over the pan, then scrub in circular motions to loosen stuck bits. The brush's flexibility lets it reach into corners without scratching the surface.
Rinse, dry thoroughly, and you're done. This method works best for pans used for eggs, pancakes, or sautéed veggies—anything that doesn't leave a heavy baked-on crust.
Why Nylon Over Other Materials
Nylon strikes the perfect balance between scrubbing power and seasoning safety. Metal brushes or scouring pads can scrape away the polymerized oil layer, while soft sponges often fail to remove stuck food. Nylon bristles are stiff enough to tackle residue but won't gouge or scratch the seasoning.
Plus, they're heat-resistant and won't melt under hot water.
How To Choose The Right Brush
Look for a brush labeled "stiff nylon" or "heavy-duty" with a comfortable handle. Avoid brushes with metal bristles or abrasive pads attached. A brush with a slight curve or angled head helps clean the sides and corners of the pan.
Some brushes come with a built-in scraper edge—handy for lifting stubborn bits without metal contact.
When To Add Soap
For most daily cleanings, hot water and the nylon brush are enough. If you cooked something particularly greasy or sticky, a drop of mild dish soap is fine. Apply it directly to the brush, scrub, then rinse thoroughly.
The key is to avoid soaking or using excessive soap—just a quick lather and rinse keeps the seasoning happy.
12. Re-season Small Spots with Stovetop Method
Even with careful cleaning, you might notice a dull patch or a small rust spot forming. Don't panic—you don't need to strip and reseason the entire pan. A quick stovetop touch-up can fix minor seasoning damage in minutes, keeping your pan ready for the next meal.
When you see a spot that looks dry or lighter than the rest, it means the seasoning layer has worn thin. The stovetop method targets only that area, saving you time and effort. It's the perfect solution for small imperfections before they spread.
What You'll Need
Grab a paper towel, a high-smoke-point oil (like grapeseed, flaxseed, or canola), and your stove. That's it. No oven preheating, no aluminum foil—just your pan and a burner.
Step-by-step Touch-up
First, clean and dry the pan thoroughly. Then, apply a tiny drop of oil to the dull spot and rub it in with a paper towel—you want a very thin layer, almost invisible. Place the pan on a burner over medium heat and let it heat until the oil just starts to smoke.
Once it smokes, turn off the heat and let the pan cool naturally. The oil will polymerize, bonding to the pan and restoring the seasoning.
When To Use This Method
This works best for small areas—think the size of a quarter or smaller. If the damage covers more than a quarter of the pan's surface, consider a full oven reseasoning. But for everyday wear and tear, the stovetop method is quick and effective.
13. Store with a Paper Towel Inside
You've cleaned your cast iron, dried it thoroughly, and even given it a light oil rub. But if you toss it in the cabinet without thinking about humidity, you might still find rust spots later. Moisture is the enemy, and a simple paper towel can act as a moisture magnet.
This small habit takes two seconds but makes a big difference, especially if you live in a humid area or store your pan in a closed cupboard. It's cheap, easy, and one of those tricks that seasoned cast iron users swear by.
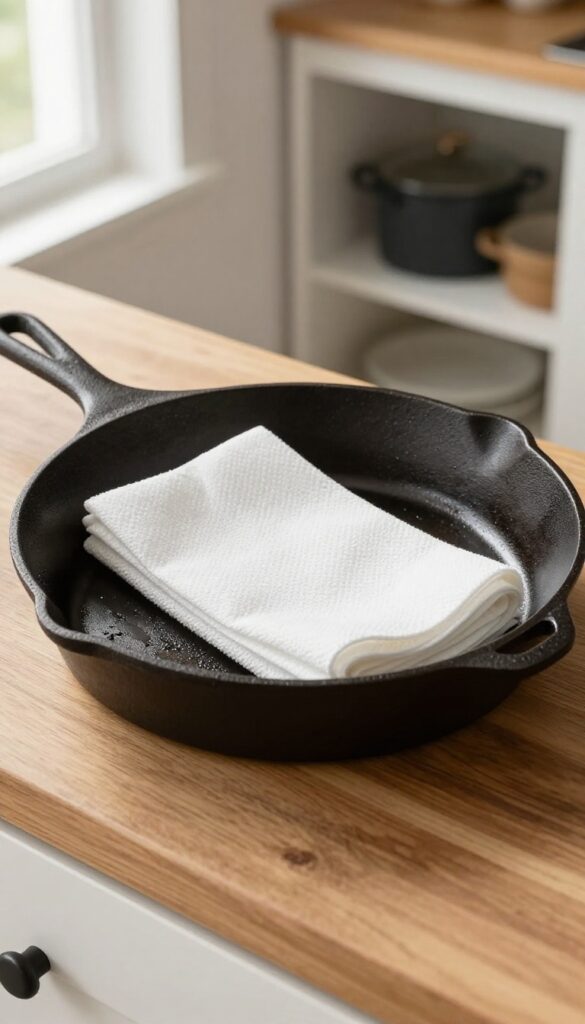
After your pan is fully dry and lightly oiled, fold a clean paper towel and place it inside the pan. The towel will absorb any lingering moisture that might condense inside the pan, especially if the pan is stored with a lid or stacked with other cookware. This prevents rust from forming in hidden spots.
Replace the paper towel every few weeks or after each use if you notice it getting damp. It's a low-maintenance way to keep your seasoning intact without any extra effort.
Why A Paper Towel Works
Cast iron is porous, and even after drying, microscopic moisture can remain. A paper towel wicks that moisture away from the metal surface, reducing the chance of rust. It also creates a slight buffer if pans are stacked, preventing scratches.
When To Skip The Towel
If you store your pan in a very dry climate or hang it in the open air, you might not need a paper towel. But for cabinets, drawers, or any enclosed space, it's a smart precaution.
14. Use Baking Soda Paste for Stubborn Stains
Sometimes, even the gentlest cleaning methods leave behind a stubborn stain or discolored patch on your cast iron. That's where baking soda steps in—a mild abrasive that can lift stains without damaging your seasoning. It's a simple, pantry-friendly fix that works wonders on those pesky marks.
Baking soda is alkaline and slightly abrasive, making it perfect for tackling stuck-on food residue or uneven coloration. When mixed into a paste, it provides enough grit to scrub away stains without scratching the seasoned surface. This method is especially useful for pans that have developed a dull patch or a ring of discoloration from acidic foods.
Always rinse thoroughly and dry immediately after use to prevent any moisture from lingering.
How To Make The Paste
Combine about two tablespoons of baking soda with just enough water to form a thick, spreadable paste. The consistency should be similar to toothpaste—not too runny, not too dry. Apply it directly to the stained area of your cool pan.
Scrubbing Technique
Use a soft sponge or a nylon brush to gently work the paste into the stain in circular motions. Avoid using steel wool or abrasive scrubbers, as they can damage the seasoning. Let the paste sit for a minute or two before rinsing.
When To Use This Method
Reserve baking soda paste for occasional deep cleaning rather than daily use. It's ideal for removing protein-based stains or discoloration from cooking acidic ingredients like tomatoes. Overuse can gradually thin the seasoning, so stick to once every few months or only when needed.
15. Know When to Strip and Start Over

No matter how careful you are, sometimes a pan reaches a point of no return. Flaking seasoning, deep rust, or a persistent burnt-on smell can make you wonder if it's time to throw in the towel. But don't toss that pan—stripping and reseasoning is a straightforward process that gives your cast iron a fresh start.
Knowing when to strip is just as important as knowing how to clean. If you see large patches of seasoning flaking off, or if rust has spread beyond a small spot, it's better to start over than to keep fighting. Stripping removes all old seasoning and rust, leaving bare metal ready for a new layer.
The two most common methods are using oven cleaner or a vinegar soak. Both are effective, but they require different levels of effort and safety precautions.
The Oven Cleaner Method
This is the easiest way to strip a pan. Spray the entire pan with a heavy-duty oven cleaner that contains sodium hydroxide (like Easy-Off). Place the pan in a plastic bag and seal it tight.
Let it sit for 24-48 hours. After that, wear gloves and rinse the pan thoroughly with water. The old seasoning should wipe right off.
Repeat if necessary, then wash with soap and water before reseasoning.
The Vinegar Soak For Rust
If rust is your main issue, a vinegar soak is your best bet. Mix equal parts white vinegar and water in a container large enough to submerge the pan. Let it soak for 30 minutes to an hour—longer can damage the iron.
Scrub off the rust with a scouring pad, rinse well, and dry immediately. You'll be left with bare metal that's ready for seasoning.
Reseasoning After Stripping
Once the pan is stripped and completely dry, apply a thin layer of oil (flaxseed, grapeseed, or vegetable oil work well). Wipe off as much as you can—a thin layer is key. Place the pan upside down in a cold oven, then set the oven to 450-500°F.
Bake for one hour, then turn off the oven and let the pan cool inside. Repeat this process 3-4 times for a strong initial seasoning.
FAQ
Can I use soap on cast iron?
Yes, mild dish soap is generally safe for well-seasoned cast iron. Avoid harsh detergents and prolonged soaking.
How do I remove rust from cast iron?
Scrub rust with steel wool or a chainmail scrubber, then rinse and dry immediately. Apply a thin layer of oil and re-season in the oven.
Why does my cast iron look patchy?
Patchiness often means uneven seasoning. Apply a thin layer of oil and heat the pan until it smokes, repeating as needed.
Can I cook acidic foods in cast iron?
Occasional cooking with acidic foods like tomatoes is fine, but prolonged exposure can damage seasoning. Avoid simmering for long periods.
How often should I season my cast iron?
Season only when the pan looks dull or food starts sticking. Regular cleaning and oiling after use usually suffice.
Conclusion
Cast iron care doesn't have to be intimidating. Once you get the hang of these 15 techniques, cleaning becomes second nature—and your seasoning stays rock solid. A little know-how goes a long way.
The key is matching the method to the mess. Whether you're dealing with stuck-on food or just doing a quick maintenance clean, you've now got a toolkit that works. Stick with it, and your skillet will only get better with time.