15 Easy Cleaning Oven Tips for Burnt Messes Fast
You open the oven door and that burnt smell hits you again. Caked-on grease and charred food bits make every bake feel like a punishment. But scrubbing for hours isn't the only option.
These 15 tips are designed to cut through the toughest burnt messes with minimal effort. Most use ingredients you already have in your pantry. No expensive sprays, no toxic fumes, just smart shortcuts.
From steam tricks to overnight soaks, each method targets a specific type of grime. Pick the one that matches your mess and get back to cooking without the dread.
1. Steam Clean with a Bowl of Water and Lemon
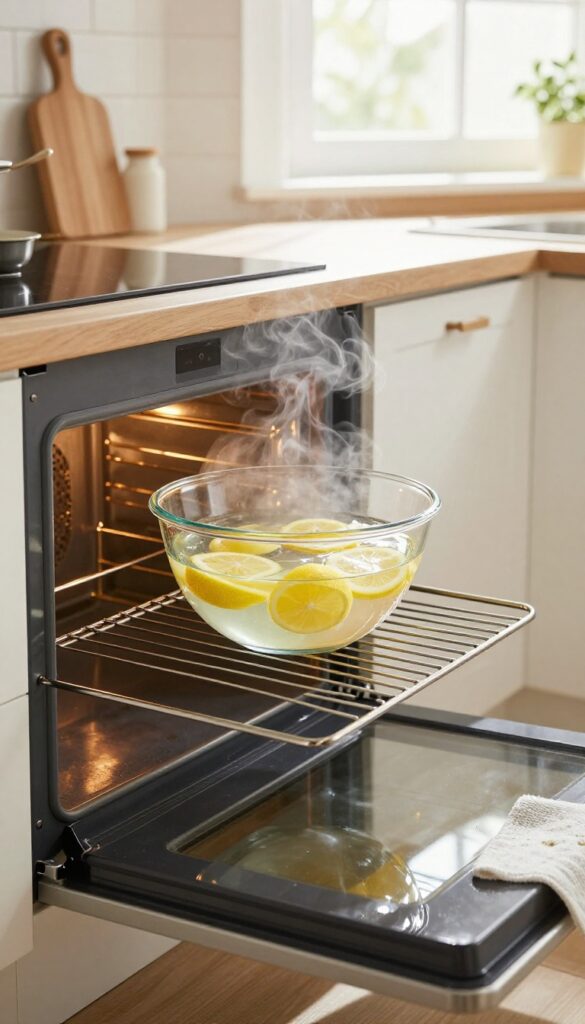
Steam is your best friend when it comes to loosening baked-on gunk without scrubbing. This method uses just water and lemon to soften burnt food and grease, making cleanup almost effortless. No harsh chemicals, no elbow grease—just heat and moisture doing the work.
Fill an oven-safe bowl with about a cup of water and add a few lemon slices. Place it on the middle rack of a cold oven, then heat to 250°F. Let it steam for 20 minutes.
The steam will soften burnt-on residue, and the lemon helps cut grease while leaving a fresh scent. After it cools slightly, wipe down the interior with a damp cloth. For stubborn spots, use a non-abrasive sponge.
This trick works best for light to moderate buildup and is a great first step before tackling tougher messes.
Why Lemon Works So Well
Lemon juice is naturally acidic, which helps break down grease and grime. The heat activates the citric acid, making it more effective at loosening burnt food. Plus, it neutralizes odors, so your oven smells clean instead of smoky.
How To Maximize The Steam Effect
For extra steam, add a splash of white vinegar to the water. Use a deep bowl to prevent boiling over. After steaming, leave the oven door open for a few minutes to let the moisture escape before wiping.
This prevents streaks and makes the final wipe-down easier.
When To Use This Method
This steam clean is ideal for routine maintenance or after a spill that hasn't been baked on for days. It's not strong enough for thick, charred layers, but it softens them enough for a follow-up scrub. Use it weekly to keep your oven fresh and reduce buildup.
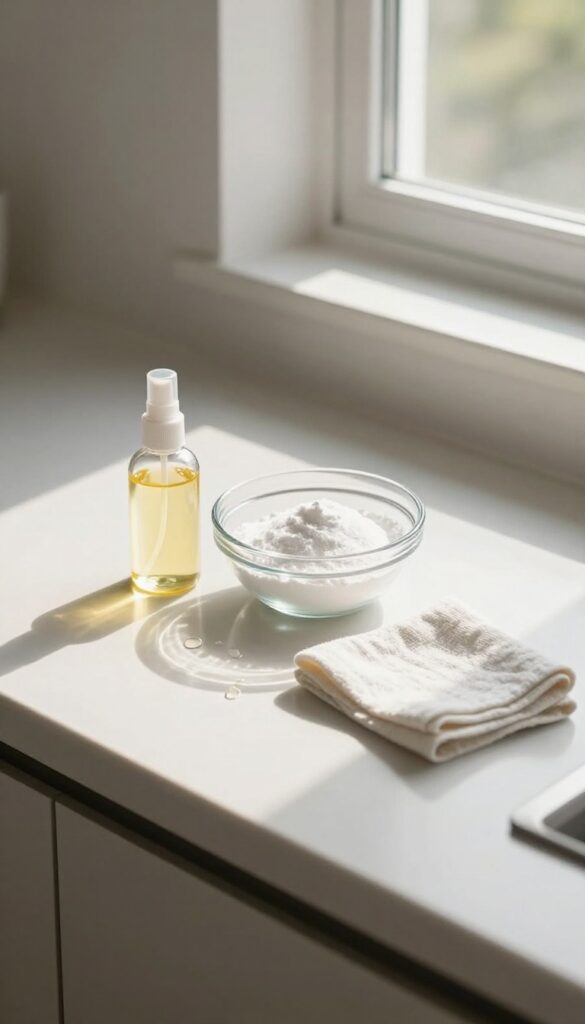
2. Baking Soda Paste for Stubborn Spots
Not all burnt messes need heavy scrubbing. Baking soda is gentle enough for enamel surfaces but tough enough to lift carbonized bits. Mixed into a paste, it becomes a targeted treatment for those crusty spots that refuse to budge.
Baking soda paste works best when you let it sit. The moisture softens the burnt layer while the mild abrasives loosen the bond. For extra stubborn areas, add a splash of white vinegar after the paste has sat—the fizz helps lift grime.
Always test on a small hidden area first if your oven has a special coating.
How To Make The Paste
Combine 1/2 cup baking soda with 2–3 tablespoons of water. Stir until it forms a thick, spreadable consistency. Add water a teaspoon at a time if it's too dry.
You want it like toothpaste—not runny.
Application Tips
Use a spatula or gloved fingers to apply the paste directly onto burnt spots. Spread it about 1/4 inch thick. Let it sit for 15–20 minutes.
For extra caked-on grime, leave it for 30 minutes.
Scrubbing And Rinsing
After the wait, dampen a non-abrasive sponge and scrub in circular motions. The paste should break away easily. Wipe residue with a clean, wet cloth.
Repeat if needed for deep-set stains.
3. Vinegar Spray to Neutralize Residue
After you've let the baking soda paste sit, it's time for the second half of this dynamic duo. White vinegar reacts with the baking soda to create a fizzy reaction that lifts stubborn grime and cuts through grease. This simple step turns a messy paste into something you can wipe away with ease.
Why Vinegar Works
White vinegar is acidic, which makes it a natural degreaser and grime dissolver. When it hits the alkaline baking soda, the fizzing action physically pushes debris away from the surface. It also neutralizes odors, so that burnt smell disappears along with the mess.
How To Apply It
Fill a spray bottle with undiluted white vinegar. Mist it generously over the baking soda paste until you see bubbles forming. Let it sit for a few minutes to work through the grime.
The fizzing will start to loosen any remaining burnt-on bits.
Wiping It Clean
After the fizzing subsides, take a damp microfiber cloth and wipe the area in circular motions. The paste should come off easily, along with the loosened residue. Rinse the cloth frequently and repeat until the oven surface is clean and shiny.
For stubborn spots, spray a little more vinegar and scrub gently.
4. Salt and Cinnamon for Burnt-On Grease
Coarse salt isn't just for seasoning—it's a fantastic gentle abrasive that lifts burnt grease without scratching your oven's surface. Adding a pinch of cinnamon masks any lingering odors and leaves your kitchen smelling warm and inviting. This simple combo works best on fresh-ish spills that haven't baked into a carbon crust.
When you've got greasy, burnt-on spots that won't budge, reach for the salt shaker. The coarse texture scrubs away gunk without damaging enamel or glass. Cinnamon isn't just for scent—its fine powder helps the salt cling to vertical surfaces inside the oven.
Together, they make a surprisingly effective paste that tackles messes with zero harsh chemicals.
Why Salt Works So Well
Coarse salt is harder than most oven surfaces but softer than abrasive powders like pumice. It grinds away burnt grease without leaving micro-scratches. The irregular crystals break down as you scrub, so they don't gouge the finish.
Plus, salt is hygroscopic—it draws moisture from the air and from the grease, helping to soften the burnt layer.
How To Use The Salt-cinnamon Method
Sprinkle a generous layer of coarse salt over the greasy spots. Add a dash of ground cinnamon—enough to lightly dust the salt. Let it sit for 10 minutes so the salt can start absorbing and loosening the grime.
Then, dampen a sponge or cloth and scrub in circular motions. The salt will dissolve gradually, leaving a clean surface with a subtle cinnamon scent.
When To Skip This Trick
This method works best on baked-on grease, not on thick, charred crusts or burned sugar spills. For those, you'll need a heavier approach like a baking soda paste or a steam soak. Also, avoid using salt on self-cleaning oven liners or any surface that says "no abrasive cleaners" in the manual.
Always test a small hidden area first.
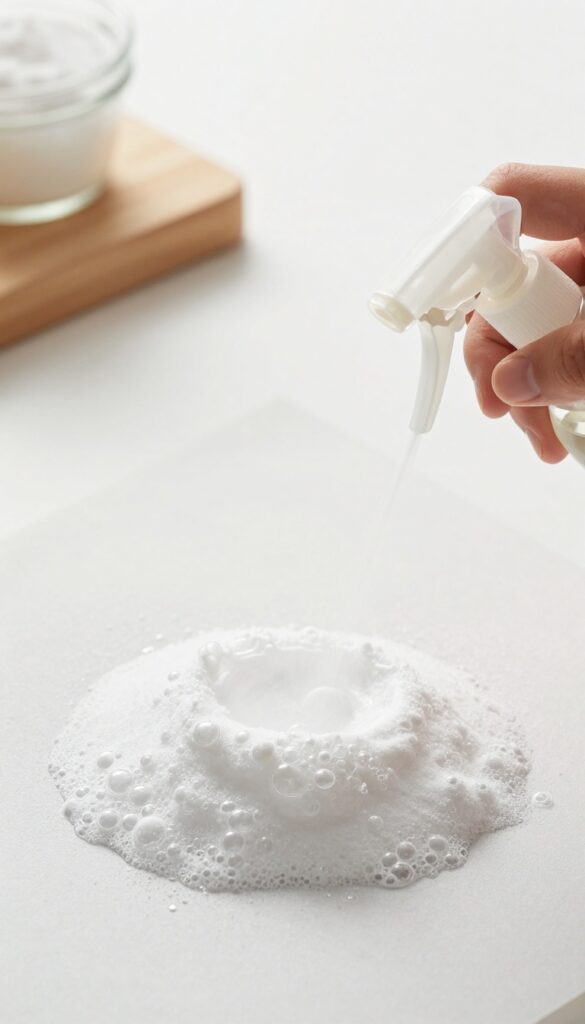
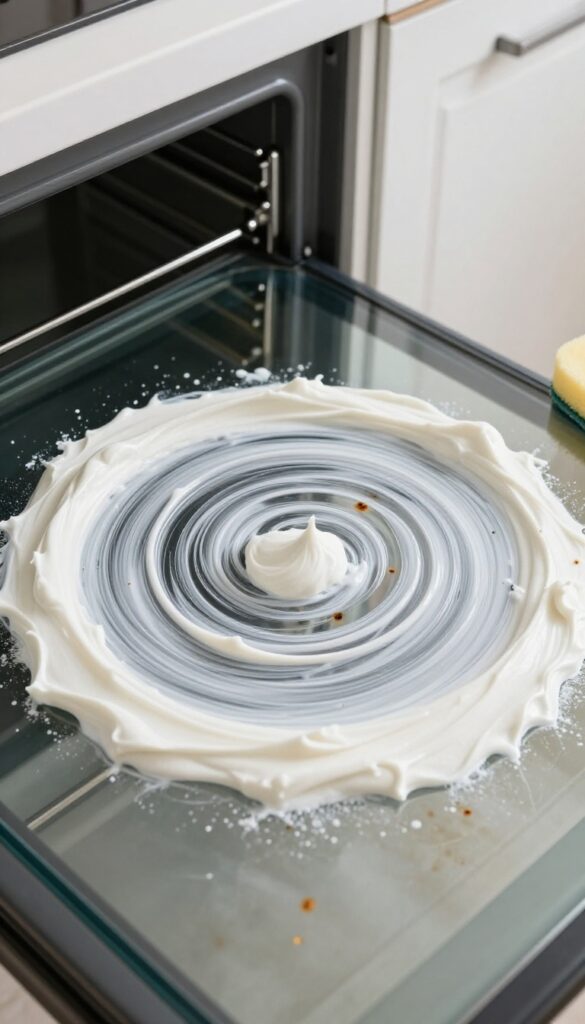
5. Dish Soap and Baking Soda Combo
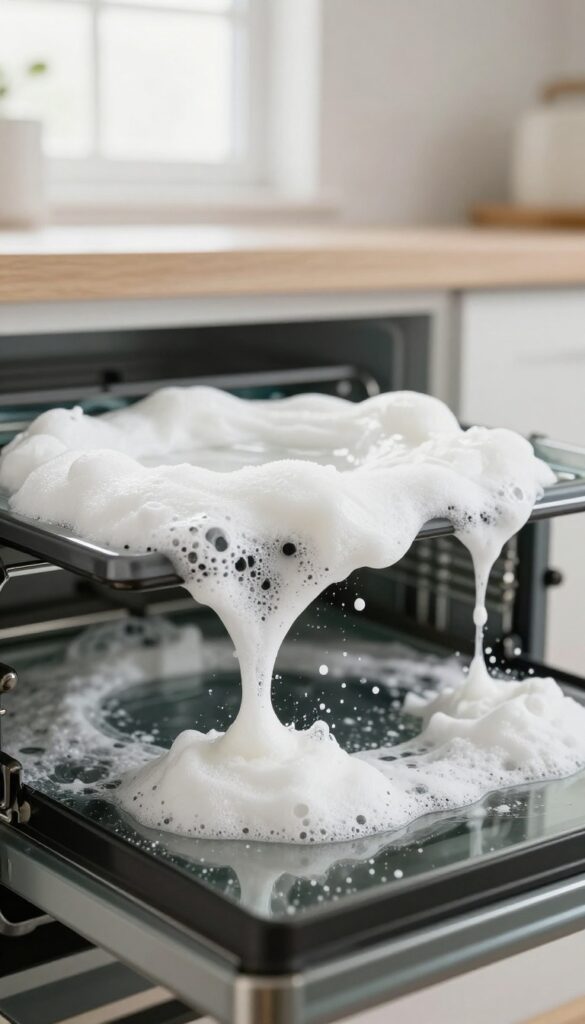
Sometimes the simplest mixtures pack the biggest punch. When you combine liquid dish soap with baking soda, you get a thick, foamy paste that clings to burnt-on grime and breaks it down without harsh scrubbing. This duo is especially effective on glass oven doors, where you can actually see the baked-on splatters.
To make the paste, mix about ¼ cup of baking soda with enough liquid dish soap to form a spreadable consistency. Apply it generously over the burnt areas and let it sit for at least 30 minutes. The soap helps lift grease while the baking soda provides gentle abrasion.
After the wait, wipe away the paste with a wet cloth—most of the grime should come off easily. For stubborn spots, let the paste sit longer or add a splash of white vinegar to boost the fizzing action.
Why This Combo Works So Well
Baking soda is a mild alkali that reacts with acidic grease to create a gentle scrubbing agent. Dish soap is a surfactant that breaks down oil and helps the mixture cling to vertical surfaces like oven doors. Together, they form a powerful but non-toxic cleaner that's safe for food-contact areas.
Best Uses For This Method
This paste is ideal for glass oven doors, where burnt-on splatters are visible and often baked hard. It also works well on enamel interiors and oven racks. Avoid using it on self-cleaning oven liners or aluminum surfaces, as the abrasiveness might cause scratching.
Tips For Maximum Effectiveness
For extra stubborn spots, let the paste sit overnight. Cover it with a damp paper towel to keep it from drying out. When wiping, use a microfiber cloth to avoid streaks on glass.
If residue remains, rinse with a vinegar-water solution (1: 1 ratio) for a sparkling finish.
6. Use a Pumice Stone on Ceramic or Glass
If you have a ceramic or glass oven surface, you might worry about scratching it. A pumice stone is actually gentle enough for these materials when used correctly. It's a lifesaver for those stubborn burnt spots that won't budge with regular cleaners.
Wet the pumice stone thoroughly before use—this is crucial to prevent scratches. Gently rub the burnt area in a circular motion. The stone's porous texture lifts the residue without damaging the surface.
Rinse the stone occasionally to remove debris. After the spot is clean, wipe the area with a damp cloth and dry it. This method works best on flat surfaces like the oven floor or door, not on textured or coated parts.
Why Pumice Works
Pumice is a volcanic rock that's naturally abrasive but softer than ceramic or glass. When wet, it becomes a fine scrubbing tool that breaks down carbonized food without scratching. It's especially effective on baked-on grease and sugar-based spills.
Step-by-step Application
First, wet the pumice stone and the oven surface. Gently rub the burnt spot with light pressure—let the stone do the work. Rinse the stone often to clear away residue.
Once the spot is gone, wipe the area with a clean damp cloth and dry it. For stubborn spots, repeat the process.
Safety Tips
Always keep the stone wet to avoid scratching. Test on a small hidden area first. Do not use on enamel or painted surfaces.
After use, let the stone dry completely before storing to prevent mold.
7. Ammonia Fumes for Heavy-Duty Cleaning
When burnt-on grease has built up into a thick, stubborn layer, sometimes you need something stronger than baking soda or vinegar. Ammonia fumes offer a deep clean that softens even the toughest grime without you having to scrub for hours. It's an old-school trick that works like magic, but you need to handle it carefully.
Place a small bowl of ammonia in a cold oven overnight. The fumes soften burnt grease. Next day, ventilate the kitchen and wipe clean with soapy water.
Use gloves and avoid mixing with bleach.
How It Works
Ammonia releases fumes that react with grease, turning it into a soapy substance that wipes away easily. The key is giving it enough time—overnight is best. The oven must be cold and off, so the fumes concentrate inside without being vented away.
Step-by-step Instructions
Remove racks and any loose debris. Pour about 1/2 cup of clear ammonia into a glass or ceramic bowl. Place it on the middle rack and close the door.
Leave it overnight (at least 8 hours). In the morning, open windows and let the kitchen air out for 15 minutes. Wearing gloves, wipe down surfaces with a sponge dipped in warm, soapy water.
Rinse thoroughly.
Safety Precautions
Never mix ammonia with bleach or any cleaner containing chlorine—it creates toxic gas. Work in a well-ventilated area. Wear rubber gloves to protect your skin.
Keep pets and children away while the ammonia sits. If the smell lingers after cleaning, wipe again with a vinegar-water solution to neutralize it.
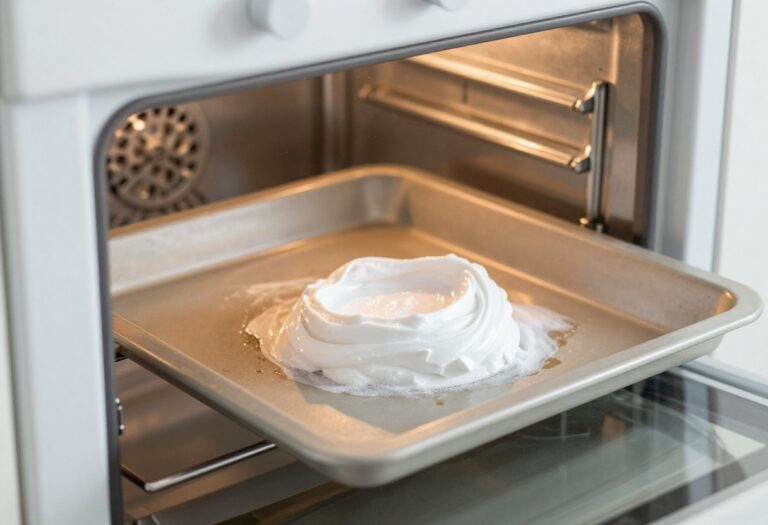
8. Cream of Tartar and Hydrogen Peroxide Paste
Burnt sugar spills are the worst—they turn into a rock-hard, sticky mess that laughs at regular cleaners. But cream of tartar and hydrogen peroxide together create a powerful paste that breaks down that caramelized gunk like magic. The acid in cream of tartar reacts with the peroxide to lift and dissolve the burnt layer, making scrubbing almost effortless.
This method is a game-changer for anyone who's ever baked a pie that bubbled over or roasted veggies that left a sticky residue. It's especially effective on glass and enamel surfaces because it's gentle enough not to scratch but strong enough to tackle tough spots. Plus, both ingredients are pantry staples, so you can whip up a batch anytime without a trip to the store.
How To Make The Paste
Mix two tablespoons of cream of tartar with enough hydrogen peroxide (3% solution works fine) to form a thick, spreadable paste. Start with a tablespoon of peroxide and add more drop by drop until it reaches a peanut butter-like consistency. Don't make it too runny or it will drip off vertical surfaces.
Application And Wait Time
Spread the paste generously over the burnt areas, focusing on the worst spots. Let it sit for 20 minutes—this gives the chemical reaction time to work. You'll notice the paste start to bubble slightly, which is a good sign.
For extra stubborn spots, let it sit up to 30 minutes, but don't let it dry out completely.
Scrubbing And Rinsing
After the wait, use a damp sponge or a soft scrub brush to gently work the paste into the mess. The burnt bits should lift away easily. Rinse thoroughly with water and wipe dry with a clean cloth.
If any residue remains, repeat the process or follow up with a vinegar wipe to neutralize any leftover peroxide.
9. Dryer Sheet Trick for Burnt-On Food
You've probably used dryer sheets to soften laundry, but they're also surprisingly effective at loosening burnt-on food. The fabric softener contains ingredients that break down grease and grime, making it easier to wipe away. This trick works best on fresh-ish burnt spots that haven't been baked on for weeks.
Wet a dryer sheet and lay it directly over the burnt area. Let it sit for 15 minutes to give the softener time to work. Then, wipe the spot with a damp cloth—the grime should come off with little effort.
For thicker buildup, you can let the sheet sit longer or use a second one. This method is also great for oven racks: lay them in the sink, cover with wet dryer sheets, and let them soak for 30 minutes before scrubbing.
How It Works
Dryer sheets are coated with a thin layer of fabric softener, which contains surfactants and lubricants. When wet, these compounds help break down the bonds between burnt food and the oven surface. The sheet also acts as a gentle abrasive, lifting grime without scratching.
Best Uses And Limitations
This trick works best on light to moderate burnt spots, especially from spills that haven't been repeatedly baked. It's not ideal for thick, charred layers—those may need a stronger method. But for everyday messes, it's a quick fix that uses something you already have.
Tips For Oven Racks
Oven racks are perfect for this trick because you can remove them and work in the sink. Wet several dryer sheets and wrap them around the rack's grimy bars. Let them sit for 30 minutes, then scrub with a brush or sponge.
The grime will slide off much easier.
10. Oven Cleaner with Natural Ingredients
Commercial oven cleaners are effective, but they come with strong fumes and harsh chemicals. If you prefer a gentler approach, a homemade cleaner can still handle burnt-on grime without the headache. You probably already have the ingredients in your kitchen.
This natural cleaner combines the abrasive power of baking soda with the grease-cutting ability of vinegar. A few drops of essential oil add a pleasant scent and extra cleaning strength. It's safe for most oven surfaces and much easier on your lungs.
The Simple Recipe
Mix 1/2 cup baking soda with 3 tablespoons water to form a paste. Spread it over the burnt areas and let it sit for 15-20 minutes. Then spray undiluted white vinegar over the paste—it will fizz and lift the grime.
Wipe away with a damp cloth.
Why It Works
Baking soda is a mild abrasive that scrubs without scratching. Vinegar reacts with the baking soda to create carbon dioxide bubbles that help dislodge caked-on food. Essential oils like lemon or tea tree add antibacterial properties and a fresh smell.
Tips For Best Results
For extra tough spots, let the paste sit overnight. Avoid using this mixture on self-cleaning oven liners, as the moisture can damage them. Always test on a small hidden area first.
11. Self-Cleaning Cycle Boost
Your oven's self-cleaning cycle is a powerful tool, but it works even better with a little prep. Instead of just hitting start, take a minute to add moisture. Steam helps loosen burnt-on grime before the high heat kicks in, making the whole process more effective.
Prep The Oven First
Before you run the self-cleaning cycle, remove any large food chunks or loose debris. A quick wipe with a dry cloth or paper towel prevents smoke and keeps the cycle from baking debris into the oven floor.
Add A Bowl Of Water
Place an oven-safe bowl filled with water on the bottom rack. As the oven heats up, the water turns to steam, which penetrates burnt-on grease and food particles. This extra moisture helps the self-cleaning cycle work more efficiently.
Run The Cycle And Ventilate
Start the self-cleaning cycle according to your oven's instructions. Make sure your kitchen is well-ventilated—open windows or turn on the exhaust fan. Once the cycle finishes and the oven cools, you'll find most of the ash wipes away easily.
12. Lemon Juice and Borax Scrub
For those tough, baked-on spots that resist gentler cleaners, a paste made from lemon juice and borax can be a game-changer. The citric acid cuts through grease, while borax adds the grit needed to lift burnt residue without scratching. This combo works especially well on glass oven doors and metal racks.
Mix equal parts lemon juice and borax to form a spreadable paste. Apply it generously to the burnt areas and let it sit for 15 minutes—the acid will start breaking down the grime. Then, scrub with a non-abrasive pad; you'll see the mess lift away with minimal effort.
Rinse thoroughly with water and wipe dry. This scrub is safe for most oven surfaces, but avoid using it on aluminum or unfinished cast iron.
Why This Combo Works
Lemon juice is a natural degreaser and deodorizer. Its acidity softens carbonized food and grease, making them easier to remove. Borax acts as a mild abrasive and helps emulsify the loosened grime.
Together, they create a powerful, non-toxic paste that tackles burnt messes without harsh fumes.
Best Uses And Tips
This scrub is ideal for burnt-on spills on oven floors, walls, and glass doors. For extra stubborn spots, let the paste sit for 30 minutes or apply a thicker layer. Use a microfiber cloth or soft sponge to avoid scratches.
Always test on a small hidden area first, especially on colored or coated surfaces.
Safety And Storage
Borax is safe for cleaning but should not be ingested. Keep it away from children and pets. Store the paste in an airtight container if you make extra; it will stay effective for a few days.
Rinse surfaces well after scrubbing to remove any residue.
13. Club Soda for Fresh Spills

Fresh spills are way easier to tackle than dried-on disasters, but you still need the right approach. Club soda works wonders because the carbonation helps break down the burnt residue without harsh scrubbing. It's a simple trick that uses something you probably already have in your fridge.
When you catch a spill while the oven is still warm but turned off, reach for club soda instead of a scraper. The bubbles lift the mess from the surface, making it easy to wipe away. Just pour it over the spill, let it fizz for 10 minutes, and then wipe with a soft cloth or sponge.
This method is especially effective for sugary spills that haven't had time to caramelize into a hard crust.
Why Club Soda Works
The carbonation in club soda creates tiny bubbles that help loosen burnt-on food from the oven floor. The mild acidity also helps dissolve grease, making it easier to wipe away without scrubbing. It's a gentle but effective cleaner that won't damage your oven's surface.
When To Use It
This trick works best on fresh spills that are still warm—right after you've taken out a dish that bubbled over. If the spill has already cooled and hardened, you'll need a different method. Also, avoid using club soda on self-cleaning oven liners or surfaces that are sensitive to moisture.
Step-by-step Guide
First, turn off the oven and let it cool slightly—it should be warm, not hot. Pour club soda directly over the spill, covering it completely. Let it sit for 10 minutes to allow the carbonation to work.
Then, use a damp cloth or sponge to wipe the area clean. Repeat if necessary, and dry the surface with a clean towel.
14. Razor Blade Scraper for Stubborn Crust
When steam and baking soda won't cut it, sometimes you need a little mechanical help. A razor blade scraper is the secret weapon for those crusty, burnt-on spots that laugh at sponges. Used correctly, it's safe and incredibly effective.
The Right Tool For The Job
Not all scrapers are created equal. Look for a handheld scraper with a retractable blade and a comfortable grip. The key is a sharp, single-edge blade—dull blades require more pressure and increase the risk of scratching.
You can find these at any hardware store or online for a few dollars.
Technique Matters
Hold the scraper at a 45-degree angle to the surface. Use short, gentle strokes, letting the blade do the work. Never press hard or use a scraping motion like you're chiseling ice.
For glass doors, keep the blade flat against the glass to avoid gouging. Work in small sections, wiping away debris as you go.
Safety First
Always retract the blade when not in use. Wear a pair of rubber gloves for grip and protection. If you're scraping near the heating element, make sure the oven is completely cool.
And never use a razor scraper on non-stick surfaces or porcelain—it will cause permanent damage. Stick to glass, ceramic, and metal.
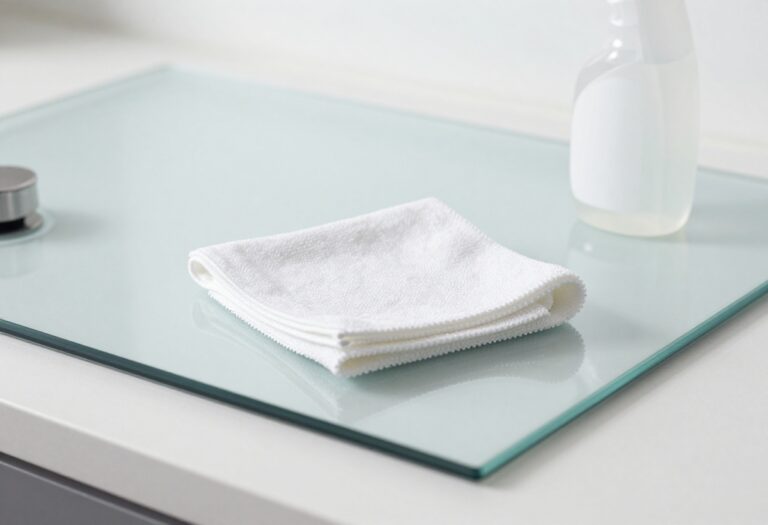
15. Regular Maintenance with a Damp Cloth

You don't need to deep clean every time you use the oven. A quick wipe-down after each use can save you from dealing with burnt-on messes later. It's the easiest habit to adopt, and it makes a huge difference.
Getting into the habit of wiping your oven while it's still warm prevents grease and food particles from baking into stubborn crust. A simple damp cloth is all you need—no chemicals required. This small step keeps your oven looking good and smelling fresh between deep cleans.
Why Warm Is Best
When the oven is warm (but not hot), grease and spills are still soft and easy to lift. Letting them cool and harden makes removal much harder. A quick wipe right after cooking takes seconds and prevents buildup.
What To Use
A soft microfiber cloth dampened with warm water works perfectly. Avoid abrasive scrubbers that can damage the interior coating. For stubborn spots, add a drop of mild dish soap.
Make It A Routine
Keep a damp cloth handy near the oven. After you turn off the oven, let it cool for a few minutes, then give the interior a quick once-over. This habit alone can cut your deep cleaning frequency in half.
FAQ
Can I use baking soda and vinegar together to clean my oven?
Yes, they work well together. Apply a baking soda paste first, then spray vinegar over it. The fizzing reaction helps lift burnt-on grime.
Wipe clean with a damp cloth afterward.
How often should I deep clean my oven?
Aim for a deep clean every 3 to 6 months, depending on usage. If you notice heavy buildup or smoke during preheating, it's time for a thorough cleaning.
Is it safe to use ammonia to clean my oven?
Ammonia can be effective but must be used carefully. Ensure the kitchen is well-ventilated, wear gloves, and never mix ammonia with bleach. Keep it away from children and pets.
What should I avoid when cleaning my oven?
Avoid using harsh abrasive pads or steel wool on glass or enamel surfaces, as they can scratch. Also, never use oven cleaner on self-cleaning oven components unless specified by the manufacturer.
Can I clean my oven while it's still hot?
It's safer to clean a warm (not hot) oven. Let it cool enough to touch comfortably. Cleaning a hot oven can cause burns and may cause cleaning solutions to evaporate too quickly.
Conclusion
Burnt messes don't have to mean hours of scrubbing. With these 15 tips, you can tackle even the toughest oven stains using simple ingredients and a little patience. Try a couple of methods next time you clean, and you'll see how fast they work.
The key is matching the technique to your mess—baking soda paste for dried spills, steam for greasy grime. Keep these tricks handy, and your oven will stay spotless with way less effort. Happy cleaning!