25 Cleaning Upholstery Tips for Stains and Fresh Fabric
You finally sit down to relax, only to spot a mysterious stain on your favorite armchair. Before you panic, know that most upholstery mishaps can be fixed with the right approach. Whether it's red wine, pet accidents, or everyday grime, these 25 tips will help you clean stains and keep fabric fresh.
From quick fixes to deep cleaning methods, we've got you covered. No need for expensive professional services every time—just smart techniques and common household items. Let's dive into the best ways to restore your upholstery.
Remember, the key is acting fast and using the right method for each fabric type. With these tips, you'll handle spills like a pro and extend the life of your furniture.
1. Blot, Don't Rub
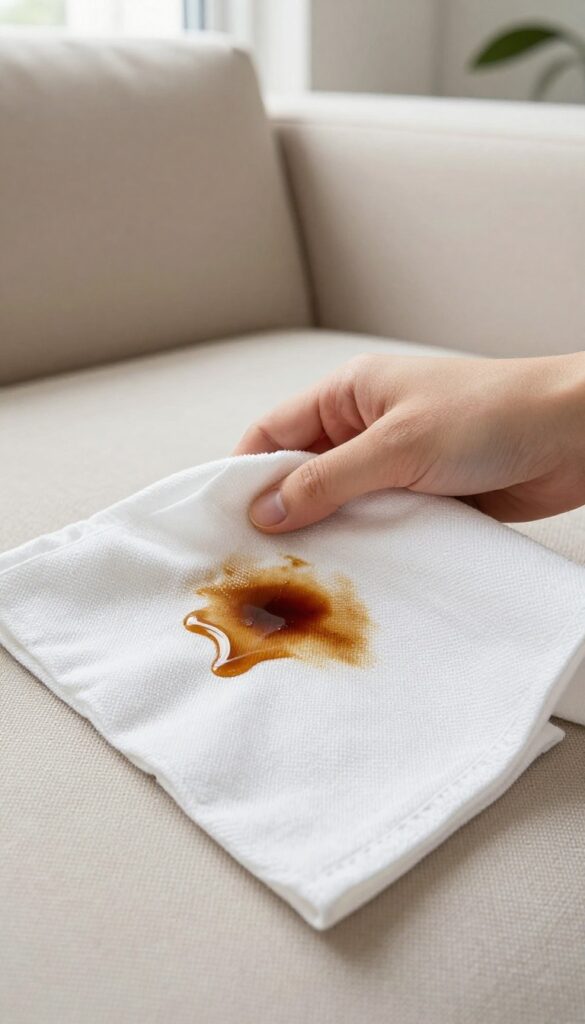
Spills happen, but how you react makes all the difference. The golden rule of stain removal is to blot, not rub. Rubbing grinds the stain into fabric fibers, making it harder to remove and potentially damaging the upholstery.
Blotting lifts the liquid without spreading it, giving you a much better chance of a clean result.
Why Rubbing Makes Things Worse
When you rub a stain, you're essentially pushing it deeper into the fabric. The friction also damages fibers, leaving a worn or fuzzy spot. For delicate materials like velvet or linen, rubbing can cause permanent texture changes.
Always resist the urge to scrub.
The Right Blotting Technique
Use a clean, white cloth or paper towel. Start at the outer edge of the stain and work inward to prevent spreading. Press gently and lift—don't swipe.
Repeat with a fresh section of the cloth until no more liquid transfers. For thicker spills, scrape off solids first with a spoon.
What To Do If The Stain Has Already Set
If you missed the window for immediate blotting, don't worry. Lightly dampen the area with a mild cleaning solution (like dish soap and water) and then blot. Avoid soaking the fabric, as excess moisture can lead to mold or mildew.
Blot dry afterward with a clean towel.
2. Test Cleaning Solutions First
Before you go all-in on that stubborn stain, take a moment to test your cleaning solution. It's a simple step that can save you from a bigger headache down the road. Upholstery fabrics react differently to cleaners, and what works on one couch might ruin another.
Testing in an inconspicuous spot—like under a cushion or behind the furniture—lets you see how the fabric responds. Apply a small amount of your chosen cleaner, blot it gently, and let it dry completely. If there's no discoloration, fading, or texture change, you're good to go.
If you notice any adverse reaction, switch to a gentler option or consult the manufacturer's guidelines.
Why Testing Matters
Upholstery fabrics are not all the same. Some are delicate and can be damaged by harsh chemicals, while others are more durable. Testing prevents permanent damage like color bleeding, shrinking, or stiffening.
It's a quick insurance policy that takes just a few minutes.
How To Test Properly
Choose a hidden area, like the back of a cushion or the bottom edge. Apply a small amount of cleaner with a white cloth—colored cloths can transfer dye. Blot, don't rub, and wait for it to dry.
Check for any changes in color or texture. If everything looks fine, proceed with confidence.
What To Look For
After drying, inspect the test spot for color loss, darkening, or a rough feel. Also check if the fabric becomes stiff or sticky. Any of these signs mean the cleaner is too harsh.
In that case, dilute the solution or try a milder alternative like mild dish soap and water.
3. Use Club Soda for Fresh Stains
Club soda isn't just for mixing drinks—it's a secret weapon against fresh upholstery stains. The carbonation helps lift dirt and liquid from fabric fibers without harsh scrubbing. Keep a bottle handy for quick action on spills like wine, coffee, or soda.
When a fresh spill happens, grab club soda and a clean white cloth. Pour a small amount directly on the stain—enough to saturate it but not soak the cushion. Blot gently with the cloth, working from the outside in to prevent spreading.
Repeat until the stain lifts. The bubbles help carry away the mess, and the lack of chemicals means no residue or color fading. Always test on an inconspicuous spot first, but club soda is generally safe for most fabrics.
Why Club Soda Works
The secret is carbonic acid, which creates gentle bubbles that loosen particles from fibers. Unlike tap water, club soda's slight acidity helps break down stains without damaging fabric. Plus, it's colorless and odorless, so no risk of setting stains or leaving smells.
Step-by-step Application
Blot the spill immediately to remove excess liquid. Pour club soda over the stain, then press a cloth firmly to absorb. Repeat this blot-and-pour cycle until the stain fades.
Avoid rubbing—that pushes the stain deeper. For stubborn spots, let the club soda sit for a minute before blotting.
When To Avoid Club Soda
Skip club soda on delicate fabrics like silk or velvet, as carbonation may damage them. Also avoid it on old, set-in stains—it's best for fresh spills. For large areas, test first to ensure the fabric doesn't react poorly.
4. White Vinegar and Water Mix
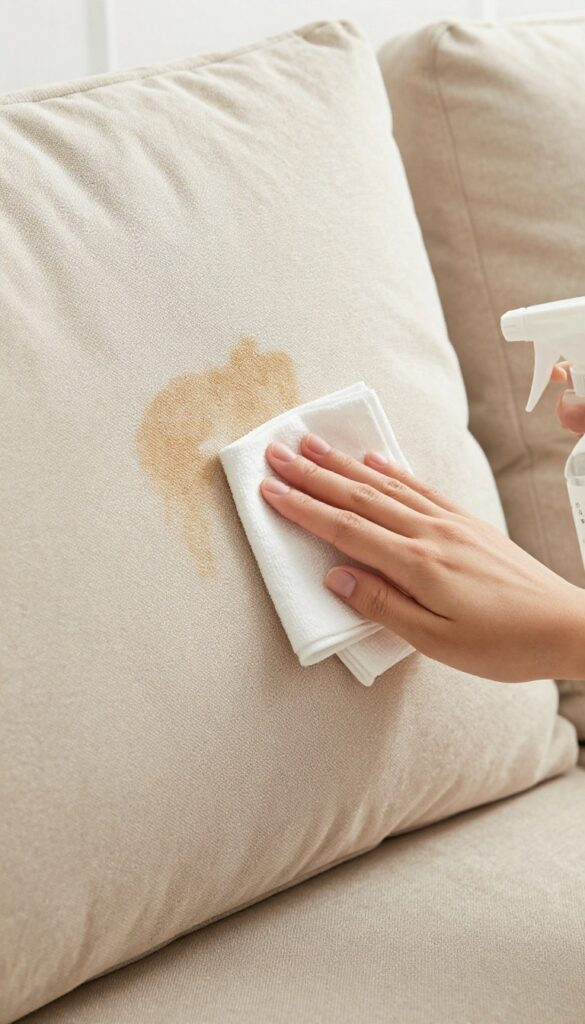
Sometimes the simplest solutions work best, and a white vinegar and water mix is proof. This gentle all-purpose cleaner tackles odors and breaks down many stains without harsh chemicals. Just mix equal parts, spray lightly, blot, and let it air dry.
It's safe for most fabrics, but always test first.
Why Vinegar Works
White vinegar is mildly acidic, which helps dissolve dirt, grease, and many organic stains. It also neutralizes odors by balancing pH levels. Unlike commercial cleaners, it leaves no residue that attracts more dirt.
How To Apply
Mix one part white vinegar with one part water in a spray bottle. Spray the solution onto a clean cloth, not directly on the fabric, to avoid oversaturation. Gently blot the stain, working from the outside in.
Let the area air dry completely.
Stains It Handles Best
This mix works wonders on coffee, tea, juice, and pet urine stains. It's also great for general freshening. For tougher stains like grease, add a drop of dish soap to the solution.
Fabric Safety Tips
Always test on an inconspicuous spot first. Avoid using vinegar on silk, acetate, or other delicate fabrics. For leather or faux leather, use a specialized cleaner instead.
5. Baking Soda for Odors and Grease
Baking soda is a powerhouse when it comes to neutralizing odors and cutting through grease on upholstery. It's gentle, inexpensive, and works wonders on everything from musty smells to oily stains. Here's how to put it to work.
To use baking soda, simply sprinkle a generous layer over the affected area. Let it sit for at least 15 minutes to absorb odors and lift grease. For stubborn smells, leave it on overnight.
Then, vacuum thoroughly. This method is safe for most fabrics, but always test on an inconspicuous spot first.
Why It Works
Baking soda is alkaline, which helps break down acidic odors and grease molecules. Its fine texture also acts as a gentle abrasive, lifting dirt without damaging fibers.
Best Fabrics To Use It On
Works well on cotton, polyester, and microfiber. Avoid on delicate fabrics like silk or velvet, as the powder may get trapped.
Pro Tips For Tough Smells
For pet odors or smoke, mix baking soda with a few drops of essential oil (like lavender) before sprinkling. Let it sit overnight, then vacuum. Repeat if needed.
6. Dish Soap for Greasy Stains
Grease stains on upholstery happen more often than you'd think—maybe from a buttery snack or a splash of cooking oil. The good news is that a drop of mild dish soap is all it takes to break down that grease without damaging the fabric. This method is gentle enough for most upholstery types and uses something you already have in your kitchen.
To tackle a greasy stain, mix a few drops of mild dish soap with warm water in a small bowl. Dip a clean microfiber cloth into the solution, wring it out so it's damp not wet, and gently dab the stain. Work from the outside in to prevent spreading.
Once the grease lifts, blot the area with a cloth dampened with plain water to remove any soap residue. Let the fabric air dry completely.
Why Dish Soap Works On Grease
Dish soap is designed to cut through grease on plates, and it does the same on fabric. Its surfactants break down oil molecules, making them easy to lift away. Just be sure to use a mild formula without bleach or harsh additives that could fade or damage upholstery.
Step-by-step Application
Start by blotting any excess grease with a paper towel. Mix the soap solution, then test it on a hidden area of the furniture. Dab the stain gently with the damp microfiber cloth, applying light pressure.
Repeat until the stain is gone, then rinse with a water-dampened cloth. Blot dry with a clean towel.
Avoid These Common Mistakes
Don't rub the stain—that pushes grease deeper into the fibers. Also, avoid using too much water, as over-wetting can lead to mold or fabric damage. Always blot, and never use dish soap on delicate fabrics like silk or velvet unless it's specifically labeled safe.
7. Rubbing Alcohol for Ink Stains
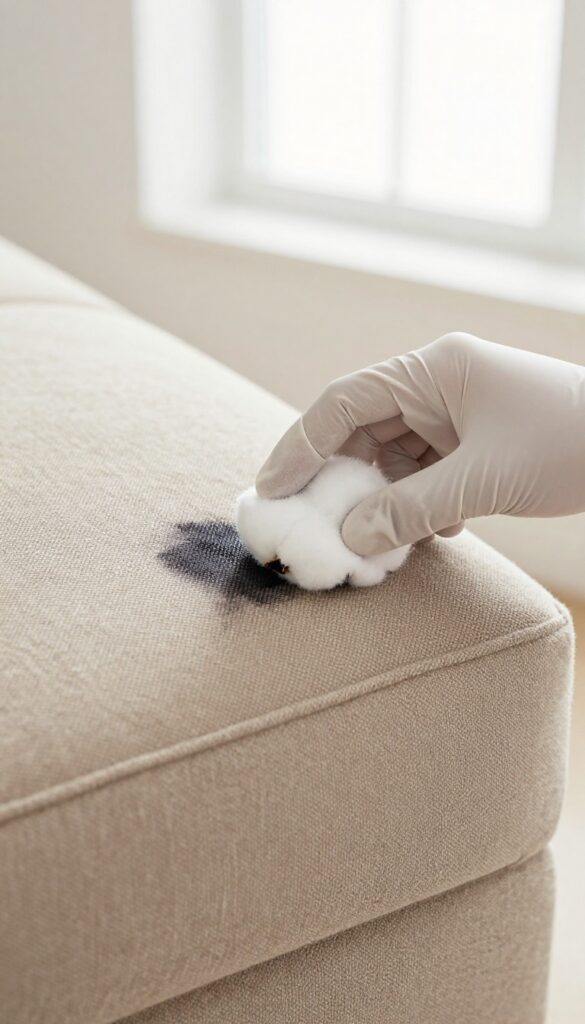
Ink stains on upholstery can feel like a permanent mistake, but rubbing alcohol often saves the day. The alcohol breaks down the ink's pigments, making them easy to lift away. Just be careful—some fabrics react differently, so a quick test is smart before you go all in.
Dab rubbing alcohol on an ink stain with a cotton ball. Blot gently until the ink transfers. Test first, as alcohol can affect some dyes.
How Rubbing Alcohol Works On Ink
Rubbing alcohol is a solvent that dissolves the dyes in most inks, turning a solid stain into a liquid that can be blotted away. It's especially effective on ballpoint pen marks, but may not work as well on permanent markers. The key is to use it quickly before the ink sets deep into the fibers.
Step-by-step Application
Start by blotting any excess ink with a dry cloth. Then dampen a cotton ball with rubbing alcohol and gently dab the stain—don't rub, or you'll spread it. Use a fresh cotton ball as it picks up ink.
Repeat until the stain fades, then blot with a damp cloth to remove residue.
Fabric Safety And Testing
Always test rubbing alcohol on a hidden spot first, especially on delicate fabrics like silk or velvet. It can strip color or damage certain finishes. For synthetic fabrics like polyester or nylon, it's usually safe.
If the test spot looks good, proceed with confidence.
8. Hydrogen Peroxide for Blood Stains
Blood stains on upholstery can be alarming, but hydrogen peroxide offers a simple and effective solution. The key is to act while the stain is still fresh, as dried blood is much harder to remove. This common household item works by breaking down the proteins in blood, lifting the stain without harsh scrubbing.
Hydrogen peroxide is a go-to for blood stains because it reacts with organic matter, creating fizzing bubbles that help lift the stain from fabric fibers. Always test on an inconspicuous area first, especially on colored fabrics, as it can bleach some materials. Avoid using it on dark or delicate fabrics like silk or wool.
How To Apply
Pour a small amount of 3% hydrogen peroxide directly onto the blood stain. You'll see it start to fizz almost immediately. Let it sit for a few minutes, then blot with a clean white cloth.
Repeat the process until the stain fades, then rinse with cold water and blot dry.
Safety Precautions
Hydrogen peroxide can lighten some fabrics, so always do a spot test in a hidden area. Wear gloves to protect your skin, and keep the area well-ventilated. Do not mix hydrogen peroxide with vinegar or bleach, as this can create harmful fumes.
When To Call A Professional
If the stain persists after several treatments, or if the fabric is particularly delicate, it's best to consult a professional cleaner. For antique or heirloom upholstery, professional help is always recommended to avoid damage.
9. Steam Clean for Deep Dirt
When your upholstery needs more than a surface refresh, steam cleaning is the way to go. A handheld steamer or steam cleaner uses high heat to kill bacteria, loosen embedded dirt, and eliminate odors without harsh chemicals. It's especially effective for fabric that's seen years of use or has stubborn grime that vacuuming alone can't remove.
Before you start, always check your furniture's care tag. Steam is safe for most synthetic and cotton blends, but delicate fabrics like silk or velvet may not tolerate moisture well. When in doubt, test in an inconspicuous spot first.
Steam cleaning is a powerful method for deep cleaning upholstery, but it requires proper preparation. Vacuuming thoroughly beforehand removes loose dirt and debris, preventing them from turning into mud when exposed to steam. Work in small sections, holding the steamer a few inches away and moving it slowly to avoid soaking the fabric.
Let each section dry completely before moving to the next.
Vacuum First For Best Results
Steam cleaning pushes dirt deeper if you skip vacuuming. Use a brush attachment to lift dust, pet hair, and crumbs from every crevice. Pay extra attention to seams and corners where grime accumulates.
A clean surface ensures the steam can penetrate deeply and sanitize effectively.
Work In Sections To Avoid Overwetting
Divide your couch or chair into manageable sections—like the seat cushion, backrest, and armrests. Steam one area at a time, using a microfiber cloth to blot away excess moisture. Overwetting can lead to mold or mildew, so keep the steamer moving and don't saturate the fabric.
Allow each section to air dry fully before using the furniture.
Use Distilled Water For Longevity
Tap water contains minerals that can leave residue or clog your steamer over time. Distilled water prevents scaling and keeps your machine running smoothly. It also avoids any potential white marks on dark fabrics, ensuring a clean finish every time.
10. Vacuum Weekly with Upholstery Attachment
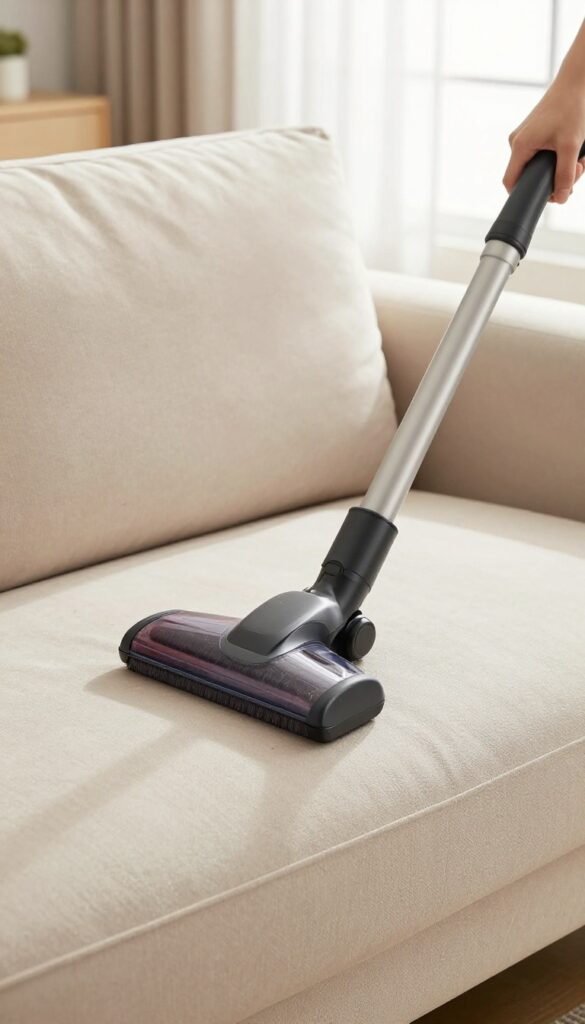
A weekly vacuum session is the unsung hero of upholstery care. It stops dirt, dust, and debris from grinding into fabric fibers, which causes premature wear and dullness. Using the right attachment makes all the difference—the upholstery brush is gentle yet effective at lifting surface grime without damaging the material.
Make it a habit to vacuum your upholstered furniture every week. This simple routine prevents dirt from settling deep into the fibers, where it becomes harder to remove and can cause abrasion over time. The upholstery brush attachment is designed to be soft enough for delicate fabrics but firm enough to dislodge embedded particles.
Don't just focus on the seat cushions—run the brush along the backrest, arms, and any crevices where crumbs and dust accumulate. For pet owners, this step is especially crucial to remove dander and hair before they become ingrained. A quick once-over with the vacuum can also reveal hidden stains or spills that need spot treatment, keeping your furniture looking fresher for longer.
Choose The Right Attachment
Not all vacuum attachments are created equal. The upholstery brush has soft bristles that lift debris without scratching or pilling fabric. Avoid using the beater bar or power head, which can be too aggressive and damage delicate fibers.
If your vacuum doesn't come with an upholstery brush, a soft brush attachment for hard floors works as a substitute.
Don't Forget The Crevices
Crevices and seams are magnets for crumbs, coins, and dust bunnies. Use the crevice tool to vacuum along the edges of cushions, where the seat meets the back, and around the base of the furniture. This prevents buildup that can attract pests and cause odors over time.
Frequency Matters
Weekly vacuuming is the sweet spot for most households. If you have kids, pets, or heavy use, increase it to twice a week. For formal living rooms that see little traffic, every two weeks might suffice.
Consistency is key—waiting too long allows dirt to embed, making removal much harder.
11. Use a Lint Roller for Pet Hair
Pet hair loves to cling to upholstery, but a lint roller makes quick work of it. Keep one in your living room or car for instant touch-ups between deep cleans. It's a simple tool that saves you from constant vacuuming.
A lint roller is a fast, low-effort way to remove pet hair, dust, and lint from fabric surfaces. Unlike vacuuming, which requires setup and noise, a lint roller is silent and portable. It's especially handy for spot-cleaning before guests arrive or when you just want a quick refresh.
Why Lint Rollers Work So Well
The adhesive sheets grab loose hair and debris without pushing them deeper into the fabric. They're gentle on most upholstery types, including velvet and microfiber. Plus, you can tear off the used sheet and keep going until the surface is clean.
Best Practices For Maximum Results
Use long, overlapping strokes in one direction to avoid spreading hair. For stubborn spots, press firmly and roll multiple times. Replace the sheet as soon as it loses stickiness.
For large areas, consider a reusable lint roller with a washable gel surface—it's eco-friendly and cost-effective.
When To Reach For A Lint Roller
Use it for quick touch-ups between deep cleans, especially on high-traffic spots like armrests and seat cushions. It's also great for removing lint from dark fabrics before a party or photo. Just don't rely on it for deep-set stains or heavy dirt—that's where vacuuming and spot cleaning come in.
12. Cornstarch for Grease and Oil
Grease stains from buttery snacks or oily skin can ruin your upholstery fast. Cornstarch is a pantry hero that lifts oil before it bonds with fabric fibers. It's a simple, chemical-free first step that works on most upholstery types.
When you spot a fresh grease stain, act quickly. Sprinkle a generous layer of cornstarch directly over the spot, covering it completely. Let it sit for about 30 minutes to draw the oil out of the fibers.
Then vacuum up the powder using the upholstery attachment. If a faint stain remains, mix a few drops of mild dish soap with water, dab the area with a clean cloth, and blot dry. Always test on a hidden area first.
Why Cornstarch Works
Cornstarch is a fine powder with absorbent properties that pull grease away from fabric. Unlike liquids that can spread the stain, cornstarch lifts it without rubbing. This makes it ideal for delicate upholstery that might fray or discolor with scrubbing.
When To Skip This Method
Avoid cornstarch on velvet or suede, as the powder can get trapped and dull the texture. For these materials, use a dry cleaning solvent or a specialized upholstery cleaner instead. Also, skip this if the stain has already set for hours—try a stronger degreaser then.
13. Shaving Cream for Set-In Stains
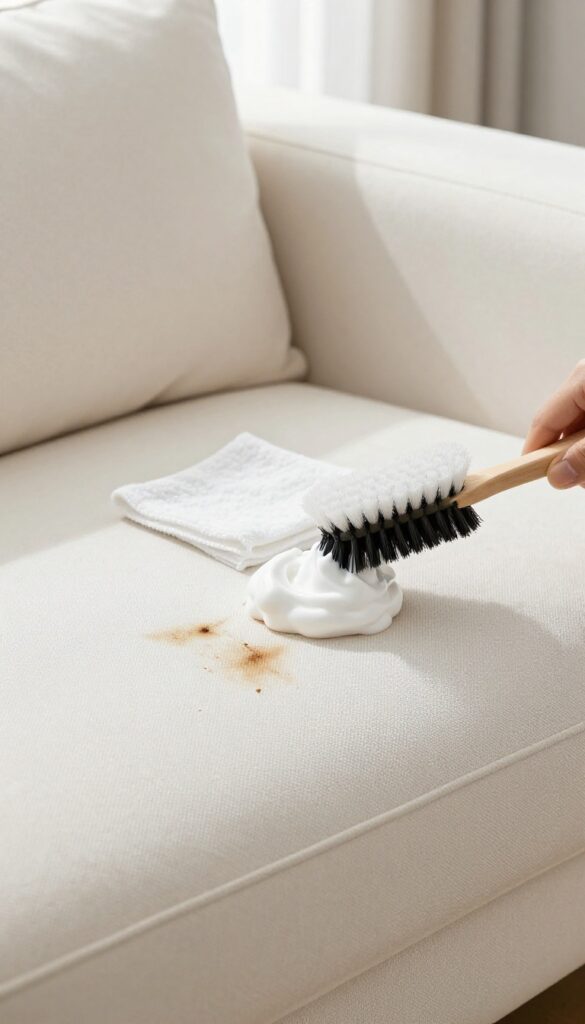
Set-in stains can feel impossible, but shaving cream is a surprisingly effective secret weapon. The foam lifts dirt and oil from fabric fibers without harsh chemicals. It's gentle enough for most upholstery and works on everything from coffee spills to mystery marks.
Shaving cream is a versatile cleaner because it contains surfactants that break down grime. Always use the white foam type, not gel, and test on a hidden spot first. This method is best for water-safe fabrics like cotton, linen, or polyester blends.
How It Works
The foam's ingredients act like a mild detergent, loosening stubborn stains. When you blot, the dirt transfers to the cloth. Rinsing with water removes any residue, leaving fabric fresh.
Step-by-step Application
Squirt a golf-ball-sized amount of shaving cream directly onto the stain. Gently work it in with your fingers or a soft brush. Let it sit for 10 minutes.
Blot with a damp cloth until the stain lifts. Then dab with a clean wet cloth to rinse. Let air dry.
Fabrics To Avoid
Skip this method on silk, velvet, or delicate synthetics. Shaving cream can leave a residue or cause discoloration. Always check the manufacturer's tag and test in an inconspicuous area first.
14. Enzyme Cleaner for Pet Accidents
Pet accidents happen, even with the best-trained animals. Urine and vomit leave behind proteins that standard cleaners can't fully break down, which is why odors often return. Enzyme cleaners are specifically designed to digest those proteins, eliminating the smell at its source rather than just covering it up.
When your upholstery takes a hit from a pet accident, reach for an enzyme-based cleaner. These products contain beneficial bacteria that produce enzymes to break down organic matter. Simply spray the stain thoroughly, let it sit for the time recommended on the label (usually 10-15 minutes), then blot with a clean cloth.
Avoid scrubbing, as that can push the mess deeper into the padding.
Why Enzymes Work Best
Regular cleaners often leave behind microscopic residues that pets can still smell, encouraging repeat accidents. Enzymes actually consume the proteins in urine and vomit, turning them into harmless byproducts. This means the odor is gone for good, not just temporarily masked by fragrances.
How To Apply Correctly
Blot up as much moisture as possible first. Then saturate the stain with enzyme cleaner—don't be shy. Let it dwell for the full time specified; rushing this step reduces effectiveness.
Afterward, blot again and let air dry. For old, set-in stains, you may need a second application.
Choosing The Right Product
Look for enzyme cleaners labeled for pet stains and odors. Avoid products with harsh chemicals that can damage fabric or kill the enzymes. Many are safe for most upholstery, but always test on an inconspicuous area first.
Some popular brands include Nature's Miracle and Rocco & Roxie.
15. Dry Cleaning Solvent for Delicate Fabrics
Some upholstery fabrics—like silk, rayon, or vintage pieces—can't handle water without shrinking or bleeding color. That's where dry cleaning solvent comes in. It's a gentle but effective way to lift stains without soaking the fibers.
Dry cleaning solvent is a must-have for water-sensitive fabrics. Always test on a hidden area first. Apply a small amount to a clean white cloth and blot the stain gently—never rub.
Work from the edges inward to prevent spreading. Follow the solvent's instructions, as some require ventilation or specific drying times. This method works well for oil-based stains, ink, and makeup.
How To Apply Dry Cleaning Solvent
Dampen a cloth with the solvent, then blot the stain. Change to a clean area of the cloth as the stain transfers. Avoid saturating the fabric; less is more.
Let it air dry completely before using the furniture.
Safety Tips For Solvent Use
Work in a well-ventilated room and wear gloves. Keep solvents away from heat sources and open flames. Store them out of reach of children and pets.
Never mix solvents with other cleaning products.
When To Call A Professional
If the stain persists or the fabric is extremely delicate, consider a professional cleaner. They have specialized equipment and experience with fragile materials. Sometimes it's worth the cost to avoid damaging a treasured piece.
16. Salt for Red Wine Spills
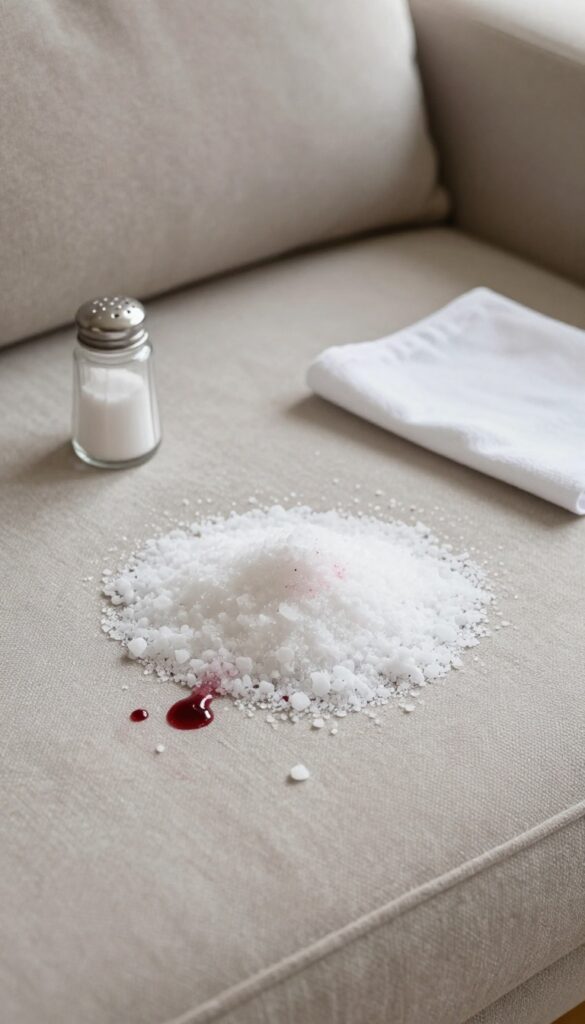
Red wine on a light-colored sofa? It happens to the best of us. The trick is to resist scrubbing and reach for the salt shaker instead.
Salt absorbs the wine before it sets, giving you a fighting chance at a stain-free couch.
When red wine spills, time is your enemy. Grab salt immediately and pour a generous layer over the entire spill. The salt will soak up the liquid, preventing it from penetrating deep into the fabric.
Let it sit for 5–10 minutes, then vacuum up the salt. Follow up with club soda: dab (don't rub) the area with a cloth soaked in club soda to lift any remaining color. Blot dry with a clean towel.
Why Salt Works So Well
Salt is a natural desiccant, meaning it pulls moisture out of fabrics. By covering the spill quickly, you stop the wine from spreading and bonding with the fibers. This simple hack buys you time and often prevents a permanent stain.
Step-by-step: Salt + Club Soda Method
Blot the spill gently with a paper towel to remove excess wine. Pour a thick layer of table salt over the area. Wait 5–10 minutes for the salt to turn pink as it absorbs.
Vacuum the salt thoroughly. Dampen a clean cloth with club soda and blot the stain, working from the edges inward. Blot with a dry cloth until the area is damp, not wet.
Let air dry.
What If The Stain Remains?
If a faint pink hue lingers after the salt treatment, mix a solution of 1 part white vinegar to 2 parts water. Test on an inconspicuous spot first. Dab the solution onto the stain, then blot with a clean cloth.
Repeat until the stain lifts. Avoid over-wetting, as it can damage upholstery padding.
17. Ice Cube for Gum or Wax
Chewing gum and candle wax are two of the trickiest things to remove from upholstery. They stick, smear, and seem to laugh at regular cleaning methods. But a simple ice cube can turn the tables by making the mess brittle and easy to scrape away.
Grab a few ice cubes from your freezer and place them in a plastic bag to avoid soaking the fabric. Hold the bag against the gum or wax for about 30 seconds until it hardens. Then use a dull knife or the edge of a credit card to gently scrape it off.
The cold makes the substance contract and lose its grip, so it comes off in chunks instead of smearing. If any residue remains, dab with rubbing alcohol on a cloth to lift the last bits. This method works on most upholstery fabrics, but test a hidden spot first to make sure the cold doesn't affect the color.
Why Cold Works So Well
Gum and wax are thermoplastic—they soften with heat and harden with cold. By freezing them, you reverse the sticky state. The hardened material becomes brittle and loses adhesion, so it breaks away cleanly without pulling fabric fibers.
It's the same principle used to remove candle wax from carpets.
What To Do After Scraping
Once the bulk is gone, you may see a faint oily stain from wax or a sugary residue from gum. For wax, place a brown paper bag over the spot and iron on low—the heat melts the wax into the paper. For gum, dab with a cloth dampened in white vinegar to remove any stickiness.
Let the area air dry completely.
Avoid These Common Mistakes
Don't use hot water or a hair dryer on gum or wax—heat melts them deeper into the fabric. Also, never rub the spot with a dry cloth, as that pushes the mess into the fibers. And skip the butter or peanut butter hack for gum—it leaves a greasy stain that's harder to clean.
18. Microfiber Cloths Are Your Best Friend
Not all cloths are created equal when it comes to upholstery cleaning. Reach for a microfiber cloth, and you'll see why it's a game-changer. These tiny synthetic fibers trap dirt and absorb moisture like a magnet, leaving no lint behind.
Paper towels might seem convenient, but they can scratch delicate fabrics and leave residue. Microfiber is gentle, effective, and reusable—a must-have in your cleaning kit.
Microfiber cloths are made of ultra-fine polyester and polyamide fibers that create a large surface area for trapping particles. They work by electrostatically attracting dust and dirt, and they can hold several times their weight in liquid. This makes them perfect for blotting fresh spills without spreading the stain.
Unlike cotton rags, they don't shed lint, so you won't have tiny fibers sticking to your upholstery. Plus, they're machine washable and last for hundreds of uses, making them eco-friendly and cost-effective.
Why Microfiber Wins Over Paper Towels
Paper towels may be absorbent, but they often leave behind lint and can rough up the fabric surface. Microfiber cloths are soft and non-abrasive, so they won't damage even delicate upholstery. They also pick up more dirt and moisture per swipe, meaning less effort for you.
For stubborn stains, a damp microfiber cloth can gently lift grime without pushing it deeper into the fibers.
How To Use Microfiber For Different Stains
For liquid spills, blot immediately with a dry microfiber cloth—don't rub, as that spreads the stain. For dried or sticky spots, dampen the cloth with warm water or a mild cleaning solution and dab gently. Grease stains?
Use a dry cloth to absorb excess oil first, then switch to a damp one with a drop of dish soap. Always test on a hidden area first.
Care Tips For Your Microfiber Cloths
To keep them effective, wash microfiber cloths separately from lint-producing fabrics like towels. Use a mild detergent and avoid fabric softener, which clogs the fibers. Air dry or tumble dry on low heat.
Over time, they may lose their grip—replace them when they stop picking up dirt effectively.
19. Avoid Over-Wetting
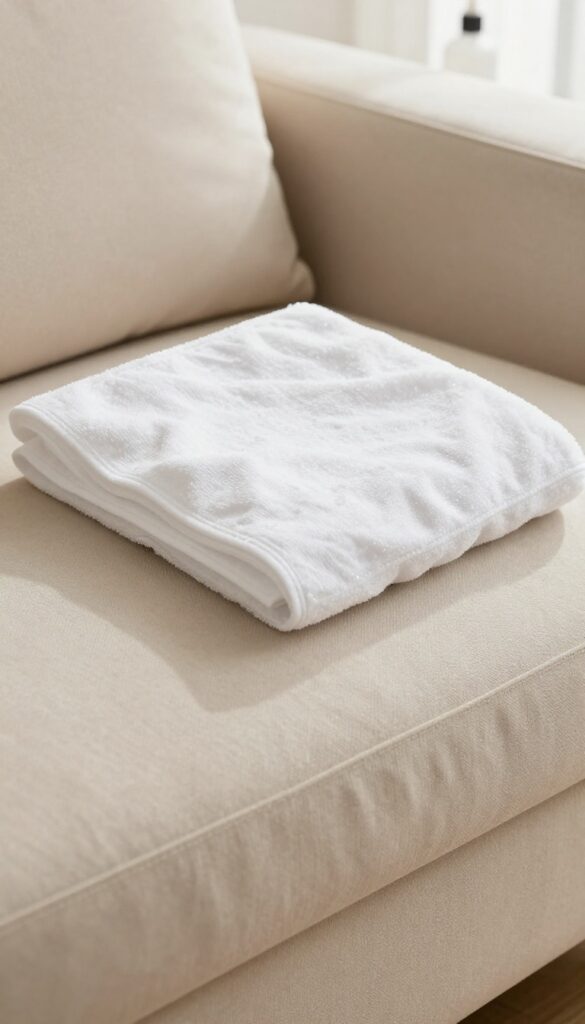
Drenching your upholstery might seem like a good way to flush out dirt, but it often backfires. Too much moisture seeps deep into the padding, creating a perfect breeding ground for mold and mildew. The key is to use minimal water and focus on blotting rather than soaking.
Over-wetting is one of the most common mistakes in DIY upholstery cleaning. When fabric stays damp for too long, it not only risks mold but also causes shrinkage, color bleeding, and a musty smell. Always work with a light hand—apply cleaning solution sparingly and blot with a clean, dry cloth until the area is just slightly damp.
For deep cleaning, a steam cleaner with adjustable water output gives you control, allowing you to lift dirt without saturating the cushion. Remember, it's easier to add a little more moisture than to fix water damage.
Why Less Is More
Upholstery fabric and foam are absorbent. When you pour water on a stain, it doesn't just sit on the surface—it travels deep into the cushion. That trapped moisture can take days to dry, especially in humid conditions.
Using a spray bottle to mist the area rather than pouring from a cup helps you control the amount of liquid. Blot immediately with a towel, pressing firmly to absorb the moisture along with the stain.
How To Blot Properly
Blotting is your best friend. Start from the outside of the stain and work inward to prevent spreading. Use a white cloth or paper towel to avoid color transfer.
Press down with your palm or the back of a spoon, then lift—don't rub, as that pushes the stain deeper. Repeat with fresh sections of the cloth until no more moisture transfers. For stubborn spots, apply a small amount of cleaning solution, let it sit for a minute, then blot again.
Steam Cleaning Done Right
If you're using a steam cleaner, choose one with variable steam settings. Hold the nozzle a few inches away and move it slowly over the fabric. The steam loosens dirt without soaking the cushion.
After steaming, go over the area with a dry towel to pick up excess moisture. Open windows or use a fan to speed up drying time. Never leave furniture wet—if it's still damp after an hour, blot again.
20. Use a Soft Brush to Restore Nap
Once your upholstery is clean and dry, the fabric might look a little flat or matted. That's where a soft-bristled brush comes in. Brushing restores the nap—the natural texture of the fabric—and makes it look fresh again.
It also helps fibers stand up, which improves airflow and speeds up any remaining moisture evaporation.
Grab a brush with soft, natural bristles (like a horsehair brush) to avoid damaging the fabric. Gently brush in the direction of the nap—usually the same way the fabric naturally lies. For velvet or corduroy, this is especially important to avoid crushing the pile.
Work in small sections, and don't press too hard. If you're dealing with a synthetic blend, test on an inconspicuous spot first to make sure the bristles don't snag.
Why Brushing Matters
Brushing doesn't just improve looks—it actually helps the fabric dry evenly. When fibers are matted down, moisture can get trapped, leading to musty smells or even mold. Fluffing them up allows air to circulate, so your upholstery dries faster and stays fresher longer.
Choosing The Right Brush
Not all brushes are safe for upholstery. Avoid stiff bristles that can scratch or pull threads. A soft-bristled brush designed for delicate fabrics is best.
You can also use a clean, dry microfiber cloth to buff the surface if you don't have a brush handy.
Brushing Technique Tips
Always brush in one direction—the same direction as the nap. For fabrics like velvet, brush in short, light strokes. If you're not sure which way the nap goes, run your hand over the fabric; it will feel smoother one way and rougher the other.
Brush in the smooth direction. For stubborn matting, a light mist of water can help, but let it dry completely before brushing.
21. Spot Clean Immediately
The clock starts ticking the moment a spill happens. The longer a stain sits, the deeper it sets into the fabric fibers, making removal much harder. That's why acting fast is your best defense against permanent marks.
Keep a small stain kit nearby—under the couch or in a nearby closet—so you're never caught off guard. Stock it with club soda, white vinegar, a clean white cloth, and a gentle dish soap. When a spill occurs, blot (don't rub) the area with a dry cloth to absorb as much liquid as possible.
Then apply your chosen cleaner and blot again until the stain lifts.
Blot, Don't Rub
Rubbing spreads the stain and can damage the fabric fibers. Always blot gently from the outside in to keep the stain from spreading. Use a clean section of the cloth each time you blot.
Your Diy Stain Kit Essentials
Club soda works wonders on fresh spills because its carbonation helps lift dirt. White vinegar cuts through grease and odors. A drop of dish soap adds extra cleaning power without harsh chemicals.
Keep these in a small caddy for quick access.
When To Call It Quits
If the stain doesn't budge after a few rounds of blotting, stop and let it dry. Overworking can damage the fabric. Some stains need professional treatment, but immediate action gives you the best shot at success.
22. Professional Cleaning Once a Year
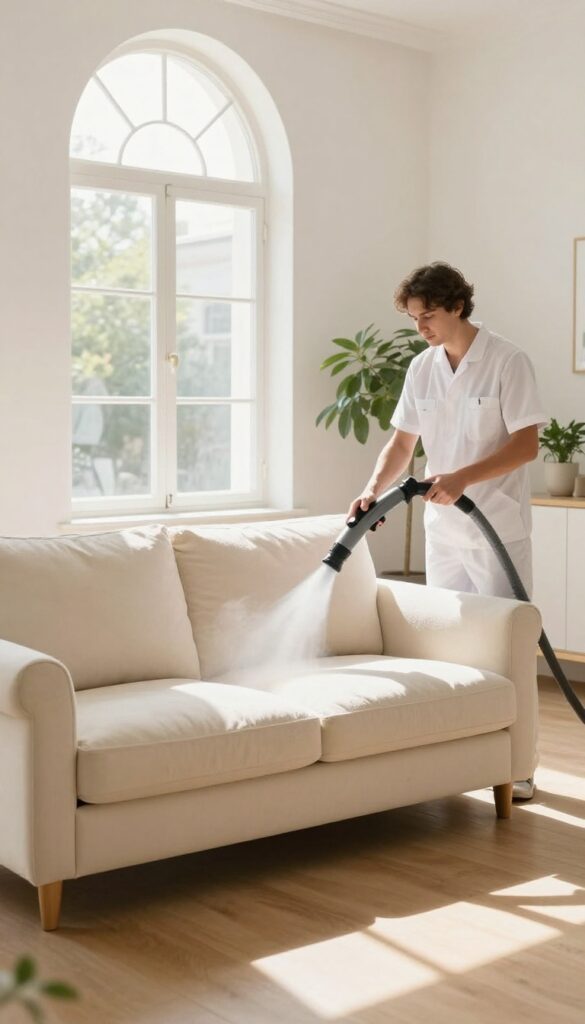
Even the most diligent DIY cleaning can't replace a thorough professional deep clean. Over time, embedded dirt, allergens, and bacteria build up deep in the fibers. A yearly or bi-yearly professional service resets your upholstery, making it look and feel like new.
Professionals use industrial-grade equipment and specialized cleaning solutions that are far more powerful than anything you can buy at the store. They can extract deeply embedded dirt that regular vacuuming and spot cleaning leave behind. This not only refreshes the fabric but also extends its lifespan by preventing abrasive particles from wearing down fibers.
Plus, they know how to handle delicate fabrics like silk or velvet without causing damage. Consider it an investment in your furniture's longevity.
What Professionals Do Differently
Professional cleaners use hot water extraction (steam cleaning) or low-moisture methods depending on your fabric. They have powerful truck-mounted vacuums that extract more water and dirt, reducing drying time and preventing mold. They also pre-treat stains with commercial-grade solvents that break down set-in spills.
How Often Should You Schedule?
For most households, once every 12 to 18 months is sufficient. If you have pets, kids, or allergies, consider annual cleanings. High-traffic pieces like sofas and sectionals may need more frequent attention.
Check your furniture warranty—some require professional cleaning every 12 months to stay valid.
Preparing For The Appointment
Before the pros arrive, vacuum loose debris and remove any cushions or pillows. Point out specific stains so they can target them. Move small furniture out of the way to give them clear access.
After cleaning, let the upholstery dry completely before using it again—typically 6 to 12 hours.
23. Protect with Fabric Guard Spray
You've cleaned your upholstery and it looks like new. Now, how do you keep it that way? Fabric guard spray is your best friend.
It adds an invisible shield that repels liquids and prevents stains from setting in. Think of it as a raincoat for your sofa.
Applying a fabric protector is a simple step that pays off big time. After your upholstery is completely clean and dry, spray an even layer of fabric guard over the entire surface. Let it dry fully before using the furniture.
This treatment creates a barrier that makes spills bead up and wipe away easily. Reapply after each deep clean to maintain protection. It's especially useful for high-traffic areas and homes with kids or pets.
Choose The Right Spray
Not all fabric guards are the same. Look for a spray that's safe for your specific upholstery material—check the label. Some are designed for synthetic fabrics, others for natural fibers.
Water-based formulas are generally safer and less likely to discolor fabric.
How To Apply Correctly
Work in a well-ventilated area. Hold the can about 6–8 inches from the fabric and spray in a steady, sweeping motion. Avoid saturating the fabric—a light, even coat is enough.
Let it dry completely, usually 2–4 hours. Don't sit on the furniture until it's dry.
When To Reapply
Fabric protection isn't permanent. Over time, it wears off from use and cleaning. A good rule is to reapply after every deep clean or every 6–12 months.
For heavily used pieces, consider reapplying more often.
24. Sunlight for Freshness
Sometimes the simplest solutions are the most effective. Sunlight is a natural disinfectant that can work wonders on upholstery. When weather permits, moving cushions or small pieces outdoors for a few hours can kill bacteria, neutralize odors, and leave fabric smelling fresh.
How Uv Light Works
The sun's ultraviolet rays break down microorganisms like bacteria, mold, and dust mites. This natural process helps sanitize fabric without any chemicals. It's especially useful for musty smells or after cleaning a stain to ensure no lingering bacteria.
Best Fabrics For Sunning
Cotton, linen, and synthetic blends handle sunlight well. Delicate fabrics like silk or wool may fade or weaken, so check care labels. For outdoor-safe pieces, sunning is a breeze.
For indoor-only items, a shaded spot on a porch works too.
Time And Rotation Tips
Aim for 2-4 hours of gentle morning or late afternoon sun. Avoid midday intensity to prevent fading. Flip cushions halfway through to expose all sides evenly.
Bring them inside before dew sets in to avoid re-moisturizing.
When To Avoid Direct Sun
If your fabric is dark or brightly colored, direct sun can cause fading. In that case, use indirect light or limit exposure to 30 minutes. Also, avoid sunning if the fabric has a stain that might set or discolor with heat.
25. Know Your Fabric Code
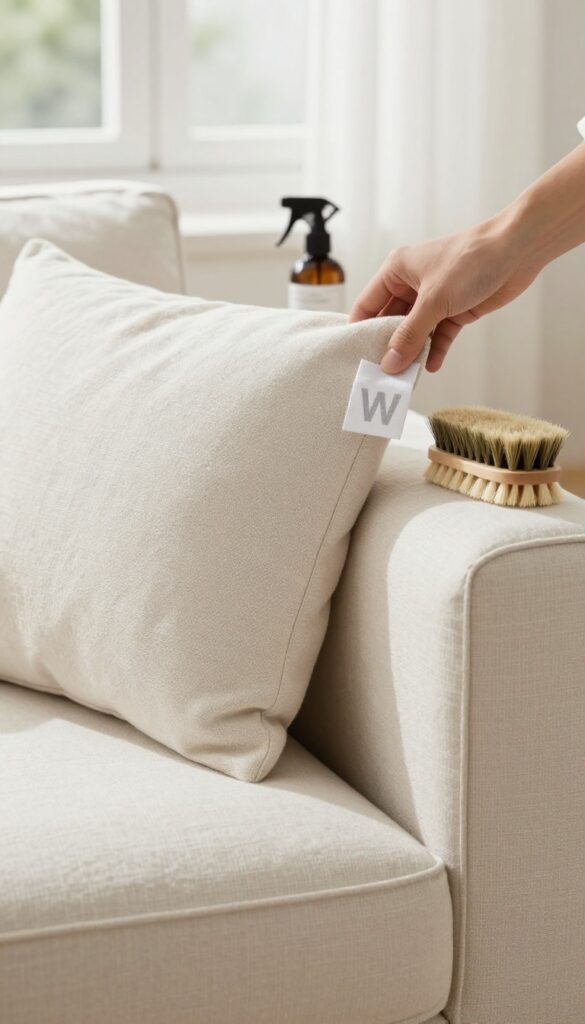
Before you spray or scrub anything, flip over a cushion or peek under the furniture. That little tag isn't just there for decoration—it tells you exactly how to clean your upholstery safely. Ignoring it can turn a small stain into a permanent disaster.
Decoding The Letters
Look for one of four letters: W means you can use water-based cleaners; S means only solvent-based (dry cleaning) products; WS means either works; and X means vacuum only—no liquids at all. Using the wrong method can cause shrinking, fading, or even fabric damage.
Where To Find The Tag
Tags are usually sewn under a cushion, on the back of the furniture, or along the bottom edge. If the tag is missing or unreadable, test any cleaner on a hidden spot first. Better safe than sorry.
Common Mistakes To Avoid
Many people assume all fabrics can handle water. That's false. Using water on an S-coded fabric can leave rings or cause the color to bleed.
And never use bleach or harsh chemicals unless the tag specifically allows it.
FAQ
Can I use bleach on upholstery?
Bleach is too harsh for most upholstery and can cause discoloration or damage. Stick to mild cleaners like vinegar or dish soap. If you need a whitener, test hydrogen peroxide on a hidden area first.
How often should I clean my upholstery?
Vacuum weekly and spot clean spills immediately. Deep clean every 6-12 months depending on usage. Homes with pets or kids may need more frequent attention.
What's the best way to remove pet urine smell?
Use an enzyme cleaner specifically designed for pet stains. It breaks down the uric acid and eliminates odor. Blot up as much urine as possible before applying.
Can I machine wash removable cushion covers?
Check the care label first. Many covers are machine washable on a gentle cycle with cold water. Air dry to prevent shrinking.
Avoid fabric softener as it can break down fibers.
How do I clean upholstery that says 'X' on the tag?
Code X means vacuum only or professional cleaning. Do not use water or solvents. Use a brush attachment to remove dust and dirt, and call a professional for deeper cleaning.
Conclusion
Keeping your upholstery clean doesn't have to be a chore. With these 25 tips, you can handle most stains and keep your fabric looking fresh for years. Remember to act quickly, use the right method for your fabric type, and always test first.
Regular maintenance like vacuuming and spot cleaning will save you from major headaches later. And don't forget to treat your furniture to a professional deep clean once in a while. Your cozy couch will thank you.