23 Fridge Cleaning Hacks for Spills, Odor, and Shelves
You open your fridge and get hit with a mystery smell. Spills have turned into sticky messes, and those shelves look like they've seen better days.
A clean fridge isn't just about appearances—it keeps your food fresher longer and saves you from scrubbing disasters later. These 23 hacks tackle everything from lingering odors to crusted-on spills, using everyday items you already have.
Whether you're dealing with a science experiment in the back or just want to stay ahead of the grime, these tips will make fridge cleaning way less of a chore.
1. Use Baking Soda to Absorb Odors
Baking soda is the classic fridge deodorizer for good reason. It works by neutralizing acidic and alkaline odor molecules instead of just covering them up. An open box placed on a middle shelf can keep your fridge smelling fresh for weeks.
For best results, use a fresh box and write the date on the top with a marker. Replace it every three months to maintain effectiveness. If you notice odors returning sooner, check for spoiled food or spills first.
Where To Place It
Set the box on a middle shelf where air can circulate around it. Avoid tucking it into a corner or behind tall containers. The airflow helps the baking soda work faster and more evenly.
How To Extend Its Life
Stir the baking soda once a week to expose fresh powder to the air. This simple step can keep it working longer. If you notice the box feels hard or clumpy, it's time for a replacement.
2. Line Shelves with Easy-Clean Mats
Spills happen, especially in a busy fridge. Instead of scrubbing sticky drips off the glass every time, put down a barrier. Clear shelf liners or silicone mats catch messes before they reach the shelf itself.
When something leaks, just lift the mat, wash it off, and pop it back in. No scraping, no soaking, no hassle.
Silicone mats are especially great because they're non-slip and dishwasher-safe. You can cut them to fit your exact shelf size, so there's no bunching or sliding around. Clear liners keep the fridge looking neat while protecting the surface underneath.
Either option saves you time and keeps your fridge cleaner between deep cleans.
Choose The Right Material
Silicone mats are flexible, heat-resistant, and easy to clean. Clear vinyl liners are cheaper and still effective, but they may warp over time. Look for BPA-free options if you're storing food directly on them.
Both materials work well for catching drips from produce bags or sauce jars.
Cut To Fit Perfectly
Measure each shelf before cutting. Leave a small gap around the edges so air can still circulate. Use sharp scissors or a utility knife for clean edges.
If you're using silicone mats, some brands come in standard sizes that need no trimming.
Maintenance Made Simple
Once a week, lift the mats and wipe down the shelf underneath. Wash the mats with warm soapy water or toss them in the dishwasher. This quick habit prevents grime from building up along the edges.
Your fridge stays fresh, and you avoid that sticky film that's so hard to scrub off.
3. Wipe Spills Immediately with a Microfiber Cloth
A spill left alone for even a few hours can turn into a stubborn stain or a sticky mess that attracts bacteria. The easiest way to keep your fridge clean is to grab a microfiber cloth and tackle it right away. Microfiber is ideal because it picks up liquids without leaving lint or streaks.
Why Microfiber Works Best
Microfiber cloths have tiny fibers that trap dirt and liquid rather than pushing them around. They absorb spills quickly and can be rinsed and reused many times. Unlike paper towels, they don't shed fibers or leave residue on shelves.
Keep A Cloth Within Reach
Store a clean microfiber cloth in a drawer or on a hook near your fridge. When a bottle tips over or a jar drips, you can grab it in seconds. Having it handy removes the excuse to wait until later.
Quick Wipe Technique
For liquid spills, blot first to soak up excess, then wipe in one direction to avoid spreading. For sticky spills like jam or syrup, dampen the cloth slightly with warm water. Rinse the cloth after each use and let it air dry so it's ready for next time.
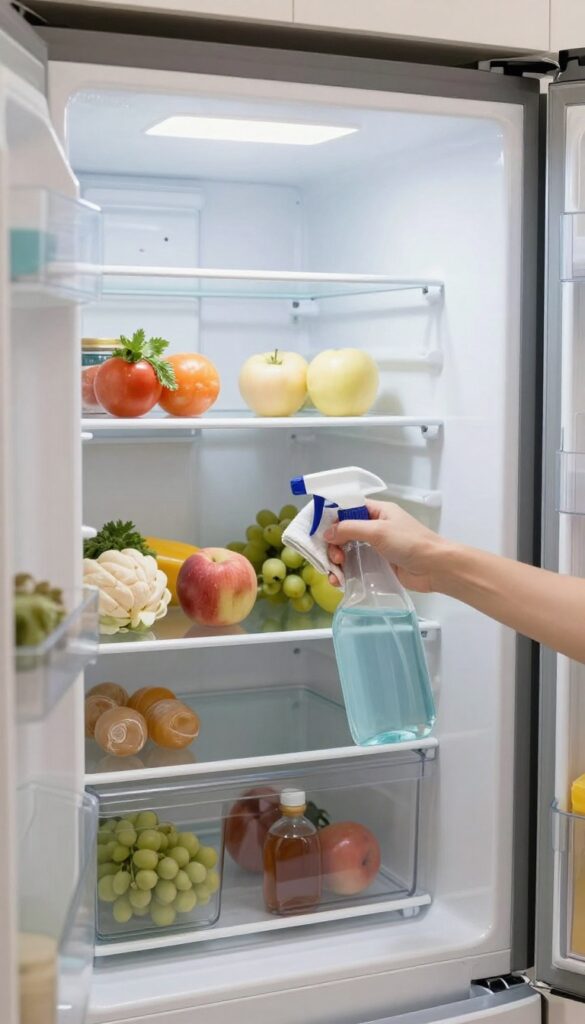
4. Deep Clean with a Vinegar Solution
When your fridge shelves and drawers have that cloudy film or sticky residue, plain water isn't going to cut it. A simple vinegar solution cuts through grime without leaving harsh chemical smells or streaks. White vinegar is a natural degreaser and disinfectant, making it perfect for food-contact surfaces.
Plus, it's cheap and you probably already have a bottle under your sink.
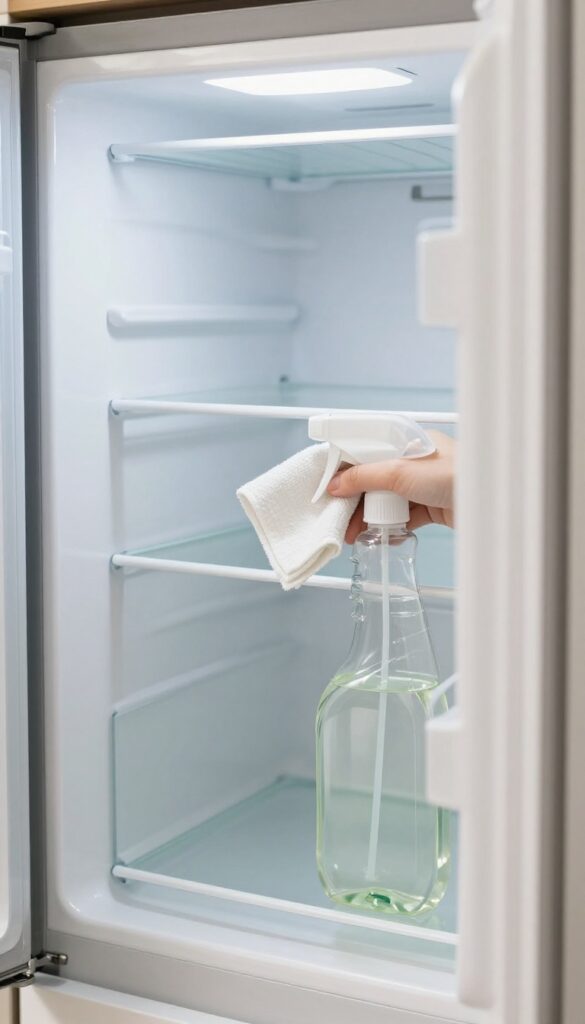
Mix equal parts water and white vinegar in a spray bottle. Spray shelves and drawers, then wipe clean for a streak-free finish.
Why Vinegar Works So Well
Vinegar's acidity breaks down grease, dried-on spills, and mineral deposits from water. It also kills many common bacteria and mold spores without introducing toxic chemicals into your fridge. The smell fades quickly once surfaces dry.
How To Do It Right
Remove all shelves and drawers. Spray the vinegar solution generously and let it sit for 2–3 minutes to loosen grime. Wipe with a microfiber cloth or sponge, then rinse with water and dry thoroughly before putting them back.
For stubborn spots, spray again and scrub gently with a soft brush.
Don't Forget The Gaskets
The rubber seals around the door collect crumbs and can get moldy. Spray the vinegar solution onto a cloth (not directly on the seal) and wipe along the gasket. This keeps the seal flexible and odor-free.
5. Use Lemon to Freshen and Cut Grease
Lemons are a powerhouse for cutting through greasy residue and leaving behind a bright, clean scent. The natural acidity breaks down oils without harsh chemicals, making them perfect for fridge shelves that have seen a few too many spills. Plus, you probably already have a lemon in your kitchen.
No need to buy special sprays or wipes. Just grab a lemon, cut it in half, and get to work.
Using lemon is one of the simplest and most effective ways to tackle greasy shelves. The citric acid dissolves grime while the fresh scent neutralizes odors naturally. Here's how to make the most of this citrus trick.
How To Use Lemon On Shelves
Cut a lemon in half and squeeze a little juice onto the shelf surface. Rub the cut side directly over greasy spots, letting the juice and pulp work into the residue. Let it sit for a minute or two, then wipe with a damp cloth.
Rinse with water to remove any sticky sugar residue from the lemon.
Why It Works So Well
Lemon juice is acidic enough to break down oils and grease on contact. It also has natural antibacterial properties, so you're not just cleaning—you're sanitizing. The fresh lemon scent lingers, leaving your fridge smelling like a citrus grove instead of last week's leftovers.
Tips For Best Results
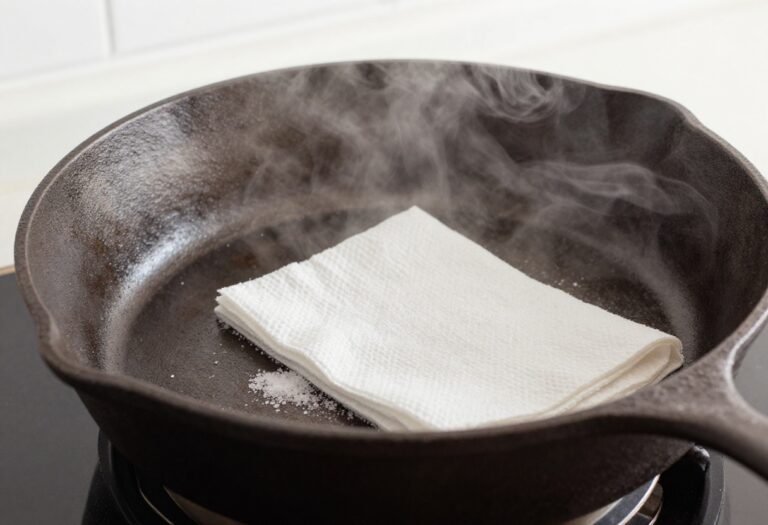
Use fresh lemons, not bottled juice, for maximum acidity and scrubbing power. For stubborn spots, sprinkle a little salt on the cut lemon to create a gentle abrasive. Always rinse shelves thoroughly after using lemon, because the sugar in the juice can become sticky if left to dry.
6. Remove Stubborn Stains with Baking Soda Paste
Some fridge stains are tougher than others. Dried-on tomato sauce, berry juice, or mystery drips can laugh at regular wiping. That's where a simple paste of baking soda and water comes in.
It's gentle enough for plastic and glass but abrasive enough to lift crusted grime without scratching.
How To Make And Apply The Paste
Mix three parts baking soda with one part water in a small bowl. You want a thick, spreadable consistency—think toothpaste, not pancake batter. Use a soft cloth or your fingers to apply the paste directly onto the stain.
Let it sit for 15 minutes to break down the residue. Then scrub gently in circular motions. For extra stubborn spots, let it sit longer or add a splash of white vinegar before scrubbing.
Best Surfaces For This Hack
This paste works wonders on glass shelves, plastic drawers, and even the rubber gaskets around the door. Avoid using it on unfinished wood or aluminum surfaces, as the abrasive can cause micro-scratches. Test on a small hidden area first if you're unsure.
For textured plastic, a soft-bristled toothbrush helps reach into grooves.
Rinse And Dry Thoroughly
After scrubbing, wipe away the paste with a damp cloth. You might need to rinse a couple of times to remove all the baking soda residue. Dry the surface completely with a clean towel before putting items back.
Any leftover moisture can lead to new stains or mold, so don't skip this step.
7. Deodorize with Coffee Grounds
Coffee grounds are a natural odor absorber that can neutralize fridge smells without harsh chemicals. Instead of reaching for baking soda, try this zero-waste trick that also gives your fridge a fresh, subtle coffee scent.
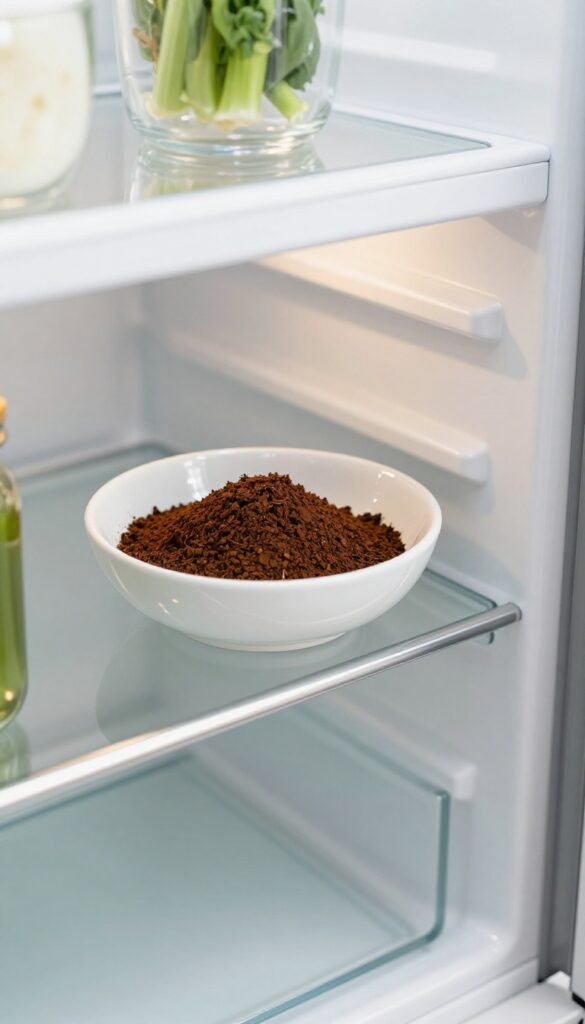
Place a bowl of dry, used coffee grounds in the back of your fridge. The grounds will soak up odors from onions, garlic, and forgotten leftovers. Replace them every month for best results.
Why It Works
Coffee grounds are porous and contain nitrogen, which helps trap and neutralize odor molecules. They work similarly to activated charcoal but are cheaper and reusable.
How To Set It Up
Spread used coffee grounds on a baking sheet and let them dry completely to prevent mold. Then transfer them to an open bowl or a small mesh bag and place it on a shelf. Avoid putting it near strong-smelling foods.
Tips For Best Results
For extra odor-fighting power, mix the grounds with a few drops of vanilla extract. Replace the grounds monthly, or sooner if you notice smells returning.
8. Clean the Condenser Coils for Efficiency
Most people never think about the back or bottom of their fridge. But those dusty coils are working hard to keep things cool. When they get caked with dirt and pet hair, the fridge has to work overtime, which can lead to warmer temps and funky smells.
Giving them a quick vacuum every six months is one of the easiest things you can do for your fridge's health.
Condenser coils release heat from the fridge. When they're dirty, the fridge struggles to maintain temperature, causing the compressor to run longer and harder. This not only hikes up your electric bill but can also lead to uneven cooling and odors from spoiled food.
Cleaning them is a simple DIY task that takes just a few minutes.
Where To Find The Coils
Most fridges have coils either behind a kickplate at the bottom front or exposed on the back. Check your owner's manual if you're unsure. For front-access coils, you can usually pop off the grille with a gentle tug or a flathead screwdriver.
Back coils are often visible once you pull the fridge away from the wall.
How To Vacuum Them Safely
Unplug the fridge before starting. Use a vacuum with a brush attachment to gently remove dust and debris. For stubborn buildup, a coil cleaning brush (a long, skinny brush) can loosen dirt before you vacuum.
Avoid using a metal brush or poking too hard—coils are delicate. Work from top to bottom so dust falls into the vacuum.
When To Do It
Twice a year is the sweet spot—mark it on your calendar. If you have shedding pets or a dusty home, consider doing it every three months. A clean set of coils can improve efficiency by up to 30%, which means lower energy bills and fewer odor issues.
Plus, it extends the life of your fridge.
9. Use a Toothbrush for Tight Spaces
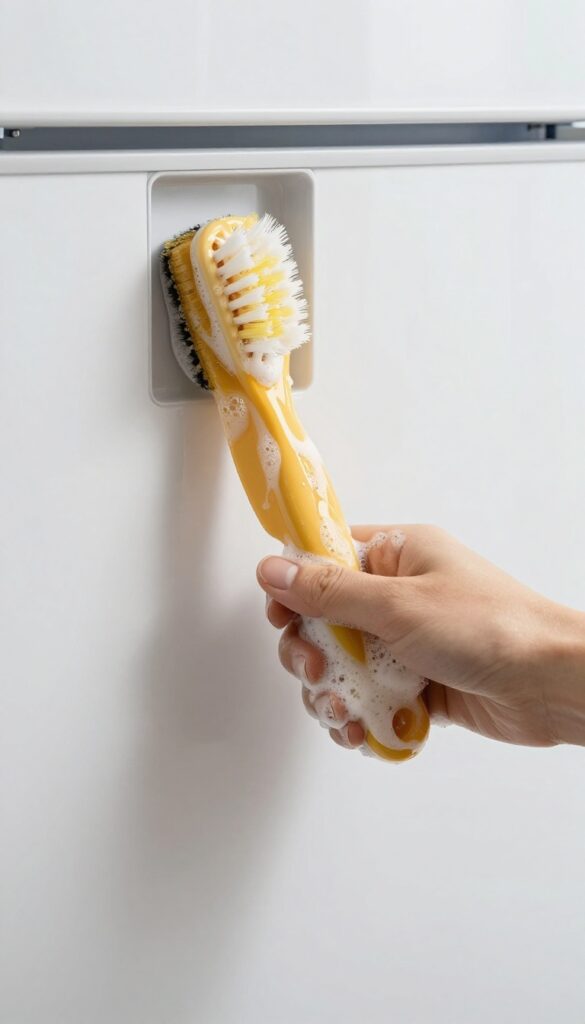
Crevices and corners in your fridge are prime spots for grime buildup. Door seals and drawer tracks collect crumbs, spills, and even mold over time. A toothbrush is the perfect tool to reach those narrow gaps without damaging the rubber or plastic.
Grab an old toothbrush with firm bristles. Dip it in a mixture of warm water and mild dish soap. Scrub along the door gasket folds and the tracks where drawers slide.
For stubborn gunk, add a little baking soda to the paste. Rinse with a damp cloth and dry thoroughly to prevent moisture from causing mold.
Why A Toothbrush Works Best
Toothbrush bristles are soft enough not to scratch surfaces but stiff enough to dislodge stuck-on debris. The small head fits into tight spots where sponges and cloths can't reach. Plus, you can angle it to clean both sides of a seal or track.
Step-by-step: Cleaning Door Seals
Start by wiping away loose crumbs with a dry cloth. Then dip the toothbrush in your cleaning solution and scrub the entire length of the gasket, paying extra attention to folds and corners. Use a second damp cloth to wipe away residue.
Let the seal air-dry before closing the door.
Tackling Drawer Tracks
Remove the drawers and inspect the tracks. Use the toothbrush to scrub away any sticky or crusted residue. If the tracks are greasy, add a drop of degreasing dish soap.
Rinse with a damp cloth and dry before sliding the drawers back in.
Preventing Future Buildup
Make it a habit to quickly wipe door seals and tracks every time you clean a spill. A monthly toothbrush scrub keeps these areas fresh. You can also apply a thin layer of food-grade mineral oil to the gasket to keep it flexible and prevent cracking.
10. Soak Drawers in Warm Soapy Water
Your fridge drawers take the brunt of spills and crumbs. Over time, they collect sticky residue and odors that just wiping can't fix. A proper soak gets them truly clean.
Pull out all removable drawers and let them soak in warm water with a few drops of mild dish soap. This loosens dried-on gunk without harsh scrubbing. After 15–20 minutes, scrub with a soft sponge, rinse thoroughly, and dry completely before sliding them back in.
For stubborn stains, add a splash of white vinegar to the soak.
Why Soaking Works Better
Soaking breaks down grease and food particles that cling to plastic. It also reaches corners and crevices that a cloth might miss. You'll see the water turn cloudy as the grime lifts away.
Drying Is Key
Wet drawers can trap moisture and encourage mold. After rinsing, pat them dry with a clean towel and let them air out on a dish rack for an hour. This prevents musty smells when you put them back.
11. Organize with Clear Bins for Easy Access
If your fridge is a jumble of condiments, leftovers, and half-used produce, you're not alone. Clear bins change the game by grouping similar items together, so you can see everything at a glance. No more digging through shelves to find that jar of pickles or forgetting about the spinach until it's a slimy mess.
Clear bins make cleaning a breeze because you can lift them out and wipe down the shelf underneath without moving every single item. They also prevent small bottles and bags from sliding to the back and getting lost. When everything has a designated spot, you'll rotate food more consistently and cut down on waste.
Group By Category
Sort your fridge contents into logical groups: dairy, condiments, beverages, produce, and leftovers. Assign a clear bin to each category. This way, when you need a specific item, you know exactly which bin to check.
It also makes restocking easier—just pull out the bin, add new items, and slide it back.
Use Bins With Handles For Heavy Items
For heavier items like soda cans or large jars, choose bins with sturdy handles. They make it easy to lift the entire bin out for cleaning or to grab a drink without disturbing the rest of the shelf. Handled bins also prevent accidental spills when you're reaching for something in the back.
Label Bins For Consistency
Take organization a step further by labeling each bin with a permanent marker or label maker. Labels help everyone in the household know where things go, so items don't end up in the wrong spot. This consistency keeps your fridge tidy longer and makes cleaning day even faster.
12. Use a Squeegee to Remove Excess Water
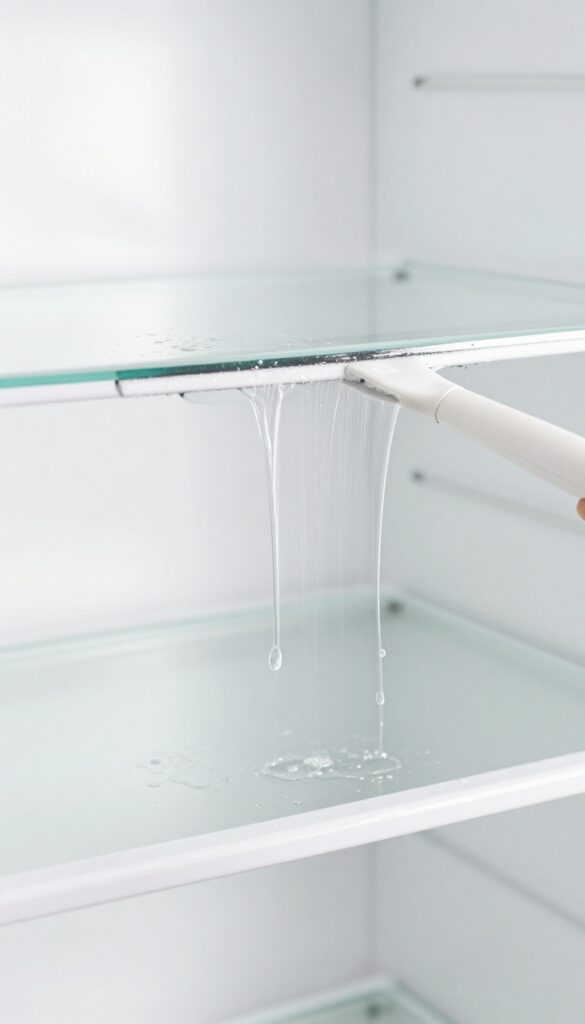
After scrubbing your fridge shelves, you're left with a wet, drippy mess. Towels can leave lint or streaks, and waiting for everything to air-dry takes forever. That's where a simple squeegee comes in—it's the fastest way to get rid of excess water and get your shelves back in place.
A squeegee isn't just for windows. It works perfectly on flat glass or plastic shelves, pushing water off in one smooth motion. No more patting dry with paper towels that disintegrate or cloths that leave fuzz behind.
Plus, it prevents those annoying water spots and streaks that show up once the shelf dries.
Why It Works So Well
Squeegees are designed to remove liquid from smooth surfaces without absorbing it. The rubber blade conforms to the shelf, wiping away every drop in a single pass. This means less time waiting and no leftover moisture that can lead to mold or odors.
How To Do It Right
After washing a shelf, hold the squeegee at a slight angle and pull it across the surface from one end to the other. Wipe the blade clean with a cloth after each pass. For stubborn drips, tilt the shelf slightly so water pools at one edge.
Work from the top shelf down to avoid dripping on already clean surfaces.
Best Squeegees For The Job
A small handheld squeegee with a 4- to 6-inch blade is ideal for fridge shelves. Look for one with a soft rubber edge to avoid scratching. If you don't have a squeegee, a silicone spatula or even a windshield scraper can work in a pinch—just make sure it's clean and dedicated to kitchen use.
13. Clean the Door Seals with Toothpaste
Door seals are easy to overlook, but they collect grime, mold, and mildew over time. That rubber gasket can get pretty nasty, especially if spills drip down the door. You don't need harsh chemicals—just a little toothpaste does the trick.
White toothpaste is mildly abrasive and contains mild cleaning agents that break down mold and mildew without damaging the rubber. It's also gentle enough to use regularly without wearing out the seal. Plus, it leaves a fresh, clean scent.
Why Toothpaste Works
Toothpaste contains mild abrasives like calcium carbonate or silica that scrub away grime without scratching. Its foaming action helps lift mold spores, and the whitening agents can brighten discolored rubber. It's a safe alternative to bleach, which can dry out and crack the seal over time.
Step-by-step Cleaning Method
Squeeze a pea-sized amount of white toothpaste onto an old toothbrush. Scrub the entire rubber gasket, focusing on grooves and corners where mold hides. Let it sit for a minute, then wipe with a damp cloth.
For stubborn spots, repeat and use a toothpick to dislodge debris.
Preventative Maintenance Tips
Wipe the door seal dry after each cleaning to prevent moisture buildup. Check monthly for cracks or gaps—if the seal is damaged, replace it to keep your fridge efficient. A quick toothpaste scrub every few months will keep mold at bay.
14. Freeze Lemon Peels for a Fresh Scent
Lemon peels are one of those things you usually toss without thinking. But they're actually a secret weapon for keeping your fridge smelling clean and fresh. Instead of reaching for a chemical air freshener or baking soda box, try this natural trick.
It's cheap, it works, and it makes use of something you'd otherwise throw away.
The natural oils in lemon peels are powerful odor fighters. They don't just mask smells—they help neutralize them. Plus, the bright citrus scent lingers in a pleasant way, making your fridge feel cleaner than it actually is.
To get started, save peels from lemons you've juiced or zested. You can also use peels from oranges, limes, or grapefruits for variety. Just make sure they're free of any fruit residue or sticky spots.
Place a small handful of peels in a bowl or on a plate in the fridge. Replace them every few days as they dry out. For a longer-lasting solution, freeze the peels and swap them out weekly.
This hack works best as a complement to regular cleaning—it won't fix a rotten spill, but it'll keep everyday odors at bay.
Why Lemon Peels Work So Well
Lemon peels contain limonene, a natural compound that breaks down odor molecules. They also have antimicrobial properties that can help reduce bacteria growth. Unlike baking soda, which absorbs odors passively, lemon peels actively release fresh scent while they work.
How To Prep And Store Peels
After using a lemon, rinse the peel under cold water to remove any sticky juice. Pat it dry with a paper towel. You can store peels in a sealed bag in the fridge for up to a week, or freeze them for longer use.
Frozen peels last for months and release scent as they thaw.
When To Replace The Peels
Check your peels every couple of days. Once they start to dry out or lose their citrusy smell, it's time for fresh ones. Dried peels can be composted or used as a natural scrub for sinks—nothing goes to waste.
15. Use a Vacuum with a Brush Attachment for Crumbs
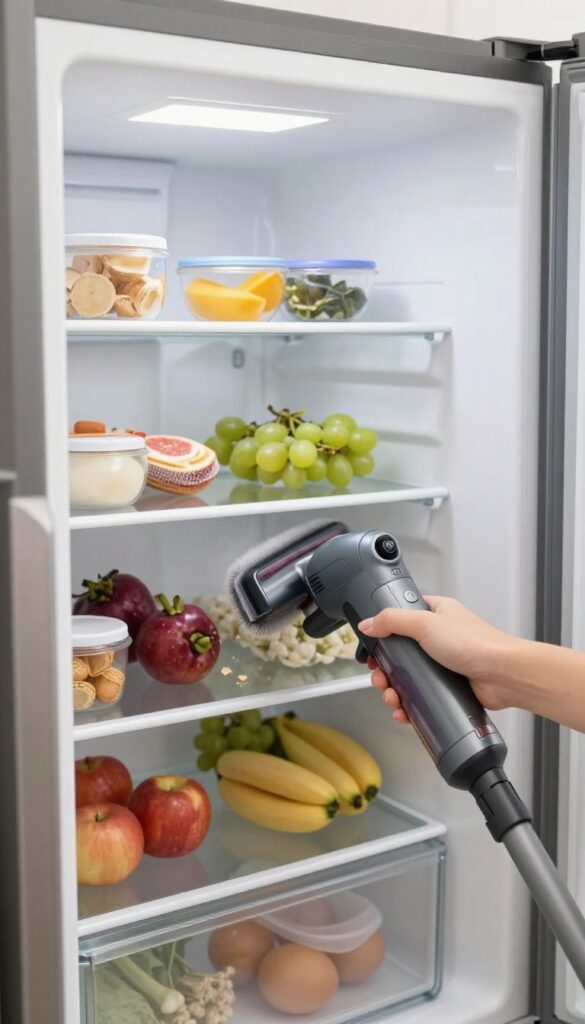
Crumbs have a way of hiding in every corner of your fridge. They fall behind jars, settle in drawer crevices, and cling to shelf edges. A damp cloth just pushes them around, and sweeping them out with your hand can get messy.
That's where a vacuum with a brush attachment comes in. It picks up every last crumb without spreading them further, making it a game-changer for quick cleanups.
Using a vacuum with a brush attachment is one of the fastest ways to clean fridge crumbs. It's gentle on surfaces and reaches into tight spots that cloths miss. This method also prevents crumbs from falling onto the floor or into other parts of the fridge.
You can even use it on door bins and rubber seals to remove dust and debris.
Why A Brush Attachment Works Best
The soft bristles of a brush attachment are perfect for fridge shelves and drawers. They loosen stuck-on crumbs without scratching glass or plastic. The vacuum suction then pulls everything away, leaving surfaces clean and dry.
This is much more effective than wiping, which can smear crumbs or push them into crevices.
How To Vacuum Without Making A Mess
Start by removing all food items and shelves if possible. Use the brush attachment to vacuum each shelf, drawer, and bin. Pay extra attention to corners and edges where crumbs collect.
For stubborn crumbs, gently agitate with the brush before vacuuming. Work from top to bottom so crumbs fall onto already-cleaned areas.
Bonus: Vacuum The Door Seals Too
Door seals often trap crumbs and dust. The brush attachment can safely clean these rubber gaskets without damaging them. Just run the brush along the seal to dislodge any debris.
This helps maintain a tight seal and prevents odors from building up in the folds.
16. Wipe Down Bottles and Jars Before Storing
That sticky ring on the shelf didn't appear out of nowhere. It came from the bottom of a ketchup bottle or salad dressing jar that you put away without a second thought. A quick wipe before storing can save you from scrubbing those crusty circles later.
It takes just a few seconds to wipe the bottoms of bottles and jars with a damp cloth or paper towel before returning them to the fridge. This simple habit prevents sticky residue from building up on shelves, which attracts dust and grime. Make it part of your routine when you put away groceries or after using a condiment.
Why Bottoms Get Sticky
Condensation, drips, and spills collect on the bottom of containers. Over time, that moisture mixes with sugars or oils from the contents and forms a tacky film. When you place the bottle back on the shelf, that film transfers and hardens into a stubborn ring.
The Quick Wipe Method
Keep a small microfiber cloth or a roll of paper towels near the fridge. After using a bottle or jar, give the bottom a quick wipe. If it's really sticky, use a little warm water or mild soap.
Dry it completely before putting it back to avoid new moisture rings.
Bonus: Label And Date
While you're wiping, check the label or add a date with a marker. This helps you keep track of how long items have been in the fridge and reduces the chance of mystery containers lurking in the back.
17. Use a Spray Bottle with Rubbing Alcohol for Sticky Residue
Sticky residue from old labels or spilled sauces can be a pain to scrub off. Rubbing alcohol cuts through that gunk without damaging the fridge surface. It’s a simple trick that saves you elbow grease and time.
Grab a spray bottle filled with isopropyl alcohol (70% works fine). Spray directly on the sticky spot and let it sit for about a minute. The alcohol dissolves the adhesive, making it easy to wipe away with a cloth or paper towel.
No scraping needed.
Why It Works So Well
Rubbing alcohol is a solvent that breaks down the sticky components in adhesives. It evaporates quickly, so you’re not left with a wet mess. Plus, it’s safe on plastic, glass, and metal surfaces found in most fridges.
Best Uses In The Fridge
Use this hack on sticker residue from new containers, price tags on produce bins, or sticky drips from spilled jam or honey. It’s also great for cleaning the gunk that builds up around the edges of shelves.
A Few Precautions
Test on an inconspicuous area first, especially if your fridge has a glossy finish. Avoid using near open flames or heat sources. And keep the spray bottle labeled so no one mistakes it for water.
18. Place a Bowl of Vanilla Extract for a Pleasant Smell
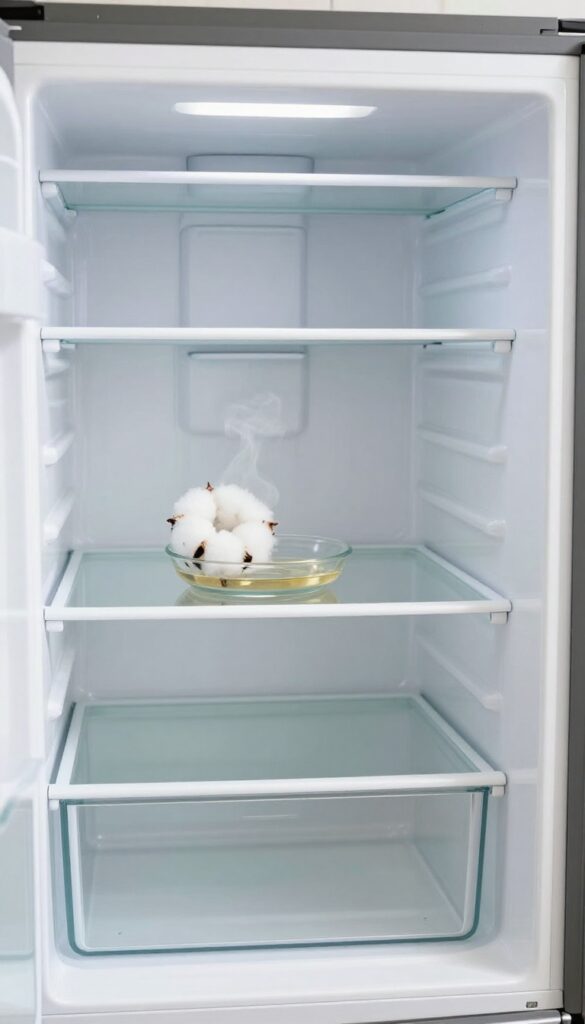
Sometimes you just want your fridge to smell nice without harsh chemicals. A few drops of vanilla extract can transform the air inside, leaving a warm, sweet scent that makes opening the door a little more pleasant. This trick works especially well after a deep clean, when you've already scrubbed away the source of odors.
The vanilla acts as a natural deodorizer, absorbing lingering smells while releasing its own gentle fragrance.
Soak a cotton ball in vanilla extract and place it in a small dish. It adds a sweet, natural scent.
Why Vanilla Works So Well
Vanilla extract contains vanillin, a compound that binds with odor molecules and neutralizes them. Unlike air fresheners that just mask smells, vanilla actually helps eliminate them. Plus, it's food-safe and won't contaminate your groceries.
How To Set It Up
Grab a small ramekin or a bottle cap and place a cotton ball inside. Drizzle a teaspoon of pure vanilla extract over the cotton ball until it's saturated but not dripping. Put the dish on a middle shelf where air circulates freely.
Replace the cotton ball every week or when the scent fades.
Pro Tips For Best Results
Use pure vanilla extract instead of imitation for a stronger, more natural smell. If you want a longer-lasting effect, add a few drops to a sponge and tuck it in the back of the fridge. Avoid placing the dish near strong-smelling foods like onions or fish, as the vanilla can absorb those odors.
19. Clean the Drip Pan Under the Fridge
There's a part of your fridge that works hard but rarely gets any attention. The drip pan sits underneath, collecting condensation and whatever else drips down from the coils. Over time, it becomes a breeding ground for mold and bacteria, which can send funky smells right back into your kitchen.
Cleaning it is simple and makes a big difference in how fresh your fridge smells.
Locate And Remove The Drip Pan
Not all fridges have an accessible drip pan, but many do. Check behind the front kickplate at the bottom of your fridge. You might need to unscrew or unclip the panel to slide the pan out.
If you can't find it, consult your manual—it's usually a shallow plastic tray near the compressor.
Wash Away The Grime
Once you have the pan out, dump any standing water into a sink. Wash it with warm, soapy water and a scrub brush. For stubborn buildup, use a mixture of vinegar and baking soda.
Rinse thoroughly and dry it completely before sliding it back in.
Prevent Future Odors
To keep the drip pan smelling fresh, add a few drops of essential oil (like lemon or tea tree) to the bottom of the pan after cleaning. This helps inhibit mold growth and leaves a light scent. Make it a habit to check the pan every few months, especially if you notice musty smells near the fridge.
20. Use a Lint Roller for Dust and Crumbs
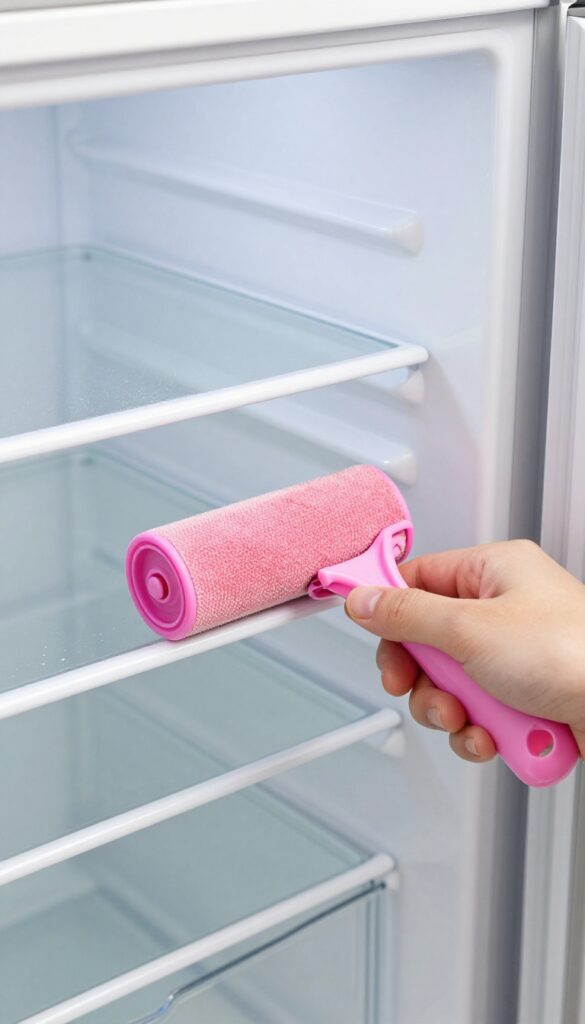
Dust and crumbs love to settle in the corners of your fridge shelves and drawer liners. A lint roller is the perfect tool to grab them without wiping everything down. It's quick, easy, and catches particles that a cloth might just push around.
A lint roller is a genius hack for fridge cleaning because it picks up dry debris without spreading moisture or bacteria. Run it over shelves, bins, and even the rubber gasket to grab dust and pet hair. It works especially well on textured surfaces like wire shelves or plastic liners where crumbs get trapped.
Keep one in your cleaning caddy for a quick touch-up between deep cleans.
Why It Works So Well
The adhesive sheets on a lint roller grab fine particles that a sponge or cloth might miss. It's also dry, so you're not adding moisture that could lead to mold or odors. This makes it ideal for quick cleanups when you don't want to wet down the whole fridge.
Where to Use It
Focus on areas where crumbs and dust accumulate: the tops of shelves, inside drawer liners, and along the door bins. You can also run it over the condenser coils (if accessible) to remove dust that reduces efficiency. Just avoid using it on wet spills—stick to dry messes only.
Pro Tip: Keep One Handy
Store a lint roller in your kitchen junk drawer or under the sink. When you notice crumbs after putting away groceries, a quick roll saves you from a full wipe-down. Replace the sheets as they lose stickiness, and you'll always be ready for a spot clean.
21. Store an Open Box of Oatmeal to Absorb Moisture
Condensation inside your fridge can lead to soggy vegetables, mold growth, and that unpleasant damp feeling every time you open the door. An open box of oatmeal placed on a shelf works like a natural dehumidifier, pulling excess moisture from the air without any chemicals or electricity. It's a simple, cheap trick that keeps your fridge dry and your produce crisp.
Oatmeal is highly absorbent, making it perfect for trapping humidity. Just open a small box (or a resealable bag with the top folded down) and set it on a middle shelf where air circulates. Replace it every month or when it starts to feel clumpy.
This hack works best in fridges that aren't already overloaded with moisture—if you see standing water, fix the seal first.
Why Oatmeal Works
Oats are porous and naturally draw in water vapor from the air. Unlike baking soda, which targets odors, oatmeal tackles the root cause of many smells: excess moisture. By reducing humidity, you also slow down the growth of mold and bacteria that thrive in damp environments.
How To Set It Up
Grab a small, unflavored box of rolled oats or instant oatmeal. Open the top and peel back the inner seal, then place the box on a shelf away from direct contact with food. If you're worried about spills, set it inside a shallow bowl or on a small plate.
Avoid flavored varieties—they can introduce unwanted scents.
When To Replace It
Check the oatmeal every couple of weeks. If it feels hard, clumpy, or damp to the touch, it's saturated and needs replacing. Typically, a fresh box lasts about a month.
Toss the used oatmeal in the compost or trash—don't eat it, since it has absorbed fridge moisture and potential odors.
22. Use a Hairdryer to Loosen Ice Buildup
Ice buildup in the freezer can reduce efficiency and take up valuable space. Instead of chipping away with a knife (which can damage the coils), a hairdryer offers a safer, faster solution. This hack works best when you combine heat with a little patience.
You'll be surprised how quickly thick frost melts away with gentle warmth.
Ice buildup in the freezer not only steals storage space but also makes the compressor work harder, driving up your energy bill. A hairdryer on low heat can safely melt the ice without the risk of puncturing the freezer walls. Just keep the dryer moving to avoid overheating any one spot, and have a towel ready to catch the water as it drips.
This method is especially useful for manual-defrost freezers or when you need to quickly clear ice before a big grocery run.
Safety First: Keep It Dry
Before you start, unplug the freezer or at least keep the hairdryer away from any water. Use the low heat setting and hold the dryer about six inches from the ice. Never use high heat, as it can warp plastic or damage seals.
Work in sections, melting a little at a time, and wipe away melted water immediately to prevent it from refreezing.
Speed Up The Process
To make the hairdryer even more effective, scrape off loose ice with a plastic spatula first. Then direct the warm air at the remaining frost. For stubborn spots, place a bowl of hot water inside the freezer to create steam, which loosens ice faster.
Just be careful not to let water splash onto electrical parts.
Prevent Future Buildup
Once the ice is gone, dry the interior thoroughly and check the door seal for gaps. A tight seal prevents warm, humid air from entering and forming new ice. Also, avoid leaving the freezer door open for long periods, and make sure the freezer isn't overstuffed, which blocks airflow and encourages frost.
23. Schedule a Monthly Quick Clean
A little routine goes a long way in keeping your fridge fresh. Instead of waiting for spills to harden or odors to take over, a monthly 10-minute wipe-down stops buildup before it starts. This habit turns fridge cleaning from a dreaded deep-clean event into a simple maintenance task.
Set a recurring reminder on your phone for the same day each month. Spend just ten minutes wiping down shelves, drawers, and door bins with a mild cleaner or vinegar solution. Focus on high-touch areas like handles and frequently used shelves.
This quick habit prevents sticky residue from hardening and keeps your fridge looking presentable with minimal effort.
What To Clean In 10 Minutes
Start by removing the most-used items from the middle shelf and door. Wipe those surfaces first, then do a quick scan of drawers—remove any wilted produce or forgotten leftovers. Use a microfiber cloth for streak-free results.
If you spot a spill, tackle it immediately rather than letting it dry.
Make It A Family Habit
Get everyone involved by assigning one shelf or drawer per person. Set a timer and make it a race. The goal isn't perfection—it's consistency.
Over time, this monthly wipe-down will dramatically cut down on the need for deep cleaning and keep your fridge smelling fresh.
FAQ
How often should I clean my fridge?
A quick wipe-down every week and a deep clean every three to four months is ideal. This prevents spills from hardening and odors from setting in.
What's the best natural deodorizer for the fridge?
Baking soda is the most effective natural deodorizer. An open box absorbs odors for up to three months. Coffee grounds and lemon peels also work well.
Can I use bleach to clean my fridge?
It's not recommended because bleach can leave harmful residues and damage surfaces. Stick to mild dish soap, vinegar, or baking soda.
How do I remove sticky labels from glass shelves?
Apply rubbing alcohol or cooking oil to the label, let it sit for a few minutes, then peel off. Wash with soapy water afterward.
Why does my fridge smell even after cleaning?
Check for spoiled food in hidden corners, the drip pan, or the condenser coils. Also, ensure the door seals are clean and dry.
Conclusion
A clean fridge makes meal prep easier and keeps your food fresher longer. These 23 hacks should help you handle spills, odors, and messy shelves without much fuss. Pick a few that fit your routine and give them a try.
You don't need to overhaul everything at once—just start with one or two. Over time, these small habits will save you from bigger cleaning headaches and make your fridge a place you actually enjoy opening.