25 Window Cleaning Tips for a Clear Streak Free Shine
Nothing beats the view through a perfectly clean window. But achieving that streak-free shine often feels like a battle against time, weather, and stubborn grime. You've tried store-bought sprays, paper towels, and even old t-shirts, yet those pesky streaks still show up.
The good news is that professional-level results are within reach without expensive tools or harsh chemicals. A few simple adjustments to your technique and the right homemade solutions can transform your windows from cloudy to crystal clear.
In this guide, you'll find 25 actionable tips that tackle everything from hard water spots to dusty screens. Whether you're cleaning interior panes or tackling exterior glass, these methods will save you time and deliver a brilliant, streak-free finish every time.
1. Use the Two-Bucket Method for Exterior Windows
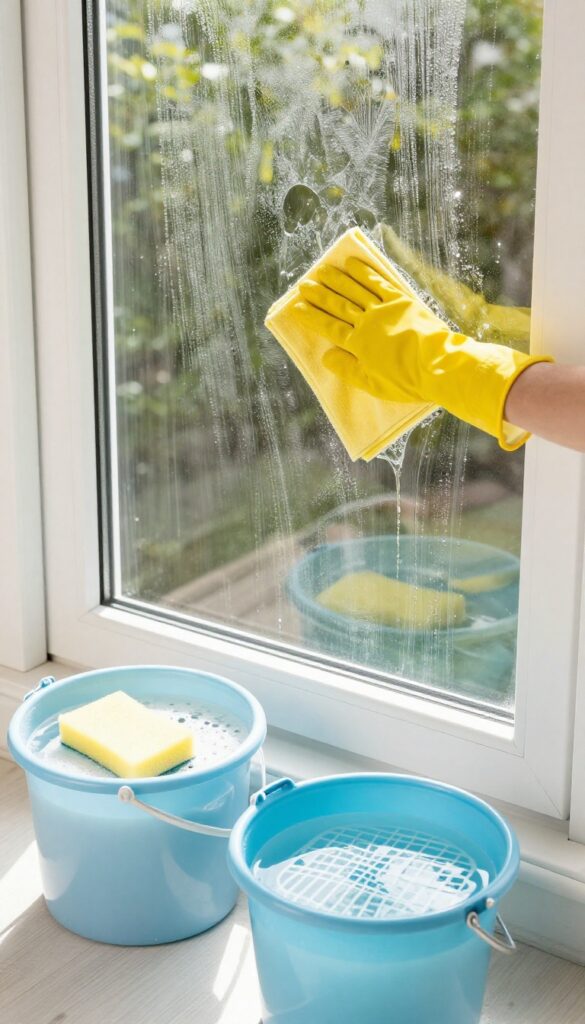
Exterior windows collect a surprising amount of dirt, pollen, and grime. If you're using a single bucket, you're basically washing your windows with dirty water. The two-bucket method is a game-changer that pros swear by.
One bucket holds your soapy water, and the other holds plain rinse water. Dip your sponge or microfiber cloth in the soapy bucket, scrub the window, then rinse the sponge in the clean water bucket before reloading with soap. This prevents redepositing dirt onto the glass, which is a major cause of streaks.
It's a simple habit that makes a huge difference.
Why It Works
When you rinse your sponge in clean water, you remove the grit and grime that would otherwise scratch the glass and leave residue. The soapy water stays sudsy and effective, so you're always cleaning with a fresh solution.
Setting It Up
Use two 5-gallon buckets. Label them or use different colors to avoid mix-ups. Fill one with warm water and a few drops of dish soap—Dawn works great.
Fill the other with plain warm water. That's it.
Pro Tip
Add a bucket grid or a scrubber insert to the rinse bucket to help agitate dirt off your sponge. You can buy these cheaply online or at hardware stores.
2. Mix Your Own Streak-Free Cleaning Solution
Store-bought glass cleaners are convenient, but they often leave behind a film or cost more than they should. A simple homemade solution works just as well, if not better, and costs pennies per batch. The right ratio of ingredients cuts through grease and dries completely clear, so you get that professional shine without the chemical smell.
The classic recipe is 2 cups of water, 1/4 cup of white vinegar, and 1/2 teaspoon of dish soap. The vinegar dissolves mineral deposits and grime, while the dish soap breaks down grease and helps the solution spread evenly. Use distilled water if your tap water is hard, as minerals can leave spots.
Mix in a spray bottle and shake gently before each use. This solution is safe for most windows, but avoid it on tinted glass or windows with special coatings unless you've tested a small area first.
Why Vinegar Works Best
White vinegar is acidic enough to cut through dirt and hard water stains but mild enough not to damage glass. It evaporates quickly, which helps prevent streaks. Unlike ammonia-based cleaners, vinegar doesn't leave a residue that attracts dust over time.
The Role Of Dish Soap
Just a tiny squirt of dish soap reduces surface tension, allowing the solution to sheet off the glass instead of beading up. This prevents those tiny droplets that dry into spots. Use a grease-fighting brand for best results, but avoid anything with moisturizers or dyes.
When To Add Rubbing Alcohol
For extra stubborn grime or cold-weather cleaning, replace half the water with rubbing alcohol. Alcohol evaporates even faster than vinegar, which helps prevent streaks on chilly days. It also helps dissolve oily residues from fingerprints or cooking splatters.
3. Choose a Squeegee with a Sharp, New Blade
The squeegee is the MVP of window cleaning, but only if the blade is in good shape. A dull or nicked blade will leave streaks, lines, and frustration. The good news is that replacing the rubber blade is cheap and easy.
A fresh blade glides smoothly, wiping away water and cleaner without leaving residue.
Using a squeegee with a sharp blade is the single most effective way to achieve a streak-free shine. The rubber edge needs to be perfectly straight and free of nicks. Over time, the blade wears down, collects debris, or gets tiny cuts that show up as streaks on your glass.
Replacing it annually is a good rule of thumb, but if you notice lines or skipping, swap it out sooner. A 12-inch squeegee is a versatile size that works for most standard window panes, giving you a good balance of coverage and control. For larger windows, you can step up to 14 or 18 inches, but stick with 12 inches for everyday use.
Why Blade Sharpness Matters
A sharp blade creates a clean seal against the glass, allowing the squeegee to pull the water and cleaner off in one smooth pass. A dull blade lifts slightly, leaving behind a thin film of water that dries into streaks. Think of it like a razor – a fresh blade cuts cleanly, while an old one tugs and leaves a mess.
The same principle applies to your window cleaning.
How Often To Replace The Blade
Replace the rubber blade at least once a year, or more often if you clean windows frequently. Signs it's time for a new blade: visible nicks or cuts, streaks that don't improve with technique, or a squeaking sound during use. Always inspect the blade before each cleaning session.
A quick visual check and a wipe with a cloth can extend its life, but don't push it past its prime.
Choosing The Right Squeegee Size
For most home windows, a 12-inch squeegee is the sweet spot. It's wide enough to cover a good area in one stroke but small enough to maneuver around edges and corners. Larger squeegees (14 or 18 inches) are great for big picture windows or sliding glass doors, but they require more skill to use without leaving streaks.
If you're just starting out, stick with 12 inches.
4. Dry the Squeegee Blade Between Passes
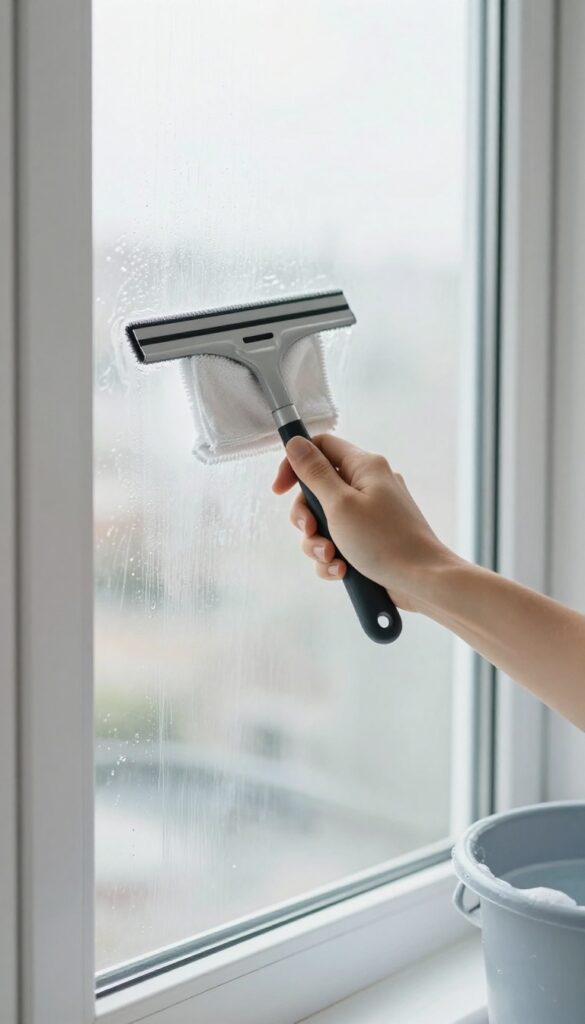
It's a tiny step that makes a huge difference. After each horizontal or vertical pass, you need to wipe the squeegee blade clean. If you skip this, excess water and soap solution cling to the blade and get dragged right back onto the glass, leaving those dreaded streaks.
A quick wipe with a lint-free cloth keeps the blade dry and ready for the next stroke.
Why It Works
When the blade is dry, it pulls water off the glass effectively instead of smearing it. A wet blade loses its grip and leaves a thin film that dries into streaks. Think of it like a windshield wiper: if the rubber is wet, it just pushes water around.
Keeping it dry ensures a clean sweep every time.
What To Use
A soft, lint-free microfiber cloth is ideal. Avoid paper towels or rough fabrics that can leave fibers or scratches. Keep the cloth in your pocket or draped over your shoulder so it's always within reach.
For larger jobs, have a few cloths on hand and swap them out when they get too damp.
The Right Technique
After each pass, gently wipe the entire length of the blade with the cloth. Pay attention to the corners where water tends to collect. Then, immediately make your next pass, overlapping slightly with the previous stroke.
This simple habit turns a mediocre cleaning into a professional-grade finish.
5. Clean Windows on a Cloudy Day
Sunshine might seem like an ally, but it's actually one of the biggest enemies of streak-free windows. When you clean under direct sunlight, the heat causes your cleaning solution to evaporate almost instantly, leaving behind residue and streaks before you can even wipe it off. Overcast days, on the other hand, give you the gift of time—time to work the solution across the glass, time to squeegee properly, and time to buff without racing the clock.
Cloudy weather slows down evaporation, which means your cleaning solution stays wet longer. This allows you to spread it evenly, let it sit for a moment to loosen dirt, and then remove it without any dried-on streaks. The result is a more consistent, professional-looking shine with less effort.
Why Sunlight Causes Streaks
Direct sunlight heats the glass surface, accelerating the drying process. As the cleaning solution dries, it leaves behind minerals and surfactants that form visible streaks. Even if you work quickly, the uneven drying creates patches.
On a cloudy day, the glass stays cooler, giving you a wider window of time to work and ensuring a uniform finish.
Best Time Of Day For Cloudy Cleaning
Early morning and late afternoon often offer the best overcast conditions, especially in summer. If the forecast shows a cloudy but dry day, that's your golden opportunity. Avoid cleaning just before or during rain, as moisture from the air can mix with your solution and cause spotting.
Bonus: Less Glare, Better Visibility
Cleaning under clouds means less glare on the glass, making it easier to spot missed spots or streaks as you work. You can see exactly where you've been and where you need to go back, leading to a more thorough clean without having to tilt your head or squint.
6. Start at the Top and Work Down
Gravity is a powerful force when you're cleaning windows. As you spray and wipe, drips and runoff will naturally travel downward. If you start at the bottom, you'll end up cleaning the same spots twice—or worse, leaving dried-on streaks where water evaporated.
By beginning at the top and working your way down, you let gravity do some of the work for you.
Starting high ensures that any dirty water that drips down will be caught by your next pass. This simple order of operations prevents re-soiling already cleaned areas and saves you from having to go back over spots. It's a small change in technique that makes a big difference in efficiency and final results.
Why Top-down Works
When you spray cleaner on a lower pane first, drips from the upper pane will land on it, leaving new streaks or dirt. By cleaning top to bottom, you always work on the dirtiest part first, and the runoff from above is removed as you go. This method is especially important for exterior windows where pollen and grime accumulate heavily.
The Right Sequence For Multi-pane Windows
For windows with multiple panes or a grid, clean the top row completely before moving down. Use a squeegee or microfiber cloth in horizontal strokes from left to right, overlapping slightly. After finishing the top row, wipe the sill or ledge before it dries, then proceed to the next row.
This prevents drips from drying on lower panes.
Don't Forget The Frame And Sill
Before you start on the glass, wipe down the top of the window frame and the sill. If you clean the glass first, dirt from the frame can drip onto your clean panes. A quick once-over with a damp cloth or an old toothbrush for corners keeps everything tidy.
7. Use a Microfiber Cloth for Detail Work
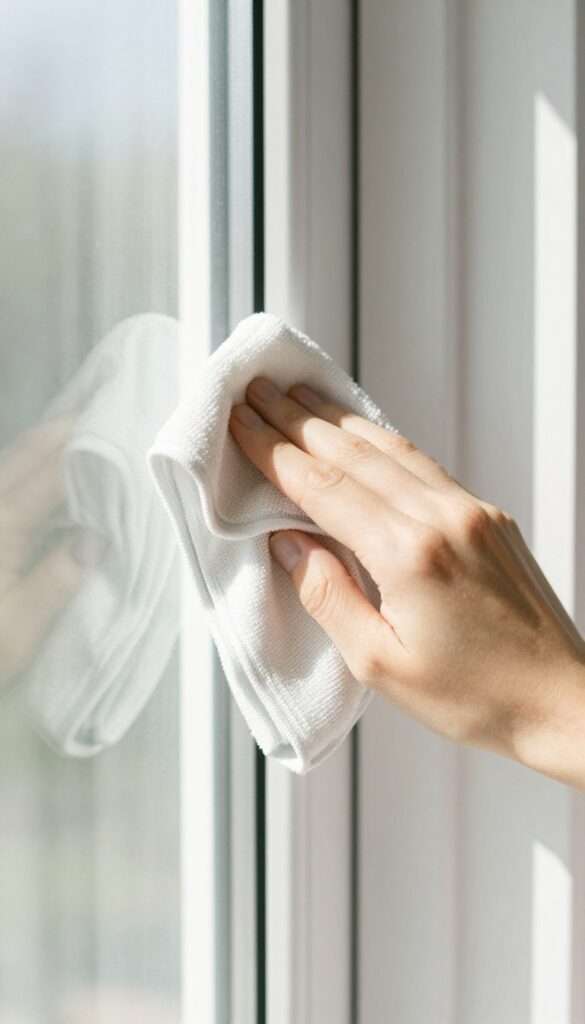
Squeegees are great for large panes, but they can't reach every nook and cranny. That's where a good microfiber cloth comes in. It's the perfect tool for detailing edges, corners, and small windows where a squeegee just doesn't fit.
Microfiber cloths are a game-changer for window cleaning because they trap dust and absorb liquid without leaving lint behind. Unlike paper towels or old rags, they won't scratch the glass or leave fibers stuck to the surface. For best results, use a clean, dry microfiber cloth to buff away any remaining moisture after squeegeeing, or use a damp one to wipe down frames and sills.
Choose The Right Microfiber
Not all microfiber cloths are created equal. For glass, look for a high-GSM (grams per square meter) cloth with a tight weave—around 300-400 GSM is ideal. Avoid cloths with rough edges or loops that can snag.
A dedicated glass-cleaning microfiber will have a smooth, lint-free finish.
Fold And Work In Sections
Fold your microfiber cloth into quarters to create multiple clean surfaces. Start at the top of the window and work your way down, using a new section of the cloth for each pass. This prevents you from redepositing dirt onto the glass.
For corners and edges, use the tip of the folded cloth to get into tight spots.
Keep Cloths Clean
A dirty microfiber cloth will just smear grime around. Wash your cloths after every use with a mild detergent—no fabric softener, as it clogs the fibers. Air dry or tumble dry on low heat.
Having a few cloths on hand lets you swap them out as needed.
8. Remove Hard Water Spots with Vinegar Soak
Hard water spots are those stubborn white or cloudy marks left behind by mineral deposits after water evaporates. They can make even freshly cleaned windows look dirty. But you don't need harsh chemicals to banish them—plain white vinegar works like magic.
White vinegar is mildly acidic, which helps dissolve the alkaline mineral deposits in hard water spots. For best results, use undiluted vinegar straight from the bottle. Soak a soft cloth or paper towel in vinegar, press it firmly against the spot, and let it sit for a few minutes.
The acid needs time to break down the minerals. After the soak, wipe the area with a clean, dry microfiber cloth. Repeat if the spot is particularly stubborn.
This method is safe for most glass types, but avoid it on tinted windows or delicate surfaces—test a small area first.
Why Vinegar Works So Well
Hard water spots are primarily calcium and magnesium carbonates. Vinegar's acetic acid reacts with these carbonates, turning them into water-soluble compounds that rinse away easily. This chemical reaction is why a soak is more effective than just wiping with vinegar—it gives the acid time to penetrate the deposit.
Step-by-step Vinegar Soak Method
First, mix equal parts white vinegar and water if the spots are light, or use full-strength vinegar for heavy buildup. Dip a clean microfiber cloth or a paper towel into the solution and wring it out slightly so it's damp, not dripping. Press the cloth onto the spotted area and hold it there for 3–5 minutes.
You can also tape the cloth in place if needed. After soaking, gently scrub the spot with the same cloth, then rinse the window with clean water and dry with a fresh microfiber cloth for a streak-free finish.
When To Avoid This Method
Vinegar is acidic and can damage certain surfaces. Avoid using it on windows with tinted film, as it may cause peeling or discoloration. Also, steer clear of vinegar on windows with etched glass or decorative coatings.
If you're unsure, test on a small, inconspicuous area first. For regular glass windows, vinegar is perfectly safe and highly effective.
9. Don't Forget the Window Screens
You scrub the glass until it sparkles, but if your screens are dusty, that grime will find its way back onto your clean panes. Screens act like filters, trapping dirt, pollen, and cobwebs. When you wash the windows, moisture reactivates that debris and it transfers to the glass.
The result? You're fighting a losing battle. Cleaning screens doesn't take much time, and it makes a noticeable difference.
A quick rinse and gentle scrub will remove the buildup so your freshly washed windows stay clean longer. Plus, clean screens let in more light and improve airflow.
Start by removing the screens from your windows. Most screens pop out easily with a gentle push or by lifting them from their tracks. Lay them flat on a driveway or patio where you have room to work.
Use a garden hose with a spray nozzle to rinse off loose dust and dirt. For tougher grime, mix a few drops of dish soap with warm water in a bucket. Dip a soft-bristle brush or sponge into the solution and gently scrub both sides of the screen.
Avoid hard scrubbing, which can damage the mesh. Rinse thoroughly with the hose, then let the screens air dry completely before reinstalling. Drying them in the sun speeds up the process and helps prevent water spots.
If you're short on time, you can clean screens while they're still in place. Vacuum them with a soft brush attachment to remove surface dust, then wipe them down with a damp microfiber cloth. This method works well for a quick refresh between deep cleanings.
Why Screens Matter
Screens catch a surprising amount of airborne particles. Pollen, dust, and even tiny bits of pollution settle into the mesh. When you spray water on the glass, some of that debris gets wet and drips onto the clean surface.
It's especially noticeable after rain, when dirty water streaks down the panes. Keeping your screens clean prevents this transfer and reduces the frequency of full window washes.
The Right Tools For The Job
You don't need anything fancy. A soft-bristle brush (like a car washing mitt or a dedicated screen brush) works best because it won't snag or tear the mesh. A mild dish soap solution is gentle enough for most screens.
Avoid harsh chemicals or abrasive scrubbers, which can damage the coating on some screens. A garden hose with a spray nozzle gives you good pressure for rinsing without damaging the screen.
When To Clean Screens
Aim to clean your screens at least twice a year, ideally in spring and fall. Spring cleaning removes winter grime and pollen, while fall cleaning clears out dust and dead bugs before winter. If you live in a particularly dusty area or near a busy road, you might need to clean them more often.
A quick visual check—if you can see a layer of dust or the screen looks darker than the frame—it's time for a wash.
10. Use a Squeegee in a Reverse-S Pattern
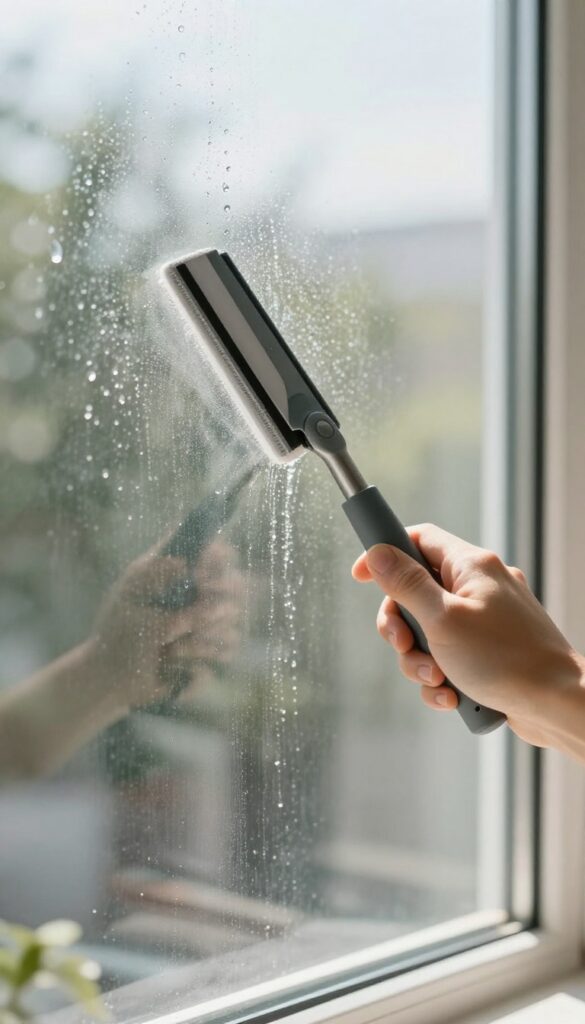
You might think a squeegee is just a straight pull tool, but the angle and path you take matter more than you'd expect. The reverse-S pattern is a game-changer because it prevents those annoying vertical streaks that show up after you think you're done. It's a small tweak that delivers professional results without any extra effort.
The standard up-and-down or side-to-side technique often leaves a thin line of water at the end of each stroke. By using a reverse-S pattern, you overlap each pass slightly and guide the water to the edge instead of letting it pool. This keeps the glass dry and streak-free from top to bottom.
Start At The Top Corner
Begin with the squeegee blade at the top left corner of the window. Pull it horizontally across the top edge, then angle the handle slightly downward—about 15 degrees—so the blade points toward the next section. This tilt helps channel water downward rather than leaving a horizontal line.
Overlap Each Pass
As you move to the next strip, overlap the previous one by about an inch. This ensures no missed spots and prevents water from being left behind. The reverse-S motion naturally creates a slight curve, so the water flows off the glass rather than sitting in a straight line.
Wipe The Blade Between Passes
After each pass, wipe the squeegee blade with a dry microfiber cloth. A wet blade will redeposit water and cause streaks. This habit takes two seconds but makes a huge difference in the final shine.
11. Wipe Window Tracks with an Old Toothbrush
Window tracks are a magnet for dirt, dust, and even mold. Over time, this buildup can make your windows harder to slide and leave a grimy residue that transfers to the glass. The good news is, you don't need fancy tools to get them clean.
An old toothbrush is the perfect size to scrub deep into those narrow grooves.
Start by removing any loose debris. Use a vacuum with a crevice attachment to suck up dirt, cobwebs, and dead bugs from the tracks. Then, dip your toothbrush in a mixture of warm water and a few drops of dish soap.
Scrub the tracks thoroughly, paying extra attention to corners. Rinse with a damp cloth and dry with a microfiber towel.
Why Tracks Get So Dirty
Window tracks are constantly exposed to the elements, collecting pollen, dust, and moisture. This creates a perfect breeding ground for mold and mildew. If left unchecked, the grime can harden and become difficult to remove, potentially damaging the window mechanism.
The Toothbrush Technique
Choose a toothbrush with stiff bristles for the best scrubbing power. Work the brush back and forth along the track, using a small amount of soapy water. For stubborn spots, let the solution sit for a few minutes before scrubbing.
A microfiber cloth can help wipe away the loosened dirt.
Preventing Future Buildup
To keep tracks cleaner longer, apply a thin layer of silicone spray or a dry lubricant after cleaning. This helps repel dust and keeps the window sliding smoothly. Regular maintenance every few months will prevent heavy buildup and make each cleaning easier.
12. Try a Rinse-Free Car Wash Soap for Exteriors
Your car wash soap can double as an exterior window cleaner. Rinse-free formulas are designed to lift dirt and leave a spot-free finish without needing a hose. This trick works especially well for ground-floor windows or patio doors.
Rinse-free car wash soaps contain polymers that encapsulate dirt and prevent water spots as they dry. They're a game-changer for quick exterior window cleaning when you don't want to drag out the hose or deal with runoff. Plus, the same solution can clean your car's windows too.
Why Rinse-free Soap Works On Glass
Unlike regular dish soap, rinse-free formulas are pH-balanced and include drying agents that minimize spotting. When applied to glass, they break down road grime, pollen, and bug splatter without leaving residue. The polymers also create a hydrophobic layer that helps water bead off, making future cleaning easier.
How To Apply It For Best Results
Dilute the soap according to the bottle instructions—usually a capful per gallon of water. Use a microfiber mitt or a soft sponge to wash the glass in straight lines, rinsing the mitt often. Work on a cool, shaded surface to prevent the solution from drying before you wipe.
For a streak-free finish, buff with a clean, dry microfiber towel immediately.
When To Avoid This Method
If your windows have heavy mineral deposits or hard water scaling, rinse-free soap alone won't remove them. Use a dedicated glass cleaner or a vinegar solution first. Also, avoid this on tinted windows—some car soaps contain additives that may damage tint films over time.
13. Use Newspaper Instead of Paper Towels
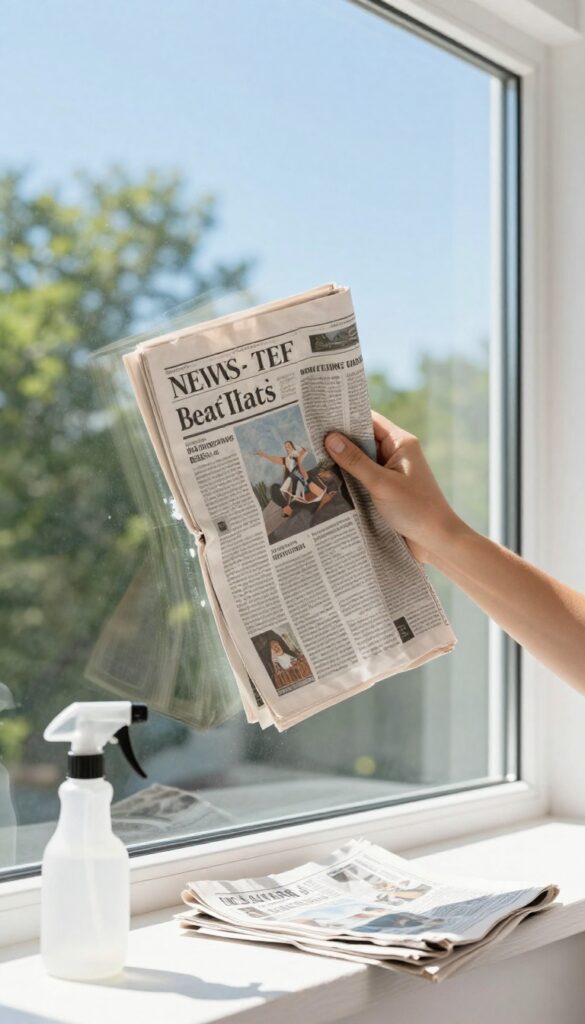
Paper towels seem convenient, but they often leave lint behind and can't handle heavy moisture. Newspaper, on the other hand, is a classic trick that professional window cleaners swear by. It's cheap, absorbent, and leaves a brilliant shine without streaks.
Newspaper works because the fibers are tight and low-lint, so they don't shed on your glass. The ink also acts as a mild abrasive that helps lift stubborn grime without scratching. Just crumple a few sheets, spray your window with a cleaning solution, and wipe in a circular motion.
Finish with a vertical or horizontal pass for a streak-free look. Always test on a small, inconspicuous area first, especially on tinted or coated glass, to make sure the ink doesn't stain.
Why Newspaper Beats Paper Towels
Paper towels are designed for absorbency, but they often leave tiny fibers behind. Newspaper's dense fibers hold up better and don't shed. Plus, the ink adds a bit of scrubbing power that helps break down dirt and grease.
How To Use Newspaper For Windows
Crumple a few sheets of newspaper into a loose ball. Spray your window with a homemade or store-bought cleaner. Wipe in a circular motion to pick up grime, then follow with straight strokes in one direction to avoid streaks.
Switch to a dry sheet for a final buff.
Safety Tips For Newspaper Cleaning
Test on a hidden corner first, especially on tinted or treated windows. The ink can sometimes transfer or react with coatings. Avoid using colored or glossy inserts, as they may not be as absorbent and could leave residue.
14. Add a Drop of Rubbing Alcohol to Your Solution
You've mixed your vinegar and water, but something's still off. The glass dries slowly, leaving behind faint streaks as it evaporates unevenly. Rubbing alcohol fixes that by speeding up the drying process and cutting through grease.
A small amount of isopropyl alcohol (70% or higher) works wonders in a homemade window cleaner. It evaporates quickly, so water doesn't have time to leave mineral deposits that cause streaks. Plus, it helps dissolve oily residues from fingerprints or cooking splatters.
Just don't overdo it—too much can make the solution too strong and potentially damage window tints or seals.
The Right Ratio For Streak-free Glass
Mix one tablespoon of rubbing alcohol per cup of water in your spray bottle. If you're using a vinegar-based cleaner, add the alcohol along with a drop of dish soap. Shake gently before each use.
This blend dries in seconds, leaving no smears.
When To Use Alcohol-based Cleaners
This solution is perfect for interior windows that get a lot of hand contact, like sliding glass doors or kitchen windows. It's also great for cleaning mirrors and glass tabletops. Avoid it on tinted windows or outdoor glass in direct sun, as rapid evaporation can leave residue if not wiped evenly.
15. Clean Both Sides of the Glass for True Clarity
You scrub the inside until it sparkles, but when the sun hits, you notice a haze. That's the outside grime showing through. Cleaning only one side is like washing half a plate—the job isn't done.
For true clarity, you need to tackle both sides, and do it in a way that doesn't transfer dirt from one side to the other.
Most people focus on the interior because it's easy to reach. But exterior glass collects dust, pollen, road grime, and hard water spots. When light passes through, that layer of dirt becomes visible.
The solution is simple: wash both sides every time. Start with the outside, then move inside. This order prevents you from dragging exterior dirt onto your clean interior.
Use Separate Cloths For Each Side
If you use the same cloth for both sides, you're just moving grime around. Exterior dirt often contains oily residues and fine grit that can scratch glass. Keep a dedicated set of microfiber cloths for the outside and another for the inside.
Color-code them if needed—blue for inside, green for outside. This small habit eliminates cross-contamination and keeps streaks away.
Don't Forget The Screens And Tracks
Even if the glass is spotless, dirty screens and tracks can make windows look dull. When you clean both sides, take a moment to wipe down the screen and vacuum the track. Dust from these areas can blow onto your freshly cleaned glass.
A quick once-over with a soft brush or vacuum attachment prevents that.
Check For A Consistent Sheen
After drying, step back and look at the window from different angles. If you see a hazy patch or a streak, it might be on the other side. A quick wipe with a dry microfiber cloth on the suspected side usually fixes it.
This final check ensures both sides are equally clear.
16. Use a Magnetic Window Cleaner for Hard-to-Reach Panes
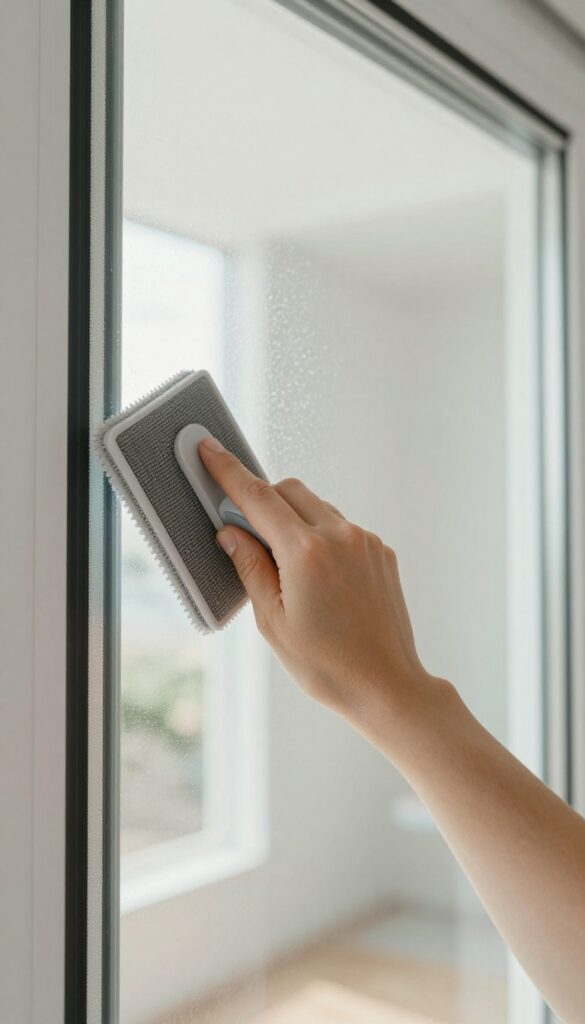
Some windows are just impossible to reach from the outside. Second-story panes, skylights, or windows above a stairwell often get neglected because cleaning them feels risky. Magnetic window cleaners solve that problem by letting you scrub both sides at once while staying safely indoors.
These devices consist of two pads with powerful magnets that hold them together through the glass. You move the inner pad, and the outer one follows along, cleaning simultaneously. They work best on double-pane windows and can handle moderate dirt, but you'll need to follow the instructions carefully to avoid losing the outer pad.
How They Work
A magnetic window cleaner has two parts: an inner pad you hold and an outer pad that sticks magnetically on the other side. As you glide the inner pad across the glass, the outer pad mirrors your movements, scrubbing and squeegeeing away grime. Most models include a safety cord or tether to prevent the outer pad from falling if the magnet loses contact.
Best Uses And Limitations
These tools shine on windows that are otherwise dangerous or impossible to reach from outside, like skylights or second-story panes above a roof. However, they're not ideal for single-pane windows (the magnetic pull may be too weak) or windows with heavy grime buildup. For best results, pre-clean the glass with a spray to loosen dirt.
Tips For Success
Always attach the safety tether before starting. Work slowly and deliberately, especially around edges, to keep the magnets aligned. Clean the pads regularly to avoid dragging dirt across the glass.
If the outer pad slips, don't panic—the tether will catch it. Practice on a lower window first to get a feel for the pressure needed.
17. Remove Sticker Residue with Cooking Oil
Peeling off a sticker or price tag from a window often leaves behind a sticky, stubborn residue. Rubbing at it with your fingernail only makes a mess, and harsh scrapers can scratch the glass. Fortunately, a common kitchen ingredient can dissolve that adhesive in seconds without any damage.
Cooking oil works because it breaks down the adhesive compounds in most sticker glues. The oil seeps into the residue, loosening its grip on the glass so you can wipe it away cleanly. This method is safe for all glass types and won't leave scratches or chemical residues.
How To Apply
Apply a few drops of vegetable or olive oil directly onto the sticker residue. Use your finger or a soft cloth to gently rub the oil into the adhesive. Let it sit for about a minute to penetrate fully.
Wipe And Wash
After the wait, use a clean cloth or paper towel to wipe the area. The residue should come off easily. You may need to repeat for thick or old stickers.
Once the adhesive is gone, wash the window with your regular glass cleaner to remove any oily film.
Why It Works
Oils are non-polar solvents that dissolve the non-polar adhesive molecules. This is the same principle behind using citrus-based cleaners, but cooking oil is gentler and always on hand. It's also effective on tape residue and glue spots from labels.
18. Invest in a Good-Quality Squeegee
Not all squeegees are created equal. The cheap plastic ones from the dollar store might get the job done in a pinch, but they often leave streaks, skip across the glass, or wear out after a few uses. A professional-grade squeegee with a brass or stainless steel handle and a replaceable rubber blade pays for itself in time saved and streak-free results.
Why The Handle Matters
A brass or stainless steel handle adds weight and balance. That extra heft helps the blade maintain consistent contact with the glass, so you don't have to press as hard. Plus, metal handles won't crack or warp over time like plastic ones do.
The Rubber Blade Is The Star
The rubber blade does the actual work. Look for a squeegee with a replaceable blade made from natural rubber or a high-quality synthetic blend. A sharp, flexible blade glides smoothly and wicks water away without skipping.
Replace the blade as soon as you notice streaks or nicks.
Size Matters For Efficiency
A 12- or 14-inch squeegee is a good all-around size for most residential windows. Larger blades cover more area faster, but they can be harder to control on smaller panes. If you clean a lot of big windows, consider an 18-inch model.
For tight spaces, keep a 6-inch squeegee handy.
19. Use Distilled Water for Spot-Free Rinsing
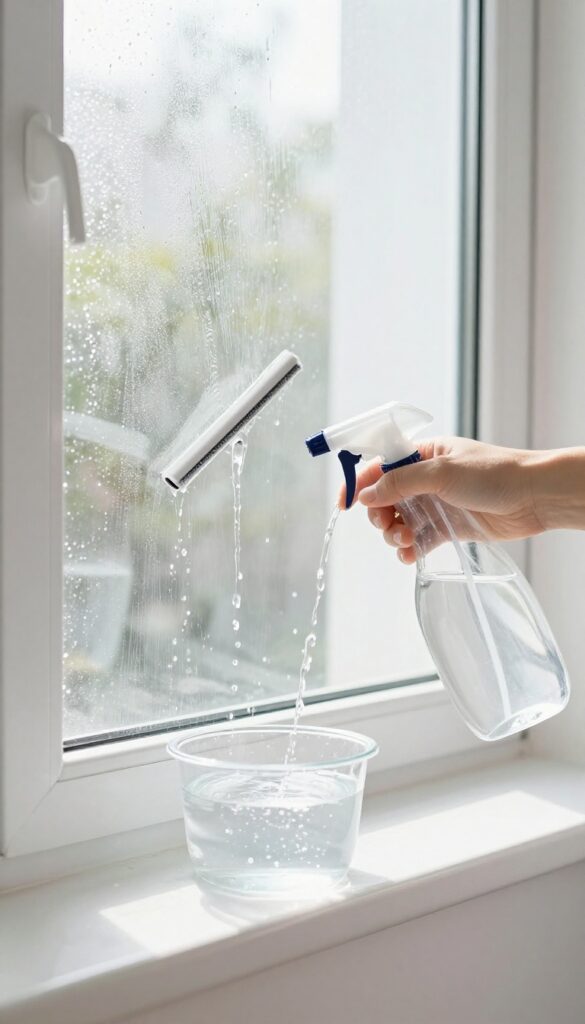
You've scrubbed and squeegeed, but once the window dries, tiny white spots appear. That's the minerals in your tap water left behind after evaporation. Hard water is the enemy of a spotless finish, especially on exterior windows where the sun bakes those deposits on fast.
Switching to distilled water for your final rinse eliminates this problem entirely. Distilled water has been boiled and condensed, removing all dissolved minerals. When it evaporates, nothing is left behind—just pure, clear glass.
It's a simple swap that makes a huge difference. You don't need to use distilled water for every step, just the final rinse. Keep a gallon in your cleaning caddy and see how much easier spot-free results become.
Why Tap Water Leaves Spots
Tap water contains calcium, magnesium, and other minerals. When water droplets dry on glass, these minerals are left behind as white or cloudy spots. Hard water makes this worse, and if you let the water air-dry, the spots become more pronounced.
Even a good squeegee can miss tiny droplets that then dry into spots.
Where Distilled Water Shines Best
Exterior windows get the most sun and are more prone to spotting because they dry quickly. Use distilled water for the final rinse on all exterior glass. It's also great for windows in kitchens and bathrooms, where hard water stains are common.
For interior windows, tap water is usually fine if you dry them quickly with a squeegee.
How To Use It In Your Routine
Mix your cleaning solution with tap water as usual. Scrub and squeegee the window. Then, using a spray bottle filled with distilled water, mist the glass lightly.
Follow with a clean, dry squeegee or microfiber cloth to remove the distilled water. This final pass leaves no residue. You can also dip your squeegee blade in distilled water between passes for extra insurance.
20. Clean Window Frames and Sills First
It's tempting to jump straight to the glass, but starting with the frames and sills saves you from doing double work. Dust, cobwebs, and grime sitting on top will inevitably fall onto your freshly cleaned panes, leaving you with a mess to fix. A quick pre-clean of the surrounding areas ensures that when you wash the glass, it stays clean.
Before you even touch the glass, give the frames and sills a thorough wipe-down. Use a damp microfiber cloth or a soft brush to dislodge dirt from corners and crevices. For stubborn buildup, a mild soapy solution works wonders.
This simple step prevents dirt from migrating onto the glass during the main cleaning and keeps your windows looking pristine longer.
Start At The Top
Always clean the top of the frame first. Gravity pulls dust downward, so if you start at the bottom, you'll just push dirt onto already cleaned areas. Work your way around the frame, then move to the sill.
This top-down approach is efficient and prevents re-soiling.
Don't Forget The Tracks
Window tracks collect a surprising amount of grit and grime. Use an old toothbrush or a small detailing brush to scrub along the tracks, then vacuum or wipe away the debris. Clean tracks not only look better but also allow your windows to slide smoothly.
Dry Thoroughly Before Washing Glass
After wiping down frames and sills, let them dry completely or give them a quick wipe with a dry cloth. Any lingering moisture can drip onto the glass and mix with your cleaning solution, causing streaks. A dry frame is a streak-free frame.
21. Try a Commercial Glass Cleaner with Ammonia
When homemade solutions aren't cutting it, sometimes you need to bring in the heavy artillery. Ammonia-based glass cleaners have been a professional favorite for decades because they tackle grease and smoke film that vinegar just can't break down. The key is knowing when to use them and how to do it safely.
Why Ammonia Works So Well
Ammonia is a powerful degreaser. It dissolves the oily residue from cooking, cigarette smoke, and even the natural oils from your hands. That's why windows in kitchens and living rooms often benefit most from an ammonia cleaner.
It evaporates quickly too, which means fewer streaks if you work fast.
Safety First: Ventilation And Mixing
Ammonia fumes are strong, so always open windows or work in a well-ventilated space. Never mix ammonia with bleach or any product containing bleach—that creates toxic chloramine gas. Stick to the cleaner as is, or dilute it according to the label.
Gloves are a good idea if you have sensitive skin.
How To Apply For Best Results
Spray the cleaner onto a microfiber cloth, not directly onto the glass, to control overspray. Wipe in a zigzag or S-pattern to avoid leaving streaks. For really grimy windows, let the cleaner sit for 30 seconds before wiping.
Follow up with a dry microfiber cloth for a final polish.
22. Use a Lint-Free Roller Cover for Large Panes
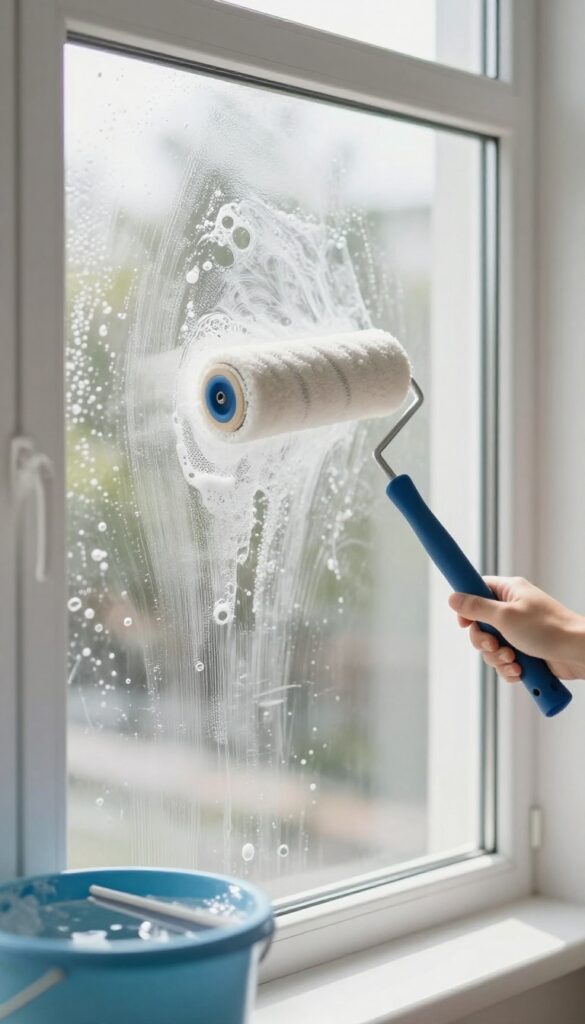
Large windows can be a real pain to clean with just a cloth or sponge. You end up stretching, missing spots, and often leaving streaks. A simple trick used by professional cleaners is to attach a microfiber roller cover to a paint roller frame.
It lets you cover a lot of surface area quickly and evenly, making the job much easier.
The roller cover applies cleaning solution uniformly without dripping or leaving excess suds. After rolling, you can follow up with a squeegee for a flawless finish. This method works especially well on picture windows, sliding glass doors, and any large pane where speed and consistency matter.
Why A Roller Cover Works Better
Unlike a sponge or cloth, a roller cover holds just the right amount of solution and releases it evenly as you roll. This prevents puddles and ensures every inch gets coated. Microfiber covers are lint-free, so no fuzz gets left behind on the glass.
How To Use It
First, mix your favorite cleaning solution in a bucket. Dip the roller cover in, then roll off excess on the tray's ridges. Start at the top of the window and roll in overlapping vertical strokes.
Work your way down, then immediately follow with a squeegee to remove the solution before it dries.
Tips For Best Results
Use a fresh cover for each cleaning session to avoid spreading old dirt. For very large windows, a roller with an extension pole saves your back. And always finish with a squeegee—don't skip it, or you'll end up with a hazy film.
23. Prevent Future Dirt with a Rain-Repellent Treatment
After all that scrubbing, wouldn't it be nice if your windows stayed cleaner for longer? A simple rain-repellent treatment can do just that. Originally designed for car windshields, these products create a hydrophobic layer that makes water bead up and roll off, carrying dirt and grime with it.
The result is less frequent cleaning and a longer-lasting shine.
Applying a rain repellent to your exterior windows is a game-changer. It's a quick step that pays off every time it rains. Here's how to do it right and what to expect.
Choose The Right Product
Look for a reputable car windshield rain repellent, such as Rain-X or a similar brand. Avoid products with harsh chemicals that might damage window seals or frames. You can also find dedicated window treatments for homes, but car products work just as well and are often more affordable.
Apply On Clean, Dry Glass
For the best results, apply the repellent to a perfectly clean and dry window. Any dirt or residue will be sealed in, so wash the glass thoroughly first and let it dry completely. Work in a shaded area to prevent the product from drying too quickly.
Buff To A Clear Finish
Most repellents require you to apply a thin, even coat and then buff it off with a clean microfiber cloth. Follow the manufacturer's instructions carefully. A common mistake is using too much product, which can cause streaking.
A little goes a long way.
Reapply Every Few Months
The hydrophobic effect isn't permanent. Depending on weather and sun exposure, you'll need to reapply every 2-3 months. You'll know it's time when water stops beading and starts sheeting again.
It's a small maintenance task that keeps your windows cleaner with less effort.
24. Use a Soft-Bristle Brush for Textured Glass
Frosted, etched, or patterned glass adds privacy and style, but it's a nightmare to clean with standard tools. A squeegee skips over the texture, leaving behind a cloudy film. The solution is a soft-bristle brush that can work into every groove without scratching the surface.
Why Squeegees Fail On Textured Glass
Squeegees rely on a smooth, flat surface to create a seal and pull water off in one pass. On textured glass, the rubber blade can't maintain contact with the uneven surface, so it leaves streaks and pools of water that dry into spots. The texture also traps dirt and soap residue that a squeegee simply can't reach.
Choosing The Right Brush
Look for a brush with natural or soft synthetic bristles, like those used for car detailing or cleaning blinds. Avoid stiff scrub brushes, which can scratch the glass. A brush with a long handle helps you reach high windows, and a angled head makes it easier to work into corners.
For small textured panels, a soft toothbrush works great.
Technique For Best Results
Start by wetting the glass with a mild cleaning solution—warm water with a drop of dish soap works well. Dip the brush in the solution and gently scrub in circular motions, making sure to work the bristles into the texture. Rinse thoroughly with a hose or a wet microfiber cloth to remove all soap.
Then, dry the glass with a lint-free microfiber cloth, blotting rather than wiping to avoid pushing water back into the grooves.
25. Schedule Regular Cleanings to Avoid Buildup
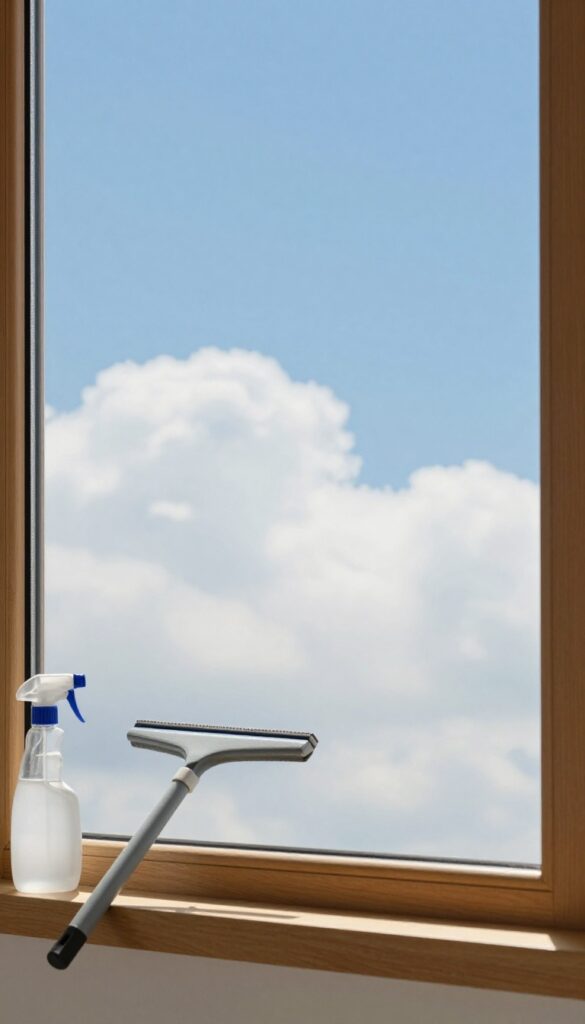
Consistency is the secret weapon for effortlessly clear windows. When you let months or years pass between cleanings, dirt, hard water minerals, and airborne grime have time to bond tightly to the glass. That bond makes each cleaning session a battle.
Regular upkeep keeps the job quick and the results stunning.
Why Every 3–4 Months Works Best
Most homes benefit from a window cleaning every three to four months. This interval prevents mineral deposits from etching into the glass and stops grime from building up a stubborn layer. Seasonal cleanings also let you catch small issues like cracked seals or rotting frames before they become costly repairs.
How Regular Cleaning Saves Time And Effort
A window cleaned every few months only needs a light wipe and a quick squeegee pass. Compare that to a window neglected for a year, which may require soaking, scraping, and multiple rounds of cleaning. Regular sessions cut your total cleaning time by more than half and reduce the need for harsh chemicals or heavy scrubbing.
Build A Simple Reminder System
Tie your window cleaning to an existing routine. Clean them when you swap out your seasonal decorations, change your air filters, or rotate your mattress. A recurring calendar reminder on your phone works too.
The key is making it automatic so you never let buildup take hold.
FAQ
What is the best homemade window cleaning solution?
Mix 2 cups water, 1/4 cup white vinegar, and 1/2 teaspoon dish soap. This solution cuts grease, dries streak-free, and is safe for most windows.
How do I prevent streaks when cleaning windows?
Use a squeegee with a sharp blade, dry the blade between passes, and clean on a cloudy day. Avoid paper towels that leave lint; use microfiber cloths or newspaper instead.
Can I use vinegar on all types of windows?
Vinegar is safe for glass, but avoid it on windows with tinted film or certain coatings. Test on a small area first. For tinted windows, use a mild soap solution instead.
How often should I clean my windows?
Every 3-4 months is ideal for most homes. If you live near a busy road or in a dusty area, clean more frequently. Regular cleaning prevents hard water spots and grime buildup.
What's the best tool for cleaning exterior windows on a second story?
A magnetic window cleaner allows you to clean both sides from inside. Alternatively, use a telescopic pole with a squeegee attachment. Always prioritize safety and consider hiring a professional for high windows.
Conclusion
Window cleaning doesn't have to be a battle against streaks. By using the right tools and techniques from this list, you can achieve crystal-clear results every time. Start with the tips that address your biggest frustration—whether that's hard water spots or lint left behind.
A few small changes in your routine will make a visible difference. Your windows will sparkle, and you'll spend less time redoing the job.