20 Air Duct Cleaning Tips for Fresher Healthier Indoor Air
Your air ducts work hard every day, circulating air throughout your home. But over time, they collect dust, pet dander, and even mold. That buildup doesn't just sit there—it gets blown into every room you live in.
Clean ducts mean fewer allergens floating around and better airflow from your HVAC system. You might notice less dust on furniture and a fresher smell in the air.
These 20 tips cover everything from simple DIY maintenance to knowing when it's time to call a professional. You don't need to be an expert to make a difference in your indoor air quality.
1. Change Your Air Filters Regularly
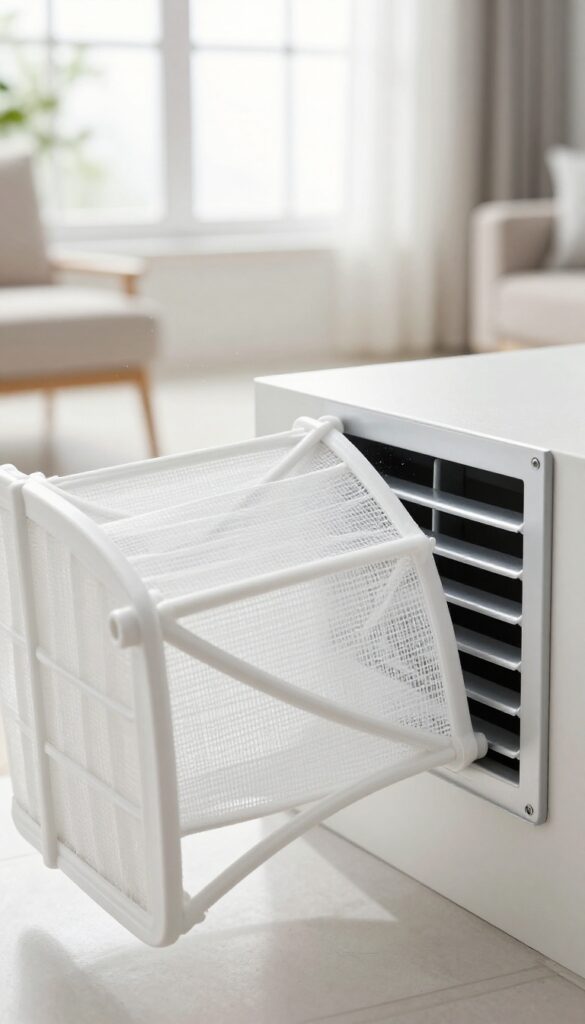
Your air filter is the first line of defense against dust, pollen, and pet dander entering your ductwork. A clogged filter forces your HVAC system to work harder and allows contaminants to circulate freely. Swapping it out on schedule is one of the easiest ways to keep your ducts cleaner and your air fresher.
A clean filter catches debris before it settles in your ducts. Check it monthly and replace it every 90 days—or sooner if you have pets or allergies. Mark your calendar or set a phone reminder so you never forget.
Why Filter Changes Matter
Dirty filters restrict airflow, making your system run longer and use more energy. They also let particles bypass the filter and accumulate inside your ductwork, turning your ducts into a breeding ground for allergens.
How Often Should You Change It?
Standard 1-inch filters need replacing every 30–90 days. If you have shedding pets or live in a dusty area, aim for every 30 days. Thicker filters (4–5 inches) can last up to 6 months, but always check the manufacturer's recommendation.
Choosing The Right Filter
Look for a MERV rating between 8 and 13 for a good balance of filtration and airflow. Higher ratings catch more particles but can restrict airflow if your system isn't designed for them. Avoid cheap fiberglass filters—they barely trap anything.
2. Use a Vacuum with a HEPA Filter
A standard vacuum can stir up more dust than it picks up, especially around vents. Switching to a HEPA-filtered vacuum traps fine particles instead of blowing them back into the air. This small change makes a big difference when you're cleaning supply registers and return vents.
Grab your HEPA vacuum and attach the brush tool. Remove the vent covers and vacuum inside the duct as far as you can reach. Pay special attention to the edges where dust tends to build up.
Do this every few months to keep debris from circulating through your home.
Why Hepa Matters
HEPA filters capture at least 99. 97% of particles as small as 0. 3 microns.
That includes mold spores, pet dander, and fine dust that regular vacuums miss. Without HEPA, you're just redistributing allergens back into your living space.
How Often To Vacuum Vents
Aim for every three months, or more often if you have pets or live in a dusty area. Mark it on your calendar so you don't forget. Consistent vacuuming prevents thick layers of grime from forming inside your ducts.
Don't Forget The Return Vents
Return vents pull air into the system, so they collect just as much dust as supply vents. Vacuum them with the same HEPA setup. Clean return vents help your HVAC system run more efficiently.
3. Seal Leaky Duct Joints
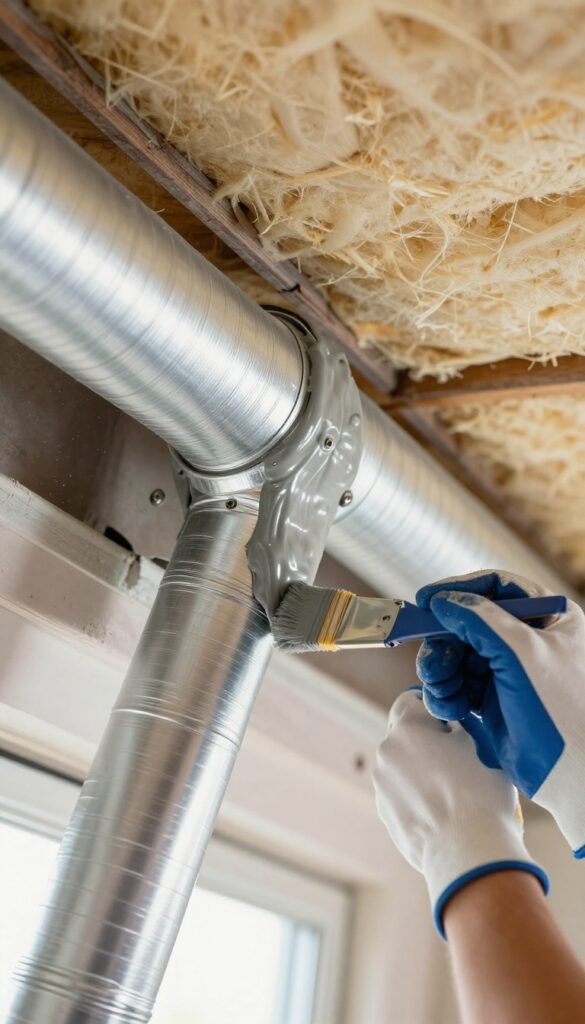
Even a small gap in your ductwork can pull in dust, insulation fibers, and other junk from your attic or crawl space. That unfiltered air then gets pumped directly into your living areas. Sealing those leaks is one of the most effective ways to improve both air quality and system efficiency.
Why Leaks Are A Problem
Leaky ducts don't just waste energy—they also act like vacuum cleaners, sucking in contaminants from unconditioned spaces. Dust, mold spores, and even rodent droppings can enter through unsealed joints. Sealing them keeps that stuff out and helps your HVAC system run more efficiently.
Best Materials For Sealing
Skip the standard duct tape—it dries out and fails quickly. Instead, use mastic sealant (a sticky paste) or UL-181 rated metal tape. Apply mastic with a brush or gloved hand over every joint and seam.
For metal tape, press it firmly around connections. Both options create a permanent, airtight seal.
Where To Focus Your Efforts
Start with the joints closest to the air handler—that's where leaks have the biggest impact. Also check where ducts connect to floor registers and ceiling vents. Don't forget the return ducts; they often leak more than supply lines.
Use a flashlight and mirror to inspect hard-to-see areas.
4. Clean Visible Mold Immediately
Mold in your ductwork isn't just gross—it's a health hazard. When you spot fuzzy black, green, or white patches inside ducts or on vent covers, don't ignore them. Mold spores can spread through your entire home, triggering allergies, asthma, and other respiratory issues.
Acting fast stops the problem from getting worse and keeps your air cleaner.
Mold thrives in dark, damp environments, and air ducts provide the perfect conditions. Leaky ducts, high humidity, or condensation can create moisture that mold loves. If you see visible mold, it means there's already a moisture issue that needs fixing.
Cleaning the mold is only half the battle—you also need to address the source of moisture to prevent it from coming back.
Diy Mold Removal For Small Patches
For small areas of surface mold (less than a few square feet), you can often handle the cleanup yourself. Mix equal parts white vinegar and water in a spray bottle. Spray the moldy area and let it sit for 10 minutes.
Scrub gently with a stiff brush or sponge, then wipe away residue. Vinegar kills many mold species without harsh chemicals. Always wear gloves, a mask, and eye protection to avoid breathing in spores.
When To Call A Professional
If the mold covers a large area, is inside the ductwork where you can't reach, or keeps coming back after cleaning, it's time to call a professional. They have specialized equipment like HEPA vacuums and antimicrobial treatments to safely remove mold without spreading spores. Severe mold growth may indicate a bigger moisture problem, like a leaky duct or inadequate insulation, that needs expert diagnosis.
Preventing Mold From Returning
After cleaning, take steps to keep mold away. Fix any duct leaks or condensation issues. Improve ventilation in bathrooms and kitchens to reduce overall humidity.
Consider installing a dehumidifier if your home is damp. Also, replace your air filter regularly and schedule annual HVAC inspections to catch moisture problems early.
5. Schedule Professional Cleaning Every 3–5 Years
Even with regular DIY maintenance, your ducts accumulate grime deep inside where you can't reach. Professional cleaners use specialized tools like high-powered vacuums and rotary brushes to dislodge and remove that hidden buildup. Think of it as a deep reset for your entire HVAC system.
While you can handle vent covers and registers yourself, the main trunk lines and branch runs need professional attention. These experts inspect for mold, pests, and damage while cleaning, giving you a complete picture of your duct health. The investment pays off in better airflow, lower energy bills, and fewer allergens circulating through your home.
When To Call The Pros
If you notice visible mold growth inside ducts, hear debris rattling when the system runs, or see dust storms from vents after cleaning, it's time for professional help. Also schedule a cleaning if you've recently completed renovations, had a pest infestation, or moved into an older home with unknown duct history.
What A Professional Cleaning Includes
A thorough service starts with a full system inspection, then uses negative pressure equipment to suck out contaminants. Technicians clean all supply and return ducts, registers, grilles, and the air handler itself. They may also apply antimicrobial treatments if mold is present.
Expect the job to take 3–5 hours depending on home size.
How Often Is Enough?
For most homes, every 3–5 years is sufficient. But if you have smokers, multiple pets, or family members with asthma or allergies, consider a 2–3 year schedule. Homes in dusty climates or with recent water damage may also need more frequent cleanings.
Your HVAC contractor can recommend a timeline based on your specific situation.
6. Keep Vents and Registers Unblocked

It's easy to arrange furniture without thinking about the vents in the floor or wall. But when a sofa, bed, or heavy curtain blocks a register, your HVAC system has to work harder to push air through. That extra effort wastes energy and stirs up dust that would otherwise stay put.
Blocked vents create pressure imbalances that force air through leaks in your ductwork, pulling in attic dust or crawlspace debris. Keeping registers clear is one of the simplest ways to improve airflow and reduce airborne particles.
Check For Furniture And Drapes
Walk through each room and make sure no furniture legs are directly over a floor register. Also pull back long curtains or drapes that cover wall vents. Even a few inches of clearance makes a big difference.
Don't Close Vents In Unused Rooms
Closing vents to save energy actually backfires by increasing pressure in the duct system. That extra pressure can cause leaks and push dust into the air. Instead, keep all vents open and adjust the thermostat for unused zones.
Vacuum Register Covers Monthly
Dust and pet hair build up on vent covers, blocking airflow. Remove the covers and vacuum them with a brush attachment. While they're off, shine a flashlight inside to spot any visible debris buildup.
7. Use a Dryer Vent Brush
Your dryer vent might not be the first thing you think of when it comes to air duct cleaning, but it plays a big role in your home's air quality and safety. Lint from the dryer doesn't just stay in the lint trap—tiny fibers escape into the vent and can settle in your main ductwork over time. That buildup restricts airflow and creates a serious fire hazard.
Cleaning your dryer vent and its connection to the main duct system annually is a simple but powerful step. A dryer vent brush is a long, flexible tool designed to reach deep into the vent pipe and dislodge lint clumps. You can find one at any hardware store for under $20.
Start by unplugging the dryer and pulling it away from the wall. Disconnect the vent hose from both the dryer and the wall outlet. Use the brush to scrub the inside of the hose and the wall vent, then vacuum up the loose lint with a shop vac.
Reconnect everything securely and push the dryer back into place. This quick task reduces fire risk, improves dryer efficiency, and cuts down on the dust that recirculates through your HVAC system.
Why Lint Buildup Matters
Lint is highly flammable. According to the U. S.
Fire Administration, failure to clean dryer vents is a leading cause of home clothes dryer fires. But beyond safety, lint clogs reduce airflow, making your dryer work harder and use more energy. That extra moisture and heat can also create a breeding ground for mold inside the vent.
How Often Should You Clean It?
At least once a year is the minimum. If you have a large family or do multiple loads daily, consider every six months. You'll know it's time if your clothes take longer to dry or the dryer feels hotter than usual.
A quick visual check—look for lint around the vent opening outside—can also tell you if it's clogged.
Tools And Tips For A Thorough Job
A dryer vent brush kit usually includes flexible rods that screw together and a brush head. Some kits come with a drill attachment for easier rotation. For tight spaces, a vacuum attachment designed for dryer vents works well.
Always disconnect power before cleaning, and check the vent hood outside to ensure the flap opens freely.
8. Inspect Ducts After Renovations
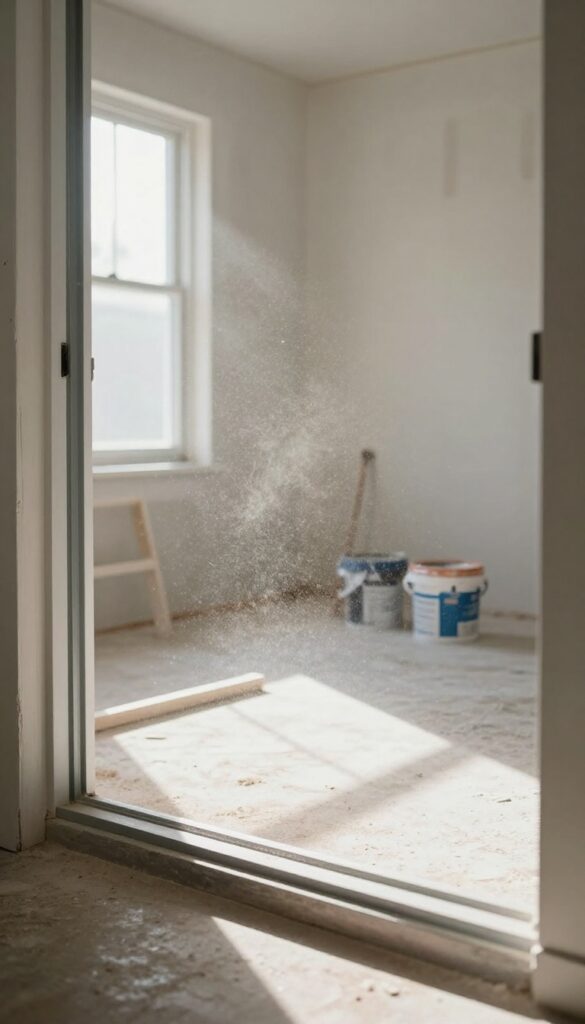
Renovation projects stir up a shocking amount of fine dust and debris. Even if you seal off doorways and cover vents, microscopic particles can still find their way into your ductwork. Once inside, they get recirculated throughout your home for months after the work is done.
A professional inspection after any major renovation can catch hidden contamination before it becomes a long-term problem. It's a simple step that protects your air quality and your family's health.
Why Renovation Dust Is Different
Regular household dust is mostly skin cells, fibers, and tracked-in dirt. Renovation dust contains drywall particles, sawdust, paint chips, and sometimes silica or lead. These materials are finer and more irritating to lungs.
They also settle deeper into duct crevices and are harder to remove with standard vacuuming.
When To Schedule The Inspection
Schedule your duct inspection after all construction work is complete and the home has been thoroughly cleaned. Wait until painters, carpenters, and flooring installers are done. Then have a certified HVAC technician check for debris buildup, especially in return ducts and near the air handler.
What An Inspection Covers
A thorough inspection includes visual checks of all accessible duct sections, looking for dust accumulation, blockages, or damage. The technician may use a camera scope to inspect deep runs. If significant debris is found, they'll recommend a full cleaning using agitation and HEPA vacuum equipment.
9. Install a UV Light in the HVAC System
UV lights might sound like something from a sci-fi movie, but they're a practical tool for keeping your HVAC system cleaner between duct cleanings. These lights zap bacteria, viruses, and mold spores that love to grow on coils and in dark duct corners. They don't replace a thorough cleaning, but they help maintain better air quality day to day.
Installing a UV light in your HVAC system is a smart upgrade that works silently in the background. The light targets microorganisms as air passes by, reducing their ability to multiply and spread. It's especially helpful for households with allergy sufferers or anyone sensitive to mold and bacteria.
Keep in mind that UV lights need periodic bulb replacement—typically once a year—and they work best when placed near the evaporator coil or inside the ductwork. They're not a set-and-forget solution, but the maintenance is minimal compared to the benefits.
How Uv Lights Improve Air Quality
UV-C light damages the DNA of microorganisms, effectively killing them. When installed in the return air duct or near the coil, the light treats the air every time the system runs. Studies show UV lights can reduce microbial growth on coils by over 90%, which means less mold and bacteria being circulated into your home.
Installation Tips For Best Results
For optimal performance, install the UV light downstream of the filter and upstream of the evaporator coil. This placement ensures the light hits the coil directly, where moisture and dust create a breeding ground for mold. Hardwired units are more reliable than plug-in models, and professional installation is recommended to avoid electrical hazards and ensure proper positioning.
Maintenance And Safety Considerations
UV lights lose effectiveness over time, so replace the bulb annually. Some models have a timer to run only when the fan is on, extending bulb life. Safety note: never look directly at a UV light—it can cause eye damage.
Install the light in a sealed section of ductwork or use a model with a shutoff switch for access.
10. Check for Pest Infestations
Rodents, insects, and other pests love dark, undisturbed spaces—and your air ducts qualify perfectly. They can squeeze through tiny gaps in the ductwork, bringing in droppings, dander, and nesting materials. If you hear scratching sounds or notice musty odors near vents, pests might have moved in.
Ignoring them means their waste gets circulated into your breathing air, which can trigger allergies and even spread diseases.
Signs Of Pests In Ducts
Listen for scratching, scurrying, or squeaking sounds, especially at night. Look for droppings near vent covers, chewed wires or insulation, and unusual odors like ammonia (from urine). You might also spot dead insects or rodent nests when you remove a vent cover.
Why Pest Debris Is Dangerous
Droppings, urine, and dander contain allergens, bacteria, and pathogens that get blown into your living spaces. Rodent droppings can carry hantavirus, and cockroach debris is a common asthma trigger. Even after pests are gone, their leftover mess continues to contaminate your air.
Steps To Take
First, call a pest control professional to eliminate the infestation. Do not try to clean the ducts while pests are active—you could spread contaminants further. After treatment, hire a duct cleaning service to remove all debris and sanitize the system.
Seal any entry points to prevent future invasions.
Prevention Tips
Keep your home clean and seal cracks around foundations, windows, and doors. Trim vegetation away from vents and ensure outdoor duct openings have sturdy screens. Store food in sealed containers and take out trash regularly to avoid attracting pests.
11. Clean the AC Coils and Drain Pan
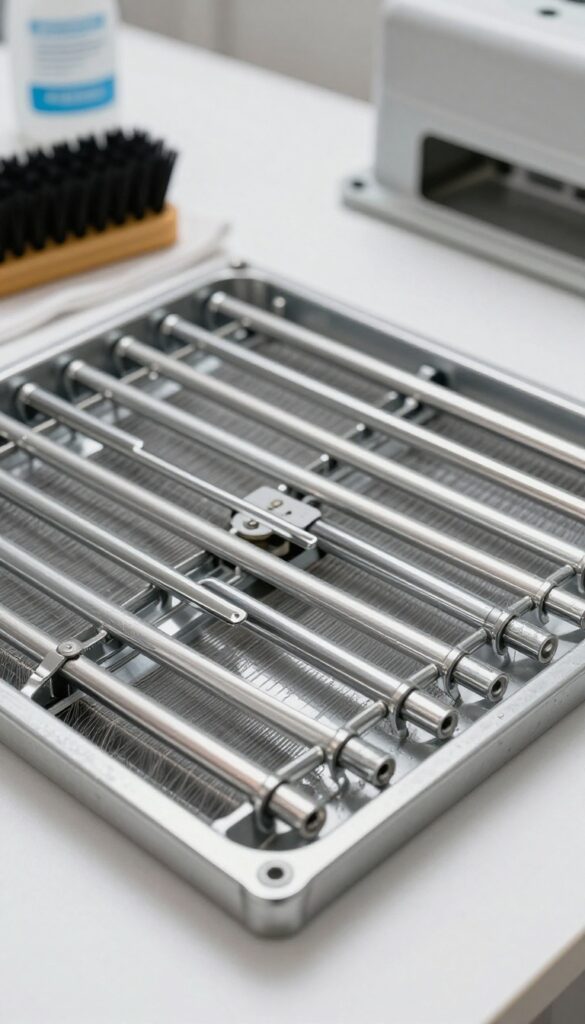
Your air conditioner's evaporator coils and drain pan are prime real estate for mold and bacteria. When the coils get caked with dirt, they can't absorb heat efficiently, and the moisture that collects in the drain pan becomes a breeding ground for microbial growth. That gunk then gets picked up by the airflow and distributed throughout your ductwork.
Cleaning these components annually is one of the most effective ways to stop mold before it starts.
Why Coils And Drain Pan Matter
The evaporator coils sit right in the path of your return air. As air passes over them, dust and debris stick to the cold, wet surface. Over time, that layer of grime insulates the coils, making your system work harder and use more energy.
Meanwhile, the drain pan catches condensation—and if it's dirty or clogged, standing water becomes a perfect environment for mold and algae. That contaminated moisture can then be pulled into the airstream and into your ducts.
How To Clean Them Safely
Turn off power to your HVAC system at the breaker or disconnect switch. Locate the access panel for the indoor unit—usually a metal cover held by screws. Remove it carefully.
You'll see the coil fins (they look like thin metal slats) and the drain pan underneath. Use a soft brush or a vacuum with a brush attachment to gently remove loose dust from the coils. For stubborn grime, spray a no-rinse coil cleaner (available at hardware stores) and let it foam away dirt.
Wipe the drain pan with a cloth and a mix of water and mild detergent. Clear the drain line by flushing it with a cup of white vinegar or using a wet/dry vac at the outdoor end.
When To Call A Pro
If your coils are severely matted with dirt or you see signs of mold inside the unit, it's worth hiring an HVAC technician. They have specialized tools like coil fin combs and commercial-grade cleaners that won't damage the delicate fins. Also, if the drain line is clogged deep inside or you suspect mold inside the air handler, a pro can safely disinfect the area without spreading spores.
Annual professional maintenance often includes coil and drain pan cleaning as part of the service.
12. Use a Duct Cleaning Kit for DIY Jobs
If you're handy with tools and want to tackle some duct cleaning yourself, a rotary brush kit can be a game-changer. These kits attach to a standard drill and let you scrub the inside of your ducts without crawling into tight spaces. They're especially useful for dislodging surface dust and debris that's been sitting for a while.
A duct cleaning kit typically includes flexible rods and a brush head that spins as you drill. You feed the brush into the duct from a register or return vent, and it scrubs the walls as you push it along. The key is to use it gently—especially on flexible ducts, which can tear or collapse under too much force.
Work in short sections, and vacuum up the loosened debris afterward. This method won't replace a deep professional cleaning, but it's great for maintenance between services.
Choosing The Right Kit
Look for a kit with a brush diameter slightly larger than your duct size so it makes good contact. Nylon bristles are safe for metal and most flex ducts. Avoid stiff wire brushes, which can scratch the interior lining.
Step-by-step Use
Start by removing the vent cover and vacuuming any loose debris near the opening. Attach the brush to the drill, then feed it into the duct a few feet at a time. Run the drill at medium speed while slowly pushing and pulling the brush.
After each pass, vacuum the dislodged dust from the vent opening.
When To Skip Diy
If your ducts have heavy mold growth, pest infestations, or are badly damaged, call a professional. DIY kits can spread contaminants or worsen damage if used incorrectly. Stick to surface cleaning only.
13. Replace Flexible Ducts if They're Crushed or Torn
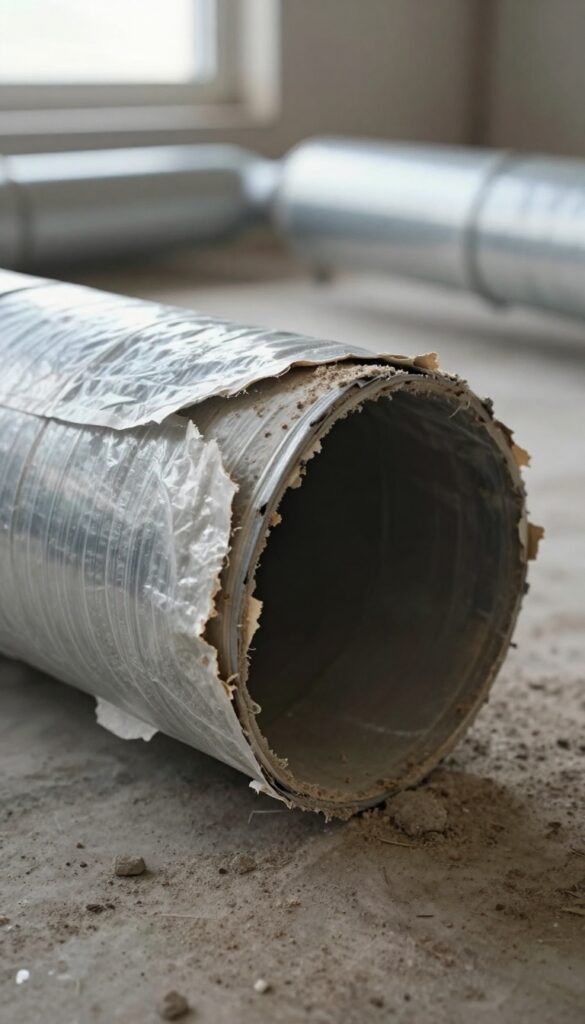
Flexible ducts are convenient for tight spaces, but they're also the most vulnerable part of your ductwork. A single crushed section can choke airflow and collect dust like a magnet. If you spot tears or kinks, replacement is often the simplest fix.
Damaged flex ducts don't just reduce efficiency—they become breeding grounds for dust and mold. Replacing them with new insulated flex duct restores proper airflow and improves indoor air quality. Here's how to handle the swap.
Spotting The Damage
Check for visible crushing, sharp bends, or tears in the outer jacket. Run your hand along the duct—if you feel a flat spot or hear air whistling, it's compromised. Also look for disconnected sections at the joints.
Choosing The Right Replacement
Buy insulated flex duct with an R-value of 6 or higher for energy efficiency. Match the diameter to your existing duct (typically 6 or 8 inches). Avoid cheap non-insulated types—they sweat and promote mold.
Installation Tips
Cut the new duct slightly longer than needed, then pull it taut without stretching. Secure with zip ties or duct clamps at both ends. Seal all connections with mastic or foil tape—never standard duct tape, which dries out quickly.
14. Test for Air Leaks with Incense
You might think your ducts are sealed tight, but tiny gaps can waste a lot of conditioned air. A simple incense stick can reveal hidden leaks that are robbing your system of efficiency. This trick costs pennies and takes just a few minutes per duct run.
Hold a lit incense stick near every joint, seam, and connection point in your exposed ductwork. Watch the smoke carefully—if it wavers, flickers, or gets pulled into a gap, you've found a leak. Mark each spot with a piece of tape so you can seal them later.
This method works best when your HVAC fan is running, as the air pressure difference makes leaks more obvious. Don't forget to check around registers and where ducts connect to the main trunk.
Why Incense Works So Well
Incense smoke is light and sensitive to the slightest air movement. Unlike your hand or a tissue, it doesn't block airflow and gives you a clear visual cue. The thin stream of smoke reacts instantly to pressure changes, making even pinhole-sized leaks easy to spot.
What To Do After You Find Leaks
Use mastic sealant or metal-backed foil tape to seal any gaps you discover. Avoid standard duct tape—it dries out and fails quickly. Apply the sealant generously with a brush or putty knife, and press the tape firmly over the seam.
For larger holes, a patch of sheet metal and mastic works best.
When To Test Your Ducts
The best time is before you turn on your heating or cooling season for the first time. Also test after any duct repairs, renovations, or if you notice uneven temperatures between rooms. A yearly check keeps your system running at peak efficiency.
15. Clean the Blower Fan and Motor
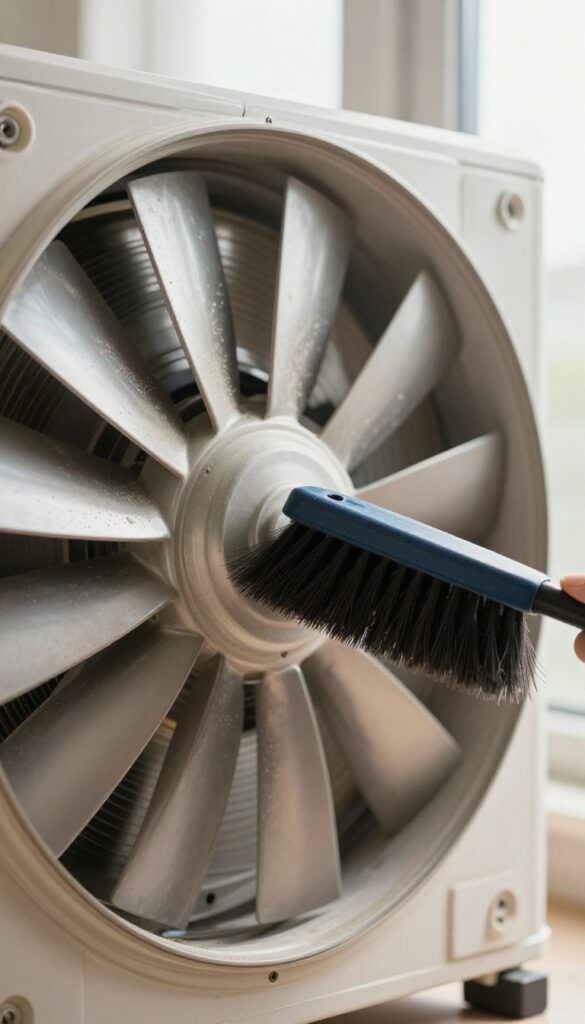
The blower fan is the workhorse of your HVAC system, pushing conditioned air through the ducts and into your rooms. When the fan blades get caked with dust, they throw that grime straight into the airstream. Cleaning the blower fan and motor can dramatically reduce airborne particles and improve system efficiency.
Why The Blower Fan Matters
A dirty blower fan doesn't just recirculate dust—it also forces your system to work harder. Dust buildup on blades throws off the fan's balance, leading to noise, vibration, and extra wear on the motor. Keeping the fan clean helps maintain consistent airflow and lowers your energy bills.
How To Clean The Blower Fan Safely
Start by turning off power to your HVAC unit at the breaker or disconnect switch. Remove the access panel to reach the blower compartment. Use a soft brush or a vacuum with a brush attachment to gently dislodge dust from each fan blade.
For stubborn buildup, compressed air works well—just direct it away from the motor. Avoid bending the blades or getting moisture on electrical parts.
Don't Forget The Motor
While you're in there, check the blower motor for dust accumulation. Use a brush or compressed air to clean the motor housing and any visible vents. If your motor has oil ports, add a few drops of lightweight machine oil per the manufacturer's instructions.
A clean, well-lubricated motor runs cooler and lasts longer.
16. Use a Dehumidifier in Damp Areas
Moisture is the enemy of clean ducts. When humidity levels climb, your ductwork becomes a breeding ground for mold, mildew, and dust mites. A dehumidifier in problem areas like basements or crawl spaces can make a huge difference.
It pulls excess moisture from the air before it ever reaches your ducts.
Keeping humidity in check is one of the most effective ways to prevent biological growth in your HVAC system. Aim to maintain indoor humidity between 30% and 50%. A dehumidifier not only protects your ducts but also makes your home feel cooler and more comfortable.
Where To Place Your Dehumidifier
Focus on the dampest parts of your home. Basements, crawl spaces, and laundry rooms are common trouble spots. Place the unit near the air return if possible, so it treats air before it enters the duct system.
A portable dehumidifier works well for smaller areas, while a whole-house unit can be integrated with your HVAC.
Signs You Need One
Notice condensation on windows, musty odors, or visible mold near vents? Those are red flags. If your basement feels clammy or you see water stains on walls, a dehumidifier is a smart investment.
Even if you don't see obvious moisture, high humidity can still promote mold growth inside ducts.
Maintenance Tips
Empty the water reservoir regularly or connect a hose for continuous drainage. Clean the filter every few weeks to keep it running efficiently. Set the humidity level to around 45%—too low can make the air feel dry and cause static electricity.
17. Don't Forget the Return Air Ducts
Return ducts are the unsung heroes of your HVAC system. While supply ducts get all the attention, return ducts pull air from your rooms back to the system for reconditioning. They collect just as much dust, dander, and debris as supply ducts, but they're often overlooked during cleaning.
Ignoring them means that dirt can recirculate, undoing all your hard work on the supply side.
Return air ducts are the pathways that bring air from your living spaces back to your HVAC unit. They typically have larger grilles and are located on interior walls or ceilings. Because they suck air in, they attract dust, pet hair, and even larger debris like toy parts or lost socks.
Over time, this buildup restricts airflow, making your system work harder and reducing efficiency. Cleaning return ducts is just as important as cleaning supply ducts for maintaining good indoor air quality and system performance.
Where To Find Return Ducts
Return ducts are usually hidden behind large metal or plastic grilles, often in hallways, living rooms, or near stairs. Look for grilles that are larger than supply vents and don't have adjustable dampers. In many homes, there's one main return on each floor.
Check behind furniture too—couches and bookshelves often block them, restricting airflow and collecting extra dust.
How To Clean Return Ducts
Start by removing the grille and vacuuming the visible dust with a brush attachment. Reach inside as far as you can with a flexible vacuum hose or a long-handled duster. For stubborn buildup, use a microfiber cloth wrapped around a stiff wire or a duct cleaning brush.
If you have a central return with a filter slot, clean the area around the filter housing as well. Wear a mask and gloves to avoid breathing in stirred-up dust.
Check The Return Plenum
The return plenum is the metal box where all return ducts converge before entering the air handler. If you can access it, remove the cover and vacuum inside. This area can accumulate a surprising amount of debris, especially if your air filter isn't perfectly sealed.
A clean plenum ensures that air entering your system is as clean as possible, reducing strain on the filter and improving overall air quality.
When To Call A Professional
If your return ducts are long, have many bends, or are made of flexible material, a thorough DIY clean might be tough. Professionals have powerful truck-mounted vacuums and rotary brushes that can scrub the entire length. If you notice mold growth, musty odors, or excessive dust even after cleaning, it's time to call in an expert.
They can also inspect for leaks or damage that could be letting in dirty attic or crawlspace air.
18. Consider a Whole-House Air Purifier
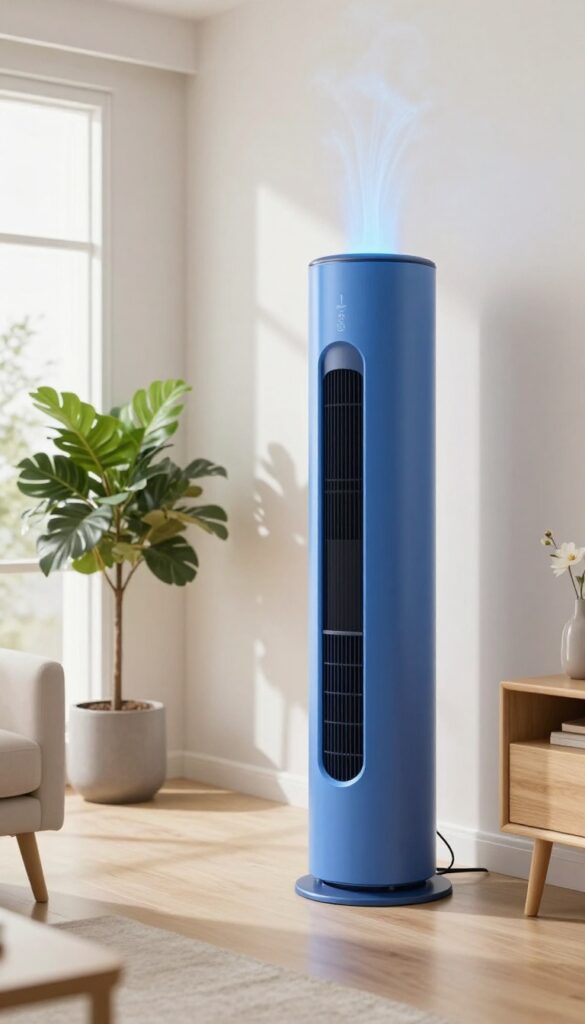
Standard air filters catch the big stuff, but tiny particles like pollen, smoke, and bacteria slip right through. That's where a whole-house air purifier steps in. Installed directly into your ductwork, it actively captures those microscopic contaminants before they reach your living spaces.
For allergy sufferers or anyone wanting consistently cleaner air, this upgrade makes a real difference.
How An In-duct Purifier Works
Unlike portable units that clean one room at a time, a whole-house purifier treats every room equally. It's mounted in your main return duct or supply plenum, so all air passing through your HVAC system gets filtered. Most models use a combination of HEPA filtration, UV light, or electrostatic precipitation to trap particles as small as 0.
3 microns.
Benefits For Allergy And Asthma Sufferers
If you're tired of sneezing or waking up stuffy, this is a game changer. A whole-house purifier continuously removes airborne triggers like dust mites, pet dander, and mold spores. You'll notice less dust settling on surfaces and fewer respiratory flare-ups throughout the year.
Installation And Maintenance Considerations
Professional installation is recommended because the unit needs to be integrated with your HVAC system. Once installed, maintenance is minimal—usually just replacing the filter or cleaning the collection cells annually. The upfront cost is higher than a portable purifier, but the long-term air quality payoff is worth it.
19. Clean Around the Outdoor Unit
Your outdoor condenser unit pulls in air that eventually travels through your entire duct system. If it's clogged with leaves, grass clippings, or debris, airflow is restricted and your system has to work harder. Keeping that area clean is an easy win for better air quality and efficiency.
The outdoor unit isn't just a box sitting in your yard—it's the starting point for much of the air that circulates through your home. When debris builds up around it, your system struggles to pull in fresh air, and that can lead to dust and pollutants being pulled into the ducts. A quick cleanup every few weeks keeps things running smoothly.
Clear Away Leaves And Grass
Trimming back any plants or grass within two feet of the unit is a good rule of thumb. Leaves and grass clippings can get sucked into the condenser fins, blocking airflow and reducing efficiency. A simple rake or blower session every couple of weeks does the trick.
Check For Blockages
After storms or heavy winds, check for sticks, trash, or other debris that might have piled up against the unit. Even a plastic bag caught on the intake can seriously restrict airflow. A quick visual inspection takes just a minute and can prevent bigger problems.
Rinse The Fins Gently
Over time, dust and grime can build up on the condenser fins themselves. Using a garden hose on a gentle spray setting, rinse them from the inside out to dislodge dirt. Avoid using a pressure washer, which can bend the delicate fins and damage the unit.
20. Know When to Call a Pro
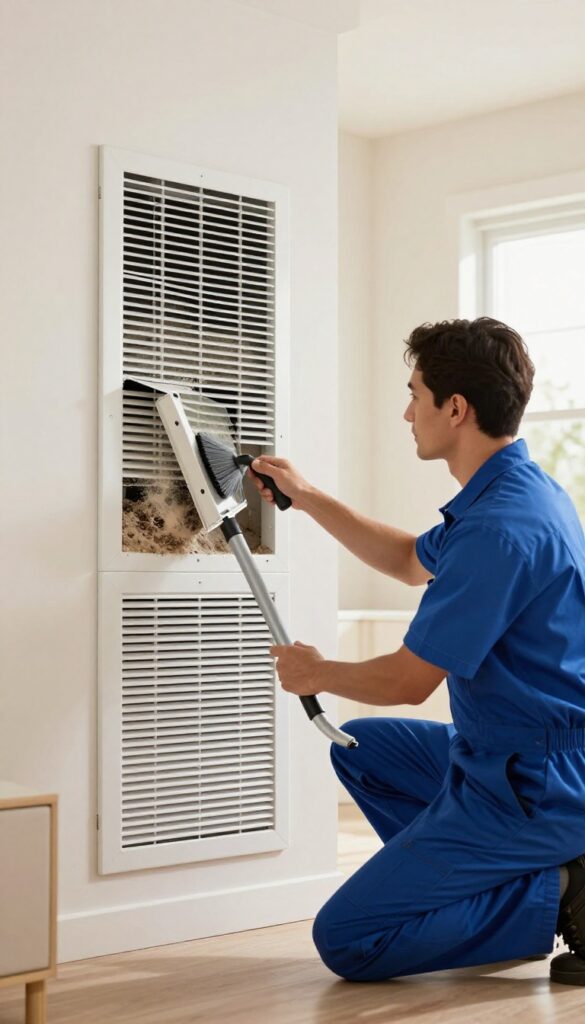
Not every air duct issue is a DIY fix. Sometimes the buildup is too severe, the problem is hidden, or you simply don't have the right tools. Knowing when to bring in a professional can save you time, money, and health headaches.
If you spot mold growing inside ducts or on vents, that's a clear red flag. Mold spores can spread quickly through your home, causing respiratory issues. A pro has the equipment to safely remove it and treat the ducts to prevent regrowth.
Another sign is heavy dust blowing from vents even after changing filters. That means debris is caked onto duct walls and needs powerful vacuuming. Unexplained allergy symptoms that improve when you leave home also point to duct contamination.
Don't wait until the problem gets worse—calling a pro early is cheaper than dealing with a full system replacement.
Visible Mold Or Mildew
Spotting black, green, or white growth inside ducts or on vent covers means mold has taken hold. DIY cleaning won't kill the roots, and disturbing it can release spores. A professional uses antimicrobial treatments and HEPA vacuums to remove mold safely.
Heavy Dust Or Debris Blowing Out
If you see dust clouds when the system kicks on, or if vents are caked with grime, your ducts are likely lined with buildup. Professional cleaning with a truck-mounted vacuum and rotary brushes dislodges and removes that debris completely.
Unexplained Health Issues
When family members develop stuffy noses, headaches, or itchy eyes only at home, dirty ducts could be the culprit. A pro can inspect for contaminants like mold, bacteria, or rodent droppings and clean accordingly.
After Renovation Or Pest Infestation
Home renovations leave drywall dust and debris in ducts. Likewise, rodents or insects can leave droppings and nests. Both require professional cleaning to remove hazardous particles and restore air quality.
FAQ
How often should air ducts be cleaned?
Most homes need professional duct cleaning every 3 to 5 years. Clean more often if you have pets, smokers, or family members with allergies or asthma.
Can I clean my air ducts myself?
You can handle basic maintenance like changing filters, vacuuming vents, and sealing small leaks. But deep cleaning inside the ducts usually requires professional equipment.
Does duct cleaning improve HVAC efficiency?
Yes. Clean ducts allow air to flow freely, reducing strain on your system. This can lower energy bills and extend the life of your HVAC equipment.
What are signs that my air ducts need cleaning?
Look for visible mold growth, excessive dust on furniture, musty odors when the system runs, or unexplained allergy symptoms among household members.
Is duct cleaning a scam?
Some companies upsell unnecessary services, but legitimate cleaning is beneficial when done correctly. Check reviews, ask for references, and avoid extremely low prices.
Conclusion
Better indoor air starts with cleaner ducts, and these 20 tips give you a clear path to fresher air. Pick a few that fit your schedule and budget—even small steps like changing filters or sealing leaks make a real difference. Your family will breathe easier, and your HVAC system will run more efficiently.
Start with the simplest tasks this week and build from there. Your lungs and your wallet will thank you.