17 Cleaning Kitchen Cabinets Wood Tips for a Gentle Shine
Your kitchen cabinets take a beating—grease splatters, sticky fingerprints, and the occasional mystery stain. But you don't need harsh chemicals to bring back their natural luster.
These 17 wood cabinet cleaning tips focus on gentle, effective methods that protect the finish while cutting through grime. From everyday dusting to tackling stubborn residue with pantry staples, each idea is designed to be realistic and budget-friendly.
No need for expensive specialty products—just simple techniques that keep your cabinets looking rich and well cared for.
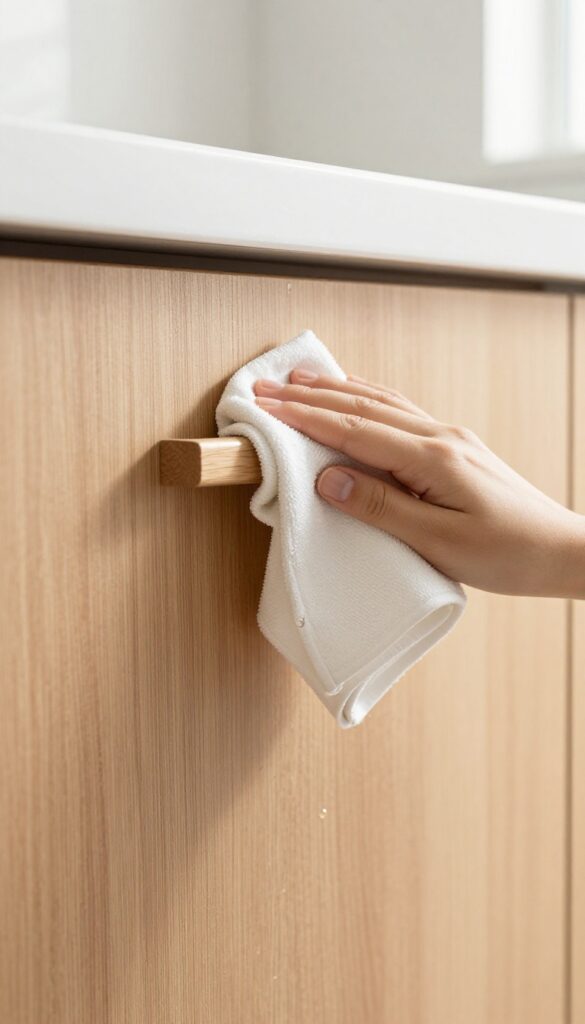
1. Dust Regularly with a Microfiber Cloth
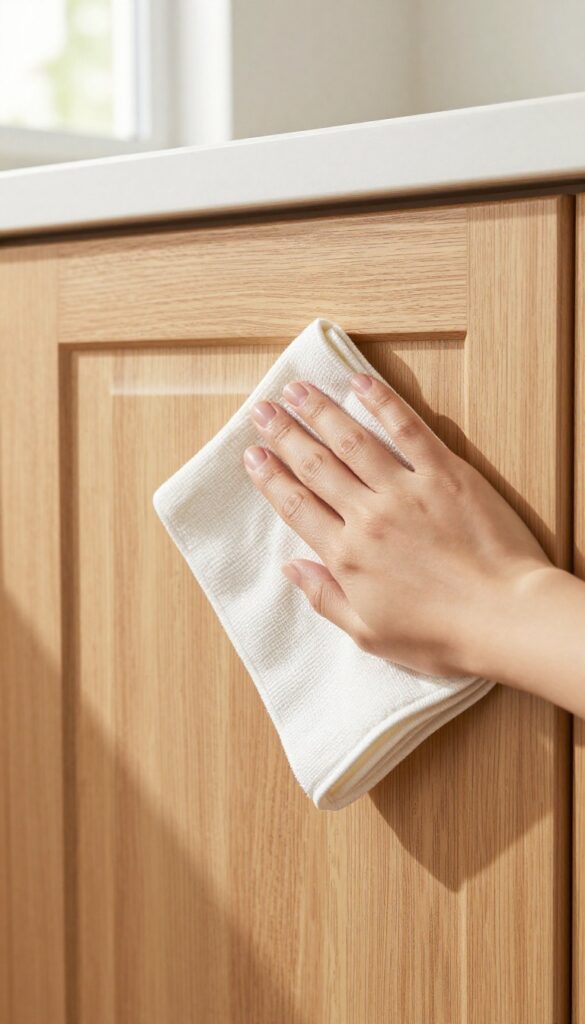
Dusting might seem too basic to mention, but it's the single most effective way to keep your wood cabinets looking fresh. A quick weekly wipe with a dry microfiber cloth prevents grime from building up into a stubborn layer that requires heavy scrubbing later. This habit also protects the wood's finish from tiny scratches caused by gritty dust particles.
Grab a clean, dry microfiber cloth and gently wipe down all cabinet surfaces—doors, frames, and edges. Microfiber traps dust instead of pushing it around, and its soft texture won't mar the wood. Pay extra attention to the areas around handles and the bottom edges where dust tends to settle.
For upper cabinets, use a step stool to reach the top panels safely. This simple routine takes just a few minutes and dramatically reduces the need for deep cleaning.
Why Microfiber Works Best
Microfiber cloths have split fibers that create a static charge, attracting and holding dust like a magnet. Unlike cotton rags, they don't leave lint behind or require any cleaning solution. For best results, use a high-quality microfiber cloth with a dense weave—cheaper ones can be less effective and may shed fibers.
How Often To Dust
Once a week is plenty for most kitchens. If you cook frequently or have open shelving, you might benefit from dusting every few days. The key is consistency—a light weekly dusting is far easier than letting dust accumulate into a visible layer that feels gritty to the touch.
Avoid These Common Mistakes
Never use a feather duster—they just scatter dust into the air and onto other surfaces. Also, skip dry paper towels, which can be abrasive and leave tiny scratches on the wood finish. Stick with a clean microfiber cloth, and wash it regularly to avoid redistributing trapped dirt.
2. Use a Gentle Dish Soap Solution for Grease
Grease buildup is the number one enemy of wood cabinets, especially near the stove. A simple dish soap solution cuts through that sticky layer without stripping the finish.
Mix a few drops of mild dish soap with warm water. Dip a soft cloth, wring it well, and wipe down greasy areas. Avoid soaking the wood to prevent water damage.
Why Dish Soap Works
Dish soap is designed to break down grease and oil. When diluted, it's gentle enough for wood finishes while still being effective. Always use a mild brand without bleach or harsh additives.
The Right Way To Wipe
Use a microfiber cloth or soft sponge—never abrasive scrubbers. Wring it out until barely damp, then wipe in the direction of the wood grain. Rinse and re-wring frequently to avoid spreading grease.
Drying Is Key
After cleaning, go over the area with a dry cloth to remove any leftover moisture. Standing water can warp wood or lift the finish, so this step is non-negotiable.
3. Try a Vinegar and Water Mix for Tough Spots
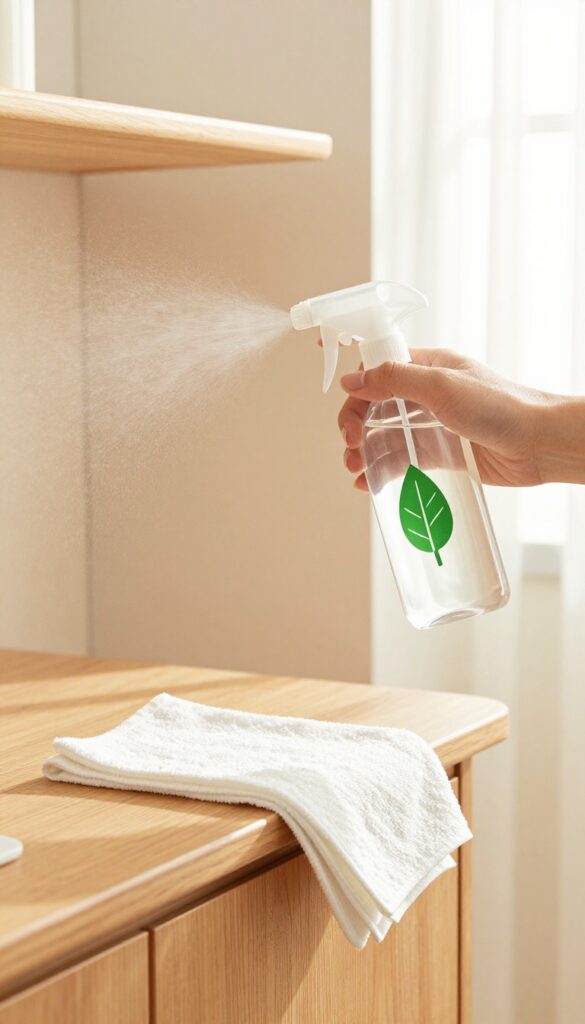
When a simple wipe-down isn't cutting it, a vinegar and water solution can break through stubborn grease without damaging the wood. White vinegar is a natural degreaser that's gentle enough for most sealed cabinets, but it's always smart to test an inconspicuous spot first. This pantry staple is cheap, effective, and leaves no harsh chemical residue.
Mix equal parts white vinegar and warm water in a spray bottle. Lightly mist the solution onto a soft microfiber cloth—never directly on the cabinet—and gently rub sticky areas. For extra stubborn spots, let the cloth sit on the spot for a minute before wiping.
Rinse with a damp cloth and dry immediately with a clean towel to prevent moisture from seeping into the wood.
Why Vinegar Works So Well
Vinegar's mild acidity cuts through grease and grime without stripping the finish. It's also non-toxic, making it safe for kitchens where food is prepared. Just avoid using it on unsealed or waxed wood, as the acid can dull the surface.
How To Apply Without Damaging The Finish
Always use a damp cloth, not a soaking wet one. Work in small sections, and wipe with the grain. After cleaning, go over the area with a dry cloth to remove any lingering moisture.
This prevents water spots and keeps the wood looking even.
When To Skip This Method
If your cabinets have a matte or oiled finish, vinegar might leave streaks or lighten the color. In those cases, stick to a mild soap and water solution or a cleaner specifically made for your cabinet type.
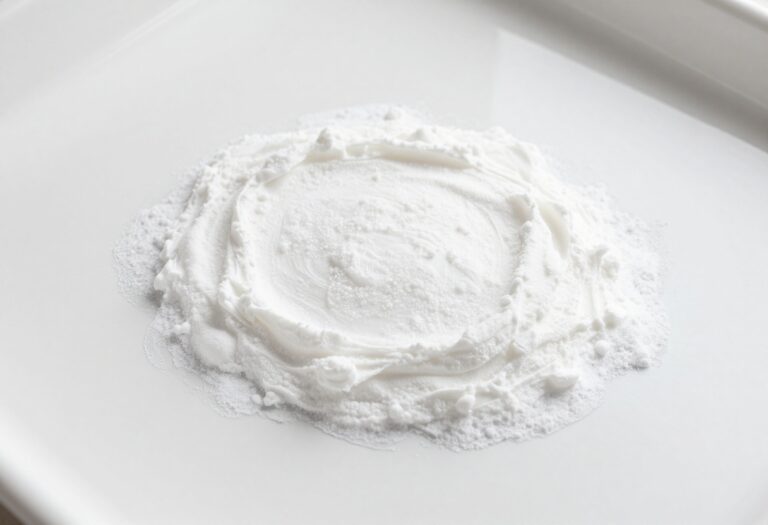
4. Baking Soda Paste for Stubborn Stains
Some stains just won't budge with a simple wipe. That's where baking soda comes in. It's a mild abrasive that can tackle tough spots without scratching the wood finish.
Mix equal parts baking soda and water to form a thick paste. Apply it to the stain using a soft cloth, then rub gently in a circular motion. The paste breaks down the gunk without damaging the surface.
Once the stain lifts, wipe the area clean with a damp cloth and dry it thoroughly. This method works great for dried-on food, sticky residue, or water marks.
Why Baking Soda Works
Baking soda is alkaline, which helps dissolve acidic stains like fruit juice or wine. Its fine particles provide just enough friction to lift grime without scratching the wood's protective coating. Plus, it's non-toxic and safe for food prep areas.
How To Apply The Paste
Start with a small amount of paste on a microfiber cloth. Test on an inconspicuous spot first. Rub gently—no need to press hard.
For stubborn spots, let the paste sit for a minute before wiping. Rinse with a damp cloth and dry immediately to prevent moisture damage.
When To Avoid This Method
Don't use baking soda paste on waxed or oiled finishes, as it can dull the surface. Also avoid it on veneer or laminate that might be damaged by abrasion. Stick to mild soap and water for those surfaces.
5. Olive Oil and Vinegar for a Natural Polish
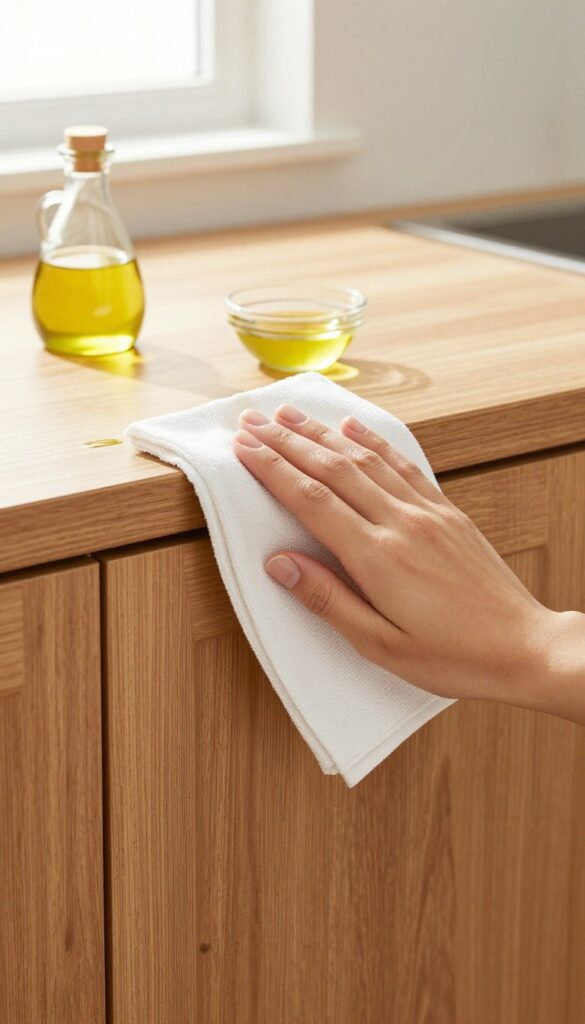
Store-bought wood polishes can be pricey and full of chemicals you don't really want near your food. A simple mix of olive oil and vinegar works just as well—and you probably already have both in your pantry. This combo cleans, conditions, and adds a soft shine without leaving a greasy residue.
The oil moisturizes the wood, preventing it from drying out and cracking, while the vinegar cuts through light grease and grime. Together, they restore the wood's natural luster. Use this polish sparingly—too much oil can attract dust.
The Perfect Ratio
Mix 1 part olive oil with 2 parts white vinegar in a small bowl. Shake or stir well before each use. The vinegar smell fades quickly as it dries.
For a light scent, add a few drops of lemon essential oil.
Application Tips
Dip a soft, lint-free cloth into the mixture and wring it out so it's damp, not wet. Wipe the cabinets in the direction of the wood grain, covering a small area at a time. Buff with a dry cloth to remove any excess and bring out the shine.
When To Use This Method
This polish is ideal for monthly maintenance on finished wood cabinets. Avoid it on unfinished or waxed wood, as the oil can soak in unevenly. Test on an inconspicuous spot first to ensure it doesn't dull the finish.
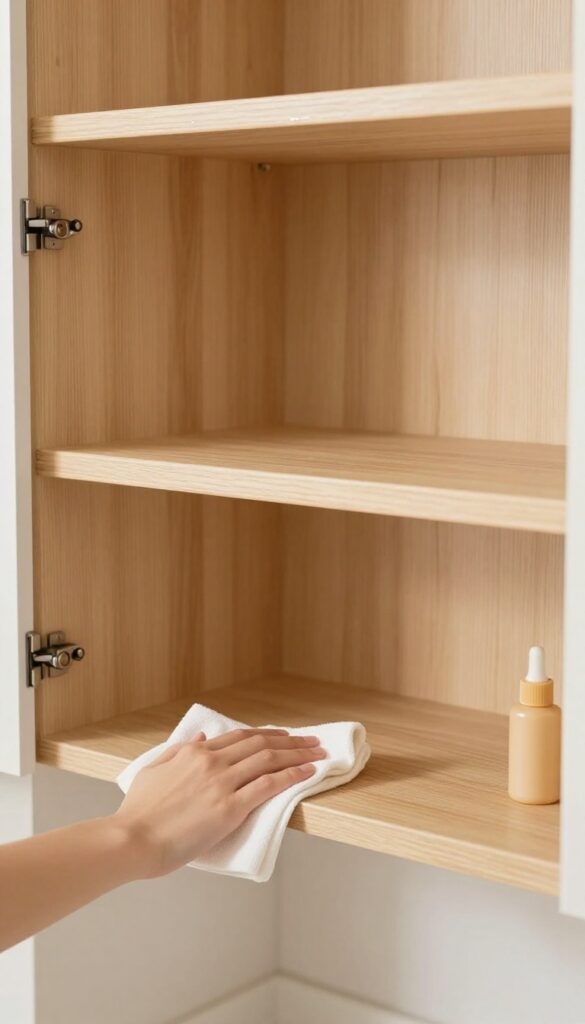
6. Mineral Oil for Dry or Dull Cabinets
Food-grade mineral oil is a simple, safe way to revive wood that's looking dry or lackluster. Unlike waxes or silicone-based polishes, mineral oil penetrates the wood fibers to restore moisture from within, leaving a natural sheen without sticky residue.
Mineral oil works best on unfinished or oil-finished wood, but it's also safe for most sealed cabinets. Always test on an inconspicuous spot first. Apply a thin layer with a soft cloth, let it soak for 10 minutes, then buff off any excess.
The wood will look richer and feel smoother immediately. Repeat every few months to maintain the luster.
Why Mineral Oil Works
Wood dries out over time due to heat, humidity changes, and cleaning products. Mineral oil fills the microscopic gaps in the wood grain, reducing dryness and preventing cracks. It's odorless, tasteless, and food-safe, making it ideal for kitchen cabinets.
How To Apply It Right
Pour a small amount of mineral oil onto a lint-free cloth—don't soak the wood. Rub it in the direction of the grain, covering all surfaces evenly. Let it sit for 10 minutes, then wipe away any oil that hasn't absorbed.
Buff gently with a clean cloth for a soft shine.
When To Reapply
Check your cabinets every couple of months. If a drop of water sits on the surface instead of beading up, it's time for another treatment. In high-use kitchens, twice a year is usually enough.
Over-oiling can attract dust, so stick to thin coats.
7. Avoid Ammonia-Based Cleaners
Ammonia might cut through grease fast, but it's a risky shortcut for wood cabinets. The chemical can strip protective finishes and leave behind dull patches or even discoloration over time. Instead of reaching for a glass cleaner or all-purpose spray with ammonia, choose pH-neutral or natural alternatives that clean effectively without compromising the wood's integrity.
Many common household cleaners contain ammonia, which can be too harsh for sealed wood surfaces. Repeated use erodes the finish, making cabinets look worn and faded. Sticking to gentle, non-ammonia formulas preserves the factory seal and keeps the wood's natural warmth intact.
Check Labels Before You Spray
Before using any cleaner, read the ingredient list. Avoid products that list ammonia, ammonium hydroxide, or quaternary ammonium compounds. Even some "natural" brands sneak in ammonia derivatives.
When in doubt, test a small hidden area first.
Natural Alternatives That Work
A simple mix of mild dish soap and warm water is safe for most wood finishes. For extra grease-fighting power, add a splash of white vinegar (diluted with water) or use a dedicated wood cleaner with plant-based surfactants. These options clean without stripping the finish.
What To Do If You Already Used Ammonia
If you've accidentally used an ammonia-based cleaner, rinse the cabinets thoroughly with a damp cloth and dry immediately. Apply a small amount of furniture polish or mineral oil to restore moisture. Avoid further ammonia exposure to prevent long-term damage.
8. Clean Cabinet Hardware Separately
Hardware often gets overlooked during cabinet cleaning, but it's a magnet for grime. Knobs and pulls collect grease and dirt from hands, and if you clean them while they're still attached, cleaner can seep into the screw holes and damage the wood over time. Taking them off is a simple step that makes a big difference.
Removing the hardware before cleaning is a game-changer. It lets you give each piece a thorough scrub without risking moisture damage to the cabinet face. Plus, it's a chance to inspect the hardware for wear or looseness.
Here's how to do it right.
Remove And Soak
Start by unscrewing all knobs and pulls. Place them in a bowl of warm water mixed with a few drops of mild dish soap. Let them soak for about 10–15 minutes.
This loosens baked-on grease and makes scrubbing way easier.
Scrub And Rinse
Use an old toothbrush to get into crevices and corners. For brass or copper hardware, a paste of baking soda and lemon juice can restore shine without harsh abrasives. Rinse each piece thoroughly under warm water to remove all soap residue.
Dry Before Reattaching
Lay the hardware on a soft towel and pat dry. Let them air-dry completely before screwing them back on. This prevents any moisture from getting trapped behind the hardware, which could lead to swelling or finish damage over time.
9. Use a Soft Toothbrush for Grooves and Details
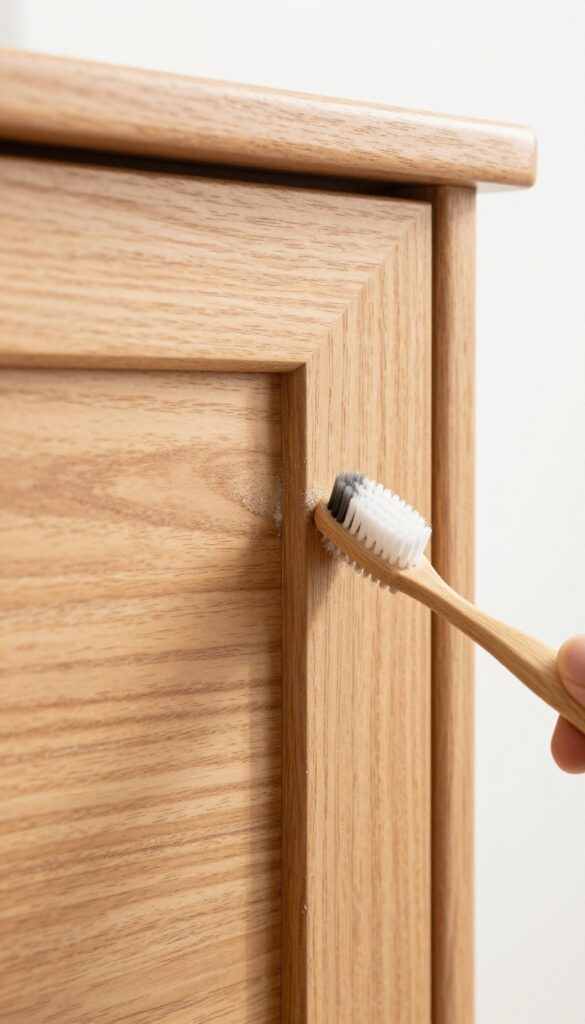
Carved details and tight corners are magnets for grime, but a regular sponge can't reach them. A soft toothbrush is the perfect tool to gently dislodge dirt from those nooks without scratching the wood. Keep one dedicated to your cleaning kit for this purpose.
When you're tackling cabinet doors with intricate patterns or raised panels, a toothbrush lets you get into every crevice. Use it dry for dusting or slightly damp for more stubborn buildup. The soft bristles are gentle enough for even delicate finishes.
Dry Brushing First
Start with a dry soft toothbrush to loosen loose dust and crumbs from grooves. This prevents turning dirt into mud when you add moisture. Brush in one direction to avoid pushing debris deeper.
Damp Cleaning For Stubborn Grime
For sticky residue or grease buildup, lightly dip the toothbrush in a mixture of warm water and a drop of mild dish soap. Wring it out well so it's barely damp. Gently scrub the grooves and details, then wipe away any moisture with a soft cloth.
Rinse And Dry Thoroughly
After cleaning, use a barely damp cloth to remove any soap residue. Follow with a dry microfiber cloth to absorb all moisture. This step is crucial to prevent water damage in those tight spaces.
10. Wipe Spills Immediately
Water rings and sticky residue set quickly. Keep a dry cloth handy and blot spills as soon as they happen. This prevents long-term damage to the wood finish.
Spills happen, but the longer they sit, the more they penetrate the wood. A quick blot with a soft cloth can save you from having to refinish a section later. Make it a habit to wipe up any liquid or food splatter right away, especially around the sink and countertops where moisture is common.
Why Speed Matters
Water and wood are not friends. When liquid sits on a wood surface, it seeps into the grain and causes swelling, discoloration, and even mold. Sticky substances like syrup or oil attract dust and can become hard to remove if they dry.
Blotting immediately minimizes contact time and keeps your cabinets looking pristine.
What To Use For Blotting
Always use a soft, lint-free cloth—microfiber works great. Avoid paper towels, which can leave fibers behind or scratch the finish if the surface is slightly rough. If the spill is greasy, follow up with a damp cloth and then dry the area thoroughly.
Make It A Habit
Keep a dedicated cloth near the sink or in a drawer so it's always within reach. Train yourself and your family to wipe spills as they happen. This simple routine will dramatically extend the life of your cabinets and keep that warm wood glow intact.
11. Steam Clean with Caution
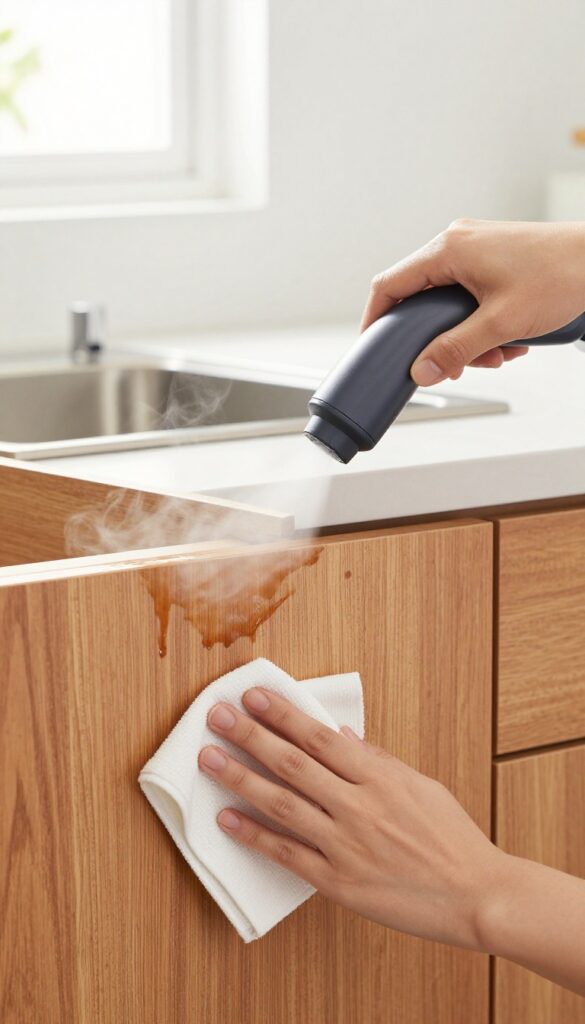
A handheld steamer can be a powerful ally against baked-on grease on sealed wood cabinets. The heat and moisture loosen grime without scrubbing, but you need to be careful. Wood and excessive moisture don't mix, so a light touch is key.
Steam cleaning works best on cabinets with a durable factory finish. Test an inconspicuous area first—if the finish bubbles or whitens, stop immediately. Keep the steamer nozzle moving constantly to avoid soaking any one spot.
After steaming a small section, wipe the area dry with a soft cloth right away. Never let moisture sit on the wood. This technique is ideal for greasy areas near the stove or handles, but skip it on unsealed or antique wood.
Choose The Right Steamer
A small handheld steamer with a nozzle attachment gives you control. Avoid large floor steamers that produce too much vapor. Look for one with adjustable steam output so you can use the lowest setting.
Work In Small Sections
Divide the cabinet front into small patches, about one square foot each. Steam one patch, then immediately wipe dry with a microfiber cloth. Move to the next section, overlapping slightly.
This prevents water from pooling.
Follow Up With Polish
After the entire surface is dry, apply a thin coat of wood polish or wax to restore shine. Steam can strip some of the finish's luster, so a quick buff brings back the glow.
12. Test Cleaners on a Hidden Spot First
Before you go all in with a new cleaner, take a moment to test it somewhere out of sight. That small step can save you from a big headache later. Different wood finishes react differently, and what works for one cabinet might dull or discolor another.
Testing on an inconspicuous area is a simple precaution that protects your cabinet's appearance. It only takes a few minutes but can prevent permanent damage. Make it a habit whenever you try a new product or homemade solution.
Why Testing Matters
Wood cabinets often have a clear coat or stain that can be sensitive to certain ingredients. Even gentle cleaners like vinegar or lemon juice can affect the finish if left too long. A quick test reveals any adverse reaction before it becomes a visible problem.
How To Test Properly
Choose an inside cabinet door or a shelf that isn't easily seen. Apply a small amount of the cleaner to a soft cloth and rub a discreet area. Wait at least five minutes, then check for any discoloration, cloudiness, or dullness.
If the spot looks fine, you're good to go.
What To Look For
After the test, examine the area under good lighting. Look for changes in sheen, color, or texture. A slight white haze or sticky residue means the cleaner is too harsh.
If everything looks normal, proceed with confidence on the visible surfaces.
13. Dry Cabinets Thoroughly After Cleaning
Once you've wiped down your cabinets, don't let them air dry. Moisture that sits on wood can seep into the grain, causing warping, swelling, or even mildew over time. A quick pass with a dry microfiber cloth removes leftover dampness and keeps the finish looking fresh.
After any wet cleaning step—whether you used a mild soap solution, vinegar spray, or a wood cleaner—always follow up with a dry cloth. This simple habit prevents water spots and protects the wood's integrity. Pay special attention to seams, edges, and areas around handles where moisture tends to pool.
A few extra seconds now can save you from costly repairs later.
Why Moisture Is Wood's Enemy
Wood is porous, so it absorbs water quickly. Even sealed cabinets can suffer if moisture sits too long. Over time, repeated exposure leads to raised grain, cloudy finish, or cracks.
Drying immediately stops that process in its tracks.
Best Cloth For The Job
Microfiber cloths are ideal because they're super absorbent and lint-free. Avoid rough towels or paper towels that can leave scratches or fibers behind. Keep a dedicated dry microfiber cloth handy specifically for this final step.
Don't Forget The Corners And Edges
Water loves to hide in crevices. Use the corner of your cloth to wick moisture out of panel grooves, trim, and the underside of cabinet doors. A quick check with your finger can confirm everything feels dry to the touch.
14. Use Furniture Wax for Extra Protection
After all that cleaning, your cabinets deserve a shield against future grime. Furniture wax does just that—it adds a thin, protective layer that repels grease and moisture while giving the wood a soft, natural sheen. Think of it as a final touch that keeps your hard work lasting longer.
Applying furniture wax is simple but requires patience. Start with clean, dry cabinets. Using a soft cloth, apply a thin layer of paste wax (beeswax or a commercial wood wax) in circular motions.
Let it haze for a few minutes, then buff with a clean cloth until shiny. The wax fills tiny pores and creates a barrier that makes future cleaning easier—grease wipes right off without soaking in.
Choosing The Right Wax
Not all waxes are equal. Paste waxes like beeswax or carnauba wax are ideal for wood cabinets. Avoid liquid polishes with silicones, which can build up and dull the finish.
Look for products labeled 'furniture wax' or 'wood wax' without added dyes or fragrances. Test in an inconspicuous spot first to ensure compatibility.
Application Tips For Best Results
Less is more. A pea-sized amount goes a long way. Work in small sections, applying wax with the grain.
Use a clean, lint-free cloth or a wax applicator. Buff firmly to bring out the shine. For high-gloss cabinets, a second thin coat after 24 hours adds extra depth.
Avoid waxing unfinished or unsealed wood, as it can absorb unevenly.
When To Reapply
Furniture wax isn't a daily routine. Depending on cabinet use, reapply every 3-6 months. Signs it's time: water no longer beads on the surface, or the wood looks dull.
Regular dusting and gentle cleaning between waxings keep the protective layer intact. Over-waxing can cause buildup, so stick to a light hand.
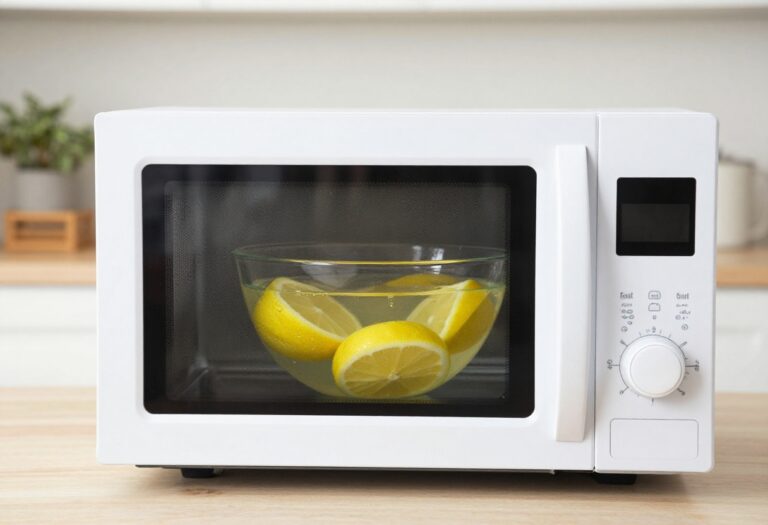
15. Baking Soda and Lemon for Odor Removal
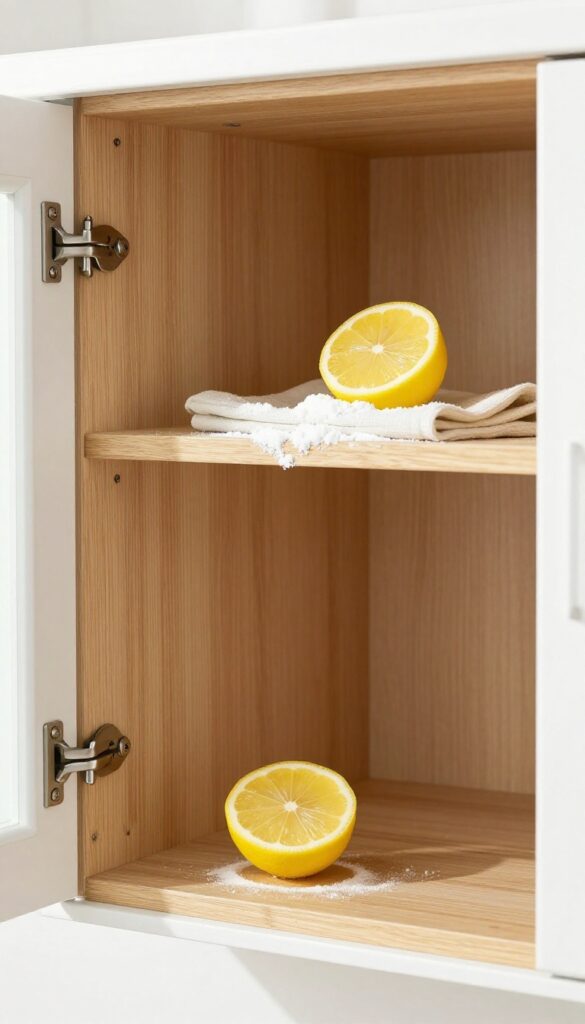
Musty smells can sneak into wood cabinets, especially in older kitchens or after a long period of humidity. Before you reach for air fresheners, try this natural duo that absorbs odors and leaves a clean citrus scent.
Baking soda is a powerhouse for absorbing musty odors without any harsh chemicals. Simply sprinkle a thin layer inside empty cabinets and let it sit overnight. The next day, vacuum or wipe it out thoroughly.
For a fresh boost, cut a lemon in half and rub the cut side over the interior surfaces—just test on an inconspicuous spot first to ensure the acidity doesn't affect the finish. Follow up by wiping with a damp cloth and drying completely. This combo tackles smells at the source and leaves a subtle, natural fragrance.
Overnight Odor Absorption
Sprinkle baking soda generously inside empty cabinets, focusing on corners and shelves. Leave it undisturbed for at least 8 hours, then vacuum or wipe clean. The powder pulls moisture and odors from the wood, leaving it fresh and dry.
Lemon Freshness Boost
After the baking soda treatment, rub a cut lemon half over the interior surfaces. The natural oils and acidity help neutralize lingering smells. Always test on a hidden area first, then rinse with a damp cloth and dry thoroughly to prevent stickiness.
16. Avoid Abrasive Scrubbers
It's tempting to reach for steel wool or a scouring pad when you spot a stubborn spot on your cabinets. But those rough materials can do more harm than good, scratching the wood finish and leaving permanent dull marks. The key to a gentle shine is choosing soft, non-abrasive tools that lift grime without damaging the surface.
Steel wool and scouring pads scratch wood finishes. Stick to soft cloths, sponges, or non-abrasive scrubby pads designed for delicate surfaces.
Why Soft Tools Win
Wood finishes are surprisingly delicate. Even a single pass with a coarse pad can create micro-scratches that dull the shine over time. Soft microfiber cloths or cellulose sponges pick up grease and dirt without leaving a trace.
For stuck-on food, let a damp cloth sit on the spot for a minute to soften it, then wipe gently.
The Right Sponge Matters
Not all sponges are created equal. Look for ones labeled "non-scratch" or "delicate surface. " Avoid sponges with embedded grit or rough scrub strips.
A soft sponge with a bit of warm, soapy water is plenty for most cabinet cleaning jobs.
When You Need A Little Extra Grip
If you're dealing with baked-on grease, try a soft-bristled brush instead of a scrub pad. A toothbrush or a dedicated cabinet brush works well in crevices and corners. Just make sure the bristles are nylon or natural—never metal.
17. Schedule a Seasonal Deep Clean
Even the best weekly wipe-downs can't replace a full reset. Every three months, your cabinets deserve a thorough deep clean that goes beyond surface-level maintenance. This isn't just about looks—it's about extending the life of the wood and catching small issues before they become big problems.
Set a recurring reminder on your phone for the start of each season. On deep clean day, empty every cabinet completely. Remove all items, shelf liners, and hardware if possible.
This gives you a blank canvas to work with and lets you inspect every inch of the interior and exterior. Wipe down all surfaces with a gentle wood cleaner or a mild soap-and-water solution. Pay extra attention to corners and edges where grease and grime accumulate.
After cleaning, apply a wood conditioner or a thin layer of mineral oil to nourish the wood and restore its natural sheen. Finally, check for any loose hinges, chipped paint, or worn seals. Tighten screws, touch up scratches with a matching stain marker, and replace any damaged hardware.
Empty And Inspect Thoroughly
Take everything out of your cabinets—dishes, pantry items, and organizers. Use this opportunity to declutter and wipe down each item before putting it back. As you work, inspect the cabinet interiors for signs of moisture, mold, or warping.
Catching these early can save you from costly repairs down the road.
Clean Every Surface Methodically
Start from the top and work your way down. Use a soft microfiber cloth dampened with a gentle cleaner. Avoid soaking the wood—damp is fine, wet is not.
For stubborn grease on cabinet doors, a mixture of warm water and a few drops of dish soap works wonders. Rinse with a clean damp cloth and dry immediately.
Condition And Protect The Wood
Once everything is clean and dry, apply a wood conditioner or a natural oil like lemon oil or mineral oil. This step replenishes moisture lost during cleaning and adds a subtle shine. Follow the product instructions carefully—usually a small amount on a soft cloth, rubbed in gently with the grain.
Buff off any excess to avoid a sticky residue.
Check Hardware And Make Adjustments
While the cabinets are empty, test all hinges and handles. Tighten any loose screws and lubricate squeaky hinges with a drop of oil. If you notice any chipped paint or scratches on the wood, now is the perfect time to touch them up.
Use a stain pen or a small brush with matching paint. This seasonal check keeps your cabinets looking their best year-round.
FAQ
Can I use bleach to clean wood cabinets?
No, bleach is too harsh for wood and can damage the finish. Stick to mild dish soap, vinegar, or baking soda solutions.
How often should I clean wood kitchen cabinets?
Dust weekly and do a gentle wipe-down every two weeks. A deep clean with conditioning is recommended every three to six months.
What's the best way to remove grease from cabinets?
A mixture of warm water and a few drops of dish soap works well. For stubborn grease, try a 50/50 vinegar and water solution.
Can I use olive oil to polish my cabinets?
Yes, but use it sparingly and mix with vinegar to avoid a sticky residue. Always buff thoroughly after application.
How do I fix water rings on wood cabinets?
Gently rub the ring with a mixture of baking soda and water (paste) or a dab of mayonnaise. Let it sit for a few minutes, then wipe clean and buff.
Conclusion
Keeping your wood kitchen cabinets clean and shiny doesn't require a cabinet full of specialty products. With a few pantry staples and a gentle touch, you can maintain their beauty for years. Remember, consistency matters more than intensity—regular dusting and prompt spill cleanup go a long way.
Pick a few tips that fit your routine and stick with them. Your cabinets will thank you with a warm, lasting glow that makes your kitchen feel fresh and inviting.