25 Kitchen Cleaning Checklist Ideas for a Fresh Reset
A clean kitchen isn't just about appearances—it's the foundation for stress-free cooking and a healthier home. But with so many surfaces to tackle, it's easy to feel overwhelmed or skip the deep cleaning tasks that really matter.
That's where a structured checklist comes in, breaking the process into manageable, high-impact steps. These 25 ideas target every corner of your kitchen, from the stovetop to the garbage disposal, so you can reset your space with confidence.
No more guessing what to clean next—just a clear path to a kitchen that feels fresh and functions better.
1. Clear and Declutter Countertops
Countertops are the first thing you see when you walk into the kitchen, and clutter can make the whole space feel chaotic. Clearing them off is the quickest way to create a sense of order and openness. It also makes wiping down surfaces much easier, so you can actually see what needs a deeper scrub.
Start by removing everything from your counters. Wipe down surfaces, then only put back essentials. This instantly makes your kitchen feel larger and cleaner.
Why It Works
Visual clutter is mentally draining. When counters are bare, your brain registers the space as clean and organized. Plus, you'll actually see crumbs and spills that need attention.
How To Do It
Pull out all appliances, canisters, and decor. Clean the countertop with a suitable cleaner. Before returning items, ask yourself: Do I use this daily?
Does it earn its spot? If not, store it elsewhere.
What To Keep Out
Keep only frequently used items like a coffee maker, toaster, knife block, and maybe a fruit bowl. Everything else goes in cabinets or drawers. Use trays or small bins to corral loose items like oils and salt.
2. Wipe Down Cabinet Fronts and Handles
Cabinet doors and handles are some of the most touched surfaces in your kitchen, yet they often get overlooked during a quick clean. Grease splatters, sticky fingerprints, and dust can build up over time, making your cabinets look dull and feel grimy. A simple wipe-down can instantly refresh the entire room and make your kitchen feel cleaner without much effort.
Start by removing any loose debris with a dry microfiber cloth. Then, mix a gentle degreaser—like a few drops of dish soap in warm water or a 50/50 vinegar and water solution—and dampen a soft cloth. Wipe each cabinet door from top to bottom, paying extra attention to areas near the stove and handles.
For stubborn grease, let the solution sit for a minute before wiping. Finally, go over handles with a disinfecting wipe or a cloth dipped in rubbing alcohol to kill germs. Dry everything with a clean towel to prevent water spots.
Choose The Right Cleaner
Avoid harsh chemicals that can strip the finish. Stick to mild dish soap, white vinegar, or a commercial kitchen degreaser safe for wood or laminate. Test on an inconspicuous spot first.
Don't Forget The Hardware
Knobs and pulls collect grime from hands. Remove them if possible and soak in warm soapy water for 10 minutes. Scrub with an old toothbrush, rinse, and dry before reattaching.
Work In Sections
Tackle one cabinet at a time to avoid missing spots. Start from the top and work downward, so drips don't land on already-clean surfaces.
3. Degrease the Stovetop and Burners
The stovetop takes the brunt of cooking splatters, and grease can build up fast. A greasy surface not only looks unappealing but can also affect how your burners perform. Giving this area a thorough degrease will make your kitchen instantly feel cleaner.
Start by removing burner grates and caps. Soak them in hot, soapy water for at least 15 minutes to loosen baked-on grease. While they soak, spray the stovetop with a degreaser or a mixture of vinegar and dish soap.
Let it sit for a few minutes, then wipe with a microfiber cloth. For stubborn spots, use a non-abrasive scrub sponge. Rinse the grates, dry them completely, and reassemble.
Soak And Scrub The Grates
Remove the grates from your burners and place them in a sink or large basin filled with hot water and a few drops of dish soap. Let them soak for 15–20 minutes to dissolve grease. After soaking, scrub each grate with a stiff brush or sponge to remove any remaining residue.
Rinse thoroughly with clean water and dry with a towel before putting them back.
Tackle Stovetop Stains
Once the grates are off, spray the stovetop surface with a degreaser. For glass or ceramic tops, use a cleaner specifically designed for them to avoid scratching. Let the cleaner sit for a few minutes to break down grease, then wipe with a soft cloth.
For stubborn, burnt-on spots, make a paste of baking soda and water, apply it to the stain, and gently scrub with a non-abrasive pad.
4. Clean the Oven Interior and Door
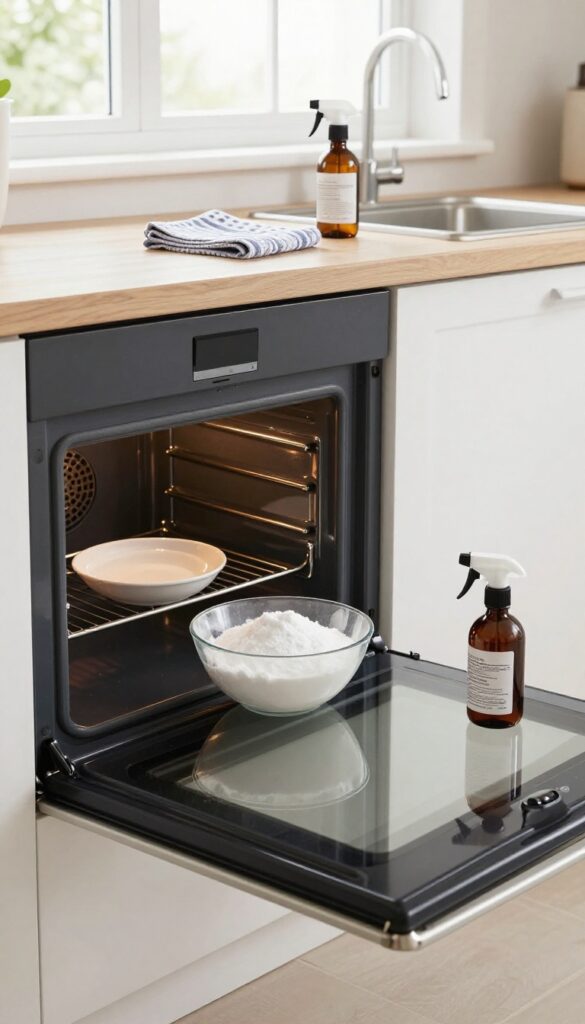
Ovens work hard, but they also collect a lot of grime. Baked-on spills and grease can affect performance and even create smoke or odors the next time you cook. Giving the interior and door a proper clean not only makes your oven look new but also helps it heat more evenly.
Start by removing oven racks and any loose debris. For the interior, a paste of baking soda and water works wonders on baked-on stains—spread it on, let it sit overnight, then wipe away. For tougher spots, a commercial oven cleaner can save time, but always follow the instructions and ventilate well.
Don't forget the oven door: a glass cleaner or vinegar solution will leave it streak-free. Finally, wipe down the gasket gently to avoid damage, and replace the racks once everything is dry.
Make A Baking Soda Paste
Mix baking soda with a little water until it forms a spreadable paste. Apply it to the interior surfaces, avoiding heating elements. Let it sit for at least 12 hours or overnight.
Then, spray vinegar over the paste to create a fizzing action, and wipe clean with a damp cloth. This method is non-toxic and effective for most messes.
Tackle The Glass Door
The glass door often gets overlooked but shows every smudge. Use a microfiber cloth with a mixture of equal parts vinegar and water, or a dedicated glass cleaner. For stubborn grease, a paste of baking soda and water applied to the glass and left for 15 minutes before wiping works well.
Buff dry for a crystal-clear finish.
Don't Forget The Racks
Oven racks can be cleaned separately. Place them in a large trash bag with ammonia (or a dishwasher tablet dissolved in hot water) and seal overnight. The next day, scrub with a brush and rinse thoroughly.
This saves elbow grease and leaves racks spotless.
5. Sanitize the Microwave Inside and Out
Microwaves can become a science experiment of dried-on splatters and mystery smells. Instead of scrubbing for ages, use steam power to do the heavy lifting. This quick method leaves your microwave spotless with minimal effort.
The Steam Cleaning Method
Fill a microwave-safe bowl with 1 cup of water and add a few lemon slices or a splash of vinegar. Microwave on high for 3 minutes. The steam loosens stuck-on food and neutralizes odors.
Let it sit for 2 minutes after the timer goes off so the steam can work its magic.
Wipe Down Every Surface
Remove the turntable and wash it with warm soapy water or place it in the dishwasher. Use a microfiber cloth or sponge to wipe the interior walls, ceiling, and floor. The grime should come off easily now.
Don't forget the door seal and the window—they collect splatters too.
Don't Skip The Exterior
The outside of your microwave also needs attention. Wipe down the top, sides, and handle with a damp cloth. For stubborn fingerprints or grease, use a mild all-purpose cleaner.
Pay extra attention to the control panel; spray the cleaner onto the cloth first, not directly onto the buttons, to avoid damage.
Final Touch For A Fresh Scent
After cleaning, leave the microwave door open for a few minutes to air out. If any odor lingers, place a small bowl of baking soda inside overnight. Your microwave will look and smell like new.
6. Scrub the Sink and Faucet
Your sink and faucet see a lot of action every day, from rinsing dishes to washing hands. Over time, grime, hard water stains, and food particles can build up, making them look dull and even smell. Giving them a proper scrub not only restores shine but also keeps your kitchen more hygienic.
It's a quick win that makes a big visual difference.
Start by clearing the sink of any dishes or debris. Sprinkle baking soda generously over the basin, then use a damp sponge to scrub in circular motions. The mild abrasiveness lifts stains and deodorizes without scratching.
Rinse thoroughly with warm water. For the faucet, mix equal parts white vinegar and water in a spray bottle. Spray the entire fixture, let it sit for a minute, then wipe with a microfiber cloth.
Buff dry for a streak-free shine. Don't forget the base and handles—those spots collect grime too.
Why Baking Soda Works Best
Baking soda is a gentle abrasive that cuts through grease and food residue without damaging stainless steel or porcelain. It also neutralizes odors, so your sink smells fresh after cleaning. Plus, it's non-toxic and cheap—a win for your wallet and the environment.
Tackling Hard Water Stains On Faucets
Hard water leaves white, crusty deposits on faucets that regular soap can't remove. Vinegar's acidity dissolves those mineral deposits easily. For stubborn spots, soak a paper towel in vinegar and wrap it around the affected area for 10–15 minutes before wiping.
Rinse well afterward to prevent any vinegar smell.
Daily Habits To Keep It Sparkling
After each use, give the sink a quick rinse and wipe the faucet with a dry cloth. This prevents water spots and grime from building up. Once a week, do the baking soda scrub to maintain that fresh look.
A little routine goes a long way.
7. Refresh the Dishwasher Filter and Interior
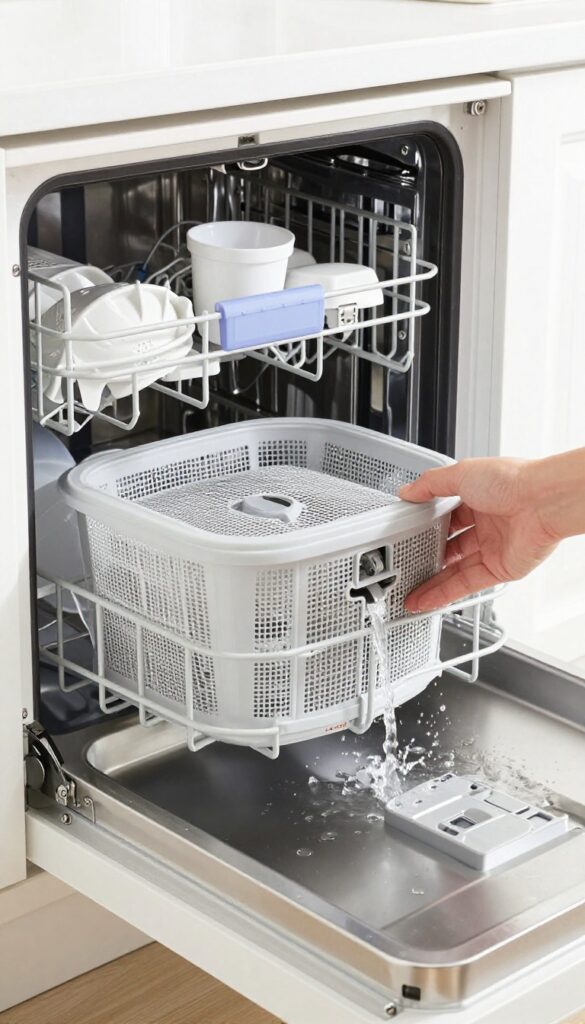
Your dishwasher works hard to get your dishes clean, but it also needs a little TLC to keep performing well. A dirty filter and grimy interior can lead to lingering odors, poor cleaning results, and even buildup that shortens the machine's life. Giving the dishwasher a quick refresh is one of those tasks that makes a big difference without taking much time.
Clean The Filter
Most dishwashers have a removable filter at the bottom of the tub. Twist it out and rinse it under hot running water, using a soft brush to dislodge any trapped food particles. A clean filter ensures water flows properly and dishes come out spotless.
Wipe Down The Interior
Check the door gasket and spray arms for debris or mold. Wipe these areas with a damp cloth and a bit of mild detergent. Pay special attention to the crevices where gunk can hide.
Deodorize With Vinegar
Place a cup of white vinegar on the top rack and run a hot water cycle. The vinegar cuts through grease, removes mineral deposits, and neutralizes odors. For extra freshness, sprinkle baking soda on the bottom before the next rinse cycle.
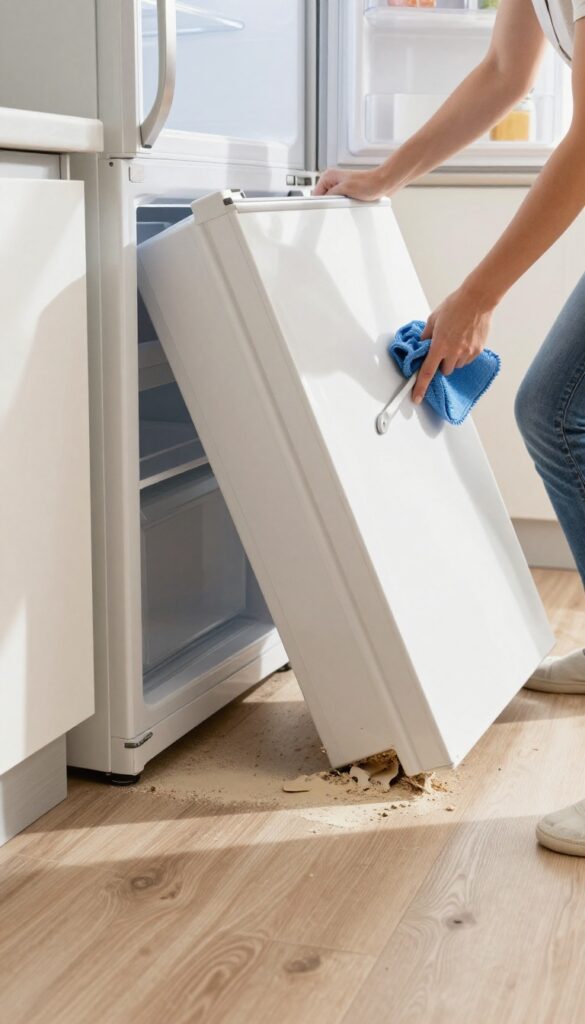
8. Wipe Down Refrigerator Shelves and Drawers
Refrigerator shelves and drawers can quickly become a sticky mess from spills and forgotten produce. A thorough wipe-down not only improves hygiene but also helps your fridge run more efficiently. Set aside 20 minutes to tackle this task, and you'll be rewarded with a crisper, more organized space.
Start by removing all food items and placing them in a cooler or insulated bag to keep perishables safe. Take out the shelves and drawers—most are removable for easy cleaning. Wash them in warm, soapy water, using a mild dish soap.
For stubborn stains or sticky residue, a paste of baking soda and water works wonders. Rinse thoroughly and dry completely before reassembling to prevent mold or mildew. While the shelves are out, wipe down the interior walls and seals with a damp cloth.
Once everything is dry, return the shelves and drawers, and organize items by category—dairy on one shelf, leftovers on another, and produce in designated drawers. This not only makes your fridge look tidy but also helps you find ingredients quickly and reduces food waste.
Removing And Cleaning Shelves
Take out all removable shelves and drawers. Wash them in warm, soapy water, using a mild dish soap. For stubborn stains or sticky residue, a paste of baking soda and water works wonders.
Rinse thoroughly and dry completely before reassembling to prevent mold or mildew.
Wiping Down Interior Surfaces
While the shelves are out, wipe down the interior walls and seals with a damp cloth. Pay special attention to corners and crevices where crumbs and spills accumulate. Use a soft brush or old toothbrush for tight spots.
Dry with a clean towel.
Organizing After Cleaning
Once everything is dry, return the shelves and drawers, and organize items by category—dairy on one shelf, leftovers on another, and produce in designated drawers. This not only makes your fridge look tidy but also helps you find ingredients quickly and reduces food waste.
9. Clean the Refrigerator Coils
Refrigerator coils are easy to forget because they're hidden away, but dirty coils make your fridge work harder and use more energy. Cleaning them twice a year can lower your electric bill and prevent costly breakdowns. It's a quick job that pays off in performance and longevity.
Why Coils Matter
The coils release heat from the fridge, so when they're caked with dust and pet hair, the compressor has to run longer to keep things cold. This extra strain shortens the appliance's life and hikes up your energy usage. Clean coils help your fridge run efficiently and quietly.
How To Clean Them
First, unplug the refrigerator to be safe. Locate the coils—usually at the back or behind a kickplate at the bottom. Use a vacuum with a brush attachment to gently remove dust and debris.
For stubborn buildup, a coil cleaning brush can reach into tight spaces. Vacuum the area around the coils too.
When To Do It
Aim for every six months, or more often if you have shedding pets. Mark it on your calendar or tie it to daylight saving time changes. If your fridge seems to run constantly or feels warm, check the coils first—they might be the culprit.
10. Organize Pantry Items and Check Expiry Dates

Your pantry can quietly become a graveyard for half-used spices and forgotten cans. A full reset not only makes cooking easier but also prevents you from accidentally using expired ingredients. This step transforms chaos into a system that actually works for you.
Start by pulling everything out and placing it on your counter or table. Wipe down all shelves, including corners where crumbs hide. As you go, check every item's expiration date—toss anything past its prime.
Group similar items together: baking supplies, canned goods, grains, snacks. Use clear, airtight containers for staples like flour, sugar, and pasta to keep them fresh and visible. Label containers with names and dates.
Arrange items so the oldest are in front, and consider adding shelf risers or bins to maximize vertical space. A well-organized pantry saves time and reduces food waste.
Empty And Deep Clean
Removing everything lets you see what you actually have and gives you a chance to scrub every surface. Use a damp cloth with mild soap, then dry thoroughly before restocking. Don't forget to vacuum or sweep the floor underneath.
Group And Contain
Sort items into logical categories—baking, canned veggies, spices, etc. Transfer open packages into clear containers to keep pests out and make contents easy to spot. Label each container with the item name and date purchased or opened.
Implement A First-in, First-out System
Place newer items behind older ones so you use up what's closest to expiring first. This simple habit cuts down on waste and ensures you're always cooking with fresh ingredients.
11. Deep Clean the Garbage Disposal
Your garbage disposal works hard grinding up food scraps, but it can quickly become a breeding ground for bacteria and foul smells. A quick rinse isn't enough to keep it fresh and functioning. This deep-cleaning method uses common kitchen ingredients to tackle grime and odors at the source.
Drop ice cubes and lemon peels into the disposal while running cold water. This sharpens blades and neutralizes odors. Follow up with baking soda and vinegar for a fizzy scrub that dislodges stuck particles, then flush with hot water.
Why Ice And Lemon Work
Ice cubes help sharpen the dull blades by knocking off residue, while lemon peels release natural oils that deodorize and leave a fresh citrus scent. The cold water keeps any fats solid so they can be flushed away instead of coating the drain.
The Baking Soda And Vinegar Boost
After the ice treatment, pour half a cup of baking soda down the disposal, followed by a cup of white vinegar. Let it fizz for five minutes to break down grease and food particles. Rinse with boiling water to clear everything out.
Preventive Maintenance Tips
Run cold water for 15 seconds before and after each use. Avoid putting fibrous foods like celery or potato peels down the disposal, and never pour grease or oil into it. A weekly lemon peel treatment keeps odors at bay.
12. Wipe Down Backsplash and Tiles
Your kitchen backsplash takes a daily beating from oil splatters, sauce spatters, and steam. Over time, that greasy film can dull the tiles and make grout lines look grimy. A quick wipe-down during your reset keeps everything looking fresh and prevents buildup from becoming a scrubbing nightmare.
Start by spraying your backsplash with a mild cleaner or a simple vinegar-and-water solution. Let it sit for a minute to loosen the grease, then wipe with a microfiber cloth. For stubborn spots, a soft sponge works well—just avoid abrasive pads that could scratch the tile.
Tackle Grout Lines
Grout is porous and loves to trap dirt and grease. Use a small brush—like an old toothbrush—dipped in baking soda paste or a grout cleaner to scrub along the lines. Rinse with a damp cloth afterward.
This step makes a huge visual difference.
Don't Forget The Area Behind The Stove
The backsplash directly behind your cooktop gets the most grease. Give it extra attention: spray generously, let the cleaner sit for a couple of minutes, then wipe and rinse. If you have a glass or metal backsplash, a streak-free glass cleaner works wonders.
13. Clean Range Hood and Filter
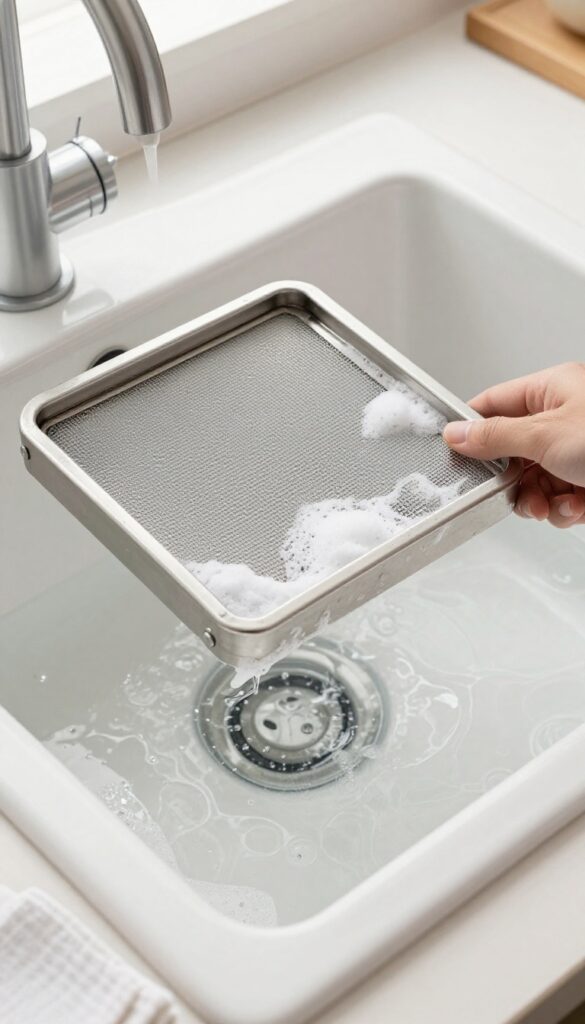
Your range hood works hard pulling smoke, steam, and grease out of the air, but that grease doesn't just disappear—it builds up on the filter and inside the hood. A clogged filter makes the fan less effective and can even become a fire hazard. Giving it a proper clean not only improves performance but also keeps your kitchen smelling fresher.
Soak The Filter In Baking Soda
Remove the metal or mesh filter from your range hood. Fill your sink or a large basin with hot water and add 1/2 cup of baking soda. Let the filter soak for 15–20 minutes to loosen the grease.
Scrub gently with a soft brush or sponge, rinse thoroughly, and let it dry completely before reinstalling.
Wipe Down The Hood Interior
With the filter removed, you have access to the inside of the hood. Use a degreasing cleaner or a mixture of vinegar and warm water to wipe down the interior surfaces. Pay special attention to the fan blades and any crevices where grease accumulates.
A microfiber cloth works well to lift grime without leaving lint.
Don't Forget The Exterior
The outside of your range hood collects dust and cooking residue just like the inside. Wipe it down with a gentle cleaner appropriate for the material—stainless steel cleaners for metal hoods, or a mild soap solution for painted surfaces. Always wipe with the grain to avoid streaks.
14. Polish Countertops (Stone or Laminate)
Countertops take a beating from spills, heat, and daily use, but the right polish can restore their shine and protect the surface. The trick is knowing what your countertop is made of—stone and laminate have very different needs. Using the wrong cleaner can dull the finish or cause permanent damage, so a little material awareness goes a long way.
Know Your Material
Stone countertops like granite, marble, or quartz are porous and sensitive to acids like vinegar or lemon juice. Laminate, on the other hand, is non-porous but can scratch easily. Check your countertop type before reaching for a cleaner—many products are formulated specifically for one or the other.
Stone Care Routine
For stone, use a pH-neutral stone cleaner or a mild dish soap and water mix. Avoid abrasive sponges or scrub pads. After cleaning, apply a stone polish or sealer designed for your specific stone to enhance shine and add a protective layer.
Buff with a soft, dry microfiber cloth for a streak-free finish.
Laminate Care Routine
Laminate countertops need a gentle touch. A spray of all-purpose cleaner or a mix of water and a few drops of dish soap works well. Wipe with a soft cloth or sponge—never use scouring pads or harsh chemicals like bleach.
Dry immediately to prevent water from seeping into seams. For extra shine, a dab of mineral oil on a cloth can bring back luster.
Daily Maintenance Tips
Wipe up spills right away, especially acidic ones on stone. Use coasters and trivets to protect from heat and moisture. Once a week, do a quick polish to keep surfaces looking fresh.
A little routine care prevents buildup and keeps your countertops in top shape.
15. Disinfect Cutting Boards
Your cutting board sees more raw meat, pungent onions, and juicy fruits than almost any other surface. But a quick rinse won't cut it—bacteria can linger in those knife scars and crevices. Here's how to give both wooden and plastic boards a deep, safe clean.
Wooden Boards: Salt & Lemon Scrub
For wooden boards, skip the soap—it can soak in and leave residue. Instead, cut a lemon in half, dip it in coarse salt, and scrub the board in circular motions. The salt acts as a gentle abrasive while the lemon's acidity kills germs.
Let it sit for 5 minutes, then rinse with hot water and dry immediately to prevent warping.
Plastic Boards: Dishwasher Or Bleach Soak
Plastic boards are more forgiving. If they're dishwasher-safe, run them on the hottest cycle with a sanitizing rinse. For a deeper clean, mix 1 tablespoon of unscented bleach per gallon of water, soak the board for 2 minutes, then rinse thoroughly.
Never mix bleach with other cleaners.
When To Replace Your Board
Even with perfect care, cutting boards wear out. Replace wooden boards once they develop deep grooves or cracks that can trap bacteria. Plastic boards should be swapped when they become excessively scratched or warped.
A good rule: if you can't get it clean, it's time for a new one.
16. Clean Small Appliances (Toaster, Blender, Coffee Maker)
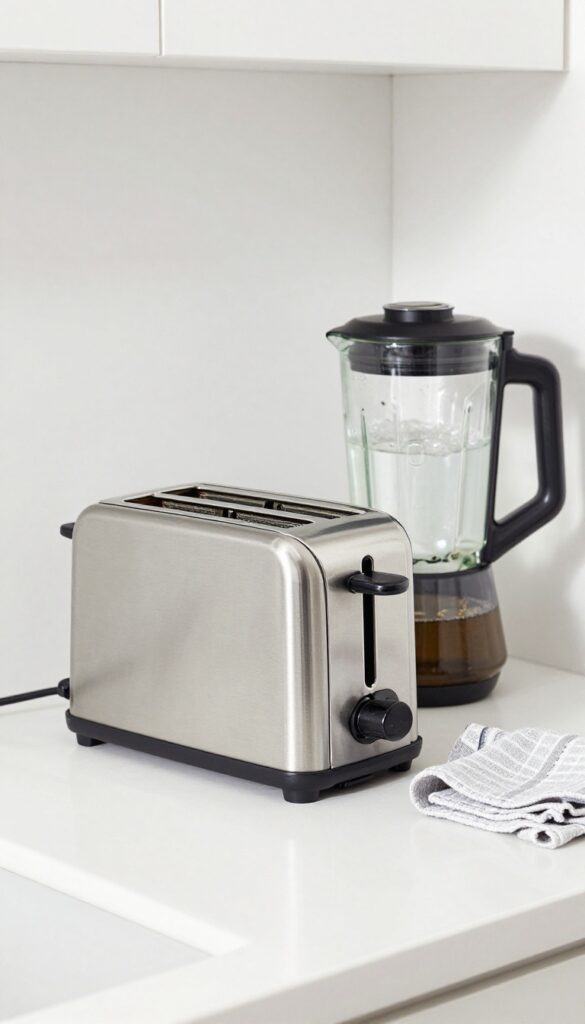
Small appliances like your toaster, blender, and coffee maker work hard every day, but they often get overlooked during a deep clean. Built-up crumbs, coffee oils, and food residue can affect performance and even become a health hazard. A quick refresh of these gadgets takes just minutes and makes a noticeable difference in both appearance and function.
Here's how to tackle each one without any fuss.
Unplug all appliances before cleaning. Wipe down exteriors with a damp cloth and mild cleaner. For the toaster, remove the crumb tray and wash it in warm soapy water.
For the coffee maker, run a cycle with equal parts water and white vinegar, then two cycles with fresh water. For the blender, fill halfway with warm water and a drop of dish soap, blend on high for 30 seconds, then rinse thoroughly. Dry all parts completely before reassembling.
Toaster: Crumbs And Grease
Start by unplugging the toaster and shaking out loose crumbs over the sink. Remove the crumb tray if possible and wash it with warm soapy water. Wipe the exterior with a damp cloth—don't forget the top where toast often leaves greasy marks.
For stubborn residue, use a paste of baking soda and water.
Blender: Blend It Clean
After unplugging, add warm water and a drop of dish soap to the blender jar. Blend on high for 30 seconds, then rinse thoroughly. For dried-on gunk, let the soapy water sit for a few minutes before blending.
Don't forget to clean the lid and the base with a damp cloth—never submerge the motor base.
Coffee Maker: Descaling And Rinsing
Unplug and remove any water reservoir parts. Run a cycle with equal parts water and white vinegar, then two cycles with fresh water to remove any vinegar taste. Wipe the exterior and the warming plate with a damp cloth.
For drip trays and carafes, wash with soapy water.
17. Wash Windows and Window Sills
Kitchen windows collect grime from cooking grease, steam, and dust, making them look dull and streaky. But clean windows let in more light and instantly brighten the whole room. Don't stop at the glass—sills and tracks often hide crumbs and mold that need attention too.
Glass Cleaning Made Simple
Mix equal parts white vinegar and warm water in a spray bottle. Spray the glass and wipe with a microfiber cloth or squeegee in an S-pattern to avoid streaks. For stubborn grease spots, add a drop of dish soap to the solution.
Sills And Tracks: The Hidden Dirt
Use a vacuum with a brush attachment to suck up loose debris from sills and tracks. Then scrub with an old toothbrush dipped in soapy water. Rinse with a damp cloth and dry thoroughly to prevent mildew.
Final Touches For A Sparkle
Buff the glass with a dry microfiber cloth to remove any remaining streaks. Open the window briefly to air out the vinegar smell. Repeat this task monthly to keep your kitchen feeling fresh and airy.
18. Sweep and Mop Floors
Floors take the brunt of kitchen messes—crumbs, spills, and sticky footprints. A quick sweep isn't enough for a true reset; you need to get into corners and under cabinets where grime hides. Follow these steps to leave your floors spotless and fresh.
Start by clearing the floor of any movable items like rugs, trash cans, or small appliances. Sweep or vacuum thoroughly, paying special attention to edges and under the fridge and stove. Then mop with a cleaner suited to your floor type—avoid harsh chemicals on hardwood or laminate.
Use a microfiber mop for best results, and let floors air dry completely before replacing items.
Pre-sweep Prep
Move everything off the floor, including chairs, pet bowls, and mats. This gives you full access to every inch. Shake out rugs outside or toss them in the wash if machine-safe.
Sweeping Or Vacuuming
Use a broom or vacuum with a hard floor setting. Focus on corners, baseboards, and under appliances. A crevice tool helps reach tight spots.
Collect debris and dispose of it.
Mopping Technique
Choose a cleaner appropriate for your flooring—pH-neutral for tile, vinegar solution for sealed hardwood, or a gentle stone cleaner. Mop in sections, rinsing the mop head frequently. Wring it well to avoid excess water.
Final Touches
Let floors dry completely before walking on them or replacing items. Open a window or turn on a fan to speed drying. Check for missed spots and do a quick touch-up if needed.
19. Clean Under and Behind Appliances
Out of sight often means out of mind, but the spaces under and behind your fridge, stove, and other movable appliances can become magnets for dust, crumbs, and even forgotten food. Pulling them out might feel like a hassle, but the payoff is a noticeably cleaner kitchen and better appliance performance. Set aside a few minutes to tackle these hidden zones, and you'll wonder why you didn't do it sooner.
Start by unplugging any appliance you plan to move. For the fridge and stove, carefully pull them straight out—enlist a helper if needed to avoid scratching floors or straining your back. Once they're clear, use a vacuum with a crevice tool to suck up dust, cobwebs, and debris along the baseboards and floor.
Follow up with a damp microfiber mop or cloth to wipe away sticky residue or grease splatters. Don't forget to clean the sides and back of the appliances themselves; a quick wipe can remove dust buildup that affects efficiency. Before pushing them back, sweep or mop the area thoroughly, then realign carefully to avoid pinching cords or damaging flooring.
Why Hidden Grime Matters
Crumbs and grease under appliances don't just look bad—they can attract pests and create unpleasant odors. Dust buildup on refrigerator coils forces the compressor to work harder, increasing energy use. A quick clean every few months helps your appliances run better and keeps your kitchen truly fresh.
Tools You'll Need
A vacuum with a crevice tool, microfiber cloths, an all-purpose cleaner or degreaser, and a long-handled duster or extendable wand make the job easier. For tight spaces, a flexible brush or an old toothbrush can help dislodge stubborn debris. Wear gloves if you're dealing with greasy buildup.
Safety Tips For Moving Appliances
Always unplug before moving. For heavy items like a fridge, slide a piece of cardboard or a furniture slider underneath to protect your floor. Watch for water lines on refrigerators with ice makers—disconnect carefully if needed.
If an appliance is too heavy, skip it and focus on cleaning what you can reach without straining.
20. Organize Utensil Drawers and Cutlery Trays
A jumbled utensil drawer makes cooking frustrating and wastes time hunting for the right spatula. Beyond the annoyance, crumbs and sticky residue can build up in the corners, attracting pests and bacteria. Taking everything out and giving the drawer a proper wipe-down is a small task that pays off every single day.
Start by pulling every single item out of the drawer. Lay them on the counter so you can see what you actually own. Wipe the drawer interior with a damp cloth and a mild cleaner, paying attention to corners and crevices.
Let it dry completely before putting anything back.
Sort And Purge
Go through the pile and separate utensils into keep, donate, and toss piles. Broken tongs, melted spatulas, and mismatched plastic spoons have no place in a functional drawer. Be honest—if you haven't used that avocado slicer in two years, let it go.
Use Dividers That Fit
Measure your drawer depth and width before buying dividers. Adjustable bamboo or plastic organizers work well for most standard drawers. Group like items together—cooking spoons on one side, measuring cups in another, and small gadgets in their own compartment.
Maintain The System
Make it a habit to return utensils to their designated spot after washing. Every few months, do a quick tidy-up to remove any items that snuck in. A little consistency keeps the drawer from turning into a chaos zone again.
21. Wipe Down Light Fixtures and Switches
Light fixtures and switch plates are some of the most touched surfaces in a kitchen, yet they rarely get a proper wipe. Grease and dust build up on overhead lights, especially above the stove and sink, making them look dingy and reducing brightness. Switch plates collect fingerprints, food splatters, and grime from hands that just handled raw chicken or sticky counters.
Dust and wipe light fixtures, especially over the sink and stove. Clean switch plates with a damp cloth to remove fingerprints.
Start With The Fixtures
Turn off the lights and let bulbs cool. Use a microfiber duster or a damp cloth with mild soap to wipe down the fixture's surface, including any glass shades. For recessed lights, a damp sponge works well.
Dry everything thoroughly to avoid water spots.
Don't Forget The Switches
Switch plates near food prep areas get surprisingly grimy. Wipe them with a cloth dipped in warm soapy water, then dry. For stubborn spots, a magic eraser works wonders.
Pay extra attention to dimmer switches, which can collect grease in their crevices.
Quick Tips For Better Results
Use a step stool or ladder to reach high fixtures safely. Clean light fixtures every few weeks to prevent heavy buildup. For switch plates, a weekly wipe keeps them looking fresh.
Consider replacing old plates with easy-clean materials like plastic or metal.
22. Deep Clean the Trash Can
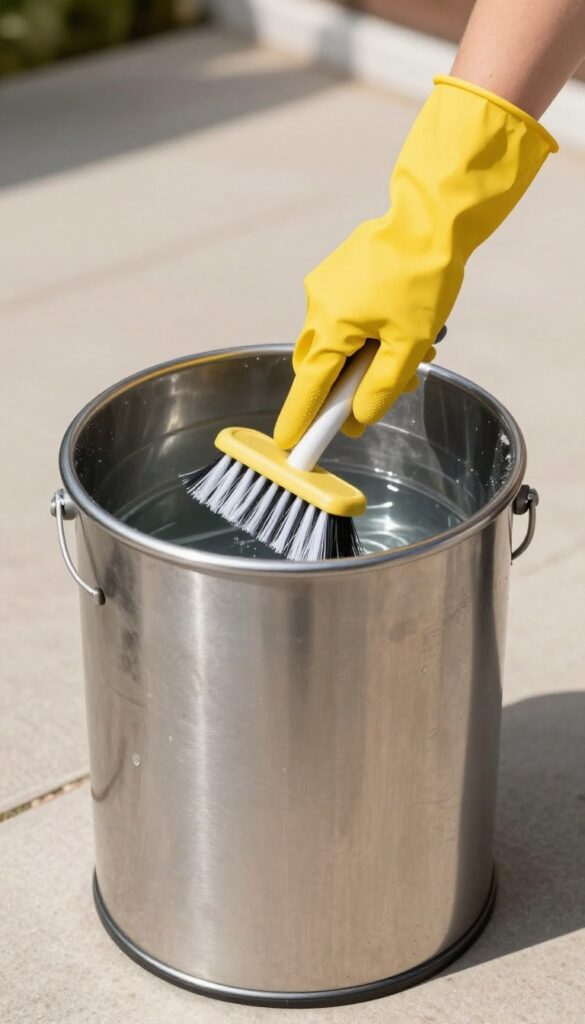
The trash can is a magnet for bacteria and odors, yet it's one of the most neglected items in the kitchen. Even with a liner, spills and leaks can create a grimy film inside. A thorough clean not only eliminates smells but also keeps your kitchen truly fresh.
Start by taking the can outside and removing the liner. Rinse it with a hose to loosen debris. Spray the interior and exterior with a disinfectant cleaner or a mix of vinegar and water.
Let it sit for a few minutes to break down grime. Scrub with a stiff brush, paying attention to the bottom and rim. Rinse thoroughly and dry with a cloth or let it air dry in the sun before adding a new liner.
Why It Matters
Even with liners, moisture and food particles can seep through, creating a breeding ground for bacteria and fruit flies. A clean can prevents cross-contamination and keeps your kitchen smelling neutral.
Pro Tips
Use a dedicated brush just for the trash can to avoid spreading germs. For stubborn odors, sprinkle baking soda inside after cleaning and let it sit before rinsing. Dry the can completely to prevent mildew.
23. Refresh Sponges and Dish Cloths
Sponges and dish cloths are workhorses in the kitchen, but they can quickly become breeding grounds for bacteria if not cleaned regularly. A musty-smelling sponge or a grimy cloth is a sign it's time for a refresh. Keeping them clean isn't complicated—just a few simple habits can make a big difference in your kitchen's hygiene.
Your sponge and dish cloth touch every plate, cup, and surface, so they need regular attention. A damp sponge left sitting on the counter is a perfect environment for germs. Similarly, dish cloths that stay wet or are used for multiple tasks can harbor odors and bacteria.
The good news is that cleaning them takes just a minute and can extend their life significantly.
Microwave Method For Sponges
Wet your sponge thoroughly, then microwave it on high for one minute. This kills most bacteria and eliminates odors. Let it cool completely before handling—it will be hot.
Never microwave a dry sponge or one with metal scouring pads, as that can cause a fire.
Dishwasher Option
If you're already running a load, toss your sponge in the dishwasher on the heated dry cycle. Place it on the top rack for the best results. This method is gentle and effective, especially if you use a sanitizing rinse.
Just make sure the sponge is secure so it doesn't fall into the heating element.
When To Replace
Even with regular cleaning, sponges wear out. Replace them every two to four weeks, or sooner if they start to smell or fall apart. For dish cloths, swap them out every few days and wash them in hot water with bleach or a sanitizing detergent.
A good rule is to have a fresh cloth for each day's use.
24. Check and Clean Seals on Doors and Drawers
Those rubber seals around your fridge and dishwasher work hard to keep cold air in and moisture out. But they're also prime real estate for mold, grime, and sticky residue that can compromise performance and even cause odors.
Inspecting and cleaning these seals is a quick win for both hygiene and efficiency. A dirty seal can prevent the door from closing properly, making your appliances work harder and increasing energy bills. Plus, mold on seals can spread to food or dishes.
What To Look For
Check for visible mold, mildew, or black spots. Also look for cracks, tears, or areas where the seal has pulled away from the door. If the seal feels brittle or doesn't spring back when pressed, it may need replacement.
How To Clean Seals Safely
Mix a solution of mild dish soap and warm water, or use a 50/50 vinegar and water spray. Dip a soft cloth or an old toothbrush into the solution and gently scrub the seal, paying extra attention to crevices. Rinse with a damp cloth and dry thoroughly to prevent moisture buildup.
When To Replace
If cleaning doesn't restore the seal's flexibility or if you notice persistent condensation inside the fridge or dishwasher, it's time for a new gasket. Replacement kits are affordable and easy to install with basic tools.
25. Create a Weekly Maintenance Schedule

Consistency beats intensity when it comes to kitchen cleanliness. A weekly maintenance schedule turns overwhelming chores into quick, manageable habits that keep your kitchen fresh without burning you out.
Start by listing daily tasks like wiping counters and sweeping floors. Then add weekly deep cleans for appliances and surfaces. Finally, schedule monthly checks for filters, seals, and hidden spots.
Stick to this routine for a kitchen that always feels reset.
Daily Quick Wipes
Every evening, spend five minutes wiping down countertops, stovetop, and sink. This prevents grime buildup and makes deeper cleans easier.
Weekly Deep Dives
Pick one day for tasks like cleaning the microwave interior, scrubbing the sink with baking soda, and wiping cabinet fronts. Rotate focus areas each week.
Monthly Check-ins
Once a month, clean the refrigerator coils, descale the coffee maker, and inspect pantry shelves for expired items. These prevent bigger problems later.
FAQ
How often should I deep clean my kitchen?
Aim for a deep clean every 3-4 months, but high-traffic kitchens may need it monthly. Daily and weekly maintenance keeps it manageable.
What's the best natural cleaner for kitchen surfaces?
A mix of equal parts water and white vinegar works for most surfaces. For grease, add a drop of dish soap. Avoid vinegar on stone countertops.
How do I remove stubborn stains from my stovetop?
Make a paste of baking soda and water, apply to stains, let sit for 15 minutes, then scrub gently with a non-abrasive sponge.
Should I clean my refrigerator coils?
Yes, every 6 months. Dirty coils make your fridge work harder, increasing energy bills and shortening its lifespan.
How can I keep my kitchen smelling fresh?
Regularly clean the garbage disposal with lemon peels, take out trash daily, and place a bowl of baking soda in the fridge to absorb odors.
Conclusion
A fresh kitchen isn't about perfection—it's about progress. By breaking down the process into these 25 checklist ideas, you can tackle one task at a time without feeling overwhelmed. Start with the areas that bother you most, and build from there.
Before you know it, your kitchen will feel like a new space, ready for cooking, gathering, and relaxing. So grab your supplies, pick a few ideas, and enjoy the transformation.