17 Microwave Cleaning Tips for a Fresh Quick Reset
Your microwave works hard, but it doesn't have to look like it. A few splatters here, a lingering smell there—before you know it, the interior feels sticky and uninviting. The good news?
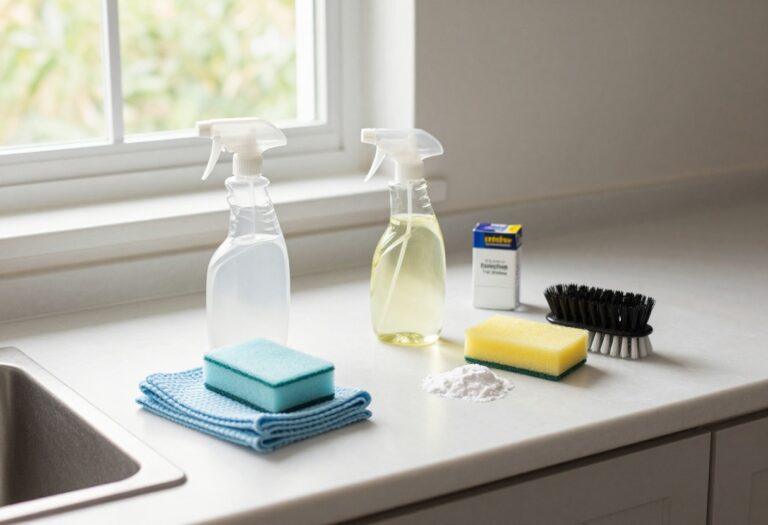
You don't need harsh chemicals or elbow grease to bring it back to life. These 17 microwave cleaning tips are designed to reset your appliance fast, using items you probably already have at home. Whether you're dealing with dried-on sauce or a funky odor, there's a simple solution waiting.
Think of this as your go-to guide for a microwave that looks and smells as fresh as the day you bought it. No scrubbing marathons required.
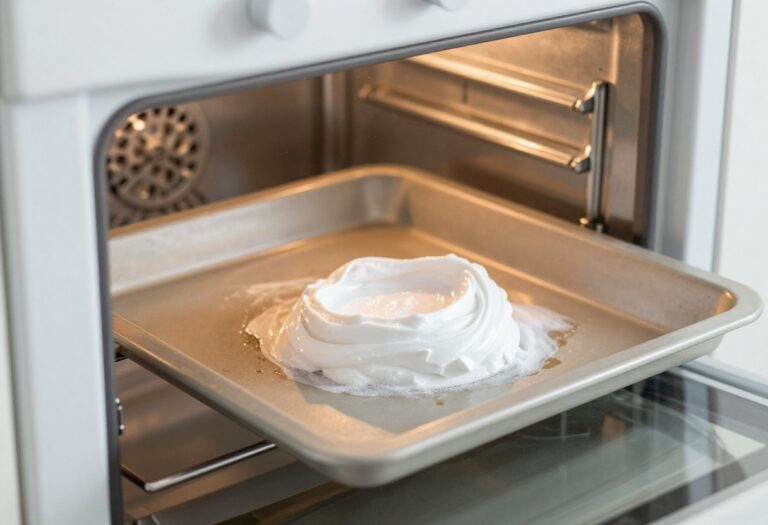
1. Steam Clean with Lemon Water
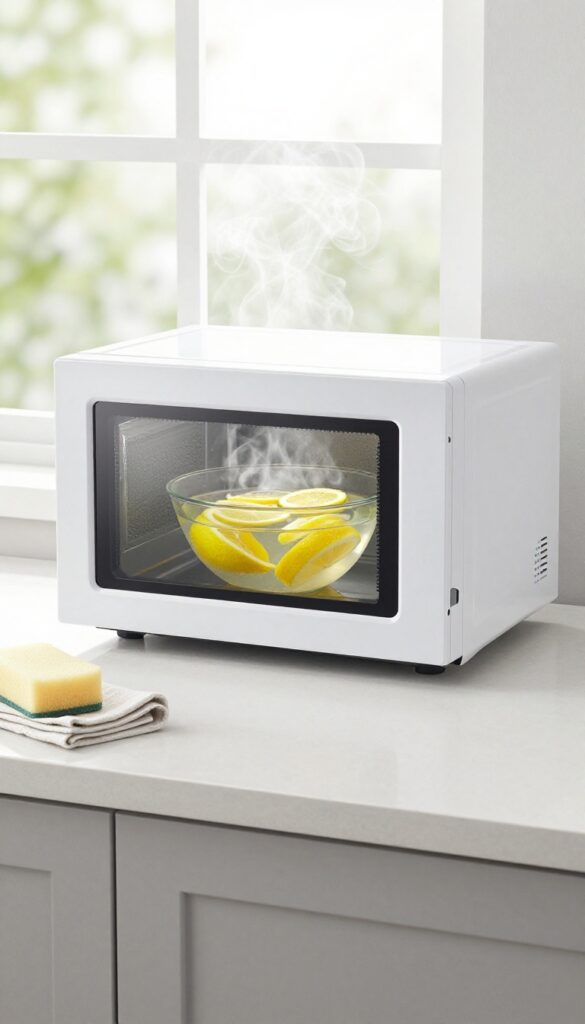
A lemon and water combo is one of the easiest ways to tackle microwave grime. The steam loosens stuck-on food while the citrus cuts through grease and leaves a fresh scent. This method works in minutes and requires almost no scrubbing.
Start by slicing a lemon in half or into thick rounds. Place the slices in a microwave-safe bowl filled with about a cup of water. Microwave on high for 3 to 5 minutes, until the water boils and the window steams up.
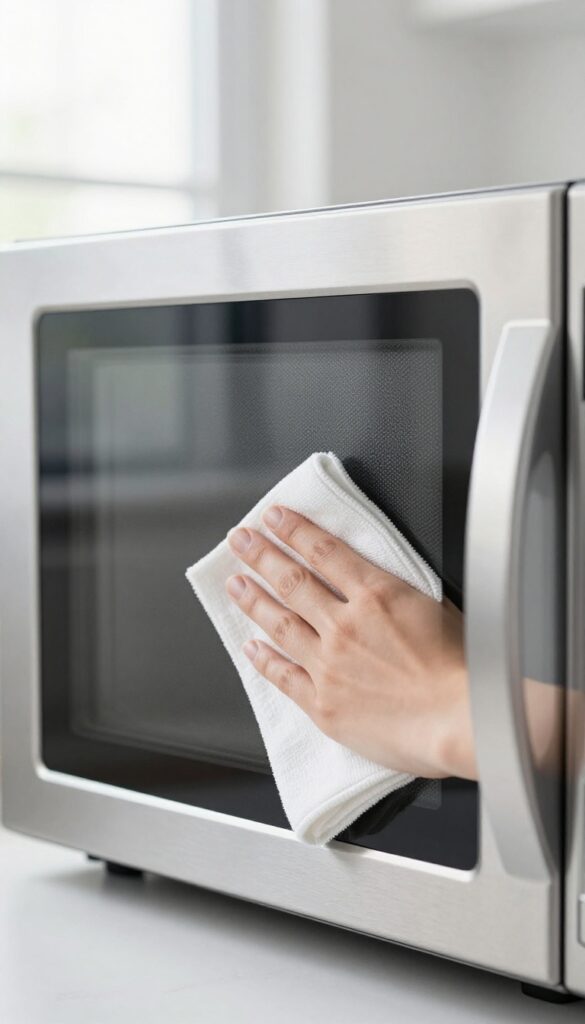
Let the bowl sit inside for another minute or two so the steam can continue working. Then carefully remove the bowl—it will be hot—and wipe down the interior with a damp cloth or sponge. The softened grime should come off easily.
For stubborn spots, dip your cloth in the lemon water for extra cleaning power.
Why Lemon Works So Well
Lemon contains citric acid, a natural cleaner that breaks down grease and mineral deposits. The heat from the microwave activates the acid, making it more effective. Plus, lemon neutralizes odors instead of just covering them up.
How Long To Microwave
Timing depends on your microwave's wattage and how dirty it is. Start with 3 minutes for light grime, then add time if needed. You'll know it's ready when the window is foggy and the inside feels warm and damp.
After The Steam
Use a microfiber cloth or soft sponge to wipe down all surfaces, including the door and ceiling. Don't forget the turntable and any removable parts—they can be washed separately with soap and water. Rinse and dry everything before reassembling.
2. Vinegar Steam for Tough Grease
When baked-on grease laughs at your regular wipe-down, it's time to bring out the big gun: white vinegar. This kitchen staple cuts through stubborn residue and neutralizes odors without leaving chemical traces. The steam method softens grime so you can wipe it away effortlessly—no scrubbing required.
Mix equal parts water and white vinegar in a microwave-safe bowl. Heat on high for 5 minutes, then let it sit for 2 minutes to let the steam work its magic. The vinegar steam loosens dried-on food and grease, making cleanup a breeze.
After the bowl cools, dip a cloth into the warm vinegar water and wipe down the interior. For extra stubborn spots, dip a sponge in the solution and scrub gently. The result: a sparkling clean microwave with zero chemical smell.
Why Vinegar Works So Well
Vinegar is acidic, which breaks down alkaline grease and mineral deposits. The steam carries the acid into crevices and corners, reaching places a cloth can't. It also kills bacteria and mold spores, leaving your microwave hygienically clean.
Step-by-step: Vinegar Steam Clean
Fill a microwave-safe bowl with 1 cup water and 1 cup white vinegar. Place it in the microwave and heat on high for 5 minutes. Let it sit undisturbed for 2 minutes so the steam condenses on surfaces.
Carefully remove the bowl (it will be hot), then wipe the interior with a soft cloth or sponge. Rinse the cloth and wipe again to remove any vinegar residue.
Tips For Best Results
Use a glass or ceramic bowl—avoid metal. If your microwave has a turntable, remove it and wipe separately. For extra tough grease, add a tablespoon of baking soda to the vinegar mixture before heating.
The fizzing action helps lift grime. Always let the microwave cool before cleaning to avoid burns.
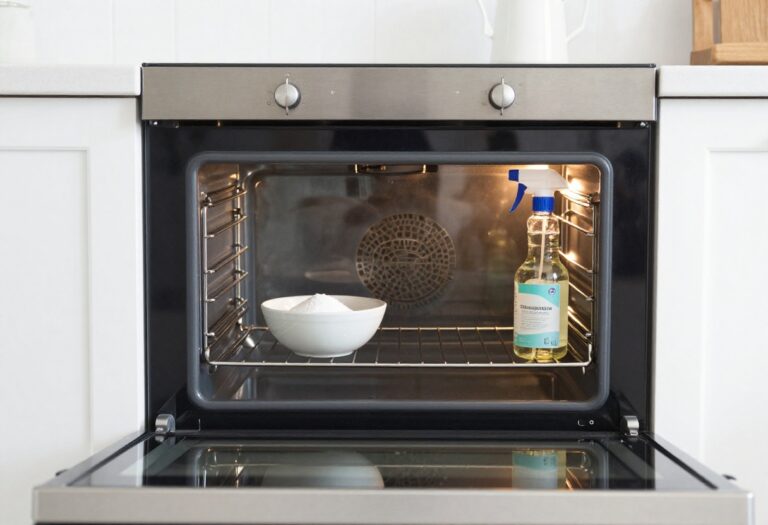
3. Baking Soda Paste for Stubborn Spots
Stuck-on food can feel impossible to remove, but baking soda is a gentle abrasive that works wonders. Mix it with a little water to form a paste, and you have a targeted cleaner that won't scratch your microwave's interior. This method is perfect for those dried-on splatters that laugh at regular wiping.
Apply the paste directly to the stubborn spots, let it sit for 10 minutes to loosen the grime, then scrub gently with a soft sponge or cloth. Rinse with a damp cloth to remove any residue. For extra tough spots, add a splash of white vinegar to the paste for more cleaning power.
Why Baking Soda Works
Baking soda is mildly alkaline, which helps break down acidic food residues and grease. Its fine particles provide gentle abrasion without scratching, making it safe for glass, ceramic, and plastic microwave interiors.
How To Make The Perfect Paste
Start with 2 tablespoons of baking soda and add water one teaspoon at a time until you get a thick, spreadable consistency. Too runny, and it won't stay on vertical surfaces; too thick, and it's hard to apply. Adjust as needed.
Pro Tip: Test First
Before applying to the entire microwave, test the paste on a small, inconspicuous area to ensure it doesn't affect the finish. This is especially important for microwaves with painted or coated interiors.
4. Dish Soap and Water Wipe Down
Sometimes the simplest method is the most effective. A quick wipe with dish soap and water is perfect for daily maintenance and keeps your microwave looking fresh without any harsh chemicals. This gentle approach works best when you tackle spills right after they happen.
Why It Works
Dish soap is designed to cut through grease and food residue without damaging surfaces. When diluted with warm water, it becomes a gentle yet effective cleaner that's safe for microwave interiors. The warm water helps loosen fresh spills, making them easier to wipe away.
Step-by-step
Fill a small bowl with warm water and add a few drops of dish soap. Dip a soft sponge or microfiber cloth into the solution, wring it out well so it's damp but not dripping. Wipe down all interior surfaces, including the door and turntable.
Then rinse the sponge with clean water and go over everything again to remove any soap residue.
When To Use This Method
This is your go-to for everyday cleaning after cooking. It's ideal for light splatters, steam marks, and minor spills. For tougher, baked-on messes, you might need a stronger method like vinegar or baking soda, but for regular upkeep, dish soap and water are all you need.
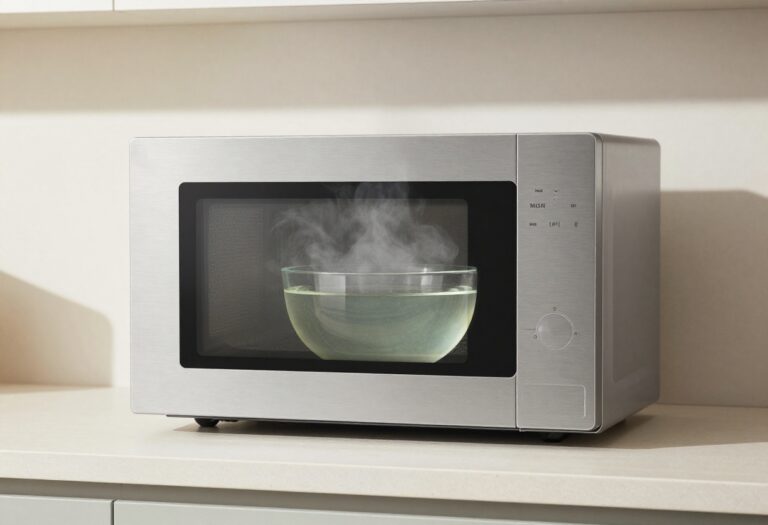
5. Microwave a Bowl of Water Alone
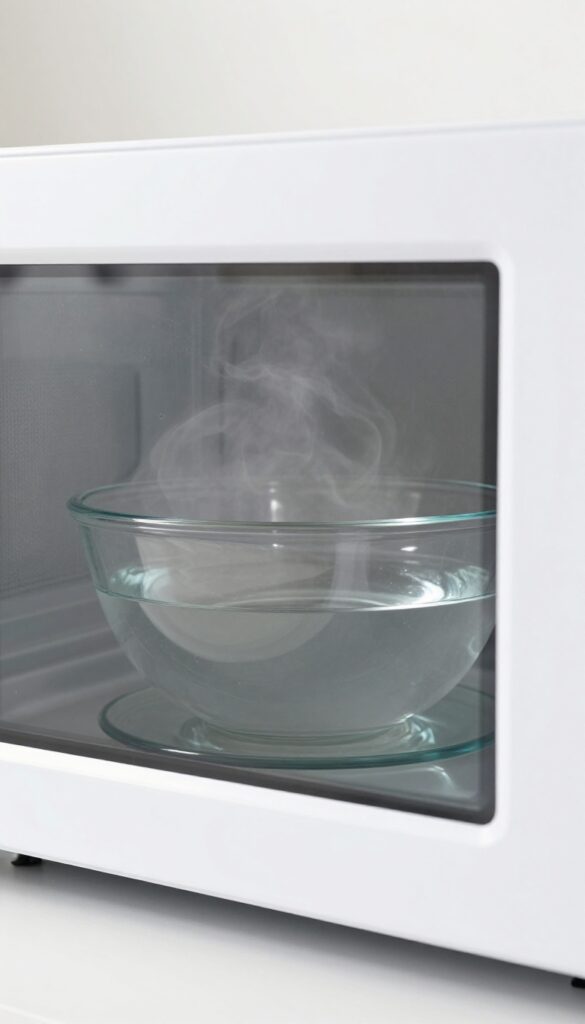
When you just need a quick refresh and don't want to mix anything, plain water is your best friend. It's almost too simple to believe, but a bowl of hot water steams away light grime and odors in minutes. No vinegar smell, no lemon scent—just clean.
This technique is perfect for daily maintenance or when you're in a rush. The steam softens dried food particles and loosens grease, so a single wipe does the job. It's also a great first step before tackling tougher stains.
Why It Works So Well
Water turns to steam at 212°F, and that steam penetrates and softens stuck-on messes. The heat also kills some bacteria and deodorizes naturally. No chemicals means it's safe for any microwave, and you can do it as often as you like.
How To Do It Right
Fill a microwave-safe bowl with 1 cup of water. Place it in the center and microwave on high for 5 minutes. Let it sit for 2 minutes after the timer ends—this lets the steam do its work.
Then carefully remove the bowl (it's hot! ) and wipe the interior with a paper towel or sponge.
When To Use This Method
Use it after every few uses to prevent buildup, or whenever you notice light splatters. It's also a great way to freshen up after reheating fish or popcorn. For tough, baked-on messes, you'll need something stronger, but for daily care, water is all you need.
6. Use a Microwave Cover to Prevent Splatters
An ounce of prevention beats a pound of scrubbing. Microwave covers are simple plastic or silicone domes that sit over your bowls and plates while heating food. They catch every pop, bubble, and splatter before it hits the walls or ceiling of your microwave.
No more baked-on tomato sauce or dried cheese crusts.
Using a cover is the easiest way to keep your microwave clean with zero extra effort. It stops splatters from forming those stubborn stains that require soaking or steaming to remove. Plus, it reduces moisture loss in your food, so leftovers reheat more evenly.
Choose The Right Cover
Look for a BPA-free, microwave-safe cover that fits your typical bowls and plates. Ventilation holes prevent pressure buildup while still trapping splatters. Silicone covers are flexible and collapse for storage, while hard plastic ones often have built-in handles.
Paper Towel Hack
No cover handy? Simply drape a paper towel over the bowl or plate before microwaving. The towel absorbs splatters and can be tossed right after.
Just make sure it doesn't touch the food or get sucked into the fan.
Clean The Cover Too
Your cover will collect gunk over time. Rinse it or run it through the dishwasher regularly. A quick wipe with soapy water after each use prevents buildup and keeps it working effectively.
7. Clean the Turntable Separately

That glass plate in your microwave might look clean, but flip it over and you'll often find a sticky film of old food and grease. The turntable gets splattered from below just as much as the walls do, yet it rarely gets the attention it deserves. Taking it out and washing it separately makes a huge difference in how fresh your microwave feels.
Removing the turntable is simple—just lift it off the rotating hub and wash it in warm, soapy water. For a deeper clean, most glass turntables are dishwasher safe (check the bottom for a label). While it's out, wipe down the plastic ring and the hub underneath with a damp cloth.
This prevents food debris from building up and causing the turntable to wobble or make noise.
Soap And Water Works Best
A quick scrub with dish soap and a soft sponge is usually enough. Avoid abrasive pads that can scratch the glass. Rinse thoroughly and dry before putting it back.
Dishwasher Option
If your turntable is dishwasher safe, place it on the top rack. The high heat and detergent will remove stubborn grease. Just make sure it's secure so it doesn't rattle against other dishes.
Don't Forget The Hub
The plastic hub and the floor underneath collect crumbs and spills. Wipe them with a damp cloth or a vinegar-water mix. This step is often overlooked but essential for a truly clean microwave.
8. Deodorize with Coffee Grounds
Even after a thorough wipe-down, some odors just won't quit. Coffee grounds are a natural deodorizer that can absorb stubborn smells without any scrubbing or heating. It's a zero-effort trick that leaves your microwave smelling subtly like a café.
Place a small bowl of fresh, dry coffee grounds inside your microwave and leave it overnight. The grounds act like a sponge, pulling in odor molecules from the air. By morning, any lingering smells—from fish to burnt popcorn—will be noticeably reduced.
No heating required, so there's no risk of a mess. Just toss the grounds afterward or reuse them in your garden.
Why It Works
Coffee grounds have a large surface area and porous structure that traps odor particles. Unlike air fresheners that mask smells, coffee grounds actually absorb them. The natural coffee aroma is a bonus—it's pleasant but not overwhelming.
Best Practices
Use fresh grounds for maximum absorption—used grounds still have some moisture and less surface area. Spread them in a shallow dish to expose more surface area. Leave the microwave door closed overnight for best results.
If the smell is strong, refresh the grounds after 24 hours.
When To Use This Method
This is perfect for after cooking pungent foods like fish, curry, or broccoli. It's also great for periodic maintenance—do it once a week to keep your microwave smelling fresh. Pair it with a quick wipe-down for a complete reset.
9. Wipe Down the Door and Seals
The microwave door and its rubber seals are prime hiding spots for crumbs, grease, and dried-on splatters. Over time, these residues can cause unpleasant odors and even prevent the door from sealing properly. A quick wipe-down of these areas is a simple step that makes a big difference in both cleanliness and performance.
Why The Seals Matter
The rubber gasket around the door creates a tight seal that keeps microwaves inside. When food particles build up there, the seal can weaken, leading to energy loss and potential safety issues. Regular cleaning ensures the door closes snugly and your microwave runs efficiently.
How To Clean Without Damage
Use a soft cloth or sponge dampened with warm water and a drop of mild dish soap. Gently wipe the entire door surface, including the handle and the rubber gasket. Avoid abrasive scrubbers or harsh chemicals, as they can damage the seal.
For stuck-on bits, let the soapy cloth sit on the spot for a minute before wiping.
Don't Forget The Crevices
The hinges and the gap between the door and the microwave body often collect grime. Use a cotton swab or an old toothbrush dipped in soapy water to reach these tight spaces. A final pass with a dry cloth removes any moisture and prevents streaks.
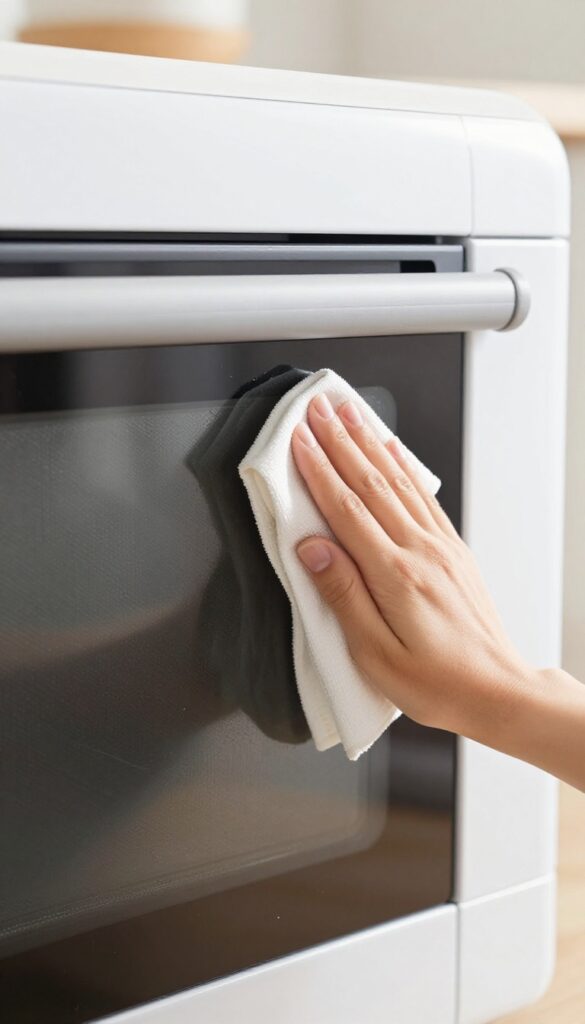
10. Clean the Exterior with Glass Cleaner
The outside of your microwave collects fingerprints, grease splatters, and dust just as fast as the inside. But many people forget to give it the same attention. A quick wipe with glass cleaner leaves the surface streak-free and looking like new.
Spray glass cleaner on a microfiber cloth and wipe the outside. Avoid spraying directly to prevent liquid from seeping into vents. This method works on stainless steel, black, and white finishes without leaving residue or damaging the surface.
Why Glass Cleaner Works
Glass cleaner is formulated to cut through grease and grime without harsh scrubbing. It evaporates quickly, so you don't have to worry about streaks or moisture sitting on the surface. Plus, it's gentle enough for daily use.
Best Practices For Different Finishes
For stainless steel, use a non-ammonia glass cleaner to avoid discoloration. On matte or painted surfaces, test a small spot first. Always use a clean microfiber cloth to prevent scratching.
Don't Forget The Handle And Buttons
The handle and control panel are high-touch areas that collect bacteria and grime. Wipe them gently with the same cloth, but avoid saturating the buttons. A dry corner of the cloth can buff away any leftover streaks.
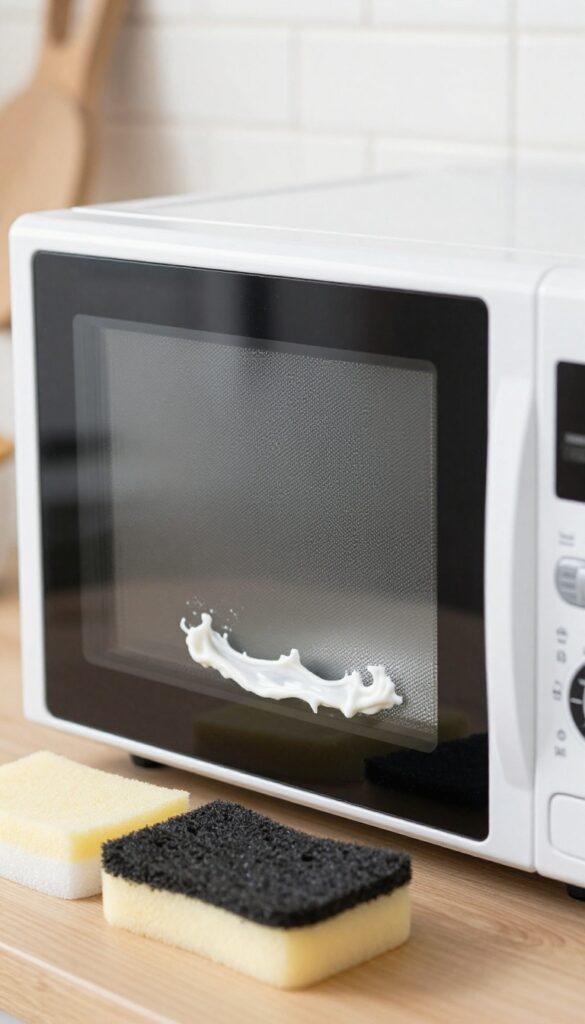
11. Use a Magic Eraser for Stubborn Marks
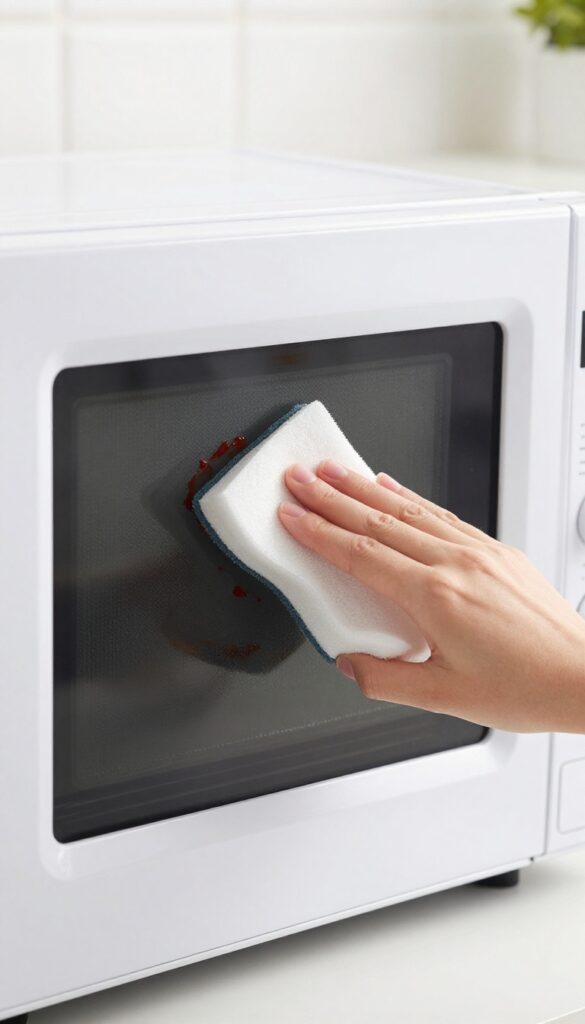
Sometimes a simple sponge and soap just won't cut it. Those baked-on splatters and crusty stains that have been reheated multiple times can feel permanent. That's where a melamine sponge, like a Magic Eraser, comes in handy.
Dampen a melamine sponge (like Magic Eraser) and gently rub baked-on stains on interior walls. Rinse area with water afterward.
How It Works
Melamine foam acts like ultra-fine sandpaper, lifting stuck-on grime without scratching the microwave's surface. It's especially effective on dried cheese, sauce splatters, and grease spots that won't budge with regular cleaners.
Step-by-step
First, dampen the sponge until it's soft but not dripping. Gently rub the stained area in small circles—no need to press hard. You'll see the mark lift away almost instantly.
Once done, wipe the area with a clean, damp cloth to remove any residue.
Important Tips
Never use a dry melamine sponge—it can be too abrasive. Test on a small hidden spot first if you're worried about finish. Avoid using on the microwave's control panel or any printed surfaces, as it can remove lettering.
12. Steam Clean with Orange Peels
Orange peels aren't just for composting or zest—they're a secret weapon for freshening up your microwave. The natural oils in the peel release a bright citrus scent when heated, cutting through lingering food odors. Plus, the steam helps loosen stubborn grime so you can wipe it away with minimal effort.
Save your orange peels after juicing or snacking. Place a handful in a microwave-safe bowl filled with about a cup of water. Microwave on high for three minutes, then let it sit for another minute so the steam can work its magic.
Carefully remove the bowl (it will be hot), and wipe down the interior with a damp cloth. The citrus oils will leave behind a fresh, clean scent.
Why Orange Peels Work
Citrus peels contain natural oils like limonene, which are excellent at cutting through grease and neutralizing odors. When heated, these oils become volatile and spread throughout the microwave, attacking stuck-on food particles. The steam also softens dried spills, making them easier to wipe off without scrubbing.
Best Peels To Use
Any citrus peel works—oranges, lemons, limes, or grapefruit. Orange peels tend to have a stronger, sweeter scent that lingers nicely. Use fresh peels for maximum oil content; dried peels will still add some fragrance but won't release as much steam-cleaning power.
Tips For Best Results
For tougher grime, add a splash of white vinegar to the water. The vinegar boosts cleaning power while the orange peels mask the smell. After microwaving, leave the door closed for a few extra minutes to let the steam penetrate.
Then wipe from top to bottom so drips don't re-soil clean areas.
13. Tackle the Ceiling with a Sponge
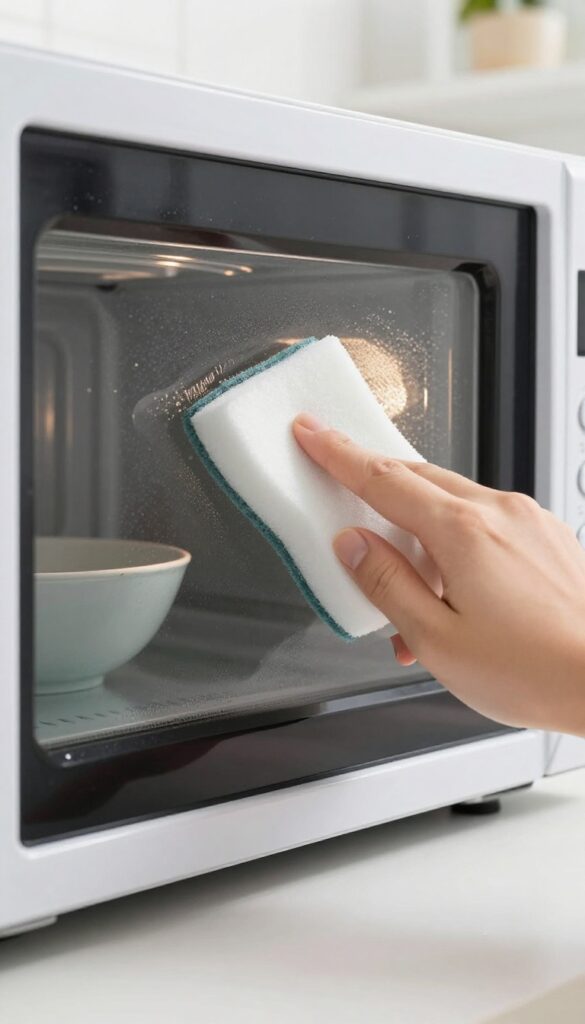
When you clean your microwave, the ceiling is probably the last place you think to wipe. But that's where steam and splatters love to settle, forming a stubborn film over time. A quick pass can make a big difference in how fresh your microwave feels.
The microwave ceiling is easy to overlook because it's out of your direct line of sight. However, every time you heat something, steam rises and deposits grease and food particles up there. If you don't address it regularly, that layer can become hard to remove and even start to smell.
The fix is simple: after steaming a bowl of water or vinegar solution, grab a sponge on a stick or use a step stool to reach the ceiling. Wipe it down while it's still warm and damp, and you'll be amazed at how much grime comes off. Make this a regular part of your cleaning routine, and your microwave will stay fresher longer.
Why The Ceiling Gets Grimy
Every time you microwave something with moisture, steam rises and condenses on the ceiling. That condensation carries tiny particles of food and grease, which then dry and bake on. Over time, this creates a sticky, discolored layer that can even affect the microwave's performance.
The Best Tools For The Job
A long-handled sponge or a microfiber cloth attached to a spatula works wonders. You can also use a step stool to get a better angle. The key is to use a damp cloth with a bit of dish soap or vinegar solution, and wipe in one direction to avoid smearing.
Make It A Habit
After each deep clean, take an extra 30 seconds to wipe the ceiling. If you do it regularly, you'll prevent buildup and avoid the need for heavy scrubbing. A quick wipe after steaming is all it takes.
14. Remove Odors with Vanilla Extract
Microwaves have a funny way of holding onto smells. One round of fish or burnt popcorn, and the whole appliance smells like a science experiment. You can scrub every surface, but the odor often lingers in the air vents and walls.
That's where vanilla extract comes in. A couple of minutes in the microwave and your kitchen will smell like a bakery instead of a cafeteria.
Vanilla extract is a natural deodorizer that works by releasing a strong, pleasant scent that overpowers and neutralizes other odors. The heat helps the vanilla molecules circulate and absorb into the microwave's surfaces. This method is quick, easy, and leaves no chemical residue.
What You'll Need
You only need two things: a microwave-safe bowl and vanilla extract. Pure vanilla extract works best, but imitation vanilla will also do the trick. Fill the bowl with about one cup of water and add one teaspoon of vanilla extract.
No need to measure precisely—a generous splash is fine.
Step-by-step Instructions
Place the bowl in the center of the microwave. Heat on high for two minutes. The water should come to a boil and steam up the interior.
After the timer goes off, leave the door closed for another five minutes. This allows the steam and vanilla scent to penetrate every corner. Then open the door and wipe down the interior with a soft cloth.
The smell will be noticeably fresher.
Extra Tips For Stubborn Odors
If the smell is really strong, you can repeat the process or leave the bowl inside for a longer rest time—up to 30 minutes. For a variation, try adding a few drops of lemon juice or a cinnamon stick along with the vanilla. You can also use this method after cleaning to give your microwave a final fresh touch.
15. Clean the Vents and Air Filter
Most people forget that microwaves need to breathe. Vents and air filters trap grease, dust, and food particles over time, which can reduce efficiency and even cause overheating. Giving them a quick clean not only helps your microwave run better but also prevents funky smells from circulating back into your kitchen.
Check your microwave's manual to locate the vent and filter—it's often behind a small grille on the bottom or back. Remove the filter carefully; some are washable, others need replacement. If it's washable, soak it in warm, soapy water for 10 minutes, then scrub gently with a soft brush.
Rinse thoroughly and let it dry completely before reinstalling. For the vent area itself, use a damp cloth or a vacuum with a brush attachment to remove loose debris. Do this every few months to keep airflow optimal and reduce grease buildup.
How To Access The Filter
Not all microwaves have the same setup. Look for a panel on the bottom or back of the unit—often held by a few screws or clips. Some over-the-range models have filters behind the top grille.
If you can't find it, check the manual or search online with your model number.
Wash Vs. Replace
Most metal mesh filters are dishwasher-safe or can be hand-washed. Charcoal filters, common in recirculating models, cannot be washed and need replacing every 6–12 months. If your filter looks warped, torn, or heavily clogged, swap it out for a new one.
Don't Forget The Vents
While the filter is out, use a microfiber cloth or a small brush to wipe down the vent opening. Grease and dust accumulate here too. A quick pass with a degreaser or all-purpose cleaner will keep the area fresh and prevent buildup.
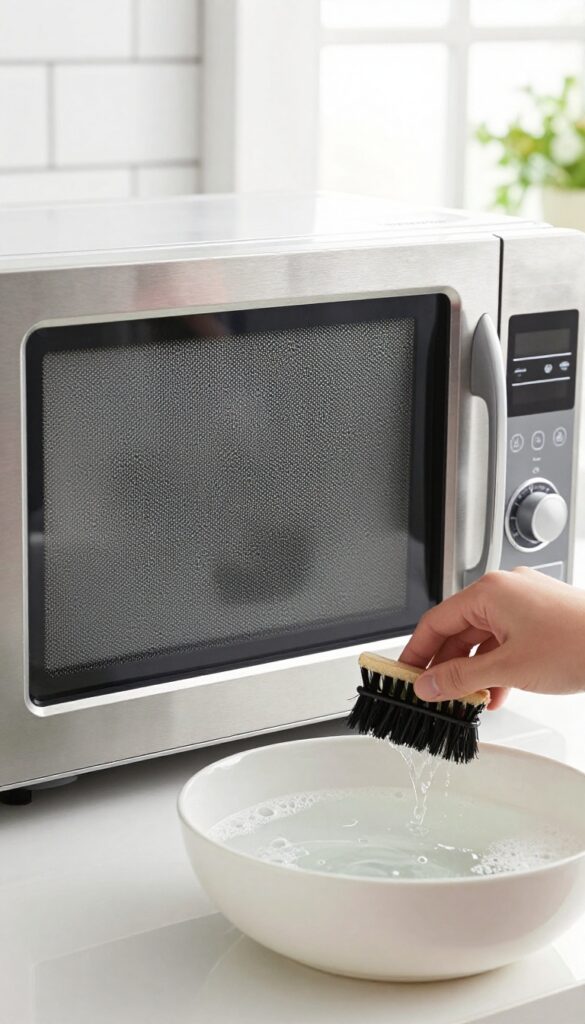
16. Use a Toothbrush for Crevices
Your microwave's exterior has plenty of nooks and crannies that a sponge just can't reach. Buttons, the display bezel, and the edges around the door handle collect grime over time. An old toothbrush dipped in soapy water is the perfect tool to tackle those tight spots without scratching anything.
Why A Toothbrush Works Best
The bristles are soft enough to avoid scratching plastic or glass, yet firm enough to dislodge stuck-on food and grease. The small head lets you get into grooves and around buttons without oversaturating sensitive electronics.
How To Clean The Control Panel
Dip the toothbrush in warm, soapy water and shake off excess. Gently scrub around each button, the display screen, and any crevices. Use a dry microfiber cloth to wipe away loosened dirt and moisture.
Avoid spraying liquid directly onto the panel.
Don't Forget The Door Seal And Handle
The rubber gasket around the door and the underside of the handle are prime spots for buildup. Use the toothbrush to sweep along these areas, then wipe with a damp cloth. This prevents sticky residue from attracting more dirt.
17. Final Polish with a Microfiber Cloth
You've scrubbed, steamed, and wiped down every surface. But before you call it done, there's one last step that makes all the difference. A quick final polish with a microfiber cloth removes any lingering streaks, water spots, or fingerprints, leaving your microwave looking like it just came out of the box.
Why Microfiber Works Best
Microfiber cloths are designed to trap dust, grease, and moisture without scratching surfaces. Unlike paper towels that can leave lint or cotton cloths that might smear, microfiber lifts residue away cleanly. The fine fibers also create a static charge that attracts dust particles, so you get a streak-free shine every time.
How To Do The Final Buff
Start with a completely dry microfiber cloth. Work in small circular motions, starting from the top of the microwave and moving down. Pay extra attention to the door, handle, and control panel—these high-touch areas tend to show smudges.
For stubborn streaks, lightly dampen the cloth with water, then follow up with a dry section.
Keep A Dedicated Cloth Handy
Designate one microfiber cloth just for microwave polishing. Wash it separately from other cleaning rags to avoid transferring grease or lint. A clean cloth ensures you're not just moving dirt around.
Toss it in the laundry after a few uses, and it'll stay effective for months.
FAQ
How often should I clean my microwave?
For best results, wipe down the interior after each use and do a deep steam clean once a week. This prevents buildup and odors.
Can I use bleach to clean my microwave?
Avoid bleach as it can damage the interior coating and leave harmful residues. Stick to mild soap, vinegar, or baking soda.
Why does my microwave smell bad even after cleaning?
Odors can linger in the vent filter, turntable, or door seals. Clean these areas separately and try deodorizing with lemon or baking soda.
Is it safe to microwave vinegar?
Yes, white vinegar is safe to microwave. The smell dissipates quickly, and it's an effective natural cleaner for grease and odors.
How do I clean a microwave without scrubbing?
Use the steam method: heat a bowl of water with lemon or vinegar for 5 minutes, then simply wipe away loosened grime with a cloth.
Conclusion
A sparkling microwave doesn't require harsh chemicals or endless scrubbing. By weaving a few of these tips into your routine, you'll keep your appliance fresh and your kitchen feeling clean. Start with the trick that solves your biggest annoyance—whether it's stuck-on food or lingering odors—and build from there.
Small habits add up fast, turning a dreaded chore into a quick win. Your microwave works hard for you, so give it a little love and enjoy the payoff every time you hit start.