23 Microwave Cleaning Hacks for Splatter and Odor
You nuke a bowl of soup, and three seconds later, the microwave looks like a crime scene. Splatters cling to the ceiling, and that lingering smell of burnt popcorn just won't quit. It's a universal kitchen struggle, but the fix is easier than you think.
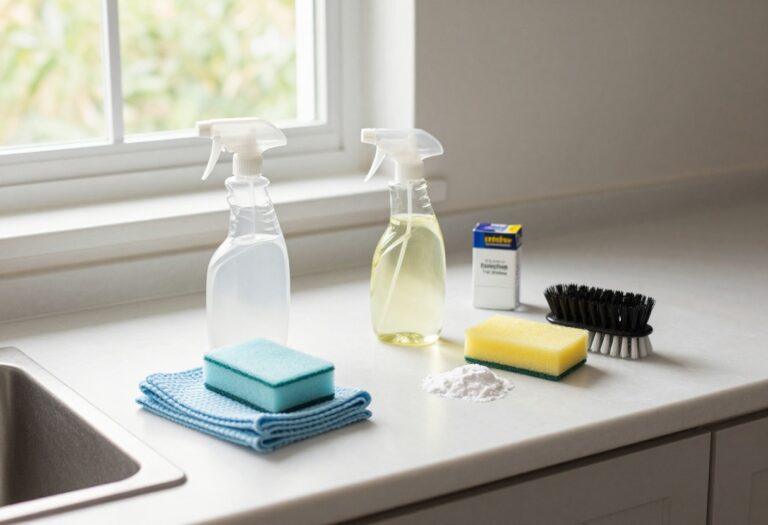
Forget harsh chemicals or endless scrubbing. With a few common pantry staples, you can tackle even the toughest messes in minutes. These 23 hacks are designed to save time, cut through grease, and neutralize odors naturally.
Whether you're dealing with dried-on cheese, tomato sauce explosions, or mysterious smells, there's a hack here for you. Let's get that microwave clean without the elbow grease.
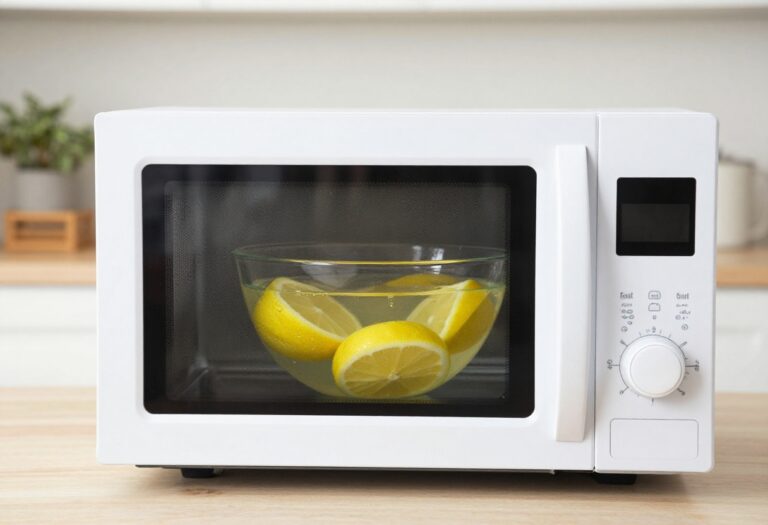
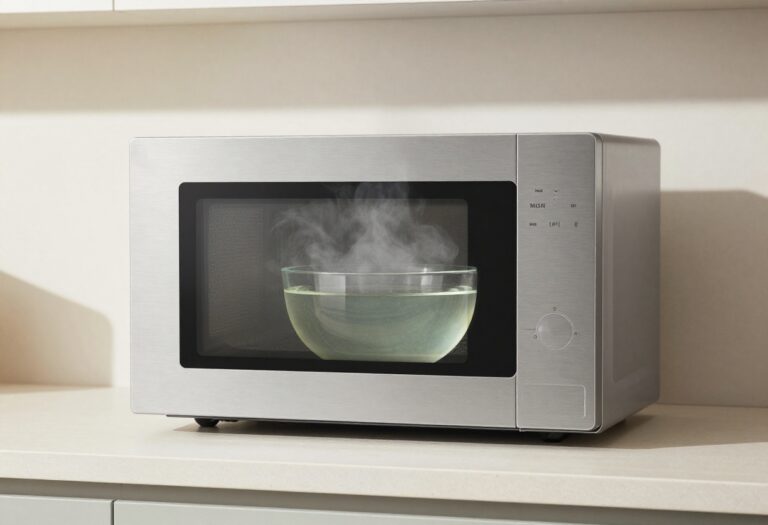
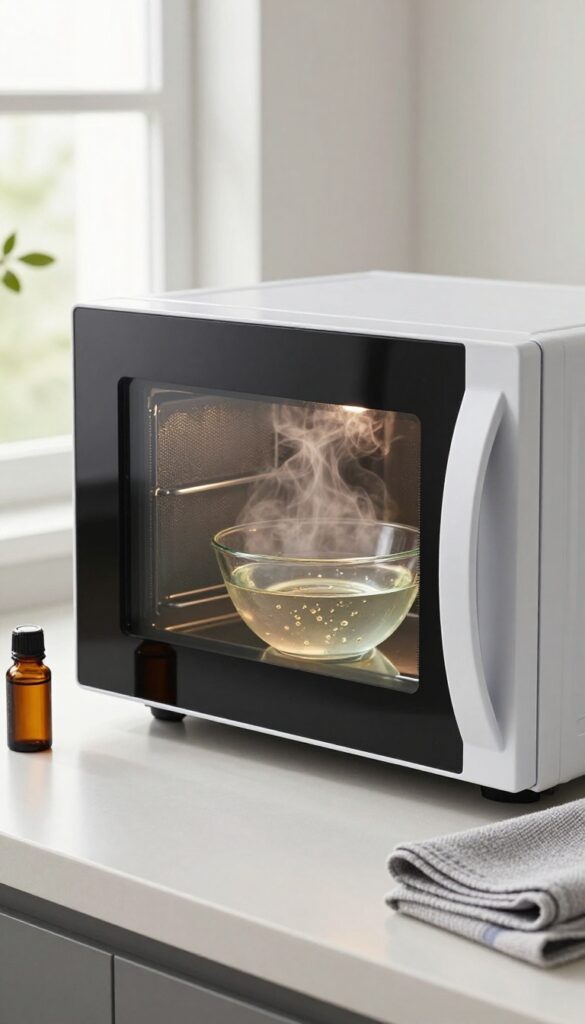
1. Steam Clean with Lemon Water

Lemon water steam is one of the simplest ways to tackle dried-on splatters and lingering odors. The heat softens crusty food bits, while the citrus cuts through grease and leaves a fresh scent. No scrubbing required—just a quick wipe after the steam does its job.
Fill a microwave-safe bowl with one cup of water. Slice a fresh lemon in half, squeeze the juice into the water, and drop the halves in. Microwave on high for 3 minutes.
Let it sit for 2 more minutes without opening the door, so the steam can condense on the walls. Carefully remove the bowl (it’ll be hot), then wipe down the interior with a damp cloth or sponge. The grime should slide right off.
Why Lemon Works So Well
Lemon juice is naturally acidic, which helps dissolve mineral deposits and grease. The steam carries the citrus oils around the cavity, neutralizing odors instead of just covering them up. Plus, it’s food-safe and smells way better than chemical cleaners.
Tips For Stubborn Spots
If you have baked-on cheese or burnt-on sauce, extend the microwave time to 5 minutes. For extra power, add a tablespoon of white vinegar to the lemon water. The vinegar boosts the acid and helps loosen tough residue.
Just be prepared for a stronger smell while it runs.
What To Avoid
Don’t use a metal bowl or anything with metallic trim. Also, avoid overfilling the bowl—stick to one cup of water to prevent boiling over. If your microwave has a turntable, remove it before steaming so you can wipe underneath afterward.
2. Vinegar Steam for Tough Grease
When dried-on grease and stubborn stains take over, vinegar steam is your secret weapon. This method loosens grime so you can wipe it away effortlessly. Plus, it neutralizes odors at the same time.
Mix equal parts water and white vinegar in a microwave-safe bowl. Heat on high for 5 minutes, then let it sit for 2 minutes without opening the door. The steam condenses on surfaces, softening stuck-on food.
Carefully remove the bowl (it's hot! ) and wipe the interior with a damp cloth. For extra-stubborn spots, dip your cloth in the vinegar water and scrub gently.
Why Vinegar Works So Well
White vinegar contains acetic acid, which breaks down grease and dissolves mineral deposits. The heat creates steam that reaches every corner, including the ceiling and turntable. It's safe, non-toxic, and leaves your microwave smelling fresh.
How To Avoid A Vinegar Smell
The sharp vinegar odor disappears once it dries. If you're sensitive to the smell, add a few drops of lemon juice or a cinnamon stick to the water before heating. This masks the scent while still cutting through grease.
When To Use This Hack
Perfect for weekly deep cleans or after cooking greasy foods like bacon or pizza. Use it whenever you notice splatters that have baked on. For light messes, reduce heating time to 3 minutes.
3. Baking Soda Paste for Stubborn Spots
Some messes just won't budge with steam alone. Dried-on cheese, burnt-on sauce, or mystery crusts need a little more persuasion. That's where a simple baking soda paste comes in—it's gentle enough for your microwave but tough on grime.
Mix a few tablespoons of baking soda with just enough water to form a thick paste. Spread it over the stubborn spots and let it sit for 10 minutes. The paste loosens the gunk without harsh scrubbing.
Then, wipe away with a damp cloth or sponge. For extra-sticky areas, let it sit longer or add a splash of white vinegar for fizzing action.
Why It Works
Baking soda is mildly abrasive, so it physically scrubs off stuck-on food without scratching the microwave's interior. It also neutralizes odors, so you're cleaning and deodorizing at the same time.
Pro Tip For Tough Stains
If the paste dries on, re-wet it with a spray bottle of water. Let it rehydrate for a few minutes, then wipe. For burnt-on spots, repeat the process once or twice.
4. Dish Soap and Water Spray

Sometimes you just need a quick, no-fuss solution for daily splatters. A simple spray bottle filled with warm water and a drop of dish soap does the trick without any waiting or strong smells. This hack is perfect for those moments when you want to wipe down the microwave in under a minute.
Fill a spray bottle with warm water and add a few drops of dish soap. Shake gently to mix. Spray the inside of the microwave generously, especially on any visible splatters.
Let it sit for about a minute so the soap can break down the grease. Then wipe everything down with a damp cloth or sponge. The soap cuts through grease, and the water loosens dried-on food.
Rinse the cloth and do a final pass to remove any soapy residue. This method is ideal for daily maintenance because it's quick and uses ingredients you already have.
Why It Works
Dish soap is designed to break down grease and food particles. When mixed with warm water, it creates a gentle but effective cleaning solution that lifts splatters without scrubbing. The spray action helps reach every corner, including the ceiling and turntable.
Best For Quick Cleanups
This hack shines when you need to clean the microwave right after use. It's not meant for baked-on grime but works wonders on fresh splatters. Keep a spray bottle under the sink for easy access, and you'll never let messes pile up again.
Pro Tips
Use a microfiber cloth to avoid streaks. If you have stubborn spots, spray them directly and let the solution sit for two minutes. Avoid using too much soap—just a few drops per cup of water is plenty.
Rinse the cloth often to prevent spreading grease around.
5. Microwave a Wet Sponge
Your kitchen sponge sees a lot of action, and it can get pretty grimy. But here's a trick that does double duty: microwaving a wet sponge loosens stuck-on splatters inside the microwave while simultaneously sanitizing the sponge itself. It's a win-win that takes just a minute.
Start by thoroughly wetting a clean sponge—it needs to be damp, not dripping. Place it on a microwave-safe plate and heat on high for one minute. The steam generated will soften any dried food bits on the microwave walls and ceiling, making them easy to wipe away.
Meanwhile, the heat kills bacteria and odors in the sponge. Let the sponge cool before handling, as it will be extremely hot. Use tongs or wait a few minutes.
Then wipe down the interior with the warm sponge—it'll lift grime effortlessly. Rinse the sponge afterward and let it air dry.
Why This Works
The combination of steam and heat is powerful. Steam rehydrates dried splatters, while the high temperature sanitizes the sponge, reducing odors and bacteria. It's a quick, chemical-free way to refresh your cleaning tools and your microwave.
Safety Tips
Never microwave a dry sponge—it can catch fire. Also, avoid sponges with metal scrub pads or those that have been used with harsh chemicals. Let the sponge cool completely before touching, and replace sponges regularly for best hygiene.
When To Skip This Hack
If your sponge smells sour or has visible mold, it's time to toss it. Microwaving won't restore a heavily soiled sponge. Also, skip this if your microwave is already clean—just use the sponge trick when you need both cleaning and sanitizing.
6. Use a Microwave Cover
Splatters are the main reason microwaves get messy. The easiest way to avoid them is to stop them before they happen. A simple microwave-safe cover or even a paper towel placed over your bowl can catch all those popping sauce droplets and steam bursts.
This isn't just about saving cleaning time—it keeps your microwave fresher between deep cleans. Plus, covers help food heat more evenly by trapping steam. It's a small habit that makes a big difference.
Using a microwave cover is the ultimate preventive measure. It stops food from splattering against the walls and ceiling, so you don't have to scrub dried-on bits later. Most covers are dishwasher safe, making cleanup effortless.
If you don't have a cover, a paper towel works in a pinch—just make sure it doesn't touch the food. This hack is especially useful for reheating saucy dishes like pasta, chili, or oatmeal.
Why Covers Work
Microwave covers create a barrier that contains splatters. They also help food heat more evenly by trapping steam, which reduces cold spots. This means your leftovers come out hotter and more consistent, with less mess to clean up afterward.
Choosing The Right Cover
Look for covers made of microwave-safe plastic or silicone. They come in various sizes to fit different bowls and plates. Some have vent holes to release excess steam—these are great for preventing lids from popping off.
Avoid metal or anything with metallic trim.
Paper Towel Trick
If you don't have a cover, place a paper towel over the bowl or plate. Make sure it's centered and not touching the food. The towel absorbs moisture and catches splatters, but it can get soggy, so use it for shorter reheating times.
It's a quick, disposable solution.
7. Coffee Grounds for Odor Absorption
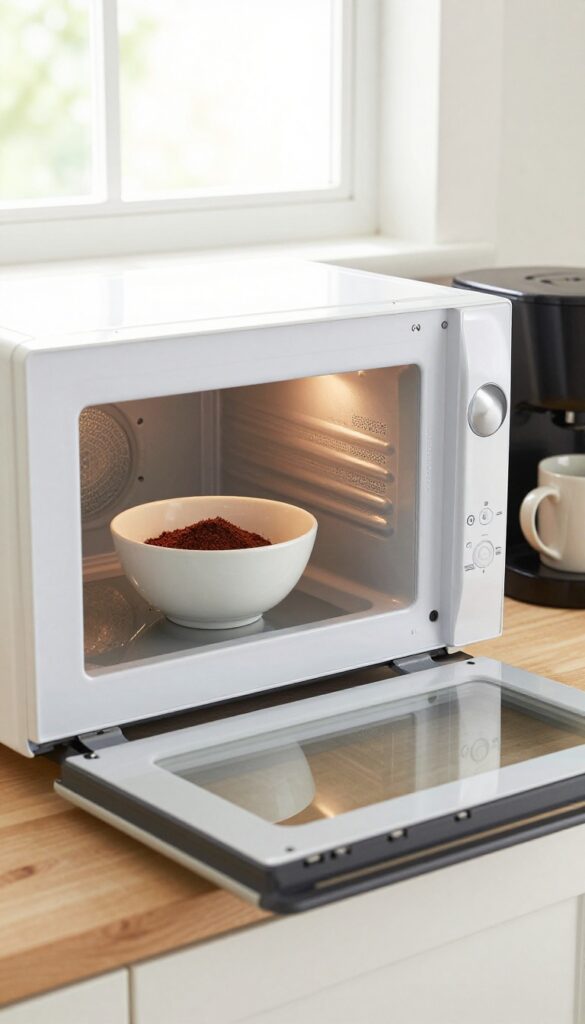
Leftover coffee grounds do more than just fertilize your garden. They're surprisingly effective at pulling stubborn smells out of your microwave. The porous texture traps odor molecules, while the natural coffee scent leaves behind a fresh, subtle aroma.
It's a zero-effort hack that works while you sleep.
After you've brewed your morning cup, don't toss the used grounds. Spread them on a plate or in a shallow bowl and place them inside the microwave. Leave the door closed overnight.
By morning, the grounds will have absorbed lingering odors from fish, garlic, or burnt popcorn. The microwave will smell like a cozy coffee shop instead of a science experiment gone wrong. For extra power, add a tablespoon of baking soda to the grounds before placing them in the microwave.
Why Coffee Grounds Work So Well
Coffee grounds are naturally porous, which means they have a large surface area for trapping odor molecules. They also contain nitrogen, which helps neutralize acidic smells. Unlike air fresheners that just mask odors, coffee grounds actually absorb them.
Plus, they leave behind a pleasant coffee scent that fades quickly.
How To Use Coffee Grounds For Maximum Effect
Use fresh, damp grounds from your morning brew. Spread them in a thin layer on a microwave-safe plate or bowl. For stubborn odors, mix in a teaspoon of baking soda.
Place the dish in the microwave and close the door. Leave it for at least 4 hours, but overnight is best. In the morning, discard the grounds and wipe the interior with a dry cloth.
Your microwave will smell clean and fresh.
A Few Tips To Keep In Mind
Don't use instant coffee granules—they're too fine and won't absorb as well. Also, avoid flavored coffee grounds, as the artificial scents can clash with food odors. If you don't drink coffee, ask a neighbor or grab a free sample from a coffee shop.
Used grounds are often given away for free.
8. Vanilla Extract for a Pleasant Scent
Not all microwave odors need heavy scrubbing to disappear. Sometimes a simple aromatic steam can do the job while leaving your appliance smelling like fresh-baked cookies. Vanilla extract is a surprisingly effective deodorizer that masks and neutralizes funky smells without any harsh chemicals.
Add a few drops of vanilla extract to a bowl of water and microwave on high for 2 minutes. The steam carries the sweet vanilla scent throughout the cavity, absorbing and covering up odors from fish, garlic, or burnt food. After the cycle, leave the door closed for a few minutes to let the aroma settle, then wipe down the interior with a soft cloth.
It's a quick, pleasant way to freshen up after cooking strong-smelling dishes.
Why Vanilla Works So Well
Vanilla extract contains compounds that bind with odor molecules, neutralizing them rather than just covering them up. The steam helps distribute these compounds evenly, reaching every corner of the microwave. Plus, the warm, sweet scent is universally appealing and lingers pleasantly.
Best Practices For Best Results
Use real vanilla extract, not imitation vanilla, as the real stuff has stronger aromatic properties. A small bowl with half a cup of water and 3–4 drops is enough. If you have stubborn odors, add a tablespoon of lemon juice to the water for extra cleaning power.
Run the microwave on high for 2 minutes, then let it sit for 5 minutes before opening.
When To Use This Hack
This method is perfect for quick refreshes between deep cleans. Use it after reheating fish, popcorn, or any dish with a strong aroma. It's also great for removing stale smells if you haven't used your microwave in a while.
Just avoid using it right after cleaning with vinegar or bleach, as the scents can clash.
9. Citrus Peels in Water
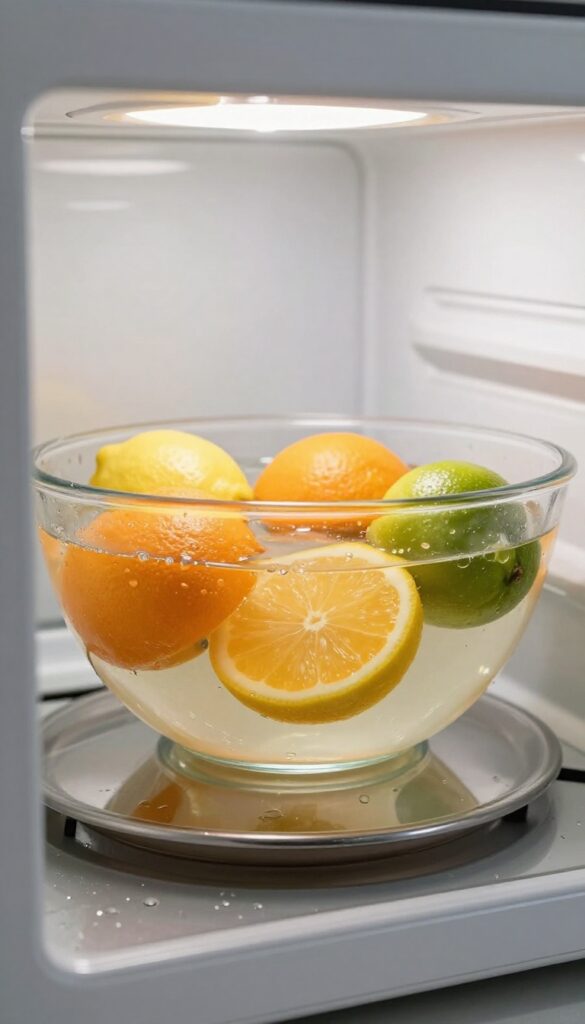
Before you toss those orange, lemon, or lime peels, think again. They're not just for zest or garnish—they're a secret weapon for microwave cleaning. The natural oils in citrus peels cut through grease and leave behind a fresh, clean scent that beats any chemical spray.
Saving citrus peels is a simple habit that pays off. After enjoying your fruit, stash the peels in a bag in the fridge. When your microwave needs a refresh, grab a handful.
Place the peels in a microwave-safe bowl filled with water—about a cup should do. Microwave on high for three minutes. The steam loosens baked-on grime, and the citrus oils work to dissolve grease.
Let the bowl sit for a few minutes to trap the steam, then wipe down the interior with a cloth. No scrubbing required.
Why Citrus Works So Well
Citrus peels contain d-limonene, a natural solvent that breaks down grease and food residue. The heat releases these oils into the steam, which coats every surface inside the microwave. It's a gentle but effective cleaner that smells amazing—no harsh fumes.
Best Citrus Combinations
You can use any citrus peel, but mixing types gives the best aroma. Lemon and orange together create a bright, clean scent. Lime adds a sharper note that cuts through stubborn odors like fish or garlic.
Experiment with what you have on hand.
Pro Tip: Don't Forget The Turntable
After steaming, remove the turntable and wash it separately with soap and water. The steam loosens grime on the glass, but a quick hand wash ensures it's spotless. While it dries, use the leftover citrus water to wipe down the microwave door and exterior.
10. Baking Soda and Vinegar Fizz
Sometimes the best cleaning duo is the simplest one. Baking soda and vinegar create a fizzy reaction that works wonders on stuck-on grime and stubborn odors. It's a classic combo that's gentle enough for daily use but tough on messes.
Sprinkle baking soda on a damp sponge, then spray with vinegar. The fizzing action lifts grime. Wipe the interior, then rinse with a clean cloth.
Why This Combo Works
Baking soda is a mild abrasive that scrubs without scratching. Vinegar cuts through grease and neutralizes odors. When combined, their chemical reaction creates carbon dioxide bubbles that help dislodge dried-on food.
How To Apply It
Dampen a sponge or soft cloth. Sprinkle a generous layer of baking soda over the surface. Spray white vinegar directly onto the baking soda until it fizzes.
Let it sit for a minute, then scrub gently in circular motions. Rinse the sponge and wipe away any residue.
Tips For Best Results
Avoid using this method on aluminum or uncoated metal surfaces, as vinegar can cause discoloration. For extra stubborn spots, let the fizz sit for up to five minutes. Always do a final wipe with a clean, damp cloth to remove any baking soda residue.
11. Toothbrush for Corners and Crevices
You've wiped down the turntable and the walls, but what about the rubber seal around the door? That's where old food particles love to hide, and a sponge just can't reach. A toothbrush is your secret weapon for these tight spots.
Grab an old toothbrush—the stiffer the bristles, the better. Dip it in white vinegar or a mild soapy solution and start scrubbing along the door seal, the vent slots, and the corners where the ceiling meets the walls. The narrow head lets you get into grooves that a cloth would miss.
Rinse with a damp cloth afterward, and you'll be amazed at the gunk that comes off.
Why The Door Seal Matters
The rubber gasket around the door is a magnet for splatters. Over time, dried food can prevent the door from sealing properly, which reduces cooking efficiency and can even cause sparks. Regular toothbrush scrubbing keeps it clean and functional.
Vents And Airflow
Microwaves have vents on the back or top to release steam. If those get clogged, your microwave might overheat or smell funky. Use the toothbrush to gently dislodge any debris from the vent grille.
A quick vacuum with a brush attachment afterward finishes the job.
Corner Crevices
The inside corners of your microwave are prime real estate for crusty spills. A toothbrush dipped in baking soda paste (baking soda plus a little water) works wonders. Scrub, wipe, and repeat until those corners are spotless.
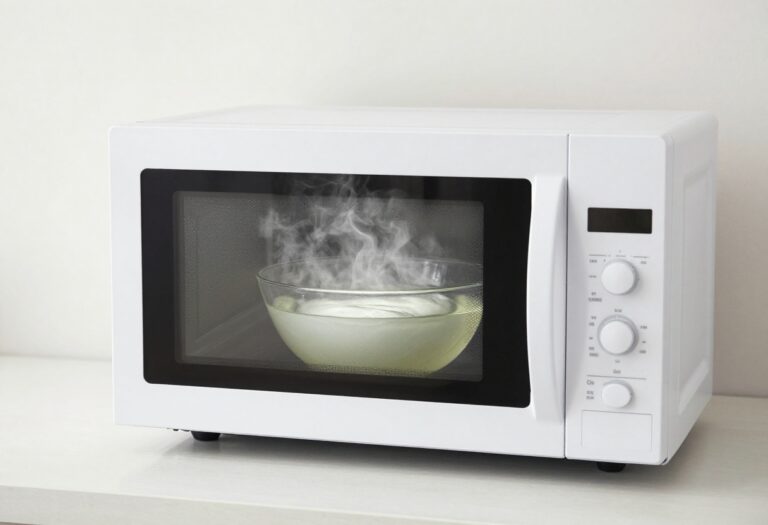
12. Steam with a Bowl of Water Only

Sometimes the most effective solution is also the simplest. A bowl of water and five minutes of microwave time can transform a crusty, splattered interior into a wipe-clean surface. No vinegar, no lemon, no special tools—just plain water and the power of steam.
This hack is perfect for those days when you just want to clean without mixing anything or hunting for ingredients. The steam softens stubborn food residue, making it fall away with minimal effort. It's also a great first step before tackling tougher stains, as it preps the surface for deeper cleaning.
How It Works
Fill a microwave-safe bowl with water—about a cup or two. Microwave on high for 5 minutes. Let it sit inside for another 2 minutes so the steam can really penetrate.
Then open the door and wipe down all surfaces with a soft cloth or sponge. The dried-on food will come off easily.
When To Use This Method
This is ideal for light to moderate messes, like splatters from reheating soup or sauce. It's also a good maintenance hack to use weekly to prevent buildup. For burnt-on stains or strong odors, you might need to add a splash of vinegar or lemon juice, but for everyday cleaning, water alone does the job.
Pro Tips For Best Results
Use a wide, shallow bowl to maximize steam surface area. Add a wooden toothpick or chopstick to the bowl to prevent superheating (when water boils explosively). After microwaving, be careful—the bowl will be hot.
Use oven mitts. Wipe in one direction to avoid spreading residue.
13. Dryer Sheet for Static and Odor
You might associate dryer sheets with laundry, but they're surprisingly effective inside the microwave. A single damp sheet can pick up dust, loosen splatters, and leave a fresh scent without any chemical spray. Plus, it tackles a hidden annoyance: static cling on the turntable.
Dampen a dryer sheet and wipe the interior. It picks up dust and leaves a fresh scent. Plus, it can reduce static cling on the turntable.
How It Works
Dryer sheets are coated with fabric softeners and antistatic agents. When dampened, those compounds help lift dried-on food particles and neutralize static electricity. The sheet's texture also grabs dust and crumbs that a sponge might miss.
Step-by-step
Take one unused dryer sheet and run it under warm water until damp but not dripping. Wipe the microwave interior, including the turntable, walls, and door. For stubborn spots, let the sheet sit on the stain for a minute before wiping.
No rinsing needed—the residue is safe and leaves a light, clean scent.
Bonus Uses
After cleaning, toss the used sheet into the bottom of the microwave overnight to absorb any remaining odors. You can also place a fresh dry sheet inside when the microwave isn't in use to keep it smelling fresh between cleanings.
14. Lemon Juice and Water Spray
Lemon juice is a powerhouse when it comes to cutting through grease and brightening surfaces. Mixed with water, it creates a gentle yet effective cleaner that tackles splatters and odors without any harsh chemicals. This hack is especially handy for those quick cleanups after a popcorn mishap or a sauce explosion.
Fill a spray bottle with equal parts lemon juice and water. Spray the interior of the microwave, focusing on stained areas. Let it sit for 3-5 minutes to allow the acidity to break down grease.
Then wipe with a damp cloth. The lemon scent leaves your microwave smelling fresh.
Why It Works
Lemon juice contains citric acid, which dissolves grease and neutralizes alkaline odors. It's a natural degreaser that's safe for food contact surfaces. The acidity also helps loosen baked-on food, making wiping effortless.
Pro Tips For Best Results
Use fresh lemon juice for maximum acidity, but bottled works in a pinch. For stubborn spots, spray extra and let it sit longer. Avoid using on metal surfaces or aluminum foil.
Always wipe with a soft cloth to prevent scratches.
When To Use This Hack
Ideal for daily maintenance after cooking smelly foods like fish or popcorn. Also great for removing light grease and water stains. For heavy messes, pair with a steam session first.
15. Microwave a Bowl of Salt
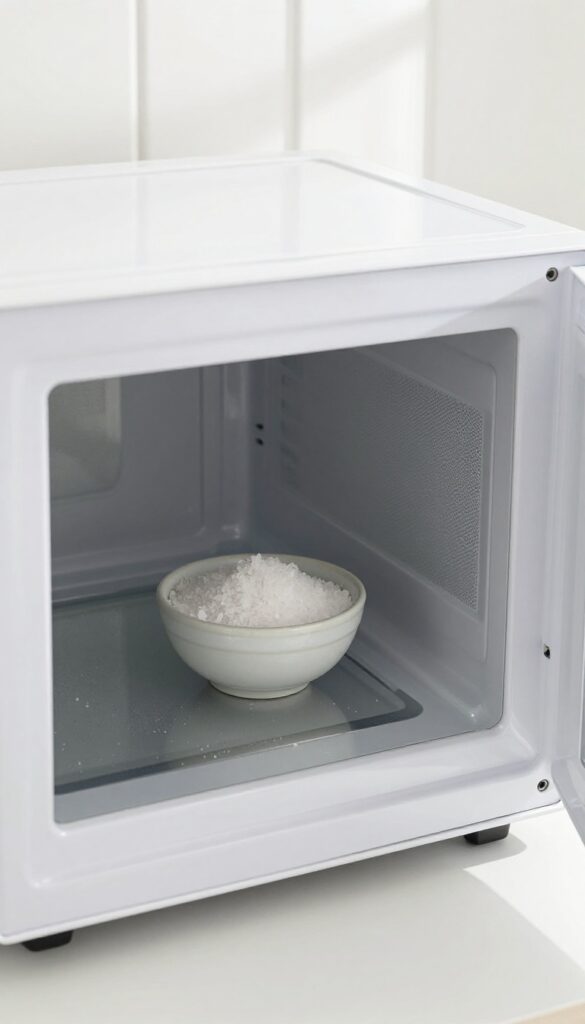
Salt isn't just for seasoning—it's a powerful odor absorber. When heated, salt traps moisture and neutralizes stubborn smells left behind from fish, garlic, or burnt popcorn. This hack is almost effortless and works in minutes.
Place a bowl of salt in the microwave and heat for 2 minutes. Salt absorbs moisture and odors. Let it cool, then discard.
Repeat as needed.
Why Salt Works
Salt is hygroscopic, meaning it pulls moisture and odor molecules out of the air. Heating it speeds up the process, making it more effective at trapping smells inside the microwave.
Best Types Of Salt To Use
Plain table salt works fine, but coarse sea salt or kosher salt has more surface area for absorption. Avoid flavored or seasoned salts, as they can leave their own scent behind.
When To Use This Method
This hack is ideal for neutralizing odors after cooking fish, onions, or garlic. It's also great for removing the smell of burnt popcorn or reheated leftovers that left a lingering stench.
16. Use a Razor Scraper for Baked-On Food
Sometimes steaming and wiping just isn't enough. When you've got a crusty layer of burnt cheese or sauce that refuses to budge, it's time to bring out the big guns—a razor scraper. But not just any scraper; you want a plastic one designed for non-stick cookware or a flat-edged tool that won't scratch the microwave's interior.
This method works best right after you've steamed the microwave, so the gunk is softened and ready to lift off.
Grab a plastic razor blade or a flat-edged scraper (even a credit card works in a pinch). Hold it at a low angle against the surface and gently push under the baked-on food. The key is to use light pressure and let the blade do the work.
If you're too aggressive, you risk scratching the paint or coating. Work in small sections, and wipe away loosened debris with a damp cloth. This hack is a lifesaver for those stubborn spots that seem to become one with the microwave wall.
Why Plastic Matters
Metal blades can leave permanent scratches or even damage the microwave's interior finish. Plastic scrapers are safe and effective. You can find them at any hardware store or online.
They're cheap and reusable—just wash them after each use.
Pair With Steam For Best Results
Always soften the crud first by microwaving a bowl of water with lemon or vinegar for 3–5 minutes. The steam loosens the bond between the food and the surface, making scraping effortless. Don't skip this step unless you want a workout.
Final Wipe Down
After scraping, give the microwave a thorough wipe with a damp microfiber cloth. This removes any tiny residue bits and leaves the surface clean. Follow up with a dry cloth to prevent water spots.
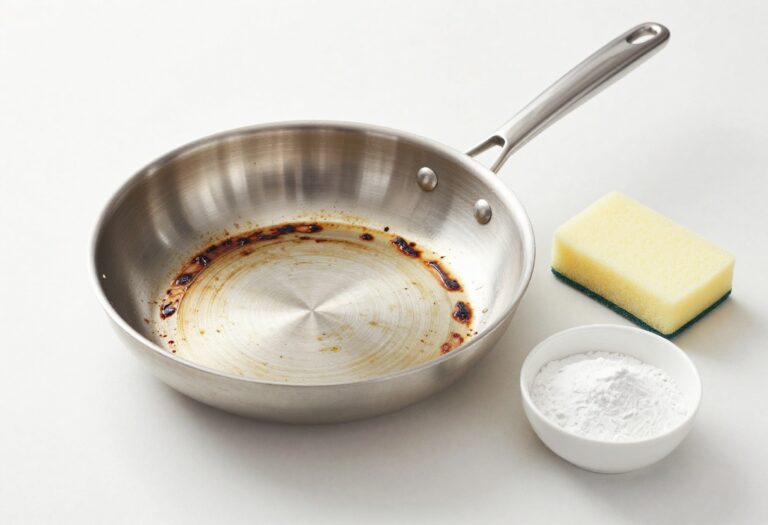
17. Baking Soda and Water Soak for Turntable
The glass turntable often bears the brunt of spills and splatters, with food baking on after repeated use. A simple soak in warm water and baking soda can loosen even the most stubborn residue, making cleanup a breeze.
Remove the turntable and place it in a sink or basin filled with warm water. Add a generous sprinkle of baking soda—about two tablespoons—and let it soak for 15 to 20 minutes. The baking soda helps break down grease and lift stuck-on food without harsh scrubbing.
After soaking, scrub gently with a non-abrasive sponge, rinse thoroughly, and dry with a clean cloth. Your turntable will look sparkling clean and ready to use.
Why Baking Soda Works
Baking soda is mildly alkaline, which helps dissolve acidic food residues and grease. Its fine grit provides gentle abrasion to lift stains without scratching glass. Combined with warm water, it creates a powerful yet safe cleaning solution.
Step-by-step Soaking Method
Fill your sink with enough warm water to fully submerge the turntable. Add 2 tablespoons of baking soda and stir to dissolve. Place the turntable in the water, ensuring it's completely covered.
Let it sit for 15–20 minutes. Remove, scrub with a soft sponge, rinse with clean water, and dry.
Extra Tips For Stubborn Stains
For dried-on food that won't budge, make a paste of baking soda and a little water. Apply it directly to the spots and let it sit for 5 minutes before scrubbing. You can also add a splash of white vinegar to the soak for extra cleaning power—just be ready for some fizzing action.
18. Microwave a Bowl of Oatmeal
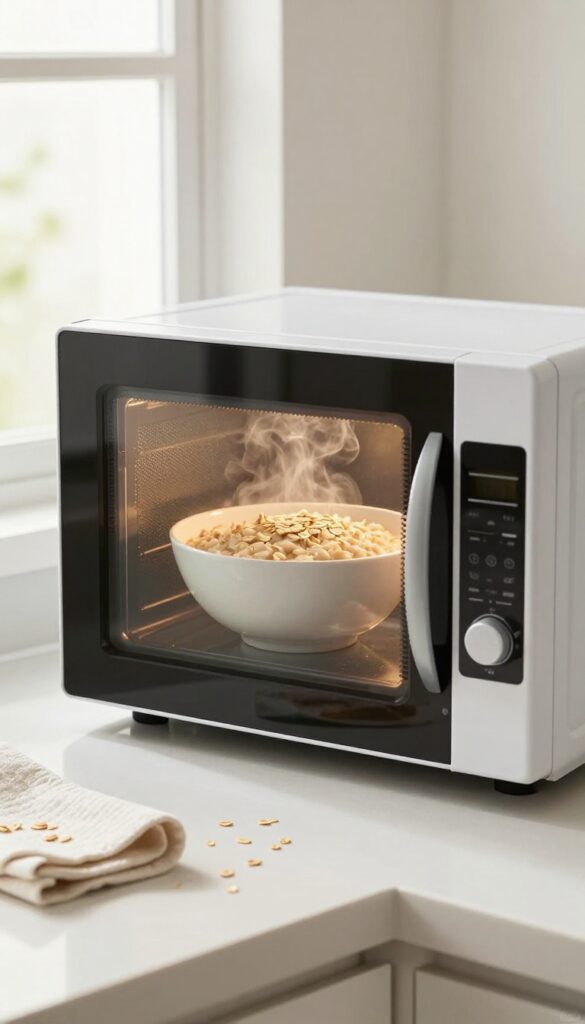
Oatmeal isn't just a comforting breakfast—it's a secret weapon for microwave cleaning. The steam from cooking oats loosens dried-on splatters, while the mild scent helps neutralize odors. Plus, you get a warm meal out of it.
Fill a microwave-safe bowl with 1/2 cup of rolled oats and 1 cup of water. Microwave on high for 2-3 minutes until the oats are cooked and steam has filled the cavity. Let the bowl sit inside for another 2 minutes to allow steam to penetrate stubborn spots.
Then, remove the bowl and wipe down the interior with a damp cloth or sponge. The softened splatters come off easily, and any lingering smells are replaced by a subtle, neutral oat scent. For extra cleaning power, add a splash of lemon juice or a pinch of baking soda to the oatmeal mixture before microwaving.
Why Oatmeal Works
Oats release steam slowly and steadily, creating a gentle but effective cleaning environment. The steam rehydrates dried food particles, making them easy to wipe away. Unlike vinegar or lemon, oatmeal has a very mild, non-acidic scent that won't clash with other foods.
Step-by-step Instructions
- Combine 1/2 cup rolled oats and 1 cup water in a microwave-safe bowl. 2.
Microwave on high for 2-3 minutes until the mixture bubbles and steam fogs the door. 3. Leave the bowl inside for 2 minutes after cooking.
- Carefully remove the bowl (it will be hot! ) and wipe down all interior surfaces with a damp cloth. 5.
Rinse the cloth and wipe again to remove any oat residue.
Bonus Tip: Eat The Oatmeal
Once you're done cleaning, you can enjoy the oatmeal as a quick breakfast or snack. Just stir in some cinnamon, honey, or fruit. It's a zero-waste cleaning hack that also fills your stomach.
19. Hydrogen Peroxide for Stains
Stubborn stains and discolored spots inside your microwave can make it look older than it is. Hydrogen peroxide offers a simple, fume-free solution that whitens and brightens without the harshness of bleach.
Hydrogen peroxide works as a mild oxidizer, breaking down organic stains and lifting them from surfaces. It's especially effective on tomato sauce, turmeric, and other pigmented spills that leave behind yellow or orange marks. The fizzing action helps loosen dried-on residue, making wiping effortless.
How To Apply
Pour 3% hydrogen peroxide into a spray bottle. Spray generously onto stained areas, ensuring full coverage. Let it sit for about a minute while it fizzes and works.
Wipe clean with a damp cloth or sponge. For stubborn spots, repeat or let it sit a bit longer.
Why It Works
Hydrogen peroxide releases oxygen when it contacts organic material, creating bubbles that help lift stains from the surface. It's a natural bleaching agent that's safe for food-contact areas once it dries, as it breaks down into water and oxygen.
Safety Tips
Always use 3% hydrogen peroxide from a pharmacy—not higher concentrations meant for industrial use. Avoid mixing with vinegar or bleach, as this can create harmful fumes. Rinse thoroughly with water after cleaning to remove any residue.
20. Essential Oils for Custom Scent
If you want your microwave to smell amazing after cleaning, essential oils are your best friend. They're natural, versatile, and let you customize the scent to your liking. A quick steam with a few drops can replace harsh chemical deodorizers with a soothing aroma.
Using essential oils in your microwave cleaning routine is simple and effective. The steam carries the oil's fragrance throughout the cavity, neutralizing odors and leaving a fresh scent. Plus, many oils have antibacterial properties, giving you an extra layer of cleanliness.
Best Oils For Deodorizing
Lavender is calming and masks odors well. Tea tree oil is a powerhouse against bacteria and mold. Lemon or orange oils cut through grease and leave a citrusy freshness.
Peppermint is invigorating and helps eliminate stubborn smells like fish or garlic.
How To Use Them Safely
Fill a microwave-safe bowl with 1 cup of water. Add 3-5 drops of your chosen essential oil. Microwave on high for 2 minutes.
Let it sit for a minute before opening the door—the steam will have worked its magic. Wipe down the interior with a cloth. Avoid using too much oil, as it can leave a residue.
Custom Blends To Try
Mix lavender and lemon for a clean, relaxing scent. Tea tree and peppermint make a fresh, antimicrobial combo. For a warm, cozy vibe, try orange and cinnamon (just a drop of cinnamon oil—it's strong).
Experiment to find your favorite.
21. Clean the Exterior with Glass Cleaner
The outside of your microwave gets just as grimy as the inside, but it's often overlooked. Fingerprints, grease splatters, and dust can build up on the door, handle, and control panel. Glass cleaner is a quick and effective solution that leaves surfaces streak-free.
Spray a small amount of glass cleaner onto a microfiber cloth—never directly onto the microwave to avoid liquid seeping into vents or buttons. Wipe down the door, handle, and control panel with gentle pressure. For stubborn spots, let the cleaner sit for a few seconds before wiping.
Finish by buffing with a dry section of the cloth for a shiny finish. This method works on stainless steel as well, but check your appliance's manual to ensure compatibility.
Why Glass Cleaner Works
Glass cleaner is formulated to cut through grease and remove fingerprints without leaving residue. It evaporates quickly, so you don't have to worry about streaks or moisture damage. Plus, it's safe for most microwave exteriors, including painted and stainless steel surfaces.
Pro Tips For A Streak-free Finish
Use a clean, lint-free microfiber cloth to avoid scratches. Wipe in one direction—horizontal for the door, vertical for the sides—to minimize streaks. If you're dealing with heavy grease, add a drop of dish soap to the cloth first, then follow up with glass cleaner.
22. Use a Steam Cleaner for Deep Clean
If you own a handheld steam cleaner, it's time to put it to work on your microwave. The high-temperature steam cuts through baked-on grease and sanitizes the interior without any chemical residue. It's especially handy for those tough spots that scrubbing just can't reach.
A steam cleaner blasts away grime with heat and moisture, making it ideal for microwaves. The steam loosens dried food and kills bacteria, leaving the appliance fresh and clean. No need for extra sprays or scrubbing—just a quick pass and wipe.
How To Use It
Fill your steam cleaner's tank with water and let it heat up. Hold the nozzle a few inches away from the microwave walls, ceiling, and turntable. The steam will loosen any stuck-on food.
After steaming, wipe everything down with a microfiber cloth. For tough spots, repeat or let the steam sit for a few seconds.
Safety Tips
Always unplug the microwave before using a steam cleaner near electrical components. Avoid directing steam into vents or openings. Let the microwave cool down if it was recently used.
Also, check your steam cleaner's manual—some models aren't recommended for use around electronics.
Why It Works So Well
Steam reaches temperatures above 212°F, which melts grease and kills germs without chemicals. The moisture softens dried-on food, making it easy to wipe away. It's also great for deodorizing—steam neutralizes odors naturally, leaving your microwave smelling clean.
23. Regular Wipe-Downs After Each Use
You've probably heard it before, but the simplest hack really is prevention. A quick wipe after every use takes just seconds and stops splatters from hardening into stubborn crust. It's the one habit that saves you the most time and effort in the long run.
Make it a routine. Keep a damp microfiber cloth or sponge near the microwave. After you take out your food, give the interior a quick once-over.
Focus on the ceiling and walls where steam and grease tend to cling. If you do this consistently, you'll rarely need a deep clean.
Why It Works
When food splatters, the moisture is still fresh. Wiping it away immediately prevents it from drying and bonding to the surface. Once it hardens, you need more scrubbing or soaking.
A few seconds now saves minutes later.
What To Use
A soft cloth or sponge with just water is usually enough. For greasy spots, add a drop of dish soap. Avoid abrasive scrubbers that can scratch the interior.
Microfiber is ideal because it traps particles without leaving lint.
How To Build The Habit
Place the cloth right next to the microwave so it's visible. After you grab your food, take two seconds to wipe. You can even do it while your food is cooling.
After a week, it'll feel automatic.
FAQ
Can I use bleach to clean my microwave?
It's not recommended. Bleach can damage the interior coating and leave harmful fumes. Stick to natural cleaners like vinegar, lemon, or baking soda.
How often should I deep clean my microwave?
A quick wipe after each use is ideal. For a deep clean, aim for once a week or whenever you notice stubborn splatters or odors.
Will lemon water damage my microwave?
No, lemon water is safe. The steam is gentle and non-abrasive. Just avoid letting the bowl boil dry, and wipe down the interior afterward.
Why does my microwave smell even after cleaning?
Odors can linger in the vent or the door seal. Try cleaning those areas with a toothbrush dipped in vinegar. Also, leave a bowl of baking soda inside overnight.
Can I put metal in the microwave to clean it?
Never put metal in a microwave. It can cause sparks and damage. Stick to microwave-safe bowls and utensils for cleaning.
Conclusion
A clean microwave doesn't require expensive products or hours of scrubbing. With these 23 hacks, you can tackle splatters and odors using things you already have at home. From lemon steam to baking soda paste, each method is simple, effective, and safe.
Pick a few that work for your routine and stick with them. Your microwave will stay fresh, and you'll spend less time cleaning. Now go ahead—heat up that leftover pasta without fear of a mess.