20 Cleaning the Kitchen Tips for a Weekly Fresh Start
A fresh kitchen every week doesn't require a deep clean—just a few smart habits. These 20 tips target the spots that collect grease, grime, and clutter, from the stovetop to the fridge.
Each one is practical and quick, so you can reset your space without spending your whole weekend scrubbing. Think of it as a weekly tune-up that keeps your kitchen looking and feeling great with minimal effort.
Ready to make Monday mornings a little brighter? Let's dive into the simple routines that make a big difference.
1. Degrease the Stovetop with Baking Soda Paste
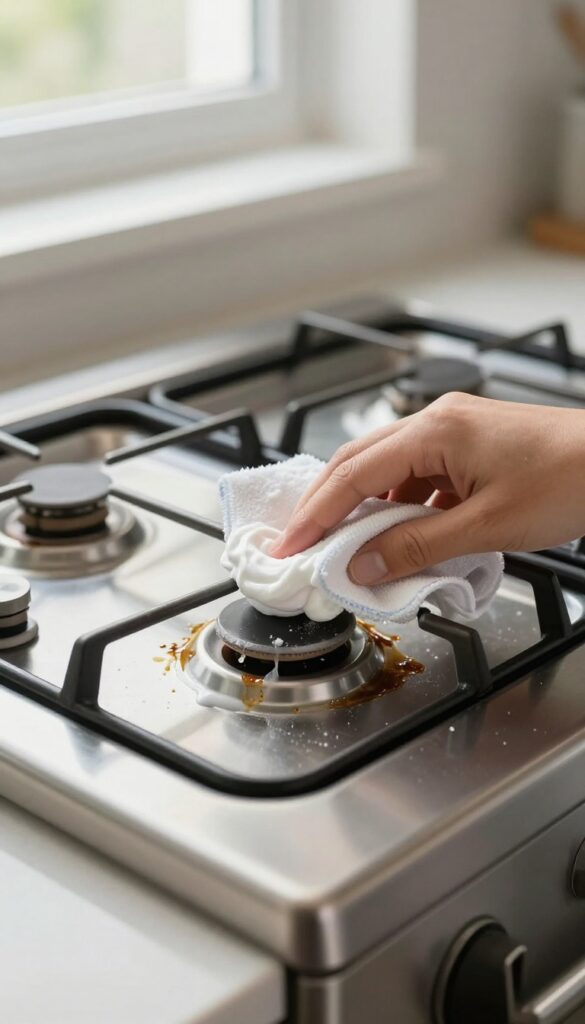
The stovetop takes the brunt of weekly cooking—splattered oil, burnt-on sauce, and stubborn stains. A baking soda paste cuts through that greasy film without harsh chemicals. This simple trick works on glass, ceramic, and stainless steel surfaces, leaving them streak-free.
Start by wiping away loose crumbs. Mix 3 parts baking soda with 1 part water to form a spreadable paste. Apply a thin layer over the cool stovetop, focusing on greasy spots.
Let it sit for 10 minutes—the baking soda breaks down the grease while you tackle other tasks. Then, dampen a microfiber cloth and wipe in circular motions. Rinse the cloth frequently to avoid redepositing grime.
For stubborn burnt bits, let the paste sit longer or add a splash of white vinegar for fizzing action. Finish with a dry cloth for a polished shine.
Why Baking Soda Works Best
Baking soda is mildly alkaline, which helps dissolve fatty acids in grease. Its fine grit provides gentle abrasion to lift stuck-on food without scratching. Unlike commercial degreasers, it's non-toxic and safe around food prep areas.
Step-by-step Application
Apply the paste with a sponge or your fingers, spreading evenly. Let it sit for 10 minutes—set a timer so you don't forget. Wipe with a damp cloth, using light pressure.
For gas stovetops, remove grates first and clean them separately.
Pro Tip For Stubborn Stains
For baked-on residue, sprinkle a little dry baking soda on the paste before wiping. The extra abrasion helps dislodge tough spots. Avoid using steel wool—it can scratch glass or ceramic surfaces.
When To Avoid This Method
Don't use baking soda paste on hot surfaces—wait until the stovetop is completely cool. Also avoid it on aluminum or unsealed cast iron, as it can cause discoloration. Stick to manufacturer recommendations for those materials.
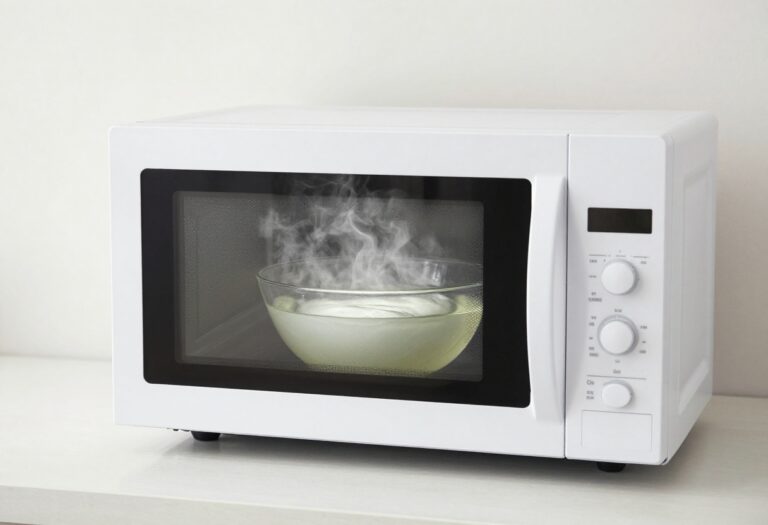
2. Microwave Steam Clean for Quick Freshening
Microwaves can get pretty gross fast. Sauce splatters, cheese explosions, and mystery odors all build up over a week. But you don't need harsh chemicals or a lot of elbow grease to get it clean again.
A simple steam treatment does the heavy lifting for you.
Fill a microwave-safe bowl with one cup of water. Add a few lemon slices or two tablespoons of white vinegar. Microwave on high for three minutes, then let the bowl sit inside with the door closed for another five minutes.
The steam softens dried-on food and loosens grease. When you open the door, just wipe down the interior with a damp cloth or sponge. Everything comes off easily, and your microwave smells fresh.
This trick works for even the toughest baked-on messes.
Why Lemon Or Vinegar Works Best
Lemon adds a fresh scent and its citric acid helps break down grease. Vinegar is a natural deodorizer and cuts through grime without leaving a chemical residue. Both are safe for food contact surfaces and won't damage your microwave.
Avoid using essential oils or commercial cleaners inside the microwave—they can leave fumes or damage the interior coating.
Don't Forget The Turntable And Door
While the steam softens the interior, remove the glass turntable and wash it separately with warm soapy water. Wipe the door edges and the rubber seal with a damp cloth—crumbs and splatters often hide there. A quick dry with a microfiber cloth prevents water spots and keeps the seal from degrading over time.
3. Wipe Down Cabinet Fronts with a Microfiber Cloth
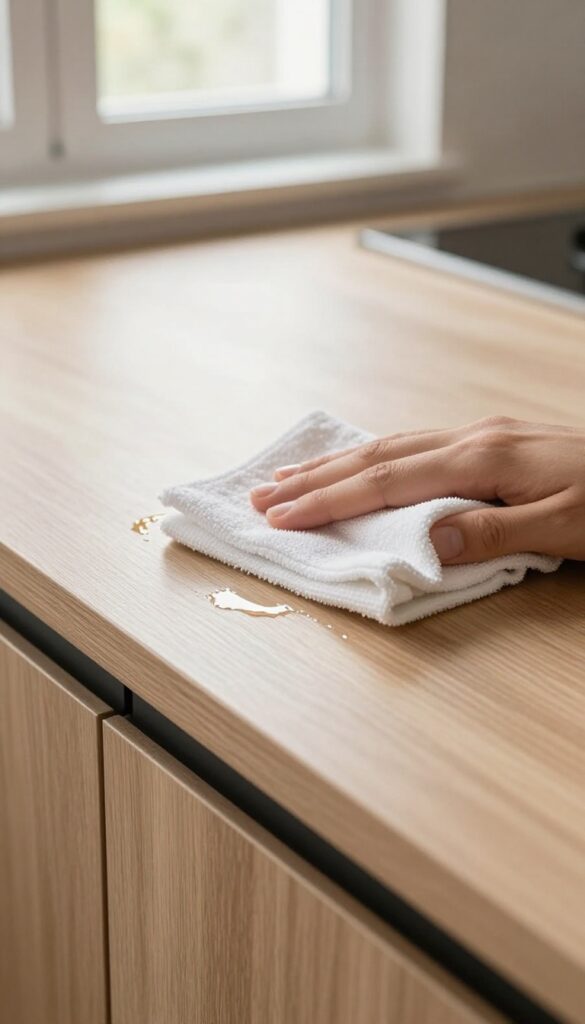
Cabinet doors are magnets for greasy fingerprints, especially around handles and near the stovetop. Over a week, that buildup can make your kitchen feel grimy even if the counters are spotless. A quick wipe-down takes two minutes and makes a huge visual difference.
Grab a damp microfiber cloth and add a tiny drop of dish soap. Wipe each door in a consistent direction—top to bottom works well—to avoid streaks. Then go over the same area with a dry microfiber cloth to remove any soap residue and bring back the shine.
Pay extra attention to the area around handles and the bottom edges where splatters collect. This simple habit keeps your cabinets looking like new and prevents stubborn grease from baking on over time.
Why Microfiber Works Best
Microfiber traps grease and dirt in its fibers instead of pushing them around like a regular sponge. It's also gentle on all cabinet finishes—wood, laminate, or painted—so you won't accidentally scratch the surface. Plus, it leaves less lint behind, which means no tiny fuzz balls stuck to your cabinets.
The Right Cleaning Solution
Dish soap is your best friend here because it cuts grease without harsh chemicals. Mix a few drops into a spray bottle of warm water, or just dampen your cloth and add soap directly. Avoid all-purpose cleaners with bleach or ammonia—they can damage the finish over time.
For extra stubborn spots, let the soapy cloth sit on the mark for 30 seconds before wiping.
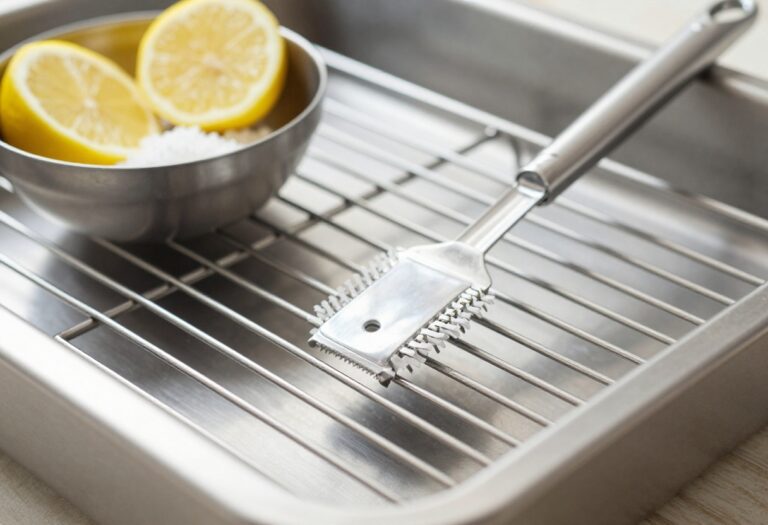
4. Sanitize the Sink with Lemon and Salt
Your sink sees a lot of action—dirty dishes, food scraps, and coffee stains. Over time, it can develop odors and a dull film. A quick scrub with lemon and salt is a natural way to cut through grease and leave it sparkling.
This simple method uses ingredients you already have. The salt acts as a gentle abrasive to lift stains, while the lemon’s acidity breaks down grime and neutralizes odors. It’s safe for stainless steel, porcelain, and enamel sinks, and it takes less than five minutes.
Why Lemon And Salt Work
Lemon contains citric acid, which dissolves mineral deposits and soap scum. Salt provides friction without scratching most sink surfaces. Together, they create a paste-like scrub that tackles stuck-on residue and leaves a fresh citrus scent.
Step-by-step Process
Cut a lemon in half and sprinkle about a tablespoon of salt on the cut side. Scrub the sink in circular motions, focusing on stained areas and the drain. Let it sit for a minute, then rinse with warm water.
Dry with a soft cloth to prevent water spots.
Extra Tips For Best Results
For tough stains, add a little baking soda to the salt. Avoid using this method on marble or granite sinks, as the acid can etch the surface. Repeat weekly to keep your sink fresh and shiny.
5. Organize the Fridge with a Weekly Purge
Your fridge can become a science experiment fast. A weekly purge keeps it fresh and makes meal prep way easier. You'll save money by not buying duplicates and reduce food waste in the process.
Start by pulling everything out. Check expiration dates and toss anything past its prime. Wipe down shelves and drawers with a baking soda solution—it cuts grime without harsh chemicals.
Then group similar items: dairy together, condiments on the door, leftovers on one shelf. This simple system means you can see what you have at a glance.
Toss And Assess
Go through every container. If it smells off, looks weird, or has been there more than a week, toss it. This is also a good time to check for spills or sticky spots.
Deep Clean Shelves
Remove shelves and drawers if possible. Wash them with warm soapy water, then wipe with a baking soda paste for stubborn stains. Dry thoroughly before putting back.
Smart Grouping
Keep raw meat on the bottom shelf to avoid drips. Store fruits and veggies in separate drawers—some produce emits ethylene gas that spoils others. Use clear bins for snacks and cheeses.
6. Clean the Dishwasher Filter for Better Performance
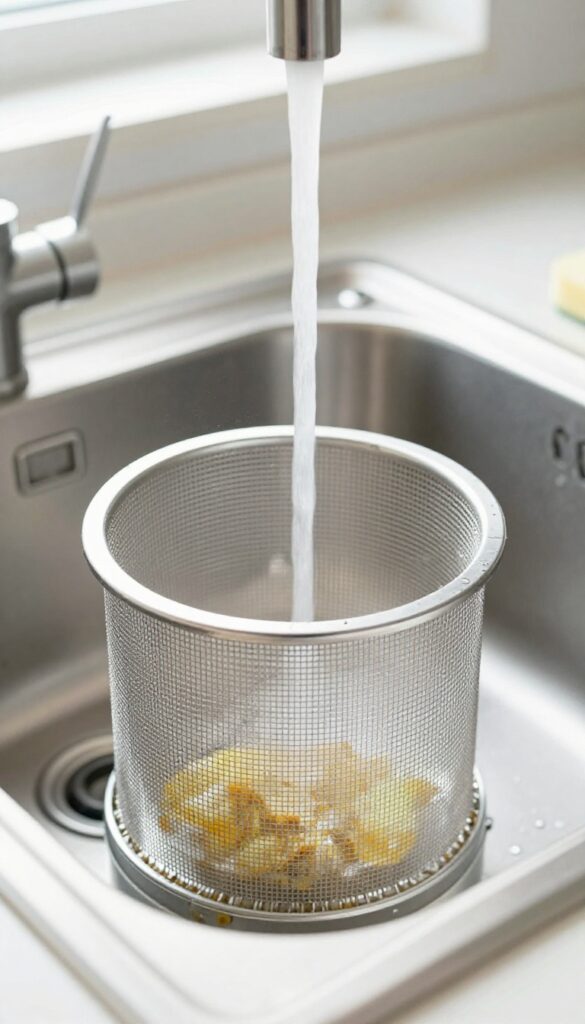
Your dishwasher works hard, but it can't do its job if the filter is clogged with food particles and grease. A dirty filter not only leads to unpleasant odors but also leaves dishes less clean. Giving it a quick rinse every week keeps your machine running efficiently and your dishes sparkling.
Locate And Remove The Filter
Start by taking out the bottom rack so you can access the filter assembly. Most dishwashers have a cylindrical or flat filter at the bottom, often near the back. Twist it counterclockwise or lift it out, depending on your model.
Check your manual if you're unsure—it's usually a simple process.
Rinse And Scrub Away Debris
Hold the filter under hot running water to flush away loose food bits. Use a soft brush or an old toothbrush to gently scrub the mesh and plastic parts, removing any stubborn buildup. Avoid harsh chemicals or abrasive pads that could damage the filter.
Reassemble And Run A Maintenance Cycle
Once the filter is clean and dry, snap it back into place and replace the bottom rack. For an extra fresh start, run an empty cycle with a dishwasher cleaner or a cup of white vinegar on the top rack. This helps eliminate any lingering odors and keeps your dishwasher in top shape.
7. Polish Stainless Steel with Olive Oil
Stainless steel appliances look sleek when they're clean, but streaks and smudges can make them look dull fast. You don't need a specialty cleaner to bring back the shine—just a little olive oil from your pantry does the trick. It's cheap, natural, and leaves a streak-free finish that lasts.
A tiny amount of olive oil goes a long way. Put a few drops on a soft, dry microfiber cloth (not paper towels, which can leave lint). Buff the surface in small circular motions, working one section at a time.
The oil fills in microscopic scratches and creates a protective barrier that repels fingerprints. Finish by wiping off any excess with a clean part of the cloth. Your appliances will look like new, and the shine can last several days.
Why Olive Oil Works Better Than Spray Cleaners
Most stainless steel sprays contain water and detergents that evaporate quickly, often leaving streaks. Olive oil is thicker and bonds to the metal, filling tiny imperfections that cause dullness. It also repels moisture and grease, so smudges don't stick as easily.
Plus, it's food-safe and smells pleasant—no harsh chemical fumes.
Which Appliances To Polish
This trick works on refrigerators, dishwashers, ovens, range hoods, and even toasters. Avoid using it on non-stainless surfaces like handles, control panels, or areas near heat sources (like the stovetop), where the oil could burn or attract dust. For best results, polish after you've cleaned the surface with a mild soap and water, and dried it completely.
How Often To Do It
Once a week is plenty for most kitchens. If you cook a lot or have kids, you might want to touch up high-traffic areas like the fridge door or dishwasher front every few days. A quick once-over takes less than a minute.
Over time, the oil builds up a thin layer that makes future cleaning even easier.
8. Deodorize the Garbage Disposal with Ice and Citrus
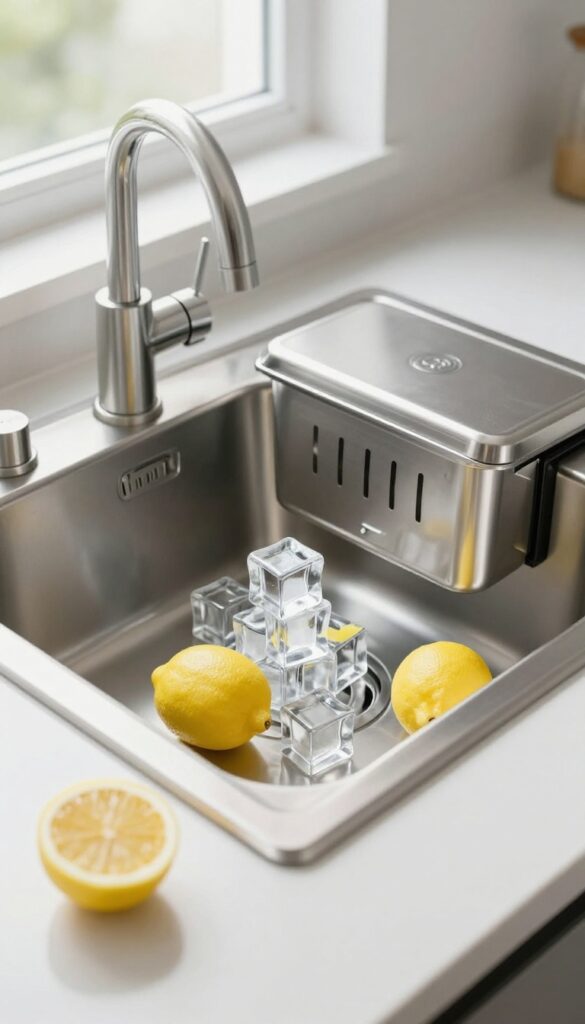
Garbage disposals can get pretty funky. Food particles get trapped in the blades and crevices, leading to that sour smell that lingers even after you run the water. The good news is you don't need harsh chemicals to freshen things up.
A simple combo of ice and citrus peels does the job naturally.
Ice cubes help dislodge stuck-on gunk and sharpen the blades, while citrus peels release oils that neutralize odors and leave behind a fresh scent. This method is quick, cheap, and uses ingredients you probably already have.
Why Ice And Citrus Work
The ice cubes are abrasive enough to scrub the blades and inner walls without damaging the disposal. As they grind, they knock off residue and grease. Lemon or orange peels contain citric acid and essential oils that cut through grime and replace bad smells with a clean, natural fragrance.
Plus, they're biodegradable and safe for your pipes.
Step-by-step Freshening
Start by dropping a handful of ice cubes—about a cup—into the disposal. Add a few strips of lemon, lime, or orange peel. Turn on the cold water, then run the disposal for 30 seconds.
Let the water run for another 15 seconds after you turn it off to flush everything through. That's it. Your disposal will smell noticeably cleaner.
Extra Tips For Best Results
For a deeper clean, you can add a tablespoon of baking soda before the ice and citrus. Avoid using this method too often—once a week is plenty. Also, never put fibrous foods like celery or banana peels down the disposal, as they can tangle the blades.
Stick with citrus peels for the best deodorizing effect.
9. Wipe Down Countertops with Vinegar Spray
Countertops are the hardest-working surface in your kitchen. They catch spills, crumbs, and sticky residue from morning coffee to dinner prep. A quick daily wipe keeps them clean, but a weekly vinegar spray treatment takes it a step further by cutting through grease and killing bacteria without harsh chemicals.
Vinegar is a natural disinfectant and degreaser that leaves countertops sparkling. Mix equal parts white vinegar and water in a spray bottle. Mist the surface lightly, then wipe with a clean microfiber cloth.
The vinegar smell disappears as it dries, leaving a streak-free shine. Avoid using vinegar on natural stone like granite or marble, as the acid can etch the surface. For those, stick to a pH-neutral cleaner.
Why Vinegar Works So Well
White vinegar contains acetic acid, which breaks down grease, dissolves mineral deposits, and kills many common household bacteria. It's cheap, non-toxic, and safe around food prep areas. Unlike commercial sprays, it leaves no chemical residue or artificial fragrance.
How To Make Your Own Spray
Fill a spray bottle with one part white vinegar and one part water. Shake gently to mix. For extra cleaning power, add a few drops of dish soap or lemon essential oil.
Label the bottle and store it under the sink. Shake before each use, as the ingredients can separate.
Best Practices For Streak-free Results
Use a microfiber cloth instead of paper towels—it picks up more grime and leaves less lint. Spray the countertop, not the cloth, to control the amount of liquid. Wipe in overlapping strokes, then buff dry with a second cloth for a crystal-clear finish.
Don't oversaturate; a light mist is enough.
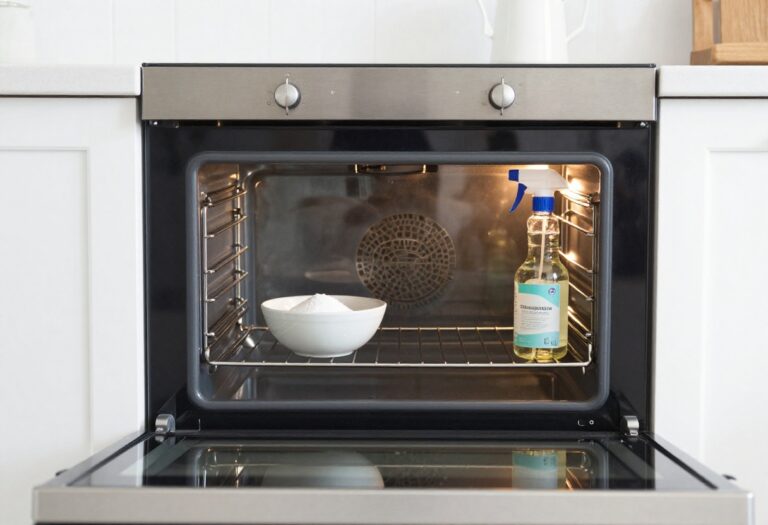
10. Clean the Oven Door Glass with Baking Soda
Oven door glass gets splattered with grease and baked-on food, making it look grimy even when the rest of the kitchen is spotless. You don't need harsh chemicals to get it clear again—just baking soda and a little patience. This method is cheap, non-toxic, and surprisingly effective.
Mix baking soda with a small amount of water to form a thick paste. Spread the paste evenly over the glass, avoiding the edges where it might drip into the oven. Let it sit for about 15 minutes so the baking soda can break down the grease.
Then, scrub gently with a damp sponge or soft cloth, and wipe away the residue with a clean, wet cloth. For stubborn spots, add a little more paste and let it sit longer. Finish with a dry microfiber cloth for a streak-free shine.
Why Baking Soda Works Best
Baking soda is a mild abrasive that lifts grime without scratching glass. It also neutralizes odors, so your kitchen smells fresher. Unlike commercial cleaners, it's safe to use around food and won't release harsh fumes.
Tips For Stubborn Grease
If the glass has layers of baked-on grease, let the paste sit for 30 minutes instead of 15. You can also add a splash of white vinegar to the paste for extra degreasing power. For really tough spots, use a plastic scraper or an old toothbrush to gently work the paste into the grime.
How Often To Do This
A weekly wipe-down with baking soda paste keeps the glass clear and prevents buildup. If you cook a lot of high-splatter dishes like roasts or stir-fries, you might need to do it twice a week. Regular maintenance makes the job quicker each time.
11. Refresh Cutting Boards with Hydrogen Peroxide
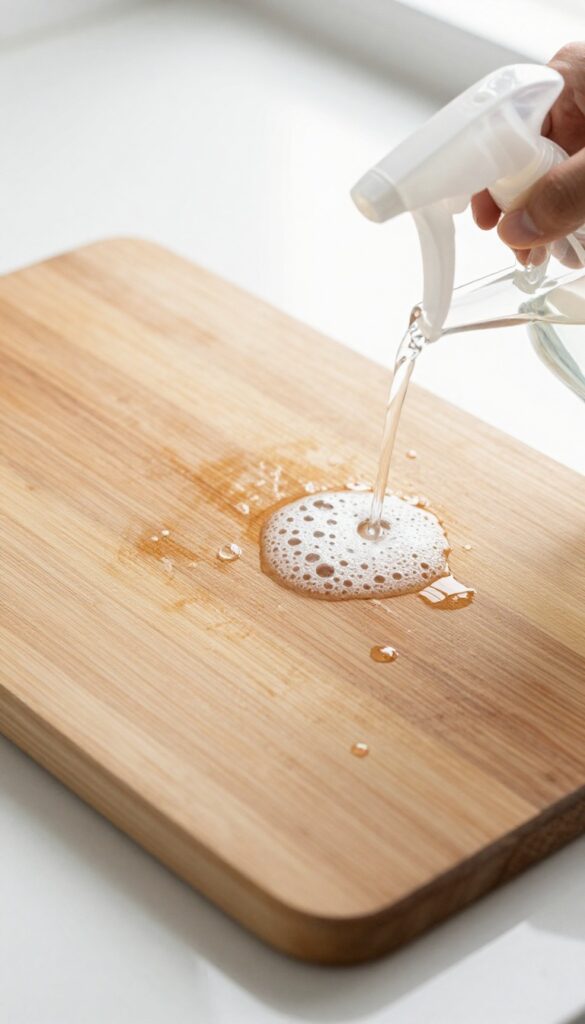
Your cutting board sees a lot of action, and even after a good scrub, bacteria can linger in knife grooves and stains. Hydrogen peroxide offers a simple, chemical-free way to sanitize and brighten it without harsh smells.
Why Hydrogen Peroxide Works
Hydrogen peroxide is a natural disinfectant that kills bacteria like E. coli and salmonella on contact. The fizzing action helps lift stains and debris from deep scratches, leaving your board fresher than soap and water alone.
How To Apply It
Pour 3% hydrogen peroxide directly onto the board or spray it evenly. Let it sit for 5 to 10 minutes—you'll see tiny bubbles forming. Then rinse thoroughly with warm water and pat dry.
For stubborn stains, sprinkle baking soda first, then spray peroxide.
When To Use This Method
Do this after prepping raw meat, fish, or strongly colored veggies like beets. It's also great as a weekly refresh to keep your board from getting that tired, stained look. Use it on wooden and plastic boards alike, but avoid letting it pool on wood for too long.
12. Vacuum Under and Behind Appliances
You might wipe down counters and sweep the floor, but when's the last time you looked under the fridge or behind the stove? Those tight spaces trap dust, crumbs, and even pet hair, creating a perfect environment for pests and odors. Moving heavy appliances sounds like a chore, but a quick weekly vacuum makes a huge difference in both cleanliness and appliance efficiency.
Start by unplugging any appliance you plan to move. For the fridge, carefully pull it straight out—watch for water lines if you have an ice maker. Use a crevice tool on your vacuum to get into corners and along the base.
Don't forget the coils on the back of the fridge; dust buildup there makes the compressor work harder and shortens its lifespan. For the stove and dishwasher, slide them out just enough to reach underneath. A flashlight helps you spot hidden debris.
After vacuuming, wipe the floor with a damp cloth before pushing the appliance back. This simple habit prevents musty smells and keeps your kitchen truly fresh.
Why It Matters
Crumbs and dust under appliances attract cockroaches, ants, and mice. They also block airflow, causing your fridge and stove to run less efficiently. A quick weekly vacuum reduces fire hazards from lint near gas stoves and helps your appliances last longer.
How To Do It Safely
Always unplug before moving. For heavy appliances, ask for help or use appliance sliders to protect your floors. Check the manufacturer's manual—some fridges have water lines that need careful handling.
Vacuum gently around coils to avoid bending them.
What To Watch For
Look for signs of pests, like droppings or chewed wires. If you find a lot of grease buildup near the stove, it might be time to deep-clean the area. Also, check for water leaks under the dishwasher or fridge—early detection saves you from costly repairs.
13. Descale the Coffee Maker with Vinegar
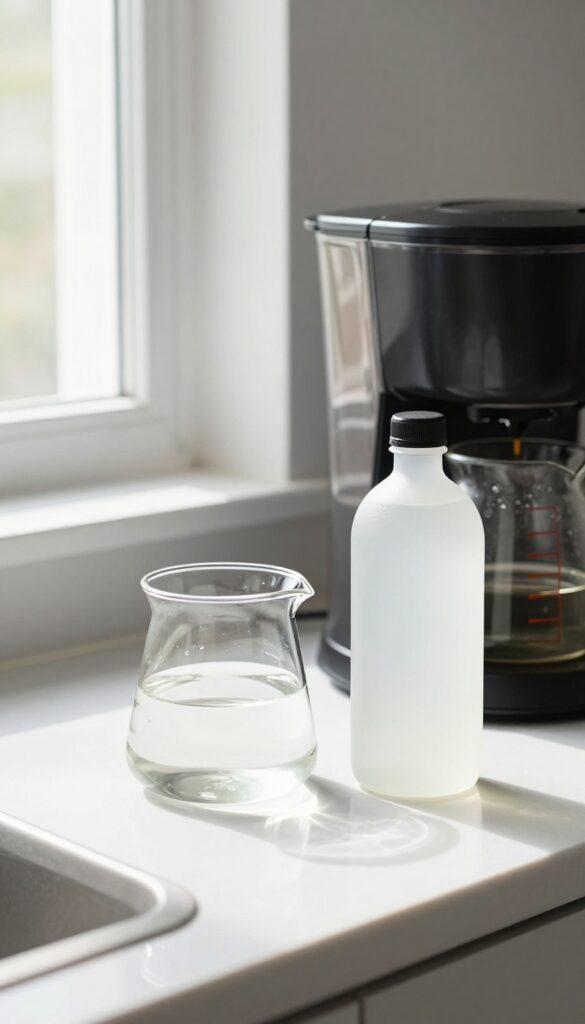
If your morning coffee has started tasting a little off or your brewer is taking longer than usual, mineral buildup is likely the culprit. Hard water leaves deposits inside the machine that affect both flavor and performance. A quick vinegar cycle restores your coffee maker without harsh chemicals.
Why Vinegar Works
White vinegar is mildly acidic, which breaks down calcium and limescale deposits without damaging internal components. It's cheap, food-safe, and leaves no chemical residue when rinsed properly. This method works for drip machines, single-serve brewers, and even espresso machines.
Step-by-step Descaling
Fill the water reservoir with equal parts white vinegar and water. Run a full brew cycle without coffee grounds. Let the machine sit for 15–30 minutes to let the vinegar work on stubborn deposits.
Then run two full cycles with fresh water to rinse out any vinegar taste or smell.
How Often To Do It
For most households, descaling once a month is enough. If you have very hard water, do it every two weeks. Your coffee maker will thank you with faster brewing and better-tasting coffee.
14. Wash Dish Racks and Drying Mats
Dish racks and drying mats sit in a damp environment day after day, making them a prime spot for mold, mildew, and soap scum buildup. Even if your dishes look clean, a grimy rack can transfer bacteria right back onto them. Giving these items a weekly wash keeps your drying area fresh and your dishes truly clean.
Start by removing all dishes and utensil holders from the rack. Fill your sink or a large basin with hot water and a few squirts of dish soap. Submerge the dish rack and let it soak for 15–20 minutes to loosen stuck-on grime.
Use a stiff brush or an old toothbrush to scrub every nook and cranny, especially around the prongs and corners where gunk hides. Rinse thoroughly with hot water and dry with a clean towel or let it air dry completely before putting it back. For drying mats, the approach is slightly different.
Most mats are made of silicone or microfiber and can trap moisture underneath. Wipe the mat with a cloth dipped in a solution of equal parts white vinegar and water. The vinegar kills mold spores and neutralizes odors.
For stubborn spots, sprinkle baking soda on the mat, spray with vinegar, let it fizz for a few minutes, then scrub and rinse. Hang the mat to dry completely before placing it back on the counter.
Soak And Scrub The Rack
Fill your sink with hot, soapy water and submerge the dish rack for 15–20 minutes. Use a stiff brush to scrub every prong and corner, then rinse thoroughly with hot water. Dry with a clean towel or let it air dry completely before returning it to the counter.
Wipe Down Drying Mats
Wipe silicone or microfiber mats with a cloth dipped in equal parts white vinegar and water. For tough spots, sprinkle baking soda, spray with vinegar, let it fizz, then scrub and rinse. Always hang the mat to dry fully to prevent mold growth.
15. Clean Light Fixtures and Range Hood Filters
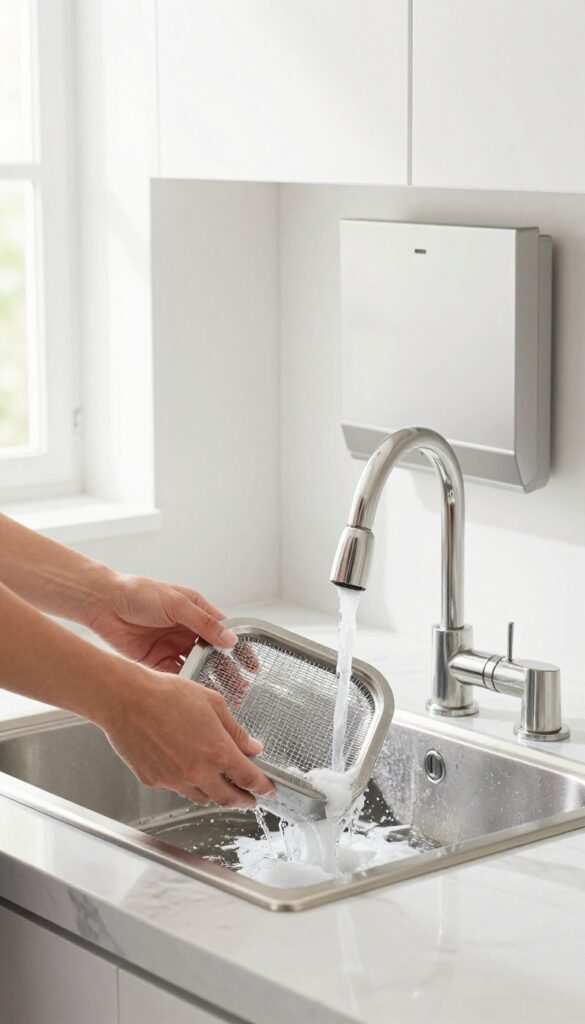
Light fixtures and range hood filters are two of the most overlooked spots in the kitchen. They collect grease and dust over time, making your kitchen look dull and your hood less effective. A quick weekly clean keeps them working well and brightening the room.
Grease and grime build up on range hood filters and light fixtures, affecting both appearance and performance. Cleaning them weekly is simple and makes a noticeable difference in your kitchen's freshness.
Soak And Scrub Range Hood Filters
Remove the metal filters from your range hood. Fill your sink or a large basin with hot water and add a generous amount of baking soda (about half a cup). Let the filters soak for 10–15 minutes to loosen the grease.
Then scrub with a soft brush or sponge, rinse well, and let them dry completely before reinstalling.
Wipe Down Light Fixtures
Use a microfiber cloth dampened with warm water and a drop of dish soap to wipe down light fixtures, including pendant lights, under-cabinet lights, and the overhead fixture. For glass shades, remove them if possible and wash in warm soapy water. Dry thoroughly to avoid water spots.
Don't Forget The Exhaust Fan
While you're at it, use a vacuum with a brush attachment to gently clean the exhaust fan blades and grille. This prevents dust buildup that can reduce airflow and spread dust around the kitchen.
16. Organize Pantry by Grouping Similar Items
A cluttered pantry makes meal prep feel like a treasure hunt. Taking everything out, wiping down shelves, and grouping like with like can transform that chaos into calm. Once you see what you actually have, you'll waste less food and find ingredients faster.
Start by emptying every shelf and tossing expired items. Wipe down surfaces with a damp cloth. Then sort everything into categories: canned goods, spices, baking supplies, snacks, grains, and condiments.
Use clear bins or baskets to keep groups together. Label shelves so everyone in the household knows where things belong. This system makes grabbing what you need quick and restocking a breeze.
Why Grouping Works
When similar items live together, you can see at a glance what you're low on. No more buying a third jar of cumin because you couldn't find the first one. It also speeds up cooking—everything for a recipe is in one zone.
Best Storage Tools
Clear plastic bins, wire baskets, or stackable can racks keep categories separate. Use lazy Susans for oils and vinegars, and tiered shelves for cans. Avoid deep cabinets without organization—things get lost in the back.
Maintenance Tips
Do a quick tidy every time you unpack groceries. Return items to their designated spots. Once a month, check for expiring goods and wipe down any spills.
This keeps your pantry functional without a full overhaul.
17. Wipe Baseboards and Window Sills
Baseboards and window sills are silent collectors of kitchen grease and dust. They're easy to ignore because they're not in your direct line of sight, but they can make the whole room feel dingy. A quick weekly wipe keeps them looking fresh and prevents buildup that's harder to scrub later.
Use a damp microfiber cloth or a dusting wand to wipe down baseboards and window sills. For stubborn grease, add a drop of dish soap to warm water. Pay extra attention to corners and the edges where the sill meets the window frame.
This simple habit takes just a few minutes and makes a noticeable difference in how clean your kitchen feels.
Why Grease Loves These Spots
Kitchen grease doesn't just stay on the stove. It travels through the air and settles on nearby surfaces, especially horizontal ones like window sills and the top edges of baseboards. Over time, dust sticks to the grease, creating a grimy film that can attract pests and look unsightly.
The Right Tools For The Job
A microfiber cloth is ideal because it traps dust without scratching paint. For high or tight spots, a long-handled duster with a microfiber head works well. Avoid using oily furniture polish on baseboards—it can attract more dust.
Stick to plain water or a mild soap solution.
Make It Part Of Your Routine
Tackle baseboards and window sills right after you wipe down counters. That way, you're already in cleaning mode and have a damp cloth handy. Set a reminder for once a week, and soon it'll become an automatic part of your kitchen refresh.
18. Clean Small Appliances (Toaster, Blender, etc.)
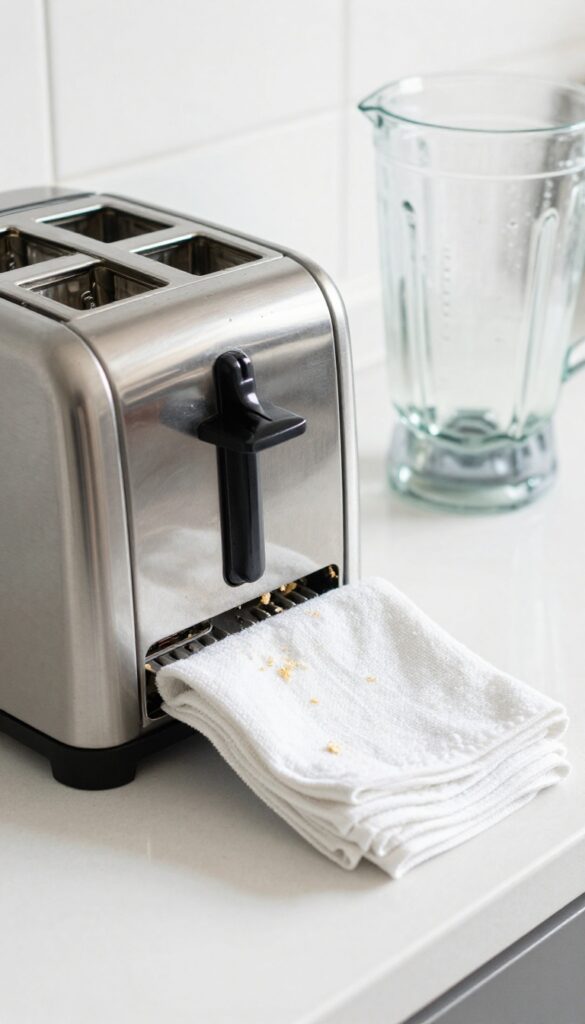
Small appliances work hard for you all week, but they often get ignored during routine cleaning. A toaster filled with crumbs or a blender with dried-on residue can affect performance and even become a hygiene issue. Giving them a quick weekly once-over keeps them running smoothly and looking presentable.
Toaster And Toaster Oven
Always unplug first. Pull out the crumb tray and dump it over the trash. Wipe the exterior with a damp cloth and a little dish soap.
For stuck-on grime inside a toaster oven, use a paste of baking soda and water on a soft sponge, then wipe clean.
Blender And Food Processor
After use, fill the pitcher halfway with warm water and add a drop of dish soap. Blend on high for 30 seconds, then rinse thoroughly. For the lid and blade assembly, hand wash with soapy water and dry completely before reassembling.
Mixer And Other Countertop Appliances
Wipe down the base and attachments with a damp cloth. For stand mixers, pay attention to the area around the attachment hub where batter can sneak in. Use a soft brush to dislodge any dried bits.
Dry everything well to prevent rust on metal parts.
19. Sweep and Mop Floors with a Gentle Cleaner
Kitchen floors take a beating—spills, crumbs, and sticky spots from daily cooking. A quick sweep or vacuum clears the loose debris, but mopping is what truly refreshes the surface. Using a gentle cleaner, like warm water with a few drops of dish soap or a pH-neutral solution, lifts grime without leaving residue or dulling the finish.
Start by removing any loose dirt with a broom or vacuum. Then mop with a solution that's tough on grease but kind to your flooring. Avoid harsh chemicals that can strip sealants or leave a sticky film.
Why Gentle Cleaners Work Best
Harsh cleaners can damage floor finishes over time, especially on tile, laminate, or vinyl. A mild soap solution effectively cuts through kitchen grease without etching or discoloring. It's also safer for pets and kids who spend time on the floor.
The Right Mopping Technique
Use a microfiber mop or a well-wrung sponge mop to avoid soaking the floor. Work in sections, starting from the farthest corner and moving toward the door. Rinse the mop head frequently to avoid spreading dirty water around.
Frequency For A Weekly Fresh Start
Aim to mop kitchen floors once a week, or more often if you cook frequently. Spot-clean spills immediately to prevent stains. This simple routine keeps your kitchen looking clean and feeling fresh without extra effort.
20. Take Out the Trash and Wipe the Bin
Trash bins are the final frontier of kitchen cleaning, but they're often forgotten until a smell tips you off. A quick weekly wipe-down prevents odors from building up and keeps your kitchen smelling fresh. Plus, a clean bin makes taking out the trash feel less like a chore.
Empty all trash bins, wash them with soapy water, and let them dry before inserting a new bag to prevent odors.
Empty And Rinse
Start by removing the old bag and any loose debris. Rinse the bin with warm water to dislodge stuck-on bits. For stubborn residue, a scrub brush works wonders.
Soap And Scrub
Use a mild dish soap and a sponge to scrub the inside and outside of the bin. Pay extra attention to the bottom and corners where gunk hides. Rinse thoroughly to remove all soap.
Dry And Deodorize
Let the bin air dry completely before adding a new bag. To keep it fresh between cleanings, sprinkle a little baking soda at the bottom or place a dryer sheet under the bag.
FAQ
How often should I deep clean my kitchen?
A weekly deep clean is ideal for maintaining a fresh kitchen. Focus on high-touch areas like the stovetop, sink, and countertops, and do a more thorough clean monthly.
What's the best natural cleaner for kitchen surfaces?
White vinegar and baking soda are excellent natural cleaners. Vinegar disinfects and cuts grease, while baking soda scrubs without scratching.
How do I remove stubborn stains from my stovetop?
Make a paste of baking soda and water, apply it to the stain, let it sit for 15 minutes, then scrub gently with a non-abrasive sponge.
Can I use bleach to clean my kitchen?
Bleach can be used for disinfecting, but it's harsh and can damage surfaces. Stick to gentler options like vinegar or hydrogen peroxide for daily cleaning.
How do I keep my kitchen smelling fresh between cleanings?
Place a bowl of baking soda in the fridge, run lemon peels through the garbage disposal, and open windows regularly to circulate air.
Conclusion
A fresh kitchen isn't about perfection—it's about building simple habits that stick. Start with just two or three tips from this list that address your biggest pain points, and practice them until they feel automatic.
Once those become second nature, layer in a few more. Over time, these small weekly actions will save you hours of deep cleaning and keep your kitchen feeling welcoming every single day.