13 Clever Reach Pantry Ideas for Neater Food Storage
Deep pantry shelves have a way of turning into a black hole. You stash things in the back, and they vanish until you move out. The problem isn't your pantry—it's how you're using the space.
Reach-in pantries are tricky because you can only see the front row. But with a few smart tweaks, you can make every inch count. No more buying duplicates or digging through chaos.
These 13 ideas focus on real solutions for deep shelves, pull-out drawers, and vertical storage. They're practical, affordable, and designed to keep your pantry neat without constant upkeep.
1. Use Clear Bins with Labels to Group Similar Items
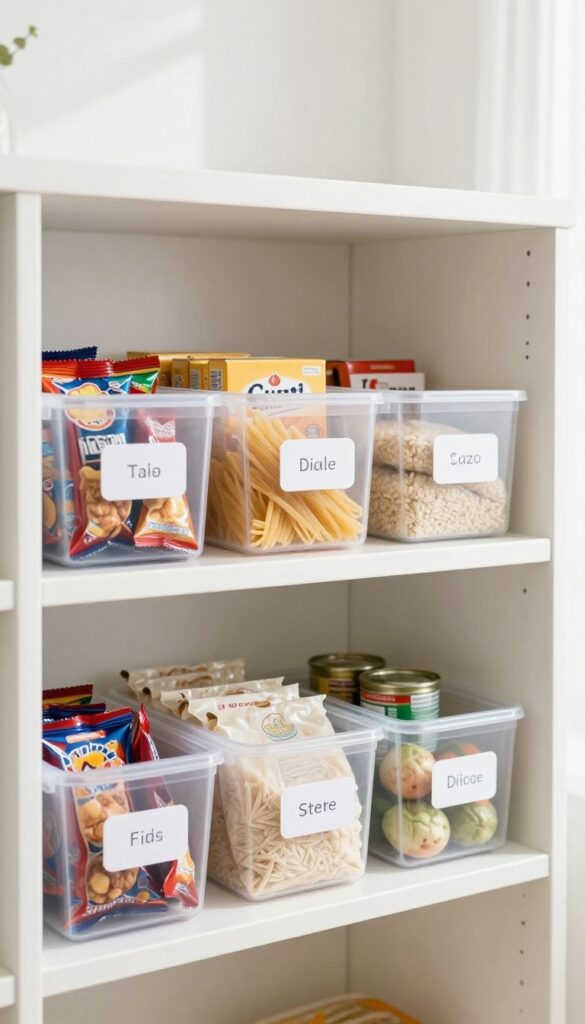
Clear bins are a game-changer for reach-in pantries. They let you see everything at a glance without pulling items forward. Group snacks, baking supplies, or canned goods together and label each bin clearly.
This simple system keeps categories separate and makes restocking a breeze.
Start by measuring your shelf depth and height. Choose bins that fit snugly without wasted space. Clear plastic or acrylic works best—avoid opaque bins that hide contents.
Group items by how you use them: breakfast foods in one bin, baking supplies in another, and snacks for kids in a third. Label each bin on the front with a label maker or chalk labels for easy updates. This method prevents duplicates and keeps your pantry organized even when you're in a hurry.
Choosing The Right Bins
Measure your shelf dimensions first. Look for bins that are wide enough to hold standard cans and boxes but not so deep that items get lost. Modular bins that stack or interlock can maximize vertical space.
Avoid bins with lids for frequently used items—they add an extra step.
Labeling For Easy Identification
Use a label maker or chalk labels for a clean look. Write categories like "Pasta & Rice, " "Canned Veggies, " or "Snacks. " Place labels at eye level on the front of each bin.
This makes it easy for everyone in the household to find and return items to the right spot.
Maintaining The System
Once a month, pull out all bins and wipe down shelves. Check for expired items and reorganize if needed. Keep a small step stool nearby so you can reach upper shelves without straining.
This routine keeps your pantry functional and clutter-free.
2. Install Pull-Out Drawers for Deep Shelves
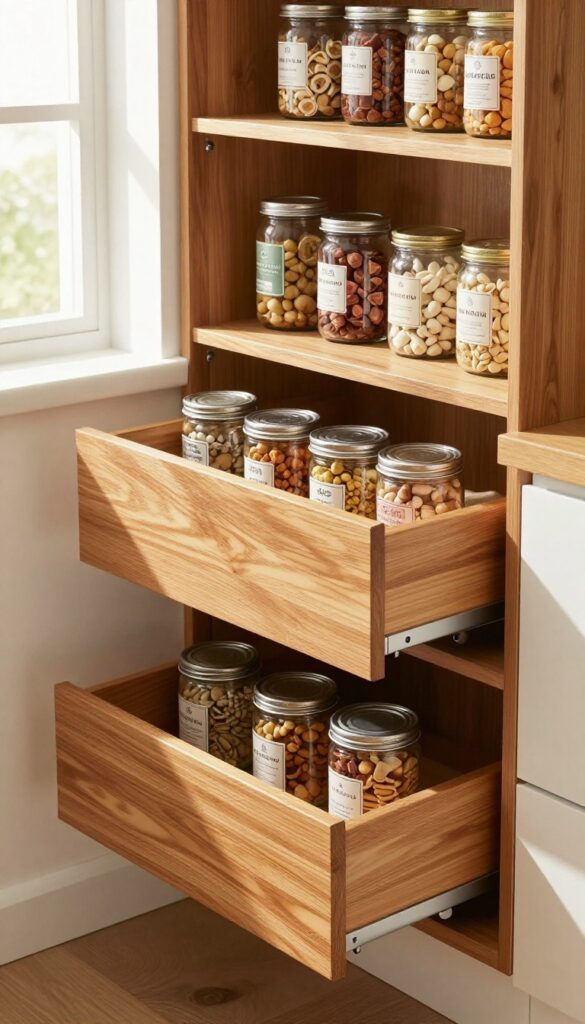
Deep shelves are notorious for hiding items in the back. Pull-out drawers or sliding baskets solve this by bringing everything forward. They transform wasted space into accessible storage that you can actually see and reach.
Pull-out drawers are a straightforward upgrade that pays off immediately. They eliminate the need to dig through stacks or pull everything out to find what you need. With a simple glide mechanism, you can access every can, jar, or box without hassle.
Choose The Right Hardware
Look for heavy-duty slides that can support the weight of canned goods or bulk items. Full-extension slides let you see the entire drawer, making it easy to grab items from the back. Soft-close features add a nice touch and prevent slamming.
Customize Drawer Heights
Not all pantry items are the same height. Install drawers at varying depths to accommodate tall bottles, cereal boxes, or short spice jars. Adjustable dividers inside the drawers keep everything organized and prevent items from tipping over.
Diy Vs. Professional Installation
If you're handy, you can retrofit existing shelves with pull-out kits from hardware stores. Measure carefully and secure the slides to the shelf and the basket. For a seamless look, consider hiring a carpenter to build custom drawers that match your cabinet dimensions.
3. Add Tiered Shelf Risers for Cans and Jars
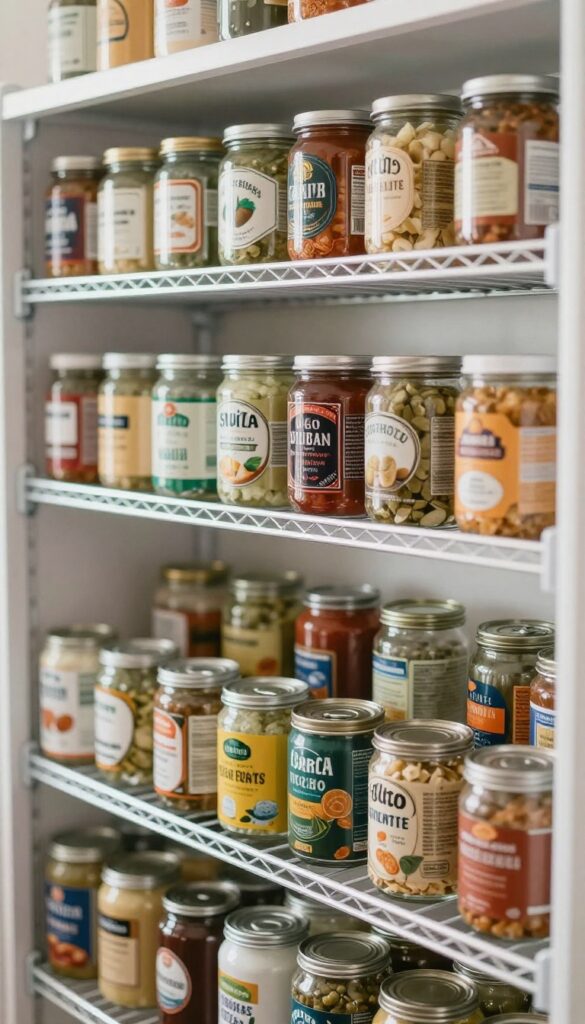
Cans and jars are notorious for hiding behind each other. You buy a second can of beans because you couldn't see the first one, and suddenly you have a surplus. Tiered shelf risers fix that by creating stadium seating for your items.
Every label is visible, and you can grab what you need without a game of Jenga.
Tiered risers are simple plastic or wire shelves that elevate the back row. They turn a flat shelf into a sloped display, so nothing gets lost. You can find them in various sizes to fit standard pantry shelves.
They're especially useful for soda cans, canned vegetables, and spice jars. The best part? They're inexpensive and require no installation—just set them down and organize.
Why They Work So Well
The key is visibility. When items are stacked flat, you only see the front row. Risers tilt everything forward, so you see the labels of the back row too.
This means you can store more without losing track. Plus, you can grab a can from the back without knocking over the front ones. It's a small change with a big impact on daily use.
Choosing The Right Risers
Look for risers that match your shelf depth. Most are adjustable or come in standard widths like 12 or 16 inches. For cans, choose a riser with a lip to prevent rolling.
For jars, a smooth surface works fine. You can also stack risers for double-decker storage if you have tall shelves. Just make sure the riser is sturdy enough to hold the weight.
Where To Place Them
Use risers on shelves where you store similar-sized items. Canned goods, condiments, and spice jars are perfect candidates. Avoid using them for tall bottles or irregular shapes—they'll topple over.
Group like items together on the same riser for a clean look. For example, all beans on one riser, all tomatoes on another.
4. Hang a Door Organizer for Spices and Small Packets
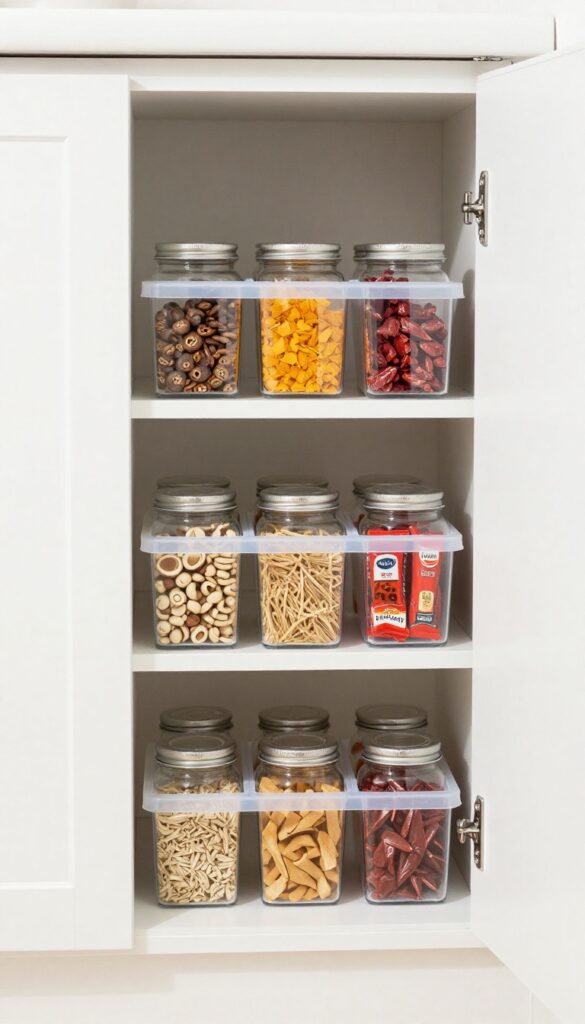
The back of the pantry door is often overlooked, but it's prime real estate for small items. An over-the-door organizer with clear pockets can transform that empty space into a spice rack and snack station. It keeps tiny packets visible and accessible, so you're not digging through shelves for that one seasoning packet.
Door organizers are incredibly versatile. Look for one with adjustable or removable pockets to fit different packet sizes. Clear pockets are key—you can see everything at a glance.
This setup works great for spice blends, sauce packets, tea bags, or even small snack pouches. It frees up shelf space for larger items and reduces clutter.
Choose The Right Size
Measure your door width and clearance before buying. Standard organizers fit most pantry doors, but check that it won't hit shelves when closed. Opt for a model with multiple pocket depths to accommodate both flat packets and taller spice jars.
Organize By Frequency Of Use
Place everyday spices and snacks in the easiest-to-reach pockets (mid-height). Reserve top pockets for less-used items like specialty seasonings or backup packets. Bottom pockets can hold heavier items like small jars or pouches.
Label For Quick Access
Add small labels to the top of each pocket or use a label maker. This helps family members find and return items correctly. It also makes restocking a breeze—you'll know exactly where each packet belongs.
5. Use Lazy Susans for Corner or Deep Shelves
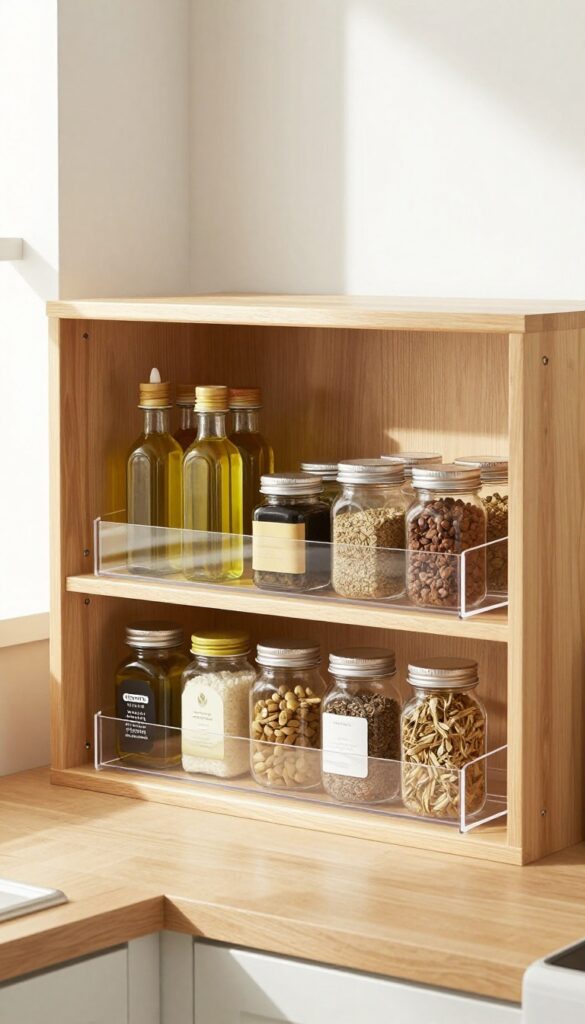
If your pantry has deep shelves or awkward corners, you know the struggle of reaching for that jar of olives hiding in the back. Lazy Susans solve this by spinning everything into view. They're simple, affordable, and instantly make your pantry more functional.
Lazy Susans are rotating trays that let you access items from all angles. Place one on a deep shelf and you can spin it to bring the back row forward. No more digging or knocking things over.
They work especially well for oils, condiments, spices, and small jars. Choose a size that fits your shelf depth. A 12-inch round Susan is great for standard shelves, while half-circle versions fit corners perfectly.
For heavy items like cans, opt for a sturdy metal or plastic model with a low profile to maximize vertical space. Group similar items on each Susan. For example, dedicate one to cooking oils and vinegars, another to sauces and dressings.
This keeps everything organized and easy to find. You can even use tiered Lazy Susans for double the storage.
Best Spots For Lazy Susans
Install them on deep shelves where items tend to get lost. Corner shelves are ideal because a full-circle Susan can rotate freely without bumping into cabinet walls. Also try them on bottom shelves for heavy items like canned goods—just spin to grab what you need without bending awkwardly.
Choosing The Right Material
Plastic Lazy Susans are lightweight and easy to clean, but they may warp under heavy loads. Metal or bamboo options are sturdier and look nicer. For pantry use, a non-slip surface or raised lip helps prevent items from sliding off during rotation.
Stacking And Layering
Maximize vertical space by using tiered Lazy Susans. These have two or three levels, perfect for spices, small packets, or snack packs. Just make sure the height between shelves is enough to clear the items below.
A two-tier Susan can double your storage in the same footprint.
6. Stack Canned Goods with Can Dispensers
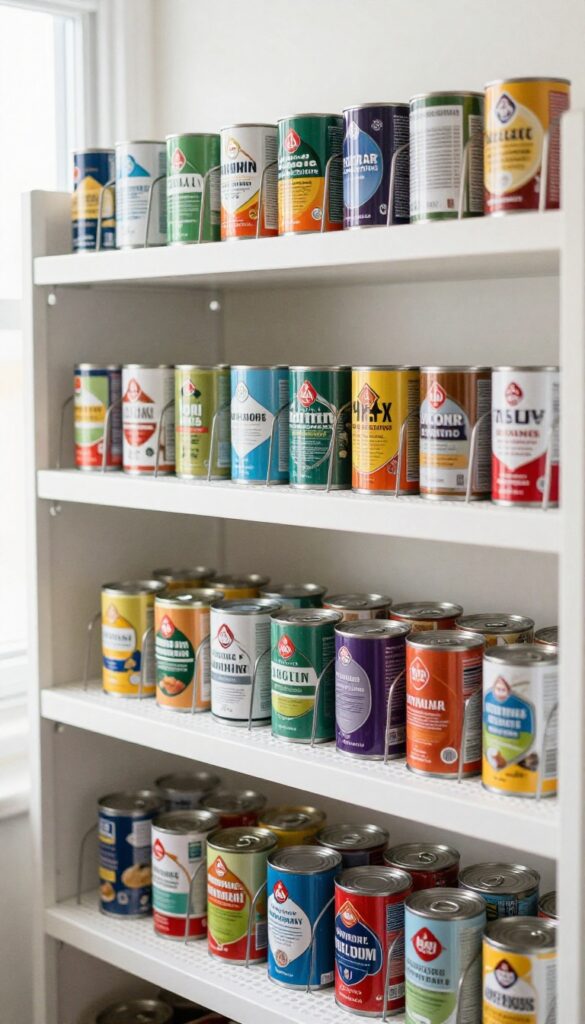
Cans are one of the hardest things to keep tidy in a deep pantry. They roll around, get pushed to the back, and before you know it, you've got three open cans of diced tomatoes. Can dispensers solve that by letting you load from the top and grab from the bottom.
It's like a vending machine for your pantry.
How They Work
These dispensers are basically angled chutes that hold cans in a single-file line. You drop new cans in the top, and gravity slides them down to the front. When you take one from the bottom, the rest shift forward.
This means you always use the oldest can first, and nothing gets lost in the back.
Best Uses
Use them for frequently used items like canned beans, tomatoes, or soups. Stack two or three dispensers side by side for different types. They're especially helpful on deep shelves where cans usually get buried.
Just make sure the dispenser width matches your can sizes—most fit standard 14-ounce cans.
Installation Tips
Most dispensers are freestanding, so no drilling required. Place them on a sturdy shelf and secure with non-slip shelf liner if needed. For a built-in look, mount them inside a cabinet door or on a pull-out drawer.
Measure your shelf depth first—dispensers range from 12 to 18 inches.
7. Install Vertical Dividers for Baking Sheets and Cutting Boards
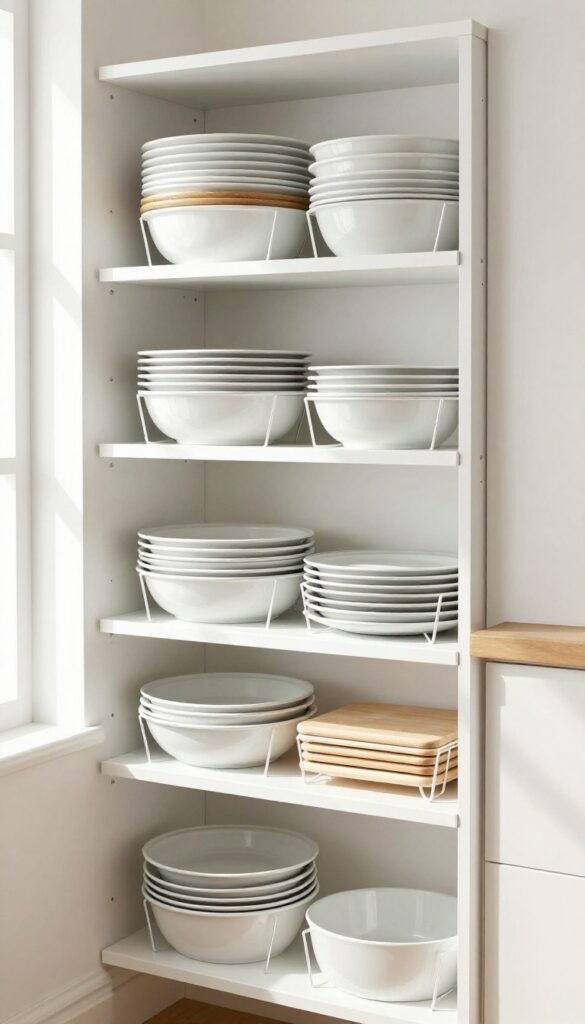
Baking sheets, cutting boards, and large trays are notorious for creating a messy pile in deep pantries. They slide around, lean on each other, and make it nearly impossible to grab one without causing a domino effect. Vertical dividers solve this by keeping each piece standing upright, so you can slide one out without disturbing the rest.
Vertical dividers are simple, affordable, and transform chaotic flat storage into organized vertical storage. They work best in cabinets or on deep shelves where you can attach them to the shelf above or below. Once installed, you'll never have to shuffle through a leaning stack again.
How To Install Them
You can buy pre-made wire or plastic dividers, or make your own using wooden dowels or metal rods. Measure the height and depth of your space, then attach the dividers with screws or adhesive brackets. Leave about 2 to 3 inches between each divider for easy access.
For a no-drill option, use tension rods placed vertically between shelves.
What To Store In Dividers
Baking sheets, cookie trays, muffin tins, cutting boards, and large platters all fit perfectly. You can also use them for wire cooling racks, pizza pans, or even shallow bins. The key is to group similar items together so you can grab what you need quickly.
Bonus Tip: Label The Dividers
If you have multiple types of trays, label the top of each divider with a small sticker or marker. This saves time when you're looking for a specific size. You can also color-code labels for different categories like baking, roasting, or serving.
8. Use Baskets with Handles for Heavy or Bulk Items
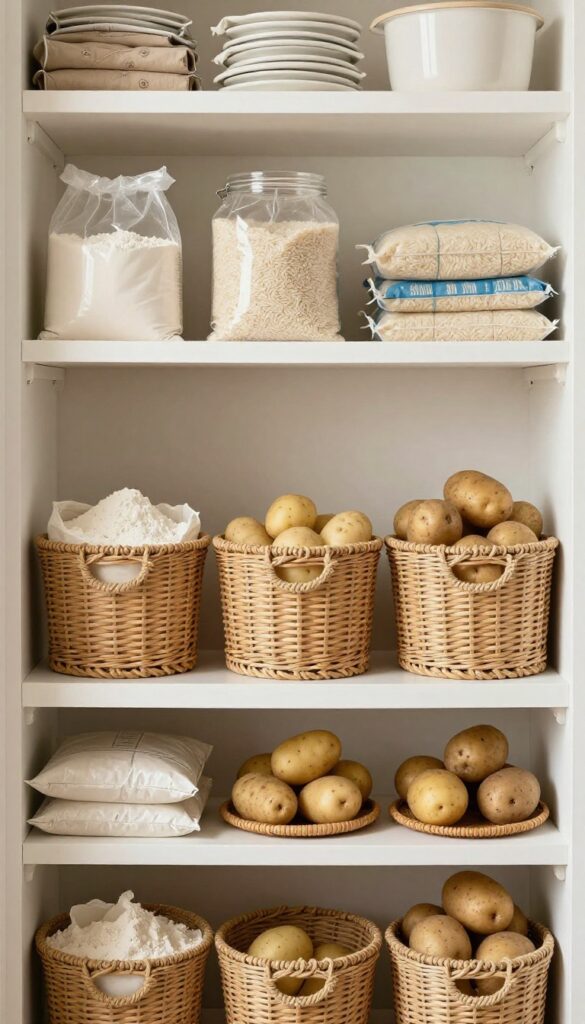
Heavy bags of flour, rice, or potatoes can be a pain to drag out from deep shelves. They often spill or get stuck. Baskets with sturdy handles solve this by letting you pull the whole load forward in one smooth motion.
They also contain any messes, keeping your shelves clean.
Choose baskets with strong, comfortable handles that can support the weight. Open-weave baskets are great for breathability, especially for potatoes or onions. For flour or rice, consider solid-bottom baskets to catch any dust.
Place these baskets on lower shelves or pull-out trays for easy access.
Pick The Right Handle
Look for baskets with handles that are thick enough to grip comfortably, even when loaded. Wooden or rope handles are sturdy and easy on the hands. Avoid thin plastic handles that might dig in or break.
Group Similar Items
Use one basket for baking supplies like flour and sugar, another for root vegetables. Label each basket with a tag or chalk label so you can grab what you need without rummaging.
Stack Or Slide
If you have deep shelves, place baskets on a slide-out tray or turntable. For shallower shelves, stack smaller baskets on top of larger ones. Just make sure the handles don't get in the way.
9. Add Under-Shelf Baskets for Extra Storage
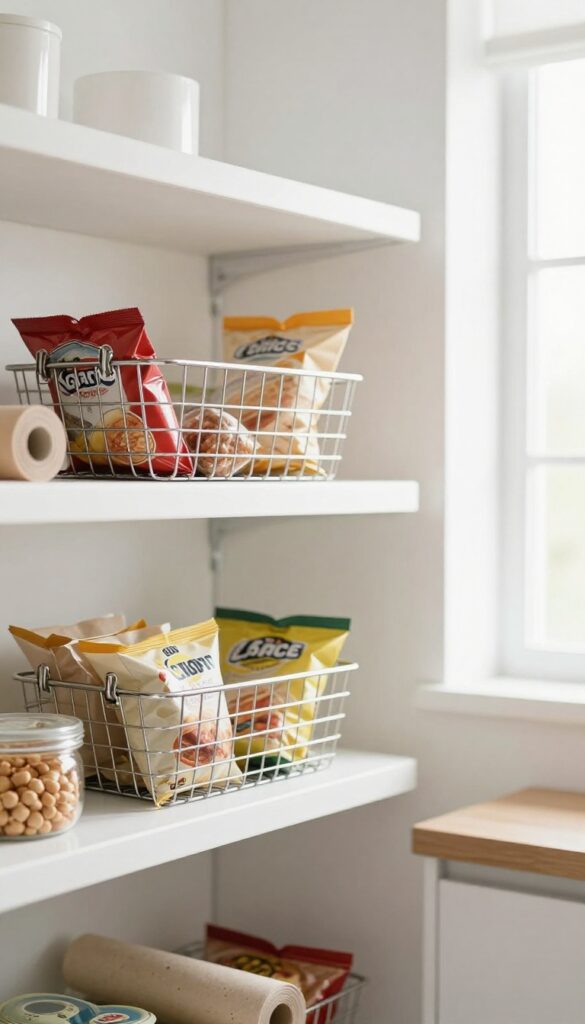
When you've filled every shelf but still have more to store, look down. The space beneath each shelf is a blank canvas waiting for a clever hack. Under-shelf baskets clip right onto the wire or solid shelf above, creating an instant second layer of storage.
They're perfect for lightweight items that would otherwise clutter your countertops or get lost in deep corners.
Under-shelf baskets are a game-changer for reach-in pantries. They clip onto the shelf above, hanging down to create a new storage level. Use them for snack bags, tea boxes, foil rolls, or spice packets.
They maximize vertical space without taking up any floor area. Plus, they keep items visible and easy to grab.
Where To Place Them
Install under-shelf baskets on the lowest shelves first, since those are hardest to access. Also consider placing them under frequently used shelves for items you reach for daily. Avoid putting them under shelves that hold heavy items, as the baskets are meant for lightweight goods.
What To Store
Store lightweight, flat items like snack bags, tea boxes, foil or plastic wrap, parchment paper, and small spice packets. You can also use them for lids, small containers, or even a roll of paper towels. Just make sure nothing is too heavy or bulky, or the basket may sag.
Installation Tips
Most under-shelf baskets come with clips that hook onto wire shelves or adhesive strips for solid shelves. Measure your shelf thickness before buying. For wire shelves, choose baskets with sturdy clips that won't slide.
For solid shelves, use strong adhesive that can hold the weight without damaging the surface.
10. Label Every Shelf Zone for Easy Restocking
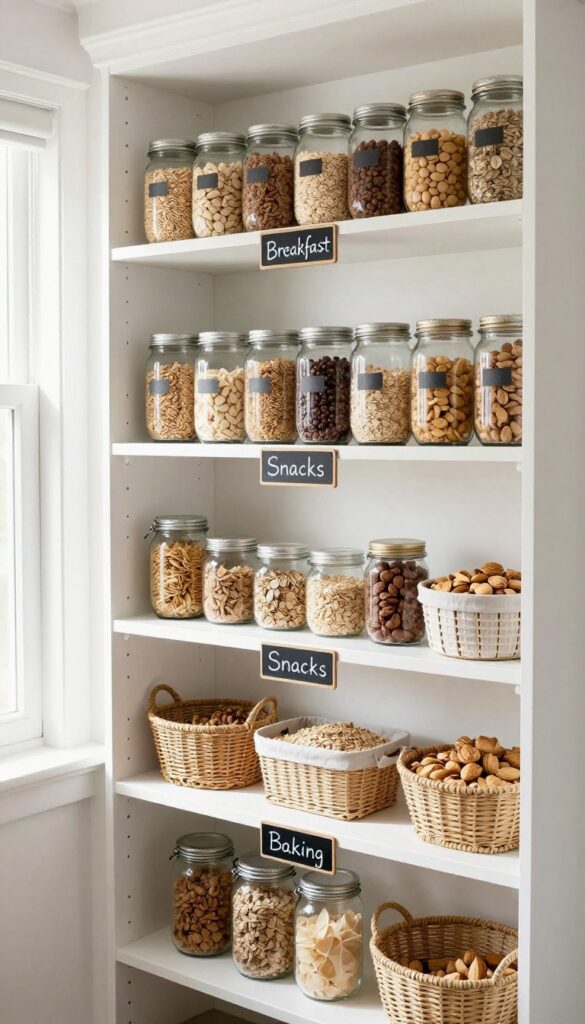
Labels aren't just for pretty aesthetics—they're your pantry's operating manual. When each shelf has a designated category, everyone in the household knows exactly where to put things back. No more guessing, no more misplaced items, and no more wasted time hunting for the pancake mix.
Assign each shelf a clear category like breakfast, snacks, baking, or canned goods. Use a label maker or simple chalkboard stickers on the shelf edge. This creates a logical home for every item and makes restocking mindless.
When you bring groceries home, you just follow the labels instead of rearranging everything.
Choose Categories That Match Your Habits
Think about how you actually use your pantry. If you bake every weekend, give baking its own shelf. If kids grab snacks constantly, put snacks at eye level.
Grouping by frequency of use makes daily life easier. Avoid vague categories like "miscellaneous"—they defeat the purpose.
Label Placement Matters
Place labels on the front edge of the shelf so they're visible at a glance. Use removable labels if you like to rotate categories seasonally. For deep shelves, add a second label on the back wall so you can see the zone even when the shelf is full.
Keep The System Flexible
Your pantry needs change over time. Maybe you start meal prepping or discover a new allergy. Leave room to adjust categories without redoing everything.
Use a label system that's easy to update—like dry-erase or magnetic labels—so you can pivot when life shifts.
11. Use Step Stools or Rolling Carts for High Shelves
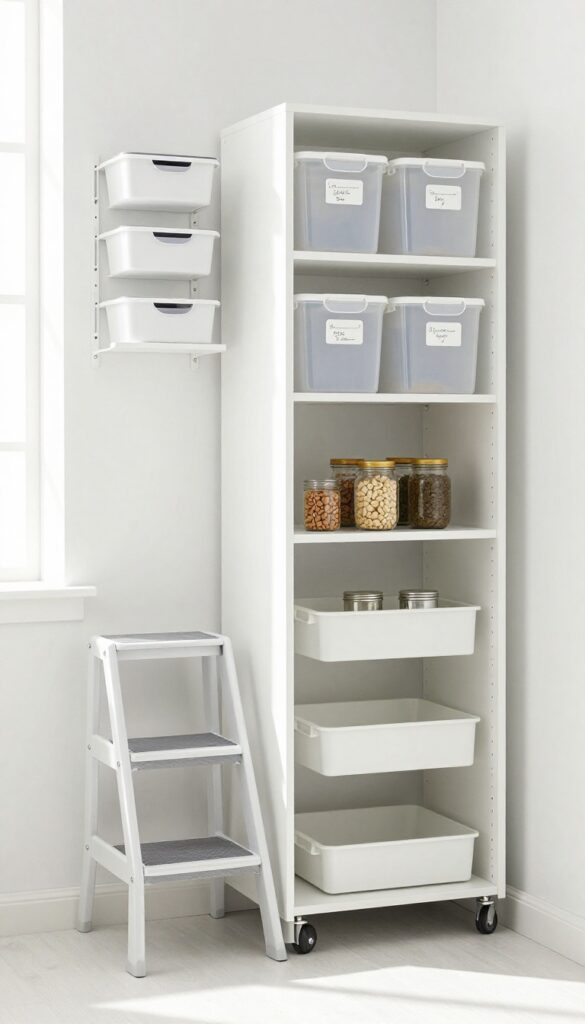
High shelves in a pantry often become dead zones. You can't reach them easily, so they fill up with random stuff you never use. But with the right tool, those top shelves can become valuable real estate for overflow or seasonal items.
Pick The Right Step Stool
A sturdy, foldable step stool that lives in the pantry or nearby makes high shelves instantly accessible. Look for one with a handle and non-slip steps. Keep it tucked next to the pantry or hang it on a hook inside the door so it's always close.
Rolling Cart As A Mobile Step
A small rolling cart with a flat top can double as a step stool and a transport tool. Pull it out, step up, and grab what you need. Plus, you can load it with items from the high shelf and roll them to your counter.
Choose one with locking wheels for safety.
Store Strategically On Top
Reserve high shelves for items you don't need often—holiday baking supplies, extra canned goods, or bulk packages. Use clear bins or baskets to group similar items. That way, when you step up, you can grab the whole bin and sort through it on the counter.
12. Store Snacks in Clear Jars with Pour Spouts
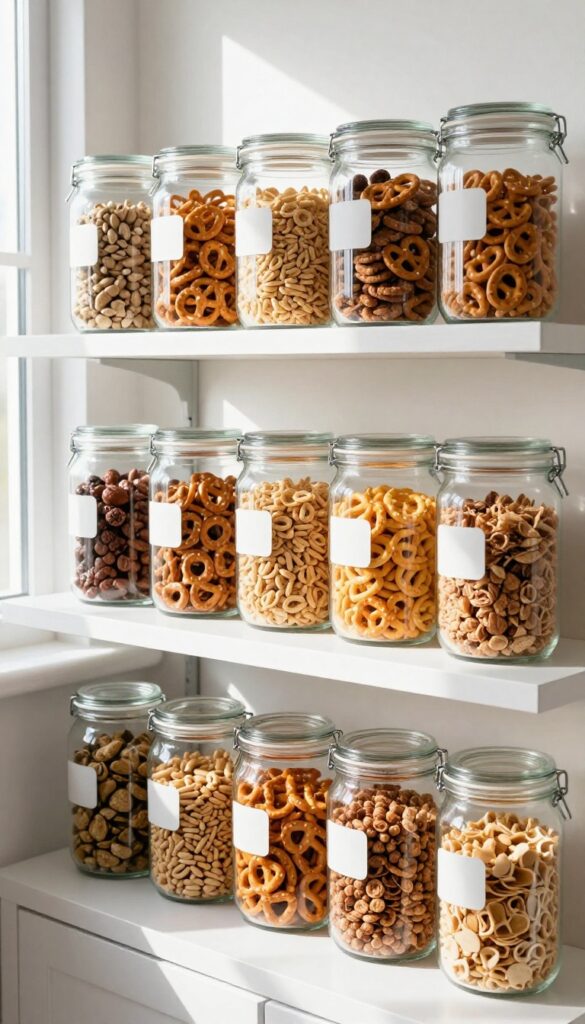
Snack bags are a nightmare in a reach-in pantry. They slide behind other items, get crushed, and you never know how much is left until you pull out a half-empty bag. Clear jars with pour spouts solve all of that at once.
These jars turn your loose snacks into a tidy, visible system. You can grab a jar, pour a handful, and put it back in seconds. No more digging through crumpled bags or buying duplicates because you thought you were out.
Why Pour Spouts Work Best
Standard mason jars are great, but pour spouts take them to another level. A plastic or metal spout with a flip cap lets you dispense snacks without removing the lid. That means less mess and faster access.
Look for jars with wide mouths so you can refill easily, and spouts that seal tightly to keep snacks fresh.
Which Snacks To Jar First
Start with the snacks you reach for most often: pretzels, cereal, nuts, trail mix, popcorn kernels, and granola. These are the items that tend to spill or go stale in their original packaging. Avoid anything that needs to stay very crisp, like crackers, unless you have an airtight seal.
For powdery snacks like protein powder, use a jar with a smaller spout.
Arranging Jars For Easy Access
Group your snack jars by type or frequency of use. Place the most popular ones at eye level on a lower shelf. If you have multiple jars, use a tiered shelf or a lazy Susan so you can see every jar at a glance.
Label the front of each jar with a chalk label or sticker so family members know what's inside without opening it.
13. Create a 'First In, First Out' System with Date Labels
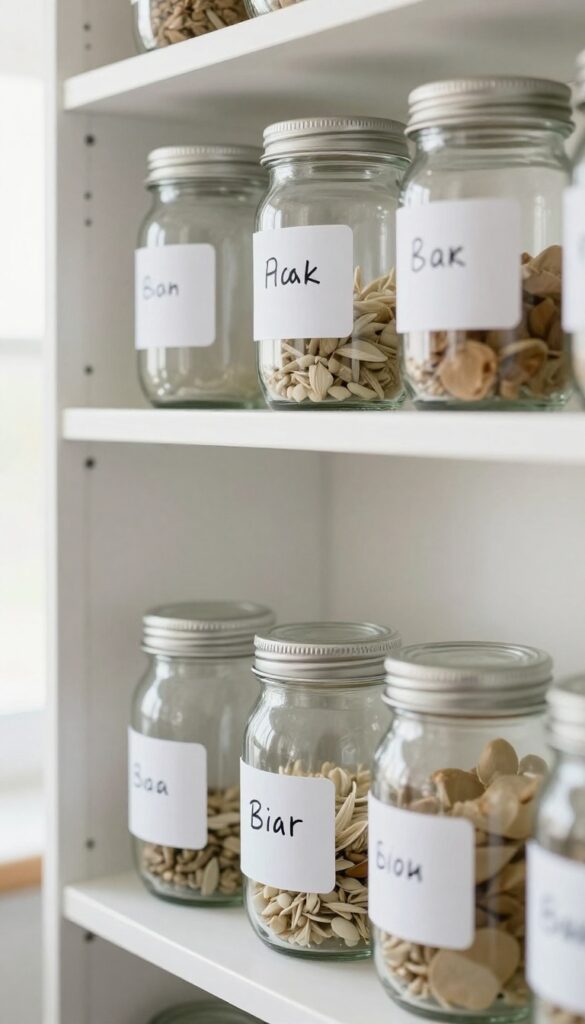
Ever reach for a can of beans only to find it expired three months ago? That happens when you don't have a system for tracking what's oldest. A simple date-labeling method can save you money and reduce food waste.
The FIFO (first in, first out) method is a grocery store standard that works perfectly at home. By labeling each item with its purchase date and arranging them so the oldest are in front, you'll always use things before they go bad. It takes just a few minutes to set up and pays off every time you cook.
Why Fifo Works So Well
When you can see at a glance which can of tomatoes is oldest, you naturally grab that one first. No more digging to the back of the shelf and forgetting what's there. This simple habit cuts down on expired food and helps your grocery budget stretch further.
Best Tools For Date Labeling
A label maker gives clean, permanent labels that won't smudge. But a simple chalk marker works great on glass jars and plastic containers. For cans and boxes, use a permanent marker or a sticky label.
Just write the date in a consistent spot—like the top or front—so it's easy to see.
How To Arrange Your Shelves
Group similar items together, then within each group, place the newest items behind the older ones. When you buy new cans of soup, put them behind the existing ones. This way, you always pull from the front.
A quick weekly check helps keep everything in order.
FAQ
What is the best way to organize a deep reach-in pantry?
Use pull-out drawers or sliding baskets to access the back. Combine with clear bins and tiered risers to keep items visible and grouped by category.
How do I maximize vertical space in a pantry?
Install under-shelf baskets, use stackable bins, and add a door organizer. You can also hang hooks for lightweight items like aprons or reusable bags.
Should I use plastic or wire bins for pantry storage?
Clear plastic bins are best because you can see contents. Wire bins offer ventilation but can let small items fall through. Choose based on what you store.
How do I keep my pantry organized long-term?
Label every zone, use a first-in-first-out system, and do a quick tidy every month. Avoid overstocking—keep only what you'll use within a few months.
Can I organize a pantry without spending much money?
Yes. Use cardboard boxes covered in wrapping paper, repurpose shoeboxes, and use binder clips to seal bags. Start with what you have and upgrade gradually.
Conclusion
Organizing your reach-in pantry doesn't require a complete overhaul. Pick one or two ideas that target your biggest frustration—maybe it's lost cans or cluttered shelves—and start there. Small changes stack up fast.
Before long, you'll open your pantry door and actually find what you need without digging. That's the whole point: a system that works for you, not against you.