10 Deep Shelf Pantry Ideas for a Cleaner, Calmer Kitchen
Deep shelves in the pantry sound like a dream—until you have to dig through three layers of cans to find the tomato paste. That back row becomes a black hole where items go to expire. You end up buying duplicates because you forgot what was hiding behind the front row.
The problem isn't your pantry's size; it's how you use the depth. With the right setup, those cavernous shelves can hold twice as much without the chaos. The goal is simple: everything visible and reachable in one glance.
These ten ideas tackle the most common deep-shelf frustrations. Each one solves a specific pain point, from sliding bins to vertical dividers.
1. Tiered Can Dispensers for Canned Goods
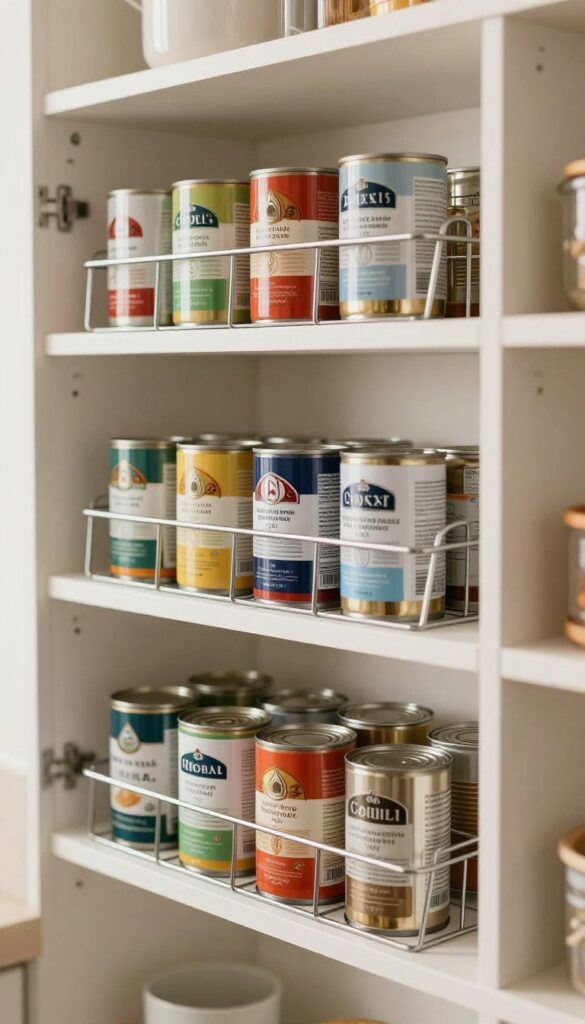
Canned goods are the worst offenders when it comes to deep-shelf chaos. You stack them, they roll, and the ones in back get forgotten until they're past their prime. Tiered can dispensers fix that by letting you load from the top and grab from the bottom, so your stock rotates automatically.
It's like having a mini vending machine for your pantry.
Tiered can dispensers are essentially angled racks that hold cans in a single-file line. As you remove one from the bottom, the next rolls down. This keeps older cans in front and newer ones in back, reducing waste.
They come in various widths to fit different shelf depths, and some are modular so you can link multiple units together. For deep shelves, look for models that are at least 12 inches deep to maximize capacity. Materials range from coated wire to sturdy plastic, but avoid anything flimsy that might tip when loaded with heavy cans.
Choosing The Right Size
Measure your shelf depth and height before buying. Most dispensers hold standard 14-ounce cans, but larger ones accommodate 28-ounce cans. If your shelves are extra deep, consider double-wide dispensers that hold two rows side by side.
Stackable options let you use vertical space for smaller cans like tuna or tomato paste.
Installation And Stability
No tools required—most dispensers just sit on the shelf. But for safety, especially with heavy cans, look for ones with non-slip feet or a weighted base. If your shelf is smooth, add a thin shelf liner underneath to prevent sliding.
Avoid overloading; stick to the manufacturer's weight limit.
Best Uses Beyond Cans
These dispensers aren't just for canned goods. They work great for spice jars, small bottles of oil or vinegar, and even snack packs. Just make sure the items are uniform in size so they roll smoothly.
For odd-shaped containers, consider a wider model with adjustable dividers.
2. Clear, Modular Bins with Handles
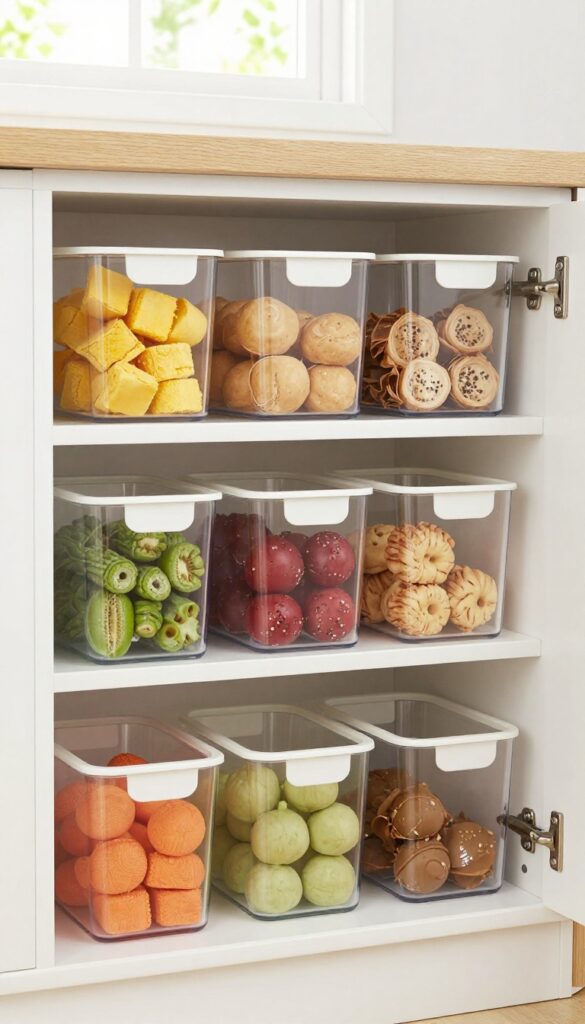
Grouping like items in clear bins with sturdy handles transforms deep shelves from a black hole into an organized system. You pull the whole bin out to access everything, then slide it back—no more digging or forgetting what's in the back. This works especially well for snacks, baking supplies, or lunchbox staples that tend to get scattered.
Clear bins let you see contents at a glance, and handles make it easy to grab the entire bin without knocking over neighboring items. Modular sizes stack or line up neatly, maximizing every inch of shelf depth. Choose bins that fit your shelf width and depth snugly to avoid wasted space.
Choose The Right Size
Measure your shelf depth and height before buying. Bins that are too tall waste vertical space; too wide leave gaps. Aim for bins that fill the shelf front to back, leaving just enough room for your hand to grip the handle.
Label Each Bin
A simple label on the front or handle saves time. Use a label maker or chalkboard stickers for easy updates. Group by category: snacks, baking mixes, granola bars, etc.
Keep Heavy Items Low
Place heavier bins on lower shelves to prevent tipping. Use smaller bins for lightweight items like tea bags or spice packets. This keeps the system safe and easy to manage.
3. Lazy Susans for Corner Shelves
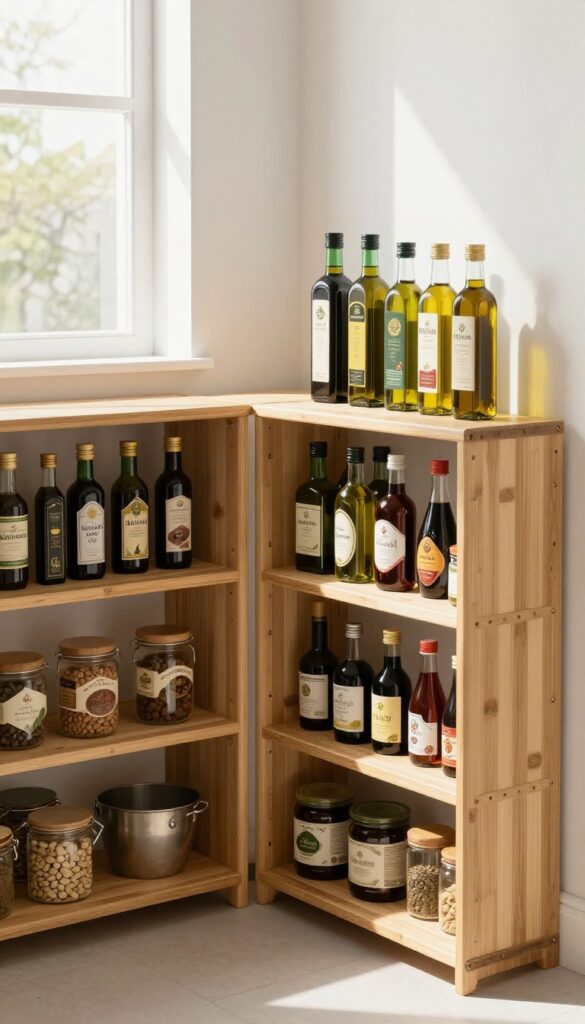
Corner shelves are the Bermuda Triangle of the pantry—things go in and never come out. A lazy Susan changes that by turning that awkward dead space into a spinning organizer that puts everything within arm's reach. Oils, vinegars, spices, or small jars finally have a home where nothing gets lost.
Pick The Right Size And Material
Measure your shelf depth and width before buying. A 12-inch diameter Susan works for most standard cabinets, but deeper shelves can handle 16-inch or even 18-inch models. Choose a sturdy material like bamboo or heavy-duty plastic that won't warp under the weight of glass bottles.
Avoid cheap wire models that wobble.
Group By Use, Not By Size
Keep your most-used items on one Susan: cooking oils, soy sauce, vinegar, and hot sauce all in one spot. Use a second for spices and dried herbs. Grouping by meal prep flow means you spin once and grab everything you need for a stir-fry or salad dressing.
Prevent Spills With Raised Edges
Look for lazy Susans with a raised lip or non-slip surface. This keeps bottles from sliding off when you spin. If your Susan has a smooth surface, add a silicone mat underneath each bottle for extra grip.
No more wiping up olive oil puddles.
4. Pull-Out Drawers or Sliding Baskets
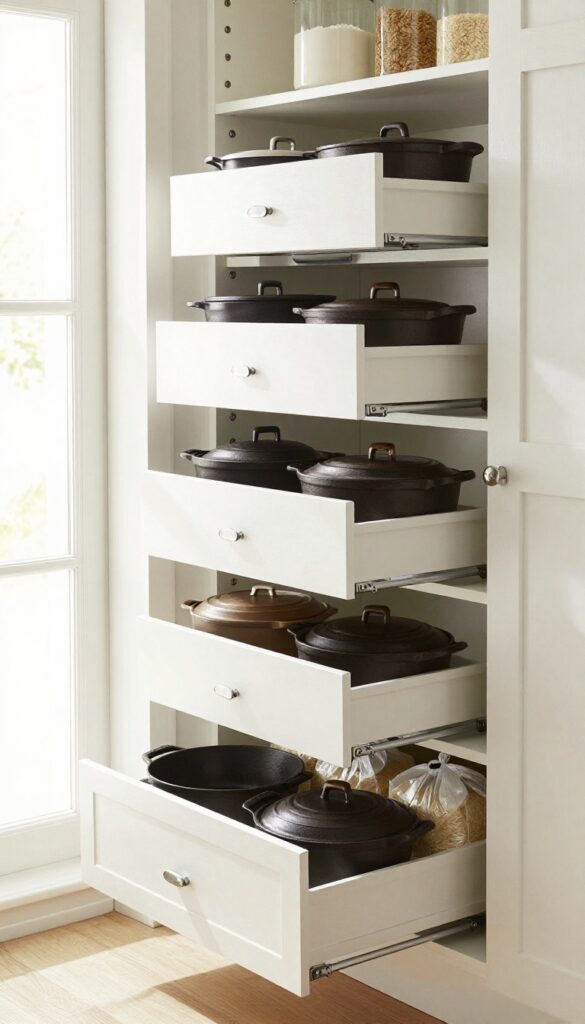
Deep shelves are notorious for hiding items in the back. The fix is simple: make the shelf move. Pull-out drawers or sliding baskets bring everything forward with a gentle tug, turning a frustrating reach into a smooth glide.
This upgrade works wonders for heavy cookware, bulk bags, and awkwardly shaped items.
Installing heavy-duty slides transforms a static shelf into a dynamic drawer. You can retrofit existing shelves with DIY kits or buy pre-built pull-out units. The key is choosing slides rated for the weight you'll store—pots and pans need at least 100-pound capacity, while dry goods can use lighter slides.
Once installed, you'll never dig in the back again.
Choosing The Right Slides
Full-extension ball-bearing slides are the gold standard. They allow the drawer to pull out completely, giving you full access. Look for soft-close features to prevent slamming.
Measure your shelf depth and width carefully before ordering—standard sizes range from 18 to 24 inches deep.
Diy Vs. Pre-built Units
For a custom fit, build your own drawer boxes from plywood and attach slides. This is cost-effective but requires tools and patience. Pre-built pull-out shelving units, like those from Rev-A-Shelf, drop right into existing cabinets with minimal effort.
They cost more but save time and guarantee smooth operation.
What To Store In Pull-outs
Heavy items benefit most: cast iron skillets, Dutch ovens, and large mixing bowls. Bulk dry goods like flour or rice bags slide out easily for scooping. You can also use them for small appliances like slow cookers or stand mixers, keeping them accessible but out of sight.
5. Vertical Dividers for Baking Sheets and Cutting Boards
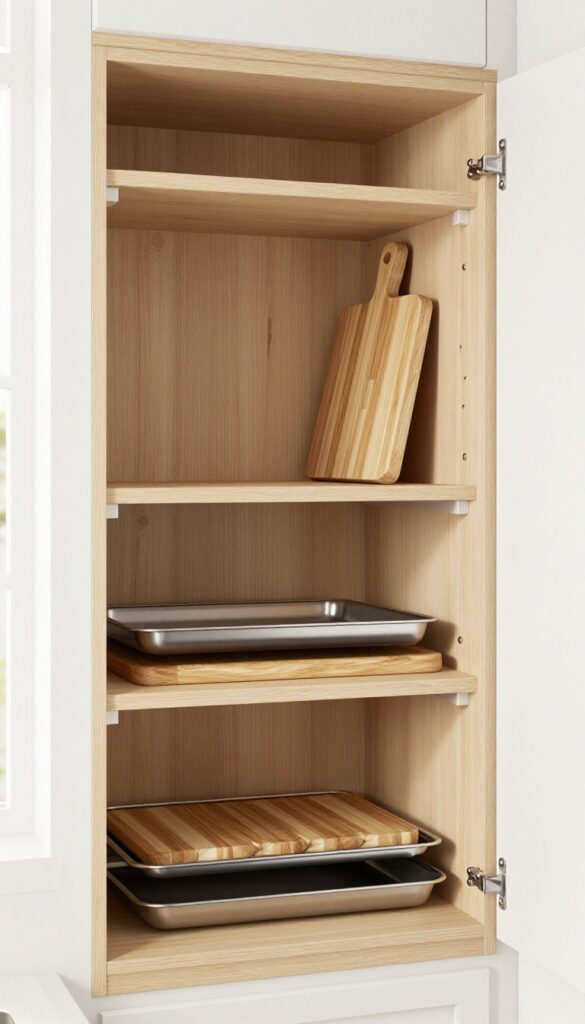
Baking sheets and cutting boards are notorious shelf hogs. Stack them flat and you waste vertical space; stack them loose and they slide everywhere, scratching each other. Vertical dividers solve both problems by letting you store these flat items upright, like files in a cabinet.
Suddenly, that wide shelf can hold twice as much, and you can grab any sheet without disturbing the pile.
This idea is about installing simple dividers—wood, metal, or acrylic—that create slots for each sheet or board. You can buy adjustable wire racks or make your own with plywood strips. The key is to space them just wide enough for your thickest item.
Once installed, you’ll slide baking sheets in and out with one hand, and the shelf below stays free for other items.
Why Vertical Storage Works
When you stack baking sheets horizontally, you can only access the top one without a wrestling match. Vertical storage turns the shelf into a filing system. Each item has its own slot, so you see every sheet at a glance.
Plus, gravity keeps them in place—no more leaning towers.
Diy Vs. Store-bought Dividers
You can buy expandable wire dividers that clamp onto shelves, or you can cut 1/4-inch plywood strips to size and glue them into grooves. For a quick fix, use tension rods between shelf brackets to create slots. DIY gives you custom spacing; store-bought is instant.
Either way, the effect is the same: instant order.
Best Placement In The Pantry
Install dividers on a lower shelf near the oven if possible—that’s where you’ll use baking sheets most. For cutting boards, a shelf at waist height works best. If you have deep shelves, place the dividers at the front half so you can still reach items behind.
Label the slots if you share the kitchen.
6. Stackable Can Racks for Soda or Canned Drinks
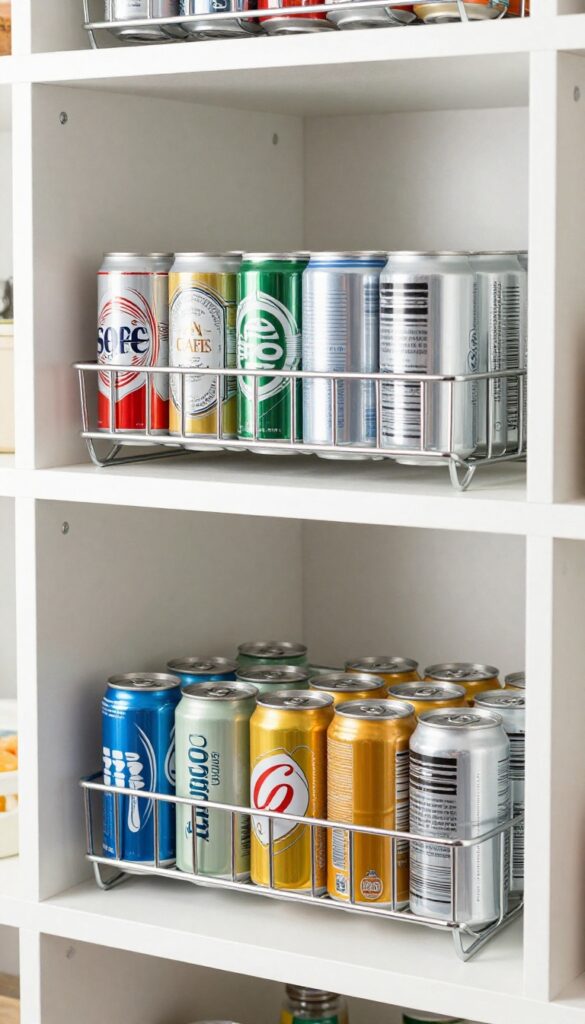
Canned drinks are a pantry staple, but they're also a prime source of clutter. Without a system, cans roll around, get crushed, or disappear into the depths. Stackable can racks solve this by holding each can in its own slot, so you can see exactly what you have and grab one without disturbing the rest.
Stackable can racks are a game-changer for deep shelves. They turn a messy pile into neat rows that maximize vertical space. You can stack two or three racks on top of each other, effectively doubling or tripling your storage without taking up more shelf area.
The racks are usually made of sturdy plastic or metal, and they come in sizes that fit standard 12-ounce cans. Some even have a slight tilt so cans roll forward automatically, making the oldest ones easiest to reach. This is especially useful for soda, seltzer, or beer, but you can also use them for canned soups or vegetables if the cans are the same diameter.
Choose The Right Size
Measure your shelf depth and height before buying. Most racks are about 12 inches deep, but some are adjustable. Make sure the rack's width fits your shelf without wasting space.
If you have narrow shelves, look for single-column racks. For wider shelves, multi-column racks hold more cans per row.
Stacking Tips
Not all racks are designed to stack. Look for ones with interlocking tabs or flat tops that support another rack securely. Avoid stacking too high—three racks is usually the max before it becomes unstable.
Place heavier drinks on the bottom rack for stability.
Mix And Match
You can use different racks for different drink types. For example, one rack for soda, another for sparkling water. Label the front of each rack with a small sticker or chalk marker so you know what's inside without pulling anything out.
Maintenance And Cleaning
Cans can leave sticky rings or dust. Wipe down the racks periodically with a damp cloth. If a can leaks, remove it immediately and clean the rack to prevent rust or odor.
Most racks are dishwasher-safe, but check the manufacturer's instructions.
7. Over-the-Door Racks for Spices or Small Jars
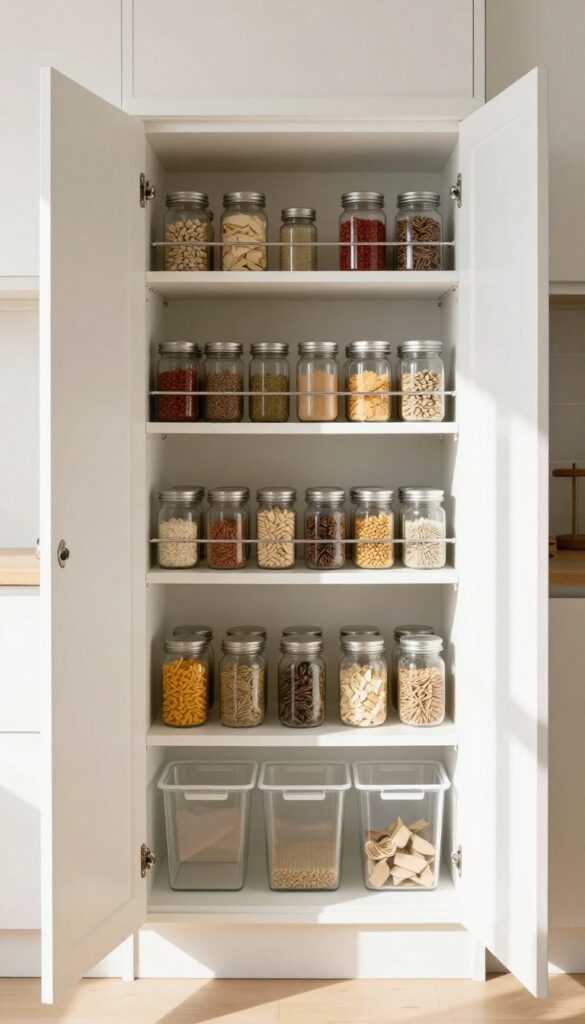
The back of the pantry door is prime real estate that often goes unused. An over-the-door rack turns that blank space into a home for spices, seasoning packets, and small jars. This simple addition frees up shelf space for larger items and keeps frequently used seasonings within easy reach.
Over-the-door racks come in various styles, from wire baskets to adjustable shelves. Look for one with enough depth to hold standard spice jars without hitting the shelves when the door closes. Clear bins or tiered shelves work best so you can see everything at a glance.
Install it on the inside of the pantry door—just make sure there's clearance between the door and the shelves.
What To Store
Spices, seasoning packets, small condiment packets, tea bags, and even snack packs fit perfectly. Avoid heavy glass jars or oversized bottles that could strain the rack or block the door from closing.
Installation Tips
Measure the door width and the gap between the door and the shelves before buying. Most racks hang over the top of the door with no drilling needed. For a secure fit, look for racks with rubber stoppers to prevent scratching.
Organization Hacks
Group spices alphabetically or by cuisine type. Use small labels on the rack shelves or on the jars themselves. Rotate stock so older items are in front.
8. Step Shelf Risers for Cans and Jars
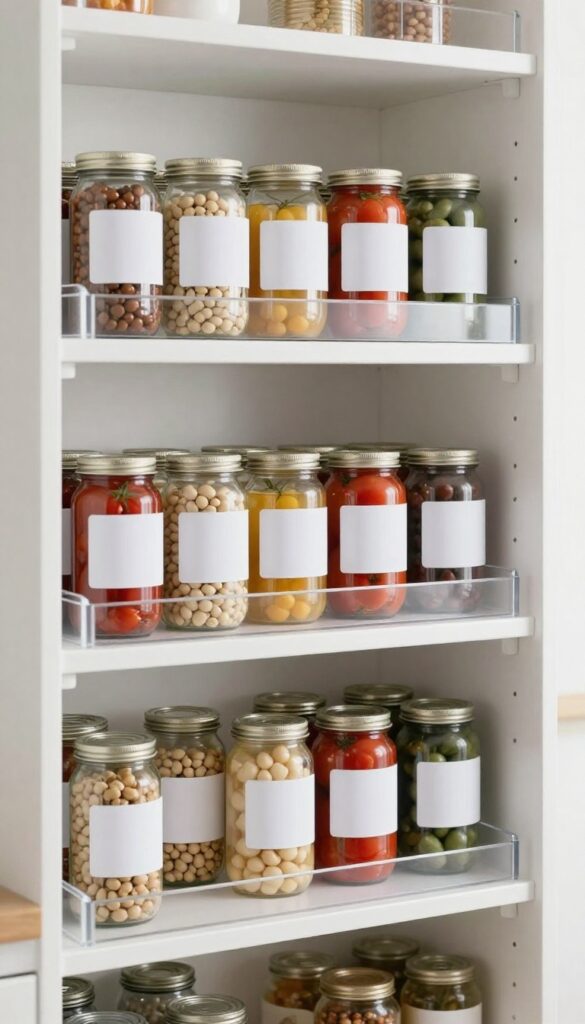
Stadium seating isn't just for sports—it works wonders in your pantry, too. Step shelf risers lift cans and jars in graduated rows so every label faces forward. No more pulling out the front row just to see what's hiding behind.
This simple upgrade turns deep shelves into a visual grid where you can spot the chickpeas or diced tomatoes instantly.
Step risers are a game-changer for deep shelves because they eliminate the need to dig. You load the back row first, then the middle, then the front, and each tier is visible at a glance. They're especially useful for canned goods, spice jars, and small bottles that tend to get lost in the shadows.
Pick The Right Height
Risers come in different step heights—usually one to three inches per tier. For standard cans (like beans or tomatoes), a two-step riser with a three-inch rise works well. For taller jars (like pasta sauce or broth), look for a three-step riser with a four-inch rise.
Measure your shelf height first to ensure the tallest item on the back row doesn't hit the shelf above.
Materials Matter
Most step risers are made of clear acrylic, bamboo, or coated wire. Acrylic is great for visibility and easy cleaning, but it can scratch over time. Bamboo looks warm and sturdy but may absorb spills if not sealed.
Wire risers are durable and allow airflow, but they can snag labels. Choose based on your pantry's style and how often you wipe down shelves.
Placement Tips
Use risers only on shelves that are at least 12 inches deep—shallower shelves don't benefit from the tiered effect. Group similar items together on one riser (e. g. , all canned vegetables) to make grabbing what you need even faster. If your shelf is extra deep, you can stack two risers side by side, but leave a gap for easy access to the back row.
9. Labeled Baskets for Snack Zones
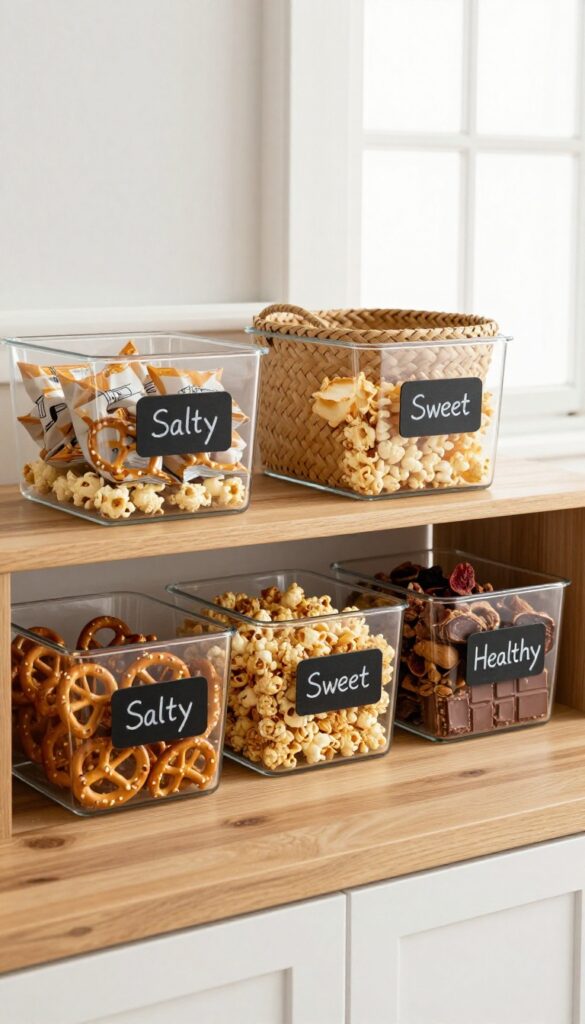
Snacks are the main source of pantry chaos. Boxes get crushed, bags get torn, and suddenly you have a pile of half-eaten pretzels mixed with granola bars. The fix is simple: assign each snack type or person a dedicated basket.
Clear baskets let you see what's inside, while woven ones add a cozy feel. Labels make it obvious where everything goes. Kids can grab their own snack basket without digging through the whole shelf.
No more mystery crumbs at the bottom of the pantry.
When every family member has their own basket, snack time becomes self-serve. You can also group by category: one basket for salty, one for sweet, one for healthy. This system works because it creates boundaries.
Once a basket is empty, you know it's time to restock. No more half-empty boxes hiding in the back. Labels are the key.
Use a label maker or chalkboard tags for a clean look. If you have kids, let them help pick their basket and label. They'll take ownership and actually put snacks back where they belong.
Choose baskets that fit your shelf depth—shallow enough that nothing gets buried, deep enough to hold a week's worth of snacks.
Basket Types That Work Best
Clear acrylic bins are great for seeing contents at a glance. Woven baskets add texture and hide mess. Metal wire baskets offer a modern industrial look.
Whatever you choose, make sure they're sturdy enough to hold heavy bags of chips or boxes of crackers. Avoid baskets with tall sides that block the view of items behind them.
Labeling Tips For Long-term Use
Use waterproof labels if you plan to wipe down baskets. Write in large, clear font so kids and guests can read them. Consider color-coding: blue for salty, green for healthy, red for treats.
If you rotate snacks seasonally, use removable labels so you can switch categories without buying new baskets.
Maintaining The System
Set a rule: one snack out at a time. When a basket is empty, it's time to shop for that category. Every month, do a quick audit—toss expired items and reorganize if needed.
This keeps the system from devolving into chaos. Involve the whole family so everyone knows the rules.
10. Tension Rods for Cutting Boards and Lids
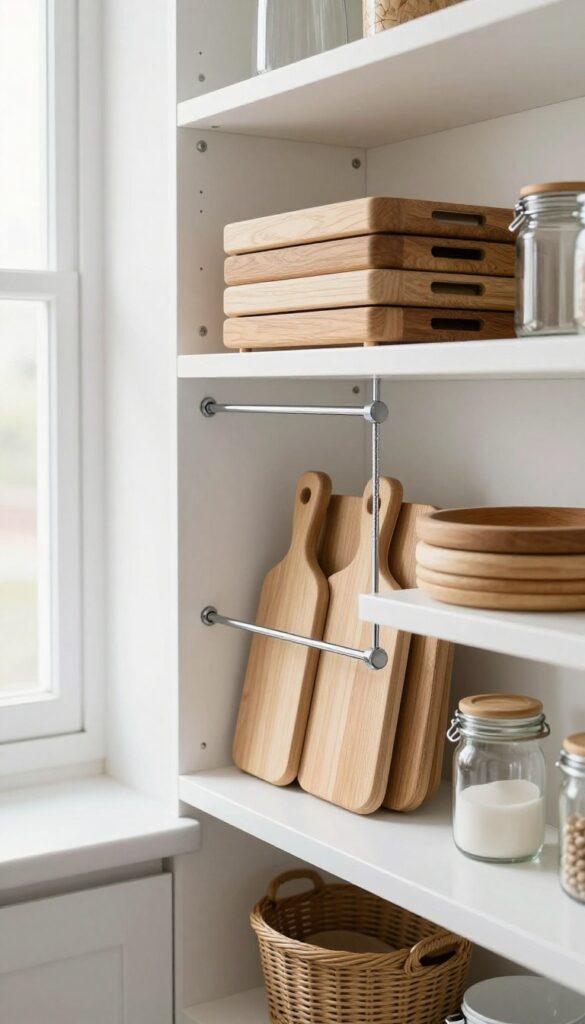
Cutting boards, baking sheets, and pot lids are some of the most awkward items to store on deep shelves. They tend to slide around, lean against each other, and create a jumbled mess that makes you want to just shove them in and forget about it. Tension rods offer a simple, no-drill solution that turns that chaos into order.
By installing tension rods vertically between the shelf above and the shelf below, you create custom dividers that keep flat items upright and separated. This prevents them from sliding backward into the abyss and makes it easy to grab exactly what you need without disturbing the rest.
Why Tension Rods Work
Tension rods are adjustable, so they fit most shelf heights. They require no tools or hardware—just twist and lock into place. The spring tension holds them securely, and they can be repositioned whenever your storage needs change.
Where To Place Them
Position rods about 4 to 6 inches apart to create slots for individual cutting boards or baking sheets. For pot lids, space them wider to accommodate different sizes. You can also use a single rod near the front of the shelf to create a stopper that keeps items from sliding back.
Pro Tips For Best Results
Choose heavy-duty tension rods with rubber ends to prevent slipping. Measure your shelf height before buying—most rods have a range, but you'll want one that fits snugly. If your shelves are extra deep, consider using two rods in tandem to create a front and back row of dividers.
FAQ
How do I organize a deep pantry without spending a lot?
Start with free or low-cost solutions like repurposing shoeboxes as bins, using tension rods from old curtains, or making your own tiered risers from cardboard. Focus on grouping like items and using vertical space before buying specialty organizers.
What is the best way to store cans on deep shelves?
Use tiered can dispensers or step shelf risers. These keep cans visible and accessible, and they help with first-in, first-out rotation. For soda or drinks, stackable can racks work well.
How can I keep items from getting lost in the back of deep shelves?
Use clear bins with handles or pull-out drawers. That way you can pull the entire bin forward to see everything. Lazy Susans also work for corners.
Avoid stacking items directly on the shelf without containers.
Are lazy Susans good for deep pantry shelves?
Yes, especially for corner shelves or wide shelves where you can't reach the back. They spin to bring items to the front. Use them for jars, oils, spices, or small bottles.
Just make sure the shelf is deep enough to accommodate the turntable.
How do I organize a deep pantry with adjustable shelves?
Adjust shelf heights to minimize wasted vertical space. Use risers or tiered shelves to create multiple levels. Group items by category and store frequently used items at eye level.
Consider adding pull-out baskets or drawers for heavy items.
Conclusion
Deep pantry shelves don't have to be a source of frustration. With a few smart organizers—like tiered risers, clear bins, or pull-out drawers—you can turn that cavernous space into a calm, efficient storage area. The key is making everything visible and easy to grab.
Start with one or two ideas that address your biggest pain point.
Maybe it's the canned goods chaos or the baking sheet avalanche. Small changes add up. Before you know it, your pantry will be a place you actually enjoy opening.