15 Eye-Catching Walk-In Tile Shower Ideas with a Seat
A walk-in shower with a seat can feel like a luxury—until you realize the seat is just sitting there, awkwardly breaking up your tile. The trick is to design around it so the bench becomes a natural part of the layout, not an afterthought.
These 15 ideas pair practical seating with tile choices that keep the whole space looking intentional and polished. Whether you're dealing with a tight corner or a spacious wet room, you'll find a combination that solves both function and style.
Let's get into the specific tile-and-seat pairings that actually work.
1. Large-Format Porcelain for a Seamless Look
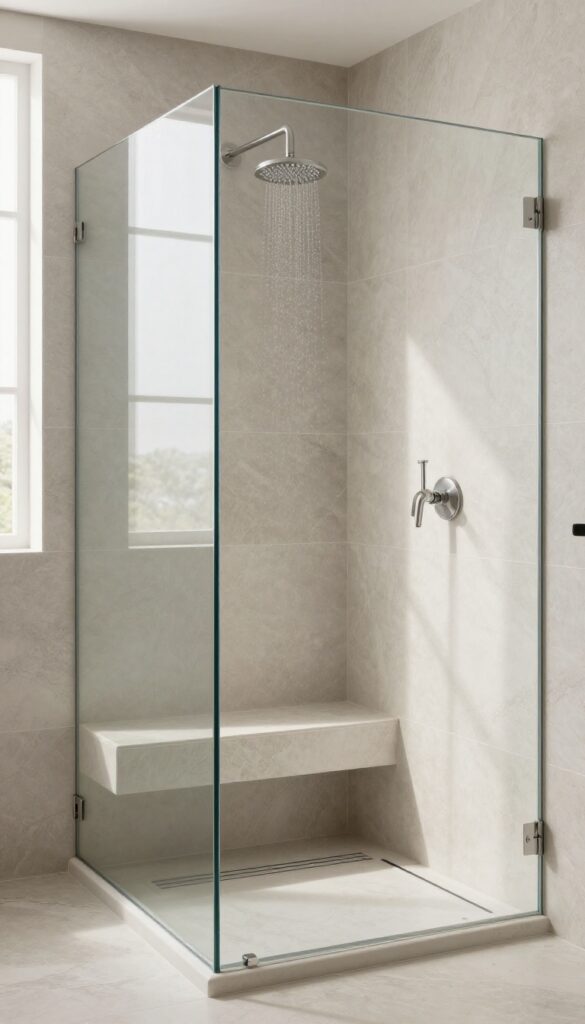
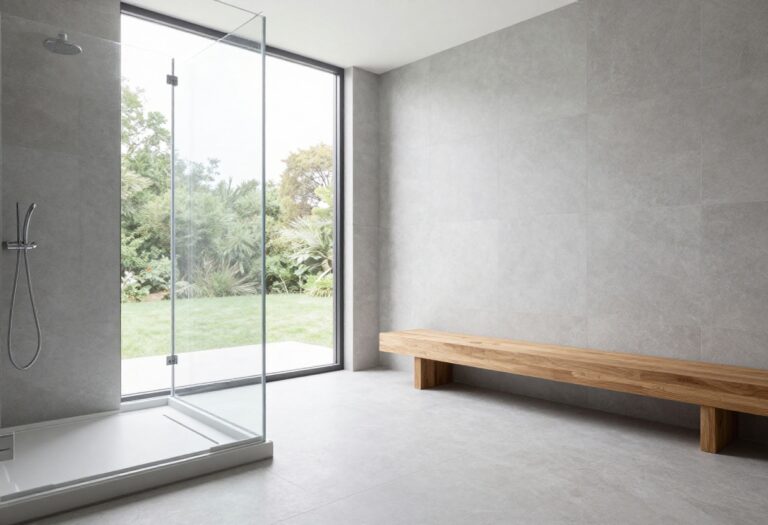
Large-format tiles are the quickest way to make a shower feel expansive, even when it's compact. By minimizing grout lines, they create a smooth, continuous surface that visually expands the space. When you wrap the seat in the same tile, the bench disappears into the design, turning a functional necessity into a seamless part of the shower's architecture.
The beauty of large-format porcelain lies in its ability to reduce visual clutter. With fewer grout joints, the eye travels uninterrupted across the walls and onto the seat, making the whole area feel more open and calm. This approach works especially well in modern and minimalist bathrooms where clean lines and simplicity are key.
Why Large Tiles Work So Well
Large tiles mean fewer grout lines, which not only looks cleaner but also gives the shower a more premium feel. They also have a practical side: less grout means fewer places for soap scum and mildew to build up, making maintenance a breeze. Plus, the larger surface area shows off the tile's natural veining or subtle texture, adding depth without overwhelming the space.
Choosing The Right Finish
For a truly seamless look, pick a matte or satin finish rather than a high-gloss one. Glossy tiles can create reflections that break up the visual flow, while matte finishes absorb light and make the seat blend into the walls more effectively. If you want a touch of luxury, consider a porcelain that mimics natural stone—it gives you that high-end feel without the upkeep.
Installation Tips For A Flawless Result
To get that seamless effect, have your installer use a leveling system to keep the large tiles perfectly flat. Also, ask for a thin grout line (around 1/8 inch) and a grout color that closely matches the tile. This way, the joints become nearly invisible, and the seat looks like it was carved out of the same slab.
2. Pebble Tile Floor with a Contrasting Seat
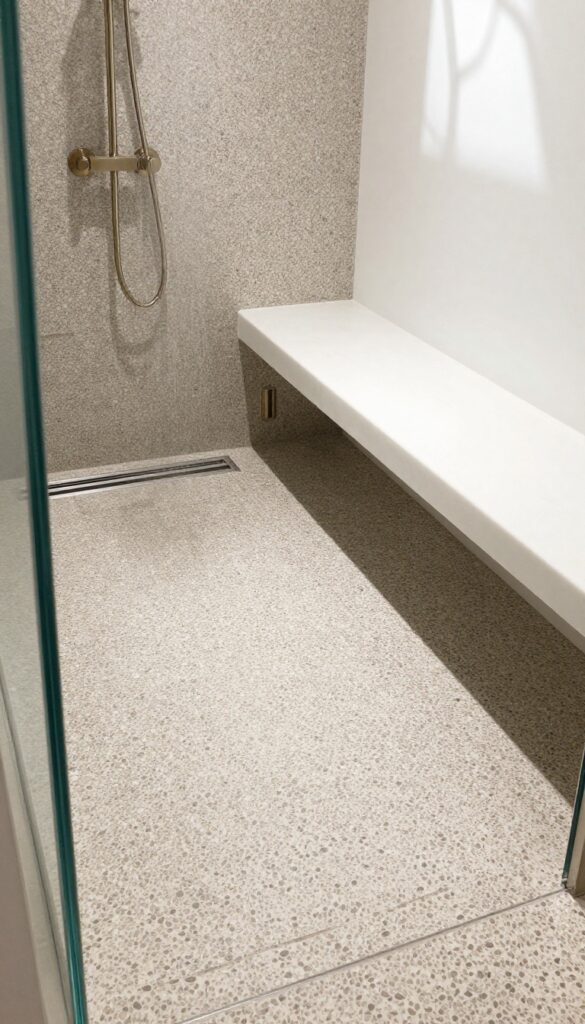
Texture can do more than look good—it can feel amazing underfoot. Pebble tiles bring that natural, spa-like sensation to your shower floor, but pairing them with a smooth, solid-color seat creates a perfect balance. The contrast not only adds visual interest but also makes the seat easier to clean and more comfortable to sit on.
The combination of rough and smooth surfaces is a classic design trick that works especially well in showers. Pebble tiles are naturally slip-resistant, which is a big plus for safety. Meanwhile, a solid-color seat—think matte white, soft gray, or even a bold navy—gives your eye a place to rest and provides a sleek contrast to the organic texture below.
Why Pebble Floors Work So Well
Pebble tiles are more than just a pretty surface. Their uneven texture provides excellent traction, making them a safe choice for a wet floor. Plus, the massaging effect underfoot is a subtle luxury that makes every shower feel like a mini spa treatment.
They come in mesh-backed sheets, which makes installation easier, and they're available in a range of natural colors from beige to slate.
Choosing The Right Seat Material
For the seat, you want something that contrasts with the pebble texture. A smooth, solid-color surface is ideal. Options include a single slab of quartz, a tiled bench with large-format tiles, or even a poured concrete seat.
Avoid using small tiles on the seat, as that can make the space feel busy and harder to clean. A seamless material like quartz is not only sleek but also hygienic.
Color And Style Ideas
Stick to a neutral palette for a timeless look. Pair warm-toned pebbles with a cream or beige seat to keep things cohesive. For a bolder statement, choose a dark charcoal or black seat against light pebbles.
You can also tie the seat color to other elements in your bathroom, like the vanity or the shower fixtures, to create a unified design.
Installation And Maintenance Tips
Make sure the pebble floor is properly sloped toward the drain to prevent water pooling. Seal the grout and the pebbles themselves to protect against stains and moisture. The smooth seat is low-maintenance—just wipe it down after each use.
With the right care, this combination will stay beautiful for years.
3. Subway Tile with a Built-In Niche
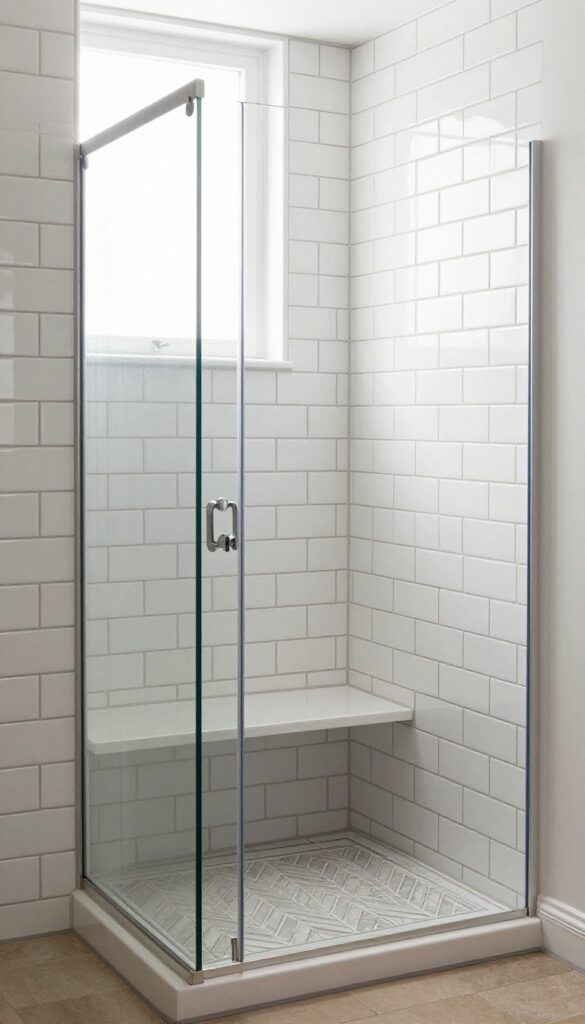
Subway tile is a timeless classic, but it can feel a bit flat if you don't give it a purpose. Adding a built-in niche that doubles as a seat changes that entirely. It’s a smart way to carve out extra storage without eating into your floor space, especially in a compact bathroom.
The key is to treat the niche as a design feature, not just a functional afterthought. By aligning the tile pattern around it and using contrasting grout or a different tile finish, you can make the seat look like it was always meant to be there. This approach works beautifully with the clean lines of subway tile, keeping the overall look tidy and intentional.
Why A Niche Seat Works
A niche seat is essentially a recessed bench built into the wall, which means it doesn't take up any visual or physical floor space. It's perfect for small bathrooms where every inch counts. Plus, it gives you a spot to rest a foot while shaving or a ledge for shampoo bottles, making it a multitasking marvel.
Tile Layout Tips
To make the niche blend seamlessly, continue the subway tile pattern right through the back of the niche. If you want to add a subtle highlight, use a different color or a contrasting herringbone pattern on the niche's back wall. This draws the eye to the seat without making it feel disconnected from the rest of the shower.
Grout And Finish Choices
Choosing the right grout can make or break the look. A contrasting grout, like dark gray with white tiles, emphasizes the subway pattern and adds depth. For a more seamless appearance, match the grout to the tile color.
Also, consider a matte finish for the niche interior to reduce water spots and keep the area looking cleaner longer.
4. Hexagon Tile Accent Wall Behind the Seat
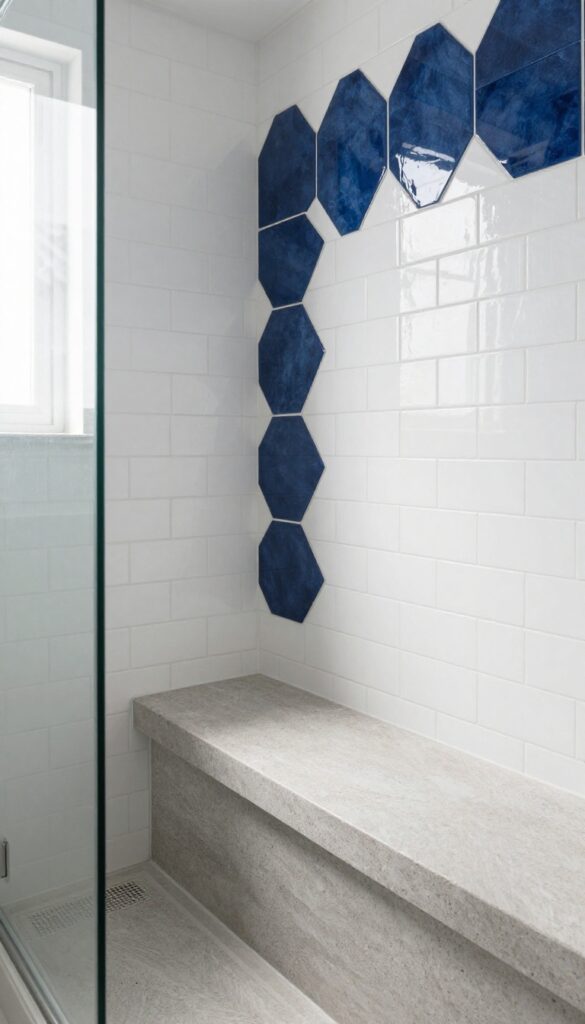
Hexagon tiles bring a playful geometry that instantly draws the eye, and placing them behind the seat turns that bench into a deliberate design feature. The contrast between the accent wall and the surrounding tile makes the seating area feel like a built-in focal point, not an afterthought. It's a simple swap that adds depth and personality without overwhelming the space.
A hexagon accent wall behind the seat works because it creates a clear visual anchor. The eye naturally lands on the pattern, making the bench look like it was always meant to be there. Plus, hexagons come in so many colors and finishes that you can easily match them to your existing palette or go bold with a contrasting hue.
When you use a contrasting color—say, deep navy hexagons against white subway tile—the seat area pops immediately. It's a low-commitment way to test a trend, and if you ever want to change the look, you only have to redo that one wall. The rest of the shower stays timeless, so you get the best of both worlds.
Choosing The Right Contrast
The key is to pick a contrast that feels intentional, not random. If your shower is mostly light, go with a darker hexagon tone like charcoal or forest green. If you have a lot of white, a warm terracotta or dusty blue adds a nice pop.
Keep the grout color in mind too—matching it to the hexagon tile creates a seamless honeycomb look, while a contrasting grout makes the pattern stand out even more.
Placement And Scale
For a small shower, a full accent wall can feel busy, so consider tiling just the area directly behind the seat, maybe a few rows above it. That keeps the focus on the bench without overwhelming the space. Larger hexagons (like 4-inch or 6-inch) work well for a modern look, while smaller ones (2-inch) give a more detailed, mosaic feel.
Either way, make sure the pattern is centered behind the seat for a balanced appearance.
Grout And Finish Tips
Satin or matte finishes hide water spots better than glossy, which is a practical win in a shower. For grout, a slightly darker color than the tile helps the hexagons read as a pattern, while a lighter grout softens the contrast. Also, consider using the same grout color as the main wall to tie the accent in, or a contrasting grout to make the hexagons pop.
Just keep it consistent with the overall style.
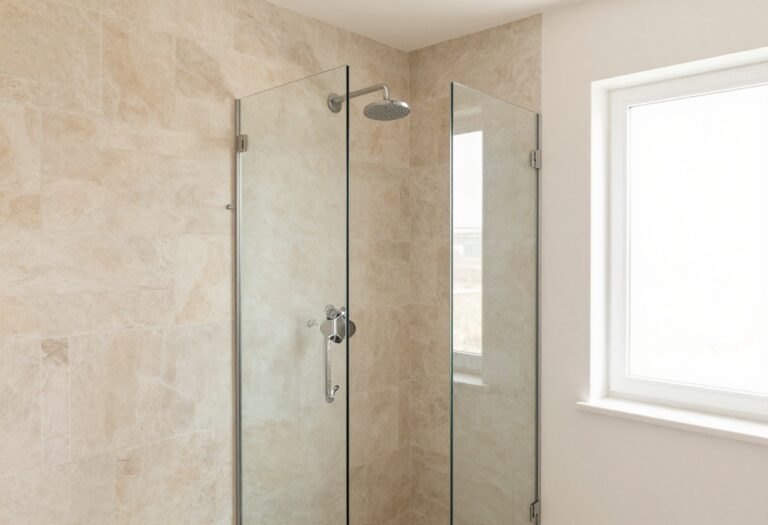
5. Natural Stone Slab Seat with Glass Enclosure
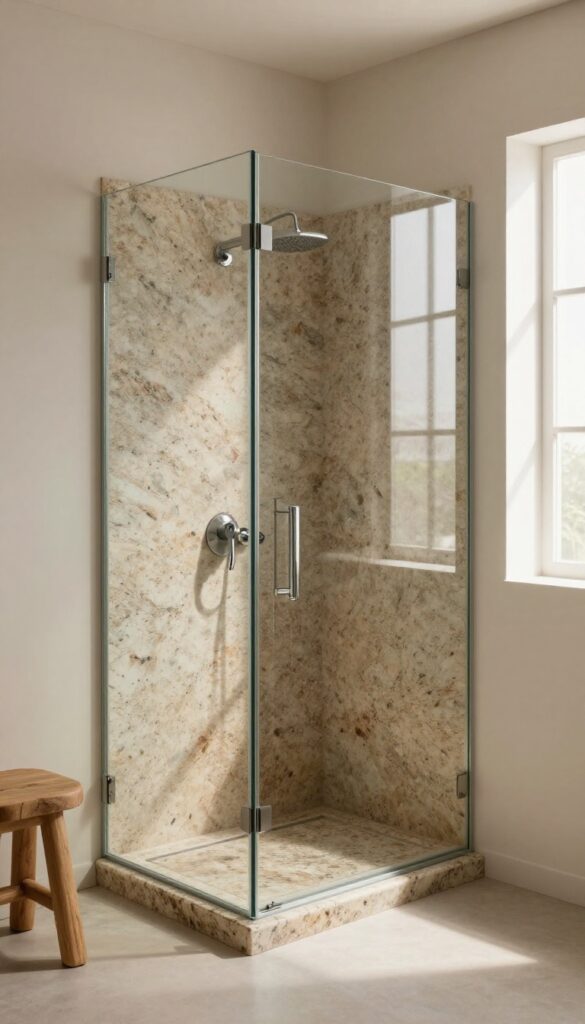
There’s something about a solid piece of stone that instantly grounds a shower. A natural stone slab seat feels like it was carved right out of the earth, giving the space a quiet, organic strength. Pair it with a frameless glass enclosure, and you get a seat that’s both a functional perch and a sculptural centerpiece.
The beauty of this idea lies in the contrast: heavy, textured stone against light, transparent glass. The glass keeps the shower open and airy, so the stone doesn’t overwhelm the room. Instead, it becomes a warm, inviting spot to sit and let the water wash over you.
Choosing The Right Stone
Not all stone slabs are created equal. For a shower seat, you want something durable and water-resistant. Granite and quartzite are top picks because they handle moisture and daily wear without flinching.
Softer stones like marble look gorgeous but need more sealing and care. Consider a honed finish for a matte look that’s slip-resistant and easy to maintain.
Sizing And Placement
A slab seat can be cut to fit your exact space, but a good rule of thumb is to aim for at least 15–18 inches deep and 18–20 inches high. That’s comfortable for sitting and doesn’t eat up too much floor space. Place it along a side wall or in a corner, and make sure it’s slightly sloped so water doesn’t pool on the surface.
Glass Enclosure Options
Frameless glass is the way to go if you want that seamless, open feel. Use a single fixed panel or a hinged door that swings outward. For a more modern look, consider a glass panel with a minimal metal clip or a channel at the bottom.
Keep the glass clear to show off the stone’s natural veining and color.
Tie It Together With Tile
The tile you choose should complement the stone without competing with it. Large-format tiles in a neutral tone—like warm gray or beige—let the seat stand out. Or, go with a textured tile on the floor to add grip and visual interest.
The goal is to create a backdrop that makes the stone the star.
6. Mosaic Tile Seat with a Border
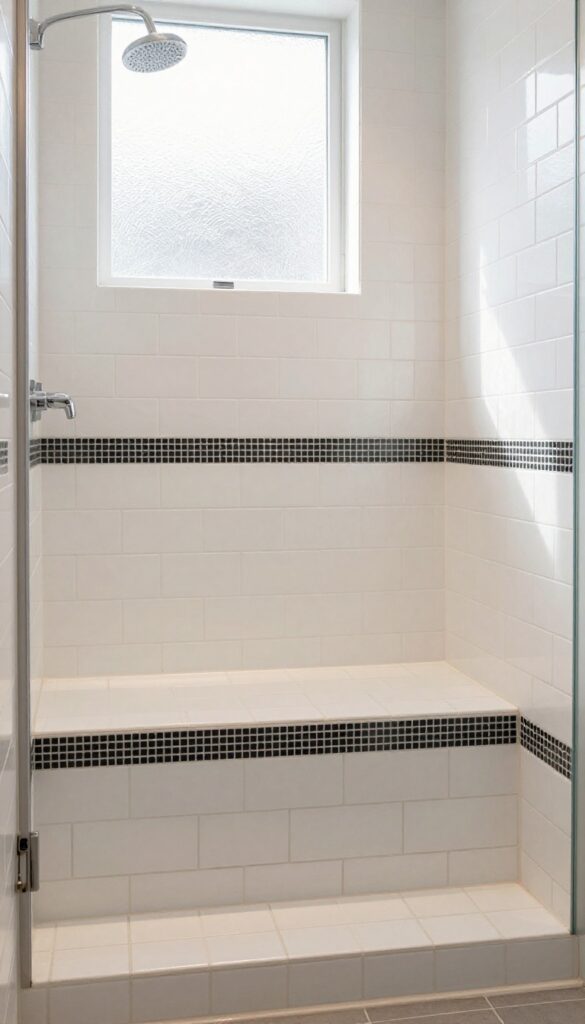
A plain bench can feel like an afterthought, but adding a mosaic border around it changes everything. This detail frames the seat and makes it look like it was part of the original plan, not a last-minute addition. The border also gives you a chance to introduce a second color or pattern without overwhelming the space.
It’s a small touch that packs a lot of visual punch.
Mosaic tiles are perfect for creating a custom look because they come in mesh-backed sheets that are easy to work with. You can use them to outline the seat, creating a crisp, defined edge that draws the eye. This works especially well if your shower uses larger format tiles on the walls—the contrast in scale adds interest and makes the seat pop.
Choose a mosaic that complements your main tile. For example, if your walls are white subway tile, a black and white mosaic border adds a classic, graphic touch. If you’re using warm beige stone, a glass mosaic in a complementary hue can add a subtle shimmer.
The key is to keep the border thin enough to feel like an accent, not a whole new wall.
Pick The Right Mosaic Material
Glass mosaics reflect light and make the shower feel brighter, while stone mosaics add organic texture. Porcelain mosaics are durable and come in endless patterns. Think about the overall vibe you want—glass for a spa-like feel, stone for a natural look, and porcelain for easy maintenance.
Placement And Proportion
A border that’s too wide can overpower the seat, while one that’s too thin might get lost. A good rule is to keep the border between 1 and 2 inches wide. You can run it along the top edge of the seat, or frame the entire seat for a more defined look.
If your seat is built into a corner, a border along the front edge is often enough.
Coordinate With The Rest Of The Shower
Use the same mosaic as an accent strip in the shower niche or as a backsplash behind the fixtures. This creates a cohesive design that feels intentional. If you’re feeling bold, you can even use the mosaic to create a subtle pattern on the seat itself, like a diamond or herringbone inlay.
7. Wood-Look Tile for a Warm, Spa Vibe
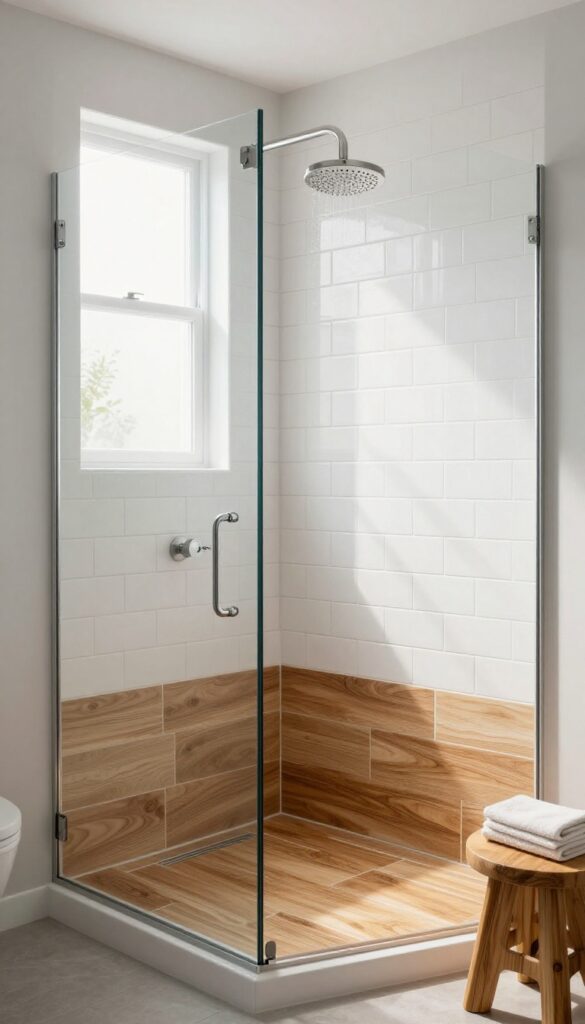
Wood-look tile is a clever way to get that cozy, organic feel without the upkeep of real wood. It brings warmth and a natural touch that makes the shower feel more like a retreat. Use it on the seat and one accent wall to create a focal point that’s both inviting and practical.
Why Wood-look Tile Works In Wet Areas
Real wood and moisture don’t mix, but wood-look porcelain or ceramic tile gives you the same visual warmth with zero warping or rotting. It’s slip-resistant when textured, and it holds up beautifully in steamy showers. Plus, the variety of grain patterns and shades means you can match almost any bathroom style.
How To Pair The Seat And Wall
For a balanced look, cover the bench and one wall behind it with the wood-look tile, then keep the other walls in a neutral solid color like white or light gray. This creates a strong focal point without overwhelming the space. If you want a more subtle approach, use wood-look tile just on the seat and add a matching niche or shelf.
Choosing The Right Shade And Finish
Lighter woods like oak or ash make the shower feel airy and bright, perfect for smaller bathrooms. Darker woods like walnut add drama and coziness but can make a small space feel closed in. Go for a matte or textured finish to improve grip underfoot and avoid a slippery surface.
8. Linear Drain with a Floating Seat
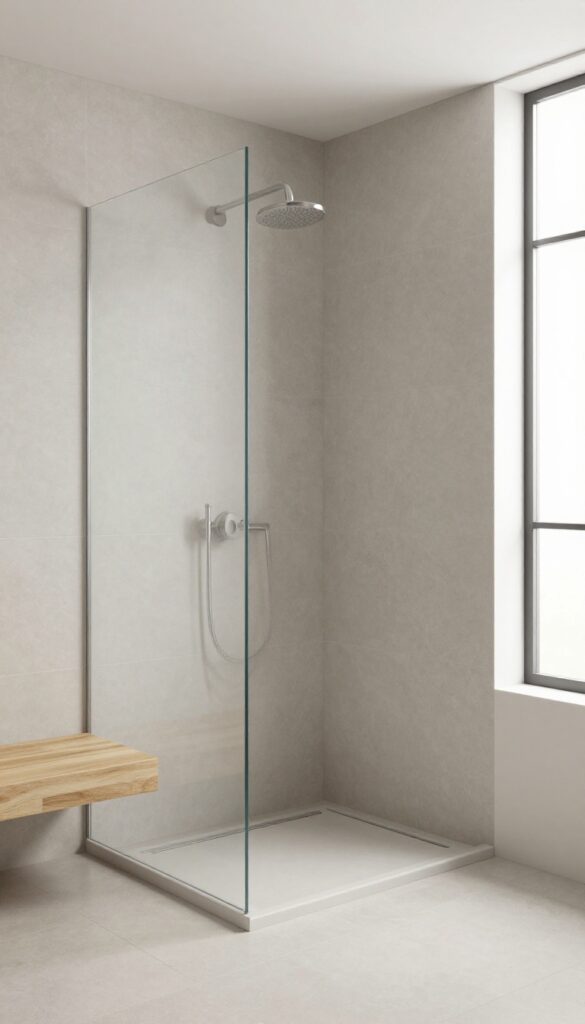
A linear drain is a game-changer for modern showers. It lets you keep the floor perfectly flat, which opens the door for a floating seat that seems to hover above the tile. The result is a sleek, minimalist look that’s also a breeze to clean.
The floating seat isn’t just about looks—it’s about practicality. With no legs or pedestal, there are fewer corners for grime to hide, and the open space underneath makes sweeping and mopping effortless. Plus, the linear drain channels water away efficiently, so you won’t be standing in a puddle.
Why A Floating Seat Works
A floating seat, anchored securely to the wall, creates a visual break in the tile without touching the floor. This design trick makes the shower feel larger and more open. The lack of a base also means you can run your tile continuously from wall to wall, which is a hallmark of high-end design.
Tile Pairing Tips
Large-format porcelain tiles are a natural match here. Their minimal grout lines complement the clean lines of the linear drain and the floating seat. Choose a matte finish to enhance the modern vibe and reduce slipping.
If you want a touch of warmth, wood-look planks in a light oak tone work beautifully.
Installation Notes
When installing a floating seat, make sure it’s properly supported with sturdy brackets or a concealed frame. The linear drain should be placed at the edge of the shower or along the back wall for optimal water flow. Coordinate with your contractor to ensure the tile falls correctly around the drain for a seamless look.
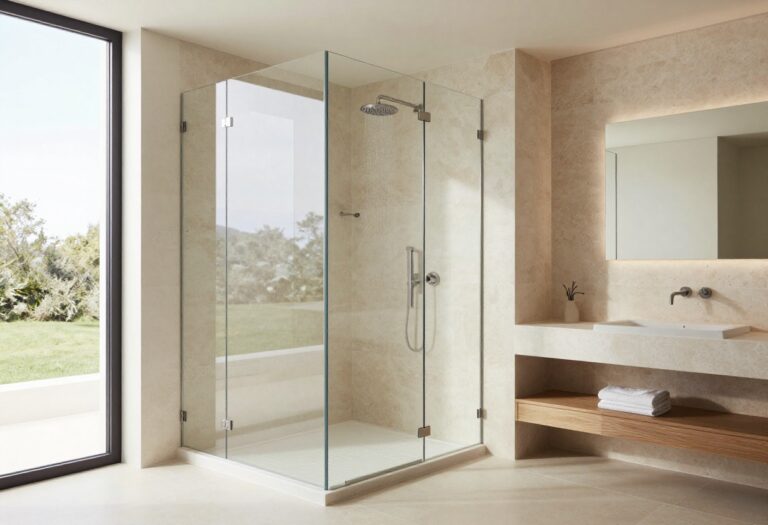
9. Marble Tile with a Matching Bench
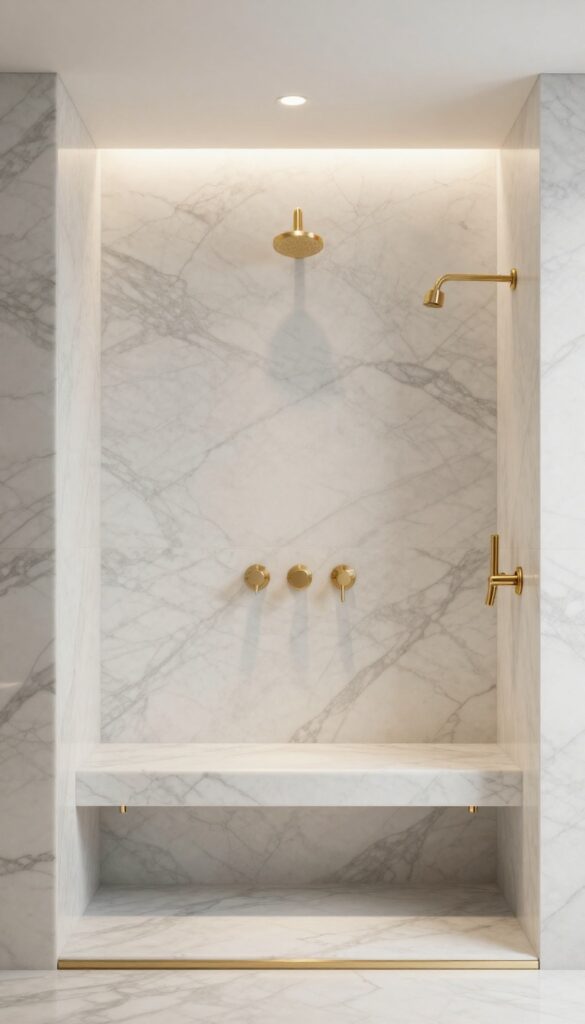
Marble has a way of making any space feel instantly more refined, and when you carry it over to the bench, the whole shower looks like a single, seamless piece. The natural veining gives each slab its own personality, so your shower ends up feeling custom and one-of-a-kind. It’s a look that pairs well with brushed gold fixtures and soft lighting for that spa-like vibe.
To pull off this idea, you don’t need to cover every inch in marble—just the main walls and the bench. The key is matching the bench top to the wall tile so it blends in rather than sticking out. Choose a marble with subtle veining, like Carrara or Calacatta, and keep the grout lines thin to let the stone shine.
A floating bench with a marble top and a hidden bracket keeps the look clean and modern.
Choosing The Right Marble
Large-format marble tiles reduce grout lines and create a more continuous look, which is ideal for a small shower. Honed marble is a safer pick for the bench because it’s less slippery when wet, and it still has that elegant matte finish. If you want extra warmth, add a wood-look tile on the floor to contrast with the cool marble.
Seamless Bench Design
For a truly integrated look, have the bench built from the same marble slab as the walls, with no visible seams. A corner bench with a marble top and a matching shelf below gives you storage without breaking the visual flow. If a full slab is out of budget, a marble-look porcelain bench is a durable alternative that’s easier to maintain.
Lighting And Accents
Marble loves light, so add a recessed shower light or a backlit mirror to highlight the veining. Pair the marble with brushed nickel or matte black fixtures for a modern contrast. Keep the rest of the bathroom simple—let the marble be the star.
10. Contrasting Grout to Highlight the Seat
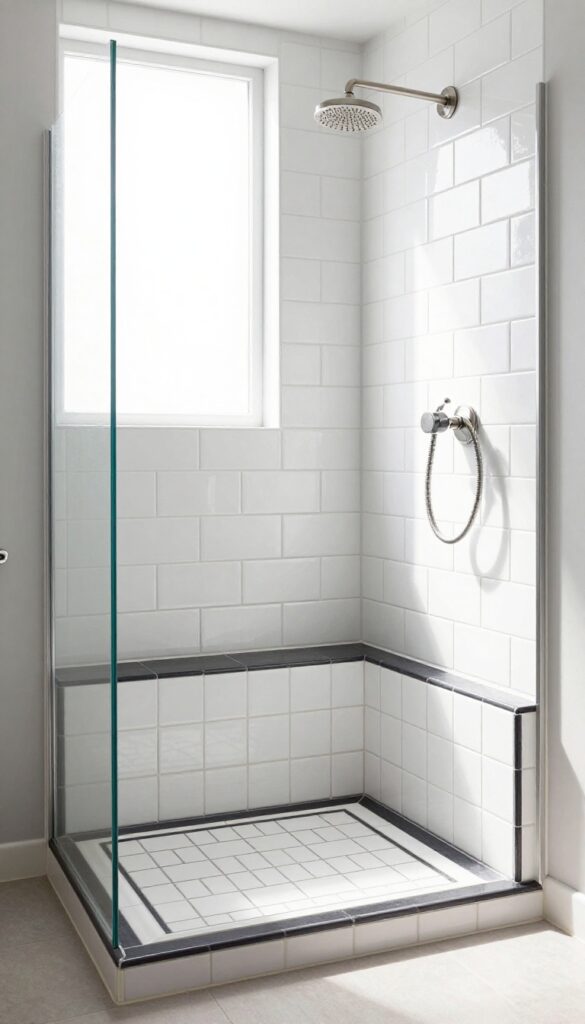
Sometimes the smallest detail makes the biggest difference. A contrasting grout color around your shower seat can turn a functional bench into a striking focal point. It’s a simple trick that adds definition without extra tile or complex patterns.
Choosing a grout color that stands out from your tile—like dark charcoal with white subway tile—creates a crisp outline that frames the seat. This works especially well with large-format tiles where the bench might otherwise blend into the wall. The contrast draws the eye naturally, making the seat look like a deliberate design choice rather than an afterthought.
Pick The Right Contrast Level
You don’t need a dramatic jump in color. A soft gray with beige tile can add subtle definition, while a deep black with light marble makes a bold statement. Consider the overall mood of your bathroom—high contrast feels modern and graphic, while low contrast keeps things calm and cohesive.
Match Grout To Other Fixtures
A clever way to make the contrast feel intentional is to match the grout color to your shower fixtures, like the faucet or showerhead. If you have brushed nickel hardware, a warm gray grout can tie the seat into the rest of the design. This creates a unified look that feels planned and polished.
Keep Grout Lines Clean
Contrasting grout shows every imperfection, so precision matters. Make sure your tiles are evenly spaced and the grout lines are consistent. Using a grout sealer will also help protect the color and keep it from staining, especially in a wet area like a shower.
11. Corner Seat with Diagonal Tile Layout
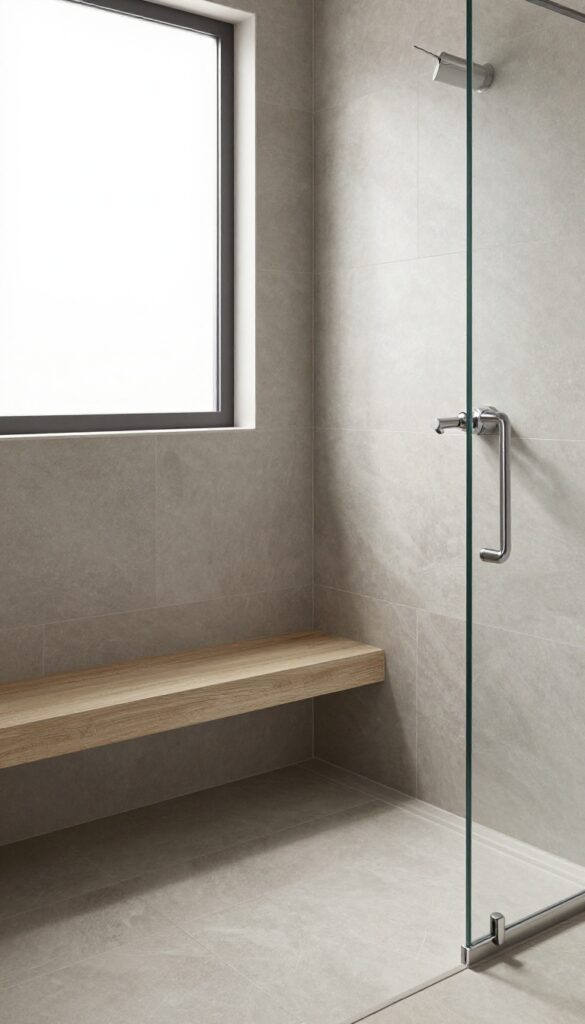
When space is tight, a corner seat is a smart way to add a bench without eating up the whole shower floor. But the real trick is how you lay the tile around it. Setting the tile on a diagonal changes the entire feel of the space, making it look larger and more dynamic.
It's a simple shift that adds movement and draws the eye across the room.
The diagonal layout works especially well with a corner seat because it breaks up the straight lines that can make a small shower feel boxy. Instead of the seat sitting in a static corner, the angled tile lines guide your gaze outward, creating a sense of flow. This approach also gives you more flexibility with tile size—larger format tiles on the diagonal can make the shower feel even more expansive, while smaller tiles add texture and detail.
Pairing a corner seat with diagonal tile isn't just about looks; it's also practical. The angled lines can help disguise any slight unevenness in the walls or floor, and they make the corner seat feel like a deliberate design element rather than an afterthought. Plus, the layout naturally accommodates the bench without awkward cuts or wasted space, so you get a clean, seamless finish.
When choosing tile for this setup, consider a large-format porcelain or ceramic tile in a neutral tone. The diagonal pattern will do the heavy lifting, so you don't need a busy pattern. A subtle texture or a matte finish can add warmth without overwhelming the space.
And don't forget the grout—choosing a color that blends with the tile can enhance the seamless effect, while a contrasting grout will emphasize the diagonal lines even more.
Why Diagonal Works In Small Showers
Diagonal tile layout is a classic trick for making small spaces feel bigger. By angling the lines, you create a sense of depth and movement that tricks the eye into seeing more square footage. In a walk-in shower with a corner seat, this effect is amplified because the seat itself can otherwise make the corner feel closed off.
The diagonal lines push the visual boundaries outward, making the whole shower feel more open and airy.
Choosing The Right Tile Size
For a corner seat with diagonal layout, tile size matters. Large-format tiles (12×24 inches or bigger) on the diagonal can make the shower feel more expansive, with fewer grout lines to break up the space. Smaller tiles, like 4×4 or 6×6, offer more grip and are easier to cut around the seat, but they can make the space feel busier.
A good middle ground is a 12×12 tile, which balances visual impact with practicality.
Seat Material And Placement Tips
The seat itself should complement the tile, not compete with it. A simple bench made of the same tile as the walls creates a seamless look, while a contrasting material like natural stone or wood-look tile can add warmth. Place the seat in the corner opposite the showerhead for maximum functionality, and make sure it's angled slightly toward the center of the shower to keep the space feeling open.
If you're using a prefab seat, consider having it wrapped in the same tile to maintain the diagonal flow.
12. Terrazzo Tile for a Playful Touch
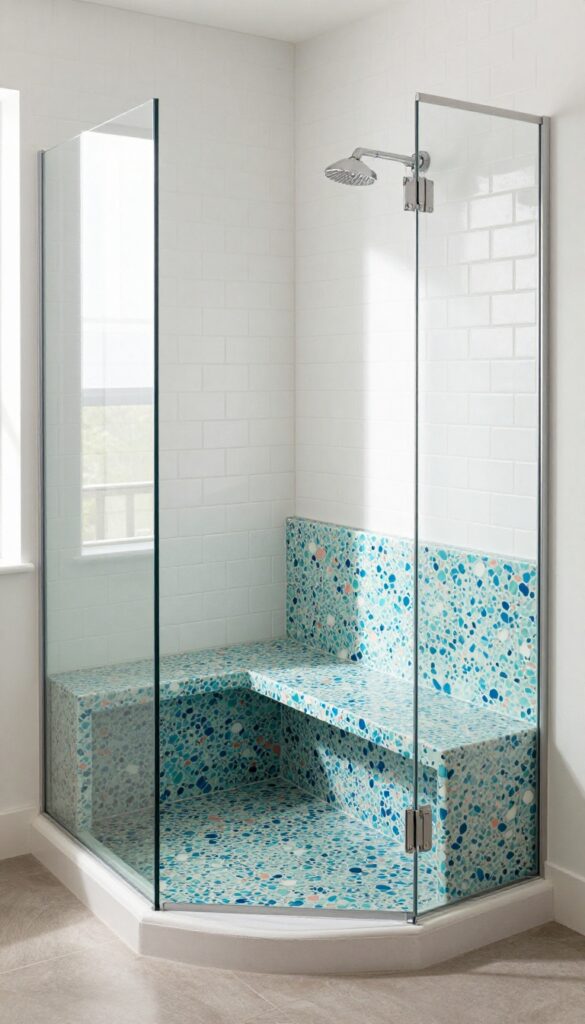
Terrazzo tile is having a major moment, and for good reason. It brings a burst of color and pattern without feeling busy or overwhelming. When you use it on the seat and floor together, the whole shower feels cohesive and fun—like a permanent piece of art you get to use every day.
Terrazzo is a composite material made of chips of marble, quartz, granite, or glass set in a binder. The result is a speckled, colorful surface that adds texture and visual interest. In a walk-in shower, terrazzo can make the space feel lively and modern, especially when you choose a palette that complements your bathroom's overall design.
Why Terrazzo Works In Showers
Terrazzo is naturally water-resistant and slip-resistant, making it a practical choice for wet areas. The tiny chips create a subtle texture that gives your feet grip, and the sealed surface is easy to clean. Plus, the variety of colors means you can match almost any bathroom style, from bold and eclectic to soft and neutral.
Designing With Terrazzo
To keep the playful look from becoming chaotic, use terrazzo on the bench and floor, but pair it with solid-colored walls. Choose a neutral wall tile like white subway or light gray to let the terrazzo shine. Alternatively, pick a terrazzo with a dominant color that ties into your accessories, like a blue or green tone that echoes your towels or vanity.
Maintenance And Care
Terrazzo is durable and low-maintenance, but it does need occasional sealing to prevent staining. Use a mild, pH-neutral cleaner and avoid abrasive scrubbers. With proper care, your terrazzo shower will stay vibrant for years, making it a smart investment for both style and function.
13. Textured Tile for Slip Resistance
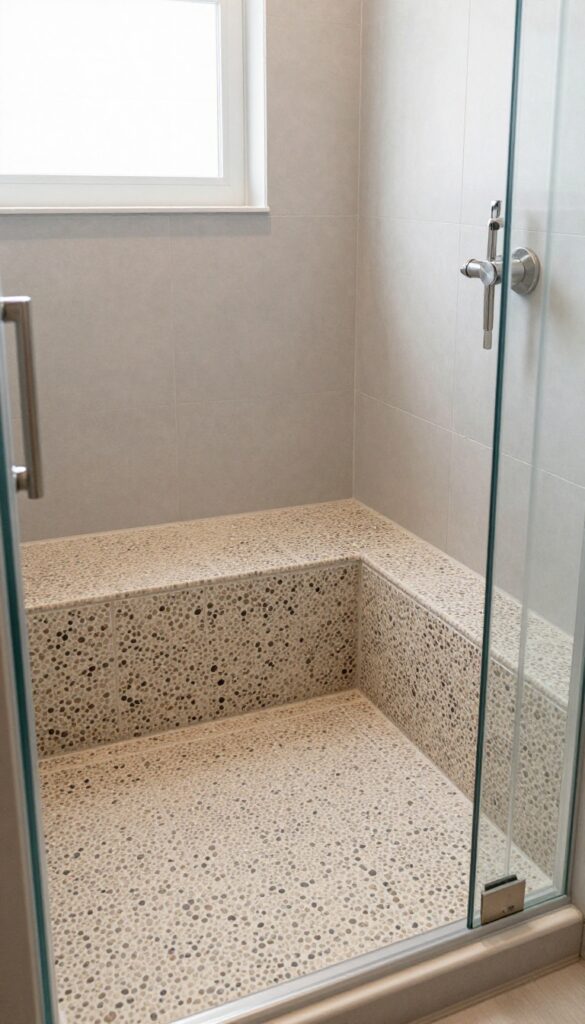
Safety often takes a back seat to style, but in a shower, it should be front and center. Textured tile on both the floor and the bench adds grip where you need it most, especially when water and soap are in play. For households with kids or older adults, this small change can make a huge difference in preventing slips.
When choosing textured tile, think beyond the obvious. Pebble tiles, slate, and matte-finish porcelain all offer great traction without sacrificing looks. The key is to balance texture with comfort—you don't want the seat to feel like sandpaper.
A slightly rough surface that’s still smooth enough to sit on is the sweet spot.
Picking The Right Texture Level
Not all textured tiles are created equal. For the floor, you want a high coefficient of friction (COF) of 0. 6 or higher.
For the seat, go with something gentler, like a tumbled marble or a matte porcelain with subtle ridges. Test samples by running your hand over them—if it feels too rough, it’ll be uncomfortable to sit on.
Coordinating Textures With Design
Texture doesn't mean boring. You can mix a smooth wall tile with a textured floor and seat for contrast. Or use the same textured tile everywhere for a cohesive, spa-like feel.
Neutral tones like beige, gray, and warm brown hide water spots and look natural in any bathroom.
Installation Tips For Best Results
Make sure your contractor uses a proper waterproofing membrane and slopes the floor toward the drain. For the seat, consider a slight downward angle so water doesn't pool. Grout lines on textured tile can be trickier to clean, so choose a darker grout or one with a sealant to keep maintenance easy.
14. LED-Lit Seat for a Modern Glow
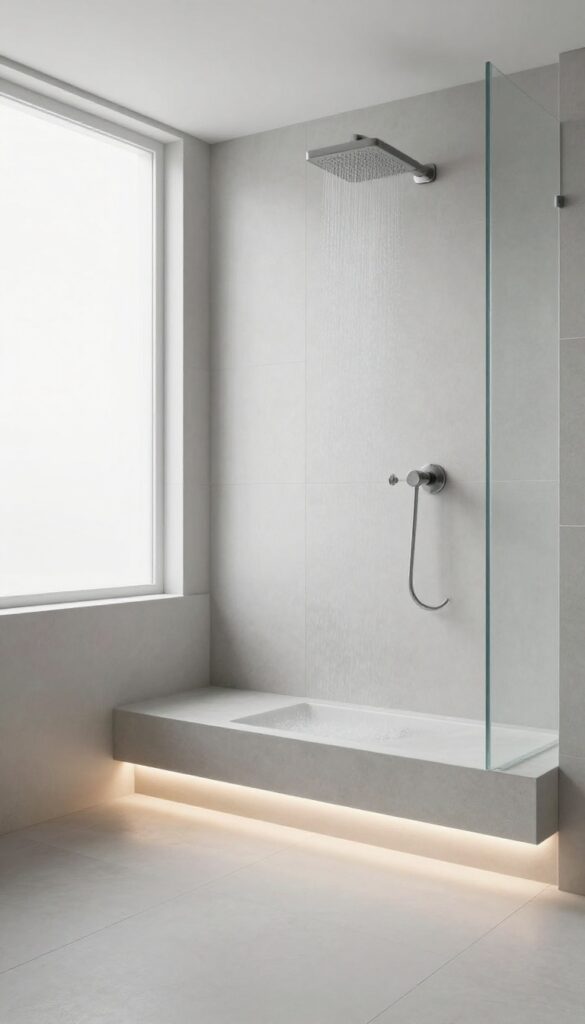
Adding LED lighting under the seat or along its edges can transform your shower into a modern retreat. The soft glow not only looks sleek but also helps you navigate at night without harsh overhead lights. It's a small upgrade that makes a big impact on both style and safety.
LED lighting has become a popular choice for modern bathrooms, and the shower seat is the perfect spot to showcase it. By placing LED strips under the seat or in the tile joints around it, you create a floating effect that adds depth and sophistication. The light can be set to a warm white for a cozy feel or a cool blue for a spa-like ambiance.
Plus, it doubles as a nightlight, so you won't stumble in the dark during those middle-of-the-night bathroom trips.
Choosing The Right Led Strips
Waterproof LED strips are a must for shower use. Look for IP67-rated strips that can handle moisture and direct water contact. You'll also want to decide between hardwired and battery-operated options.
Hardwired strips are more permanent and can be connected to a dimmer switch, while battery-operated ones are easier to install but may require frequent changes. Consider the brightness and color temperature that best suits your bathroom's aesthetic.
Placement Ideas For Maximum Effect
Under the seat is the most common spot, creating a floating look that's both stylish and functional. You can also install strips along the edge of the seat where it meets the tile, or even in a recessed niche above the seat for a subtle uplight effect. If you have a tiled bench, you could integrate the LED strips into the tile design itself, running them through a channel for a seamless look.
The key is to position them where they won't be directly in your eyes but still cast a nice glow.
Installation Tips And Safety
Always hire a licensed electrician for any hardwired lighting in wet areas. They'll ensure the wiring is properly grounded and protected by a GFCI circuit. For a DIY approach, battery-operated LED strips with adhesive backing are a quick fix, but make sure the surface is clean and dry before applying.
Also, think about how you'll control the lights—a simple switch outside the shower or a smart system that connects to your phone can add convenience.
15. Minimalist Design with a Single Tile Accent
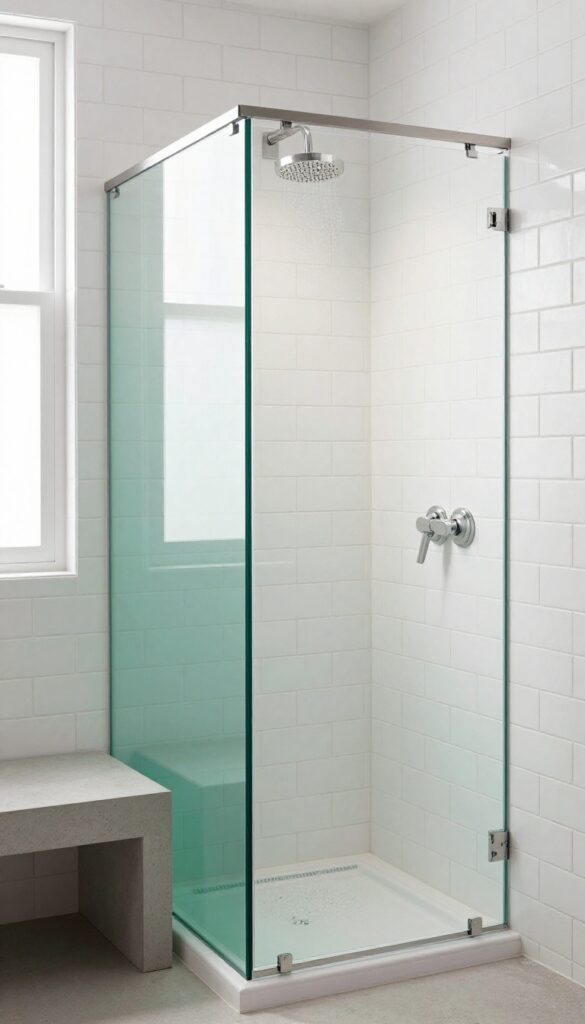
Not every shower needs a full wall of dramatic tile. Sometimes a single strip of contrasting tile behind the seat is all it takes to make the space feel designed. This approach keeps costs down, stays timeless, and lets the bench become a subtle focal point without overwhelming the room.
The idea is simple: keep the rest of the shower in a neutral, solid tile, then add one horizontal band of a different tile—maybe a bold color, a different texture, or a geometric pattern—directly behind the seat. That small accent draws the eye to the seating area and gives the shower a custom look without the expense of covering every surface in specialty tile.
Why It Works
A single accent strip creates visual interest without visual chaos. It gives the eye a place to rest and makes the seat feel intentional. Plus, because the accent is limited to a small area, you can splurge on a higher-end tile without blowing your budget.
Choosing The Right Accent Tile
Pick a tile that contrasts with the main tile but still complements the overall palette. For example, if your shower is white subway tile, a strip of black hexagon tile adds a modern edge. Or, if you have light gray large-format tile, a band of emerald green glass tile brings a pop of color.
Keep the accent strip about 6 to 12 inches tall to maintain that minimalist feel.
Placement Tips
Position the accent strip at the height of the seat or slightly above it, so it frames the bench naturally. If your seat is built into a corner, run the accent along the back wall and maybe wrap it around the side for a cohesive look. Avoid placing it too high or too low—it should align with the seat to create a visual connection.
FAQ
What is the best tile for a shower seat?
Porcelain or ceramic tile is durable, water-resistant, and easy to clean. Natural stone adds luxury but requires more maintenance. Choose a textured tile for the seat to prevent slipping.
How big should a shower seat be?
A typical shower seat is about 15-18 inches deep and 18-20 inches high. The width can vary, but 24 inches is a comfortable minimum for most adults.
Can I add a seat to an existing walk-in shower?
Yes, you can add a freestanding teak or stone bench, or have a contractor install a built-in seat. Ensure proper waterproofing if you're modifying the shower structure.
Do I need a permit to install a shower seat?
Usually, adding a seat as part of a shower remodel doesn't require a separate permit, but it's best to check local building codes. If you're altering plumbing or electrical, a permit may be needed.
How do I clean tile on a shower seat?
Use a mild, non-abrasive cleaner and a soft cloth or sponge. Avoid harsh chemicals that can damage grout or tile. Regular cleaning prevents soap scum and mildew buildup.
Conclusion
Choosing the right tile and seat combo can turn a simple shower into a daily retreat. Focus on what feels good underfoot and what matches your cleaning habits, and the rest will fall into place.
Whether you go bold with texture or keep it sleek and minimal, the best ideas are the ones that fit your real routine. Start with one upgrade you love, and build from there.