25 Oven Cleaning Tips for a Fresh Grease Free Kitchen
Grease and grime build up fast in an oven, turning a simple bake into a smoky mess. You don't need harsh chemicals or endless scrubbing to get it sparkling again.
These 25 tips use common household items and smart techniques to cut through stubborn residue. From natural pastes to steam tricks, each method targets a specific problem without wasting your time.
Whether you're dealing with burnt-on spills or cloudy glass, there's a practical solution here. Let's make your oven look as good as new, one tip at a time.
1. Start with a Dry Scrape to Remove Loose Debris
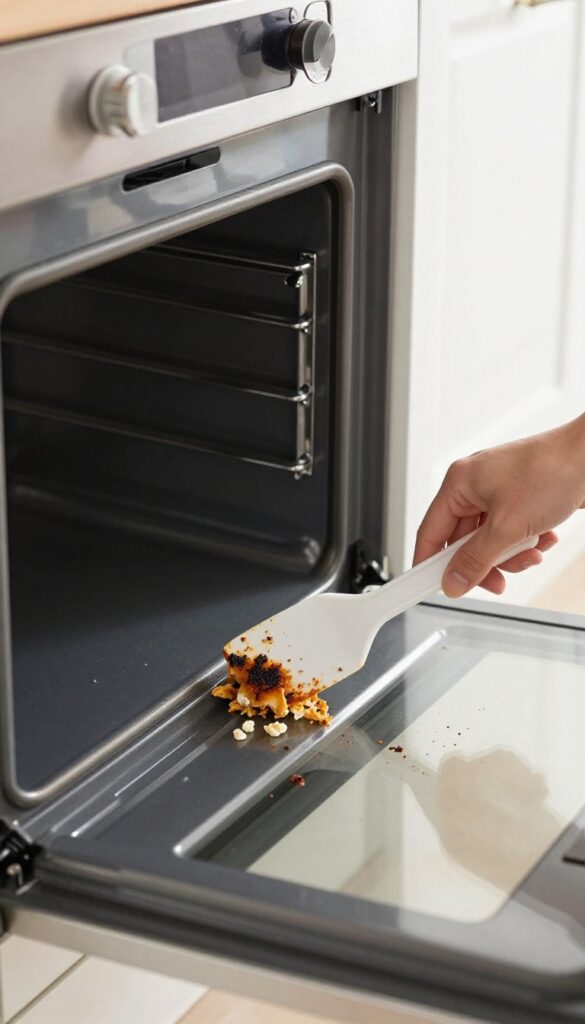
Before you bring out any sprays or pastes, grab a plastic scraper or an old spatula. A quick dry scrape lifts off burnt-on food chunks and loose crumbs without smearing them around. This simple first step stops debris from turning into a sticky paste when you add moisture later, making every following step easier and faster.
Why Dry Scraping Works Best
When you apply cleaner directly over loose bits, the moisture softens them into a sludge that spreads across the oven floor. Dry scraping removes the bulk before any liquid touches the surface. Use a plastic scraper to avoid scratching enamel or glass.
For stubborn spots, hold the scraper at a low angle and push gently.
Tools That Do The Job Without Damage
A plastic putty knife from the hardware store works perfectly. So does a silicone spatula or even a stiff plastic card like an old gift card. Avoid metal scrapers or steel wool—they leave scratches that trap grease later.
If you don't have a scraper, try the edge of a plastic spoon.
When To Scrape And What To Do With The Debris
Scrape while the oven is cool to the touch. Work over a trash can or line the oven floor with newspaper to catch falling bits. After scraping, vacuum or wipe out the loose particles with a dry paper towel.
Now your oven is prepped and ready for deeper cleaning without the mess.
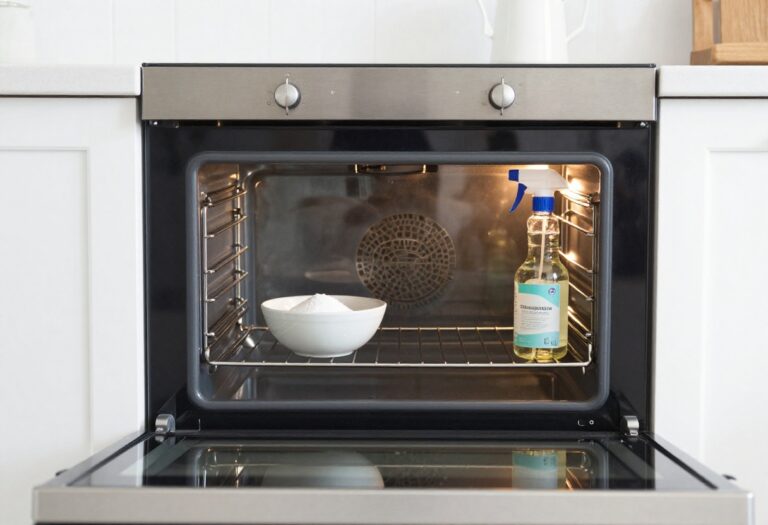
2. Use Baking Soda and Water for a Natural Paste
If you prefer a non-toxic approach, baking soda is your best friend. It's gentle enough to avoid scratching surfaces but abrasive enough to lift baked-on grease. Mixed with water, it turns into a paste that works wonders on oven interiors.
This method is simple, cheap, and effective. You probably already have both ingredients in your kitchen. No harsh fumes, no rubber gloves required.
Making The Paste
In a small bowl, combine about half a cup of baking soda with a few tablespoons of water. Stir until it forms a thick, spreadable paste. Adjust the ratio as needed—add more water if it's too dry, more baking soda if it's too runny.
Applying And Waiting
Using a sponge or your fingers (gloves optional), spread the paste evenly over the oven's interior, avoiding heating elements. Pay extra attention to greasy spots and burnt-on food. Let it sit overnight—this gives the baking soda time to break down the grime.
Wiping Away The Grime
The next day, dampen a clean cloth with water and wipe away the paste. You'll see the grime come off with it. For stubborn areas, scrub gently with the damp cloth or a non-abrasive sponge.
Rinse the cloth frequently and repeat until all residue is gone.
Final Rinse And Dry
After removing all the paste, go over the surfaces with a fresh damp cloth to remove any baking soda residue. Dry with a soft towel or let the oven air dry before closing the door. Your oven will look noticeably cleaner without any chemical smell.
3. White Vinegar Spray to Neutralize Residue
Once the baking soda paste has done its heavy lifting, it's time for the second act. White vinegar steps in to neutralize the alkaline baking soda and dissolve any leftover grease. The fizzy reaction isn't just fun to watch—it actively lifts stubborn bits that scrubbing alone might miss.
This one-two punch leaves your oven clean, streak-free, and ready for the next roast.
Why Vinegar Works
White vinegar is a mild acid that cuts through grease and breaks down mineral deposits. When it reacts with baking soda, the carbon dioxide bubbles help dislodge baked-on grime from crevices and corners. Plus, vinegar is a natural deodorizer, so it neutralizes any lingering food smells without leaving a chemical scent behind.
How To Apply It
Fill a spray bottle with undiluted white vinegar and spritz generously over the baking soda paste. Let it fizz for a few minutes—you'll see the reaction lifting residue. For extra stubborn spots, spray again and let it sit for five minutes before wiping.
The foam makes it easy to see where you've worked.
Wiping Away The Mess
Use a damp microfiber cloth to wipe down the surfaces in circular motions. The vinegar-baking soda mixture rinses off cleanly, leaving no sticky film. For glass doors, finish with a dry cloth to prevent streaks.
If any residue remains, a quick spritz of vinegar and a fresh wipe will handle it.
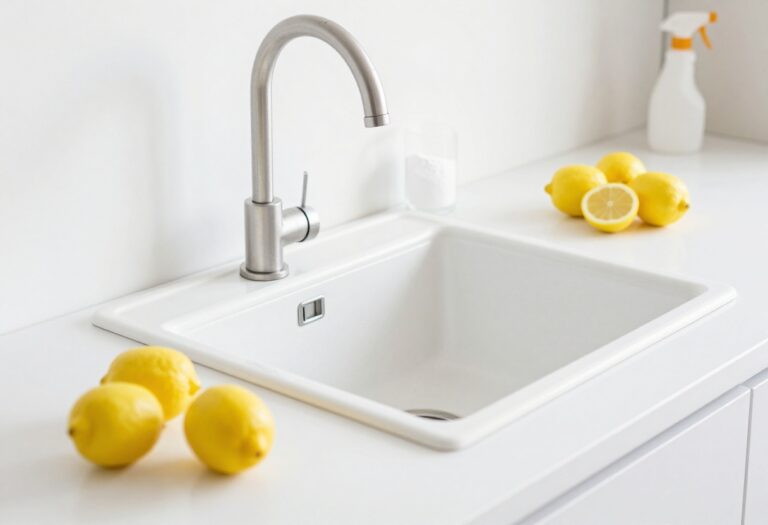
4. Lemon Juice and Steam for Stubborn Grease
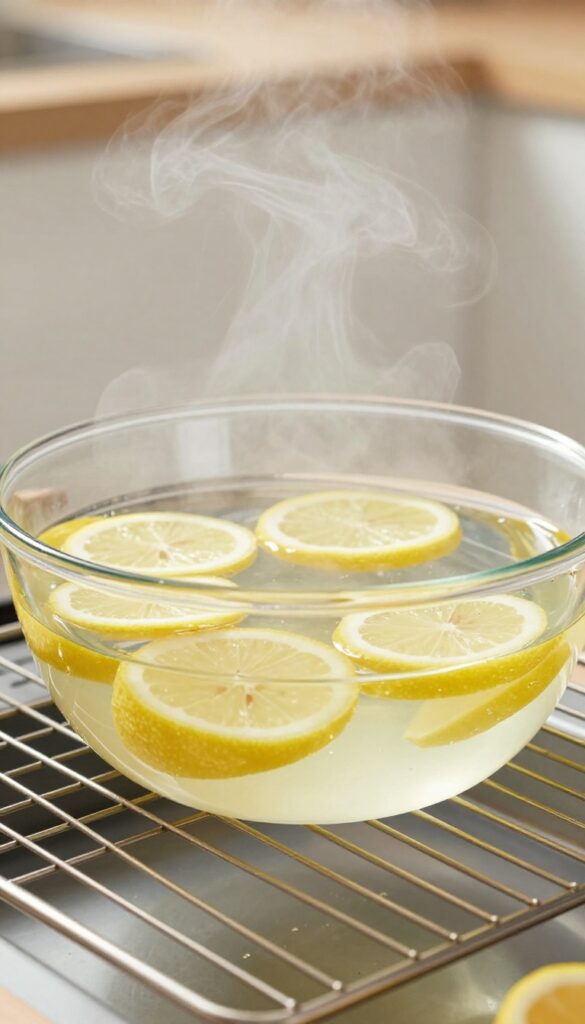
Steam is a powerful ally when it comes to loosening baked-on grease, and adding lemon takes it up a notch. The citrus cuts through grime while leaving your kitchen smelling fresh. This method is perfect for when you need a quick, chemical-free clean.
This technique works best on warm ovens, so if yours is cool, preheat it to 250°F (120°C) and then turn it off. Place a large, oven-safe bowl filled with water and a few lemon slices on the middle rack. Close the door and let the steam work for 20 minutes.
The moisture softens crusty spills, and the lemon helps break down grease naturally. After steaming, simply wipe down the interior with a damp cloth or sponge. For extra stubborn spots, use a non-abrasive scrubber.
This method is gentle on enamel and glass surfaces, making it a go-to for regular maintenance.
Why Lemon Works
Lemon juice is acidic, which helps dissolve grease and neutralize odors. When heated, the steam carries the citric acid into every corner, reaching areas you might miss with a cloth. Plus, it leaves a pleasant scent instead of chemical fumes.
Best Practices For Steaming
Use a deep bowl to prevent water from boiling over. Add a few lemon slices or a splash of lemon juice for extra power. Don't open the oven during steaming—let the heat and moisture build up.
After wiping, leave the door open for a few minutes to dry completely.
When To Use This Method
This technique is ideal for light to moderate grease buildup. For heavily burnt-on spills, pair it with a baking soda paste afterward. Avoid using this on self-cleaning ovens or if your oven has a sensitive electronic panel—check the manual first.
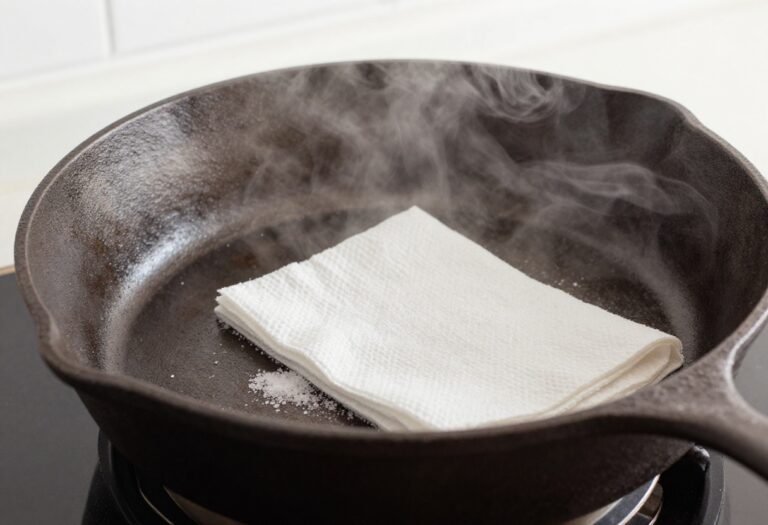
5. Salt and Cinnamon for a Fresh Scent While Cleaning
Cleaning the oven doesn't have to leave your kitchen smelling like harsh chemicals. A simple combination of salt and cinnamon can tackle grease and leave a warm, inviting aroma. This natural trick works double duty: salt absorbs oil while cinnamon neutralizes odors.
Start by sprinkling a generous layer of salt over any greasy spills or burnt-on food inside the cold oven. Let it sit for about 10 minutes—the salt will soak up the oil, making it easier to wipe away. After you've wiped the salt and loosened grime, sprinkle a pinch of cinnamon on the oven floor.
Set the oven to a low heat (around 200°F or 90°C) for 5–10 minutes. The gentle heat releases cinnamon's natural deodorizing properties, leaving the oven smelling fresh without any artificial scents. This method is especially useful for a quick refresh after cooking strong-smelling foods like fish or garlic.
Why Salt Works On Grease
Salt is a natural absorbent. When you sprinkle it on fresh or baked-on grease, it draws the oil out of the surface. This makes wiping away the mess much easier, reducing the need for scrubbing.
Plus, salt is gentle on oven surfaces, so you won't risk scratches.
How Cinnamon Deodorizes
Cinnamon contains compounds that neutralize odors rather than just covering them up. When heated, it releases a pleasant scent that bonds with odor molecules in the air. This leaves your oven smelling clean and cozy, without any chemical residue.
Step-by-step Quick Clean
First, remove any loose debris from the oven. Sprinkle salt generously over greasy areas and let it sit for 10 minutes. Wipe away the salt and grease with a damp cloth.
Then, sprinkle a pinch of cinnamon on the oven floor. Run the oven at 200°F for 5 minutes, then turn it off and let it cool. Wipe out the cinnamon residue.
Your oven is now clean and fresh.
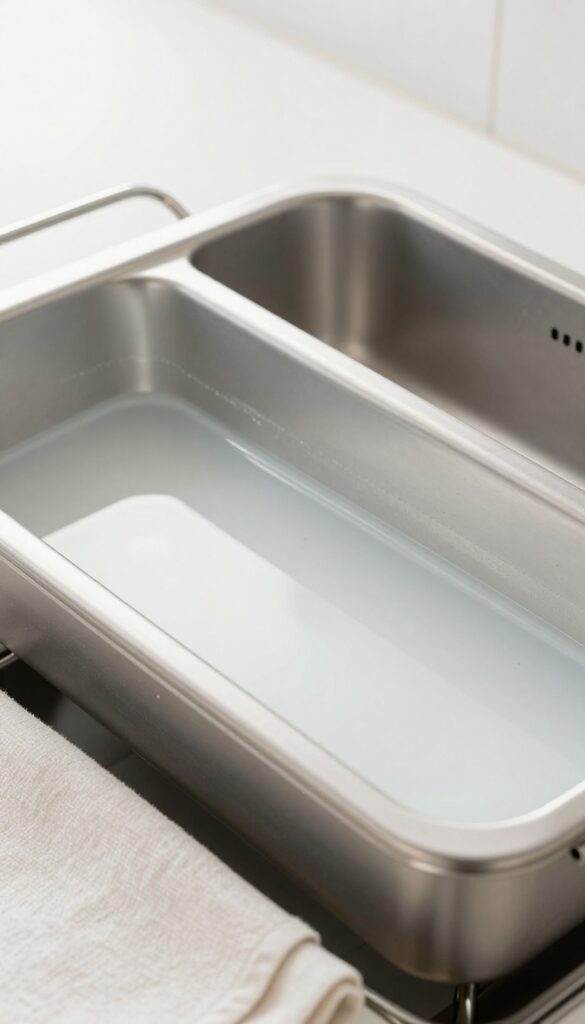
6. Dish Soap and Hot Water for Oven Racks
Oven racks often get caked with baked-on grease and food residue, but they're usually removable, making them easier to clean separately. Instead of scrubbing them inside the oven, try a simple soak in hot, soapy water. This method loosens grime without the need for harsh chemicals or heavy elbow grease.
Remove the oven racks and place them in a bathtub, large utility sink, or a heavy-duty trash bag. Fill the container with the hottest water possible from your tap, then add a generous squirt of dish soap. Let the racks soak for at least 30 minutes – longer for heavily soiled racks.
After soaking, scrub each rack with a non-abrasive pad or sponge. Rinse thoroughly with clean water and dry before returning them to the oven.
Why Hot Water Works Best
Hot water helps dissolve grease and soften burnt-on food, making it easier to wipe away. The dish soap breaks down oils, so the combination is a powerful yet gentle cleaner. For extra stubborn spots, add a quarter cup of baking soda or white vinegar to the soak.
Protecting Your Bathtub Or Sink
Oven racks can scratch surfaces, so place an old towel or a rubber mat at the bottom of your tub or sink before adding water. This prevents damage and also provides a non-slip surface for scrubbing. If using a trash bag, double-bag to avoid leaks.
Alternative: Cleaning Without A Soak
If you can't remove the racks or prefer not to soak them, spray them with a mixture of equal parts white vinegar and water, then scrub with a damp sponge. For tough spots, make a paste of baking soda and water, apply it, let it sit for 15 minutes, then scrub.
7. Use a Pumice Stone on Burnt-On Spills
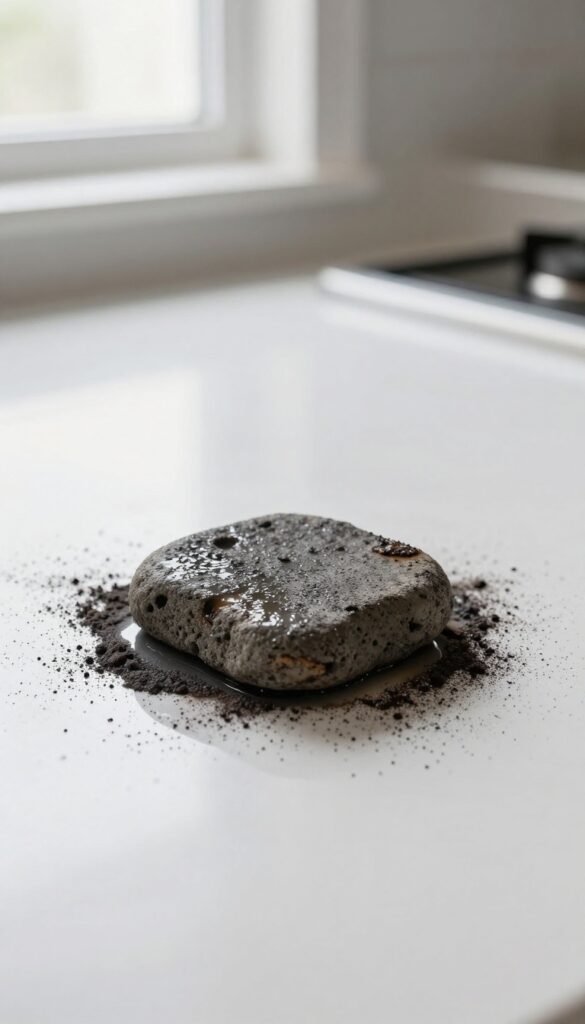
Pumice stones aren't just for foot care—they're surprisingly effective at removing stubborn burnt-on spills from your oven floor. The porous volcanic rock gently abrades carbonized residue without scratching enamel surfaces. It's a low-effort trick that handles messes baking soda paste might struggle with.
Start by soaking the pumice stone in water for a few minutes until it's fully saturated. A dry stone can be too abrasive, so keep it wet while you work. Gently rub the stone over the burnt spot using light pressure and small circular motions.
The residue will turn into a fine powder as it lifts. Wipe away the powder with a damp cloth, and repeat if needed. This method works best on smooth enamel floors, not on rough or coated surfaces.
Always test on a small hidden area first to ensure no damage.
Why Pumice Works So Well
Pumice is a natural abrasive that's harder than burnt-on carbon but softer than oven enamel. When wet, it provides controlled friction that scrapes away residue without scratching. It's especially good for spills that have been baked on multiple times and have become rock-hard.
Step-by-step Technique
Soak the stone for 5 minutes. Rub gently on the spill with a wet stone—no scrubbing hard. You'll see the residue turn to dust.
Wipe with a damp cloth. For thick spots, repeat a few times. Rinse the stone occasionally to remove clogged particles.
Safety And Precautions
Never use a dry pumice stone—it can scratch. Avoid using on glass, ceramic, or non-stick surfaces. Stick to enamel oven floors.
Wear gloves if you prefer, and keep the area well-ventilated. After cleaning, rinse the oven floor with water and dry it.
8. Steam Clean with a Microwave-Safe Bowl
Steam is a gentle yet effective way to loosen baked-on grease and grime without scrubbing. By using a microwave-safe bowl filled with water and a splash of vinegar, you can create a steam bath that softens stubborn residue, making it easy to wipe away. This method is especially useful for quick touch-ups or when you don't have time for a deep clean.
Steam cleaning is a game-changer for oven maintenance. The combination of heat and moisture penetrates caked-on food particles, while the vinegar helps cut through grease and neutralize odors. After microwaving, let the steam sit for 10 minutes to maximize its effect.
Then, simply wipe the interior with a damp cloth or sponge. For extra stubborn spots, use a non-abrasive scrubber. This method works best on light to moderate buildup and can be repeated as needed.
Why Vinegar Works
Vinegar is a natural degreaser and deodorizer. Its acetic acid breaks down grease molecules, making them easier to remove. Plus, it's safe and non-toxic, so you don't have to worry about chemical residues.
The steam carries the vinegar's cleaning power into every corner of the oven, even reaching areas you can't easily scrub.
Step-by-step Guide
Start by removing oven racks and any large debris. Fill a microwave-safe bowl with 1 cup of water and 1 tablespoon of white vinegar. Place it in the center of the oven and microwave on high for 5 minutes.
Let the bowl sit inside with the door closed for another 10 minutes. Then, carefully remove the bowl (it will be hot) and wipe down the interior with a soft cloth or sponge. For tough spots, let the steam sit longer or repeat the process.
When To Use This Method
This steam cleaning technique is ideal for regular maintenance between deep cleans. It's also great for freshening up the oven after cooking dishes that splatter, like roasting or baking. However, for heavy, burnt-on buildup, you might need to combine this with a baking soda paste or a commercial cleaner.
Always test on a small area first if your oven has a special coating.
9. Apply a Commercial Degreaser for Heavy Build-Up
When natural solutions aren't cutting it, a commercial oven degreaser can be your best friend. These products are formulated to dissolve thick, sticky grease that has been baking on for months. They work fast and require minimal elbow grease, making them ideal for deep cleaning sessions.
Choose a spray-on degreaser specifically designed for ovens. Apply it generously to the interior surfaces, avoiding heating elements. Let it sit for the recommended time—usually 10 to 30 minutes—so it can penetrate the grime.
Then scrub with a nylon brush or non-abrasive pad. Rinse thoroughly with a damp cloth to remove any residue.
Picking The Right Product
Look for a degreaser that is safe for your oven type. Some are formulated for self-cleaning ovens, while others work on standard models. Check the label to ensure it won't damage the finish or leave harmful fumes.
Safety First
Always wear gloves and work in a well-ventilated area. Open windows or turn on a fan to avoid inhaling fumes. Keep the degreaser away from children and pets until the surface is rinsed clean.
Tackling Stubborn Spots
For extra tough spots, apply the degreaser directly and let it soak longer. Use a plastic scraper to gently lift the softened grease. Avoid metal scrapers that can scratch the oven surface.
10. Line the Oven Bottom with Aluminum Foil (Carefully)
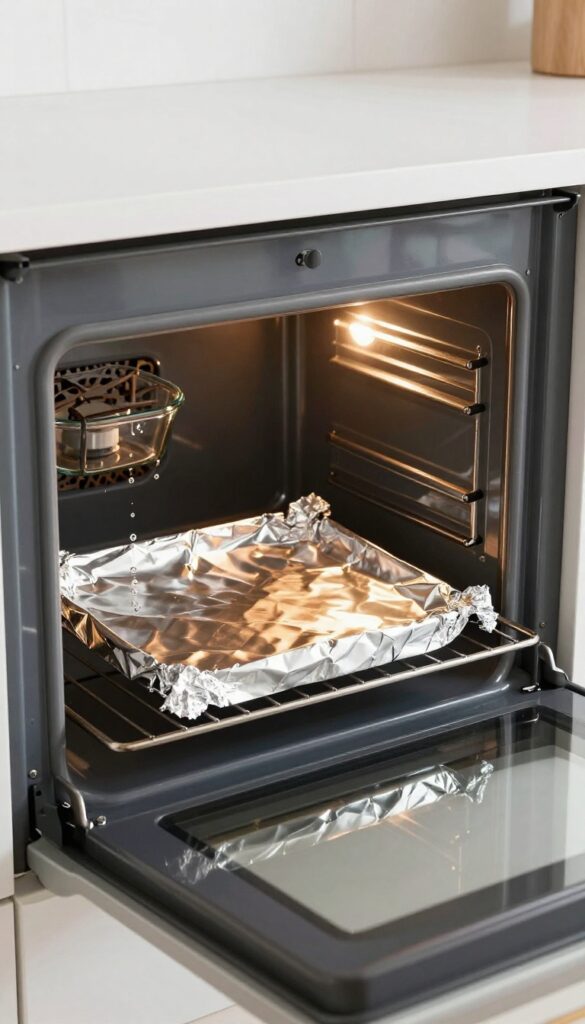
Aluminum foil is a simple hero when it comes to catching drips and spills before they bake onto your oven floor. A single sheet placed on the bottom rack can save you from scrubbing burnt-on messes later. Just be careful not to cover the heating elements—foil can reflect heat and cause damage or uneven cooking.
Lining the oven bottom with foil is a preemptive cleaning trick that works wonders. It catches any overflow from casseroles, pizza cheese, or roasting pans before it hits the oven floor. Since the foil is disposable, you can simply peel it off and toss it after each use, leaving the actual oven surface spotless.
This method is especially handy for heavy bakers or anyone who roasts frequently. Just remember to replace the foil regularly—old foil can tear or develop holes, letting grease seep through. And never line the very bottom of the oven where the heating element sits; always place the foil on the lowest rack position to allow proper airflow.
Where To Place The Foil
Place the foil on the lowest oven rack, not directly on the oven floor. This keeps it away from the heating element while still catching drips from dishes above. Make sure the foil is large enough to cover the rack but doesn't hang over the edges, which could block heat circulation.
When To Replace It
Swap out the foil after every major cooking session or whenever you notice visible grease buildup. Leaving the same foil for weeks can lead to smoke or even a fire hazard if grease accumulates. A quick check before preheating ensures you're always starting fresh.
What To Avoid
Never cover the oven floor, heating elements, or vents with foil. This can trap heat, damage the oven, and create a fire risk. Also avoid using foil on the top rack where it might touch the broiler element.
Stick to the bottom rack only.
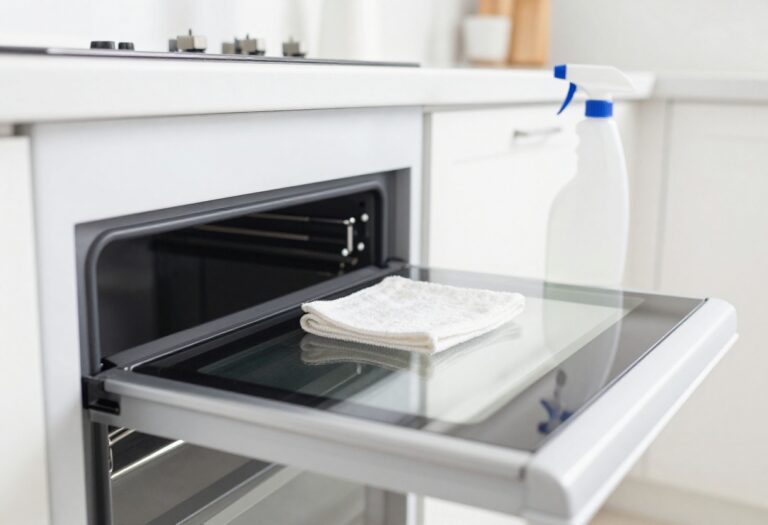
11. Clean the Oven Door Glass with a Paste of Baking Soda
Oven door glass often gets overlooked, but it's one of the first things people notice. A simple baking soda paste can cut through the greasy film and leave the glass crystal clear. This method is gentle enough to avoid scratching the glass, yet effective against baked-on splatters.
To get started, mix baking soda with a small amount of water until you have a thick, spreadable paste. Apply it generously to the inside of the oven door glass, focusing on any stubborn spots. Let it sit for about 15 minutes to break down the grease.
Then, dampen a microfiber cloth and wipe away the paste in circular motions. Rinse the cloth frequently and finish with a dry section for a streak-free shine. For extra stubborn residue, let the paste sit longer or add a splash of white vinegar to the mix.
Why Baking Soda Works So Well
Baking soda is mildly abrasive, which helps lift grime without scratching glass. Its alkaline nature also helps dissolve grease, making it a powerful yet safe cleaner. Plus, it's non-toxic, so you don't have to worry about chemical fumes near your food.
Avoid Common Mistakes
Don't use too much water or the paste will run off. Also, avoid using paper towels, as they can leave lint. Stick with a microfiber cloth for the best results.
If you have a self-cleaning oven, be careful not to get paste into the door seals.
When To Repeat The Process
For heavily soiled glass, you may need to repeat the paste application. After the first wipe, check for any remaining haze and apply a fresh coat. A second round usually does the trick, leaving the glass spotless.
12. Use a Razor Blade for Stubborn Glass Spots
Sometimes, even the best cleaners leave behind those stubborn, baked-on spots on your oven door glass. Before you give up, try a simple razor blade. It's a quick fix that can make your glass look brand new again.
Why A Razor Blade Works
A razor blade is thin and sharp enough to scrape off burnt-on residue without damaging the glass. It's perfect for those hard, crusty spots that won't budge with sprays or sponges.
The Right Technique
Hold the blade at a 45-degree angle to the glass. Gently scrape in one direction, not back and forth. Keep the glass wet with a mixture of water and vinegar or a glass cleaner to lubricate the surface and prevent scratches.
Safety First
Always use a new, sharp blade—dull ones can skip and cause scratches. Wear gloves to protect your hands, and work slowly. After scraping, wipe the glass clean with a damp cloth to remove any residue.
13. Wipe Down the Gasket with a Damp Cloth
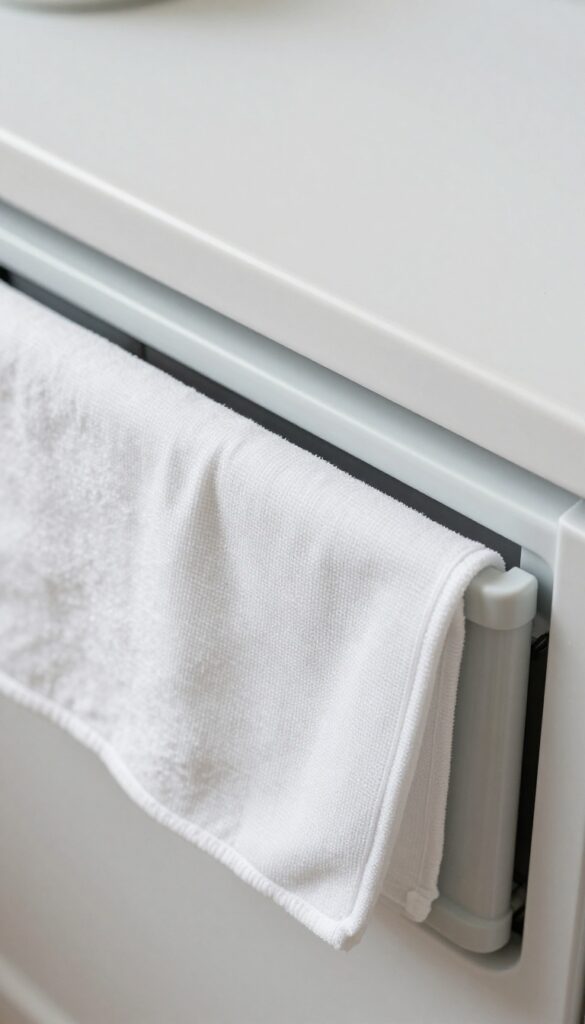
The rubber gasket that seals your oven door is a magnet for grease and food particles. Over time, that buildup can prevent the door from closing tightly, letting heat escape and making your oven work harder. A quick wipe-down keeps it clean and functional.
Start by inspecting the gasket for any visible grime or sticky spots. Mix a small amount of mild dish soap with warm water, dip a soft cloth in the solution, and wring it out well so it's damp, not soaking. Gently run the cloth along the entire gasket, paying extra attention to crevices where grease hides.
Avoid harsh scrubbing or abrasive tools that could tear the rubber. Once you've wiped away the dirt, go over the gasket with a dry cloth to remove excess moisture. This step is key to preventing mold or mildew from forming in the folds.
A dry, clean gasket also ensures a proper seal every time you close the door, which helps maintain consistent oven temperatures and saves energy.
Why The Gasket Matters
The gasket creates a tight seal that traps heat inside the oven. If it's coated in grease, it can't do its job properly. You might notice longer preheat times or uneven baking—both signs that your gasket needs attention.
What To Use And What To Avoid
Stick with a soft cloth and mild soap. Stay away from bleach, ammonia, or any harsh chemical cleaners—they can degrade the rubber over time. Also, skip the scrub brushes and scouring pads; they can create tiny tears that ruin the seal.
When To Replace Instead Of Clean
If you notice cracks, tears, or the gasket feels hard and brittle, cleaning won't fix it. In that case, order a replacement gasket specific to your oven model. A worn-out gasket is a common cause of heat loss and can make your oven less efficient.
14. Vacuum the Oven Floor Before Wet Cleaning
You wouldn't mop a floor without sweeping first, so why do it with your oven? Grabbing a handheld vacuum with a brush attachment is a quick pre-step that makes a huge difference. It lifts loose crumbs, burnt bits, and debris before they turn into sludge when you spray on cleaner.
This simple habit saves you from extra scrubbing and keeps your cleaning solution working on the real grime.
Skipping the dry vacuum step is a common mistake that leads to a messy paste of cleaner and crumbs. A few minutes with a vacuum prevents that gunk from smearing around and clogging your sponge. It's especially helpful for ovens with heavy food residue or after a big spill.
Why Dry Cleaning First Works
When you spray a liquid cleaner directly onto loose debris, it just creates a muddy mess. That sludge is harder to wipe away and can even scratch the enamel if you scrub too hard. Vacuuming first removes all the dry particles, so your cleaner can focus on dissolving the baked-on grease and stains.
It's a small step that makes the whole process faster and cleaner.
Best Tool For The Job
A small handheld vacuum with a crevice tool or soft brush attachment is ideal. It can reach into corners and along the door seal without scratching. If you don't have a handheld, a vacuum hose with a brush works fine.
Just make sure the brush is clean to avoid spreading dust.
When To Vacuum
Do this before every deep clean, especially if you see visible crumbs or burnt bits. It's also a good habit after cooking something that spilled, like a pie or casserole. A quick vacuum then prevents those bits from baking on harder next time.
15. Use a Self-Cleaning Cycle Sparingly
Self-cleaning cycles sound like a dream—just lock the door and let the oven do the work. But that convenience comes with a few downsides you should know about before hitting start. The high heat, usually around 800°F, burns off food residue and turns it into ash.
That sounds great, but it can also produce smoke, strong odors, and even trigger your smoke alarm. Plus, the extreme temperature can strain oven components over time.
The self-cleaning cycle is best reserved for heavy buildup that scrubbing won't touch. For light messes, stick to gentler methods to avoid unnecessary wear and tear. When you do use it, remove large debris first, open windows for ventilation, and stay nearby.
Once the cycle finishes and the oven cools, simply wipe away the ash with a damp cloth. Avoid using oven cleaners before or after the cycle, as chemical residues can create harmful fumes.
When To Use Self-clean
Only use the self-cleaning cycle when you have thick, baked-on spills that won't come off with other methods. For everyday grime or small splatters, skip it. Frequent use can shorten the life of your oven's heating elements, door seals, and control board.
How To Prepare And Clean Up
Before starting, remove all oven racks, pans, and foil. Wipe up loose crumbs and grease to reduce smoke. After the cycle, let the oven cool completely, then vacuum or wipe out the ash residue.
A microfiber cloth works well for the final polish.
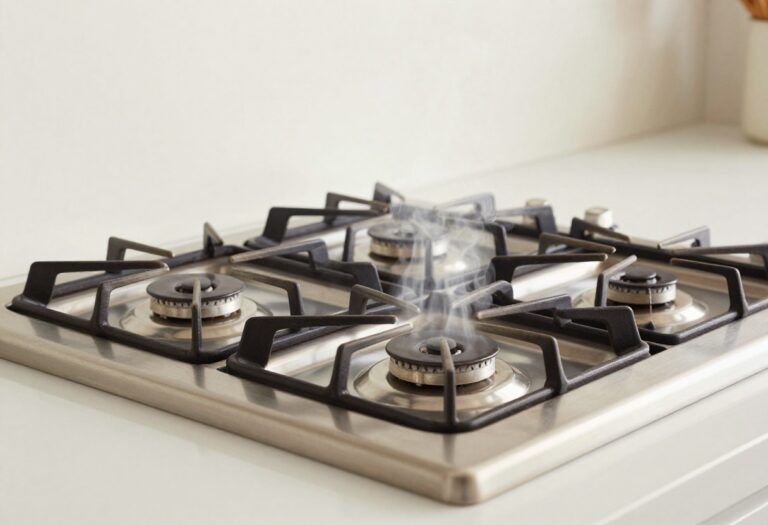
16. Clean the Oven Vents to Improve Airflow
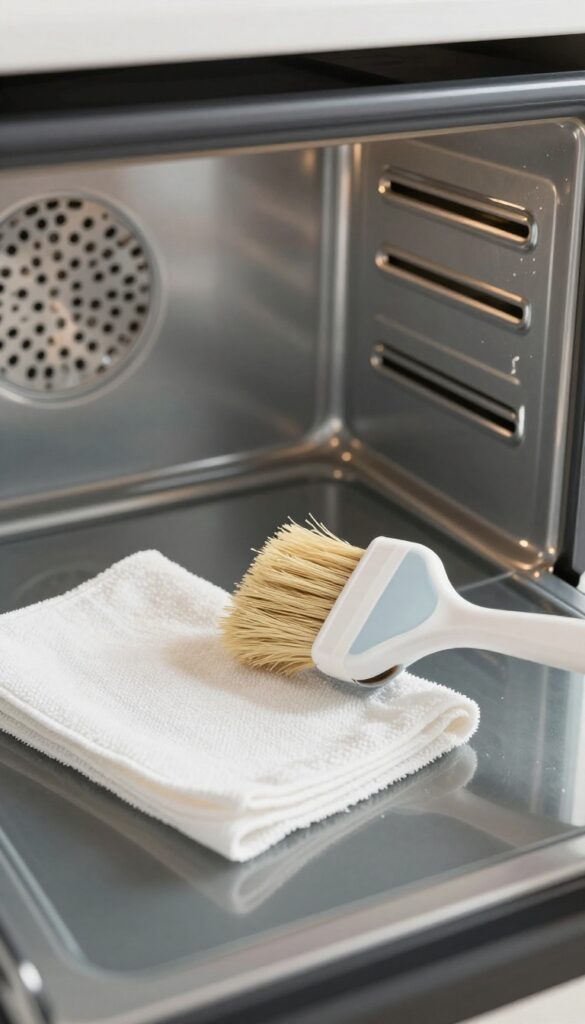
Oven vents are easy to ignore, but they play a big role in how well your oven cooks and smells. When grease and crumbs clog these openings, air can't circulate properly, leading to hot spots, longer preheat times, and funky odors every time you bake. A quick clean can make a real difference.
Start by locating your oven's vents—they're usually on the back wall, bottom, or sides of the oven cavity. Turn off the oven and let it cool completely. Use a flashlight to check for visible debris.
A soft brush, like a clean paintbrush or a pastry brush, works great for loosening dry crumbs. For stubborn grease, dip the brush in a mix of warm water and mild dish soap, then gently scrub the vent openings. Avoid pushing debris further inside.
After brushing, wipe the area with a damp microfiber cloth. If you have compressed air (like the kind for cleaning electronics), you can blow out any remaining particles from hard-to-reach spots. Just be sure to hold the can upright and use short bursts.
Do this every few months to keep airflow optimal.
Why Vents Get Clogged
Every time you roast, bake, or broil, tiny grease particles and food bits get airborne. They settle on vent surfaces and gradually build up. Spills that bubble over during cooking can also drip into vent openings.
Over time, this gunk hardens and restricts airflow, making your oven work harder and less efficiently.
Tools That Make The Job Easy
You don't need special equipment. A small, soft-bristled brush (like a toothbrush or bottle brush) is perfect for dislodging debris. Compressed air cans are great for blowing out dust without touching anything.
A microfiber cloth and a spray bottle with mild soapy water handle the greasy residue. Avoid using sharp objects that could damage the vent fins.
How Often To Clean Vents
Check your vents every time you do a deep oven clean. If you bake frequently (several times a week), aim for a quick vent cleanup every month. For occasional bakers, every three months is enough.
A clean vent not only improves performance but also reduces the chance of smoke and unpleasant smells during cooking.
17. Soak Removable Parts in a Degreasing Solution
Your oven knobs, drip pans, and racks collect some of the worst grease buildup because they sit right where spills happen. Instead of scrubbing them in place, pop them off and give them a proper bath. A good soak does the heavy lifting, so you barely have to scrub.
Removing those parts first makes the whole job easier. You can reach every nook and cranny without awkward bending or missing spots. Plus, soaking loosens the baked-on grease that would otherwise take forever to scrub off.
Which Parts To Remove And Soak
Focus on detachable items: knobs, drip pans (if your oven has them), oven racks, and any removable trim pieces. Check your oven manual first—some parts may not be dishwasher safe or may have electronic components. For knobs, gently pull them straight off; for racks, slide them out and set them aside.
The Best Degreasing Soak Solution
Fill your sink or a large tub with hot water—the hotter the better, as long as it's safe for the parts. Add a generous squirt of a degreasing dish soap (like Dawn) and a quarter cup of baking soda. Stir until dissolved.
Submerge the parts completely and let them soak for at least 30 minutes, or overnight for tough buildup.
Scrubbing And Rinsing After The Soak
After soaking, most of the grease will have loosened or floated away. Use a non-abrasive sponge or a soft brush to gently scrub any remaining residue. For stubborn spots, make a paste of baking soda and water and apply it directly.
Rinse thoroughly with clean water and dry with a soft cloth before reinstalling.
18. Use a Magic Eraser on Stubborn Marks
Sometimes you just need a little extra muscle on those baked-on spots that won't budge. That's where a simple melamine sponge, often sold as a Magic Eraser, comes in handy. It's like a gentle sandpaper that lifts grime without scratching most surfaces.
Just dampen it, squeeze out excess water, and you're ready to tackle those stubborn marks on the oven walls.
How It Works
Melamine foam is a micro-abrasive material that acts like extremely fine sandpaper. When dampened, it creates a mild scrubbing action that breaks down baked-on grease and food residue. The foam crumbles slightly as you use it, exposing fresh abrasive surface, which makes it effective for tough spots without harsh chemicals.
Step-by-step Use
First, make sure the oven is cool. Wet the Magic Eraser and wring it out until it's just damp—not soaking wet. Gently rub the stained area in a circular motion.
You'll see the mark start to fade. Rinse the sponge frequently as it picks up grime. After scrubbing, wipe the area with a damp cloth to remove any foam residue.
Where To Avoid
Don't use a Magic Eraser on non-stick coatings, like those on some oven racks, because it can damage the surface. Also avoid it on glass oven doors if the glass has a tinted coating—test an inconspicuous spot first. Stick to the porcelain or enamel interior walls for best results.
19. Apply a Thin Layer of Coconut Oil to the Interior
You've just spent time scrubbing your oven until it shines. Now, keep it that way with a simple trick: coconut oil. A thin layer on the interior walls creates a protective barrier that makes future spills slide right off.
After your oven is completely clean and cool, take a small amount of coconut oil on a soft cloth. Rub it gently over the interior walls, avoiding the heating elements. The oil won't burn or smoke at normal baking temperatures, but it will fill microscopic pores in the enamel.
When something drips or splatters next time, it won't bond to the surface. A quick wipe with a damp cloth is all you need. This method works best on the sides and back wall, not the bottom, where direct heat might cause slight smoking.
Reapply every few months or after a deep clean.
Why Coconut Oil Works
Coconut oil has a high smoke point around 350°F, so it stays stable during most baking. Its fatty acids create a slick, hydrophobic layer that repels grease and food particles. Unlike chemical sprays, it's food-safe and adds a light barrier without residue.
How To Apply It Right
Use a lint-free cloth or paper towel. Dip just enough to coat the surface thinly—too much can cause drips or a sticky feel. Start from the top and work downward.
Let it sit for 10 minutes, then buff off any excess with a dry cloth.
When To Skip This Tip
Avoid applying coconut oil near heating elements, vents, or the oven floor. Also, skip it if you frequently use self-cleaning cycles, as the high heat can burn the oil and create smoke. Stick to manual cleaning if you use this method.
20. Clean the Oven Light Cover Separately
That little glass cover over your oven light collects grease and dust just like everything else. But since it's fragile and electrical, you can't just spray it in place. Taking it off and washing it by hand is safer and gets it much cleaner.
Removing the light cover is usually simple—just twist or unscrew it gently. Once it's off, wash it in warm soapy water with a soft sponge. Avoid abrasive scrubbers that could scratch the glass.
Dry it completely before reinstalling to prevent moisture from damaging the bulb or socket.
How To Remove The Cover Safely
Turn off the oven and let it cool completely. Most covers twist counterclockwise or have a small tab to press. If it's stuck, don't force it—use a rubber grip pad for extra traction.
Never try to remove it while the oven is still warm, as the glass can crack.
Cleaning Without Damaging The Glass
Use a mild dish soap and a non-abrasive sponge. For stubborn grease, soak the cover in hot soapy water for 10 minutes. Rinse thoroughly and dry with a lint-free cloth.
Avoid putting it in the dishwasher, as high heat can weaken the glass seal.
Reinstalling And Testing
Make sure the cover is bone-dry before putting it back. Twist it into place until it feels snug but not overtightened. Turn on the oven light to check that it works and that no moisture has gotten inside.
If the bulb looks foggy, replace it before using the oven.
21. Use a Toothbrush for Tight Corners and Crevices
An old toothbrush dipped in baking soda paste works wonders on hinges, corners, and around the door seal where grime hides. Those tight spots are exactly where grease and burnt-on food love to settle, and a sponge just can't reach them. A toothbrush's bristles get into every nook and cranny, making it a perfect precision tool for detail work.
Don't toss your old toothbrush—repurpose it for oven detailing. The small head and stiff bristles are ideal for scrubbing hinges, the gap between the oven door and frame, and the edges of the control panel. Dip it in a paste of baking soda and water, then scrub gently.
For stubborn buildup, add a little white vinegar to the paste to boost cleaning power. Rinse the brush frequently and wipe away residue with a damp cloth. This method is especially effective for the rubber door seal, where grime can cause a poor seal and heat loss.
Why A Toothbrush Works Best
Unlike larger scrub brushes or sponges, a toothbrush can fit into the narrowest spaces. Its bristles are firm enough to dislodge baked-on grime but gentle enough not to scratch surfaces. Plus, you can angle it precisely to reach under edges and into crevices that would otherwise stay dirty.
Step-by-step: Toothbrush Cleaning
First, make a thick paste of baking soda and water. Dip the toothbrush into the paste and start scrubbing the tight areas. For extra stubborn spots, let the paste sit for 10 minutes before scrubbing.
After scrubbing, wipe away the paste with a damp microfiber cloth. Repeat if necessary, then dry the area with a clean towel.
Where To Focus Your Efforts
Pay special attention to the door hinges, the area around the oven light, the edges of the door glass, and the rubber gasket. These spots collect grease and crumbs that can bake on over time. A toothbrush makes quick work of them, leaving your oven looking thoroughly clean.
22. Wipe Down the Exterior with a Gentle Cleaner
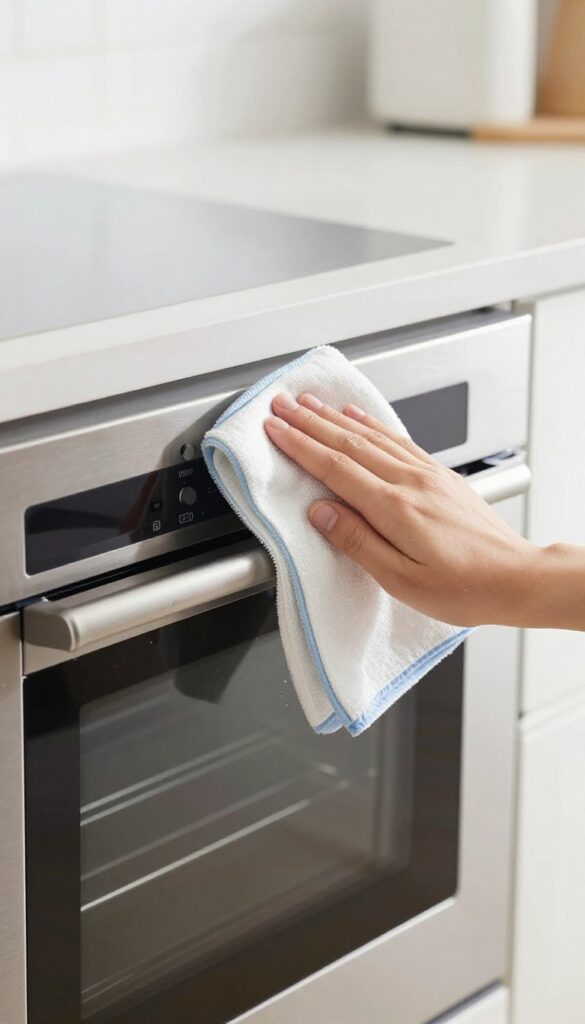
The outside of your oven gets just as grimy as the inside, especially around the handle and control panel. A quick wipe with the right cleaner keeps it looking fresh and prevents buildup.
For daily or weekly maintenance, a mild all-purpose cleaner or a simple vinegar-water solution works perfectly. Spray it on a soft cloth—never directly on the oven—to avoid moisture seeping into buttons or vents. Gently wipe the door, handle, and control panel, then dry with a separate cloth to prevent streaks.
Avoid abrasive sponges or scrub pads; they can scratch the finish and ruin the look of your appliance.
Choose The Right Cleaner
A 50/50 mix of white vinegar and water is a safe, effective option for most oven exteriors. For tougher grease, add a drop of dish soap. If you prefer a commercial product, pick a mild all-purpose cleaner without bleach or ammonia.
Always test on a small hidden area first.
Tackle Stubborn Spots
For dried-on splatters or greasy fingerprints, let the cleaner sit for a minute or two before wiping. A microfiber cloth works best to lift residue without scratching. For the handle, use a cotton swab or toothpick to clean around the edges where grime hides.
Keep The Control Panel Safe
Spray cleaner onto your cloth, not the panel, to prevent liquid from seeping into sensitive electronics. Wipe gently with a damp cloth, then dry immediately. For digital displays, use a barely damp cloth to avoid damage.
23. Place a Bowl of Vinegar Inside Overnight to Absorb Odors
Even after a deep clean, stubborn smells can linger inside your oven. Burnt food particles and grease residue often leave behind an unpleasant odor that affects the taste of your next meal. A simple bowl of white vinegar can solve that without any extra scrubbing.
White vinegar is a natural deodorizer that neutralizes alkaline odors (like burnt food) by balancing pH levels. It doesn't just mask smells—it chemically breaks down the compounds causing them. For best results, use plain white vinegar (not apple cider) as it's more acidic and leaves no residual scent once dry.
How To Set It Up
After cleaning and drying your oven, pour about one cup of white vinegar into a microwave-safe bowl. Place the bowl on the center rack. Make sure the oven is completely cool and turned off.
Leave it overnight, or for at least 8 hours. In the morning, remove the bowl and let the oven air out for a few minutes. The vinegar smell will dissipate quickly, taking the burnt odors with it.
When To Use This Method
This trick works best after you've already cleaned visible grime. It's ideal for tackling lingering smells from baked-on spills, fish, or strong spices. If your oven still smells after a regular cleaning, this is a gentle, chemical-free next step.
Avoid using it right after a self-cleaning cycle, as the oven needs to cool completely first.
Pro Tips For Best Results
For extra odor-fighting power, add a few drops of lemon juice or a cinnamon stick to the vinegar. This adds a fresh scent without compromising the vinegar's deodorizing ability. Don't skip the overnight step—shorter times won't fully neutralize the odors.
Also, make sure the bowl is stable and won't tip over if you accidentally bump the oven.
24. Schedule a Monthly Quick Wipe to Prevent Build-Up
A deep clean every few months is great, but a quick monthly wipe keeps things from getting out of hand. Spend just ten minutes once a month wiping down the interior with a damp cloth. This simple habit stops grease from hardening into stubborn crust and makes your next deep clean almost effortless.
Why A Monthly Wipe Works
When grease and food splatters sit for weeks, they bake onto surfaces and become rock-hard. A monthly wipe catches them while they're still soft. You'll spend less time scrubbing later and keep your oven smelling fresh between deep cleans.
What You'll Need
Grab a soft microfiber cloth and warm water. For light grease, a drop of dish soap helps. Avoid abrasive sponges or harsh cleaners—they can damage the enamel.
Keep a spray bottle of water and vinegar handy for extra degreasing power.
How To Do The Quick Wipe
Let the oven cool completely. Remove racks and soak them if needed. Wipe down the interior walls, floor, and ceiling with the damp cloth.
Pay extra attention to the door seal and corners where grease hides. Dry with a clean cloth to prevent streaks.
25. Keep a Small Brush Handy for Daily Crumb Sweeps
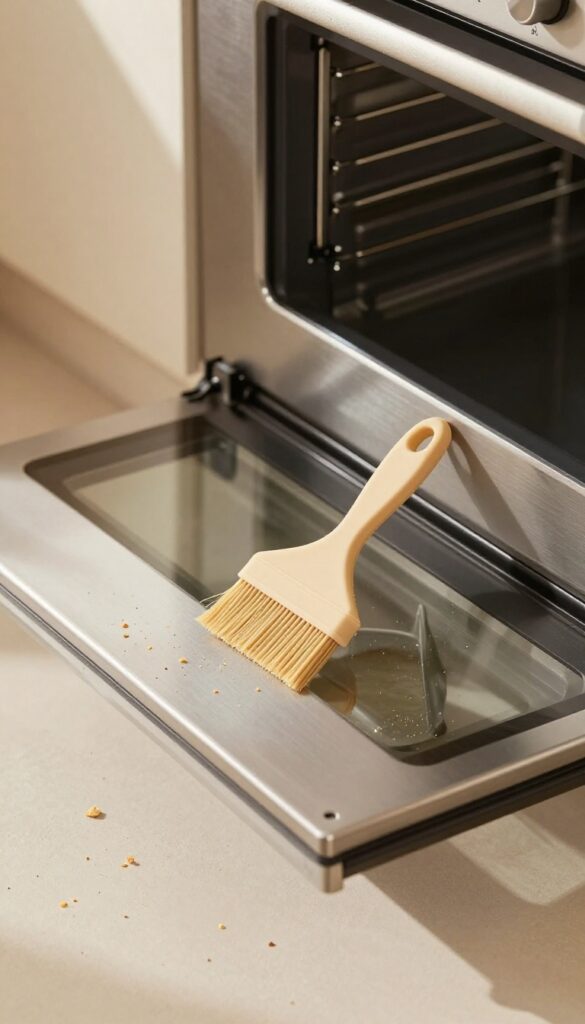
A quick daily habit can save you from major scrubbing later. Keep a small pastry brush or silicone brush near the oven and sweep out crumbs and loose debris after every use. It takes just 30 seconds and stops bits from baking onto the oven floor, where they turn into stubborn black spots.
This simple tool is your first line of defense against baked-on mess. A brush with firm but gentle bristles reaches into corners and along the door groove where crumbs hide. Silicone brushes are especially good because they don't scratch the enamel and can be washed easily.
Make it a routine: while the oven is still warm (but not hot), open the door and sweep everything into a dustpan or onto a paper towel. You'll be surprised how much less scrubbing you need to do on deep-clean day.
Why A Brush Beats A Cloth
A cloth pushes crumbs around and can smear grease, while a brush lifts debris cleanly. Pastry brushes have soft bristles that won't scratch the oven floor, and their slim shape fits into tight spots. Silicone brushes are non-stick and heat-resistant, so you can use them on a slightly warm surface without melting.
Best Brushes For The Job
Look for a brush with a long handle to keep your hand away from any residual heat. A 2-inch wide pastry brush covers more area quickly. Silicone basting brushes work well too—they're easy to clean and don't absorb odors.
Avoid metal-bristled brushes, as they can scratch the oven's interior finish.
Where Crumbs Hide Most
The back corners of the oven floor, under the bottom heating element (if exposed), and along the door gasket are crumb magnets. Use the brush's edge to sweep these areas. For the gasket, gently brush along the folds to dislodge trapped bits without damaging the seal.
FAQ
How often should I deep clean my oven?
A deep clean every 3 to 6 months is ideal, depending on usage. If you roast or bake frequently, aim for every 3 months to prevent heavy grease build-up.
Can I use bleach to clean my oven?
It's not recommended. Bleach can damage the enamel and produce harmful fumes when heated. Stick to baking soda, vinegar, or mild commercial oven cleaners.
Is it safe to use the self-cleaning cycle?
Yes, but use it sparingly. The high heat can create smoke and odors, and it may shorten the lifespan of some oven components. Always remove large debris first and ventilate the kitchen.
How do I remove burnt-on sugar from the oven floor?
Sprinkle baking soda over the burnt sugar, then spray with vinegar. Let it fizz for 10 minutes, then scrape gently with a plastic scraper. Repeat if needed.
Can I clean the oven while it's still warm?
Yes, a warm (not hot) oven can make cleaning easier because grease is softer. Turn it off and let it cool to a safe temperature before applying any cleaner.
Conclusion
Keeping your oven clean doesn't have to be a dreaded chore. With these 25 tips, you can tackle grease and grime using simple ingredients and a little know-how. Regular maintenance, like a quick wipe after each use, makes a huge difference.
Pick a few methods that work for your routine and stick with them. Your oven will look better, smell fresher, and perform more efficiently. A clean oven is the heart of a fresh kitchen, and you now have all the tools to keep it that way.