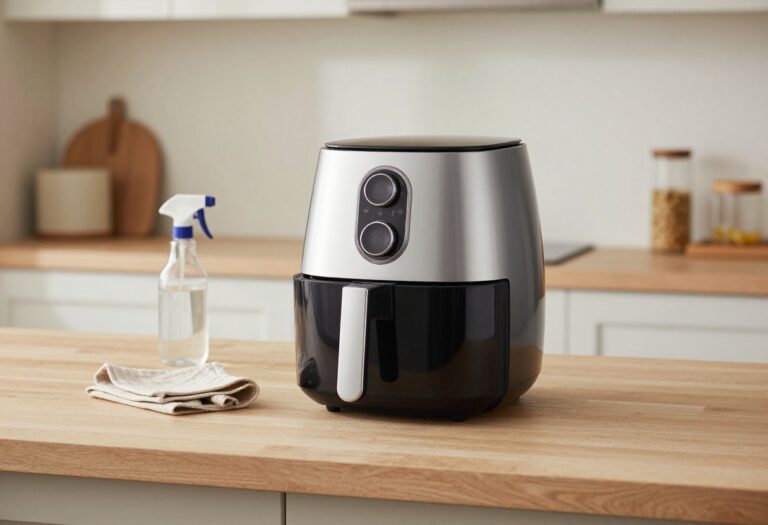
23 Stove Cleaning Hacks for Grease, Grates, and Burners
Your stove doesn't have to look like a battlefield of burnt grease and crusted grates. With the right tricks, you can cut through that stubborn buildup faster than you'd expect, using items you probably already have in your pantry.
These 23 hacks target every part of your stove, from burner caps to glass cooktops, so you can stop scrubbing and start enjoying a spotless kitchen.
Let's get into the methods that actually work.
1. Degrease with Dish Soap and Baking Soda Paste
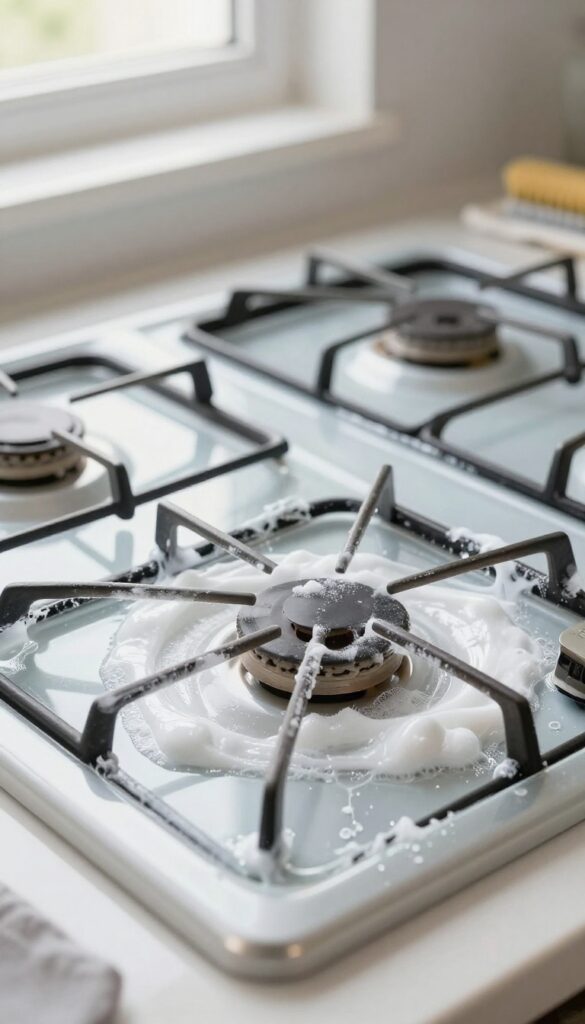
Baking soda and dish soap are a powerhouse duo when it comes to cutting through tough grease. The baking soda provides gentle abrasion to lift grime, while the dish soap breaks down oil. Together, they form a paste that clings to vertical surfaces and crevices, making it ideal for stove tops and burner grates.
Mix equal parts baking soda and dish soap until you get a thick, spreadable paste. Apply it generously to greasy areas, focusing on baked-on spots. Let it sit for 15 minutes to loosen the grime, then wipe away with a damp cloth or sponge.
For stubborn residue, scrub gently with a soft brush. Rinse and dry for a streak-free shine.
Why This Paste Works So Well
The combination creates a mild alkaline solution that emulsifies grease on contact. Baking soda's fine particles act as a gentle scrubber, so you don't need harsh chemicals or steel wool that could scratch surfaces. It's safe for glass, ceramic, and stainless steel cooktops.
Best Way To Apply It
Use a spatula or your fingers (with gloves) to spread the paste evenly. Focus on the greasiest spots, like around burner rings and control knobs. Let it sit for at least 15 minutes—longer for heavy buildup.
Then wipe in a circular motion with a non-abrasive sponge.
When To Avoid This Method
Avoid using this paste on unsealed cast iron or porous surfaces, as the moisture can cause rust or damage. Also, test on a small hidden area first if your stove has a special coating. For most modern stoves, it's perfectly safe.
2. Steam Clean Burner Caps with Vinegar
Burner caps take the brunt of every boil and spill, so they often end up with a thick layer of carbon that scrubbing alone can't touch. Instead of fighting that crust with elbow grease, let steam do the heavy lifting. This method uses simple kitchen staples and gives you near-spotless caps with minimal effort.
Place your burner caps in a large pot and cover them with a 50/50 mix of water and white vinegar. Bring the pot to a boil, then reduce to a simmer and let it go for about 10 minutes. The acidic steam penetrates the baked-on grime, loosening it so you can wipe it away with a sponge or soft brush.
For extra-stubborn spots, let the caps soak in the hot liquid for another 15 minutes after turning off the heat. Rinse thoroughly and dry before putting them back on the stove.
Why Vinegar Works So Well
White vinegar is mildly acidic, which helps break down the alkaline compounds in burnt food and grease. The heat from boiling accelerates the reaction, and the steam carries the acid into every nook and cranny of the cap. It's a chemical-free way to dissolve carbon without scratching the metal surface.
Tips For Best Results
Use a pot large enough that the caps aren't stacked too high. If your caps are especially grimy, add a tablespoon of baking soda to the boil for extra fizzing action. Always rinse with clean water afterward to remove any vinegar residue, which can leave a slight smell if left on.
And never boil aluminum caps for too long—stick to 10 minutes to avoid discoloration.
When To Skip This Hack
This method works great for stainless steel, enameled, and cast iron caps, but avoid using it on caps with painted or coated surfaces, as the heat and acid can damage the finish. Check your stove's manual if you're unsure about the material.
3. Use a Pumice Stone on Ceramic Cooktops
Ceramic and glass cooktops are sleek but prone to burnt-on spills that laugh at regular cleaners. A pumice stone offers a gentle abrasive solution that lifts stubborn residue without scratching the surface. It's a favorite trick among professional cleaners for restoring that like-new shine.
Wet the pumice stone thoroughly and rub it lightly over the burnt spots. The porous stone wears down slightly as you work, exposing fresh abrasive surface. Rinse the cooktop afterward and buff dry with a microfiber cloth.
This method works best on baked-on food and grease stains that have been sitting for a while.
Why Pumice Works Without Scratching
Pumice is softer than glass and ceramic, so it won't leave micro-scratches if used correctly. The key is keeping the stone wet and using gentle pressure. The abrasive action is just enough to break down carbonized residue without damaging the smooth surface underneath.
Step-by-step Application
First, ensure the cooktop is cool and free of loose debris. Wet the pumice stone in water, then rub it in a circular motion over the burnt area. Rinse the stone frequently to remove debris and re-wet it.
Once the residue is gone, wipe the cooktop with a damp cloth and dry it completely.
When To Avoid This Method
Skip the pumice stone on scratched or damaged cooktops, as it can worsen imperfections. Also avoid it on surfaces with a protective coating, like some induction tops. Test on an inconspicuous area first if you're unsure.
Maintenance Tips For Long-lasting Results
After using the pumice stone, apply a ceramic cooktop cleaner and polish to restore the shine. Regular maintenance with a soft sponge and gentle cleaner will reduce the need for abrasive methods. Always clean spills immediately to prevent them from baking on.
4. Soak Grates in Ammonia Overnight
If your stove grates look like they've survived a decade of spaghetti splatters, this hack is for you. Ammonia is a heavy hitter against baked-on grease, and the best part is you barely have to scrub. Just let the fumes do the work while you sleep.
This method uses the power of ammonia fumes to break down tough grease. It's almost magical how easily the grime rinses off the next morning. Just make sure to work in a well-ventilated area and wear gloves.
What You'll Need
All you need is a large trash bag (heavy-duty is best), 1/4 cup of clear ammonia, and your greasy grates. That's it. No fancy tools or expensive sprays.
Step By Step
Place the grates inside the trash bag. Pour the ammonia over them, then seal the bag tightly. Give it a gentle shake to coat the grates, then let it sit overnight—at least 8 hours.
In the morning, open the bag outside or in a well-ventilated space (the smell is strong). Rinse the grates thoroughly with water and scrub lightly if needed. They'll come out sparkling.
Safety Tips
Never mix ammonia with bleach or other cleaners—it creates toxic fumes. Wear rubber gloves to protect your skin, and work in a well-ventilated area. Keep the bag away from pets and kids.
If you're sensitive to strong smells, this might not be for you.
5. Scrub with a Magic Eraser for Quick Shine
Sometimes you just need a quick fix that makes a big difference. A magic eraser is perfect for those in-between days when the stovetop looks messy but doesn't need a full deep clean. Just a few swipes and you're done.
Melamine foam erasers are surprisingly effective at lifting light grease and dried-on spills without any extra scrubbing power. They work on glass, ceramic, and stainless steel surfaces, but avoid using them on textured or painted finishes. Keep one under the sink for a fast refresh whenever you notice smudges or splatters.
How To Use It Right
Dampen the eraser with water until it's soft but not dripping. Wipe the stovetop in gentle circles, focusing on greasy spots. Rinse the eraser as it picks up grime, and change to a fresh one if it gets too dirty.
No soap needed—the foam does the work.
Best Surfaces And Limits
This hack shines on smooth glass cooktops and ceramic stoves. It's also great for stainless steel backsplashes and control knobs. But skip it on cast iron, non-stick coatings, or any matte finish—it can cause scratching or dullness.
When To Use This Hack
Use it for daily touch-ups after cooking, especially if you've spilled sauce or oil. It's not a replacement for a deep clean on baked-on grease, but it will keep your stove looking presentable between those heavy-duty sessions.
6. Remove Burnt-On Food with Dryer Sheets
Dryer sheets aren't just for softening laundry—they're surprisingly good at loosening burnt-on messes on your stovetop. The fabric softener contains chemicals that break down carbonized food, making scrubbing way easier. This trick works especially well on glass cooktops and metal burner grates.
To use this hack, grab a used or new dryer sheet and soak it in water. Lay it directly over the burnt-on spill or stain, making sure it's fully covering the area. Let it sit for at least an hour—overnight for tougher spots.
The moisture and softening agents will work together to weaken the burnt crust. After soaking, remove the sheet and wipe the area with a sponge or cloth. Most of the residue should come off with minimal effort.
For stubborn bits, a gentle scrub with a non-abrasive pad will finish the job.
Why It Works
Dryer sheets contain surfactants and softening agents that help dissolve grease and carbon buildup. When wet, these chemicals become more active, penetrating the burnt-on layer and breaking its bond with the surface. This saves you from harsh scrubbing that could scratch your cooktop.
Best Surfaces To Use This On
This method is safe for ceramic and glass cooktops, as well as metal burner grates and drip pans. Avoid using it on porous surfaces like unsealed stone or unfinished cast iron, as the chemicals might leave a residue. Always test on a small hidden area first if you're unsure.
Pro Tips For Best Results
For extra stubborn spots, place a heavy pot or pan on top of the wet dryer sheet to keep it in full contact with the stain. You can also use hot water instead of cold to activate the chemicals faster. After cleaning, rinse the area with water to remove any leftover softener residue.
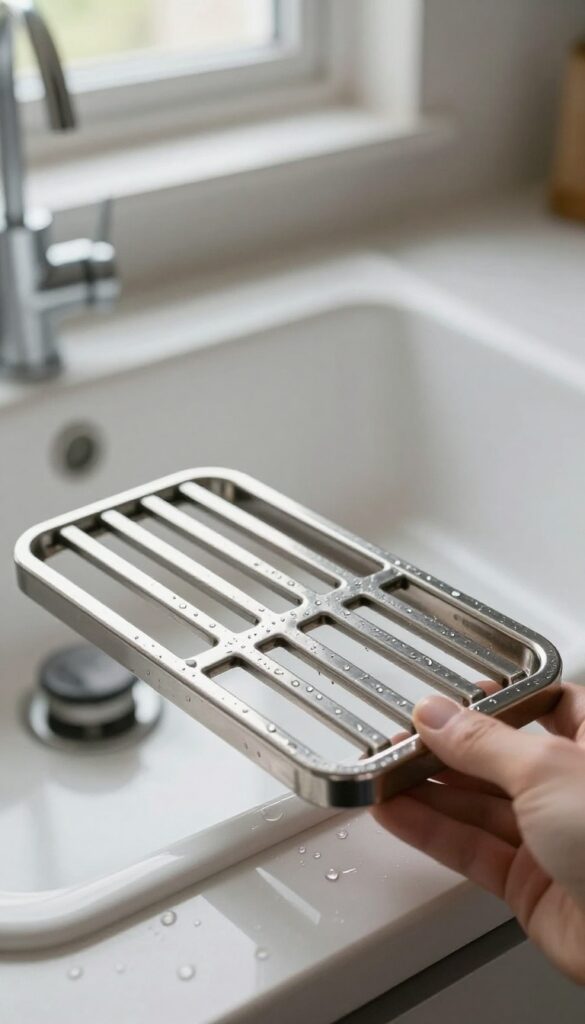
7. Clean Burner Grates in the Dishwasher
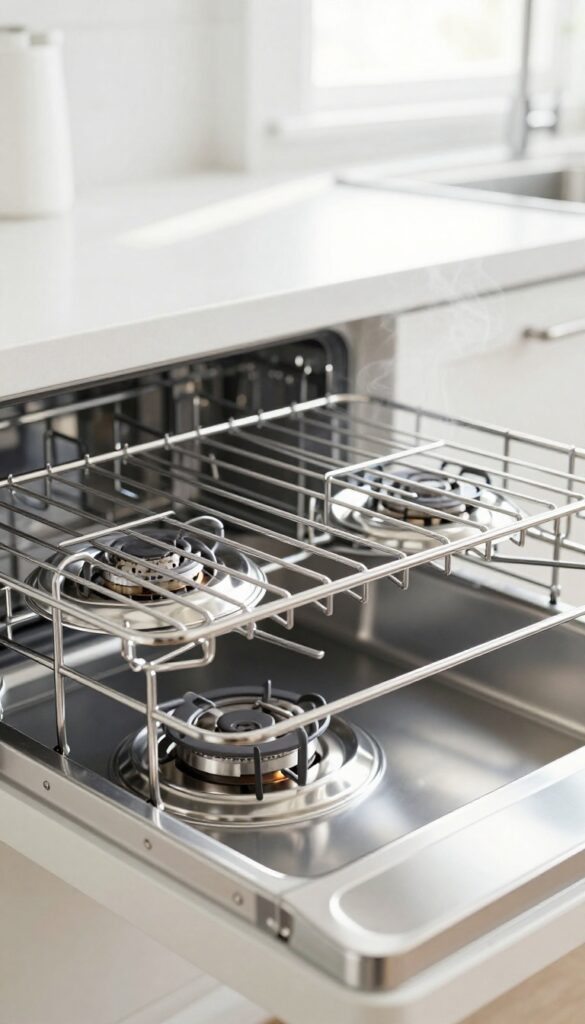
Your dishwasher can do more than just clean plates—it's a secret weapon for nasty burner grates. If your grates are dishwasher-safe, this method saves serious elbow grease. Just load them up, run a heavy cycle with a degreasing detergent, and let the machine do the work.
For extra stubborn grime, add a cup of white vinegar to the rinse cycle. The vinegar helps break down baked-on grease and leaves grates looking almost new. Always check your stove's manual first to confirm your grates are dishwasher-safe—some cast iron or coated grates may need hand washing.
Check Your Grate Material
Not all grates are dishwasher-friendly. Porcelain-coated or stainless steel grates usually are, but cast iron grates can rust or lose their seasoning. Look up your stove model online or check the manual before tossing them in.
Pre‑soak For Heavy Buildup
If your grates have a thick crust of carbon, give them a quick soak in hot, soapy water for 15 minutes before the dishwasher cycle. This loosens the top layer so the dishwasher can blast away the rest.
Use The Right Detergent And Cycle
Choose a heavy-duty cycle with high heat and a degreasing dishwasher detergent. Add a rinse aid for spot-free results. If your dishwasher has a steam or sanitize option, use it—it helps melt grease more effectively.
8. Make a Lemon and Salt Scrub for Stainless Steel
Stainless steel stovetops and backsplashes look amazing when they're clean, but they show every fingerprint and grease smear. You don't need a fancy cleaner to get that mirror-like finish. A lemon and salt scrub is a simple, natural solution that cuts through grime and leaves a streak-free shine.
This two-ingredient scrub works because lemon juice breaks down grease with its citric acid, while salt acts as a gentle abrasive to lift stuck-on residue without scratching the surface. It's safe for most stainless steel finishes and smells fresh, too.
How To Make And Use The Scrub
Cut a lemon in half and sprinkle a generous amount of coarse salt (like kosher salt) onto the cut side. Scrub the stainless steel surface in circular motions, applying light pressure. Focus on greasy spots or areas with baked-on food.
Rinse with a damp cloth and buff dry with a soft towel for a streak-free shine.
Best Surfaces For This Method
This scrub works great on stainless steel stovetops, backsplashes, and range hoods. Avoid using it on painted, coated, or plastic surfaces, as the salt can scratch those. It's also not ideal for glass cooktops, where the salt might leave micro-scratches.
Pro Tips For Best Results
Use a fresh lemon half for each cleaning session, as the juice loses potency over time. If you need more abrasion, add a little baking soda to the salt. Always wipe with the grain of the stainless steel to avoid swirl marks.
Finish by polishing with a microfiber cloth for extra shine.
9. Use a Toothbrush for Crevices and Knobs
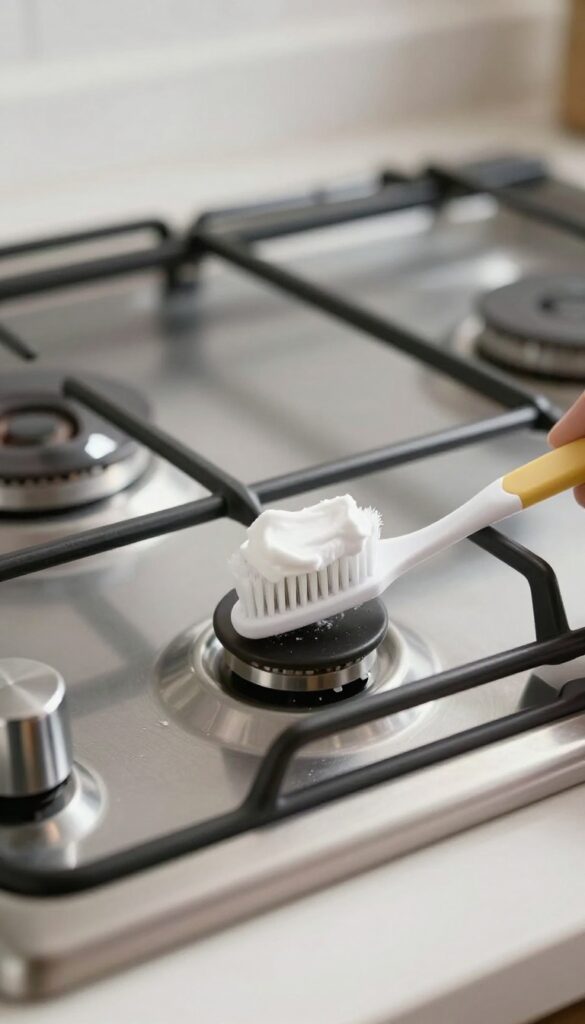
Those tight spaces around burner bases and control knobs are magnets for grime. A sponge can't squeeze in there, but an old toothbrush can. Dip it in baking soda paste or vinegar and give those crevices a targeted scrub.
It's a simple swap that makes a huge difference.
An old toothbrush is the perfect tool for getting into the nooks and crannies that sponges miss. The stiff bristles dislodge baked-on grease and food particles without scratching surfaces. For best results, dip the brush in a paste of baking soda and water or straight white vinegar.
Scrub in small circular motions around each knob and burner base, then wipe away the loosened grime with a damp cloth.
Why A Toothbrush Works Best
Toothbrushes have small, firm bristles that can reach into grooves and around tight corners. They're also gentle enough for delicate surfaces like ceramic knobs or painted metal. You can even bend the handle slightly to access awkward angles.
How To Make A Baking Soda Paste
Mix three parts baking soda with one part water until it forms a thick, spreadable paste. Apply it to the toothbrush bristles and scrub. The mild abrasiveness lifts grime without scratching.
For tougher spots, add a few drops of dish soap.
Tackling Stubborn Grease With Vinegar
If grease has hardened, dip the toothbrush in white vinegar first. Vinegar cuts through grease naturally. Scrub, let it sit for a minute, then wipe clean.
Repeat if needed. The combination of vinegar and baking soda paste can handle even the crustiest buildup.
10. Wipe Down with Rubbing Alcohol for Streak-Free Finish
You've scrubbed, degreased, and polished, but those last smudges and streaks keep ruining the look. Rubbing alcohol is the secret to a truly spotless stovetop. A quick wipe after your main cleaning removes any leftover residue and dries without leaving marks, giving you that mirror-like shine that makes the whole kitchen look cleaner.
Rubbing alcohol evaporates almost instantly, so it doesn't leave water spots or streaks. It also cuts through any remaining grease or cleaner residue that regular wiping might miss. This step is especially helpful on glass cooktops and stainless steel surfaces where every smudge stands out.
Why Rubbing Alcohol Works So Well
Unlike water, rubbing alcohol has a low surface tension, so it spreads evenly and evaporates fast. It dissolves oils and grime that water alone can't handle, and it doesn't leave behind minerals or soap scum. Plus, it's a mild disinfectant, giving you a cleaner surface overall.
How To Apply It Correctly
Don't spray alcohol directly onto the stovetop—it can pool and drip into crevices. Instead, pour a small amount onto a clean microfiber cloth. Wipe the entire surface in one direction, then flip the cloth to a dry section and buff lightly.
The result is a streak-free, glossy finish.
Safety Tips And Surface Checks
Rubbing alcohol is flammable, so keep it away from open flames and let the stovetop cool completely before using it. Test on an inconspicuous spot first, especially on coated or painted surfaces. Avoid using it on rubber or plastic parts, as it can cause drying or cracking.
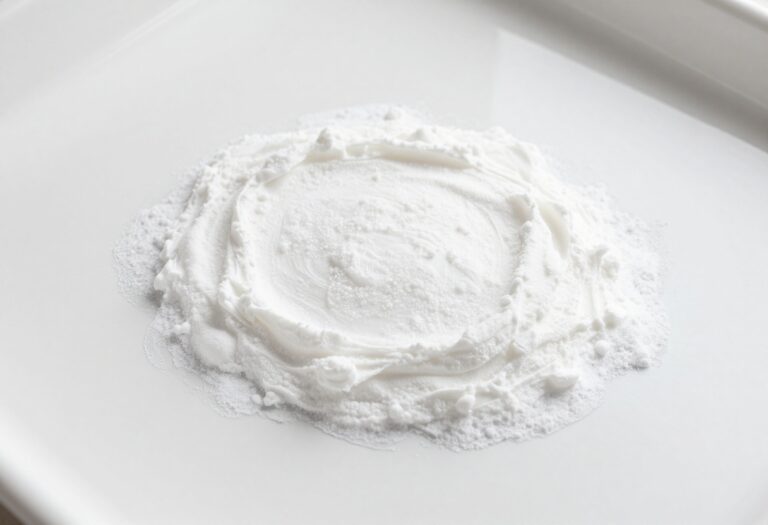
11. Create a Hydrogen Peroxide and Baking Soda Paste
White stoves look great when they're clean, but they tend to yellow or stain over time, especially around the burners. A simple paste made from hydrogen peroxide and baking soda can help restore that bright, like-new finish without harsh chemicals.
Mix three parts baking soda with one part hydrogen peroxide until you get a thick, spreadable paste. Apply it to any stained or yellowed areas on your white stove—focus on the cooktop, control panel, and backsplash. Let it sit for about 20 minutes so the peroxide can work on breaking down discoloration.
Then wipe it off with a damp cloth and buff dry. You'll notice a visible difference in brightness, and it's gentle enough for regular use.
Why This Paste Works
Hydrogen peroxide is a mild bleaching agent that targets organic stains and yellowing, while baking soda provides gentle abrasion to lift grime. Together, they create a non-toxic cleaner that's safe for most white stove surfaces, including enamel and painted finishes.
Application Tips For Best Results
Always test the paste on a small, hidden area first to ensure it doesn't affect the finish. For stubborn stains, let the paste sit for up to 30 minutes, but don't let it dry completely—reapply if needed. Use a soft sponge or microfiber cloth to avoid scratching the surface.
When To Avoid This Method
Skip this paste on black or dark-colored stoves, as hydrogen peroxide may lighten the finish. Also avoid using it on glass cooktops, where abrasives can cause micro-scratches. Stick to the manufacturer's cleaning recommendations for those surfaces.
12. Use a Razor Blade for Glass Cooktops
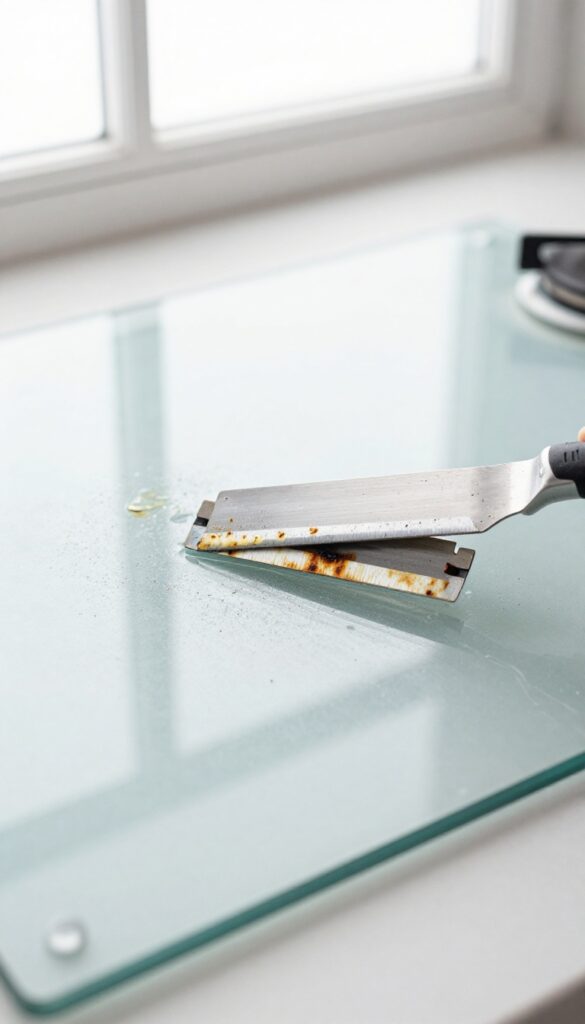
Glass cooktops look sleek, but burnt-on spills can turn them into a sticky mess. A single-edge razor blade is one of the fastest tools for lifting that crust without damaging the surface—if you use it the right way. The trick is all in the angle and pressure.
Hold a single-edge razor blade at a 45-degree angle and gently scrape off burnt-on food. Always use on cool glass and keep the blade flat to avoid scratches. Work in short, controlled strokes, and wipe away debris as you go.
Choose The Right Blade
Not all blades are equal. Go for a single-edge razor blade with a sturdy handle or a dedicated scraper tool. Avoid double-edge blades—they're too flexible and can bend, causing uneven pressure that might scratch the glass.
Prep The Surface First
Before scraping, make sure the cooktop is completely cool. A hot surface can cause the glass to crack under pressure. Also, wipe away loose crumbs and grease so the blade glides smoothly without dragging grit across the surface.
Master The Technique
Hold the blade at a consistent 45-degree angle and push it forward in short, gentle strokes. Don't saw back and forth—that increases the risk of scratching. Keep the blade flat against the glass, and lift it after each pass to check your progress.
Finish With A Cleaner
After scraping, use a glass cooktop cleaner or a vinegar-water spray to remove any residue. Buff with a soft cloth for a streak-free shine. This also helps protect the surface from future buildup.
13. Clean Gas Burner Heads with a Pin or Paperclip
Gas burner heads have small ports that deliver gas to create a steady flame. Over time, food debris, grease, and dust can clog these tiny openings, leading to uneven flames, yellow tips, or weak heat. Instead of replacing the burner or calling a repair person, you can fix this with something as simple as a straight pin or an unfolded paperclip.
Cleaning clogged gas ports is a quick maintenance task that restores your burner's efficiency and saves you from uneven cooking. Here's how to do it safely and effectively.
Why Clogged Ports Are A Problem
When burner ports get blocked, the gas flow is restricted. This can cause some flames to be smaller than others, create yellow or orange flames instead of blue, or make the burner harder to light. Uneven flames mean uneven heat distribution, which can ruin a delicate sauce or leave cold spots on your pan.
Regular cleaning prevents these issues.
How To Clean With A Pin Or Paperclip
First, make sure the burner is completely cool and the gas is turned off. Remove the burner head (it usually lifts off easily). Take a straight pin or an unfolded paperclip and gently insert it into each port.
Push straight in and out; don't wiggle it sideways, as that could damage the port. Work your way around the entire burner head. After clearing the ports, tap the burner head lightly to dislodge any debris, then wipe it with a damp cloth before replacing it.
When To Do This Maintenance
Aim to clean the burner ports every few months or whenever you notice uneven flames. If you cook frequently or use high heat often, check them monthly. This simple habit keeps your stove performing like new and prevents buildup from becoming stubborn.
It also helps your burner ignite faster and burn cleaner.
A Few Safety Tips
Always work on a cool stove with the gas off. Use a metal pin or paperclip, not plastic or wood, which could break off inside the port. If a port is extremely clogged, soak the burner head in warm soapy water first, then dry it completely before using the pin.
Never use a drill or sharp tool that could enlarge the port and change the gas flow.
14. Soak Drip Pans in Boiling Water and Dish Soap
Drip pans take a beating. They sit under burners collecting spills, grease, and burnt-on food until they look beyond saving. But you don't need harsh chemicals or a lot of elbow grease to get them clean again.
A simple soak in boiling water and dish soap does most of the work for you.
Remove the drip pans from your stove and place them in a sink or large pot. Pour boiling water over them until they're fully submerged, then add a generous squirt of dish soap. Let them soak for 30 minutes.
The heat helps break down grease, while the soap lifts grime away from the metal. After soaking, scrub each pan with a non-abrasive sponge or soft brush. Rinse thoroughly and dry before putting them back on the stove.
For extra-stubborn spots, let them soak longer or scrub with a paste of baking soda and water.
Why Boiling Water Works Best
Hot water is a natural degreaser. It melts hardened grease and makes it easier for soap to penetrate. Cold or warm water won't have the same effect, so bring that water to a rolling boil before pouring it over the pans.
What About Aluminum Pans?
Aluminum drip pans can discolor if soaked too long in hot water or if you use certain cleaners. Stick to a 30-minute soak and avoid harsh abrasives. If they're heavily stained, a vinegar rinse after scrubbing can help restore shine.
When To Replace Instead Of Clean
If your drip pans are rusted, warped, or have peeling coating, it's time to replace them. New pans are inexpensive and will make your stove look instantly cleaner. Check your stove model for the right size and shape.
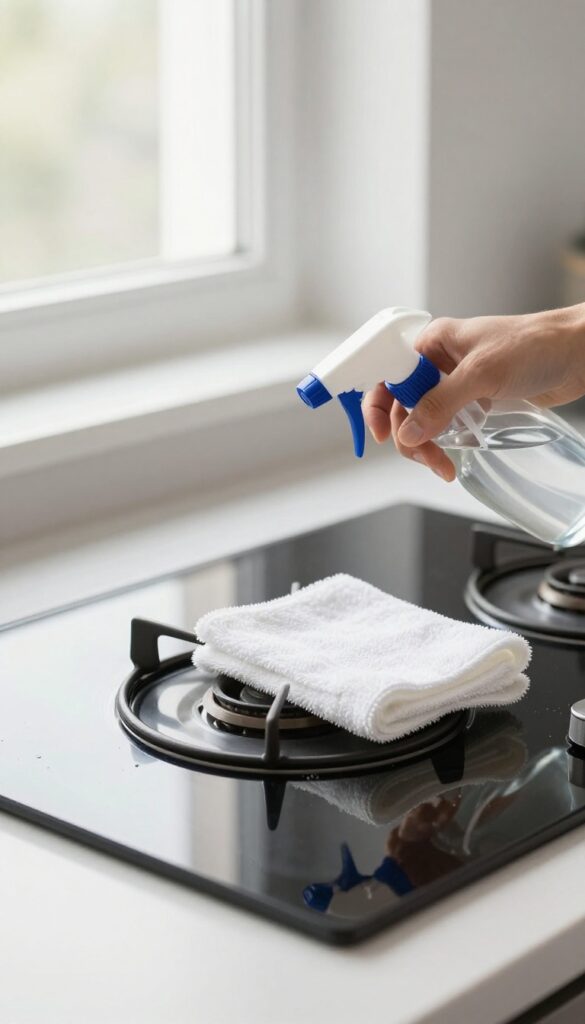
15. Use a Vinegar and Water Spray for Daily Maintenance
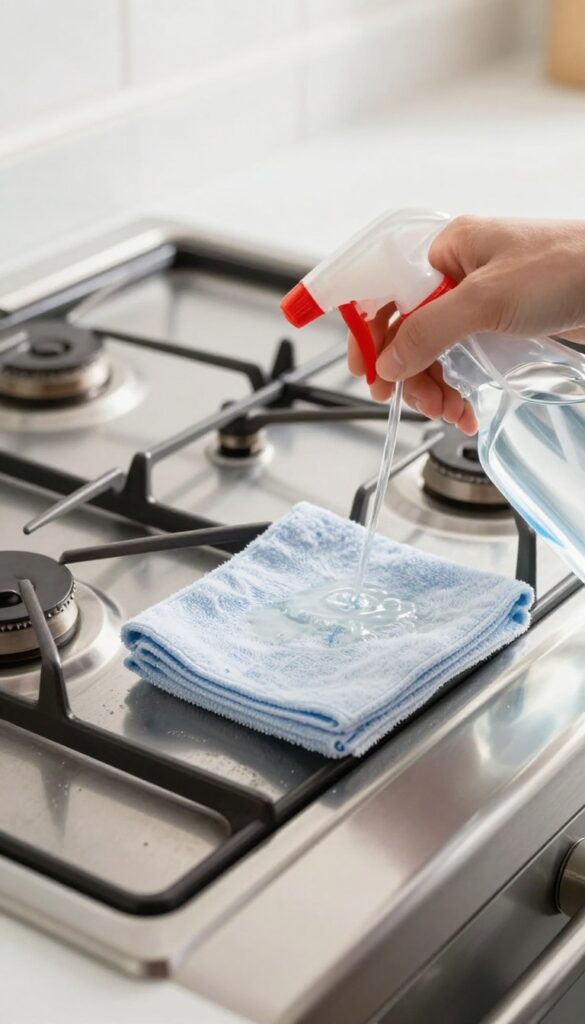
A quick daily spritz can save you from heavy scrubbing later. White vinegar cuts through fresh grease and prevents it from hardening into stubborn layers. Mix equal parts vinegar and water in a spray bottle, and you've got an instant stovetop cleaner that costs pennies.
This simple habit takes just 30 seconds after cooking. Spray the surface lightly, let it sit for a moment, then wipe with a microfiber cloth. The vinegar's acidity breaks down grease while the water dilutes it enough to be safe on most stovetop materials, including glass, ceramic, and stainless steel.
Why Vinegar Works So Well
Vinegar is a mild acid that dissolves grease and grime without harsh chemicals. It also helps neutralize odors and leaves a streak-free shine when used with a lint-free cloth. Unlike commercial sprays, it won't leave a sticky residue that attracts more dust.
Best Practices For Daily Use
Always let the stovetop cool completely before spraying to avoid thermal shock, especially on glass cooktops. Use a dedicated microfiber cloth for the stovetop to avoid cross-contamination. For stubborn spots, let the spray sit for a minute before wiping.
What To Avoid
Don't use vinegar on unsealed stone or marble surfaces. Avoid spraying directly onto electrical components or gas burner openings. If you have a ceramic or glass cooktop, ensure the cloth is damp, not soaking wet, to prevent liquid from seeping into edges.
16. Polish with Olive Oil for a Protective Layer
After you've scrubbed and rinsed your stainless steel stove, a quick polish with olive oil can make a big difference. This pantry staple does more than just shine—it creates a thin barrier that helps keep fingerprints and smudges at bay.
Applying olive oil is simple and takes less than a minute. Use a soft, lint-free cloth and add just a drop or two of oil. Buff it gently into the stainless steel surface, following the grain.
The result is a streak-free shine that also repels water spots and grease splatters.
How It Works
Olive oil fills the microscopic pores in stainless steel, creating a smooth, hydrophobic layer. This prevents moisture and oils from your hands from sticking, so fingerprints wipe off easily. It also adds a subtle luster without the harsh chemicals found in some commercial polishes.
Best Practices
Less is more—too much oil can leave a greasy residue. Always use a clean cloth and buff thoroughly after applying. Avoid using olive oil on non-stainless surfaces like glass cooktops or painted areas, as it may leave streaks or attract dust.
When To Reapply
You'll notice the protective effect diminishing after a few days, especially if you cook often. Reapply after each deep clean or whenever you see fingerprints returning. It's a quick habit that keeps your stove looking polished between major scrubs.
17. Remove Rust with Lemon Juice and Salt
Rust on burner grates and drip pans is stubborn, but you don't need harsh chemicals to tackle it. Lemon juice and salt work together to lift rust naturally, leaving metal surfaces clean and ready to use. This simple method saves money and keeps your kitchen free of strong fumes.
Sprinkle salt generously over the rusty areas on burner grates or drip pans. Squeeze fresh lemon juice directly onto the salt, making a paste that clings to the metal. Let it sit for about an hour—the acid in the lemon breaks down the rust while the salt provides gentle abrasion.
After the wait, scrub with a stiff brush or scouring pad, then rinse thoroughly with water. Dry completely before putting parts back on the stove to prevent new rust from forming.
Why This Works
Lemon juice contains citric acid, a mild natural acid that dissolves iron oxide (rust) without damaging the metal underneath. Salt acts as an abrasive to physically scrub away loosened rust particles. Together, they create a non-toxic rust remover that's safe for kitchen use.
Best For Cast Iron And Steel
This method works well on cast iron grates and steel drip pans. Avoid using it on aluminum or chrome surfaces, as the acid can cause discoloration. Always test a small hidden area first if you're unsure about the metal type.
Tips For Stubborn Rust
For heavy rust, let the paste sit longer—up to two hours—or apply a second round. You can also add a bit of baking soda to boost scrubbing power. Rinse well and dry immediately to stop any leftover moisture from causing new rust.
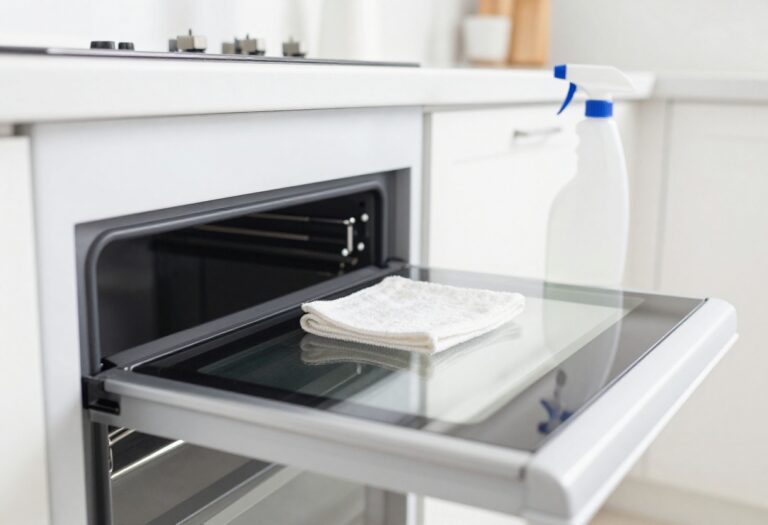
18. Use a Steam Cleaner for Deep Grease Removal
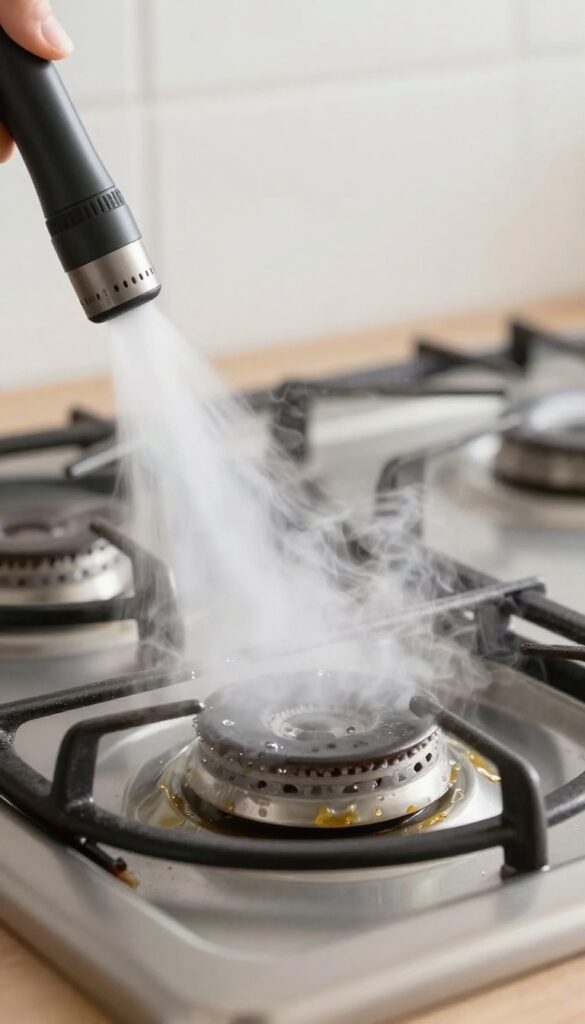
If you've been battling baked-on grease that refuses to budge, it's time to bring in some heat. A handheld steam cleaner uses pressurized hot steam to melt and lift grime from every nook and cranny without any harsh chemicals. This method is especially effective on stove hoods, backsplashes, and burner grates where grease tends to harden over time.
Steam cleaning is a game-changer for tackling the toughest grease deposits. The high temperature liquefies the grease, making it easy to wipe away with a microfiber cloth. It's also safe for most surfaces, including stainless steel, glass, and ceramic cooktops, as long as you follow the manufacturer's guidelines.
Plus, it sanitizes as it cleans, killing bacteria and mold without any chemical residue.
How To Steam Clean Your Stove
Start by filling the steam cleaner's water tank according to the instructions. Let it heat up until steam is produced steadily. Hold the nozzle a few inches away from the greasy area and move it back and forth, letting the steam penetrate for a few seconds.
Wipe away the loosened grease with a clean cloth. For burner grates, you can place them on a towel and steam them directly, then scrub with a brush if needed.
Best Areas To Target With Steam
Focus on the stove hood and exhaust fan, where grease accumulates heavily. The backsplash behind the stove also benefits from steam cleaning. For burner grates, steam helps dislodge burnt-on food and grease without soaking them in chemical solutions.
Even the control knobs and crevices around the burners can be steamed clean, but avoid electrical components.
Safety Tips For Steam Cleaning
Always unplug the stove before cleaning. Never direct steam at electrical outlets, switches, or the stove's internal wiring. Wear heat-resistant gloves to protect your hands from the hot steam.
Test the steam cleaner on a small, inconspicuous area first to ensure it doesn't damage the surface. Let the stove cool completely before steaming.
19. Line Drip Pans with Aluminum Foil for Easy Cleanup
Drip pans are magnets for grease, sauce splatters, and burnt-on bits. Scrubbing them can be a real chore, but there's a simple trick that keeps them looking new with almost zero effort. Aluminum foil acts as a disposable shield, catching the mess before it ever touches the pan.
Place a sheet of heavy-duty aluminum foil under burner grates or directly over drip pans. Make sure the foil is smooth and doesn't block airflow to the burner. When spills happen, the foil takes the hit.
Once it's dirty, just crumple it up and toss it. Replace with a fresh sheet, and you're done in seconds. This hack works best for electric coil stoves and gas ranges with removable drip pans.
Avoid using foil on glass cooktops or sealed burners where it could interfere with heat distribution.
Why It Works
Aluminum foil creates a non-stick barrier that heat doesn't penetrate easily. Grease and food residue sit on top of the foil instead of baking onto the metal pan. That means no soaking, no scrubbing, and no harsh chemicals.
Just peel and replace.
How To Do It Right
Use heavy-duty foil for durability. Tear a piece slightly larger than the drip pan. Press it gently around the edges so it stays in place.
Avoid covering the burner holes or vents. For gas stoves, place the foil under the grate, not over the burner cap. Check the foil weekly and swap it out whenever you see buildup.
When To Avoid This Hack
Don't use foil on glass or ceramic cooktops, as it can scratch the surface and cause uneven heating. Also skip it on induction cooktops, where foil can interfere with the magnetic field. Stick to removable drip pans and burner grates only.
20. Clean Control Knobs with a Q-Tip and Rubbing Alcohol
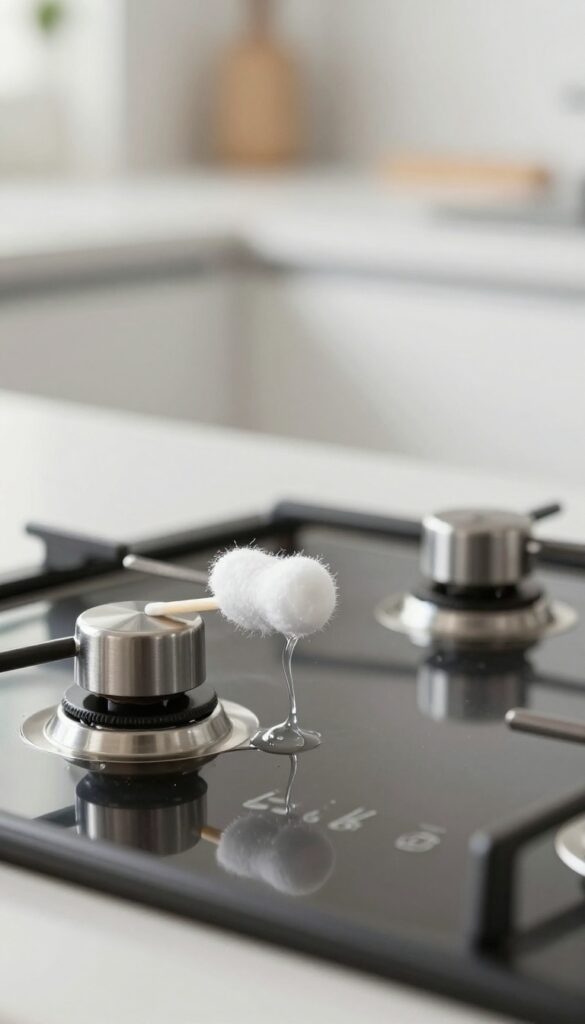
Control knobs collect a surprising amount of grime, especially in those tiny crevices around the base. A quick wipe with a damp cloth often misses the sticky buildup that attracts more dirt. Rubbing alcohol and a cotton swab make it easy to get into every nook without damaging the knob's surface.
Start by removing the knobs if possible—most pull straight off. If they're stuck, gently wiggle them. Dip a cotton swab in rubbing alcohol (70% or higher works best) and run it along the base, around the stem, and into any lettering or ridges.
The alcohol dissolves grease and disinfects in seconds. For stubborn residue, let the swab sit on the spot for a few seconds before wiping. Once clean, dry with a soft cloth and reattach.
This method works on both plastic and metal knobs without leaving streaks or sticky film.
Why Rubbing Alcohol Works Best
Rubbing alcohol evaporates quickly, so it won't seep into electrical components or leave moisture behind. It cuts through grease without being harsh on most finishes. Plus, it kills bacteria—handy for knobs that get touched multiple times a day.
What About Knobs That Don't Come Off?
If your knobs are fixed, use a Q-tip dipped in alcohol and carefully work it around the base. Tilt the swab to reach underneath. Follow up with a dry swab to absorb any excess.
For tight spaces, a toothpick wrapped in a bit of cotton can help.
A Quick Maintenance Tip
Make this part of your weekly stove wipe-down. A once-over with a Q-tip and alcohol takes less than a minute and prevents buildup from turning into a sticky mess. Your knobs will look new and feel clean to the touch.
21. Use a Dishwasher Tablet to Clean Burner Grates
Dishwasher tablets aren't just for dishes. Drop one into a sink full of hot water, let it dissolve, and soak your burner grates for about half an hour. The enzymes in the tablet go to work on grease and grime, loosening everything so a quick rinse is all you need.
No scrubbing, no elbow grease.
This method is a lifesaver for cast-iron or enameled grates that usually require serious scrubbing. The tablet's surfactants break down baked-on oils without damaging the finish. Just make sure the grates are fully submerged and give them a good rinse afterward to remove any residue.
Why It Works
Dishwasher tablets contain enzymes and detergents designed to dissolve tough food residue. When dissolved in hot water, they create a powerful soaking solution that penetrates grease and carbon buildup. The heat activates the cleaning agents, making them more effective than cold water soaks.
Step-by-step Instructions
Fill your sink or a large bucket with the hottest tap water. Drop in one dishwasher tablet and let it dissolve completely. Remove the burner grates from your stove and submerge them in the solution.
Let them soak for 30 minutes. After soaking, lift out the grates and rinse thoroughly with clean water. Dry them completely before putting them back on the stove.
Tips For Best Results
For extra-stubborn grates, let them soak for up to an hour. If the water cools down, add more hot water to keep the enzymes active. Avoid using this method on aluminum grates, as the chemicals can cause discoloration.
Always check the manufacturer's instructions for your specific grates.
22. Apply a Baking Soda and Vinegar Foam for Tough Spots
Some stains just won't budge no matter how hard you scrub. That's where the classic baking soda and vinegar combo comes in. The fizzy reaction works like a gentle scrubber, lifting burnt-on food and grease without damaging your stove's surface.
Sprinkle a generous layer of baking soda over the stubborn spots. Spray white vinegar directly onto the baking soda until it forms a thick foam. Let it sit for 10 minutes—the longer, the better for tough grime.
Then scrub with a non-abrasive sponge or brush, and wipe clean with a damp cloth. This method works wonders on cooktop stains, burner grates, and drip pans.
Why It Works
Baking soda is a mild abrasive that physically scrubs away grime. Vinegar is acidic and dissolves grease and mineral deposits. Together, they create carbon dioxide bubbles that help lift debris from crevices.
Best Surfaces For This Hack
Use this on glass cooktops, ceramic stoves, enamel drip pans, and stainless steel. Avoid using it on aluminum or unsealed cast iron, as vinegar can cause pitting or discoloration.
Pro Tips For Maximum Effectiveness
For extra-stubborn spots, make a paste with baking soda and a little water first, let it sit for 15 minutes, then spray vinegar. Cover with a damp cloth to keep the foam active. Rinse thoroughly to avoid any residue.
23. Finish with a Glass Cleaner for a Streak-Free Shine
You've scrubbed, degreased, and rinsed. But if your stovetop still looks a little dull or streaky, you're missing one final step. A quick spritz of glass cleaner after your main cleaning routine can make all the difference.
Glass cleaner isn't just for windows. It cuts through any remaining residue and leaves a streak-free shine that makes your stovetop look brand new. The key is to use it after you've already removed all the grease and grime, so it's just polishing the surface, not fighting buildup.
Why Glass Cleaner Works
Most glass cleaners contain ammonia or alcohol, which evaporate quickly without leaving streaks. They also dissolve any last traces of grease or soap scum that might dull the finish. On glass cooktops, ceramic surfaces, or even stainless steel, this final polish creates a mirror-like shine.
How To Apply For Best Results
Spray a light mist over the entire stovetop, then wipe immediately with a dry, clean microfiber cloth. Use long, even strokes and flip the cloth often to avoid spreading residue. If you see any streaks, buff them out with a fresh section of the cloth.
What To Avoid
Don't use glass cleaner on hot surfaces, and avoid spraying it near open flames or electrical components. Also, skip any glass cleaners that contain vinegar if you have a glass cooktop, as vinegar can damage the surface over time. Stick to a standard ammonia-based spray for the best results.
FAQ
How often should I deep clean my stove?
Aim for a deep clean every 1-2 months, depending on usage. Wipe down the stovetop after each use to prevent buildup.
Can I use bleach on my stove?
Avoid bleach on most stovetops as it can damage finishes. Stick to mild cleaners like vinegar, baking soda, or dish soap.
How do I clean a glass cooktop without scratching it?
Use a soft cloth, baking soda paste, or a razor blade at a 45-degree angle. Avoid abrasive pads or harsh scrubbers.
What's the best way to clean gas burner heads?
Remove burner heads and soak in warm soapy water. Use a pin to clear clogged ports. Dry thoroughly before replacing.
How do I remove yellow stains from a white stove?
Make a paste of hydrogen peroxide and baking soda. Apply to stains, let sit for 20 minutes, then wipe clean. Repeat if needed.
Conclusion
Getting your stove sparkling clean doesn't have to be a dreaded chore. With these 23 hacks, you can tackle grease, grates, and burners using everyday items you already own.
A little regular maintenance saves you from hours of scrubbing later. Pick a couple of methods to try this week, and enjoy a kitchen that looks and feels fresh with minimal effort.