25 Deep Cleaning Kitchen Tips for a Full Home Reset
Your kitchen might look clean on the surface, but hidden grease, grime, and lingering odors tell a different story. A deep reset goes beyond wiping counters—it targets every crevice, from cabinet interiors to the exhaust fan.
These 25 deep cleaning tips will transform your kitchen into a truly fresh, organized space. Roll up your sleeves and get ready to tackle the mess you've been ignoring.
Each step is practical, straightforward, and designed to make your kitchen feel brand new. Let's get started.
1. Clear and Declutter First
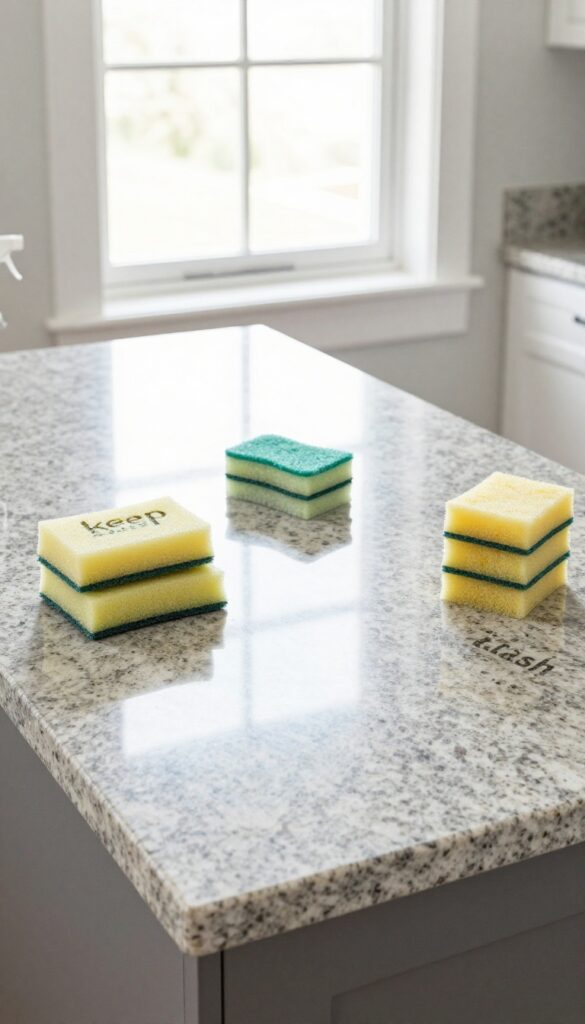
Before you pull out any cleaning supplies, take everything off your countertops, out of your drawers, and off your shelves. You can't deep clean around clutter—it just gets in the way. Sort each item into one of three piles: keep, donate, or trash.
This step alone makes the rest of your deep cleaning faster and more effective.
Starting with a blank slate is the secret to a thorough kitchen reset. When surfaces are bare, you can reach every corner, wipe every drip, and scrub every stain without moving things around. Plus, decluttering reduces visual noise and makes your kitchen feel instantly calmer.
Tackle Countertops First
Pull everything off the counters—appliances, canisters, utensil holders, even the fruit bowl. Wipe down each item as you go, then set aside only what you use daily. Store the rest in cabinets or donate it.
You'll be surprised how much space you free up.
Sort Drawers And Cabinets
Empty one drawer or cabinet at a time. Toss expired spices, broken utensils, and mismatched lids. Group similar items together (baking tools, measuring cups, storage containers) so you can find what you need later.
A tidy drawer makes cleaning inside it much easier.
Don't Forget The Fridge Top
The top of the fridge is a magnet for random stuff—cookbooks, mail, small appliances. Clear it off completely. If you don't use something regularly, find it a proper home elsewhere.
This one spot, when empty, makes your whole kitchen look more organized.
2. Degrease Cabinet Doors and Handles
Cabinet doors and handles are grease magnets, especially near the stove. Over time, a sticky film builds up that attracts dust and looks dull. A simple degreasing routine will restore their shine and make your whole kitchen feel cleaner.
Mix The Right Cleaner
Fill a bucket with warm water and add a few squirts of a heavy-duty degreasing dish soap. Avoid using harsh chemicals that might damage the cabinet finish. For extra grease-cutting power, add a splash of white vinegar.
Test on an inconspicuous spot first to ensure it won't harm the surface.
Wipe Down Every Surface
Dip a soft microfiber cloth into the soapy water, wring it out well, and wipe down all cabinet fronts. Pay special attention to the areas around the stove and above the oven where grease splatters are heaviest. Rinse your cloth frequently and change the water if it becomes too greasy.
Don't Forget The Handles And Crevices
Handles and knobs collect grime from hands and cooking splatters. Use a damp cloth to clean them, and for intricate designs or crevices, an old toothbrush works wonders. Dip the toothbrush in the soapy water and scrub gently around the base of handles and along raised edges.
Dry And Buff For A Streak-free Finish
After cleaning, go over the cabinets with a dry microfiber cloth to remove any remaining moisture and prevent water spots. Buffing also helps restore the original luster. For wood cabinets, follow up with a wood polish or conditioner to keep the finish looking fresh.
3. Scrub Inside Cabinets and Drawers
Cabinet interiors and drawers collect crumbs, dust, and sticky spills over time. Even if you keep a tidy kitchen, these hidden spots need a thorough scrub to truly reset your space. This step also gives you a chance to declutter and reorganize, making your kitchen more functional.
Start by removing everything from your cabinets and drawers. Lay items on the counter or a table so you can sort through them. Vacuum out all crumbs and debris using a brush attachment, then wipe every surface with a damp microfiber cloth and a mild cleaner.
Pay extra attention to corners and seams where grime builds up. Let everything dry completely before returning items—moisture can lead to mold or warping. Consider adding shelf liners to make future cleanups easier.
Empty And Sort
Take everything out and group similar items together. This is the perfect time to toss expired spices, chipped dishes, or gadgets you never use. Wipe down each item before putting it back.
Deep Clean The Interior
Use a vacuum with a crevice tool to suck up loose debris. Then wipe with a cloth dipped in warm, soapy water or a vinegar solution. For sticky residue, a paste of baking soda and water works wonders.
Don't forget the drawer bottoms and the top edges of cabinet openings.
Dry And Reline
After cleaning, leave doors and drawers open to air dry fully. If you're adding shelf liners, measure and cut them to fit before placing items back. Liners catch spills and make future cleanings a breeze.
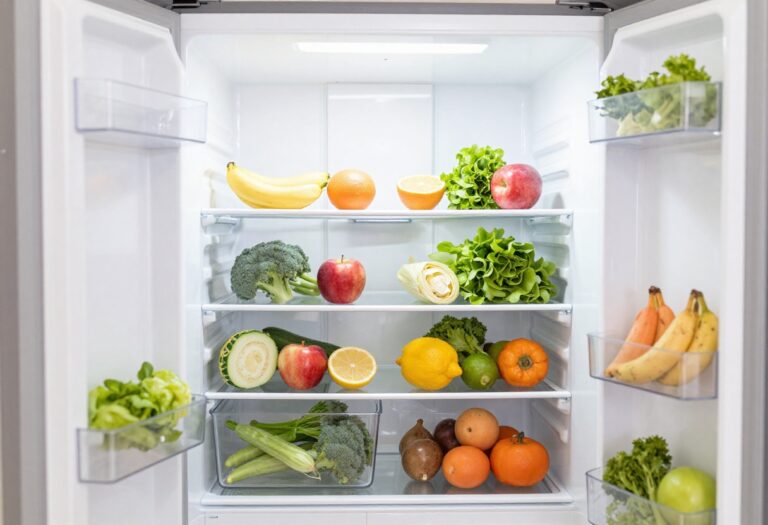
4. Deep Clean the Refrigerator
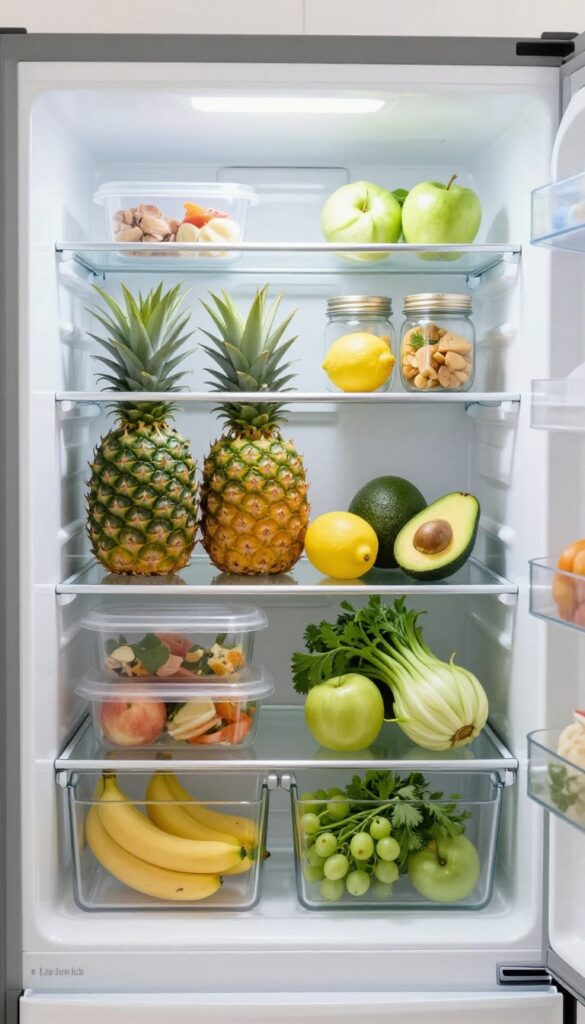
The refrigerator works hard 24/7, but it rarely gets the attention it deserves. A deep clean not only removes spills and odors but also helps your appliance run more efficiently. Plus, it's the perfect chance to toss expired items and rediscover what you actually have.
Empty And Sort
Start by pulling everything out—every jar, bottle, and leftover container. Check expiration dates and toss anything past its prime. Group similar items together (condiments, dairy, produce) so you can easily put them back in an organized way.
Wash All Removable Parts
Take out shelves, drawers, and bins. Wash them in warm soapy water, rinse well, and let them air dry completely. For stubborn stains, make a paste of baking soda and water, let it sit for a few minutes, then scrub gently.
Wipe Interior And Seals
Use a mixture of equal parts water and white vinegar to wipe down the interior walls, ceiling, and floor of the fridge. Pay special attention to the door seals—gunk can build up there and prevent a tight seal. A toothbrush works great for getting into the crevices.
Organize Before Restocking
Once everything is clean and dry, put items back in a logical order. Use clear bins for small items, keep raw meat on the bottom shelf, and store leftovers in clear containers so you can see what's inside. This setup makes future cleaning easier and reduces food waste.
5. Tackle the Oven Interior
Ovens take a beating. Baked-on spills, splattered grease, and burnt-on food can turn your appliance into a smoky mess. A clean oven not only looks better but also cooks more evenly and smells fresh.
Don't let the task intimidate you. With the right approach, you can get that interior sparkling without harsh scrubbing marathons. Here's how to do it right.
Choose Your Cleaner
You have two solid options: a commercial oven cleaner or a homemade baking soda paste. Commercial cleaners are powerful and fast, but they contain strong chemicals. If you prefer a gentler route, mix ½ cup baking soda with a few tablespoons of water to form a spreadable paste.
Both work well—pick what fits your comfort level.
Apply And Let It Sit
Remove oven racks and set them aside. Coat the interior surfaces—walls, floor, ceiling, and door—with your chosen cleaner. For the paste, use a spatula or gloved hand to spread it evenly.
Close the oven and let it sit overnight, or at least 12 hours. This dwell time loosens even the toughest grime.
Wipe It All Clean
After the wait, grab a damp microfiber cloth or sponge and wipe down the surfaces. You may need to rinse and repeat a few times to remove all residue. For stubborn spots, a plastic scraper can help.
Don't forget the oven door glass—use a glass cleaner or vinegar spray for a streak-free shine.
Don't Skip The Racks
While the oven interior soaks, clean the racks separately. Place them in a large trash bag with ¼ cup ammonia, seal it, and let it sit in the sun for a few hours. Then rinse with water.
Alternatively, scrub them with a baking soda paste. Either way, they'll come out looking new.
6. Clean the Stovetop and Burners
The stovetop takes the brunt of daily cooking, so it's no surprise that baked-on spills and greasy residue accumulate fast. A thorough clean not only makes your kitchen look better but also helps your burners heat more efficiently. Start by removing the grates and burner caps—these are often the dirtiest parts.
A good soak and scrub will get them looking like new again, while a careful pin cleaning clears gas burner holes for even flames.
Remove And Soak The Grates And Caps
Lift off the grates and burner caps and place them in a sink or large basin filled with hot, soapy water. Let them soak for at least 15–20 minutes to loosen stubborn grime. For extra tough buildup, add a cup of white vinegar or a sprinkle of baking soda to the soak.
Scrub The Stovetop Surface
While the parts soak, wipe down the stovetop surface. Use a non-abrasive cleaner—like a mix of dish soap and warm water or a dedicated ceramic/glass cooktop cleaner—to avoid scratching. For dried-on spills, let the cleaner sit for a few minutes before gently scrubbing with a soft sponge or microfiber cloth.
Clean Gas Burner Holes With A Pin
If you have a gas stove, food debris can clog the tiny burner holes, causing uneven flames. Once the stovetop is clean and dry, take a straight pin or a paperclip and gently poke each hole to dislodge any blockages. This simple step helps your burners ignite quickly and burn evenly.
Dry And Reassemble
After scrubbing the grates and caps, rinse them thoroughly and dry completely with a clean towel before putting them back on the stove. Moisture left behind can cause rust or interfere with burner performance. Once everything is dry, reassemble and admire your sparkling stovetop.
7. Descale the Dishwasher
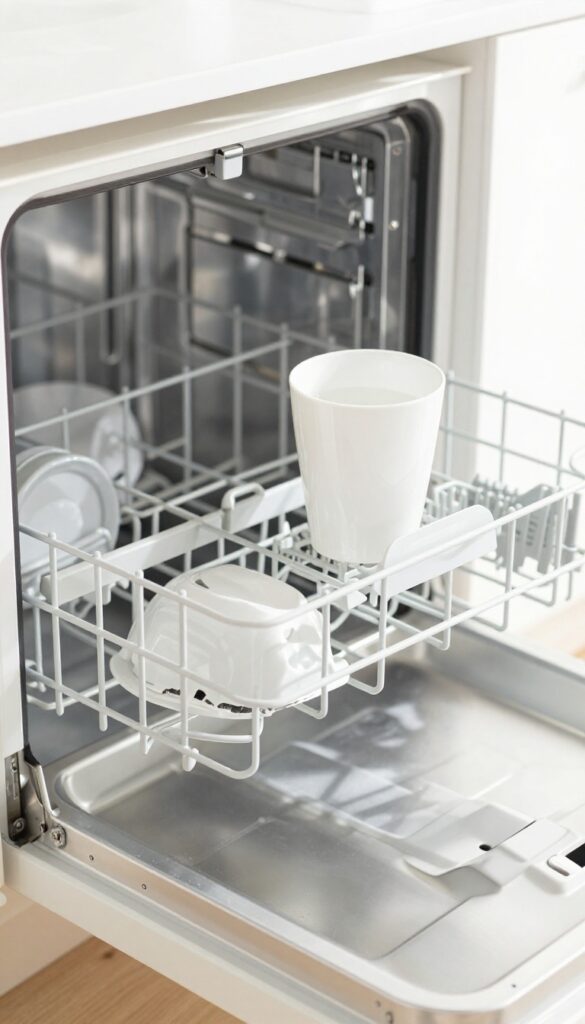
Your dishwasher works hard every day, but mineral deposits, soap scum, and food particles can build up over time. A neglected dishwasher doesn't just clean less effectively—it can also start to smell. Giving it a deep clean every few months keeps it running smoothly and your dishes sparkling.
Start by removing the bottom rack and checking the drain filter for debris. Rinse it under hot water and scrub away any gunk with an old toothbrush. Then place a dishwasher-safe cup filled with white vinegar on the top rack and run a hot cycle.
The vinegar breaks down hard water deposits and dissolves grease. After that cycle finishes, sprinkle a cup of baking soda across the bottom of the dishwasher and run a short hot cycle. The baking soda neutralizes odors and leaves the interior fresh.
For stubborn buildup, use a commercial dishwasher cleaner instead of vinegar—it's more effective on heavy scale.
Why Descaling Matters
Hard water leaves white chalky deposits on your dishes and inside the dishwasher. Over time, these deposits can clog spray arms and reduce water flow, making the dishwasher less efficient. Descaling removes that buildup and extends the life of your machine.
What You'll Need
White vinegar or a dishwasher cleaner, baking soda, a toothbrush, and a microfiber cloth. That's it. No fancy tools or expensive products required.
Step-by-step Descaling
First, empty the dishwasher and remove the bottom rack. Check and clean the filter. Place a cup of white vinegar on the top rack and run a hot cycle.
When done, sprinkle baking soda on the bottom and run a short hot cycle. Wipe down the door gasket and edges with a damp cloth.
How Often To Do This
Aim for once every three months. If you have very hard water or use your dishwasher daily, consider doing it every two months. Your dishwasher will thank you with better performance and fewer odors.
8. Sanitize the Sink and Drain
Your sink and drain see a lot of action, from rinsing raw meat to washing dirty dishes. Over time, bacteria and odors can build up in places you can't see. A deep clean here isn't just about looks—it's about hygiene.
Start by removing any dishes or debris from the sink. Sprinkle baking soda all over the basin, then spray or pour vinegar over it. The fizzing action helps lift grime and stains.
Scrub with a sponge or brush, focusing on corners and around the drain. Rinse thoroughly with hot water. For the drain, first pour a kettle of boiling water down it.
Then dump in half a cup of baking soda, followed by a cup of vinegar. Cover the drain with a plug or cloth to contain the fizz. Let it sit for 10-15 minutes, then flush with another kettle of boiling water.
This routine clears away grease, soap scum, and odor-causing buildup.
Why The Sink Needs Special Attention
The sink is a hotspot for cross-contamination, especially if you handle raw poultry or meat. Even with regular rinsing, bacteria can cling to the basin and drain. Baking soda and vinegar provide a non-toxic way to sanitize without harsh chemicals.
Step-by-step Sink Scrub
Wet the sink surface, then sprinkle baking soda generously. Spray vinegar until it fizzes, then scrub with a non-abrasive sponge. Pay extra attention to the rim and around the faucet base.
Rinse with hot water and dry with a clean cloth.
Deep Cleaning The Drain
Boiling water is your first line of defense—it melts grease and flushes loose debris. The baking soda and vinegar reaction breaks down gunk inside the pipes. Follow with hot water to wash away the dissolved residue.
Repeat monthly to keep drains fresh.
9. Refresh the Garbage Disposal
Garbage disposals are workhorses, but they can get funky fast. Leftover food particles and grease build up, leading to unpleasant smells that spread through your kitchen. A quick refresh keeps it running smoothly and smelling clean without harsh chemicals.
This simple method uses ingredients you likely have on hand to clean and deodorize your disposal. The ice cubes help knock off stuck-on grime, while lemon peels provide a fresh scent and natural antibacterial action. Follow up with baking soda to neutralize odors and leave the disposal fresh.
Ice Cubes And Lemon Peels
Drop a handful of ice cubes and a few lemon peels into the disposal. Turn on the cold water and run the disposal until the ice is ground up. The ice scours the blades and impeller, while the lemon oil cuts grease and leaves a citrusy smell.
Baking Soda Flush
After the ice treatment, sprinkle about a tablespoon of baking soda down the drain. Let it sit for a minute, then flush with cold water for 30 seconds. Baking soda neutralizes any lingering odors and leaves the drain clean.
10. Wipe Down Backsplash and Walls
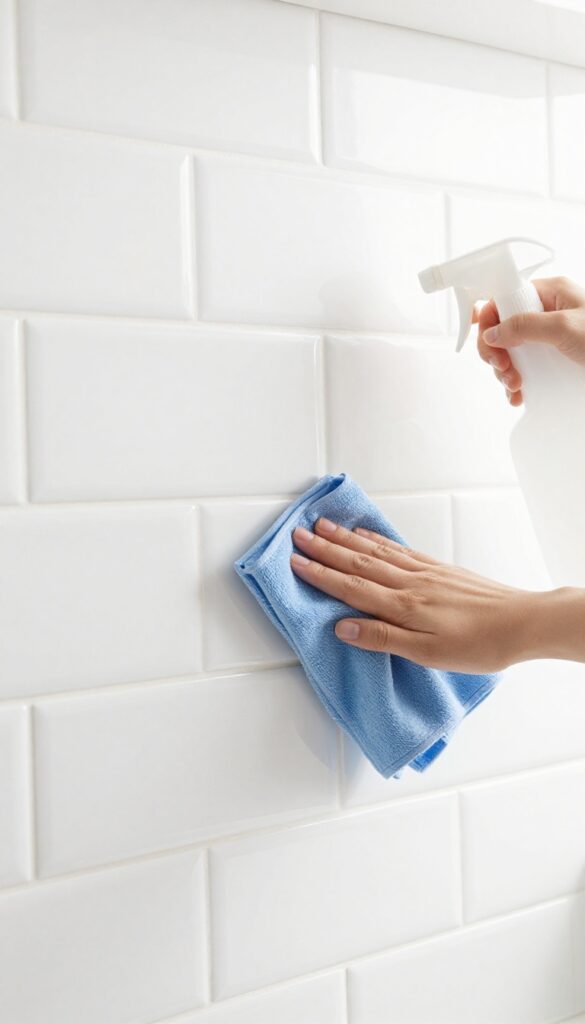
Your backsplash and walls silently collect splatters, grease, and dust over time. A quick wipe might not cut it when there's a film of cooking residue or stubborn stains around the stove. Giving these surfaces a proper scrub makes the whole kitchen feel brighter and cleaner.
Start by mixing a degreaser or all-purpose cleaner with warm water. For tile backsplashes, spray the solution and let it sit for a minute to loosen grime. Wipe with a microfiber cloth, rinsing frequently.
For painted walls, test a small area first to avoid damaging the finish. Use a gentle cleaner and a soft sponge, working from top to bottom. Don't forget the area behind the stove and sink—these spots often have the most buildup.
For grout lines, make a paste of baking soda and water, apply with a small brush, scrub gently, then rinse. This step alone can make your kitchen look noticeably fresher.
Choose The Right Cleaner
For tile and stone backsplashes, use a pH-neutral cleaner or a specialized degreaser. Avoid acidic cleaners on natural stone. For painted walls, stick with a mild all-purpose cleaner to prevent stripping the paint.
Always test in an inconspicuous spot first.
Tackle Grease Buildup
Grease tends to accumulate behind the stove and near the cooktop. Apply a degreaser directly to these areas, let it sit for a few minutes, then scrub with a non-abrasive sponge. For stubborn spots, use a soft-bristled brush.
Rinse with a damp cloth and dry.
Refresh Grout Lines
Grout can trap dirt and look dingy. Mix baking soda with a little water to form a paste. Apply it to grout lines, scrub with a small brush (an old toothbrush works great), then wipe away with a damp cloth.
For extra whitening, add a splash of hydrogen peroxide.
11. Clean Exhaust Fan and Filter
Your exhaust fan works overtime pulling grease and moisture out of the air, but when was the last time you actually cleaned it? A clogged filter not only smells bad—it makes the fan work harder and less efficiently. This is one of those tasks you’ll wonder why you put off for so long.
Soak The Filter
Pop out the metal mesh filter (most slide right out). Fill your sink or a large basin with hot water and a few squirts of dish soap, or add a quarter cup of baking soda for extra grease-cutting power. Let the filter soak for at least 15 minutes—longer if it’s caked on.
You’ll see the water turn brown as the grease loosens.
Scrub And Rinse
Use a soft brush or an old toothbrush to gently scrub any remaining gunk from the mesh. Avoid harsh scrubbers that could damage the coating. Rinse thoroughly under hot running water until all soap is gone, then shake off excess water and pat dry with a clean towel.
Wipe The Fan Blades And Housing
While the filter dries, tackle the fan itself. Use a microfiber cloth dampened with warm soapy water to wipe down the blades, the inside of the hood, and any exposed surfaces. For stubborn grease, a little white vinegar on the cloth works wonders.
Dry everything with a clean cloth to prevent water spots.
12. Detail the Microwave Inside and Out
The microwave is one of the most used appliances in the kitchen, but it's often neglected until something splatters. A thorough clean inside and out removes baked-on food, odors, and greasy fingerprints. This method uses steam to loosen grime so you barely have to scrub.
Steam Clean The Interior
Fill a microwave-safe bowl with 1 cup of water and add a few lemon slices or a tablespoon of vinegar. Microwave on high for 5 minutes. Let the bowl sit inside with the door closed for another 2 minutes so the steam can condense on the walls.
Then remove the bowl and wipe down all interior surfaces with a soft sponge or cloth. The steam softens even stubborn dried-on food, making it wipe away effortlessly.
Remove The Turntable And Wash Separately
Take out the glass turntable and the roller ring. Wash them in warm, soapy water or place them in the dishwasher if they're dishwasher-safe. Dry thoroughly before putting them back.
This prevents hidden grime from building up underneath and keeps the microwave spinning smoothly.
Clean The Exterior And Control Panel
Wipe down the outside of the microwave with a microfiber cloth dampened with mild all-purpose cleaner or a vinegar-water solution. Pay special attention to the handle, door edges, and control panel where fingerprints and splatters accumulate. Avoid spraying cleaner directly onto the control panel; instead, dampen the cloth first to prevent liquid from seeping into the electronics.
Deodorize And Polish
For lingering odors, leave the microwave door open for a few minutes after cleaning. You can also place a small bowl of baking soda inside overnight. To restore shine, buff the exterior with a dry microfiber cloth.
A clean microwave not only looks better but also heats food more evenly without old-food smells.
13. Organize and Clean Pantry Shelves
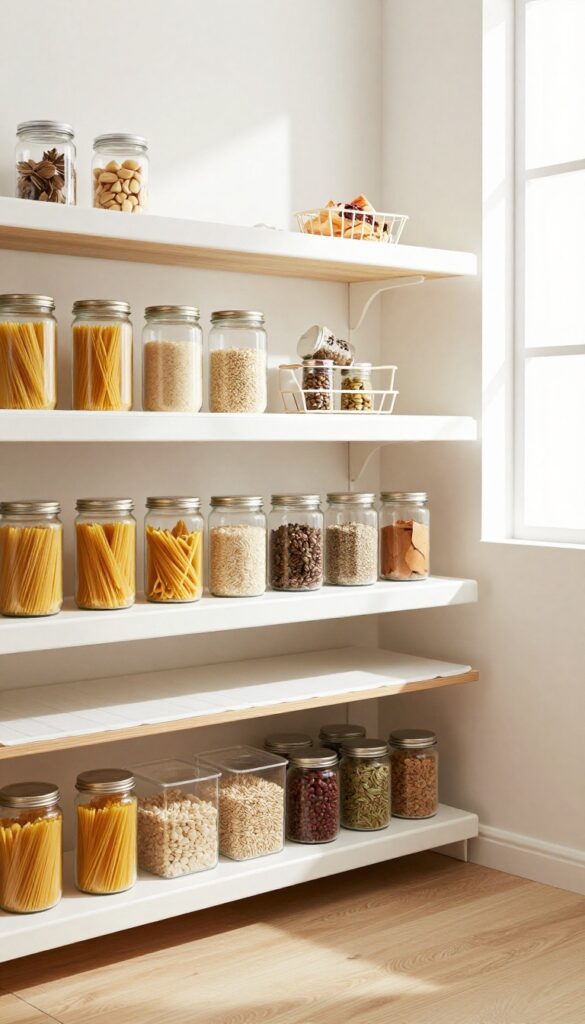
Pantry shelves often become a black hole for half-used bags of rice, forgotten spices, and expired cans. A deep clean here not only makes cooking easier but also prevents pests and food waste. Let's reset your pantry so everything is visible, accessible, and fresh.
Start by removing every single item from the shelves. This is your chance to wipe down every surface and inspect for spills or crumbs. Vacuum the shelves thoroughly, then wipe them with a damp cloth and mild soap.
Pay attention to corners where dust and debris hide. Once dry, line shelves with easy-to-clean shelf liners or non-slip mats to protect them from future messes.
Check Expiration Dates And Group Similar Items
As you go through each item, check expiration dates and toss anything past its prime. Group similar items together: all baking supplies in one spot, canned goods in another, and snacks on a dedicated shelf. This makes meal prep faster and grocery shopping easier because you'll know exactly what you have.
Use Bins And Baskets For Better Organization
Clear bins, wire baskets, or even cardboard boxes can transform a chaotic pantry into a streamlined system. Use them to corral small packets, spice jars, or snack bags. Label each bin so everyone in the household knows where things belong.
For deeper shelves, consider tiered racks or lazy Susans to keep items accessible without digging.
Maintain The System With A Quick Weekly Tidy
After all that work, you'll want to keep it looking good. Spend five minutes each week straightening shelves, wiping up any spills immediately, and rotating older items to the front. This habit prevents buildup and makes your next deep clean much easier.
14. Deep Clean Small Appliances
Your small appliances work hard every day, but they rarely get the attention they deserve. A quick wipe on the outside isn't enough—crumbs, coffee oils, and food residue build up inside, affecting performance and hygiene. Give your toaster, coffee maker, blender, and air fryer the deep clean they need.
Coffee Maker Descaling
Mineral deposits from water can clog your coffee maker and make your brew taste bitter. Run a descaling cycle using equal parts white vinegar and water, then follow with two cycles of plain water to rinse. For a deeper clean, remove the filter basket and carafe and wash them with warm soapy water.
Toaster Crumb Tray And Interior
Unplug the toaster and shake out loose crumbs over the sink. Remove the crumb tray and wash it with hot, soapy water—dry thoroughly before reinserting. For stuck-on residue inside, use a soft brush or damp cloth to gently wipe the interior walls.
Never use metal tools that could damage the heating elements.
Blender And Air Fryer Care
For blenders, fill the jar halfway with warm water and a drop of dish soap, then blend on high for 30 seconds. Rinse and scrub the lid and gasket with a small brush. For air fryers, remove the basket and tray and wash them in warm soapy water.
Wipe the heating coil and interior with a damp cloth to remove grease buildup.
15. Wash Trash and Recycling Bins
Trash and recycling bins are the unsung heroes of your kitchen, but they can quickly become breeding grounds for bacteria and odors. A simple wipe-down isn't enough—these bins need a proper deep clean to keep your kitchen smelling fresh and hygienic. Here's how to give them the reset they deserve.
Prep And Safety
Start by taking both bins outside to a well-ventilated area, preferably on a sunny day. Wear gloves and old clothes, as you'll be dealing with grime and potentially strong cleaning solutions. Empty any lingering trash or recyclables, and give the bins a quick shake to remove loose debris.
Scrub And Disinfect
Spray the inside and outside of each bin with a disinfectant or a mixture of one part bleach to nine parts water. Let the solution sit for a few minutes to break down grease and kill germs. Use a stiff-bristled brush or a scrub sponge to work the solution into every corner, paying special attention to the bottom and lid where residue tends to build up.
Rinse And Dry
Rinse the bins thoroughly with a garden hose, making sure no soap or bleach residue remains. Turn the bins upside down to drain, then let them air dry completely in the sun. Sunlight acts as a natural disinfectant and helps eliminate any lingering odors.
Once dry, bring them back inside and line them with fresh bags.
16. Clean Under and Behind Appliances

The spaces behind and under your refrigerator, stove, and dishwasher are prime real estate for dust bunnies, crumbs, and even forgotten food. These areas rarely see the light of day, so they collect grime that can affect appliance efficiency and indoor air quality. It's time to pull those heavy machines out and give them the attention they deserve.
Cleaning under and behind appliances is a two-step process: clearing the debris and then sanitizing the floor. Start by unplugging the refrigerator and stove for safety. Carefully slide them out, being mindful of gas lines or water connections.
Use a vacuum with a crevice tool to suck up dust, pet hair, and crumbs. Then, mop the exposed floor with a gentle cleaner. While you're back there, check for any spills, mold, or items that may have rolled out of sight.
This is also a good time to wipe down the sides and backs of the appliances before pushing them back into place.
Prepare And Protect Your Floor
Before moving heavy appliances, lay down a cardboard sheet or an old towel to protect your flooring from scratches. If your floor is tile or hardwood, this step is especially important. Also, have a helper if the appliance is large—safety first.
Vacuum Like A Pro
Use a vacuum with a brush attachment to loosen dust from the appliance coils and the floor. For tight spaces, a crevice tool works wonders. Don't forget to vacuum the floor under the appliance after you've moved it out.
Check For Hidden Surprises
It's common to find lost items like bottle caps, kids' toys, or even old food scraps. Dispose of anything that's not supposed to be there. If you spot a spill, clean it immediately to prevent stains or odors.
Wipe Down Appliance Exteriors
While the appliance is pulled out, give its back and sides a quick wipe with a damp cloth. For stainless steel, use a cleaner that matches the grain. This prevents dust from immediately resettling on the clean floor.
17. Polish Countertops and Sealing
Countertops take a beating daily—spills, heat, knife marks, and general wear. But a deep clean isn't complete until you've given them the right treatment. Using the wrong cleaner can damage the surface, so it's crucial to match the product to your material.
This step not only removes grime but also protects your investment.
Start by clearing everything off your countertops. Wipe down with a gentle, material-specific cleaner to remove any residue. For natural stone like granite or marble, use a pH-neutral cleaner to avoid etching.
For quartz, avoid harsh chemicals that can break down the resin. Laminate is more forgiving but still benefits from a non-abrasive cleaner. Once clean, dry thoroughly with a microfiber cloth.
Choosing The Right Cleaner
Granite and marble need a cleaner designed for natural stone—stay away from vinegar, lemon, or bleach. Quartz is non-porous but can be dulled by high-pH products; use a gentle soap or a dedicated quartz cleaner. Laminate is durable but scratches easily, so stick to mild dish soap and water.
Always test a small hidden area first if you're unsure.
Sealing Natural Stone
If you have granite or marble, check if it needs resealing by dripping a little water on the surface. If it beads up, the seal is good. If it darkens the stone, it's time to seal.
Apply a stone sealer evenly with a soft cloth, let it sit for the time specified on the bottle, then buff off excess. This prevents stains and keeps your counters looking pristine.
Buffing To A Shine
After cleaning and sealing (if needed), give your countertops a final buff with a dry microfiber cloth. This removes any streaks or residue and restores the natural luster. For an extra glow on granite, you can use a stone polish, but use it sparingly—too much can leave a buildup.
For quartz and laminate, a simple buff is all you need.
18. Scrub the Kitchen Floor
The kitchen floor sees it all—spilled sauce, dropped crumbs, muddy footprints. A quick sweep might handle the surface debris, but deep cleaning means tackling the grime that builds up over time. Give your floor the attention it deserves, and you'll notice the difference underfoot and in the overall freshness of the room.
Prep With A Sweep Or Vacuum
Before you bring out the mop, remove every loose particle. Sweep thoroughly, paying attention to corners and under cabinets. If you have a vacuum with a hard floor setting, use it to pick up fine dust that a broom might miss.
Choose The Right Cleaner For Your Floor Type
Not all floors are the same. Tile, vinyl, laminate, and hardwood each need specific care. Use a pH-neutral cleaner for most surfaces, and avoid harsh chemicals that can dull or damage the finish.
For stubborn spots, spot-clean with a gentle solution before mopping the whole floor.
Tackle Grout Lines With Baking Soda Paste
Grout can trap dirt and look dingy even after mopping. Mix baking soda with a little water to form a thick paste. Apply it to the grout lines, scrub with a stiff brush, and let it sit for a few minutes.
Rinse well with clean water. The grout will look noticeably brighter.
Rinse Thoroughly To Avoid Residue
After mopping or scrubbing, do a final rinse with clean water. Leftover cleaner can attract more dirt and leave a sticky film. Use a clean mop or cloth for the rinse, and let the floor air dry completely before walking on it.
19. Clean Windows and Window Sills
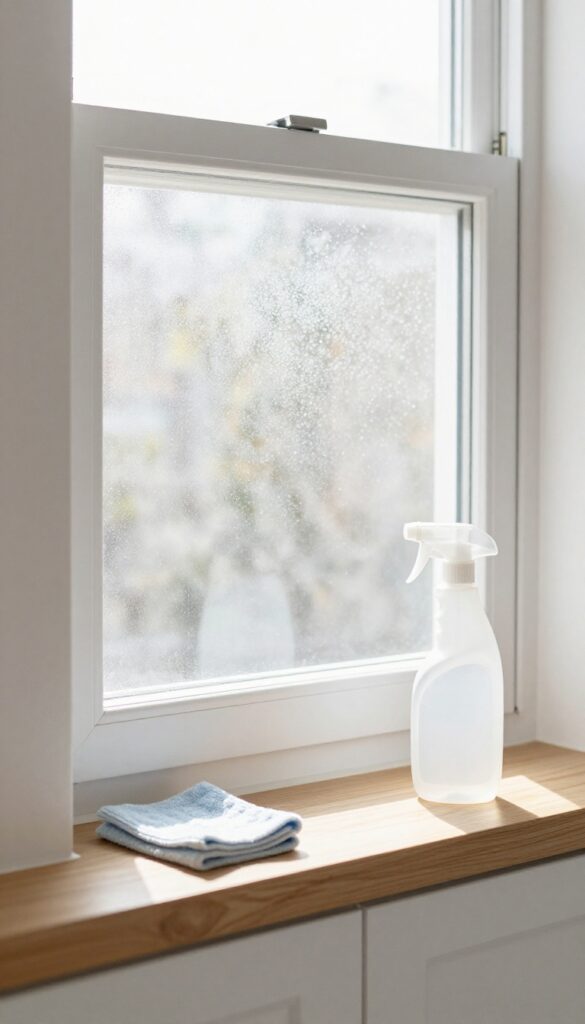
Kitchen windows collect grease, dust, and grime that regular cleaning often misses. A thorough window cleaning brightens the space and removes stubborn buildup. Don't stop at the glass—the sills and tracks need attention too.
Tackle The Sills And Tracks
Start by wiping down window sills with a damp microfiber cloth to remove loose dust and debris. For stuck-on grime, use a mild all-purpose cleaner. Window tracks are trickier—use an old toothbrush or a small brush to scrub out dirt, then vacuum with a crevice tool or wipe with a damp cloth.
Get The Glass Sparkling
Spray a quality glass cleaner onto a lint-free cloth or paper towel, then wipe the panes in a zigzag motion to avoid streaks. For greasy kitchen windows, add a drop of dish soap to your cleaner. Finish with a dry microfiber cloth for a crystal-clear shine.
Don't Skip The Screens
Window screens trap dust, pollen, and cooking grease. Remove them and vacuum both sides with a soft brush attachment. If they're very dirty, wash them with mild soapy water and a sponge, then rinse and let them dry completely before reinstalling.
20. Disinfect Light Switches and Outlets
Light switches and outlets are some of the most frequently touched surfaces in your kitchen, yet they rarely get a proper cleaning. Grease, food residue, and germs build up on switch plates and outlet covers, especially near the sink and stove. A quick disinfecting step not only improves hygiene but also makes your kitchen feel fresher.
Before you start, turn off the power to the switches and outlets you plan to clean at the breaker box. This is a critical safety step to avoid shock. Use a disinfectant wipe or a cloth lightly dampened with rubbing alcohol to wipe down the switch plates and outlet covers.
Pay attention to the edges and crevices where grime collects. Let the surfaces air dry completely before turning the power back on. For stubborn grime, use a cotton swab dipped in alcohol to clean around the switch toggles and outlet slots.
This simple task takes only a few minutes but makes a noticeable difference in your kitchen's cleanliness.
Why This Matters
Kitchen light switches and outlets are high-touch areas that can harbor bacteria like E. coli and Salmonella, especially if you handle raw meat or unwashed produce. Regular disinfecting reduces the risk of cross-contamination and keeps your kitchen environment healthier.
What You'll Need
Disinfectant wipes or rubbing alcohol (70% or higher), clean microfiber cloths, cotton swabs, and a screwdriver if you want to remove switch plates for a deeper clean. Always have a flashlight handy to see what you're doing if you turn off the lights.
Pro Tips For A Thorough Job
Don't forget less obvious spots like the switch for your garbage disposal or the outlet near the coffee maker. If switch plates are yellowed or cracked, consider replacing them for an instant upgrade. For outlets, use a dry cloth first to remove dust, then follow with the disinfectant.
21. Wash Curtains or Blinds
Kitchen curtains and blinds trap airborne grease, cooking odors, and dust that regular dusting can't fully remove. Over time, they can look dingy and even hold onto smells. Giving them a proper wash makes the whole room feel fresher and cleaner.
Check The Care Label First
Before you do anything, locate the care tag on your curtains or blinds. Some fabrics are machine-washable, others require hand washing, and some are dry-clean only. Ignoring these instructions can lead to shrinkage, fading, or damage.
For blinds, check if they're made of fabric, vinyl, or aluminum—each material needs a different cleaning method.
Machine-wash Curtains The Right Way
If the label says machine-washable, remove any hooks or weights. Wash on a gentle cycle with cold water and a mild detergent. Add a half cup of white vinegar to the rinse cycle to cut grease and odors without harsh chemicals.
Hang them back up while still slightly damp to prevent wrinkles—never put them in the dryer unless the label says it's safe.
Deep-clean Greasy Blinds
For kitchen blinds, especially those near the stove, grease buildup is common. Start by dusting with a microfiber cloth to remove loose dirt. Then, fill your sink or a large tub with warm water and a few drops of dish soap.
Submerge the blinds and let them soak for 15–20 minutes. Gently scrub each slat with a soft sponge, rinse thoroughly, and let them air dry completely before rehanging.
22. Clean Baseboards and Trim
Baseboards and trim are the unsung heroes of a clean kitchen—they frame the room and collect dust, grease, and grime without anyone noticing. Over time, that buildup becomes a sticky film that dulls the finish and traps odors. Giving them a thorough wipe-down is a small effort that makes a big visual difference.
Start by dusting or vacuuming the baseboards to remove loose dirt. Then, mix a mild cleaner—like a few drops of dish soap in warm water—and wipe with a damp cloth or sponge. For stubborn spots, a soft-bristled brush or an old toothbrush works wonders in corners and along the top edge.
Rinse with a clean damp cloth and dry to prevent water marks. Pay extra attention near the stove and sink, where grease and moisture accumulate most.
Why Baseboards Get So Grimy
Kitchen baseboards are magnets for cooking grease, dust, and splashes from mopping. The combination creates a stubborn film that regular sweeping misses. Over time, this buildup can yellow white trim and even attract pests.
A deep clean every few months keeps them looking fresh and prevents long-term damage.
The Right Tools For The Job
You don't need fancy supplies. A microfiber cloth, a bucket of warm water with a squirt of dish soap, and a soft brush are enough. For painted trim, avoid abrasive scrubbers that can scratch the finish.
A small angled paintbrush or a dedicated baseboard cleaning tool helps reach tight spots without bending over.
Pro Tips For Stubborn Grime
For baked-on grease, add a splash of white vinegar to your cleaning solution—it cuts through grease naturally. If the trim is especially dirty, let the cleaner sit for a minute before wiping. For textured or wood trim, use a slightly damp cloth and dry immediately to avoid moisture damage.
A final wipe with a dry microfiber cloth adds shine.
23. Freshen Up the Kitchen Trash Can Area
The area around your trash can often gets overlooked during regular cleaning, but it can harbor spills, crumbs, and odors that affect the whole kitchen. A thorough reset here makes a noticeable difference in freshness. Start by pulling the can out completely and inspecting the floor and wall behind it.
You might be surprised by what's accumulated there. With a few simple steps, you can eliminate smells and keep this high-traffic zone clean.
Wipe Down The Floor And Wall
Move the trash can aside and sweep or vacuum any debris. Then, use a degreasing cleaner or a mixture of warm water and vinegar to wipe the floor and any adjacent wall surfaces. Pay special attention to corners and baseboards where grime builds up.
For stubborn spots, let the cleaner sit for a few minutes before scrubbing.
Replace The Liner Properly
Once the area is dry, place a new trash bag liner, making sure it fits snugly and doesn't slip down. Consider using a scented bag or one with odor-neutralizing properties. If your can has a lid, wipe it down inside and out as well, as odors can cling there.
Add An Odor Absorber
To keep the trash can area smelling fresh between deep cleans, place a charcoal filter or a small open box of baking soda at the bottom of the can (under the liner). You can also stick an adhesive odor absorber to the inside of the lid. Replace these every few months for best results.
24. Organize Utensil Drawers and Cutlery
Utensil drawers can become a chaotic jumble of spatulas, whisks, and mystery gadgets. A deep clean here not only makes finding the right tool easier but also prevents cross-contamination from crumbs and spills. Start fresh by emptying everything out and giving the drawer a thorough vacuum and wipe-down.
Once the drawer is clean, use dividers to group similar items—cooking utensils, serving spoons, and measuring tools each get their own section. This simple system keeps everything in its place and makes unpacking the dishwasher a breeze. While you're at it, inspect each item: toss anything cracked, melted, or rusted, and sharpen your knives for safer, more efficient cutting.
Empty And Deep Clean
Remove every single item from the drawer, including liners. Vacuum out crumbs and dust, then wipe down all surfaces with a mild cleaner. Don't forget the corners and edges where grime hides.
Let the drawer dry completely before adding dividers.
Sort And Divide
Group utensils by function: cooking tools, serving pieces, baking gadgets, and cutlery. Use adjustable dividers or small bins to create custom compartments. This not only keeps things tidy but also speeds up your cooking flow.
Sharpen And Discard
Check the condition of your knives and scissors. A dull blade is dangerous and inefficient—sharpen them with a whetstone or take them to a professional. Dispose of any broken or duplicate items.
Consider donating unused but functional tools.
25. Final Wipe-Down of All Surfaces
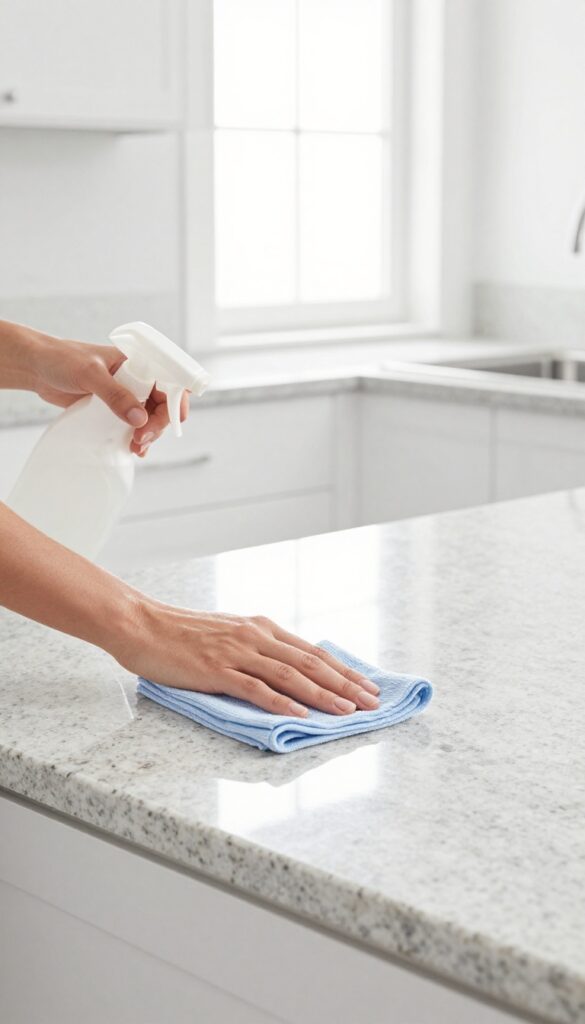
After scrubbing every nook and cranny, it's time for the grand finale. A final wipe-down ensures no residue or missed spots remain, leaving your kitchen truly spotless. This last pass is quick but essential—it's the difference between a clean kitchen and a sparkling one.
Grab a microfiber cloth and your favorite disinfectant spray. Start with the countertops, working from the back to the front. Then hit the stove, sink, and all handles.
Let the disinfectant sit for the recommended time (usually 30 seconds to a minute) to kill germs. Finally, wipe everything dry with a clean cloth. Step back and admire your work—your kitchen is now reset and ready for action.
Choose The Right Disinfectant
Not all sprays are created equal. For kitchen surfaces, pick a disinfectant that's safe for food contact areas. Look for EPA-approved options or make your own with diluted bleach (1 tablespoon per gallon of water).
Avoid harsh chemicals on delicate surfaces like granite—use a pH-neutral cleaner instead.
Work In A Logical Order
Start from the highest surfaces (like upper cabinets) and work down to the floor. This prevents drips from re-soiling already cleaned areas. Within each surface, wipe from the cleanest area to the dirtiest.
For example, on the stove, do the back panel first, then the burners, and finally the drip pans.
Don't Forget The Details
Pay extra attention to frequently touched spots: faucet handles, refrigerator door handles, cabinet pulls, and light switches. These are germ magnets. Also wipe down the backsplash and any small appliances you use daily, like the coffee maker or toaster.
A quick pass on the microwave exterior and the trash can lid finishes the job.
FAQ
How often should I deep clean my kitchen?
Aim for a deep clean every 3 to 6 months, depending on how much you cook. High-traffic kitchens may need it every 2 months.
What is the best natural cleaner for kitchen grease?
A mixture of equal parts white vinegar and water, plus a few drops of dish soap, works well. Baking soda paste is great for scrubbing.
How do I remove baked-on food from the oven?
Apply a baking soda paste, let it sit overnight, then spray with vinegar and scrub. For tough spots, use a plastic scraper.
Can I use bleach on my kitchen countertops?
Avoid bleach on natural stone like granite or marble. For laminate or tile, dilute bleach with water (1: 10) and rinse thoroughly.
How do I clean a greasy exhaust fan filter?
Remove the filter and soak it in hot water with a degreasing dish soap. Scrub with a brush, rinse, and let dry completely before reinstalling.
Conclusion
A deep-cleaned kitchen isn't just about looks—it's about resetting your home's heart for better cooking and peace of mind. Working through these 25 tips systematically turns an overwhelming task into manageable, rewarding steps. Start with the areas you use most and build momentum from there.
Even tackling five of these tips this weekend will leave your kitchen feeling noticeably fresher. Your future self will thank you.