13 Bathroom Shower Niche Ideas for a Clean, Polished Layout
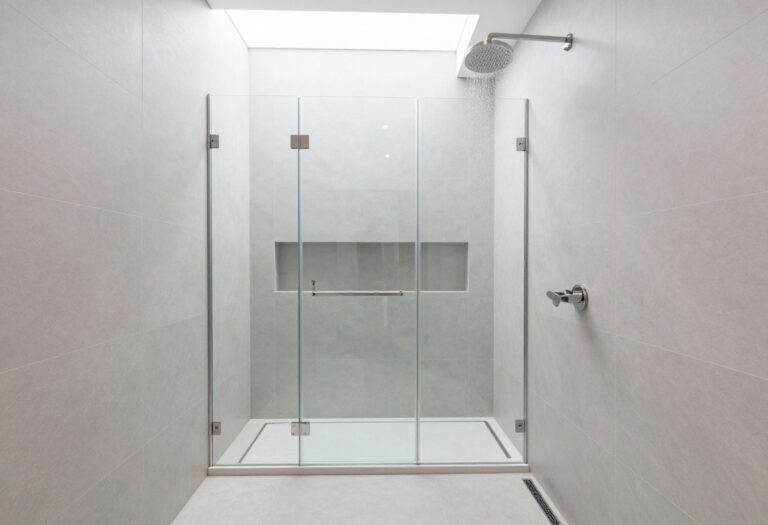
A shower niche does more than hold bottles. It turns a plain tiled wall into a clean, built-in feature that looks intentional, keeps products off the floor, and makes the whole bathroom feel finished. Get the shape, size, and placement right and the daily routine gets easier too.
The tricky part is picking a layout that fits your shower, your tile, and how much stuff you actually store. A tall stacked niche suits a family of five, while a single recessed box keeps a guest bath minimal.
Corner niches rescue tight stalls, and lighting or a stone shelf can push the look upscale. These thirteen ideas cover the practical and the pretty.
1. Classic Recessed Niche with Subway Tile
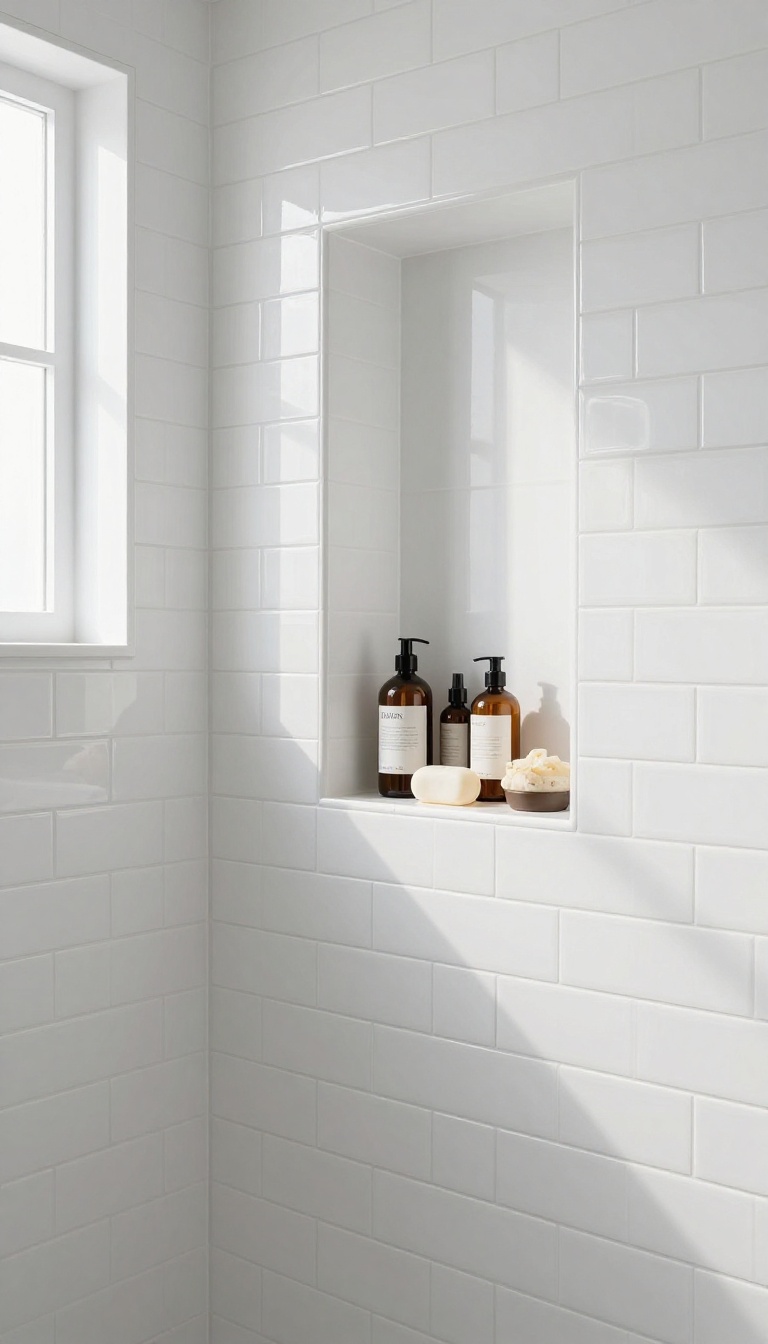
Subway tile has been a shower staple for decades, and for good reason. It's affordable, easy to clean, and its simple horizontal lines make any space feel tidy. Pair it with a recessed niche, and you get a storage spot that disappears into the wall instead of sticking out.
The recessed part is key. A niche that sits flush with the tile keeps the shower looking seamless, and subway tile's uniform shape makes that transition almost invisible. It's a look that works in a modern apartment, a farmhouse bathroom, or a basic rental upgrade.
You don't need a designer to pull this off. A standard 12-by-24-inch niche lined with the same subway tile as the walls is one of the most budget-friendly ways to add both function and polish.
Subway tile niches are popular because they solve two problems at once: storage and style. The tile itself is cheap, widely available, and forgiving to install. The recessed box gives you a dedicated spot for shampoo and soap without adding a bulky shelf.
When the niche uses the same tile as the surrounding wall, the eye reads it as part of the architecture. That's what makes it feel custom even when it's not. You can also run the tile horizontally inside the niche to match the wall, or switch to a vertical stack for a subtle contrast.
The real win is maintenance. Subway tile has fewer grout lines than mosaic or small formats, so there's less to scrub. A quick wipe with a squeegee after most showers keeps it looking new for years.
Why Subway Tile Works So Well
Subway tile is a 3-by-6-inch rectangle with a slight bevel, and that bevel hides minor installation imperfections. It's also one of the least expensive tiles per square foot, which means you can spend more on the niche framing or a quality waterproofing membrane. Because the tile is so common, you'll find matching trim pieces and bullnose edges at any home improvement store.
That makes finishing the inside corners of the niche much easier. No special order, no long wait.
Sizing And Placement Tips
A niche that's 12 inches wide, 24 inches tall, and 4 inches deep fits most standard bottles. If you're tiling a tub surround, center the niche on the long wall or stack two smaller ones for his-and-hers storage. Keep the bottom of the niche at least 12 inches above the shower floor to avoid constant water pooling.
And always slope the bottom shelf slightly toward the shower so water drains out instead of sitting inside.
Making It Feel Custom
Add a marble or quartz threshold at the bottom of the niche for a high-end touch that costs very little. You can also frame the opening with a contrasting trim tile, like a pencil liner, to define the space. Another trick: run the subway tile vertically inside the niche while the walls are horizontal.
It's a small change that makes the niche read as a deliberate design choice rather than an afterthought.
2. Vertical Stacked Niche for Tall Bottles
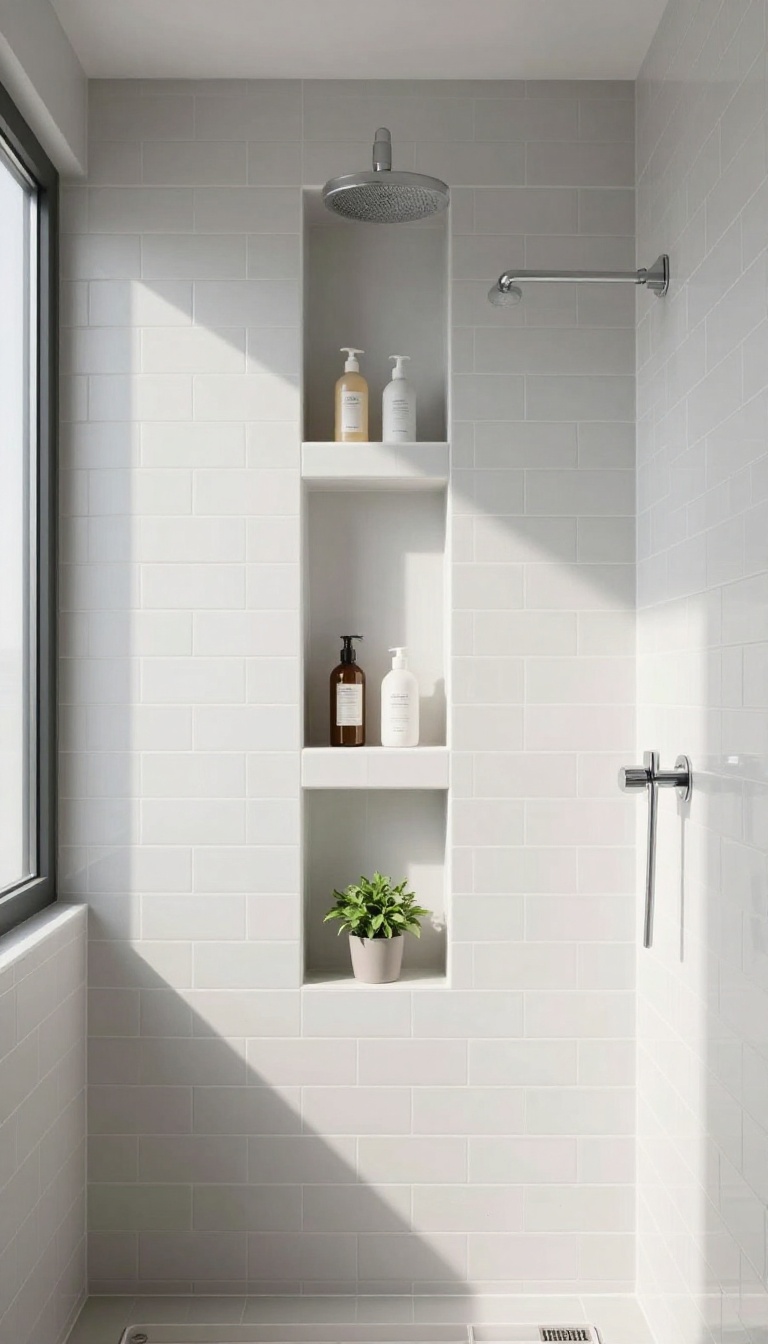
Tall shampoo and conditioner bottles are the bullies of shower storage. They tip over, hog shelf space, and make everything else look cluttered. A vertical stacked niche solves that by giving them their own column in the wall.
Instead of one wide opening, you get two or three slim compartments stacked from about knee height to eye level. Each level holds a bottle upright, so nothing dominoes when you reach for soap. It’s a smart fix for small showers where floor space is already tight.
The stacked niche works because it uses height instead of width. You’re not stealing inches from the shower floor or bumping elbows with a corner shelf. The wall cavity does the work, and the tile layout stays clean.
Most builders frame these niches between 12 and 16 inches wide and 24 to 36 inches tall, then divide that height into two or three sections. A 12-inch-wide column fits standard 16-ounce bottles with room to spare. If you use liter-size bottles, go 14 to 16 inches wide and check the depth—4 inches is the sweet spot for most pump tops.
Placement matters more than size. Put the niche on the wall opposite the showerhead so water doesn’t spray directly into it. Keep the lowest shelf at least 18 inches above the floor to avoid constant splashing.
And line up the niche edges with your tile grout lines—it looks custom instead of cut in.
Sizing For Real Bottles
Measure your tallest bottle before you frame anything. A 32-ounce pump bottle can run 9 to 10 inches tall, so two shelves need at least 22 inches of interior height. Add an inch of wiggle room per shelf so you’re not fighting to pull things out.
Depth is the sneaky part. Three and a half inches holds a bar of soap, but pump dispensers need closer to 4 or 5 inches. If your wall framing allows, go 4 inches deep and keep the back sloped slightly so water drains forward.
Framing And Waterproofing
Stacked niches mean more seams, so waterproofing has to be done right. Use cement backer board or a foam board system, then coat every corner with a liquid waterproofing membrane. Tape and thinset the joints before you tile.
Slope the bottom shelf toward the shower floor—about 1/8 inch per foot is enough. That keeps standing water from pooling behind your bottles. Skipping this step is how niches turn into science experiments.
Tile And Trim Details
You can tile the inside of the niche with the same tile as the wall, or use a contrasting slab for a bolder look. Marble or quartz slabs cut down on grout lines and wipe clean fast. For the edges, bullnose tile or a metal profile strip gives a finished border.
Keep the shelves thin—3/4 inch is plenty—so they don’t eat into your bottle space. A simple pencil tile trim along the front makes the whole stack look deliberate.
3. Double Niche Setup for His and Hers
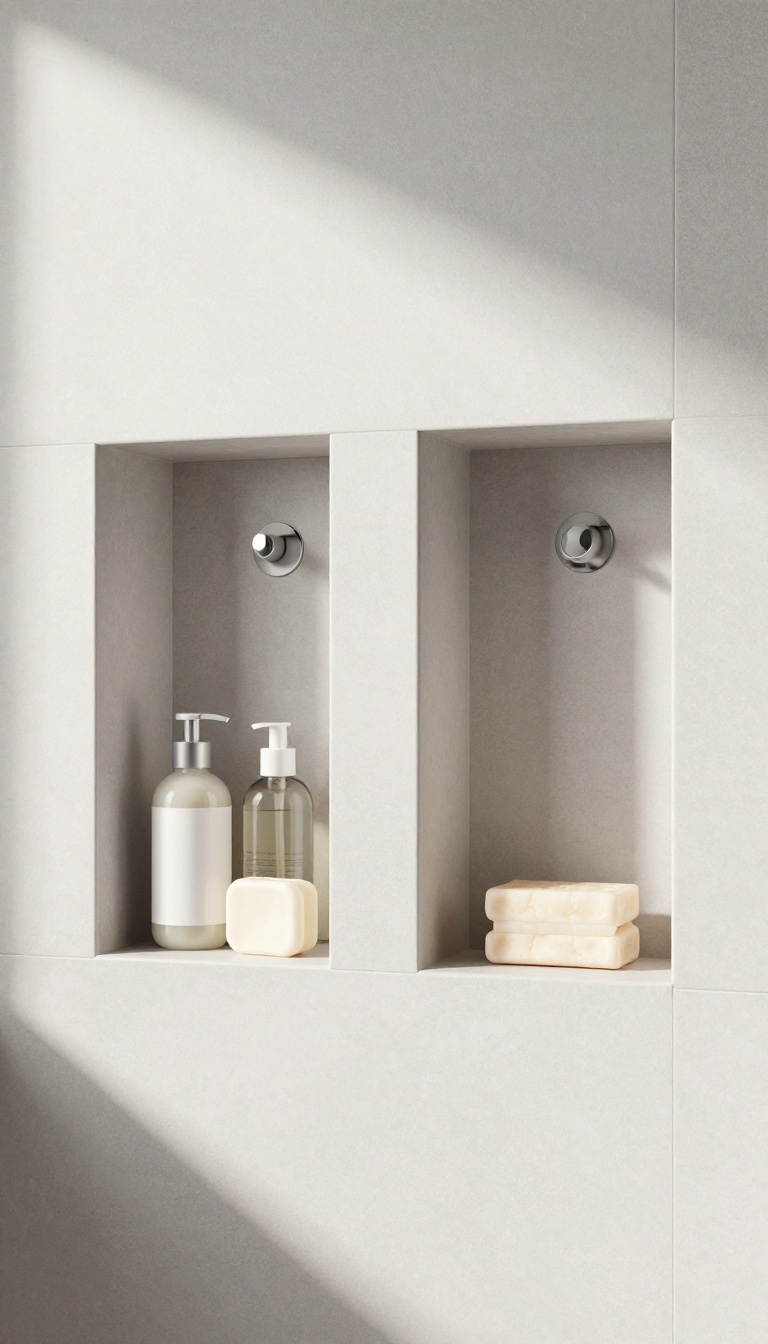
Sharing a shower often means sharing shelf space, and that can get messy fast. A double niche setup gives each person their own spot, so bottles don't pile up or get knocked over. It's a simple change that keeps the shower organized and the peace intact.
Two separate niches also let you customize heights and sizes. One can sit lower for easy reach, while the other goes higher for taller items. This way, both people get storage that works for them.
A double niche setup is exactly what it sounds like: two recessed shelves instead of one. They can sit side by side, stacked, or even on opposite walls. The goal is to give each person a dedicated zone, which cuts down on clutter and the classic 'your shampoo is in my way' problem.
Placement That Works For Two
Think about how you and your partner move in the shower. If you both stand facing the same wall, side-by-side niches make sense. If you face each other, put one niche on each wall.
Heights matter too: a taller person might prefer a higher niche, while someone shorter benefits from a lower one. Measure reach before you commit.
Sizes And Shelves
You don't need identical niches. One could be wider for bulkier items like a large conditioner, while the other stays narrow for a razor and face wash. Adding a shelf inside each niche doubles the usable space without making the recess deeper.
Just keep the depth consistent with your wall framing.
Tile And Trim Details
When you have two niches, the tile layout needs extra thought. You can frame each niche with the same trim for a cohesive look, or use a contrasting tile to define each person's spot. A continuous shelf that spans both niches can tie them together visually.
Keep grout lines aligned for a polished finish.
4. Horizontal Niche with a Built-In Shelf
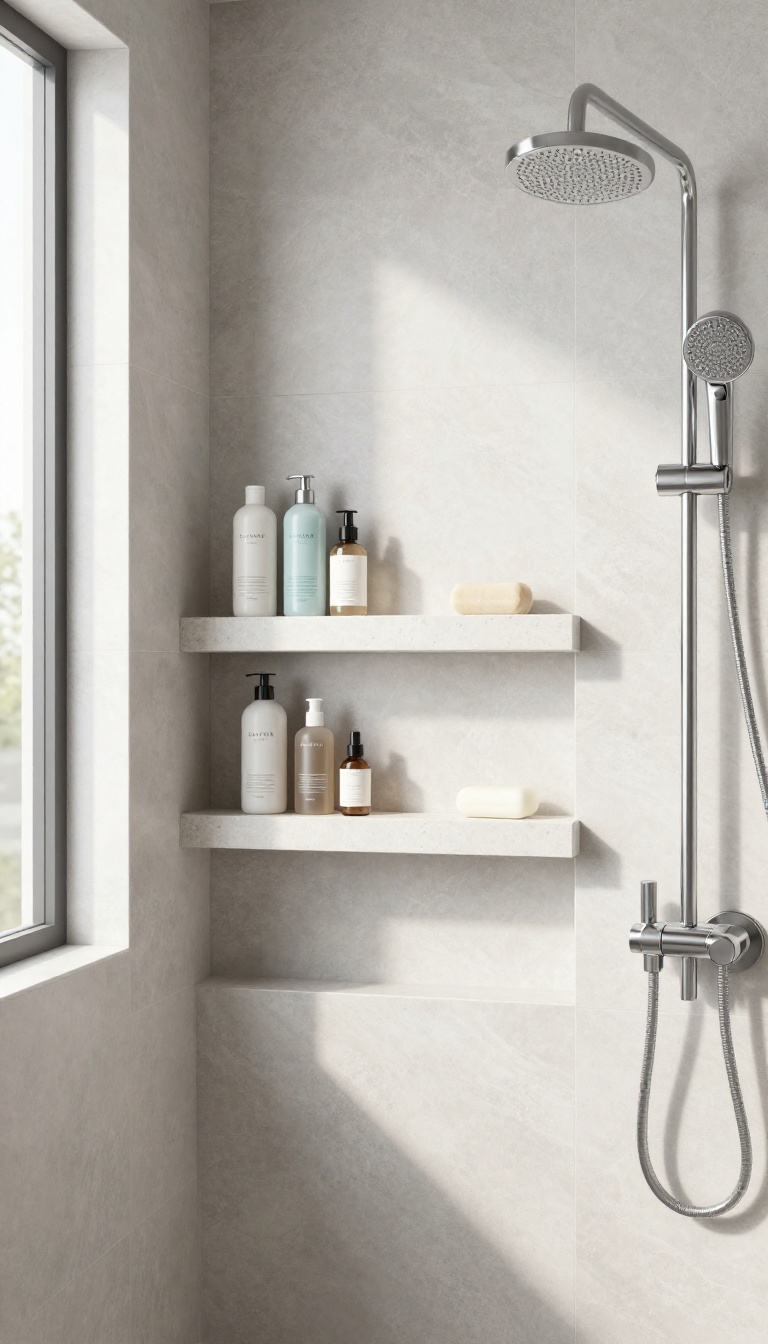
A wide horizontal niche with a middle shelf gives you two levels of storage in one clean recess. It turns a single opening into a stacked setup that handles tall bottles on the bottom and smaller items up top. The shelf also breaks up the tile in a way that reads as deliberate design, not just a hole in the wall.
This layout works best when the niche spans at least 24 to 36 inches across. That width lets you fit family-sized shampoo, conditioner, and body wash side by side without a game of Tetris every morning. The center shelf can be tile, stone, or a slab that matches your countertop, and it sits flush so nothing catches on it.
You get the look of two niches with the framing and waterproofing of one, which often costs less than stacking two separate boxes.
Sizing It Right
Aim for 12 to 16 inches tall on each level if you store big bottles. If your shower wall is framed with 2x4s, the niche depth will land around 3. 5 inches, which fits most products.
Deeper walls give you more room, but don't go so deep that items get lost in the back.
Shelf Materials That Hold Up
Use the same tile as the walls for a seamless look, or switch to a solid stone shelf for contrast. Quartz and granite are low-maintenance and resist water well. Avoid marble in a daily-use shower unless you seal it regularly, since it can etch and stain.
Placement And Framing
Center the niche on the wall you face when you step in, or offset it toward the showerhead for easy reach. Keep it at least 4 inches from the valve trim so you don't crowd the controls. Your tiler will need to frame it before the backer board goes up, so decide on the size early.
5. Niche with Contrasting Tile or Stone
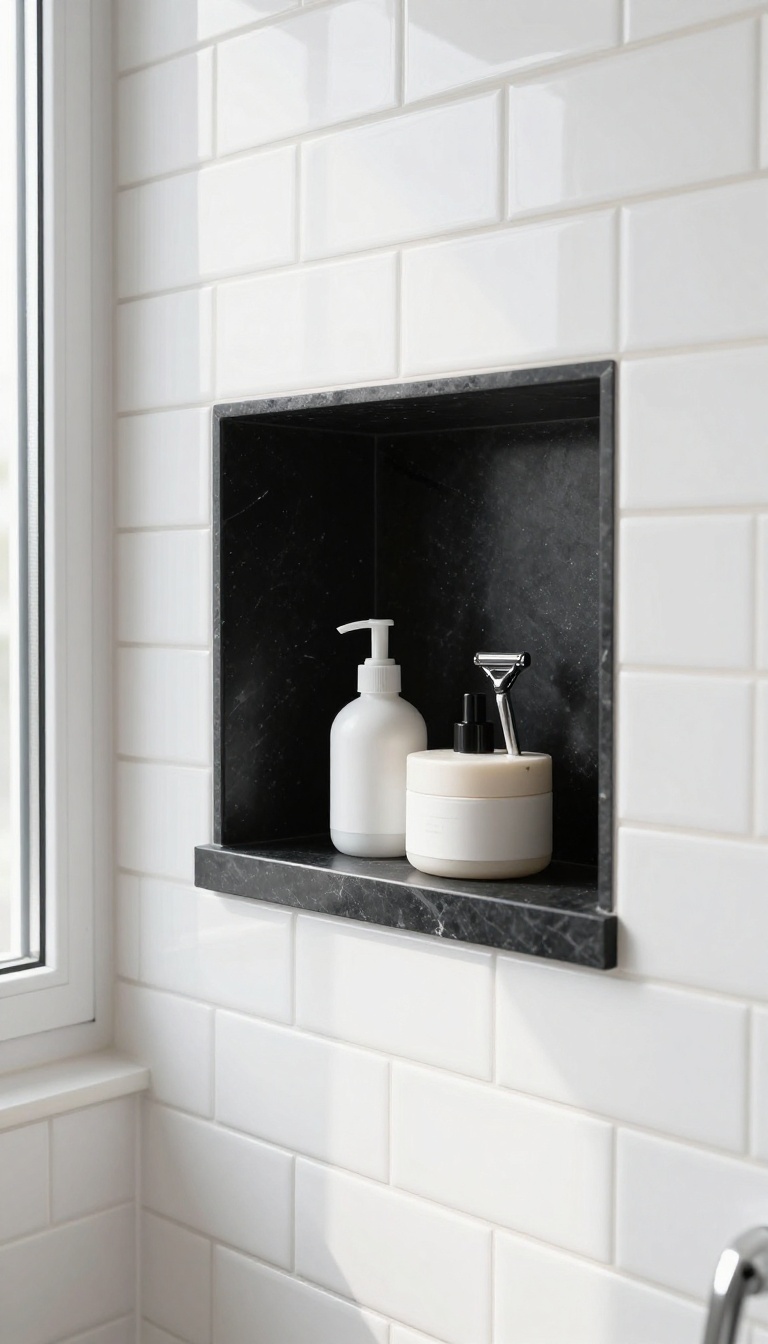
A niche that matches the surrounding tile disappears into the wall, which is fine if you want subtle. But swap in a different material inside the recess and the whole thing flips. The niche becomes the spot your eye lands on first.
Contrast works because it creates depth. A dark interior makes the recess read as a shadowed pocket, while a light stone inside a dark shower glows like a lit shelf. Either way, you get a custom look without rebuilding the whole bathroom.
The trick is picking a contrast that feels deliberate instead of accidental. A few simple rules keep it on the designer side of the line.
Pick A Material That Plays Well With Your Main Tile
Marble, slate, quartz, and even a contrasting porcelain all work as niche liners. The material itself matters less than the relationship it has with the field tile. A glossy white subway wall loves a honed black slate interior.
Matte gray large-format tile pairs beautifully with a warm travertine or marble slab. Busy patterned walls usually want a quiet, solid niche interior so the two don't fight. If you already have a accent tile on the floor or a border, pulling that same material into the niche ties the room together.
Reusing a material you've already paid for also keeps the budget in check.
Decide How Strong The Contrast Should Be
Soft contrast means the niche reads as a quiet variation, like a slightly warmer tone or a subtle texture change. Strong contrast means the niche announces itself, like black stone inside a white shower. Soft contrast is safer for small bathrooms because it doesn't chop up the wall.
Strong contrast works best when the niche is large enough to look intentional, not like a patch. A good middle ground: keep the niche tile the same color family but change the finish. Matte inside a glossy wall, or polished inside a honed wall, gives you depth without a hard visual break.
Get The Details Right So It Looks Built-in
Line up the niche edges with the tile grout lines whenever you can. A niche that ignores the grid looks added-on, no matter how nice the stone is. Use a solid slab or a single large piece for the back when possible.
Fewer seams mean a cleaner look and less grout to scrub. If you're using tile, miter the edges or add a slim trim piece so the cut edges aren't exposed. Seal natural stone before the first shower and reseal it once a year.
Marble and slate are gorgeous but they're porous, and soap scum loves an unsealed surface.
Match The Shelf And Trim To The Niche Material
A stone shelf inside a stone niche looks seamless. A glass shelf inside a stone niche looks like an afterthought. If you're using marble or quartz, ask your fabricator for a matching shelf and side pieces cut from the same slab.
The veining will flow across the niche, which is the detail that makes people ask who did your bathroom. For a budget version, use a contrasting porcelain that mimics stone and pair it with a slim metal trim in a finish that matches your fixtures. It's a small upgrade that reads as custom.
6. Corner Niche for Tight Showers
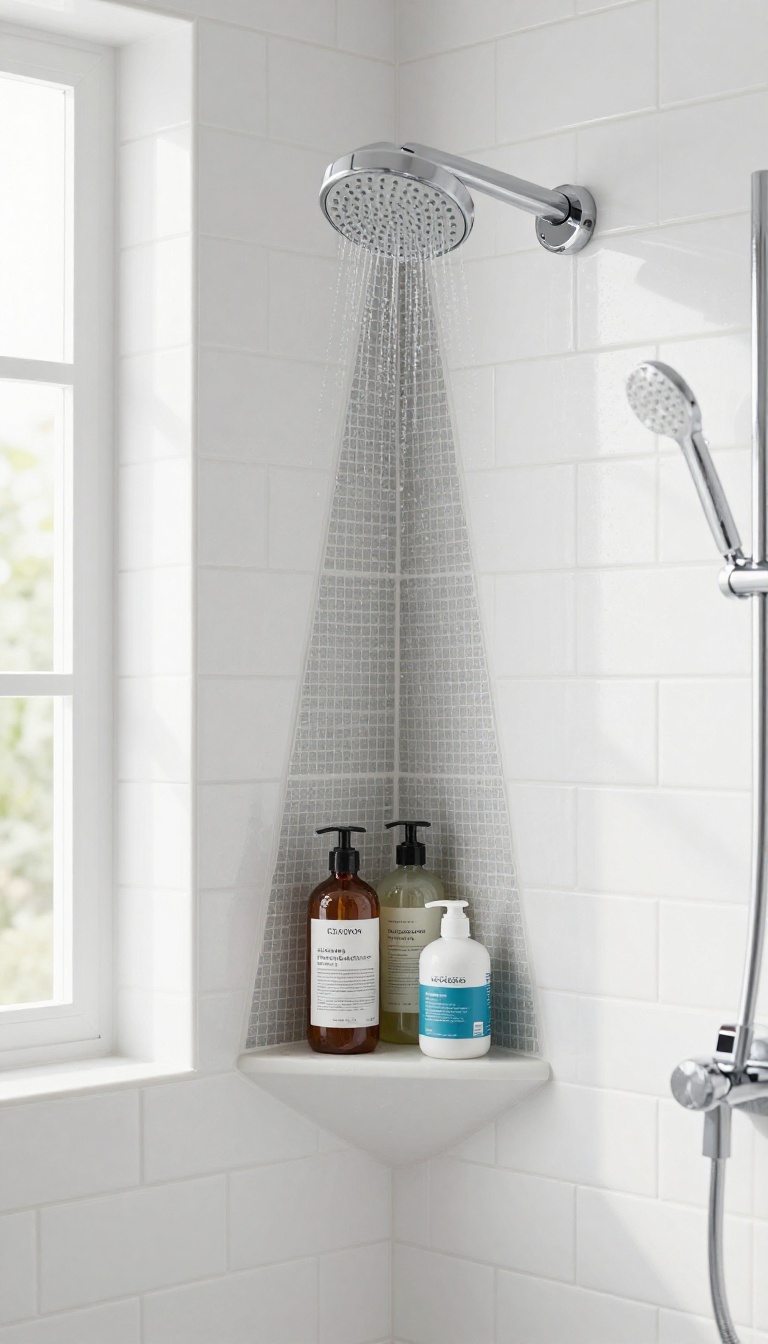
Tight showers leave little room for error. A corner niche tucks into the angle where two walls meet, using space that would otherwise sit empty. It frees up the flat wall for showerheads, controls, and elbow room.
Standard niches need a stretch of flat wall, and small stalls rarely have one to spare. A corner niche solves that by carving storage into the intersection itself. You get a shelf without losing a single inch of usable wall.
Why Corners Work So Well
Corners are dead space in most showers. Nothing hangs there, and water rarely pools. A corner niche turns that dead zone into a dedicated spot for bottles.
It also keeps products out of your way, so you're not bumping into a caddy every time you turn around.
Sizing And Shape Options
Most corner niches are triangular or pie-shaped, but you can also find square models that angle into the corner. A single tall triangle handles shampoo and body wash. If you need more, stack two or three triangles vertically.
Just make sure the niche fits between studs and doesn't interfere with plumbing.
Tile And Waterproofing Details
Corner niches need careful waterproofing because they have more seams than a standard recess. Use a preformed foam niche or build one with cement board and a liquid membrane. Then tile the inside edges first, followed by the face tiles.
A slight slope toward the drain keeps water from sitting inside.
Making It Look Intentional
A corner niche can feel like an afterthought if the tile doesn't line up. Run the same tile into the niche, or use a contrasting mosaic on the back for a focal point. Trim pieces on the edges give it a clean, finished border.
Keep the shelf material simple—stone or porcelain works with almost any shower.
7. Niche with LED Lighting
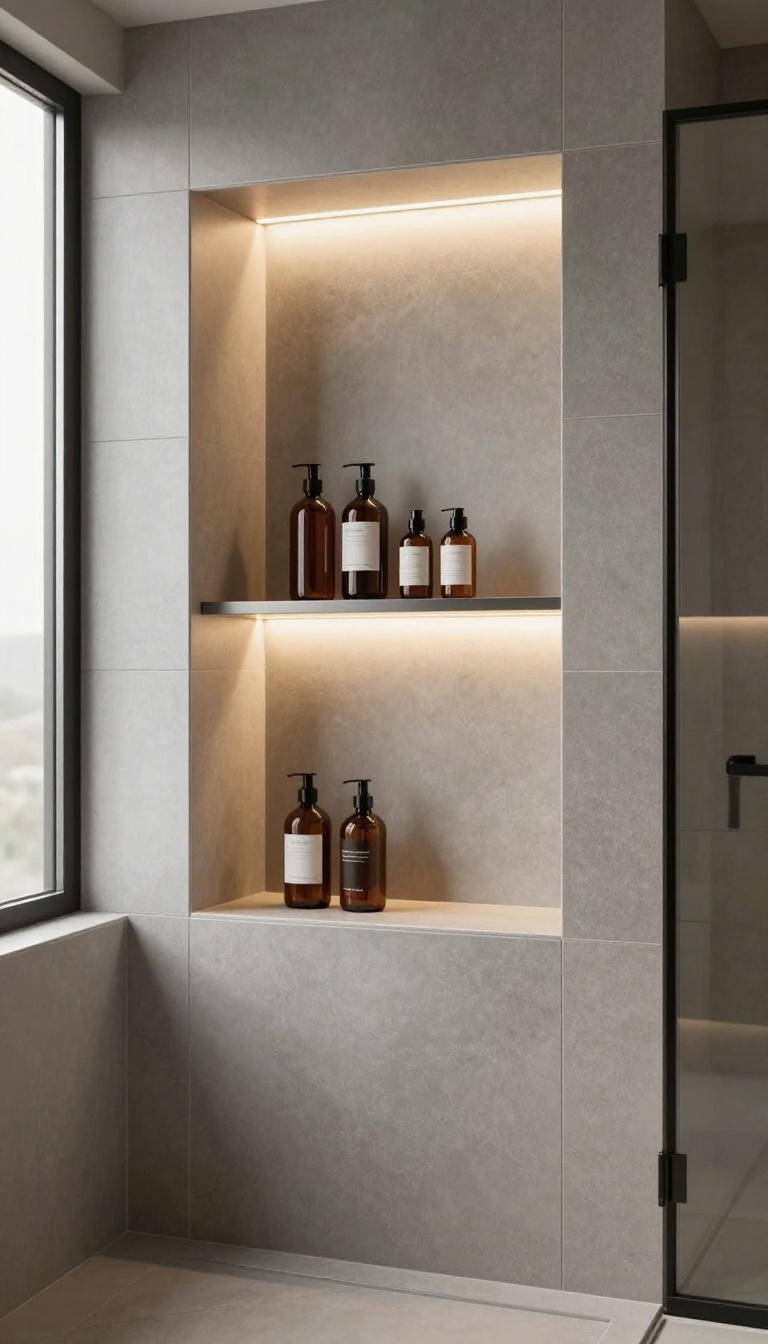
A dark shower niche hides your products in shadow, which defeats the purpose of built-in storage. LED lighting fixes that by putting a soft glow right where you need it. It also turns a basic recess into a modern focal point without changing the tile or layout.
LED strips inside a niche give you two wins at once: you can actually see what you're grabbing, and the shower picks up a spa-like vibe. The light is low and even, so it never feels harsh first thing in the morning. You can run it along the top edge, the back wall, or both, depending on how much glow you want.
Because the niche is already recessed, wiring is easier to hide than you might think. Most setups use a low-voltage strip tucked behind a slim aluminum channel or a tile trim lip. That keeps the LEDs out of direct water spray and makes the whole thing look intentional.
You don't need a huge niche to pull this off. Even a small 12-inch box with a single strip along the top reads as high-end. The trick is picking the right color temperature and protecting the strip from moisture so it lasts.
Pick The Right Color Temperature
Warm white (2700K to 3000K) makes the shower feel cozy and hotel-like. Cool white (4000K) looks crisper and more clinical, which can work in a modern bathroom but may feel stark at night. If you want the glow to flatter skin tones, go warm.
If you want the tile to pop, go neutral.
Where To Run The Strip
The top edge of the niche is the most common spot because it lights the shelf below without shining in your eyes. A strip along the back wall creates a floating effect and makes the niche look deeper. For a bold look, run LEDs on both the top and back, but use a dimmer so you can tone it down.
Keep It Waterproof And Safe
Showers are wet, so use IP65 or higher-rated LED strips and seal the ends with silicone. Hide the driver in an accessible spot outside the shower, like under the vanity or in a nearby closet. A GFCI-protected circuit is a must, and a licensed electrician should handle the wiring.
Make It Easy To Control
A simple wall dimmer lets you switch from bright task light to soft ambient glow. If you want more flexibility, a smart controller lets you change colors or set a schedule. Just keep the controls outside the shower so you're not reaching into the spray with wet hands.
8. Niche with a Decorative Back Panel
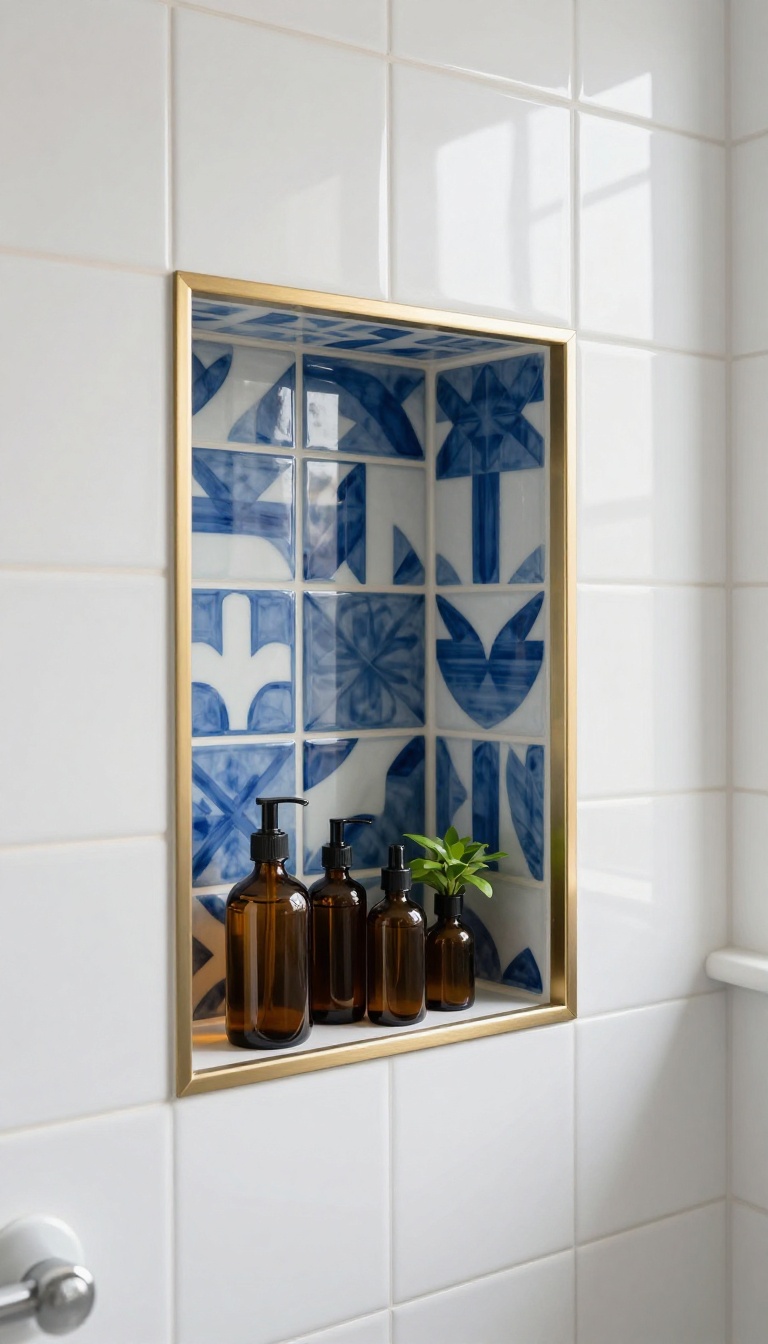
The back wall of your niche is prime real estate for a little personality. A patterned tile or glass panel turns that recessed box into a focal point without touching the rest of the shower. It’s a low-commitment way to try a bold color or texture you might not want on every wall.
You get the storage you need, plus a custom look that feels intentional. And because the panel is tucked inside the niche, it stays protected from direct spray and heavy wear. That means you can go with materials that might not hold up on a full wall.
Pick A Material That Pops
Glass is the easiest win. A frosted or tinted piece adds depth and reflects light, making the niche feel bigger. Patterned ceramic or porcelain tile works too, especially if you choose a motif that contrasts with the main tile.
For a natural vibe, a slab of marble or travertine brings subtle movement. Just seal stone properly so it handles moisture.
Keep The Layout Balanced
The back panel should feel like an accent, not a patchwork. If your shower tile is busy, go with a solid color or simple texture on the back. If the walls are plain, a bold pattern can shine.
Match the panel’s edges to the niche trim for a clean transition. And don’t forget to center the pattern if it has a repeat.
Install It Without The Headache
Measure the niche opening precisely before you order any material. For glass, you’ll need a custom cut, so factor in lead time. Tile panels go in just like regular tile, but use a waterproof adhesive and grout made for wet areas.
If you’re DIYing, practice on a scrap piece first. A pro can handle it quickly if you’re short on time.
9. Niche with a Marble or Quartz Shelf
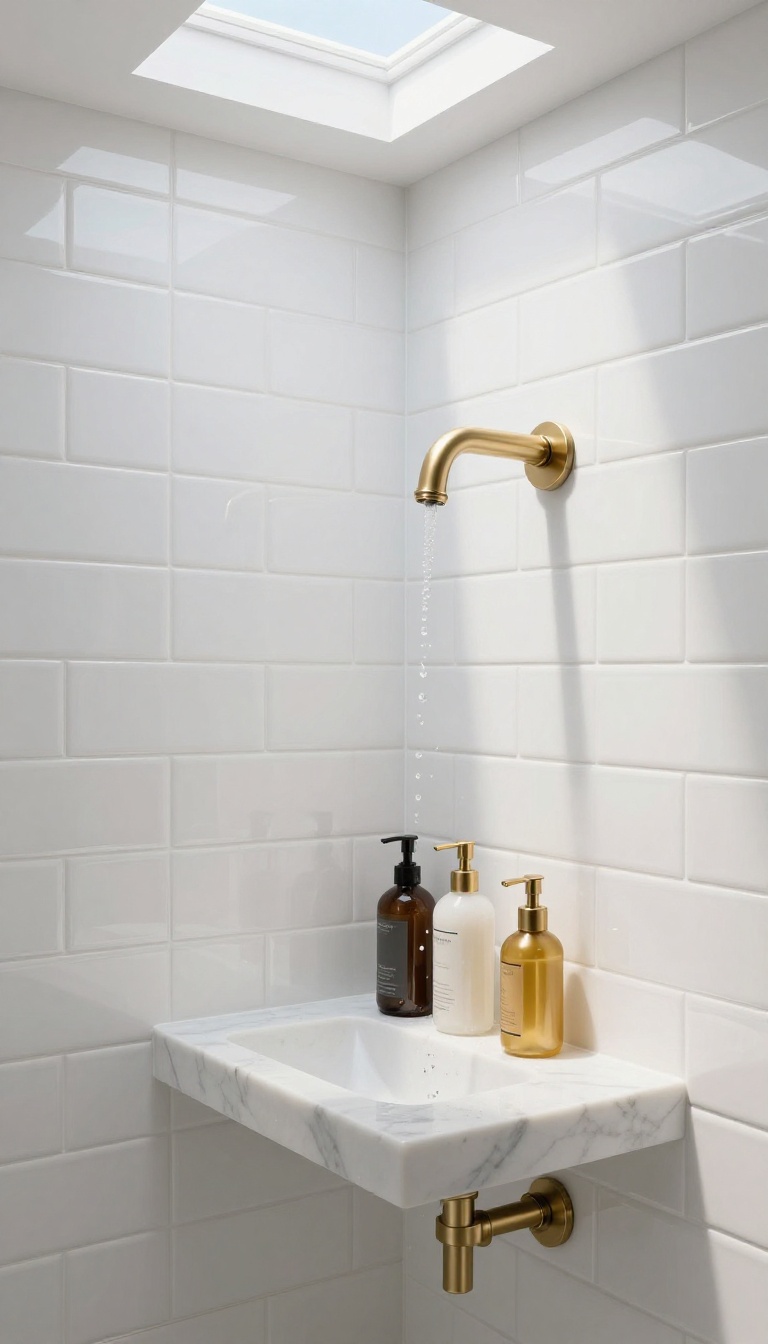
A solid stone shelf inside your shower niche instantly upgrades the look and stands up to daily water exposure. Marble and quartz both resist moisture, so they won't warp, swell, or peel like some wood or MDF options. It's a small detail that makes the whole niche feel custom and high-end.
Stone shelves bring a sense of permanence to a space that sees a lot of steam and splashing. They don't just look good—they hold up. You get a surface that stays smooth and clean with minimal effort, and it won't stain or etch as easily as some other materials.
Whether you choose marble for its classic veining or quartz for its consistent color, you're adding a durable, polished element that ties the niche into the rest of the bathroom.
Why Stone Works In A Wet Zone
Marble and quartz are non-porous when sealed properly, so water beads up instead of soaking in. That means no swelling, cracking, or mold growth in the shelf itself. Quartz is especially low-maintenance because it's engineered to resist stains and doesn't need regular sealing.
Marble requires a bit more care, but its natural beauty is hard to beat. Both materials handle the heat and humidity of a shower without breaking a sweat.
Choosing Between Marble And Quartz
Marble offers unique veining and a timeless look, but it can etch from acidic cleaners, so you'll need to use gentle products. Quartz comes in a wide range of colors and patterns, including marble-look options, and it's more forgiving. If you want zero fuss, go quartz.
If you love the real-stone vibe and don't mind a little upkeep, marble is a stunning choice. Either way, pick a slab that complements your tile without competing with it.
Installation Tips For A Clean Look
Have your fabricator cut the shelf to fit the niche exactly, with a slight slope toward the drain so water runs off. A 1/8-inch overhang on the front edge gives it a finished, furniture-like detail. Use a color-matched silicone caulk at the seams instead of grout—it flexes with temperature changes and won't crack.
If you're adding a shelf mid-niche, make sure the framing supports the weight before tiling.
10. Niche with a Frameless Glass Front
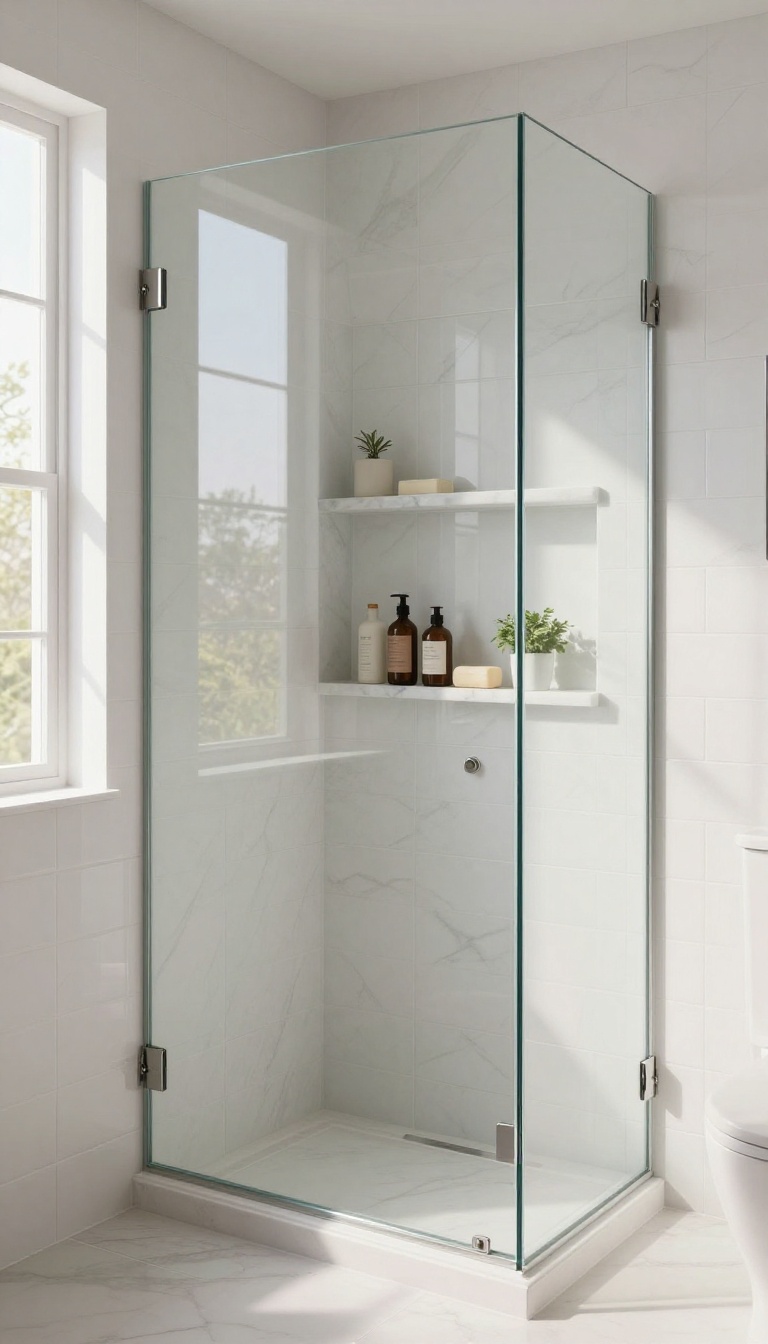
A glass front on a shower niche might sound like extra work, but it solves a real problem: keeping your stuff dry and contained while still showing off the tile behind it. The frameless version looks almost invisible, so the niche reads as a clean, built-in display rather than a shelf with a door. It's a smart pick if you want a contemporary look without hiding the tile work you paid for.
And because there's no frame to catch soap scum, wiping it down takes seconds.
A frameless glass front turns your niche into a little display case. You get the storage benefits of a recessed box, but your products stay put and the tile inside stays visible. It's a clean, modern solution that works in almost any shower style.
Unlike a framed glass door, a frameless panel has no metal edges to trap grime. That means fewer crevices to scrub and a sleeker look overall. The glass itself is usually tempered and about 3/8 inch thick, so it's sturdy enough for daily use.
You can hinge it, slide it, or even make it removable. The choice depends on how often you need to reach in and how much you want to spend. Either way, the goal is the same: keep the niche looking tidy without sacrificing easy access.
Why Go Frameless?
Frameless glass gives you an uninterrupted view of the tile inside. There's no bulky frame to distract from your design, and no tracks for water to pool in. It's the closest thing to having an open niche while still keeping everything contained.
Plus, the smooth surface is a breeze to clean. A quick squeeze of glass cleaner and a wipe, and you're done. No scrubbing around corners or digging out gunk from hinges.
Installation Basics
You'll need to plan for the glass before the tile goes up. The niche opening has to be perfectly square and level, or the glass won't sit right. Most glass suppliers will template the opening after tiling, so measure twice and cut once.
Hardware matters too. Choose hinges or clips that match your other fixtures, and make sure they're rated for wet areas. A professional installer can handle the heavy lifting, but DIY kits are available if you're handy.
Keeping It Clean
The beauty of frameless glass is how little maintenance it needs. A daily squeegee after your shower prevents water spots, and a weekly wipe with a mild cleaner keeps it crystal clear. Avoid abrasive pads or harsh chemicals that can scratch the glass.
If you have hard water, a vinegar-and-water solution works wonders. Just don't let soap scum build up—it's much harder to remove once it sets.
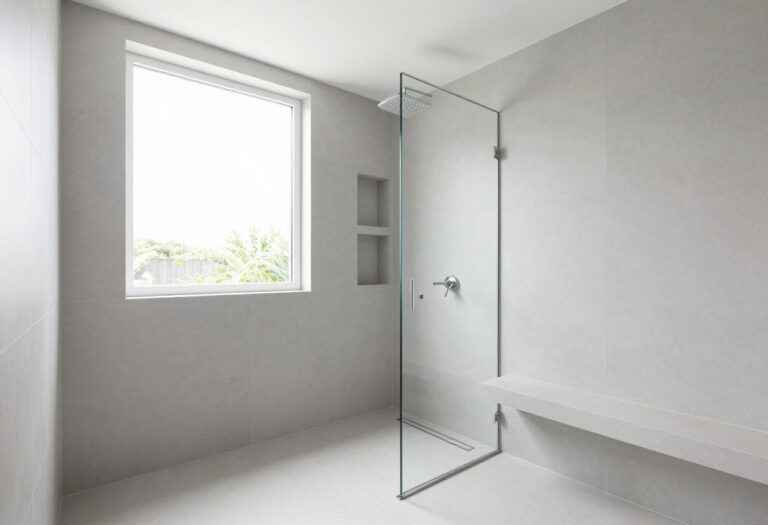
11. Niche with a Built-In Bench or Seat
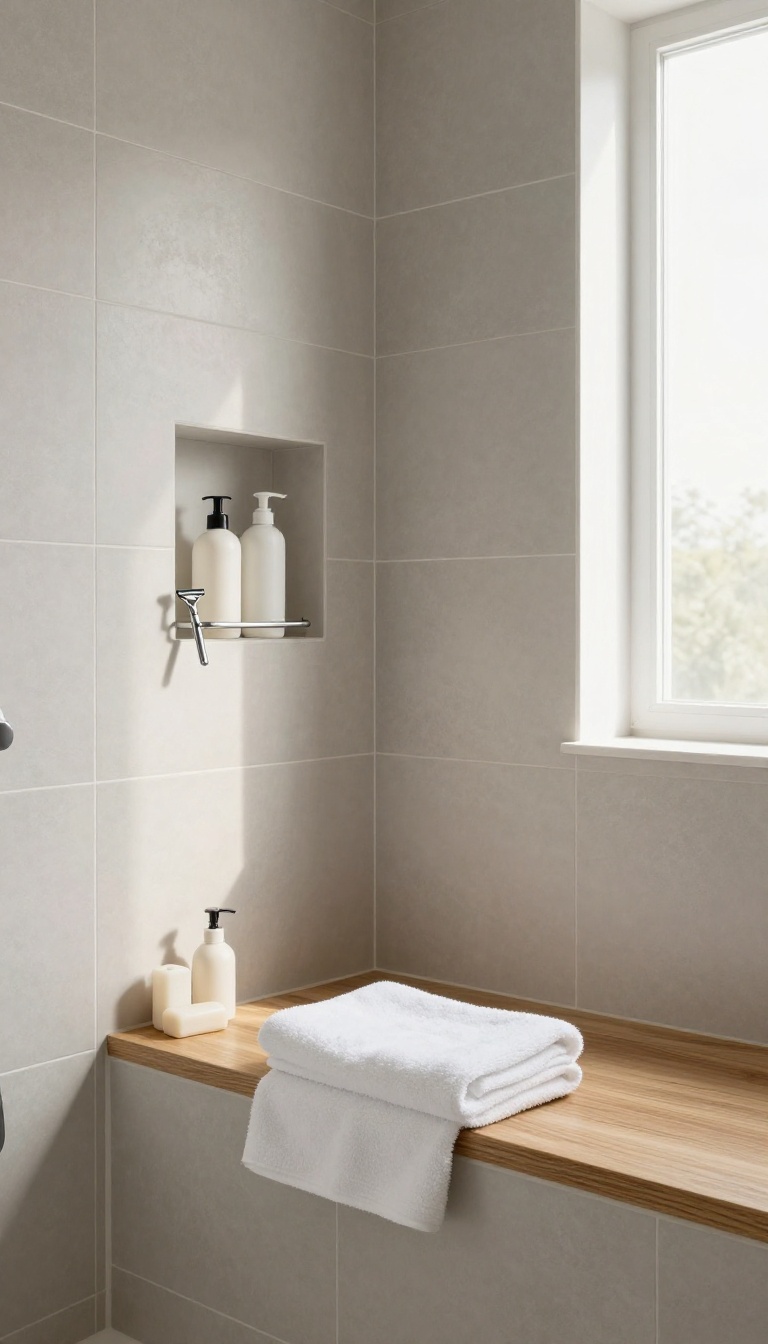
A bench in the shower changes how you use the space. It gives you a spot to sit while shaving, to rest a foot while scrubbing, or to just pause under the water. When you pair that bench with a niche, everything you need is within arm's reach.
The niche can sit right above the seat, so your razor, soap, and shampoo stay close without cluttering the bench itself. It's a smart combo for anyone who wants a shower that works harder without looking busy.
The bench doesn't have to be huge. Even a narrow ledge that's 12 to 16 inches deep gives you enough room to sit or prop a foot. The niche above it should match the bench width or be slightly narrower so the proportions feel balanced.
Keep the niche bottom at least 12 inches above the bench top so you have clearance for your knees and elbows. If you're tiling the bench, use the same tile as the walls for a seamless look, or choose a contrasting slab for a furniture-like feel. A floating bench made of teak or a stone slab can look lighter and more modern than a built-in masonry seat, but it needs solid blocking behind the tile.
For a built-in bench, frame it with pressure-treated lumber and cover it with cement board before waterproofing. Slope the bench top slightly toward the drain so water doesn't pool. The niche can be recessed between the studs above the bench, but check for plumbing lines first.
If you can't recess it, a surface-mounted niche box works too, though it won't look as clean. Lighting inside the niche makes it easier to see what you're grabbing, especially in a dim corner. A small LED strip under the niche lip adds a soft glow and doubles as a nightlight.
Keep the bench simple: one or two shelves in the niche are plenty. Too many shelves and the niche starts to look cluttered. If you have a handheld shower on a slide bar, mount it near the bench so you can sit and rinse without twisting.
A grab bar on the wall opposite the bench is a good safety add, even if you don't need it yet. The bench also gives you a place to set a towel or a bath mat while you're drying off, though you'll want to keep a hook nearby for that. For small showers, a corner bench with a corner niche saves space and looks intentional.
Just make sure the bench doesn't block the shower door swing or your standing room. In a curbless shower, a bench can double as a step for kids or pets. The niche above it should be easy to reach from a seated position.
Test the height by sitting on a stool in your current shower and reaching for where the niche would be. You want your hand to land naturally, not stretch. A bench with a niche is one of those upgrades that feels like a luxury but is really just good planning.
Getting The Height And Depth Right
The bench top usually sits 17 to 19 inches from the shower floor, which is standard chair height. The niche bottom should be about 12 to 18 inches above that. If you're tall, go higher; if you're shorter, go lower.
Depth matters too: a bench that's 15 inches deep gives you room to sit, while a 12-inch bench is more of a footrest. The niche depth should be at least 4 inches so bottles don't stick out. Measure twice before you frame, because moving a bench later means tearing out tile.
Materials That Handle Water
Teak and ipe are great for floating benches because they resist rot, but they need to be sealed regularly. Stone slabs like quartz or granite are heavy but low-maintenance. For a built-in bench, cover the framing with cement board and waterproof it with a liquid membrane or a sheet membrane.
Tile the bench with the same thinset and grout you use on the walls. Avoid marble on the bench if you use harsh cleaners, since it can etch. A solid surface like Corian is another option that's easy to clean and warm to the touch.
Lighting And Accessibility
A light inside the niche helps you see products, especially if the bench is in a shadowed corner. LED strips are cheap to run and don't need much space. Put the switch on a GFCI circuit and keep the transformer away from direct water.
If you plan to age in place, add blocking for a grab bar near the bench. A handheld shower on a slide bar lets you sit and rinse without standing. Make sure the bench doesn't interfere with the shower valve or trim.
And leave enough room between the bench and the opposite wall so you can still turn around comfortably.
12. Niche with a Niche Within a Niche
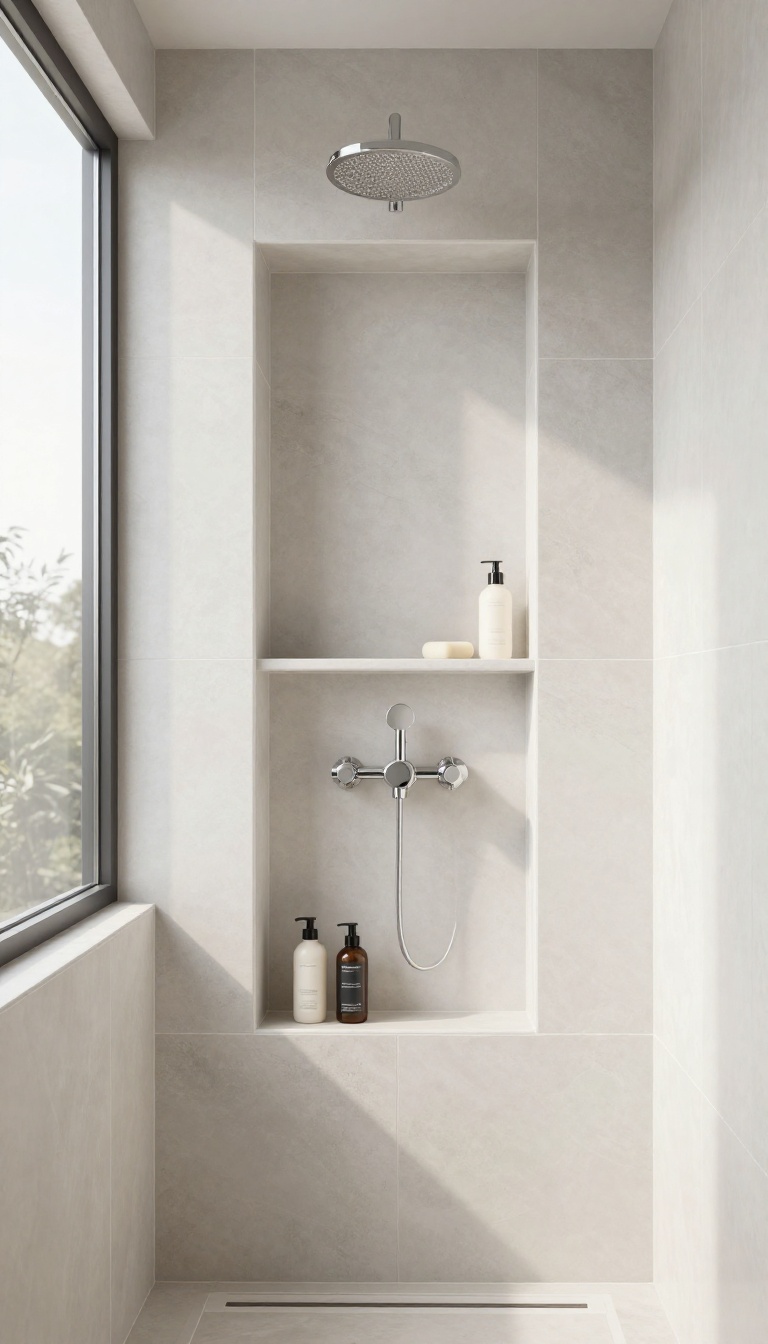
Picture a normal shower niche, then imagine a smaller recess carved into its back wall or one of its sides. That little pocket becomes its own zone, so bar soap, a razor, or a face wash stops mingling with the big shampoo bottles. You get the organization of two separate storage areas without cutting a second hole in the wall.
The trick works because your shower stuff naturally falls into two groups: tall, heavy bottles that live on the main floor, and small items that get lost or knocked over when everything shares one surface. A nested niche gives those small things a defined home. It also adds a bit of architectural interest, since the stepped depth catches light and shadow in a way a flat recess never does.
You are not limited to one inner pocket, either. Some layouts stack two small niches inside a tall outer box, which reads almost like built-in shelving. The key is keeping the proportions balanced so the outer niche still feels generous and the inner one feels deliberate, not like an afterthought.
Done well, this layout looks custom and costs very little extra. You are paying for a bit more framing and tile work, not a whole new wall opening.
Where The Inner Niche Works Best
The back wall is the easiest spot because it keeps the small pocket at eye level and out of the direct spray. A side-wall version works too, especially in a narrow shower where you want the soap within easy reach but not underfoot. Just avoid tucking it into a corner where your elbow will hit it every time you turn around.
Sizing The Two Openings
Keep the outer niche at least 12 inches wide and 20 inches tall so full-size bottles still fit upright. The inner pocket can be as small as 4 by 6 inches and still hold a bar of soap, a razor, or a couple of travel tubes. If you want it to hold a washcloth or a small bottle, go closer to 6 by 8 inches.
Framing And Waterproofing Details
Your tile setter needs to build a small framed box inside the larger recess before waterproofing goes on. That means extra backer board, a sealed seam, and a slope on the inner shelf so water runs out instead of pooling. Skipping the slope is the one mistake that turns a clever detail into a mildew trap.
Tile And Trim Choices
Using the same tile on both niches keeps the look calm and seamless. If you want the inner pocket to stand out, line it with a contrasting mosaic or a slab of stone, then trim the edges so the transition looks intentional. A thin metal or stone edge also protects the tile corners from chips.
13. Niche with a Tile-In Frame or Border
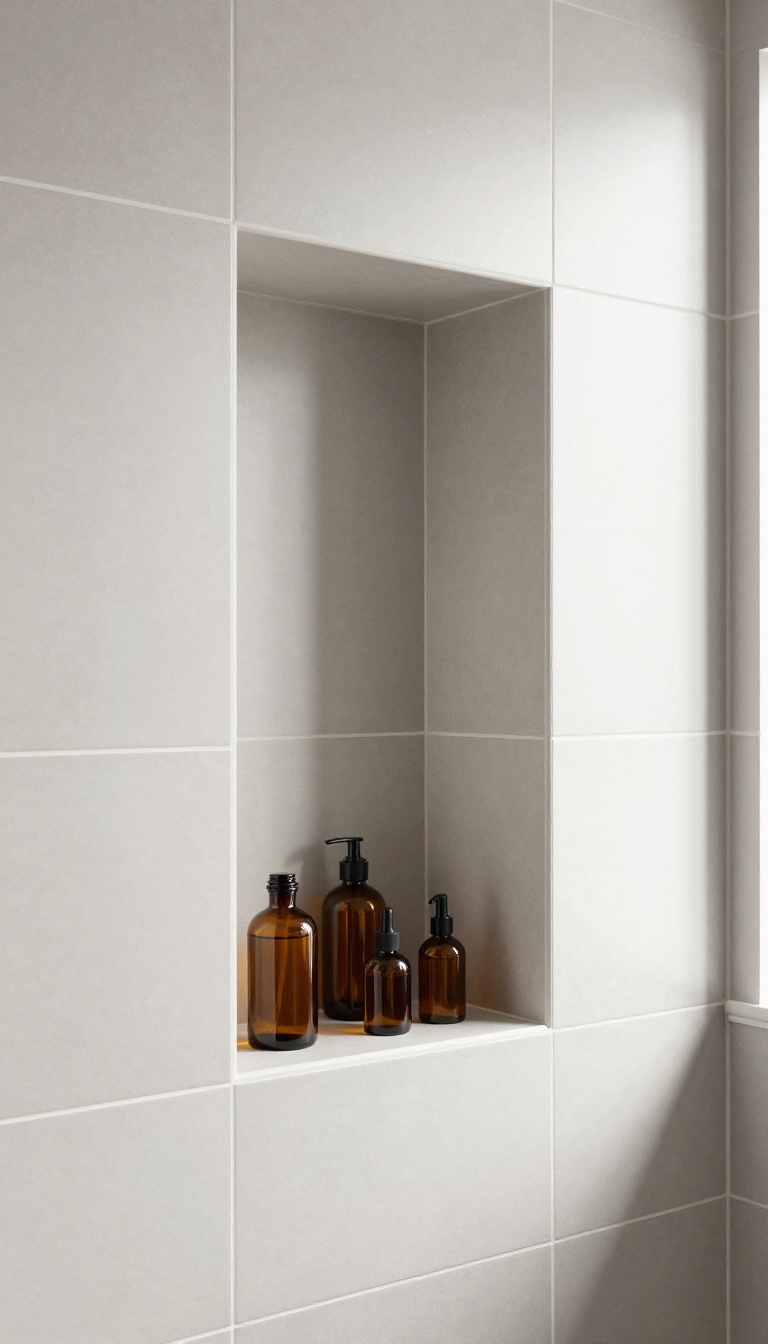
A tile border around the niche does the same thing a mat does for a framed print. It creates a clean edge, separates the recess from the field tile, and tells your eye where to land. The trick is contrast, not clutter.
A slim band of a different color, finish, or shape gives the niche definition without turning it into a busy focal point. Done well, it looks like the builder planned it from day one.
Most niches get tiled inside and out with the same material, which is fine but flat. Adding a frame turns the recess into a deliberate feature. You keep the same waterproofing and layout, you just change what goes on the edges.
You can frame the opening, the back wall, or both. Each one reads differently in the finished shower, so it helps to know what you actually want before the tile setter starts cutting.
Frame The Opening, Not The Whole Box
The simplest version is a border that runs around the face of the niche, like a picture frame sitting flush with the wall. Use pencil tile, a slim mosaic strip, or a contrasting rectangular tile cut to width. This approach works in almost any shower because it does not change the interior depth.
The frame sits on the surface, so your shelves and storage still fit the way you planned. It also hides slightly imperfect cut edges around the opening, which is a quiet bonus.
Line The Back Wall For A Backdrop Effect
If you want the niche to feel deeper, tile the back wall in a different material and leave the sides alone. A dark slate back behind light field tile makes the recess read like a shadow box. Keep the border thin so it does not eat into usable shelf space.
A two- or three-inch band along the top and bottom of the back wall is usually enough to frame the contents without crowding them.
Match The Shower Floor Or Accent Band
A border looks most intentional when it echoes something else in the room. Pull the same tile you used on the shower floor, the accent strip, or the vanity backsplash. That repetition ties the niche into the overall design instead of making it look like an afterthought.
It also solves the problem of picking a random contrast color that clashes with everything else.
Keep The Grout Lines Working With You
A frame only looks crisp if the grout lines line up. Ask your installer to center the border on the niche and keep the joints symmetrical on both sides. If the border tile is a different size than the field tile, do not force the grout to match up everywhere.
Let the frame be its own clean rectangle and keep the surrounding field tile consistent. That small decision keeps the detail from looking sloppy.
FAQ
What is the best size for a shower niche?
A common size is 12 inches wide by 24 inches tall, but it depends on your bottles and wall space. Measure your tallest products and add a few inches for breathing room.
Where should I place a shower niche?
Place it at a comfortable height, usually between 48 and 60 inches from the floor. Avoid placing it directly in the shower spray to keep products dry.
Can I install a shower niche in an existing shower?
Yes, but it requires removing tile and cutting into the wall. It's best done during a remodel to avoid damaging waterproofing.
What materials are best for a shower niche?
Porcelain tile, natural stone, and quartz are all good choices. They're waterproof, durable, and easy to clean.
How do I keep my shower niche from looking cluttered?
Use a niche with a shelf or two, and only keep daily essentials inside. Store extras elsewhere and wipe the niche weekly to prevent buildup.
Conclusion
A good niche should feel like it was always part of the wall, not something bolted on at the end. Pick a size that fits your tile grid, line up the edges, and let one material do the talking. Get that right and the shower reads clean from every angle.
Start with the idea that matches your layout and budget, then stop before the wall gets crowded. You can always add a shelf, swap the trim, or change the grout later. Build it once, build it simple, and enjoy the finished look.