13 Beautiful Shower Floor Ideas with Smart, Practical Appeal
Your shower floor sets the tone for the entire bathroom, and it's also the surface that takes the most daily wear and tear. The right choice balances slip resistance, drainage, and easy cleaning with a look that feels intentional and inviting.
From classic patterns reimagined to natural textures that bring the spa home, these 13 ideas prove that style and practicality can go hand in hand.
Each option tackles a specific need—whether it's grip underfoot, durability, or a visual statement—so you can upgrade with confidence.
1. Classic Subway Tile with a Twist
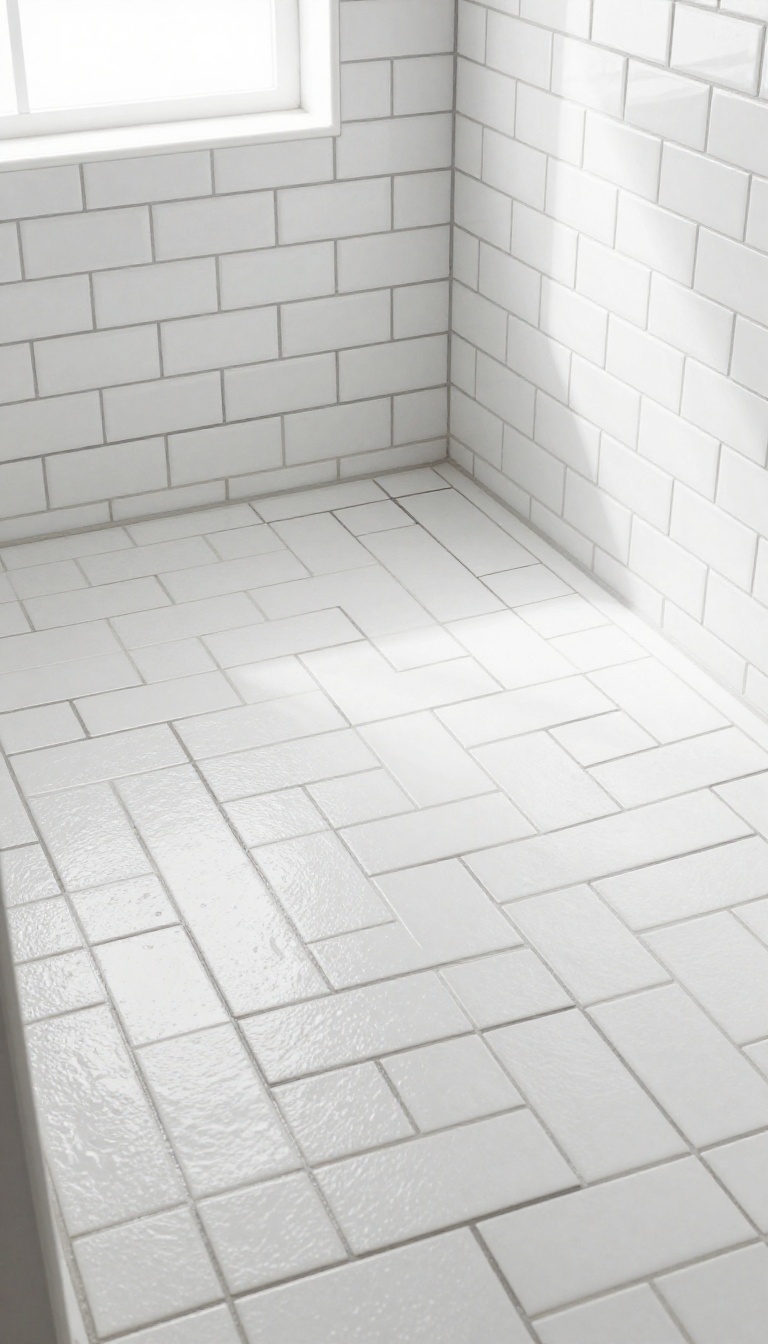
Subway tile has been a bathroom staple for over a century, and for good reason. It’s clean, bright, and easy to wipe down. But a straight stack or running bond can feel a bit predictable, especially if you’re aiming for a more distinctive look.
The fix is simple: change the layout. Laying the same rectangular tiles in a herringbone or vertical pattern instantly adds movement and depth without sacrificing the timeless appeal. Plus, with a slip-resistant grout and the right tile size, you get a floor that’s both safe and stylish.
Subway tile is a classic choice for shower floors because it’s versatile, affordable, and available in a range of finishes. The twist comes from the installation pattern. Instead of the usual horizontal offset, try a herringbone layout that creates a dynamic zigzag, or go vertical to make the shower feel taller and more spacious.
These patterns draw the eye and add texture, making the floor a focal point rather than an afterthought. When choosing subway tile for a floor, opt for smaller tiles (like 3×6 inches) and a matte or textured finish to improve grip. Pair them with a contrasting grout—darker grout hides dirt and adds definition, while lighter grout keeps things airy.
For safety, use a grout that meets slip-resistance standards, and consider adding a non-slip additive to the grout mix for extra peace of mind.
Why Pattern Matters
A herringbone or vertical layout isn’t just about looks—it also affects how water flows and how the floor feels underfoot. The angled lines of herringbone break up the surface, reducing the chance of slipping because your foot naturally catches on the ridges. Vertical patterns elongate the shower, making it feel more open and luxurious.
Both patterns add visual interest without overwhelming the space, so you can keep the rest of the bathroom simple.
Choosing The Right Tile And Grout
Not all subway tile is created equal for floors. Look for porcelain or ceramic tiles with a PEI rating of 3 or higher, which indicates good durability for foot traffic. A matte finish is safer than glossy, as it provides more friction.
For grout, use a sanded or epoxy-based product that’s designed for wet areas and has a higher coefficient of friction. You can also ask your installer about adding a non-slip additive to the grout mix—it’s a small step that makes a big difference.
Installation Tips For A Safe, Long-lasting Floor
Proper installation is key to both safety and longevity. Ensure the substrate is level and waterproofed before tiling. Use a trowel size that gives good coverage, and back-butter each tile to avoid hollow spots.
After installation, seal the grout to prevent staining and moisture absorption. And don’t forget to maintain a slight slope toward the drain—your shower floor should always shed water efficiently, which also helps prevent slippery standing water.
2. Pebble Mosaic for a Spa-Like Feel
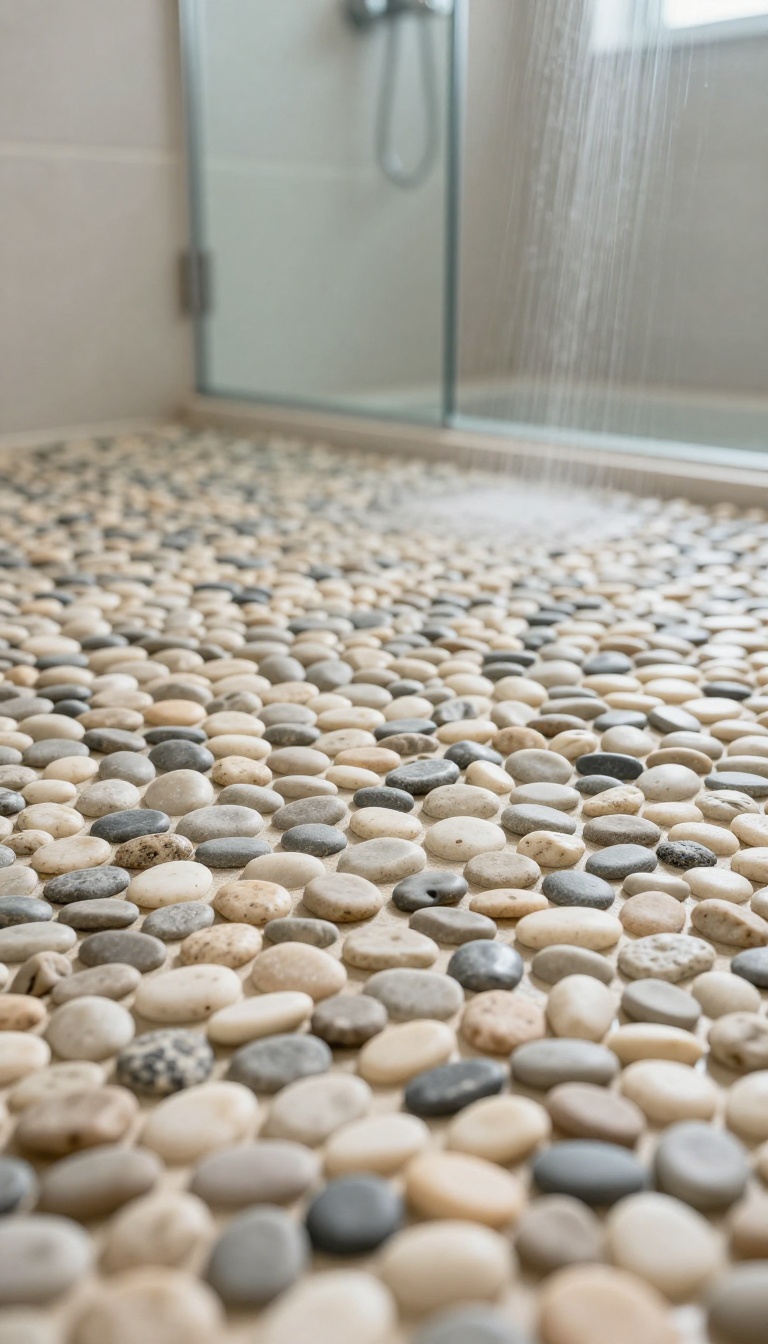
Smooth river stones arranged in a mosaic bring an organic, calming texture to your shower floor. The rounded pebbles feel gentle underfoot, almost like a natural foot massage, while their irregular surface provides excellent grip even when wet. This is a look that instantly makes a bathroom feel more like a retreat.
Pebble mosaics come pre-mounted on mesh sheets, which makes installation far easier than placing each stone by hand. The sheets can be trimmed to fit your shower pan, and the mesh backing allows for proper drainage while keeping the stones securely in place. You can choose from a range of natural hues—from soft beige to deep charcoal—to match your bathroom's palette.
Why It Works Underfoot
The uneven surface of pebbles creates natural traction, reducing the risk of slips. Plus, the smooth texture feels pleasant on bare feet, turning every shower into a mini spa session. The gaps between stones also allow water to flow through quickly, so you won't be standing in a puddle.
Installation And Grout Tips
Use a flexible, epoxy-based grout to keep the mosaic durable and water-resistant. Apply the grout carefully, filling the spaces between pebbles without covering their tops. After installation, seal the surface to protect against stains and moisture.
It's a job you can DIY, but hiring a pro ensures a flawless finish.
Cleaning And Maintenance
Pebble floors are surprisingly easy to clean—just sweep or vacuum to remove debris, then mop with a mild cleaner. The grout lines may require occasional scrubbing, but a soft brush and a bit of baking soda can handle that. Avoid harsh chemicals that can damage the sealer.
3. Large-Format Porcelain Slabs
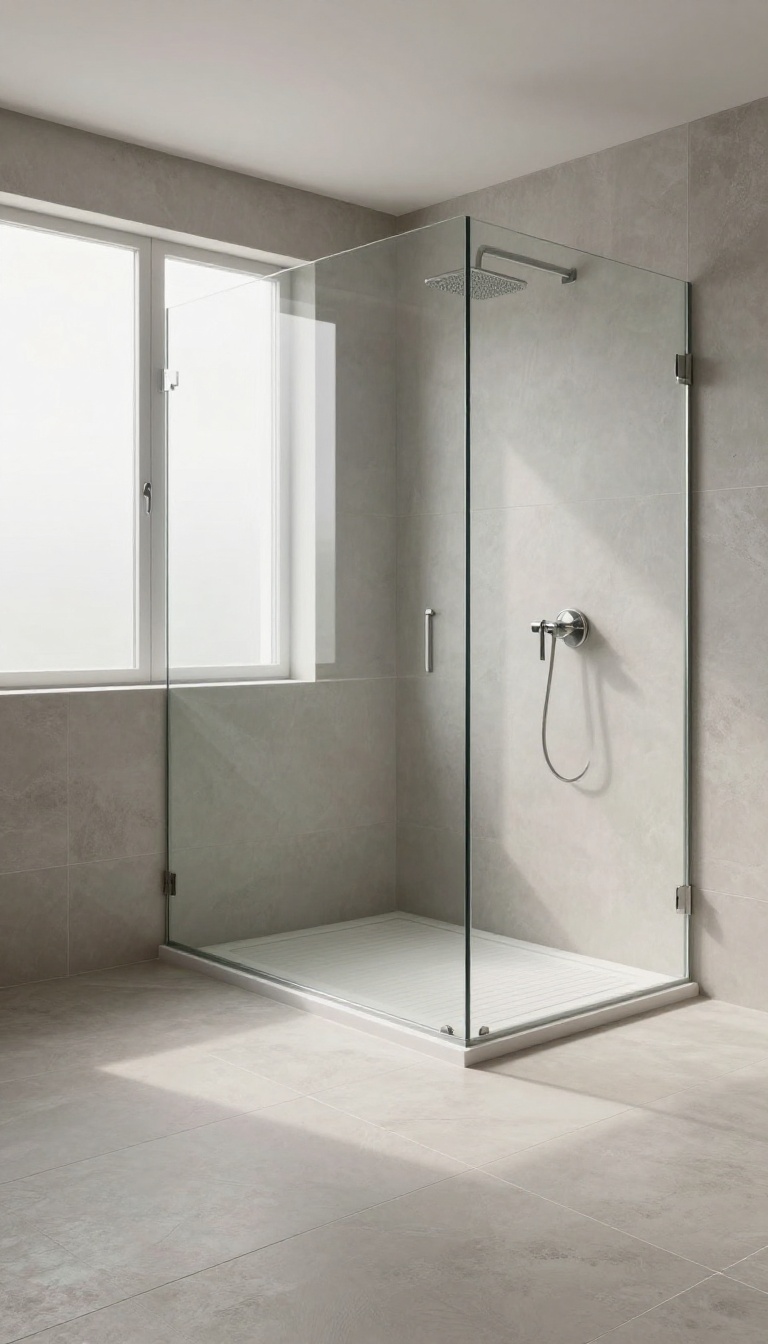
If you're tired of scrubbing grout lines, large-format porcelain slabs might be your new best friend. These big tiles—often measuring 12×24 inches or larger—minimize the number of joints, which means less upkeep and a cleaner look. They also create a seamless, modern aesthetic that makes a small shower feel more open and airy.
Large-format tiles are a game-changer for shower floors. Because they cover more area with fewer grout lines, they reduce the places where soap scum and mildew can build up. Plus, the sleek surface feels smooth underfoot and gives your bathroom a high-end, spa-like vibe.
Here's why they're worth considering for your next remodel.
Why Fewer Grout Lines Matter
Grout is porous and prone to staining, so every line is a potential headache. With large-format slabs, you have far fewer lines to worry about. That means less time scrubbing and more time enjoying your shower.
It's a practical win that also looks cleaner and more streamlined.
Choosing The Right Finish
For a shower floor, slip resistance is key. Look for large-format tiles with a textured or matte finish, or choose ones rated for wet areas. Glossy tiles might look stunning, but they can be slippery when wet.
A subtle texture gives you the best of both worlds: style and safety.
Installation Tips For Large Tiles
Large-format tiles require a perfectly level substrate to avoid lippage—where one edge sits higher than the other. Make sure your contractor uses a leveling system and back-buttering technique to ensure a smooth, even surface. Also, consider using a larger trowel to get proper coverage under the tile.
4. Hexagon Tiles for a Retro Vibe
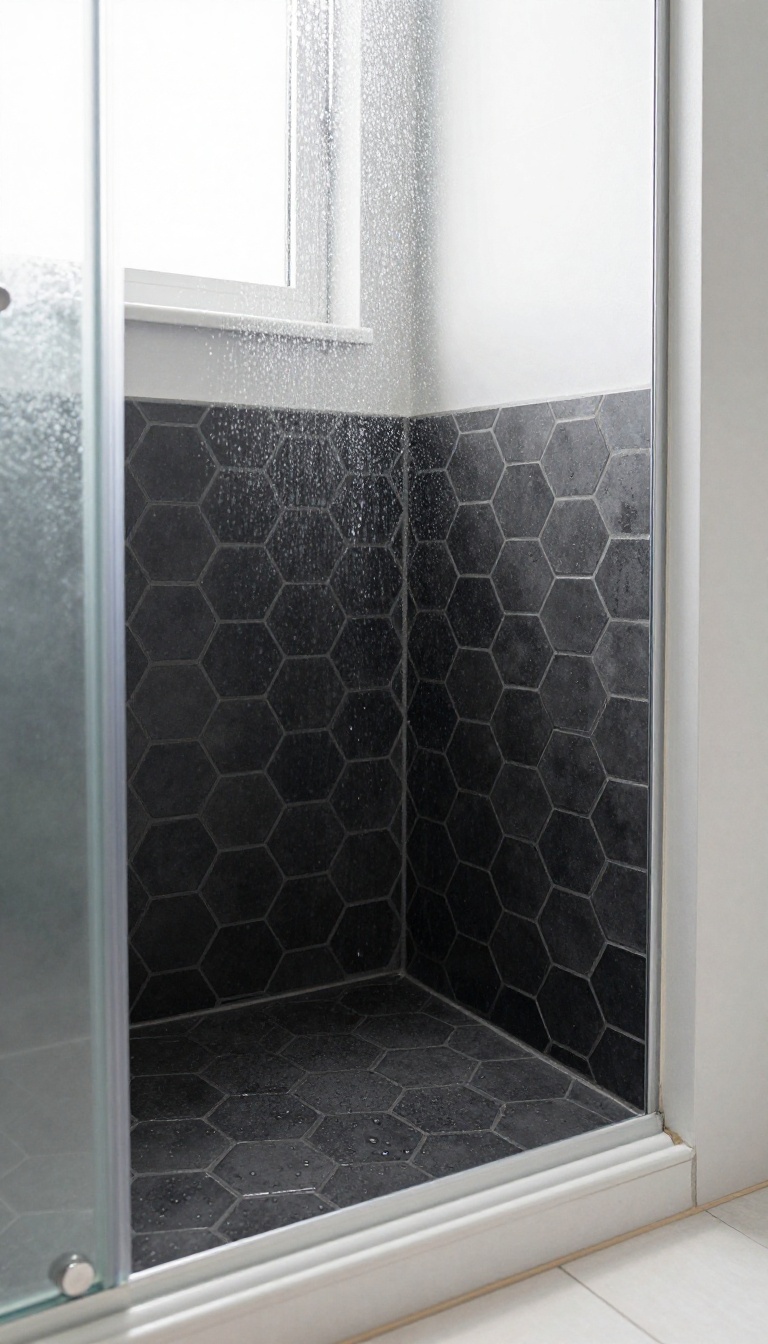
Hexagon tiles are having a serious moment, and it's easy to see why. Their six-sided shape brings a playful, vintage charm that instantly adds character to any shower. But they're not just about looks—when you pick a matte finish and pair it with darker grout, hexagon tiles become a surprisingly practical choice for a wet floor.
The key to making hexagon tiles work in a shower is all in the details. A matte finish gives you better grip underfoot compared to glossy options, especially when water is involved. Darker grout not only hides soap scum and mildew but also creates a striking contrast that makes the tile pattern pop.
Plus, the small size of hexagon tiles means more grout lines, which actually helps with slip resistance—making them a smart, stylish option for your shower floor.
Why Hexagons Work So Well In Showers
Hexagon tiles offer a unique combination of form and function. The geometric shape creates a visually interesting pattern that can make your shower feel more dynamic. The many grout lines provide natural traction, reducing the risk of slips.
And because hexagons can be arranged in various patterns—like honeycomb or herringbone—you can customize the look to match your style.
Choosing The Right Finish And Grout
For safety, always go with a matte or textured finish rather than high-gloss. Glossy tiles can become dangerously slippery when wet. Grout color matters too: white grout looks clean but shows dirt quickly, while darker grout like charcoal or gray hides staining and creates a bold, defined pattern.
It's a small choice that makes a big difference in both maintenance and aesthetics.
Installation Tips For A Flawless Look
Hexagon tiles come in sheets, which makes installation easier, but you still need a skilled installer to ensure even spacing and proper waterproofing. Use a high-quality thinset and seal the grout to protect against moisture. If you're feeling adventurous, consider mixing hexagon tiles with other shapes or colors for a truly custom look.
5. Textured Natural Stone
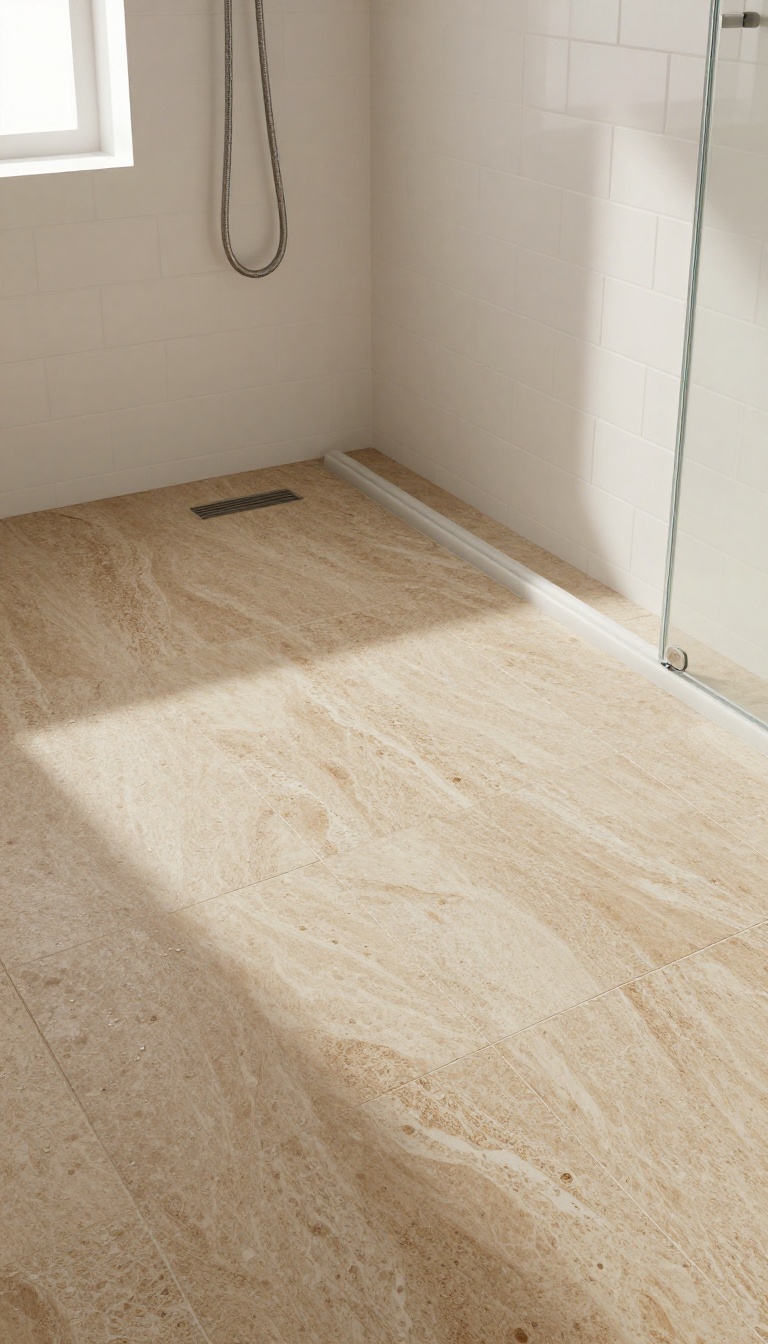
Natural stone brings a rugged, earthy feel that few materials can match. When you choose travertine, slate, or limestone with a honed or tumbled finish, you get a surface that’s both beautiful and safer underfoot. The subtle texture provides natural slip resistance, making it a smart pick for a shower floor that sees water every day.
Textured natural stone isn’t just about looks—it’s about creating a shower that feels grounded and connected to nature. The variations in color and veining mean no two floors are exactly alike, giving your bathroom a one-of-a-kind character. Plus, the matte finish hides water spots and soap scum better than polished stone, so it stays looking cleaner between scrubs.
Why Texture Matters For Safety
Smooth, polished stone can be dangerously slippery when wet. A honed or tumbled finish creates a slightly rougher surface that gives your feet more grip. This is especially important in a shower, where soap and water create a slick environment.
Slate, in particular, has a naturally cleft surface that offers excellent traction without feeling rough or uncomfortable.
Choosing The Right Stone
Travertine is a classic choice with warm, earthy tones, but it’s porous and needs regular sealing. Slate is denser and more durable, with a rustic look that ranges from gray to green to purple. Limestone offers a softer, more uniform appearance, but it’s also porous and requires careful maintenance.
Think about your lifestyle and how much upkeep you’re willing to commit to.
Sealing And Maintenance Tips
Natural stone is porous, so sealing is non-negotiable. Apply a high-quality penetrating sealer once a year, and use a pH-neutral cleaner to avoid damaging the surface. Avoid acidic cleaners like vinegar or lemon, which can etch the stone.
With proper care, textured natural stone can last for decades and still look stunning.
6. Linear Drain with Tile Inserts
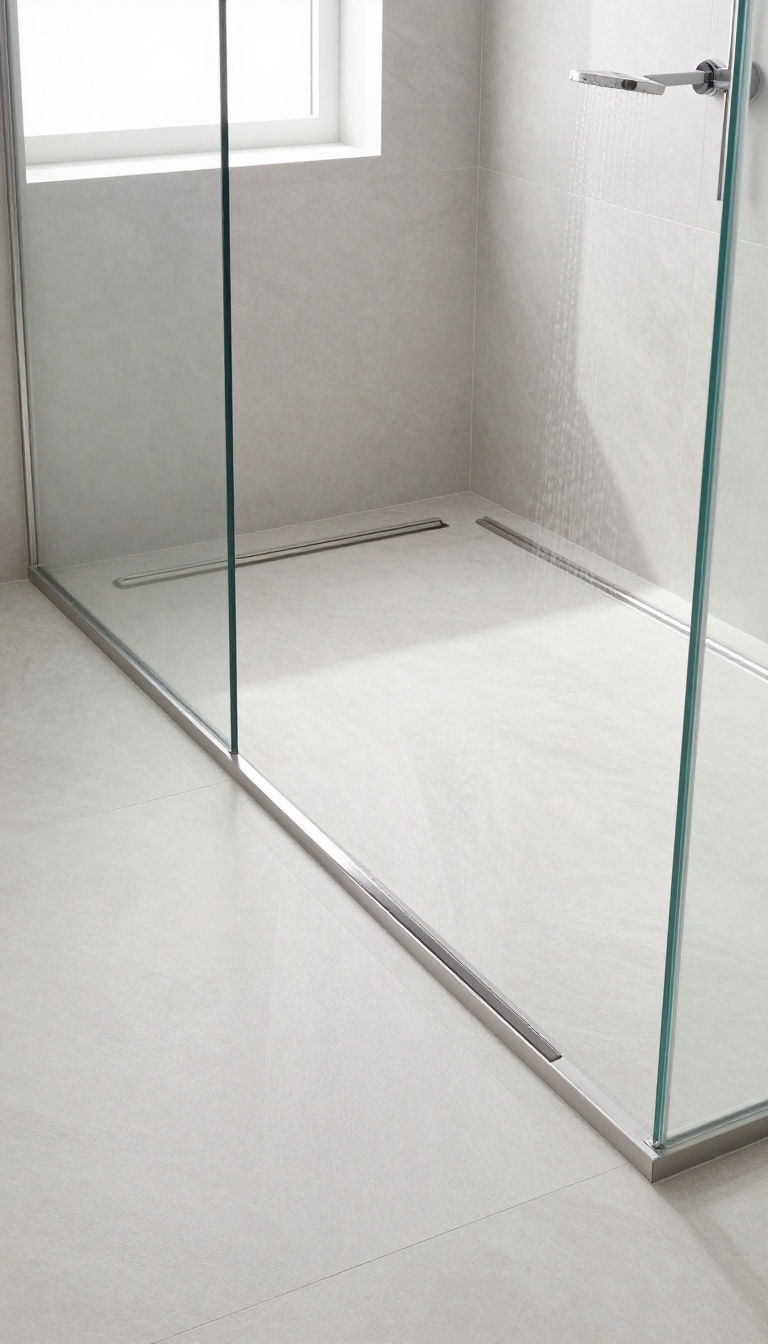
Linear drains are a modern upgrade that changes how your shower floor feels and functions. Instead of a central drain, a long, narrow channel sits along one edge, letting water flow in a straight line. This simple shift opens the door to larger tiles, fewer grout lines, and a cleaner look overall.
What really sets this idea apart is the tile insert—a matching strip of tile that sits right on top of the drain cover. It blends seamlessly with the floor, so the drain almost disappears. You get the practicality of excellent drainage without the visual interruption of a traditional round drain.
A linear drain paired with tile inserts gives you the best of both worlds: a sleek, continuous surface and superior water management. The long channel catches water efficiently, and because it's installed at one end, you can slope the floor in a single direction. That means you can use large-format tiles that would otherwise be tricky with a point drain.
The result is a floor that looks expansive and uncluttered, while also being safer and easier to keep clean. The tile insert itself is a game-changer. It's a piece of tile cut to fit perfectly into the drain cover, so the pattern flows right over the channel.
You can match it exactly to your floor tile, or use a contrasting shade for a subtle design accent. Either way, the drain becomes part of the design rather than an eyesore. Plus, the insert is removable for easy cleaning, so you don't have to sacrifice hygiene for aesthetics.
Why Choose A Linear Drain?
Linear drains handle water flow more efficiently than traditional point drains. Because the channel is long and narrow, water exits quickly, reducing the chance of puddles. The single-slope floor also means fewer low spots where water can pool.
For larger showers, a linear drain can be placed along the back wall or at the entrance, giving you more design flexibility. And with a tile insert, the drain becomes a design feature, not a compromise.
Tile Selection Tips
Large-format tiles, like 12×24 or 24×24 porcelain, work beautifully with linear drains. They minimize grout lines, which means less scrubbing and a more seamless look. If you're using natural stone, make sure it's sealed properly to resist moisture.
For a cohesive feel, choose the same tile for the floor and the insert. If you want a subtle contrast, pick a slightly darker or lighter shade that complements the main floor.
Installation Considerations
Installing a linear drain requires precise planning. The floor needs a consistent slope toward the channel, which is easier to achieve with a single slope than a multi-directional one. You'll also need to coordinate with a plumber to ensure the drain connects properly to your plumbing.
The tile insert must be cut accurately to fit the cover, so it's a job best left to a professional unless you're experienced with tile work. Expect a slightly higher cost than a traditional drain, but the payoff in looks and function is worth it.
7. Penny Tiles for a Bold Statement
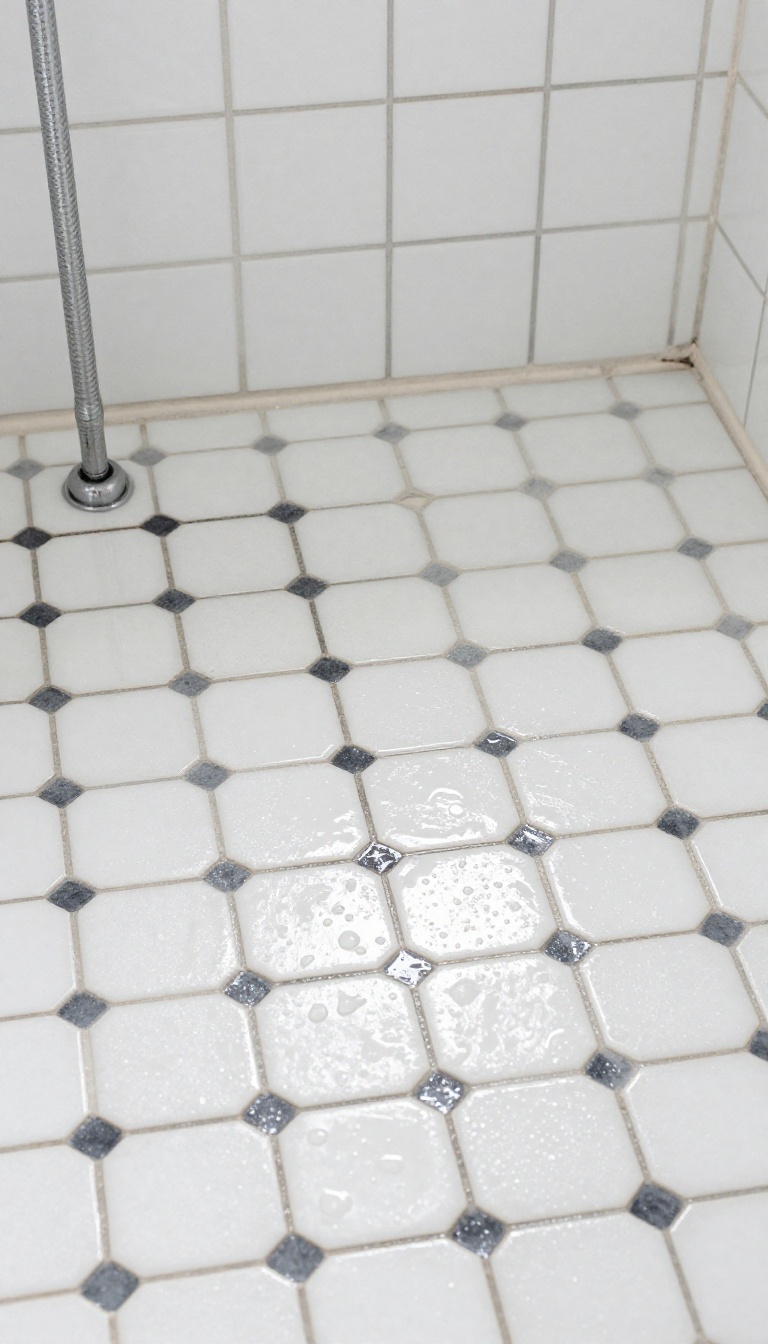
If you want a shower floor that feels playful yet polished, penny tiles deliver. These small, round tiles pack a lot of personality into a compact space, and their tight grid creates a visually busy surface that hides water spots and soap scum surprisingly well. Beyond the looks, the slightly textured face of penny tiles offers a gentle grip underfoot, making them a smart pick for a wet area.
Penny tiles come in a wide range of colors, from classic white to deep navy or even mixed metallics. The key to pulling off this look is choosing a contrasting grout that makes the circles pop. Dark grout with white tiles creates a classic polka-dot effect, while a light grout with colorful tiles keeps the focus on the pattern.
Because the tiles are small, they conform easily to curved surfaces, so you can extend them up a wall or into a niche for a seamless look.
Why Penny Tiles Work In The Shower
The small size means more grout lines, which actually works in your favor. The extra texture provides traction, and the many lines break up the surface so water doesn't pool. Plus, the round shape feels softer underfoot than sharp-edged tiles, which is a nice bonus when you're standing barefoot.
Choosing The Right Color And Grout
For a bold statement, go with a contrasting grout color. White tiles with charcoal grout give a crisp, graphic look. If you prefer something more subtle, pick a grout that matches the tile color to create a seamless, almost fabric-like texture.
Either way, make sure the grout is sealed properly to resist moisture and staining.
Installation Tips To Keep In Mind
Penny tiles come on mesh sheets, which speeds up installation, but the sheets can sometimes have slight color variations. Ask your installer to blend sheets from different boxes to avoid patchy areas. Also, use a flexible thin-set adhesive to accommodate any minor movement, and choose a grout that's rated for wet areas.
8. Wood-Look Porcelain for Warmth
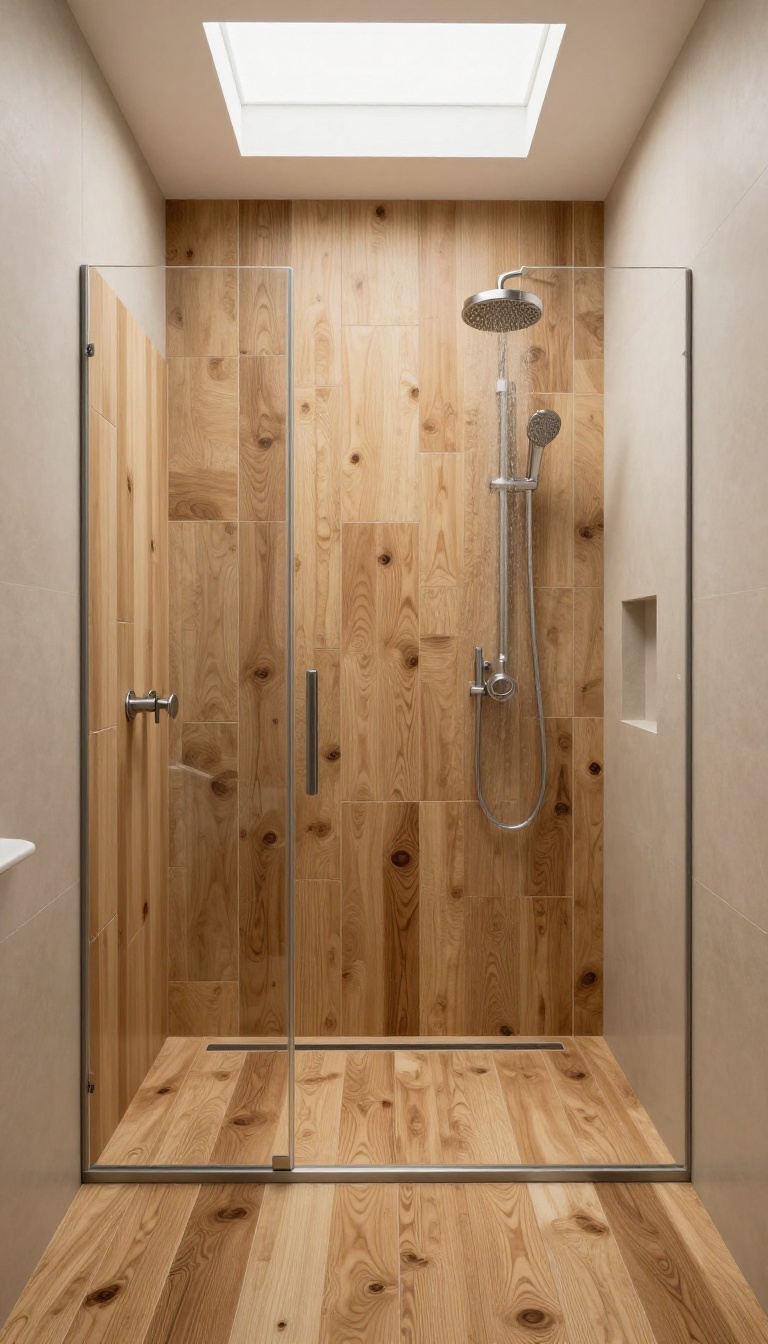
Who says you can't have the cozy look of wood in a wet area? Wood-look porcelain planks bring that warm, organic feel to your shower floor without the headaches of real timber. They're designed to handle moisture, resist stains, and stay beautiful for years.
Plus, with textured finishes, they offer the grip you need underfoot.
Wood-look porcelain is a game-changer for anyone who loves the aesthetic of hardwood but wants the practicality of tile. These planks are made to mimic the grain, knots, and color variations of real wood, but they're far more durable and completely waterproof. The best part?
They can be used on shower floors with the right texture and finish, so you get that inviting, spa-like warmth without worrying about rot, warping, or constant maintenance.
Why It Works In A Shower
Real wood and moisture don't mix, but porcelain is impervious to water. Wood-look porcelain is fired at high temperatures, making it dense and non-porous. That means no swelling, no warping, and no mold growth.
Plus, many options come with a textured surface that meets slip-resistance standards, so you can step out of the shower with confidence. It's the perfect blend of rustic charm and modern engineering.
Choosing The Right Plank
When picking wood-look porcelain for your shower floor, look for a few key things. First, ensure the tile has a matte or textured finish—glossy can be slippery when wet. Second, choose a plank size that fits your space; longer planks can make a small shower feel bigger, while shorter ones work better for tighter layouts.
Finally, consider the color: lighter woods brighten the room, while darker tones add drama. And don't forget to check the PEI rating for durability—you want something that can handle foot traffic.
Installation And Grout Tips
To get the best look, install wood-look planks in a staggered pattern, like real hardwood. Use a grout color that blends with the tile to create a seamless wood effect, or go slightly darker for definition. Make sure your contractor uses a waterproof membrane underneath, and consider a linear drain to enhance the modern vibe.
With the right prep, your wood-look floor will look stunning and last for decades.
9. Mosaic Patterns with Mixed Materials
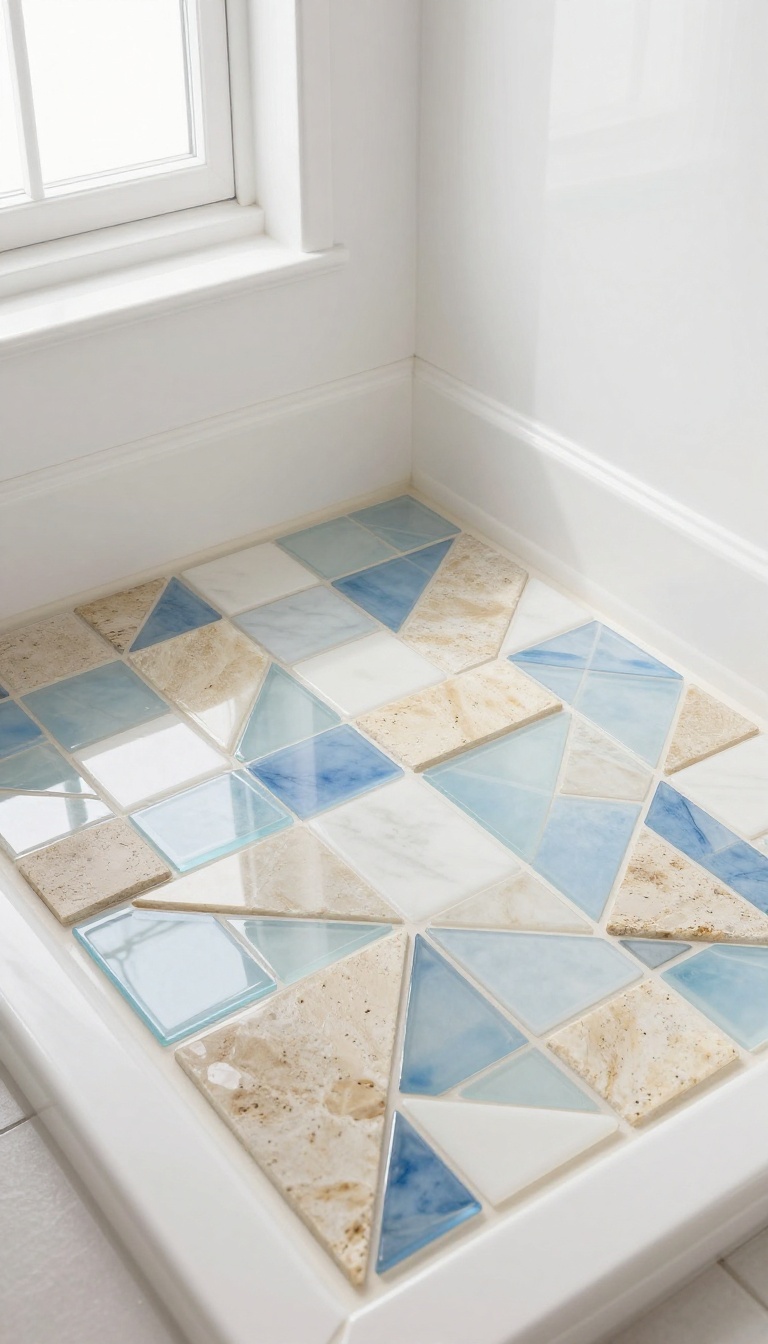
Mosaic tiles are a classic way to add visual interest, but mixing materials takes it to another level. Combining glass, stone, or ceramic in one pattern creates a custom look that feels rich and personal. Plus, the smaller pieces naturally offer better traction, making it a smart choice for a shower floor.
When you blend different materials, you get the best of both worlds: the durability of stone, the shine of glass, and the versatility of ceramic. The key is to keep the pattern cohesive, so the mix feels intentional rather than chaotic. Use a consistent color palette or geometric layout to tie it all together.
Why Mixed Materials Work
Different materials bring different strengths. Stone adds texture and a natural, earthy feel, while glass reflects light and adds a touch of sparkle. Ceramic is easy to clean and comes in countless colors.
Together, they create a floor that's both functional and eye-catching. The varied surfaces also help with slip resistance, as the differing textures give your feet more to grip.
Design Tips For A Cohesive Look
Stick to a limited palette—two or three materials max—to avoid visual chaos. Use a repeating pattern like a diamond or herringbone to give structure. Consider using a mesh-backed mosaic sheet for easier installation, but make sure the materials are all rated for wet areas.
And don't forget to choose a grout that complements the mix, like a neutral gray or warm beige.
Maintenance And Safety
Seal natural stone regularly to prevent staining and moisture damage. Use a non-sanded grout for smaller joints, and ensure the grout is properly cured to avoid mold. The smaller tile pieces mean more grout lines, which can be a bit more work to keep clean, but a good sealant and routine wiping make it manageable.
In terms of safety, the textured surfaces of mixed materials provide excellent slip resistance, making this a practical choice for families or anyone concerned about falls.
10. Concrete with a Broom Finish
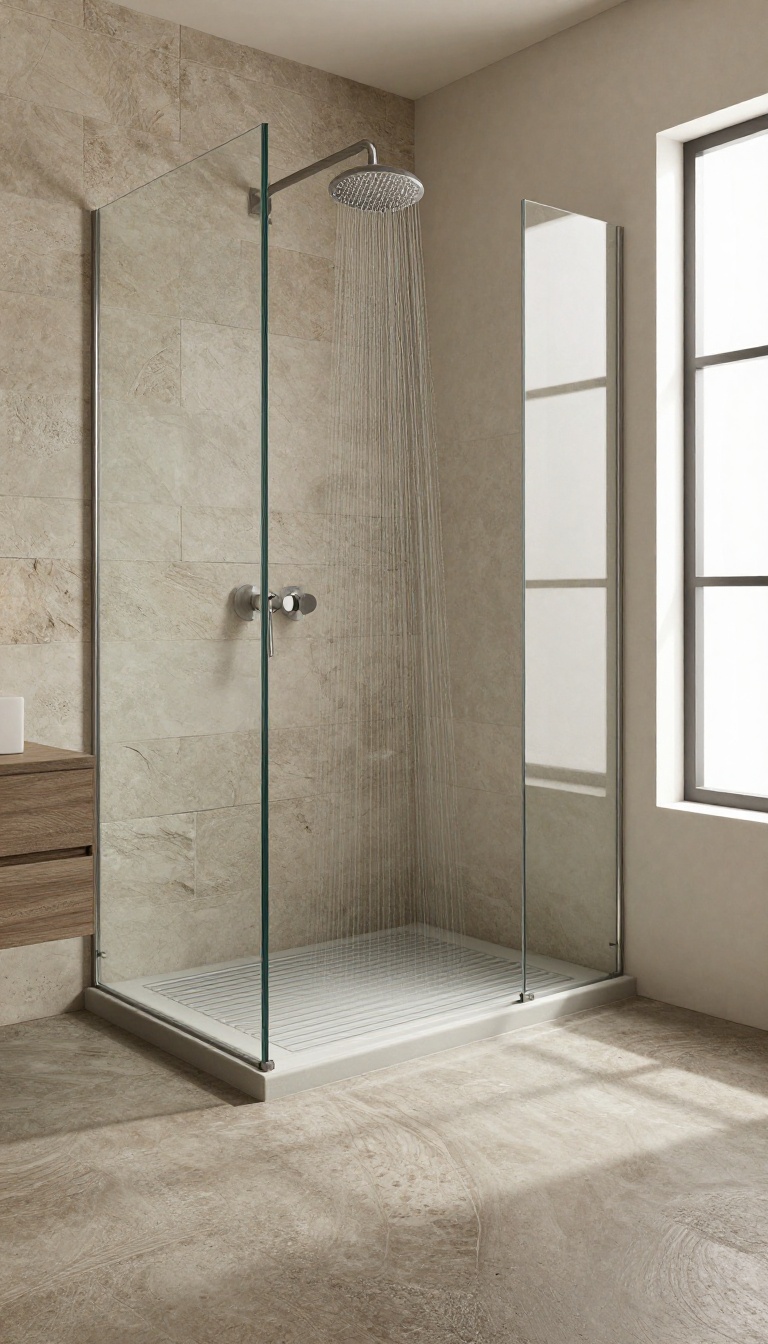
Concrete might not be the first material that comes to mind for a shower floor, but it's a surprisingly versatile choice. A broom finish adds texture that improves traction, making it safer than smooth polished concrete. Plus, it brings an industrial, minimalist vibe that pairs well with modern or rustic bathrooms.
With the right sealer, it's also easy to keep clean and durable enough to last for years.
The broom finish is created by dragging a stiff-bristled broom across the surface while the concrete is still wet, leaving fine ridges that increase grip. This texture is perfect for a shower floor where slip resistance is a top priority. The look is raw and utilitarian, but it can be customized with stains or dyes to match your style.
Sealing is essential to protect against moisture and staining, and a good penetrating sealer will keep the surface low-maintenance.
Why Broom Finish Works In A Shower
The main advantage is safety. The subtle ridges give your feet something to grip, even when soap and water are everywhere. Unlike smooth concrete, which can become dangerously slick, a broom finish offers peace of mind.
It also hides water spots and soap scum better than glossy surfaces, so it looks cleaner for longer.
Customizing The Look
Concrete doesn't have to be gray. You can add integral color or apply acid stains to create earthy tones like warm browns, soft grays, or even slate blues. For a more polished industrial look, consider embedding small pebbles or using a finer broom for a subtler texture.
The key is to keep the finish consistent so it feels intentional, not accidental.
Sealing And Maintenance Tips
A high-quality penetrating sealer is a must. It protects the concrete from moisture and makes cleaning easier. Sweep or vacuum regularly to remove grit, and clean with a mild, pH-neutral cleaner.
Avoid harsh chemicals that can degrade the sealer. Reapply the sealer every year or two, depending on wear, to keep the floor in top shape.
11. Quarry Tile for Durability
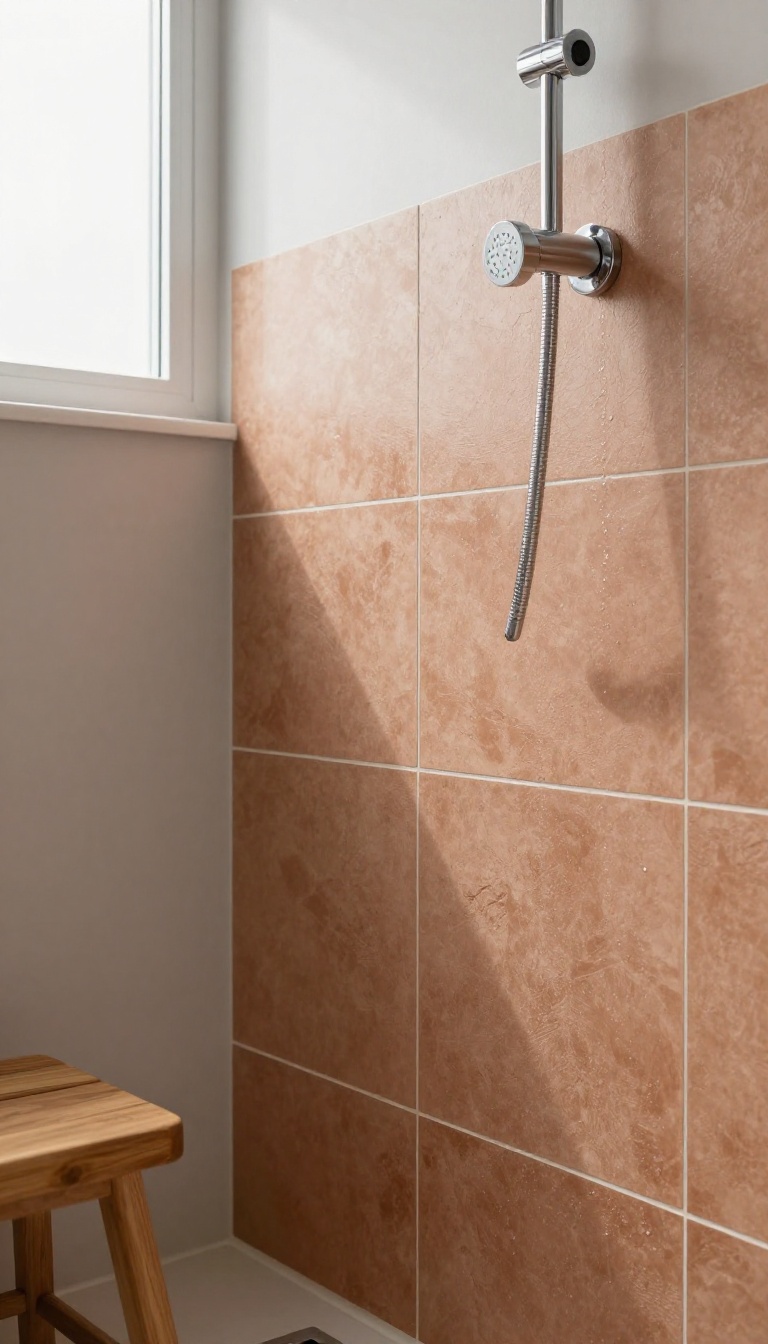
Unglazed quarry tile is a workhorse in the flooring world, and it brings that same rugged reliability to your shower. Its dense, clay-based composition shrugs off moisture and heavy use, making it a go-to for busy family bathrooms where the floor sees a lot of action. Plus, its naturally textured surface provides grip even when wet, so you don't have to sacrifice safety for strength.
Quarry tile has been a staple in commercial settings for decades, and for good reason. It's tough, low-maintenance, and can handle just about anything you throw at it. In a residential shower, that translates to a floor that will look great for years with minimal fuss.
The earthy, unglazed finish also adds a warm, rustic touch that pairs well with both modern and traditional designs.
Why It Works In A Shower
The secret to quarry tile's durability lies in its density. It's extruded, not pressed, which makes it less porous than other unglazed options. That means it resists water absorption and staining, so you won't have to worry about mold or mildew taking hold.
The slightly rough surface also provides excellent slip resistance, which is a must-have for any shower floor.
Style And Color Options
Quarry tile is often associated with a classic red or brown hue, but you have more choices than you might think. From muted grays to earthy tans, you can find a shade that blends seamlessly with your bathroom's palette. The natural variation in color and texture gives each tile a unique character, so your shower floor will feel anything but generic.
Installation And Maintenance Tips
Because quarry tile is dense and heavy, it's important to use a high-quality thinset and a proper waterproofing membrane underneath. Sealing the tile after installation is also a smart move, even though it's unglazed—it adds an extra layer of protection against moisture. For daily cleaning, a simple pH-neutral cleaner and a soft brush will keep the surface looking fresh without damaging the finish.
12. Cork Flooring for a Soft Touch
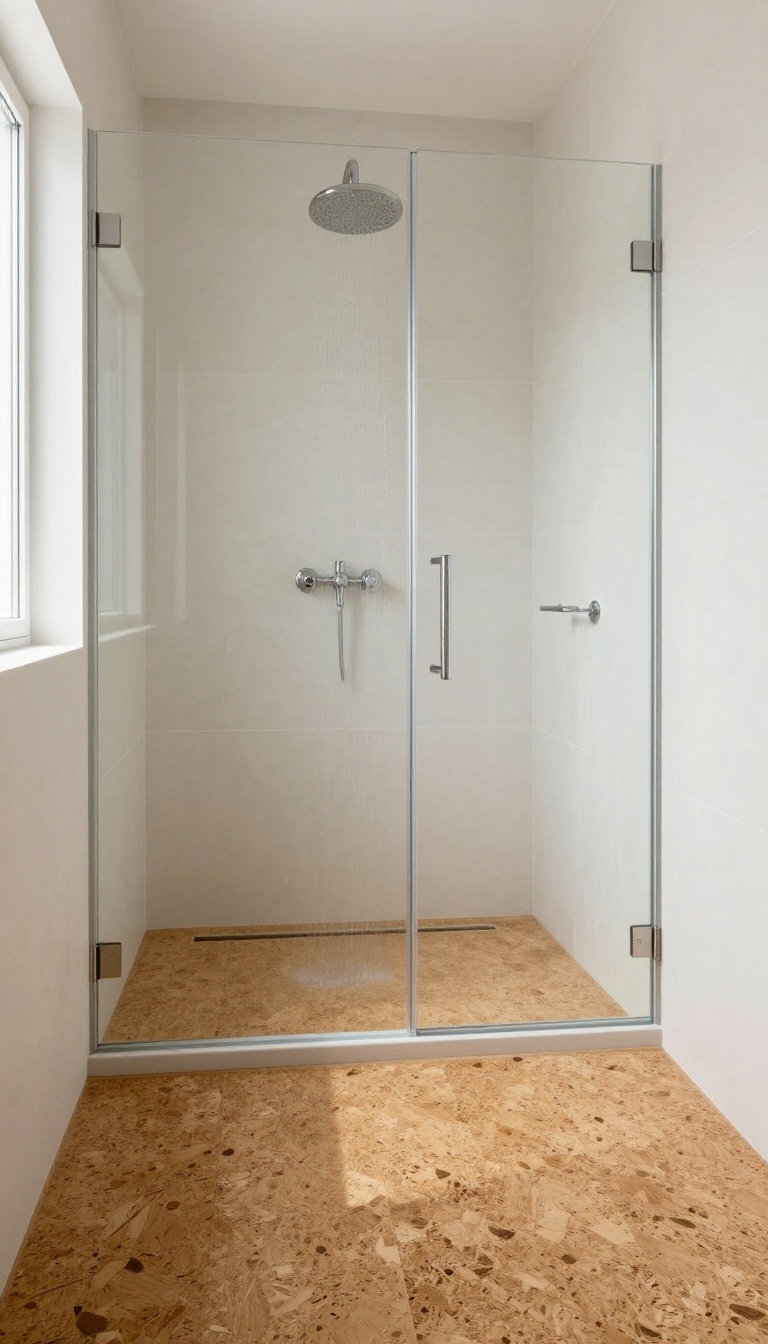
Cork brings a warm, cushioned feel underfoot that’s hard to beat in a shower. It’s naturally antimicrobial, which helps keep mold and mildew at bay, and the slight give reduces fatigue if you stand for long showers. With the right sealer, cork can handle moisture beautifully while adding an earthy, organic texture to your space.
Why Cork Works In Wet Areas
Cork’s cellular structure is packed with air, making it soft and insulating. That same structure also makes it naturally resistant to mold and mildew because it’s inhospitable to those growths. When sealed properly with a waterproof finish, cork becomes a durable, low-maintenance option that feels like a spa retreat.
Sealing And Maintenance Tips
The key to cork in a shower is a high-quality penetrating sealer, applied in multiple coats. Reapply every year or two to keep the barrier strong. Clean with a mild, pH-neutral cleaner and avoid abrasive scrubbers.
With a little care, your cork floor will stay beautiful for years.
Comfort And Safety Combined
Cork’s natural cushioning reduces impact on joints, making it a joy to stand on. It also provides good traction, even when wet, thanks to its slightly textured surface. That combination of comfort and slip resistance makes it a smart pick for families or anyone who values a gentle landing.
13. Patterned Cement Tiles for Personality
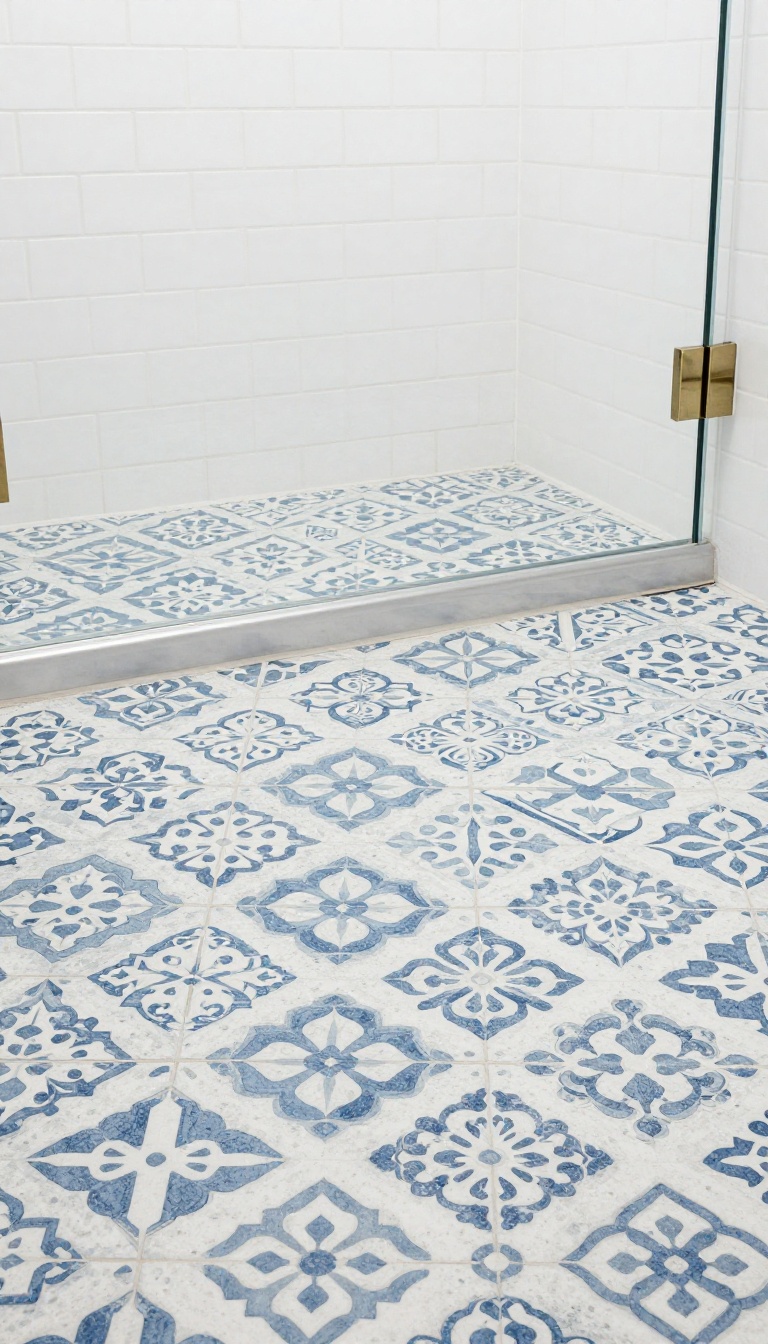
Cement tiles bring a handcrafted feel that most materials can't match, and their bold patterns turn a functional floor into a focal point. They're not just about looks though—when sealed properly, the slightly textured surface offers dependable traction, making them a smart pick for wet areas. If you want your shower to feel like a piece of art, this is the route to take.
Patterned cement tiles are a favorite for adding character to bathrooms, and they work especially well on shower floors. Their dense, matte finish provides a natural grip that glossy tiles lack, and the variety of designs means you can go from subtle geometrics to vibrant florals. The key is choosing the right sealer and maintaining it, so the tiles stay both beautiful and safe.
Why They Work In A Shower
Cement tiles are naturally porous, but with a high-quality penetrating sealer, they become water-resistant and easier to clean. The slight roughness of the surface—even after sealing—offers more slip resistance than polished stone or glazed ceramic. Plus, the patterns help hide soap scum and water spots, so the floor looks cleaner between washes.
Choosing The Right Pattern
Large-scale motifs like Moroccan stars or encaustic-style florals make a bold statement, while smaller, repetitive patterns like herringbone or basketweave add texture without overwhelming the space. Consider the size of your shower: a busy pattern in a tiny stall can feel chaotic, so opt for a simpler design if your floor is compact. Neutral tones with a single accent color often age better than high-contrast mixes.
Sealing And Maintenance Tips
Seal your cement tiles before grouting and again after installation, then reapply a fresh coat every year or two to keep them protected. Use a pH-neutral cleaner and avoid acidic products, which can etch the surface. With proper care, these tiles can last for decades and even develop a lovely patina that adds to their charm.
FAQ
What is the most slip-resistant shower floor material?
Textured materials like pebble mosaics, quarry tile, and broom-finished concrete offer the best slip resistance. Look for tiles with a high coefficient of friction (COF) and use a textured finish.
Can I use large-format tiles on a shower floor?
Yes, but ensure they are rated for floor use and have a textured surface. Large tiles reduce grout lines, but they need proper slope for drainage and may require cutting for a linear drain.
How do I clean a pebble shower floor?
Use a mild, non-abrasive cleaner and a soft brush to scrub between the pebbles. Rinse thoroughly to prevent soap scum buildup. Sealing the grout can make cleaning easier.
Is wood-look tile safe for a shower floor?
Yes, as long as it's porcelain or ceramic with a textured finish. These tiles mimic wood but are waterproof and slip-resistant, making them a safe and stylish choice.
What is the best grout for shower floors?
Epoxy grout is highly recommended for shower floors because it's waterproof, stain-resistant, and doesn't require sealing. It's more durable than cement-based grout and resists mold and mildew.
Conclusion
Your shower floor is more than just a surface—it's a key part of your bathroom's comfort and safety. With so many beautiful and practical options, you can find the perfect match for your style and needs.
Whether you prefer the natural feel of pebbles or the sleek look of large-format tiles, there's an idea here to inspire your next renovation. Take your time, consider your lifestyle, and choose a floor that will look great and perform well for years to come.