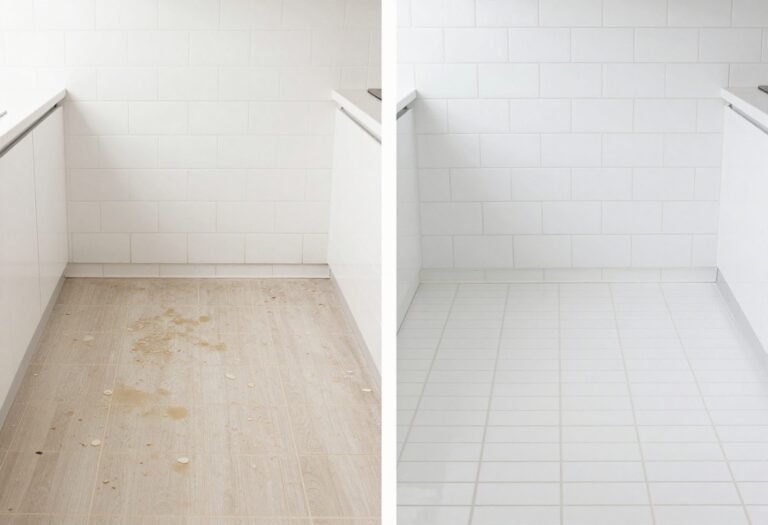
25 Cleaning Checklist Ideas for a More Organized Home
A clean home doesn't happen by accident—it takes a system that actually fits your life. These 25 cleaning checklist ideas break down the overwhelm into manageable daily, weekly, and monthly tasks. Whether you're a busy parent or a neat freak, you'll find routines that keep every room in order without eating up your whole weekend.
From the daily 10-minute tidy-up to deep-cleaning the oven, each idea targets a specific area or task. You'll learn how to tackle the kitchen, bathroom, living room, and beyond with practical steps that make sense.
No more guessing what to clean next or feeling guilty about what you missed. Ready to transform your home into a place that practically cleans itself?
1. Daily 10-Minute Tidy-Up

You don't need hours to keep your home tidy—just ten minutes a day can make a huge difference. This quick evening reset stops clutter from taking over and sets you up for a fresh start tomorrow. It's the simplest habit to build, and it pays off fast.
Set a timer for ten minutes each evening, ideally right before you unwind for the night. Walk through your main living areas—living room, kitchen, and entryway—and put away anything that's out of place. Wipe down kitchen counters, fluff couch pillows, and fold throw blankets.
That's it. No deep cleaning, just a quick surface reset. Over time, this ritual trains your brain to notice messes early and prevents the weekend from becoming a catch-up marathon.
Why 10 Minutes Works
Ten minutes is short enough to feel doable every day, but long enough to make a visible difference. It builds consistency without burnout. You'll walk into a clean space each morning, which boosts your mood and productivity.
What To Focus On
Prioritize high-traffic zones: the kitchen counters, dining table, living room floor, and entryway. Don't worry about bedrooms or bathrooms unless they're part of your main path. The goal is to reset the spaces you see most.
Tips To Stick With It
Pair the tidy-up with an existing habit, like after dinner or before your evening shower. Use a timer so you don't overdo it. Keep a small basket for items that belong in other rooms—you can put them away later or delegate.
2. Weekly Kitchen Deep Clean
The kitchen is the heart of the home, but it also collects the most grime. A weekly deep clean keeps it fresh, sanitary, and a joy to cook in. You don't need to spend hours—just focus on the high-touch areas and surfaces that daily wiping misses.
Tackle Appliances Inside And Out
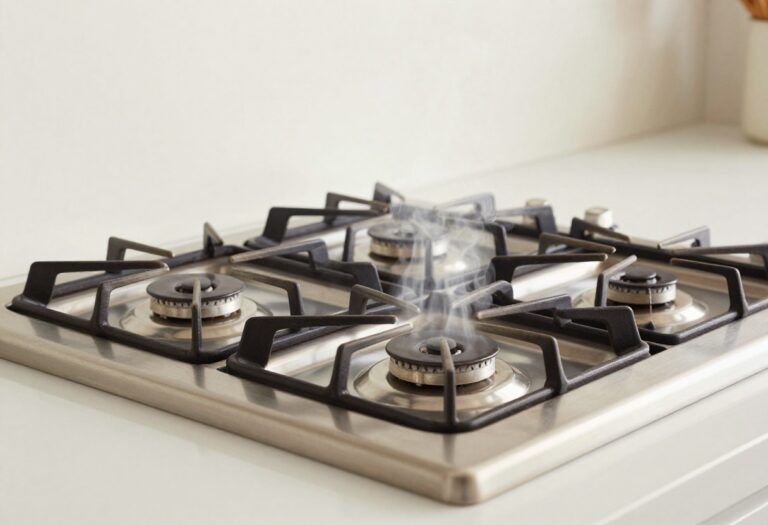
Wipe down the microwave inside and out, including the turntable. Clean the stovetop burners and knobs, and don't forget the oven door glass. For the refrigerator, quickly check for expired items and give shelves a once-over with a damp cloth.
Scrub The Sink And Faucet
Your sink sees a lot of action. Sprinkle baking soda and scrub with a sponge, then rinse. Polish the faucet with a microfiber cloth to remove water spots.
A clean sink instantly makes the whole kitchen feel brighter.
Disinfect Countertops And Backsplash
Clear everything off the counters, then spray with a disinfectant or vinegar solution. Wipe down the backsplash too—splatters hide there. Let it air dry for a few minutes before putting items back.
Mop The Floor And Take Out Trash
Sweep or vacuum first to remove crumbs, then mop with a cleaner that works for your flooring. While the floor dries, take out the trash and recycling. This final step leaves the kitchen smelling fresh and looking spotless.
3. Bathroom Refresh Routine
The bathroom can quickly feel grimy, but a full deep clean every few days isn't realistic. That's where a quick refresh routine comes in. Spending just five minutes every other day keeps mirrors streak-free, toilets fresh, and showers ready for use without the heavy scrubbing.
This routine is about maintenance, not perfection. By tackling small tasks frequently, you prevent soap scum and hard water stains from building up. The key is consistency—make it a habit after your morning or evening shower.
Mirror Magic
Keep a microfiber cloth and a small spray bottle of glass cleaner under the sink. After brushing your teeth, give the mirror a quick wipe. It takes 30 seconds and eliminates those annoying toothpaste splatters.
Toilet Touch-up
Use a daily toilet cleaning tablet or a squirt of bleach gel under the rim. Let it sit while you do other tasks, then give a quick swish with the brush. This keeps stains and odors from forming.
Shower Spray Down
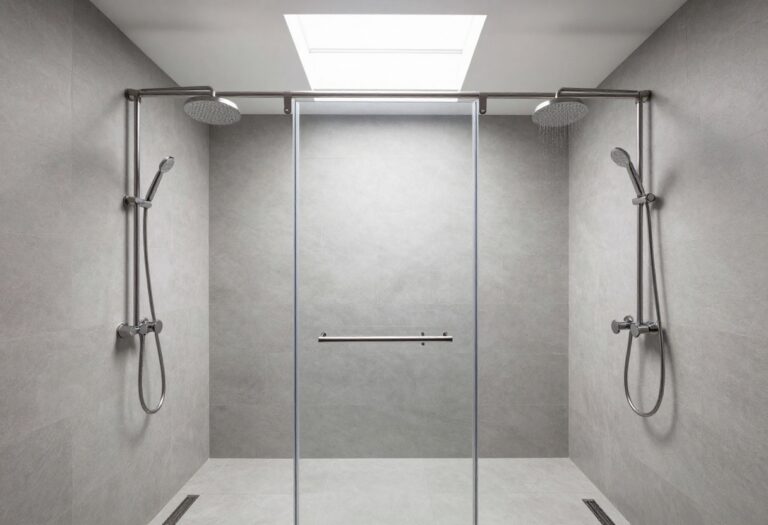
After your last shower, use a daily shower spray (or a DIY mix of water and vinegar) to mist the walls and glass door. This prevents soap scum and mildew, so you only need a deep clean every few weeks.
4. Living Room Dust and Vacuum
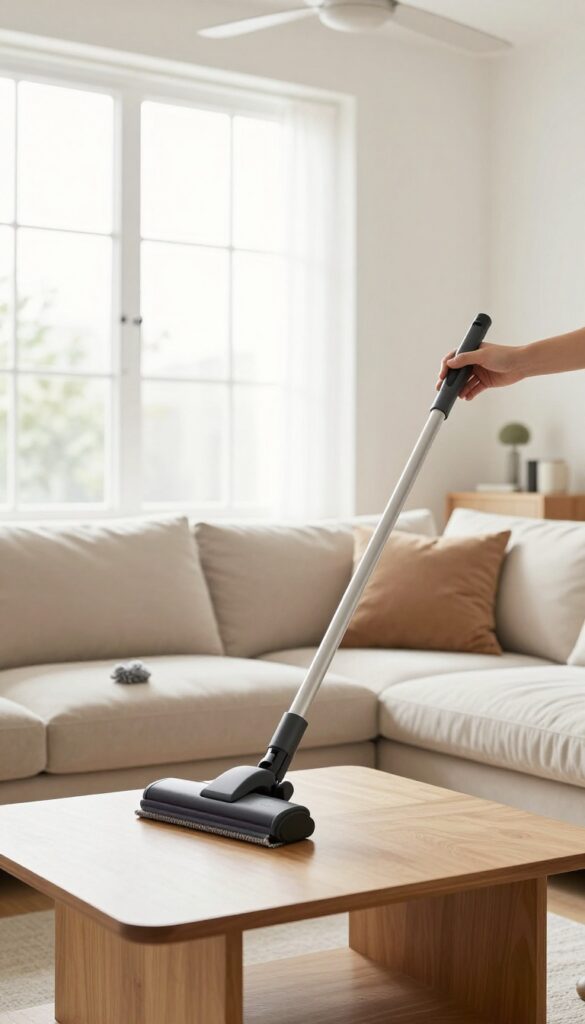
The living room sees the most traffic, so dust and dirt pile up fast. A quick once-over on surfaces and floors makes a huge difference in how the space feels. Plus, tackling hidden spots like under cushions keeps allergens and crumbs from taking over.
Start High, End Low
Always dust from top to bottom—ceiling fans, shelves, then furniture—so particles fall onto surfaces you'll clean next. Use a microfiber cloth or an extendable duster to reach high corners and light fixtures without spreading dust around.
Don't Skip Electronics And Blinds
TV screens, soundbars, and gaming consoles attract static dust. Wipe them with an anti-static cloth or a slightly damp microfiber towel. For blinds, close them flat and run a duster or a damp cloth across each slat—it's faster than cleaning them individually.
Vacuum Like You Mean It
Move coffee tables and ottomans to get under them. Use the crevice tool along baseboards and between couch cushions. If you have pets, vacuum upholstery with the brush attachment to lift fur and dander.
Finish by spot-cleaning any stains on carpets or rugs.
Refresh Cushions And Pillows
Remove couch cushions and vacuum both sides, then flip and fluff them. Toss decorative pillow covers in the wash if they're removable. This step alone can make your living room look and smell noticeably cleaner.
5. Bedroom Bed-Making and Surface Wipe
Your bedroom should be a sanctuary, but clutter and dust can make it feel chaotic. Starting the day by making your bed and giving nightstands and dressers a quick wipe sets a calm, organized tone. It takes less than five minutes and pays off in mental clarity.
This daily ritual is the simplest way to keep your bedroom tidy. Making the bed instantly makes the room look 80% cleaner. A quick dusting of surfaces prevents buildup and keeps allergies at bay.
Combine this with a weekly linen change for a fresh, inviting space.
Morning Bed-making Routine
Pull up the sheets, straighten the duvet, and fluff pillows. If you have decorative pillows, arrange them last. This small act signals that the day has started and reduces visual clutter.
It also makes it easier to resist crawling back in.
Quick Surface Wipe
Use a microfiber cloth or a dusting spray to wipe down nightstands, dresser tops, and any shelves. Focus on areas where you place glasses, books, or phones. This prevents dust from settling into a thick layer and keeps surfaces looking polished.
Weekly Refresh
Once a week, strip the bed and wash sheets in hot water. While the bed is bare, vacuum the mattress and flip it if needed. Wipe down headboards and baseboards.
This deeper clean keeps your bedroom feeling hotel-fresh without much extra effort.
6. Entryway and Mudroom Organization
The entryway sets the tone for your entire home, but it's also the first place to descend into chaos. Shoes pile up, coats get tossed, and bags become trip hazards. A few simple systems can turn this high-traffic zone into a model of efficiency, making it easier to leave and return without the stress.
Create A Drop Zone With Hooks And Bins
Install a row of sturdy hooks at different heights for coats, bags, and hats. Place a bench or shoe rack underneath for easy seating and storage. Use labeled bins for each family member's shoes, gloves, and scarves.
This keeps everything off the floor and makes grabbing what you need a breeze.
Weekly Wipe-down Routine
Set a recurring 10-minute task every Sunday to wipe down the door, handles, light switches, and floor. Use a disinfecting spray or a damp microfiber cloth to catch dirt and germs before they travel deeper into your home. Don't forget to shake out doormats and vacuum the entry rug.
Seasonal Swap-out System
Keep the entryway clutter-free by storing off-season gear elsewhere. As the weather changes, swap heavy winter boots for sandals and raincoats for light jackets. Store the out-of-season items in labeled bins in a closet or garage, so your mudroom stays functional year-round.
7. Home Office Declutter

Your desk might be the most used surface in your home, yet it's often the first place to collect piles of papers, tangled cords, and sticky coffee rings. A cluttered workspace doesn't just look messy—it actually makes it harder to focus and get things done. This idea walks you through a quick, effective declutter that'll have your home office feeling fresh and functional in no time.
A clean desk is a productivity booster. Start by clearing everything off the surface—papers, pens, gadgets, and that mystery pile you've been avoiding. Wipe down the desk with a gentle cleaner, then sort items into three piles: keep, relocate, and trash.
Only put back what you truly use daily. For papers, scan or shred what you don't need. For cables, use zip ties or clips to bundle them neatly.
A few minutes of effort here can transform your entire workday.
Paper Purge And Sort
Go through every document on your desk and in nearby drawers. Shred old bills, recycle outdated notes, and file important papers in labeled folders. If you're digital, scan and store everything in cloud folders.
Aim for a clean surface with only the current project visible.
Desk Surface And Drawers
Wipe down the desk with a microfiber cloth and all-purpose cleaner. Empty drawers and vacuum out crumbs and dust. Line drawers with felt or drawer liners to keep things tidy.
Only return items that have a designated spot—everything else goes.
Cable Management
Unplug all devices and label each cord with a small tag or color-coded sticker. Use cable clips, sleeves, or a cable box to keep cords off the floor and out of sight. Velcro straps work great for bundling.
A tidy cable setup instantly makes your workspace feel more professional.
8. Laundry Room Maintenance
The laundry room works hard, but it's easy to overlook until something goes wrong. A quick weekly checklist keeps your machines running efficiently and prevents musty smells or lint buildup. Plus, staying on top of forgotten items in pockets saves you from ruined clothes and clogged drains.
Lint Trap And Dryer Vent
Clean the lint trap after every load—it's a fire hazard if ignored. Every few months, check the dryer vent hose for lint accumulation. Use a vent brush or vacuum attachment to clear it out.
This simple step improves drying efficiency and reduces energy bills.
Washer And Dryer Exteriors
Wipe down the washer and dryer surfaces with a damp microfiber cloth. Pay attention to the control panels, door seals, and detergent dispensers. For front-load washers, leave the door ajar after use to prevent mold.
A monthly cleaning cycle with vinegar or a washer cleaner keeps the drum fresh.
Floor And Hidden Areas
Sweep or vacuum the floor to catch lint, dust, and stray socks. Move the machines slightly if possible to clean underneath and behind. Check for forgotten items like pens, tissues, or coins in pockets before washing—they can stain clothes or damage the machine.
9. Pantry Inventory and Wipe-Down
Your pantry might be the hardest-working room in the house, but it's also the easiest to let slide into chaos. A monthly reset keeps everything visible and accessible, so you're not buying duplicates or discovering expired goods. This routine takes about an hour and saves you money and stress in the long run.
Set aside one Saturday a month to empty every shelf and bin. As you pull items out, check expiration dates and toss anything past its prime. Wipe down all surfaces with a gentle cleaner, then group similar items together—canned goods, grains, snacks, baking supplies.
Use clear bins or baskets for small items to keep them from rolling around. Label shelves if that helps your family put things back in the right spot. When you're done, take a quick inventory of what you need to restock.
This simple habit turns your pantry into a functional space where you can actually find what you're looking for.
Empty And Sort
Start by taking everything out. This gives you a clean slate and lets you see what you actually have. As you handle each item, group it by category—pasta, canned vegetables, spices, snacks.
Use this moment to toss anything expired or stale. If you have duplicates, combine them into one container to save space.
Wipe And Refresh
With the shelves bare, vacuum up crumbs and wipe down all surfaces with a damp cloth and mild cleaner. Pay attention to corners and under shelf liners where spills can hide. Let everything dry completely before restocking.
This step prevents pests and keeps your pantry smelling fresh.
Organize For Visibility
Return items in a way that makes sense for how you cook. Put frequently used ingredients at eye level and less-used items on higher or lower shelves. Use clear containers for dry goods like flour, sugar, and cereal so you can see when supplies are low.
Arrange cans and jars with labels facing forward. Group similar items together—all baking supplies in one bin, all breakfast items in another.
Maintain The System
After your monthly reset, keep it tidy with a quick daily check. When you put away groceries, take a moment to push older items to the front and newer ones to the back. Wipe up spills as they happen.
A few minutes each day prevents the chaos from building up again.
10. Refrigerator Clean-Out
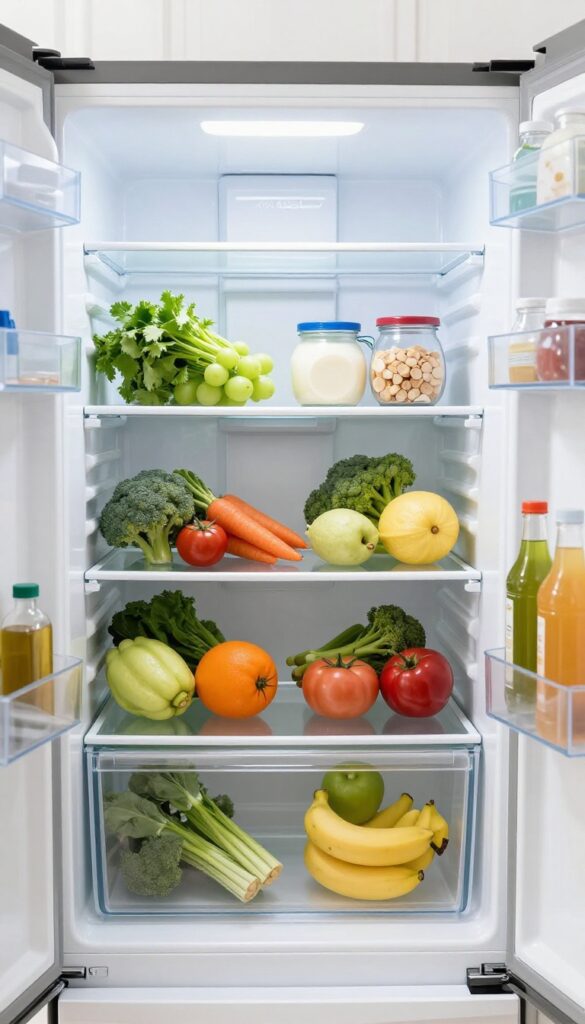
Your fridge works hard to keep food fresh, but it can quickly become a science experiment. A weekly clean-out before your grocery run prevents waste, saves money, and makes meal prep easier. Plus, you'll actually see what you have.
Start by removing everything—yes, everything. Check expiration dates and toss anything past its prime. Wipe down shelves and drawers with a mild cleaner or vinegar solution.
Group similar items together: condiments, dairy, produce, leftovers. Use clear bins or lazy Susans to keep things visible and accessible. Finally, give the door shelves a quick wipe and return items neatly.
This routine takes 15 minutes but saves hours of frustration.
What To Toss And What To Keep
Be ruthless with expired items, wilted vegetables, and mystery leftovers. Keep only what you'll realistically use in the next week. Transfer leftovers into clear containers and label them with dates.
Organizing For Visibility
Store frequently used items at eye level. Use bins for like items—cheeses, yogurts, sauces. Keep raw meat on the bottom shelf to avoid drips.
Designate a 'eat first' bin for items nearing expiration.
Quick Cleaning Hacks
Use a microfiber cloth and an all-purpose cleaner. For stubborn spills, let baking soda paste sit for 10 minutes. Remove drawers and wash them in warm soapy water.
Dry thoroughly before replacing.
11. Oven and Stovetop Deep Clean
Your oven and stovetop take a beating from spills, splatters, and baked-on grease. A deep clean not only makes them look brand new but also helps your oven heat more evenly and your stovetop cook more efficiently. Set aside an hour for this task, and you'll wonder why you put it off so long.
Start With A Baking Soda Paste
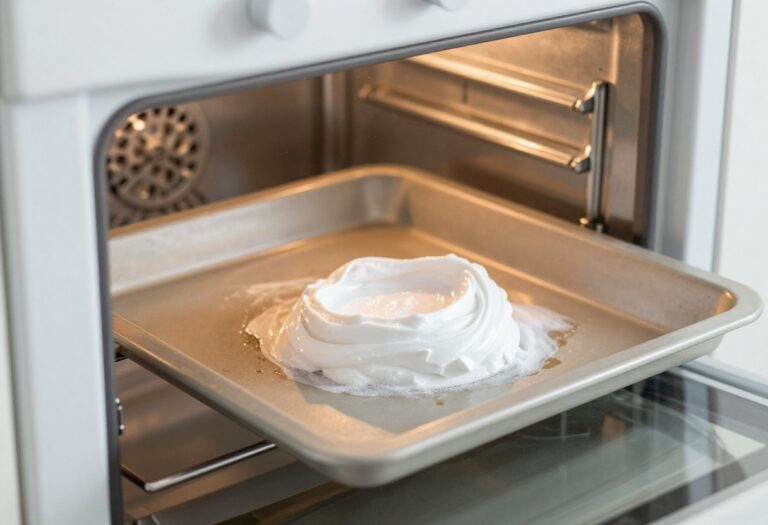
Mix baking soda with a little water to form a spreadable paste. Coat the inside of your oven (avoid heating elements) and let it sit overnight. The paste breaks down grease without harsh fumes.
Wipe it out the next morning with a damp cloth, then spray vinegar to fizz away any residue.
Tackle The Stovetop Grates And Burners
Remove grates and burner caps and soak them in hot, soapy water for 30 minutes. Scrub with a non-abrasive sponge to remove burnt-on food. For gas stovetops, use a toothbrush to clean the burner ports.
Dry everything completely before reassembling.
Finish With A Glass Oven Door Polish
The oven door often has a stubborn layer of grease. Make a paste of baking soda and water, apply it, let it sit for 20 minutes, then scrub with a sponge. For a streak-free shine, wipe with a microfiber cloth dampened with vinegar.
Your oven will look like new.
12. Microwave and Small Appliance Wipe
Your microwave, toaster, and coffee maker see daily use but rarely get the attention they deserve. A quick wipe-down of these appliances keeps them looking fresh and working well. Plus, it prevents old food smells and sticky buildup from lingering.
Start With The Microwave
Fill a microwave-safe bowl with water and a few lemon slices or a splash of vinegar. Heat it for three minutes, then let it sit for another two. The steam loosens all that dried-on gunk, so you can easily wipe the interior with a damp cloth.
Don't forget the turntable and the door seal—those spots trap crumbs and splatters.
Tackle The Toaster And Toaster Oven
Unplug the toaster first, then shake out crumbs over the sink. Use a soft brush or a dry cloth to clean the inside walls. For the exterior, a damp microfiber cloth works wonders—just avoid getting water near the slots.
For toaster ovens, remove the crumb tray and wash it with warm soapy water. Wipe the glass door with a vinegar-water solution to remove grease spots.
Refresh Your Coffee Maker
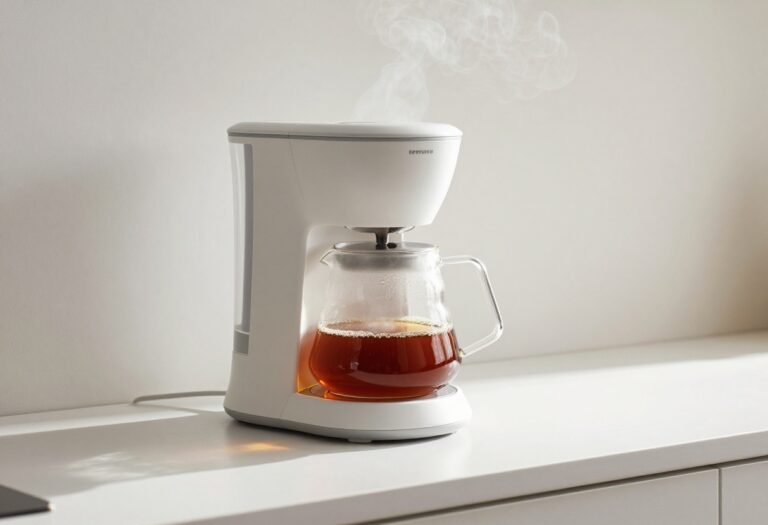
Remove the carafe and filter basket, and wash them in warm soapy water. Wipe down the warming plate and the exterior with a damp cloth. For a deeper clean, run a cycle with equal parts water and white vinegar, then two cycles with plain water.
This removes mineral deposits and keeps your coffee tasting fresh.
13. Dishwasher Filter and Seal Care
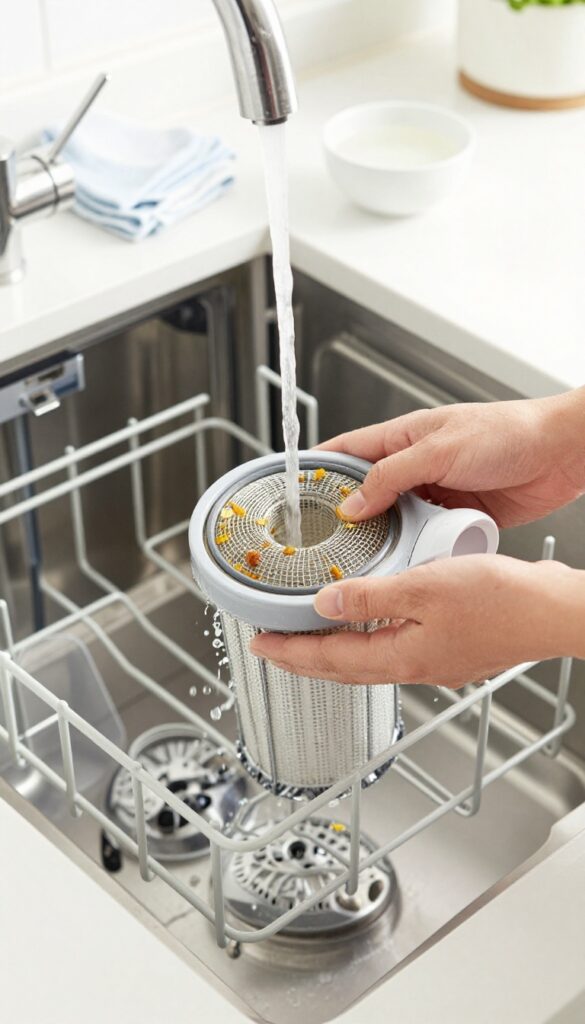
Your dishwasher works hard to keep dishes spotless, but it needs a little TLC to stay efficient. Many people forget about the filter and door seal until a funky smell or poor cleaning performance shows up. A quick monthly maintenance routine can prevent buildup and extend the life of your machine.
Start by locating the filter at the bottom of the dishwasher—usually a cylindrical mesh or flat screen. Twist it counterclockwise to remove, then rinse it under hot water to dislodge food particles. Use a soft brush or old toothbrush for stubborn debris.
Wipe the door seal with a damp cloth and mild soap to remove grime and mold. Finally, run an empty cycle with a cup of white vinegar in a dishwasher-safe bowl on the top rack to deodorize and descale. This simple routine keeps your dishwasher fresh and running efficiently.
How To Clean The Filter
Pull out the bottom rack to access the filter. Twist it off and rinse under running water. Use a soft brush to scrub away stuck-on bits.
Let it dry before reinstalling.
Wiping The Door Seal
The rubber seal around the door traps moisture and food residue. Wipe it down with a cloth dipped in warm, soapy water. Pay attention to folds and crevices where mold can hide.
Running A Cleaning Cycle
Place a cup of white vinegar on the top rack and run a hot water cycle. This cuts grease, removes odors, and prevents mineral buildup. Do this monthly for best results.
14. Window and Glass Cleaning
Clean windows and glass surfaces can instantly make your home feel brighter and more spacious. Dust, smudges, and hard water stains accumulate quickly, especially on frequently used doors and mirrors. A monthly cleaning routine keeps them sparkling without the streaks.
Best Diy Streak-free Cleaner
Skip the expensive store-bought sprays. Mix equal parts white vinegar and distilled water in a spray bottle, then add a drop of dish soap. The vinegar cuts grease and grime, while the soap prevents streaking.
For extra shine, finish with a microfiber cloth.
Tools That Make A Difference
A good squeegee is worth its weight in gold. Use a rubber-blade squeegee for large windows and a smaller one for shower doors. Microfiber cloths are lint-free and absorbent, perfect for mirrors.
Avoid paper towels—they leave residue.
Hard Water Stain Removal
For stubborn mineral deposits on glass doors or windows, make a paste of baking soda and vinegar. Apply it, let it sit for 15 minutes, then scrub gently with a non-abrasive sponge. Rinse thoroughly and dry with a microfiber cloth.
15. Ceiling Fans and Light Fixtures
Ceiling fans and light fixtures are often the forgotten heroes of a clean home. They collect dust and grime that can circulate through the air, making allergies worse and dulling the room's brightness. Giving them a regular wipe-down not only improves air quality but also makes your whole space feel fresher.
Start by turning off the power to the fan or fixture to stay safe. Use a microfiber duster or an old pillowcase to trap dust from fan blades without scattering it everywhere. For light fixtures, remove any glass covers and wash them in warm, soapy water, then dry thoroughly before reattaching.
Don't forget the pull chains and the area around the base—those spots collect dust too. Wipe down bulbs with a dry cloth to keep them shining bright. Aim to do this every month or two, and you'll notice less dust settling on furniture.
Dust Fan Blades Without The Mess
The best trick is to use an old pillowcase. Slip it over each blade, then pull it back off—the dust stays inside the case. No clouds of dust floating around your room.
You can also use a microfiber duster with an extendable handle to reach high fans easily.
Clean Light Fixtures For Better Light
Dusty bulbs and glass shades can cut light output by up to 30%. Remove glass covers carefully and wash them in the sink with mild dish soap. Let them air dry completely before putting them back.
Wipe bulbs with a dry cloth—never wet, as moisture can cause them to burst.
Don't Forget The Hardware
The fan motor housing, pull chains, and light switch plates also gather grime. Wipe them down with a damp cloth and a little all-purpose cleaner. For ceiling fans, check that screws are tight and the fan is balanced to avoid wobbling and noise.
16. Baseboards and Trim Dusting
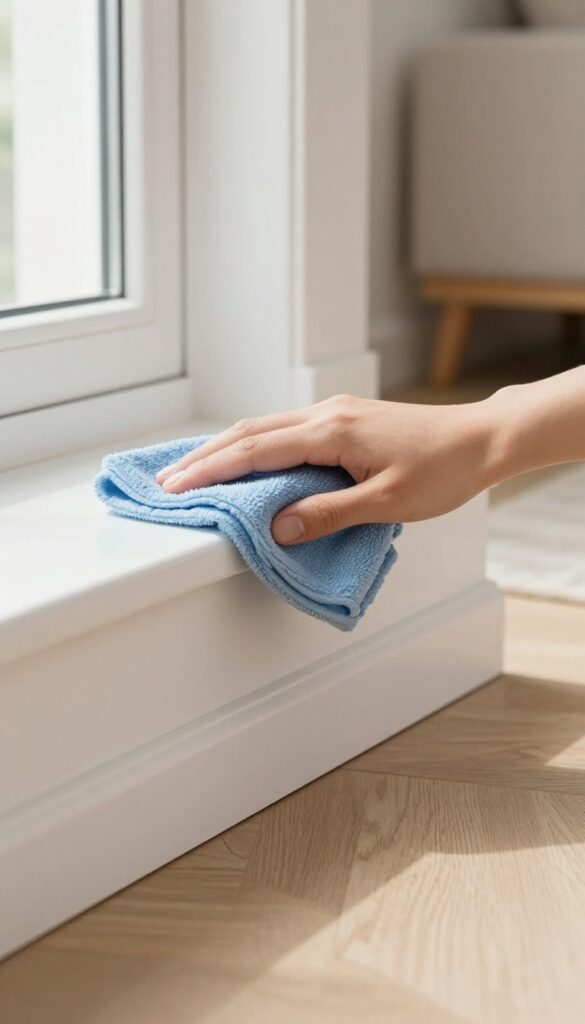
Baseboards and trim are the unsung heroes of a clean-looking room. They collect dust, pet hair, and grime that you might not notice until you actually run your finger along them. A quick dusting every few weeks keeps them looking fresh and prevents buildup that can be tough to scrub later.
Use a microfiber cloth or a long-handled duster to wipe down baseboards, door frames, and window sills. Start at one end of the room and work your way around, bending or using an extension tool to reach low spots. For stubborn dirt, lightly dampen the cloth with water or a gentle cleaner.
This simple habit makes your entire home feel cleaner without much effort.
Why Baseboards Matter
Baseboards frame your floors and walls, so when they're dusty, the whole room looks neglected. Regular dusting prevents that gray film from settling in, especially in high-traffic areas. It's a small detail that makes a big difference in how polished your space feels.
Tools That Make It Easy
A microfiber cloth is your best friend here—it traps dust instead of pushing it around. A flat microfiber mop with a swivel head can also work wonders for baseboards without you having to bend over. For tight corners, a small detailing brush or an old toothbrush gets into crevices.
Quick Routine Tips
Tackle baseboards while you're already dusting other surfaces, like shelves or blinds. Set a reminder every two to four weeks so it becomes automatic. If you have pets or live on a dirt road, you might need to do it weekly.
Just a few minutes per room keeps the grime at bay.
17. Upholstery and Curtain Care
Your sofa, armchairs, and curtains collect dust, pet dander, and allergens over time, yet they're often overlooked in regular cleaning routines. Giving them some attention not only freshens up your living space but also extends the life of your furniture and fabrics. A little regular care goes a long way toward a healthier home.
Vacuum Every Surface
Use your vacuum's upholstery attachment to go over sofas, chairs, and even curtains. Don't forget the crevices where crumbs and dust hide. For curtains, vacuum from top to bottom using a gentle brush attachment to avoid snagging delicate fabrics.
Spot-clean Stains Immediately
Blot spills right away with a clean cloth—never rub, as that pushes the stain deeper. Use a mild detergent solution or a fabric-safe cleaner, testing on an inconspicuous area first. For curtains, check the care label before applying any liquid.
Deodorize And Refresh
Sprinkle baking soda on upholstery, let it sit for 15 minutes, then vacuum it up to neutralize odors. For curtains, a quick steam or a fabric refresher spray can help between washes. This keeps your living room smelling clean without harsh chemicals.
Schedule Deep Cleaning
Aim to deep-clean upholstery and curtains every 6 to 12 months. You can rent a steam cleaner or hire a professional for a thorough job. Regular deep cleaning removes embedded dirt and allergens, keeping your home truly fresh.
18. Carpet and Rug Deep Clean
Carpets and rugs are magnets for dust, dirt, and allergens, but they don't always look dirty until they start smelling or looking matted. A deep clean every 6 to 12 months can revive them and make your whole room feel fresher. High-traffic areas might need attention more often—think hallways, living room paths, and spots where pets hang out.
Shampooing your carpets and rugs isn't just about appearances; it extends their life by removing grit that wears down fibers. You can rent a machine, hire a pro, or use a handheld cleaner for spot treatments. The key is to vacuum thoroughly beforehand and let everything dry completely to prevent mold.
Prep Work Matters
Before you break out the shampoo, vacuum the carpet multiple times to lift loose dirt. Move furniture to another room or place foil under legs to avoid rust stains. Test your cleaner on a hidden spot to make sure it doesn't discolor the fibers.
Choosing The Right Cleaner
Not all carpet cleaners are the same. For synthetic fibers, a general detergent works fine, but wool or silk rugs need a gentle, pH-neutral solution. If you have pets, look for an enzymatic cleaner to break down odors and stains.
Drying And Post-clean Care
After cleaning, open windows and run fans to speed up drying—this can take 6 to 12 hours. Avoid walking on the carpet until it's fully dry to prevent re-soiling. Once dry, vacuum again to fluff the fibers and restore the texture.
19. Mattress and Pillow Freshening
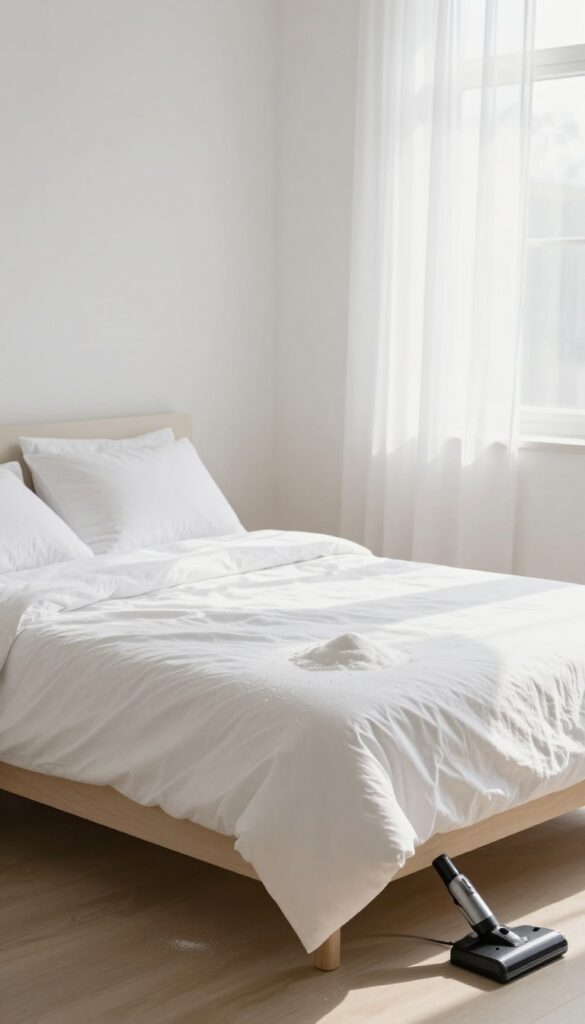
Your mattress and pillows work hard every night, absorbing sweat, dead skin cells, and dust mites. Over time, they can start to smell and become a haven for allergens. Freshening them up is easier than you think and makes a huge difference in your sleep quality.
Start by stripping all bedding and washing it in hot water. Vacuum the entire mattress surface, paying extra attention to seams and crevices. Sprinkle a generous layer of baking soda over the mattress and let it sit for at least 30 minutes—longer if possible.
The baking soda absorbs odors and moisture. Vacuum it all up thoroughly. For pillows, check the care label; most can be machine washed on a gentle cycle with mild detergent.
Dry them completely, fluffing occasionally to prevent clumping. Aim to wash pillows every three to six months.
Why Mattress Freshening Matters
You spend a third of your life in bed, so keeping your mattress clean directly impacts your health. Dust mites, mold, and bacteria thrive in warm, moist environments. Regular vacuuming and baking soda treatments reduce allergens and extend the life of your mattress.
It also helps your bedroom smell fresh without chemical sprays.
How To Wash Pillows Correctly
Most synthetic pillows can go in the washing machine, but memory foam and latex pillows need spot cleaning only. Use a gentle cycle with warm water and a small amount of detergent. Add an extra rinse cycle to remove all soap residue.
Dry pillows on low heat with a couple of tennis balls or dryer balls to keep them fluffy. Make sure they are completely dry to prevent mold.
Quick Monthly Freshening Routine
Between deep cleans, give your mattress a quick refresh. Strip the bed and spray a light mist of vodka or a fabric refresher (test first). Let it air out for 15 minutes.
For pillows, toss them in the dryer on a no-heat or air-only cycle with a dryer sheet for 10 minutes to fluff and deodorize.
20. Closet Organization and Purge
Your closet might be the most personal space in your home, yet it's often the most chaotic. When you can't find what you're looking for or you're squeezing clothes past overstuffed hangers, it sets a stressful tone for the day. A seasonal closet overhaul isn't just about tidying—it's about curating a wardrobe that actually works for you.
Set aside a few hours twice a year to completely empty your closet. As you pull everything out, you'll see exactly what you own and spot items you forgot about. This fresh start makes it easier to decide what stays and what goes.
The Three-pile Method
Create three piles: keep, donate, and trash. Be honest with yourself—if you haven't worn it in a year, it's probably time to let it go. For items in good condition, donate to a local charity.
Anything stained, torn, or worn out should be tossed or repurposed as rags.
Organize By Category And Color
Once you've purged, group similar items together: all tops, pants, dresses, and outerwear. Within each category, arrange by color from light to dark. This visual system makes it a breeze to grab what you need and see what you have.
Storage Solutions That Stick
Use matching hangers for a uniform look and to save space. Add shelf dividers for sweaters and bins for accessories like scarves and belts. If you have seasonal items, store them in labeled bins on the top shelf or under the bed.
21. Drawer and Cabinet Declutter
Drawers and cabinets are where clutter goes to hide. You shove things in and shut the door, only to forget what's actually in there. Tackling them one at a time makes the job painless and surprisingly satisfying.
Start with the junk drawer or the most chaotic cabinet—the one you avoid opening. Empty everything onto a clean surface, wipe down the inside, and toss anything expired, broken, or unused. Group similar items together, then decide what truly belongs.
Use drawer dividers, small bins, or even cardboard boxes to keep categories separate. Only put back what you use regularly; relocate rarely-used items to a storage bin elsewhere. This method turns chaos into calm, one compartment at a time.
Why One At A Time Works
Trying to declutter every drawer at once is overwhelming. By focusing on a single drawer or cabinet, you build momentum without the burnout. Each small win motivates you to keep going, and you'll see immediate results in your daily routine.
What To Keep, Toss, Or Relocate
Be ruthless. If you haven't used it in a year, it's probably not essential. Toss expired spices, broken utensils, and old receipts.
Keep only what you reach for regularly. Items you use occasionally but not daily can go in a labeled bin in the garage or basement.
Organizing Tools That Actually Help
Drawer dividers, adjustable shelf risers, and small clear containers are game-changers. They prevent items from shifting and make everything visible at a glance. Even simple DIY solutions like egg cartons for small items or shoeboxes for larger ones work wonders.
22. Electronics and Tech Clean

Our gadgets and screens get touched, breathed on, and dropped into couch cushions daily. They're also some of the germiest spots in the house. A quick electronics wipe-down not only keeps things looking new but also extends the life of your devices.
Start by unplugging everything. Use a dry microfiber cloth for screens—no paper towels or harsh cleaners. For keyboards, turn them upside down and gently tap out crumbs, then use a compressed air canister to blast between keys.
Remote controls, gaming controllers, and phone cases can be wiped with a slightly damp cloth (just a little water) or a 70% isopropyl alcohol wipe. Don't forget to clean charging ports and headphone jacks with a dry cotton swab or a soft brush. Finally, vacuum or dust vents on computers, gaming consoles, and TVs to prevent overheating.
Screens And Displays
TVs, monitors, laptops, and phones all need gentle care. Use a soft, lint-free microfiber cloth and just water or a dedicated screen cleaner. Never spray liquid directly on the screen—spray on the cloth first.
Wipe in gentle circles to avoid streaks.
Keyboards And Mice
Keyboards are crumb magnets. Shake out loose debris, then use compressed air to dislodge stubborn bits. For sticky keys, a slightly damp cloth or alcohol wipe works.
Mice get grimy from hand oils—wipe the top and bottom, and clean the sensor with a dry cotton swab.
Cords And Accessories
Charging cables, earbuds, and other accessories collect dust and grime. Wipe cables with a damp cloth and let them dry fully before coiling. Earbud tips can be removed and cleaned with soapy water.
Organize loose cords with velcro ties or clips to prevent tangling.
23. Outdoor Living Space Sweep
Your patio, deck, or balcony is an extension of your home, but it often gets neglected in cleaning routines. A quick sweep and wipe-down can transform it from a dusty afterthought into a welcoming retreat. When the outdoor area is tidy, you're more likely to use it and actually relax there.
Sweep And Clear Debris
Start by sweeping the entire surface—concrete, wood, or tile—to remove leaves, dirt, and cobwebs. Don't forget corners and under furniture. If you have potted plants, move them aside to get underneath.
A leaf blower can speed things up for larger spaces.
Wipe Down Furniture And Cushions
Use a mild soap solution or a specialized outdoor cleaner to wipe down tables, chairs, and benches. For cushions, check the care label—most can be spot-cleaned with a damp cloth and mild detergent. Let everything air dry completely before putting cushions back.
Tackle The Details
Wipe railings, light fixtures, and door frames. Clean the grill if it's nearby. Sweep or hose down the steps.
A final touch: arrange furniture neatly and add a fresh doormat. Now your outdoor space is ready for morning coffee or evening hangs.
24. Garage and Storage Area Tidy
The garage often becomes the dumping ground for everything that doesn't have a home inside the house. But a cluttered garage makes it hard to park your car, find tools, or start projects. With a focused cleaning checklist, you can reclaim this space and turn it into a functional area that actually works for you.
Start by clearing everything out of the garage so you can see what you're working with. Sweep the floor thoroughly, then sort items into keep, donate, sell, or trash piles. Be ruthless—if you haven't used it in a year, it's probably time to let it go.
Organize Tools And Equipment
Group similar items together: power tools, hand tools, gardening equipment, sports gear, and car care supplies. Use pegboards for frequently used tools, shelves for bins, and hooks for larger items like ladders and hoses. Label everything clearly so you can find what you need in seconds.
Dispose Of Hazardous Waste Properly
Old paint, batteries, motor oil, and pesticides can't go in the regular trash. Check your local waste management guidelines for drop-off locations or special collection days. Proper disposal keeps your family safe and protects the environment.
Maximize Vertical Space
Install heavy-duty shelving units along the walls to store bins off the floor. Overhead storage racks are perfect for seasonal items like holiday decorations or camping gear. The more you get off the ground, the easier it is to clean and move around.
Maintain A Clear Floor Plan
Designate zones for parking, workbench, and storage. Keep a clear path from the door to the car and to the house entry. A monthly quick tidy—sweeping, returning misplaced items, and checking for spills—keeps the garage from sliding back into chaos.
25. Seasonal Deep Clean Checklist

The changing seasons are the perfect reminder to give your home a thorough refresh. A seasonal deep clean checklist ensures you tackle the big jobs—like washing windows, deep cleaning carpets, and rotating bedding—before they pile up. By breaking tasks into spring, summer, fall, and winter lists, you keep your home feeling fresh all year without the overwhelm of a single massive clean.
A seasonal deep clean checklist is your secret weapon against dust, grime, and clutter that builds up over months. Each season brings specific tasks: spring for windows and screens, summer for outdoor spaces and fans, fall for gutters and cozy linens, winter for indoor air quality and holiday prep. Rotating these chores prevents any one season from becoming a cleaning marathon.
Plus, it’s a great way to involve the whole family—assign each person a room or task so the work gets done faster.
Spring: Wake Up Your Home
Start with windows—wash inside and out, and clean screens. Deep clean carpets with a steam cleaner or hire a pro. Rotate heavy winter bedding for lighter linens, and store bulky blankets.
Declutter closets by pulling out items you didn’t wear all season and donate or sell them. Don’t forget the fridge: pull it out, wipe behind, and toss expired food.
Summer: Tackle Outdoor And High-traffic Areas
Focus on patios, decks, and outdoor furniture—scrub and seal if needed. Clean ceiling fans and light fixtures, which collect dust during warmer months. Wash area rugs and flip mattresses.
Deep clean the kitchen: degrease range hood, scrub oven, and organize pantry. Also, check and clean air conditioner filters for better efficiency.
Fall: Cozy Up And Prep For Winter
Clean gutters and downspouts before leaves pile up. Swap summer clothes for fall and winter gear, and store summer items properly. Deep clean carpets again to remove summer dirt.
Wash all blankets and comforters, and rotate to heavier bedding. Give the fireplace a thorough cleaning—remove ash, check the flue, and stock firewood neatly.
Winter: Indoor Focus And Holiday Prep
Focus on indoor air quality: replace HVAC filters, clean vents, and vacuum upholstery. Deep clean the bathroom—scrub grout, descale showerheads, and organize medicine cabinets. Before holiday guests arrive, declutter common areas and do a top-to-bottom dusting.
Finally, clean the oven and stovetop so you’re ready for big meals.
FAQ
How often should I deep clean my home?
Deep cleaning tasks like carpet shampooing or oven cleaning are best done every 3-6 months. High-traffic areas may need more frequent attention.
What's the best way to stay on top of daily cleaning?
Set a timer for 10-15 minutes each evening to do a quick tidy. Consistency beats marathon cleaning sessions.
Should I clean room by room or by task?
Both work, but room-by-room is often easier to manage. Focus on one space at a time to avoid feeling scattered.
How can I make cleaning less overwhelming?
Break tasks into small, specific steps. Use a checklist and reward yourself after completing each section.
What are the most important areas to clean regularly?
Kitchen and bathrooms should be cleaned weekly due to germs and moisture. High-touch surfaces like doorknobs and light switches should be wiped daily.
Conclusion
A tidy home isn't about perfection—it's about building routines that actually stick. Start with just two or three checklist ideas that feel manageable, then layer in more as those become second nature.
The goal is progress, not a spotless house overnight. Pick what works for your lifestyle, stay consistent, and watch your space transform without the overwhelm.