11 Easy DIY Camping Shower Ideas with Simple, Stylish Design
After a long day of hiking or lounging by the campfire, nothing beats a warm shower. But hauling a full bathroom into the woods isn't exactly practical. The good news?
You can build a simple, stylish camping shower with everyday materials and a little creativity. These DIY projects range from five-minute fixes to weekend builds, so there's something for every skill level.
Whether you're car camping or backpacking, these ideas focus on affordability, portability, and keeping things simple. Let's dive into the best ways to rinse off under the open sky.
1. The Classic Solar Shower Bag
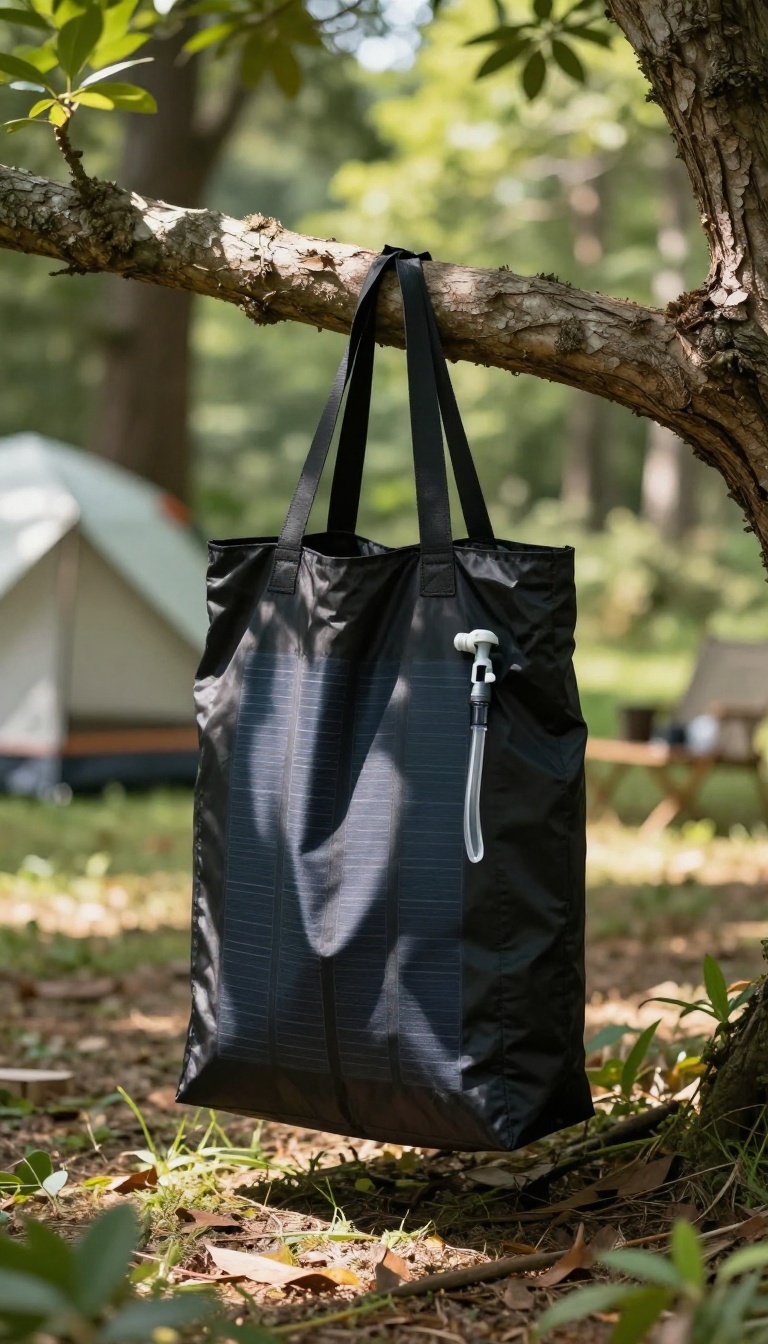
The solar shower bag is the go-to for many campers because it’s simple, cheap, and effective. You just fill it with water, leave it in the sun for a few hours, and you’ve got a warm shower ready to go. It’s a no-fuss solution that works almost anywhere, from a backyard to a remote trail.
This design has been around for ages, and for good reason. It’s basically a heavy-duty plastic bag with a hose and a nozzle. The black material absorbs sunlight, heating the water inside.
Once it’s warm enough, you hang it from a sturdy branch or a shower stand, and gravity does the rest. The flow is gentle, but it’s plenty for a quick rinse after a dusty day.
Why It’s So Popular
The main draw is the price—you can grab a decent solar shower bag for under $20. It’s also incredibly lightweight and packs down small, which makes it perfect for backpacking or car camping. Plus, there’s no setup beyond filling and hanging.
You don’t need electricity or a pump, just a sunny spot.
How To Get The Best Results
To get the water warm, place the bag in direct sunlight for at least three to four hours. The darker the bag, the better it absorbs heat. If you’re in a hurry, you can mix in some hot water from a kettle or pot.
Hang it high enough so the nozzle is above your head, and use the on/off valve to control the flow.
A Few Clever Upgrades
You can make this basic idea even better with a few tweaks. Attach a small showerhead instead of the standard nozzle for a wider spray. Or, add a rope and pulley system so you can adjust the height without untying knots.
Some people even sew a reflective panel onto the back to speed up heating.
2. PVC Pipe Stand Shower
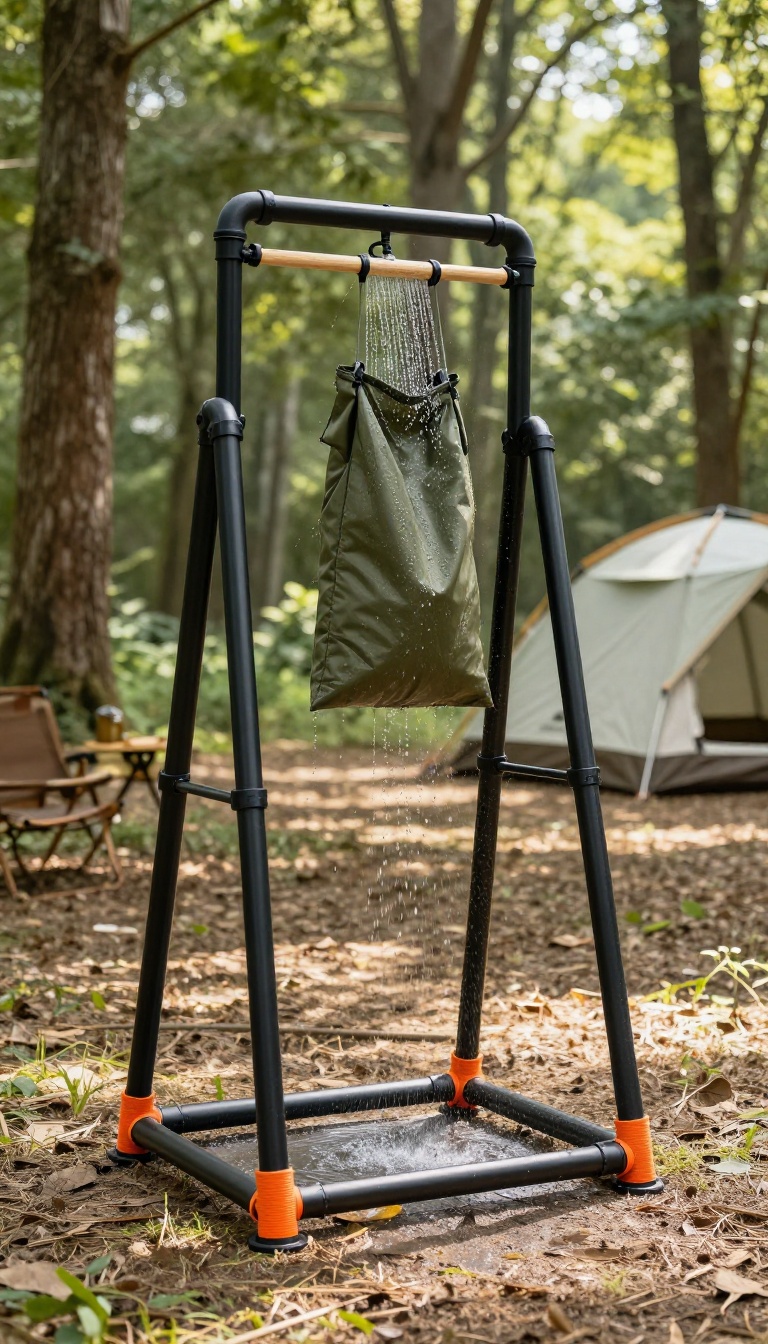
If you're camping with a group, a single hanging bag often isn't enough. A PVC pipe stand gives you a sturdy, elevated frame that can support a larger shower bag or a handheld shower head. It's a weekend project that pays off in comfort and convenience.
Building your own stand lets you customize the height and footprint to fit your campsite. Plus, you can take it apart and store it flat between trips. Here's how to make one that's both practical and easy to pack.
What You'll Need
Gather 1-inch PVC pipes, elbows, tees, and end caps. You'll also need a pipe cutter or saw, PVC cement, and a measuring tape. For a freestanding design, plan for a base that's wider than the top to prevent tipping.
Assembly Tips
Dry-fit all pieces before gluing to make sure everything aligns. Use a tee at the top to hold a shower bag hook or a clamp for a handheld shower head. If you want it collapsible, skip the cement on the joints and use friction-fit connections instead.
Making It Stylish
Spray paint the pipes in a matte black or forest green to blend into nature. Add a wooden dowel across the top for a more natural look, or wrap the legs with paracord for extra grip and a pop of color.
On-site Setup
Set the stand on level ground and consider anchoring it with tent stakes if the wind picks up. Hang your shower bag or attach a portable shower head, and you're ready to rinse off. When you're done, disassemble and store the pipes in a duffel bag.
3. Portable Camp Shower with a Weed Sprayer
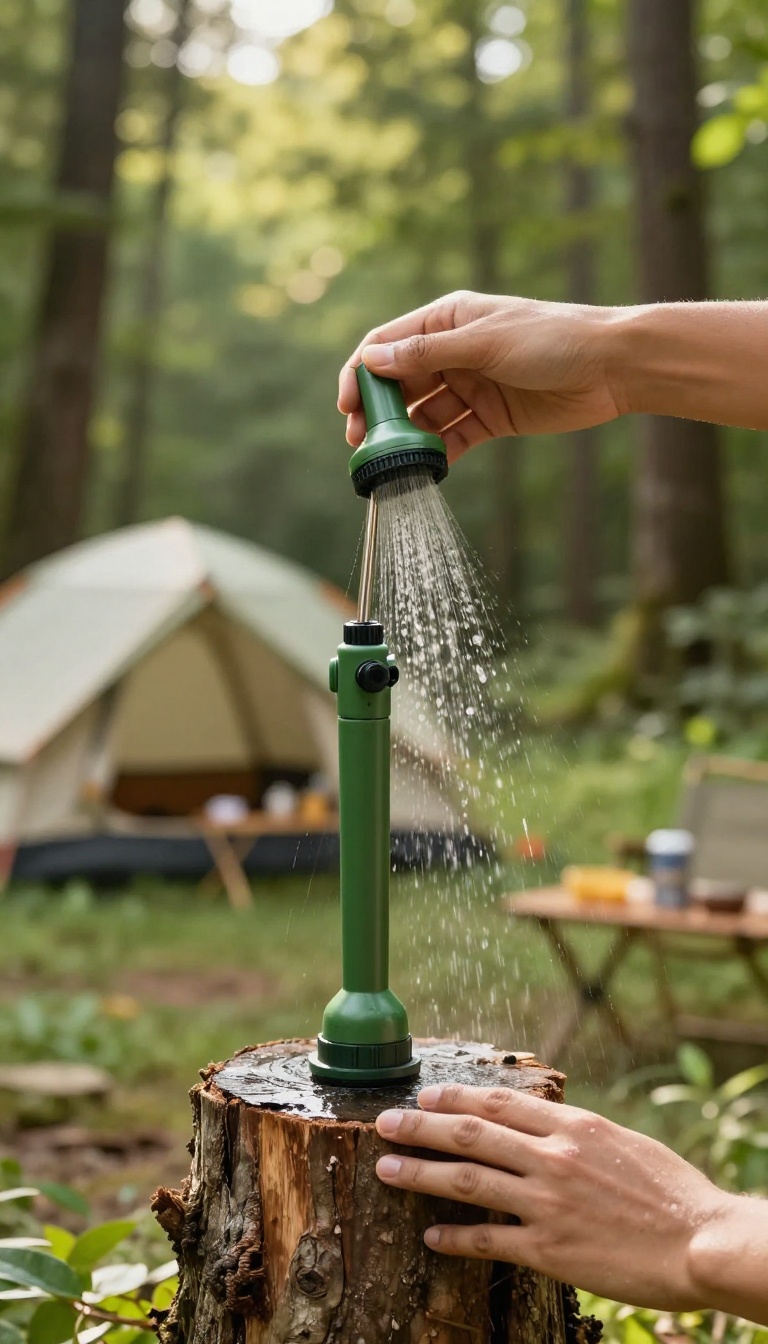
Garden centers and hardware stores are full of pump sprayers, but campers know them as something else: a handy, inexpensive shower. If you've ever used one to water plants, you know the pressure is just right for a gentle rinse. This hack turns that familiar tool into a compact camp shower that's perfect for quick clean-ups.
The weed sprayer shower is a favorite among minimalist campers because it's lightweight, easy to use, and costs almost nothing. You can pick up a new sprayer for under $20, or repurpose one you already have. The key is to clean it thoroughly before using it for personal hygiene, especially if it previously held herbicides or pesticides.
Why A Weed Sprayer Works As A Shower
The pump mechanism creates steady water pressure, so you don't need gravity or a hanging bag. You can control the flow with the nozzle, making it easy to rinse off sandy feet or spray down dishes. The tank holds a few gallons, which is plenty for a quick shower.
Plus, it's compact enough to toss in the trunk or a backpack.
How To Set It Up
First, clean the sprayer with warm soapy water and rinse thoroughly. Fill it with warm water (not boiling) and pump to pressurize. Use the nozzle to spray yourself—starting from your head and working down.
For hands-free operation, you can set the sprayer on a stump or hang it from a branch with a strap. Just remember to release the pressure before opening the tank.
Tips For A Better Experience
Warm water is more comfortable, so heat some on the camp stove and mix it with cold to get the right temperature. If you're using it for dishes, bring a separate sprayer to avoid cross-contamination. And to keep the nozzle clean, strain the water before filling to avoid clogging.
4. Privacy Shower Tent with a Bucket
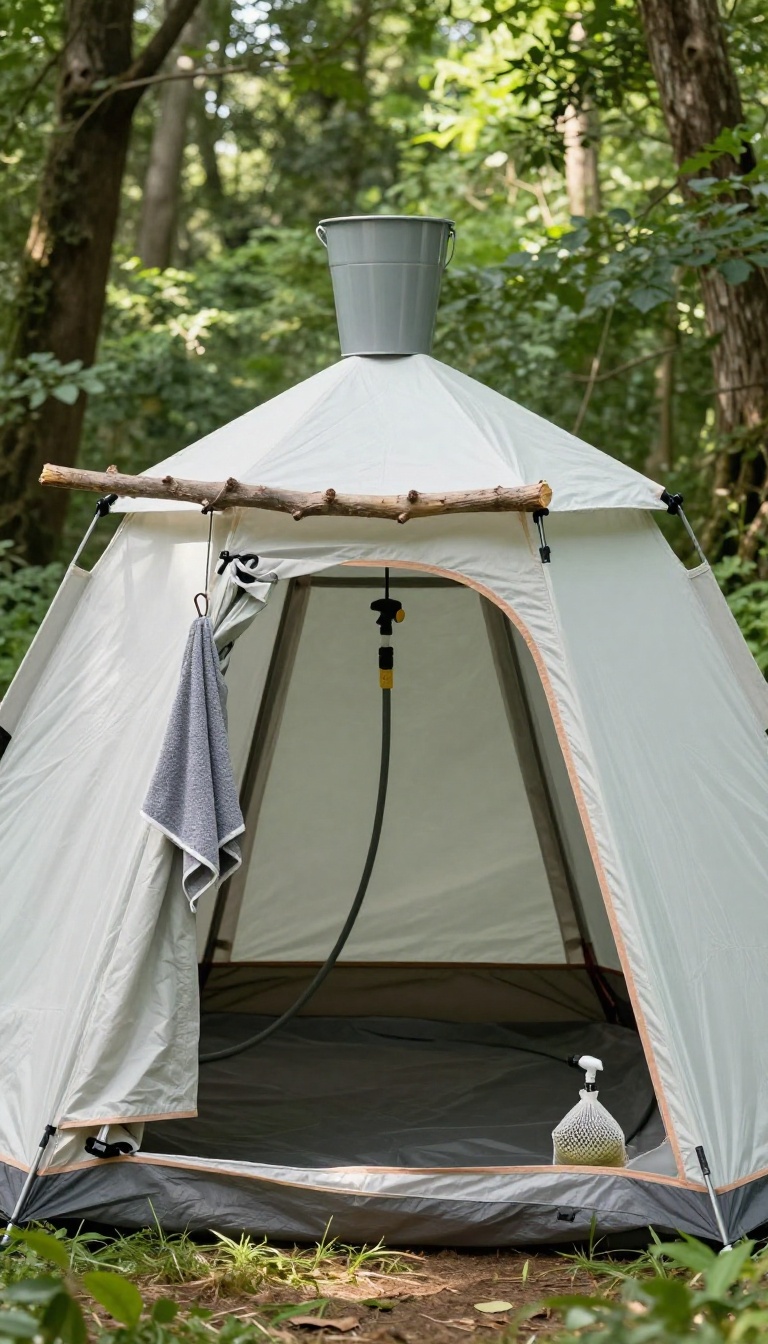
Sometimes you want more than just a rinse—you want a little privacy and a place to change without flashing the whole campsite. A pop-up privacy tent paired with a simple bucket-and-rope system gives you exactly that. It's a clever combo that's still lightweight, affordable, and easy to set up.
This setup shines when you're camping with family or friends and need a dedicated spot to wash up. The tent blocks wind and prying eyes, while the bucket provides a steady, gravity-fed flow of water. You can even hang a solar shower bag inside the tent for a warmer rinse, but the bucket method works just fine with cold water on hot days.
What You'll Need
Gather a pop-up privacy tent (the kind used for changing or as a portable toilet enclosure), a 5-gallon bucket with a lid, a length of rope or paracord, a shower head or nozzle that fits the bucket, and a small pump or just a simple spigot. Most hardware stores sell bucket shower kits with a hose and spray head that screw onto the bucket's lid.
Setting It Up
Find a level spot near your camp. Pop open the tent and secure it with stakes if it has them. Fill the bucket with water (warm if you can), screw on the shower head, and attach a rope to the bucket's handle.
Hoist the bucket to a sturdy branch or a pole inside the tent, making sure it's above head height. The water will flow by gravity when you open the valve.
Tips For A Better Experience
Hang a small mesh bag inside the tent for soap and shampoo. Keep a towel on a hook near the entrance. If you want warmer water, leave the bucket in the sun for a few hours before use.
For extra pressure, place the bucket a bit higher or use a longer hose. And always test the setup before you get in—nobody wants a surprise cold splash.
5. DIY PVC Privacy Shower Enclosure
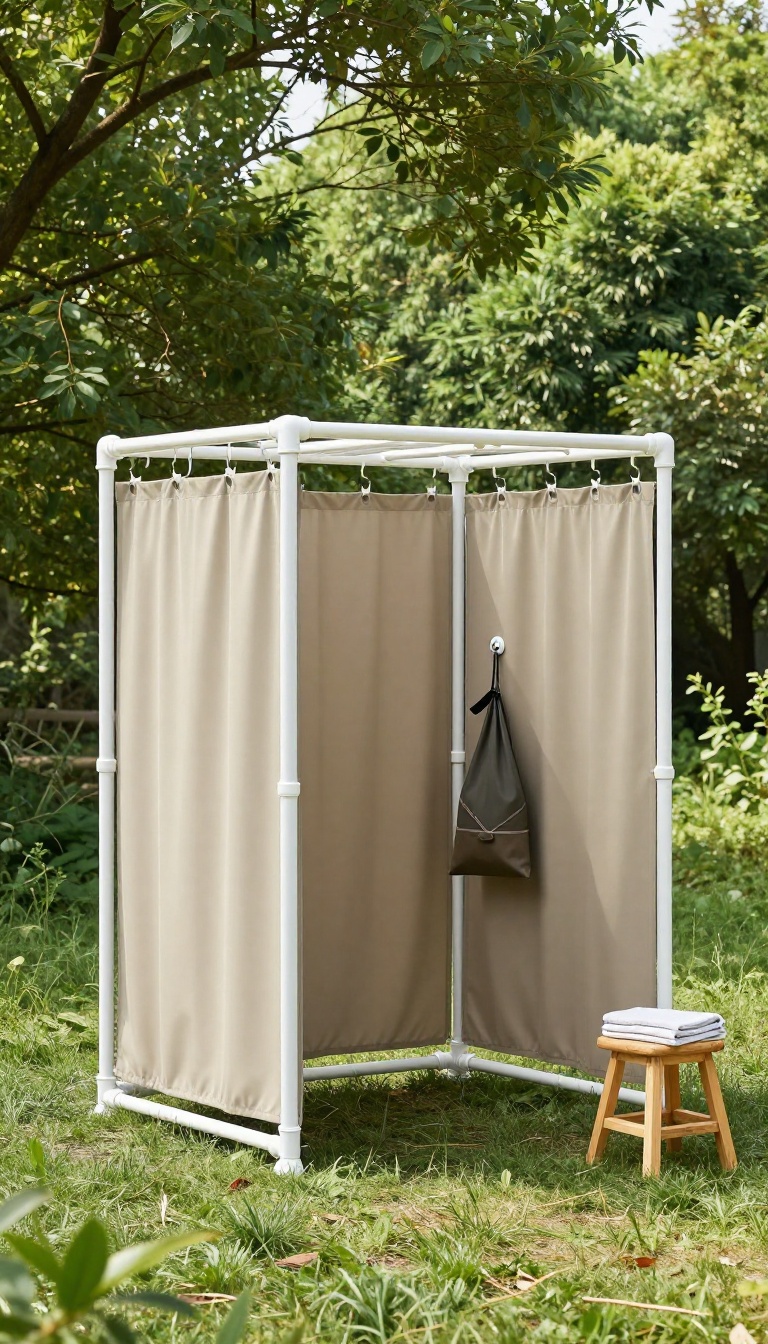
When you're camping with friends or family, finding a private spot to shower can be a challenge. A PVC privacy enclosure gives you a dedicated space that's both roomy and easy to set up. Best of all, it breaks down flat, so it won't hog space in your car.
Building a PVC privacy shower enclosure is a straightforward weekend project. You'll need PVC pipes, connectors, and a few tools. The frame is lightweight yet sturdy, and you can customize the size to fit your needs.
Once wrapped with curtains or fabric, it offers a comfortable changing area and shower stall that feels surprisingly luxurious in the outdoors.
What You'll Need
Gather 1-inch PVC pipes, elbow and tee connectors, a pipe cutter, and a measuring tape. You'll also need shower curtains or waterproof fabric, grommets, and zip ties or rope. For a freestanding structure, consider adding base flanges or sandbags for stability.
Step-by-step Assembly
Cut the PVC into your desired dimensions—typically a 4x4x7-foot frame works well. Assemble the base rectangle, then attach vertical risers at each corner. Connect the top frame, and add crossbars for extra support.
Use a pipe cutter for clean cuts and dry-fit all pieces before gluing. Once assembled, attach the curtains with grommets and zip ties, leaving an opening for entry.
Customization And Style
Choose outdoor-rated shower curtains in earthy tones or fun patterns to match your campsite vibe. Add a tension rod inside for hanging towels or clothes. For a more permanent feel, paint the PVC with spray paint designed for plastic.
You can also add a small shelf or caddy for toiletries.
Portability And Storage
The genius of this design is its portability. Disassemble the frame by pulling apart the connections—no glue needed if you want easy breakdown. Store the pipes in a long bag or bundle them with bungee cords.
The curtains can be folded separately. This setup is ideal for car campers who want a touch of comfort without permanent fixtures.
6. Solar Heated Shower with a Black Tank
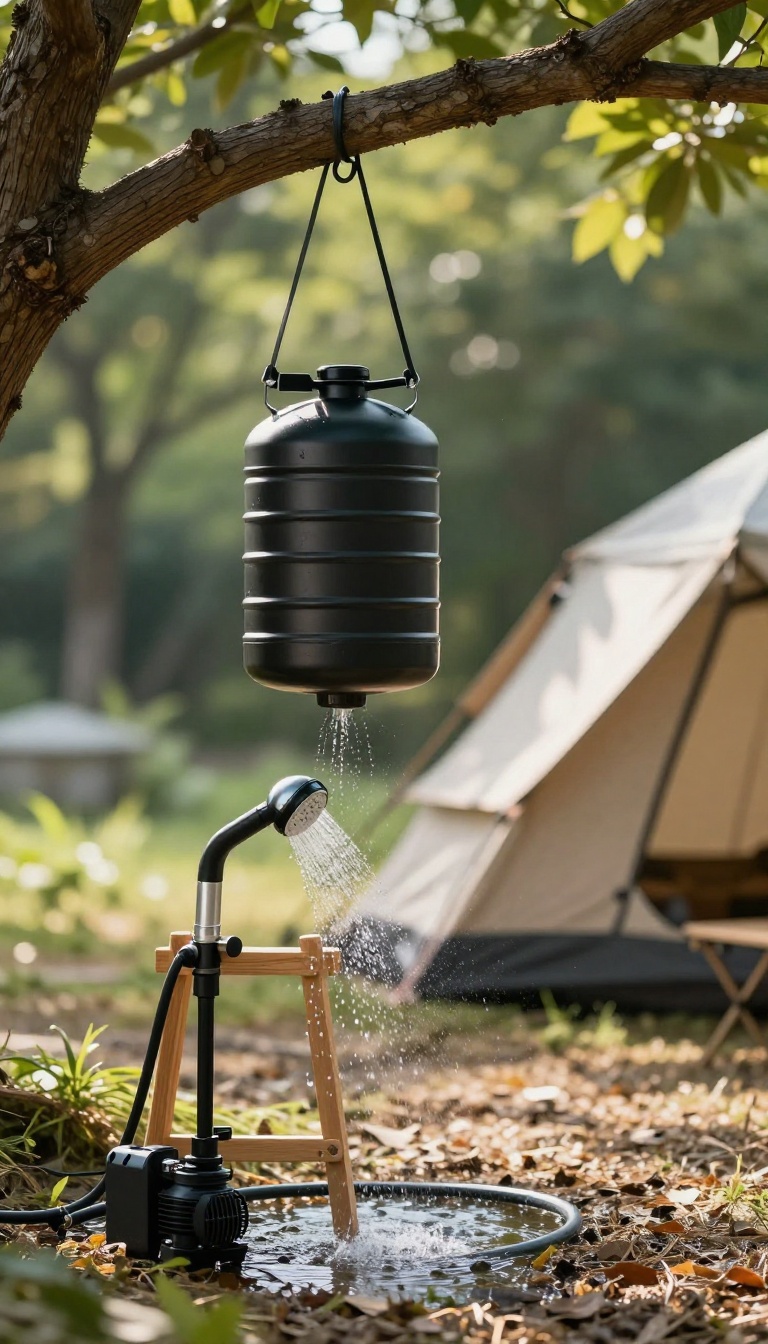
For a more powerful stream than a typical solar bag, try this setup using a large black water tank. The dark surface absorbs sunlight and warms the water inside, while a small pump delivers a steady, satisfying flow. It's a step up in comfort without a huge jump in complexity or cost.
This DIY shower uses a portable RV or boat water tank, which holds 5 to 10 gallons. Black tanks heat faster than lighter colors, so you get warm water even on partly cloudy days. You'll need a small 12V water pump, a rechargeable battery or solar panel, and a handheld showerhead to complete the system.
Picking The Right Tank
Look for a food-grade, BPA-free black tank with a wide opening for filling and cleaning. A 5-gallon tank is enough for a quick rinse, while 10 gallons gives you a more comfortable shower. Make sure it has a threaded outlet that matches your pump's inlet hose.
Setting Up The Pump And Power
A 12V water pump with a built-in strainer works well. Connect it to the tank's outlet with a short hose, then attach the showerhead to the pump's output. Power the pump with a small rechargeable battery pack or a portable solar panel.
Keep the pump close to the tank to minimize suction loss.
Heating And Using It In The Field
Place the tank in direct sunlight for a few hours before you need it. If the water isn't warm enough, you can add a few cups of hot water from a kettle. Hang the tank from a sturdy branch or use a folding stand to create height.
The pump will give you a steady spray, making it feel more like a home shower.
7. Camp Shower from a Reusable Water Bottle
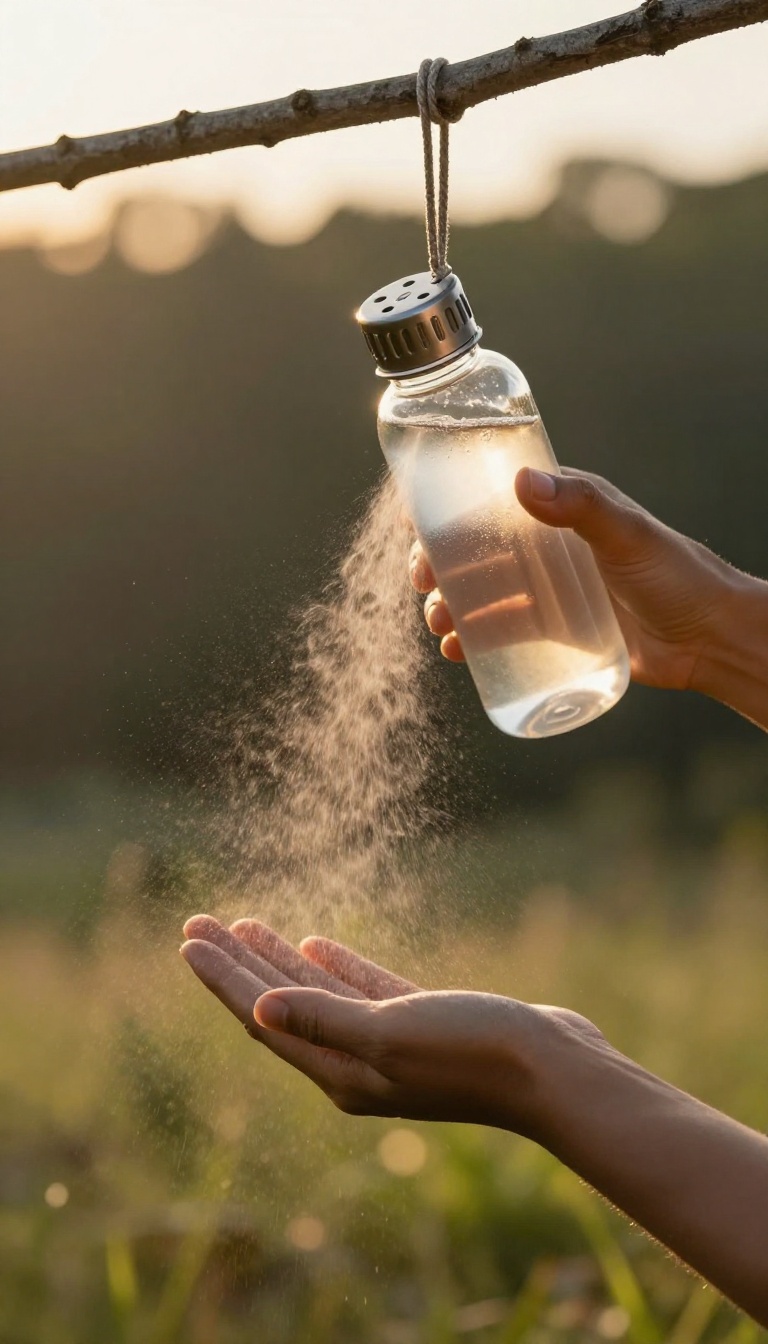
When every ounce counts, a full shower setup feels like a luxury you can't afford. But staying clean doesn't have to mean carrying extra gear. A simple reusable water bottle can double as a surprisingly effective shower, especially for ultralight backpackers who value simplicity above all.
This clever hack turns a standard water bottle into a gravity-fed shower with just a few holes and a piece of cord. It's not going to give you a spa-like experience, but it will get you clean with minimal fuss and zero added weight to your pack. The best part?
You probably already own everything you need.
What You'll Need
Gather a clean, large water bottle (like a 1-liter Nalgene or similar), a sharp pin or needle, and some sturdy cord or paracord. That's it. No fancy tools or special parts required.
How To Make It
Poke several small holes in the bottle cap using the pin. The smaller the holes, the finer the spray. Fill the bottle with water, screw the cap on, and tie the cord around the bottle's neck.
Hang it from a tree branch or a makeshift tripod, and you have a gravity-fed shower. To release the water, just loosen the cap slightly—the tighter the cap, the slower the flow.
Why It Works For Ultralight Camping
This shower weighs almost nothing and takes up no extra space since you're already carrying a water bottle. It's perfect for a quick rinse after a sweaty hike or for washing off trail dust before crawling into your sleeping bag. Just remember to use biodegradable soap and keep at least 200 feet away from natural water sources.
Tips For A Better Experience
Warm the water in the sun for a few hours if you want a less shocking rinse. For a bit more pressure, squeeze the bottle gently while it's hanging. And if you're worried about the bottle falling, use a secure knot and test it before stepping underneath.
8. DIY Camp Shower Stand from Wood
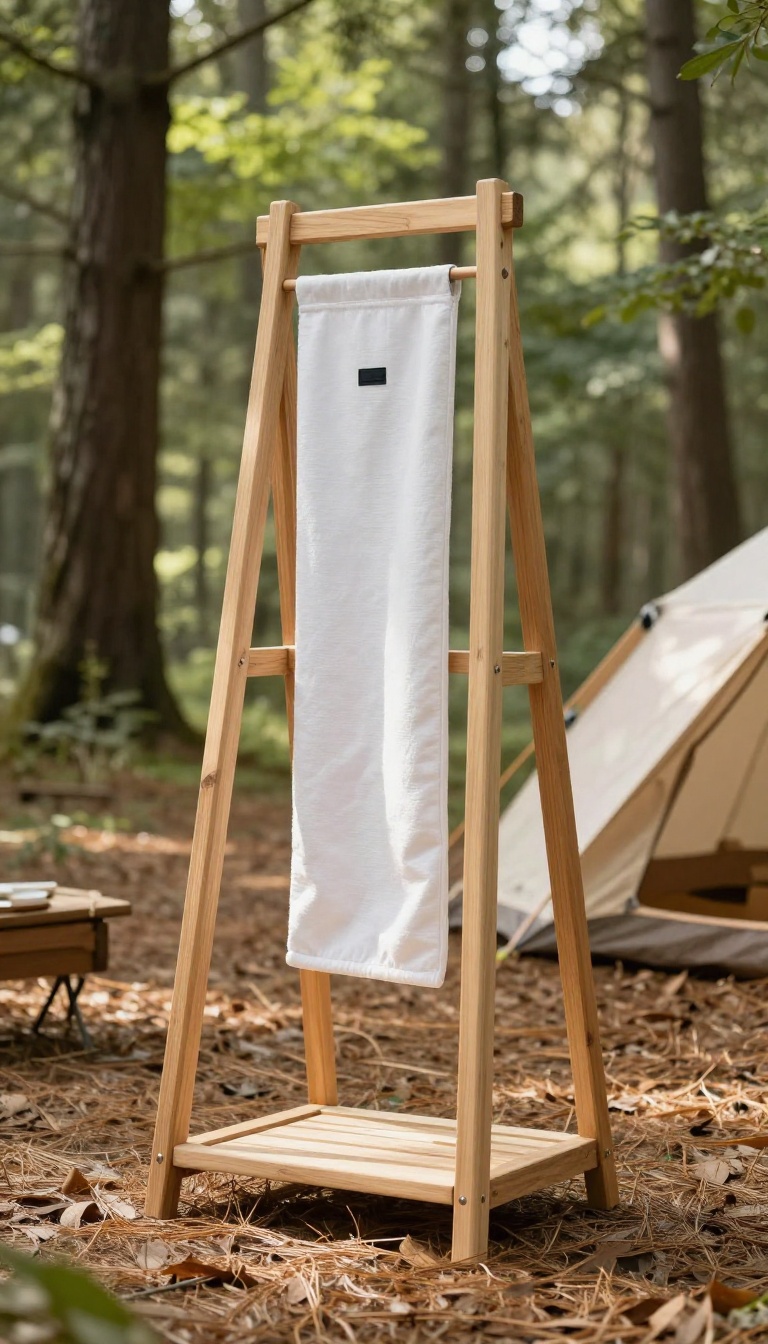
A simple wooden stand can turn a basic solar shower bag into a comfortable, hands-free setup. You don't need to be a master carpenter—just a few boards and some basic tools. This rustic A-frame design is sturdy, looks great at any campsite, and even doubles as a clothesline.
Building your own shower stand is easier than you might think. With a handful of lumber, some screws, and about an hour of your time, you'll have a reliable structure that elevates your shower bag to the perfect height. The natural wood finish blends into the surroundings, adding a warm, outdoorsy feel that plastic frames just can't match.
Why Choose A Wooden Stand?
Wooden stands are stable, eco-friendly, and surprisingly portable. They don't rust like metal, and if you treat the wood with a waterproof sealant, they'll last for many camping seasons. Plus, you can customize the height and width to fit your shower bag or bucket perfectly.
How To Build Your A-frame Stand
Start with two 6-foot 2x4s for the legs and one 2×4 for the crossbar. Cut the legs at an angle so they form an A-shape when crossed. Secure them with a bolt at the top, then attach the crossbar about 5 feet up.
Add a small hook or carabiner to hang your shower bag. Sand the edges to avoid splinters, and you're done.
Tips For A Sturdy And Safe Setup
Make sure the legs are spread wide enough for stability—about 3 feet apart at the base. You can also drive tent stakes through small holes in the legs to anchor it on windy days. For extra convenience, tie a rope between the legs to hang towels or clothes.
9. Pressurized Shower with a Foot Pump
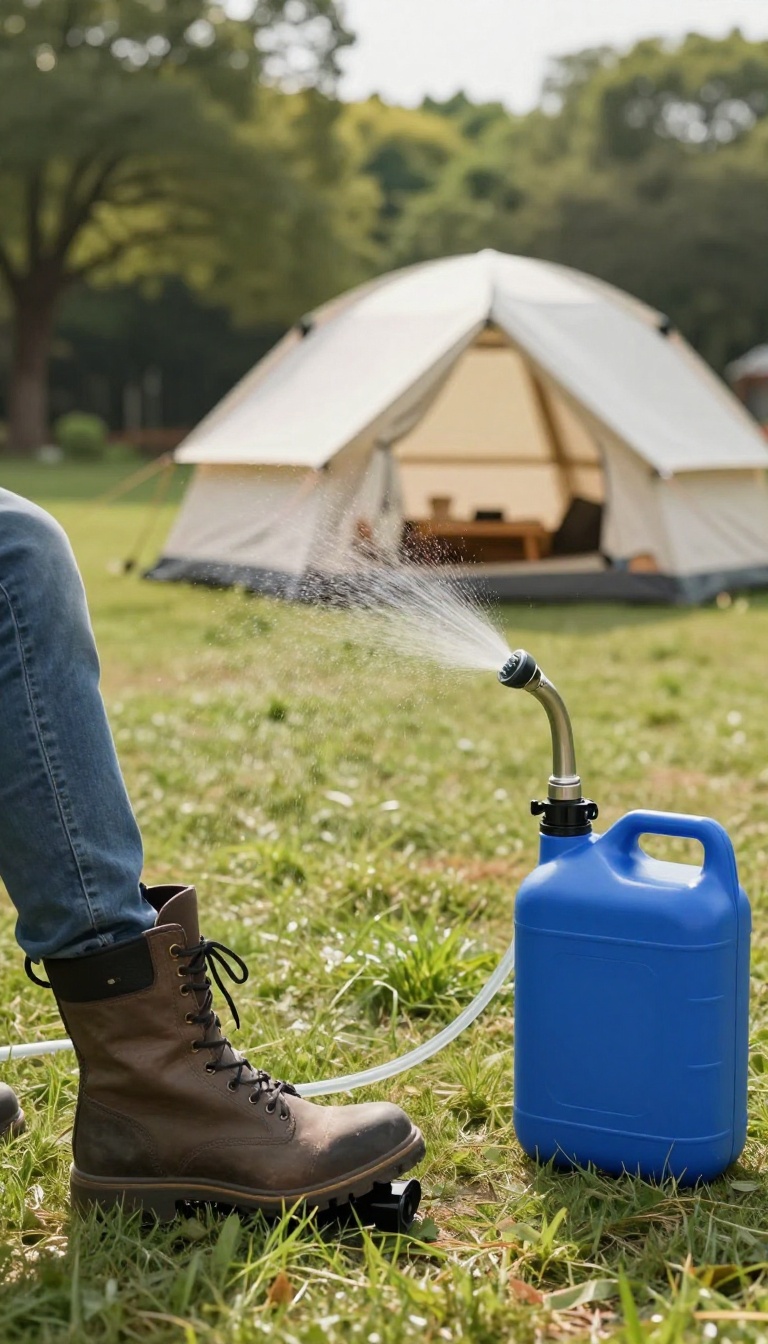
If you're tired of gravity-fed showers that lose pressure halfway through, a foot pump setup is a game changer. It uses a simple foot-operated pump to pressurize a water container, giving you a steady, hands-free stream without batteries or electricity. This is perfect for car campers who want a more comfortable rinse without investing in a pricey propane system.
This DIY shower idea is all about using a foot pump to create consistent water pressure. You'll need a durable water container (like a 5-gallon jerry can), a foot pump designed for camp showers, and a shower hose with a spray head. The pump attaches to the container and pressurizes it as you step on the pedal, so you get a strong, even flow that lasts much longer than a typical solar bag.
How To Set It Up
Start by choosing a container with a wide mouth for easy filling and cleaning. Attach the foot pump's intake hose to the container's lid or a dedicated port, and connect the shower hose to the pump's output. Make sure all connections are snug to avoid leaks.
Once everything is hooked up, fill the container with warm water (heated on the stove or in the sun), then place the pump on the ground and step on it a few times to build up pressure. You'll feel the water flow immediately.
Why It's Worth The Effort
The main advantage of a foot pump shower is that it gives you hands-free operation—you can lather up and rinse without holding a pump or bag. The pressure is also much more consistent than gravity-fed options, so you won't get a weak trickle when the water level drops. Plus, since it's mechanical, there are no batteries to worry about, making it a reliable choice for extended trips.
Tips For A Smooth Experience
To keep the water warm longer, insulate your container with a reflective wrap or place it in the sun before use. Practice using the pump a few times at home to get a feel for the pressure. And if you're camping in a group, consider a larger container (like a 10-gallon) so multiple people can shower without refilling.
Just remember to release the pressure before opening the container to refill.
10. Instant Camp Shower with a Portable Camp Shower Device
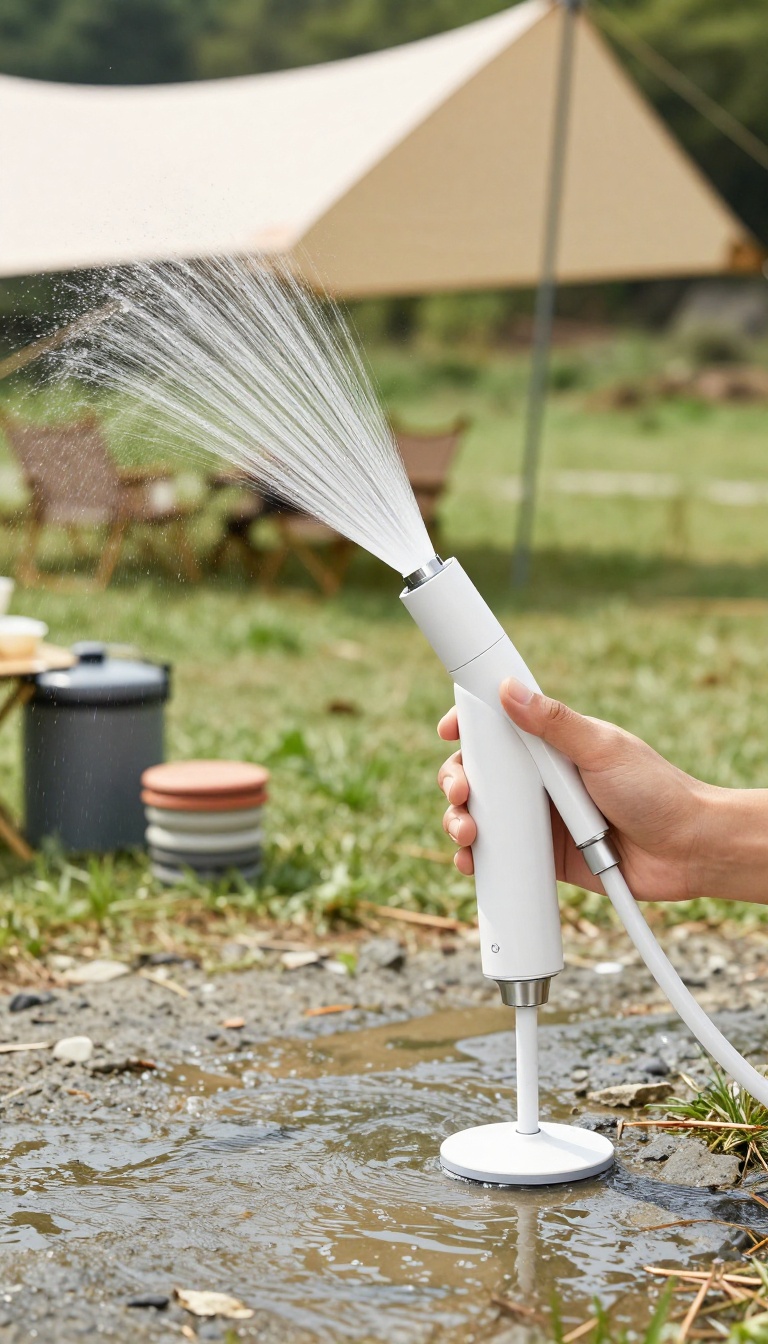
Sometimes you just want to turn on a shower and have water flow without rigging up bags or pumps. That's where a rechargeable portable shower device comes in. These compact gadgets draw water from any source—a lake, a bucket, or even a collapsible container—and deliver a steady, surprisingly strong spray.
They're a favorite among campers who value convenience and don't mind a small investment for a big upgrade in comfort.
These devices are essentially handheld pumps with a shower head attached. You drop the intake hose into your water source, press a button, and you've got a pressurized shower. Most run on rechargeable batteries, so you can charge them via a power bank or your car's USB port.
They're lightweight, often weighing under a pound, and pack down small enough to fit in a side pocket of your backpack. The spray pressure is impressive for such a tiny unit—many offer multiple modes, from a gentle mist to a focused jet. This makes them perfect for rinsing off after a swim, washing dishes, or even cleaning muddy gear.
The setup takes seconds: no hanging bags, no gravity tricks, just a simple, effective stream of water.
How To Choose The Right Portable Shower
When picking a portable shower device, consider battery life, flow rate, and weight. Look for one with at least 10-15 minutes of continuous use on a full charge, which is usually enough for a quick rinse. A flow rate of around 2-3 liters per minute feels like a regular shower.
Also, check the hose length—some models come with a longer intake hose so you can reach deeper water sources. Waterproofing matters too; you'll be using it in wet conditions. And don't forget to see if it has a filter to keep out debris, which is handy when drawing from natural water.
Setting It Up At Camp
Using a portable shower device is straightforward. Fill a collapsible bucket or use a natural water source like a lake or stream. Submerge the intake hose, turn on the unit, and you're ready.
For privacy, you can hang a portable shower tent or use a tarp strung between trees. Since the device is handheld, you can easily control the spray direction, making it easy to soap up and rinse off without wasting water. Some models even come with a hook, so you can hang the shower head from a branch for hands-free operation.
Maintenance And Longevity Tips
To keep your portable shower running for many trips, rinse it with clean water after each use, especially if you've been drawing from murky sources. Let it dry completely before storing to prevent mold. Charge the battery fully before packing it away, and store it in a cool, dry place.
If the spray gets weak, check the filter for clogs and clean it as needed. With proper care, these little devices can last for years and become a staple in your camping gear.
11. DIY Camp Shower with a Rain Barrel
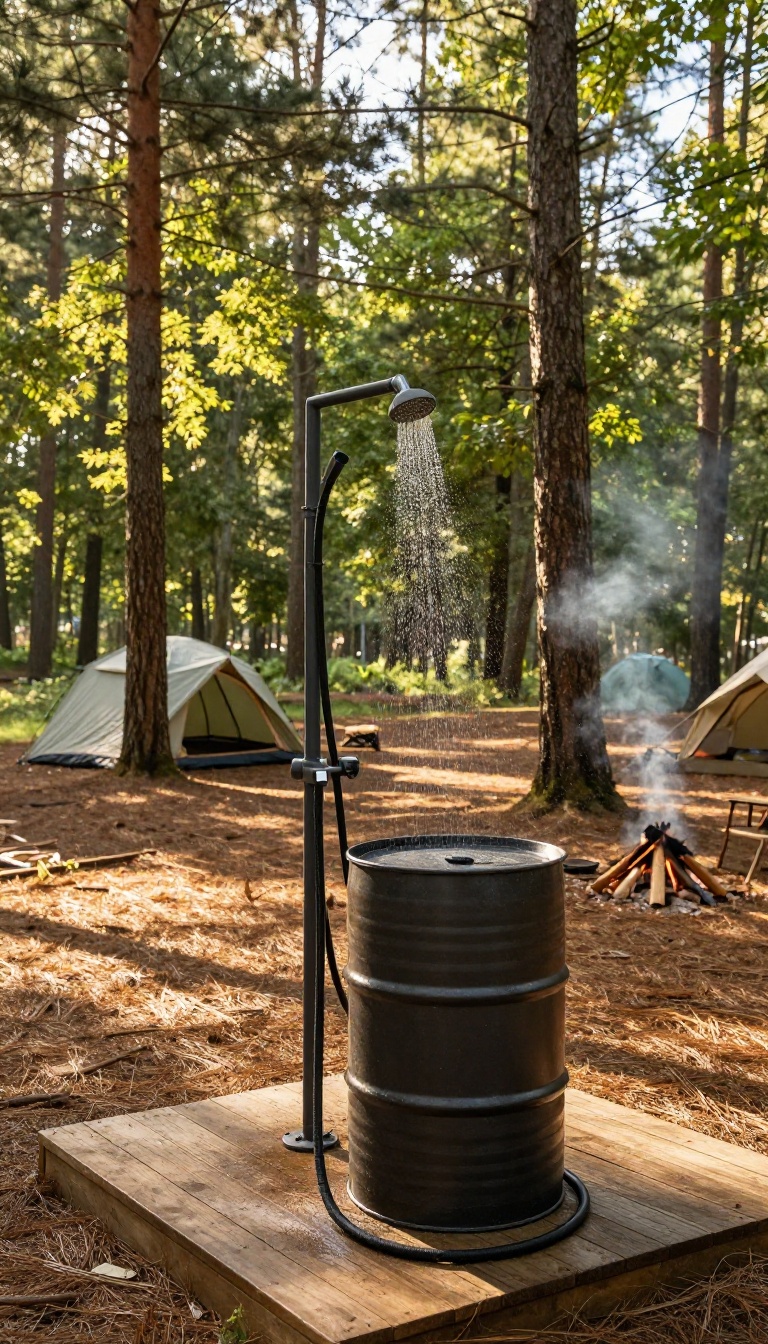
If you're staying put for a few days, a rain barrel shower is a solid upgrade from the usual solar bag. It collects rainwater, heats it with the sun, and gives you a steady, hands-free rinse. This setup takes a bit more work upfront, but once it's running, you'll feel like you've brought a piece of home to the campsite.
A rain barrel shower is all about using what nature gives you. You'll need a clean rain barrel (food-grade is best), a spigot, a short hose, and a showerhead. Place the barrel on a sturdy platform—like a few cinder blocks or a wooden stand—so gravity does the work.
Paint the barrel black or leave it clear to absorb heat, and position it in full sun for a few hours before you need it. The water won't be scalding hot, but it'll be plenty warm for a comfortable rinse.
Setting Up The Barrel
Start by cleaning your barrel thoroughly—any leftover residue will ruin the experience. Drill a hole near the bottom for the spigot, and another near the top for an overflow or to attach a hose. Use plumber's tape to prevent leaks.
If you want to filter out debris, wrap the intake with a fine mesh. Place the barrel on a level surface that's high enough to give you good water pressure, like a picnic table or a stack of pallets.
Adding The Showerhead
Attach a short hose from the spigot to a handheld showerhead or a fixed one mounted on a pole. A simple Y-connector lets you switch between showering and filling a bucket for other uses. For extra convenience, add a shut-off valve near the showerhead so you can pause the water while you soap up.
This saves water and keeps the shower from running out too fast.
Heating And Maintenance Tips
To boost the temperature, paint the barrel black or wrap it in a dark tarp. On a sunny day, a 30-gallon barrel can reach a comfortable 80–90°F. If the water gets too warm, just add a bit of cold water from a separate container.
Keep the barrel covered when not in use to prevent mosquitoes and debris, and drain it before you leave to avoid any stale water issues.
FAQ
What is the most budget-friendly DIY camping shower idea?
The weed sprayer and the reusable water bottle are the most budget-friendly, costing under $10. They're simple, effective, and easy to pack.
How do I heat water for a camping shower without electricity?
Use the sun! Solar shower bags and black tanks absorb heat from sunlight. Alternatively, heat water on a camp stove and mix with cold water in a bucket.
How can I get privacy while showering at a campsite?
Use a pop-up privacy tent or build a PVC frame with curtains. You can also position your shower behind a large tree or use a portable changing room.
Are DIY camping showers environmentally friendly?
Yes, if you use biodegradable soap and avoid polluting water sources. Always shower at least 200 feet away from lakes and streams to protect the ecosystem.
Can I use a DIY camping shower for backpacking?
Yes, but keep it ultralight. A simple water bottle with holes or a small solar bag works well. For longer trips, consider a portable shower device that weighs little.
Conclusion
With these 11 DIY camping shower ideas, you can stay fresh and clean without sacrificing comfort or style. Whether you prefer a simple solar bag or a more elaborate PVC enclosure, there's a solution that fits your needs and budget.
Remember to choose an option that suits your camping style and always practice Leave No Trace principles. Now, go enjoy your next adventure with the confidence of a great shower waiting at the end of the trail.