15 3 Kids Bedroom Ideas for Shared Spaces That Work
Three kids in one bedroom can feel like a losing battle against clutter, noise, and territory disputes. Then a few smart changes flip the whole dynamic, and suddenly the room works harder than you ever expected. The trick isn't squeezing in more furniture.
It's stacking function vertically, carving out personal zones, and choosing pieces that pull double duty. A triple bunk here, a curtain divider there, and the chaos starts to settle.
Below are 15 ideas built for real shared rooms, from loft beds with play space underneath to shared desks and labeled cubbies. Pick the ones that match your layout, your kids, and your budget, then adapt them to fit.
1. Triple Bunk Beds That Save Serious Floor Space
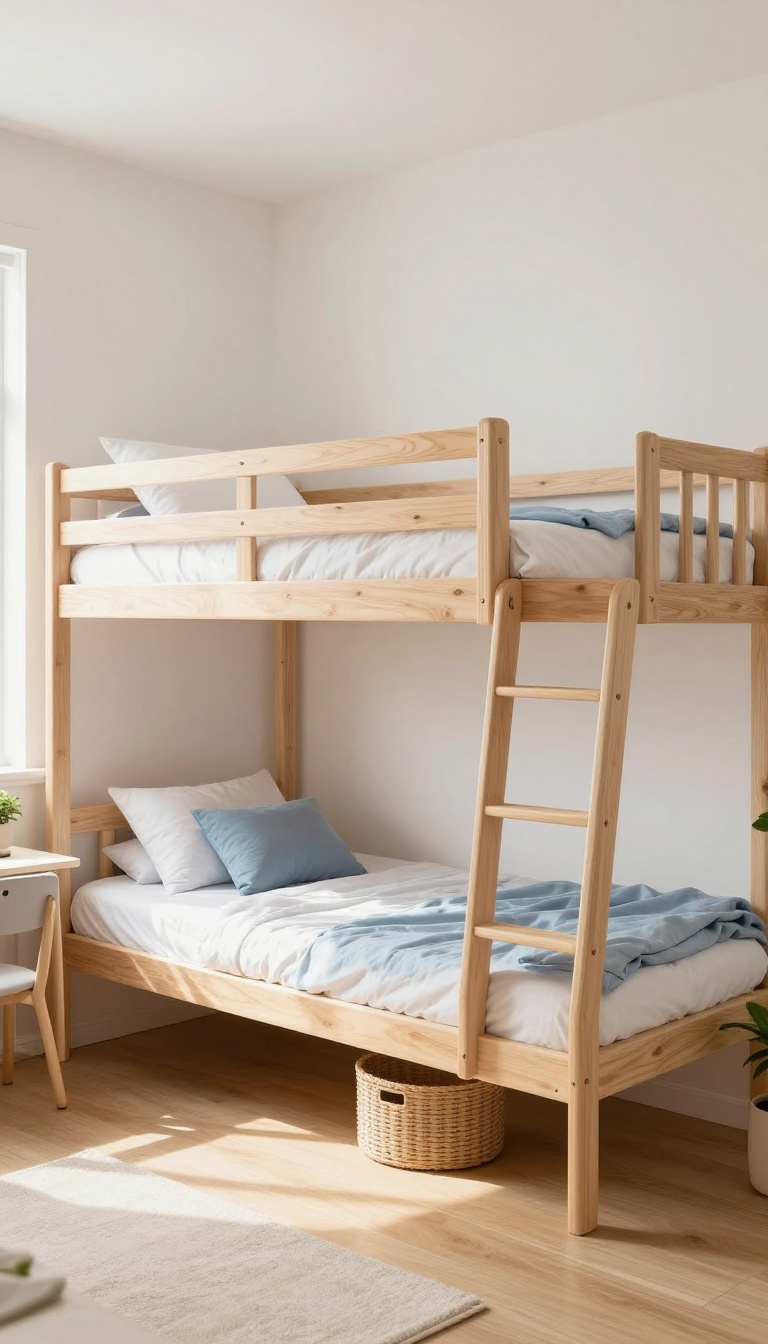
When three kids share one room, the floor disappears fast. Triple bunk beds fix that by stacking sleepers vertically and freeing up the footprint below. You get three beds in the space of one, plus room left for play, storage, or a tiny homework nook.
A triple bunk isn't just a regular bunk with an extra level. It's a deliberate piece of furniture that changes how the whole room flows. You can go with a classic three-high stack, or a bunk-over-full setup that sleeps three without feeling like a ladder factory.
Either way, the goal is the same: keep the floor clear and give each kid a spot that feels like theirs.
Safety Comes First, Always
Any bed above the ground needs a guardrail, and a triple bunk needs them on every upper level. Look for rails that run at least five inches above the mattress and attach firmly to the frame. Also check the weight limits per bunk, because kids grow and so does the wear and tear.
If your ceiling is low, measure twice. You want at least two feet of clearance between the top mattress and the ceiling so nobody sits up into a light fixture.
Assigning Levels Without The Drama
Someone will want the top, someone will fear it, and someone will claim the bottom as their castle. Settle it before the beds arrive. You can rotate levels every six months, draw straws, or let the oldest pick first and the youngest get a special perk like a curtain or extra shelf.
The point is to make the decision feel fair, not like a punishment. A simple chart on the wall can stop the daily 'you always get the good one' argument.
Making Each Level Feel Personal
A triple bunk can feel like a stack of mattresses if you don't add personality. Give each kid a clip-on reading light, a small shelf for a water bottle and a book, and a way to mark their space. A colored fitted sheet, a set of decals, or a little hanging organizer does the trick.
The bottom bunk often feels darkest, so a stick-on LED light or a small fan can make it the coziest spot in the room.
2. L-Shaped Bunk with a Built-In Desk Underneath
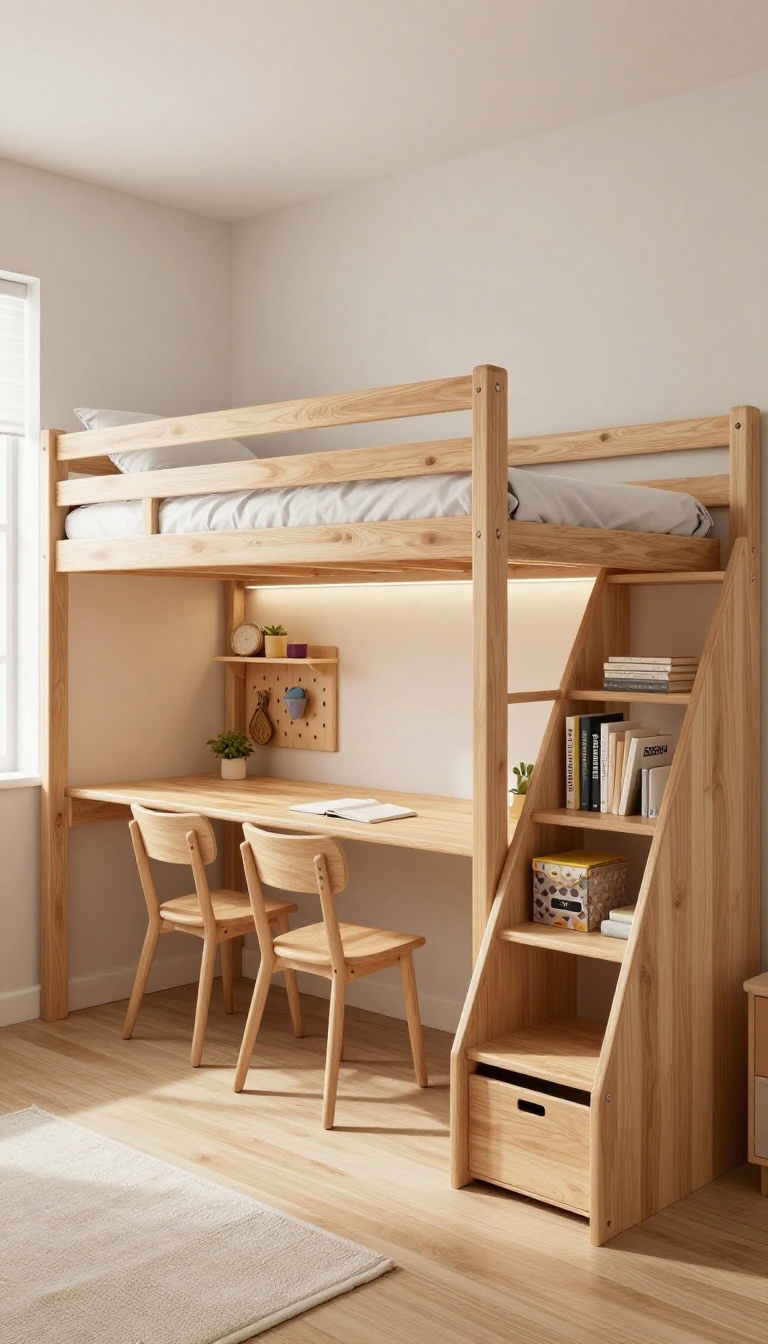
An L-shaped bunk turns a standard corner into a functional zone. The lower bed sits perpendicular to the upper one, leaving a clear pocket underneath for a desk. That pocket becomes a shared study station without stealing floor space from the rest of the room.
It’s a smart way to give three kids a place to work, sleep, and store their stuff without feeling crammed.
The real win here is how the stairs do double duty. Instead of a plain ladder, you get a staircase that hides drawers in every step. Each kid can claim a drawer for school papers, socks, or secret snacks.
The side of the staircase can also hold open shelves for books and bins. That means less furniture on the floor and more room to move. Under the lofted bed, the desk runs along the back wall.
It’s wide enough for two chairs, so two kids can work side by side. A third kid can use a rolling stool that tucks away when not in use. Above the desk, a simple pegboard or floating shelf keeps supplies within reach but off the surface.
Lighting matters more than you think in a corner like this. A clip-on lamp or a slim LED strip under the upper bunk keeps the desk bright without taking up space. Add a small outlet strip so chargers and tablets stay organized.
With the right setup, this corner becomes the most productive spot in the room.
Why The L-shape Works For Three
A standard bunk bed leaves one wall unused. The L-shape claims that wall for storage or a desk. It also creates a natural divider between the sleeping area and the study zone.
That separation helps kids focus and keeps bedtime from feeling like a free-for-all.
Stair Drawers And Hidden Storage
Every step can be a drawer. Use deep ones for bulky items like hoodies and shallow ones for pencils and chargers. Label each drawer with a name or color so there’s no arguing over whose stuff is whose.
The side of the stairs can hold hooks for backpacks or a small shelf for water bottles.
Desk Setup That Fits Two (or Three)
Measure the space under the loft before you buy a desk. A 48-inch-wide top usually fits two chairs comfortably. If you need room for three, add a rolling stool or a small fold-down shelf on the side.
Keep the desk surface clear with wall-mounted organizers and a single drawer for shared supplies.
3. Zone the Room with Rugs and Color Blocks
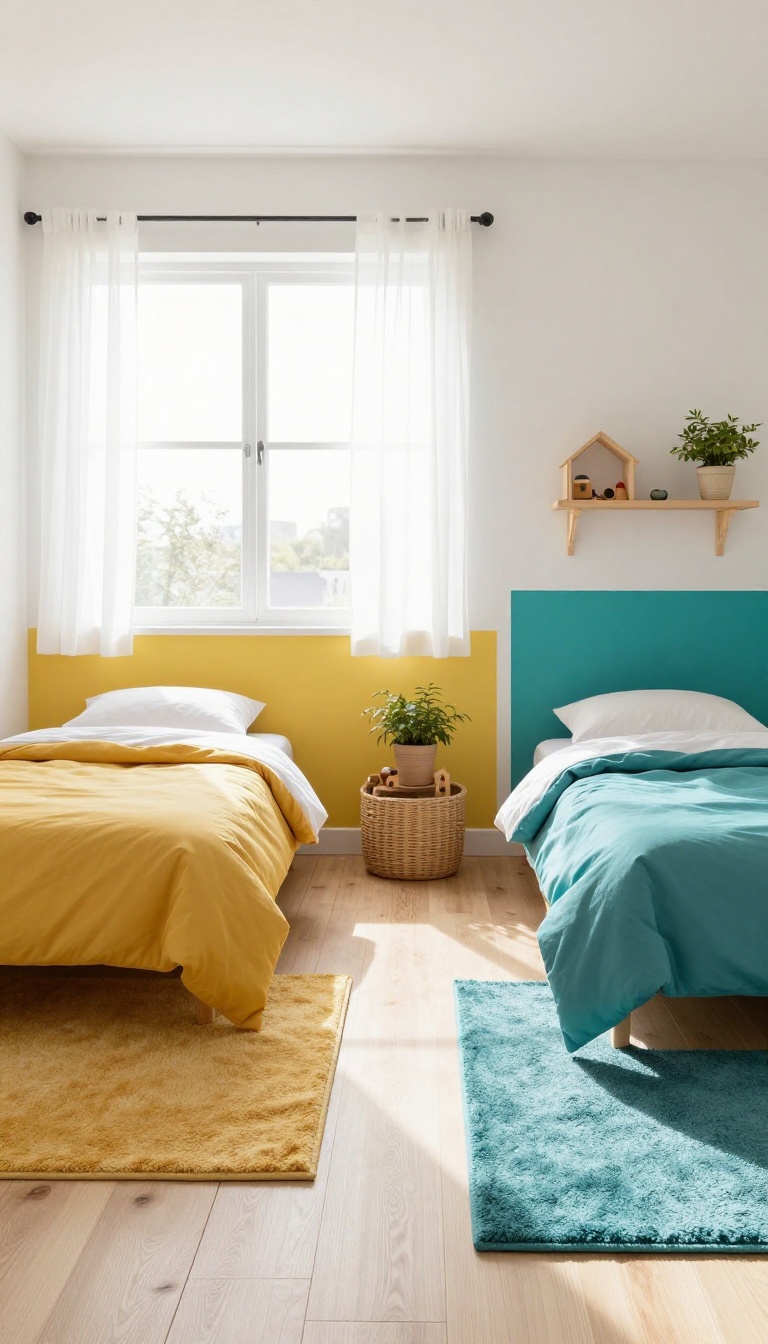
A shared bedroom can feel like one big blur where nobody knows where their stuff ends and someone else's begins. Rugs and color blocks change that by giving each child a clear visual territory. It sounds simple, but it cuts down on a surprising number of arguments.
When kids can see their own space, they stop fighting over the whole room. They also start taking better care of their things because it's obvious what's theirs. You don't need a big budget or a remodel to make it work.
Start by looking at the room's layout and figuring out where each child naturally gravitates. That corner by the window might be perfect for the reader, while the wall near the door works for the one who's always coming and going. Once you know those spots, you can mark them with a rug or a painted stripe.
Color is your best tool here. Pick a different shade for each kid and use it consistently. That way, even a toddler can tell which side of the room is theirs.
It also makes clean-up faster because everyone knows where things belong. You don't have to paint an entire wall. A simple stripe or a block of color behind each bed does the job.
Rugs are even easier because you can move them if you rearrange the furniture later.
Pick A Color For Each Child
Let each kid choose a color they actually like. When they're involved in the decision, they're more likely to respect the zones. If two pick the same color, tweak one shade so they're still distinct.
You can use that color on their bedding, rug, and a few storage bins.
Use Rugs To Define Floor Space
A rug instantly turns a patch of floor into a room within a room. Place one beside each bed or under a small play area. Choose low-pile rugs for easy cleaning, and make sure they don't slide around.
A rug pad keeps them in place and adds a little cushion.
Add A Painted Stripe Or Wall Block
If you're up for a quick paint job, tape off a stripe behind each bed and roll on a different color. It's a cheap way to add personality and clear boundaries. Keep the rest of the wall neutral so the room doesn't feel chaotic.
A painted block works well too, especially if you have bunk beds.
4. Wall-Mounted Cubbies for Each Kid
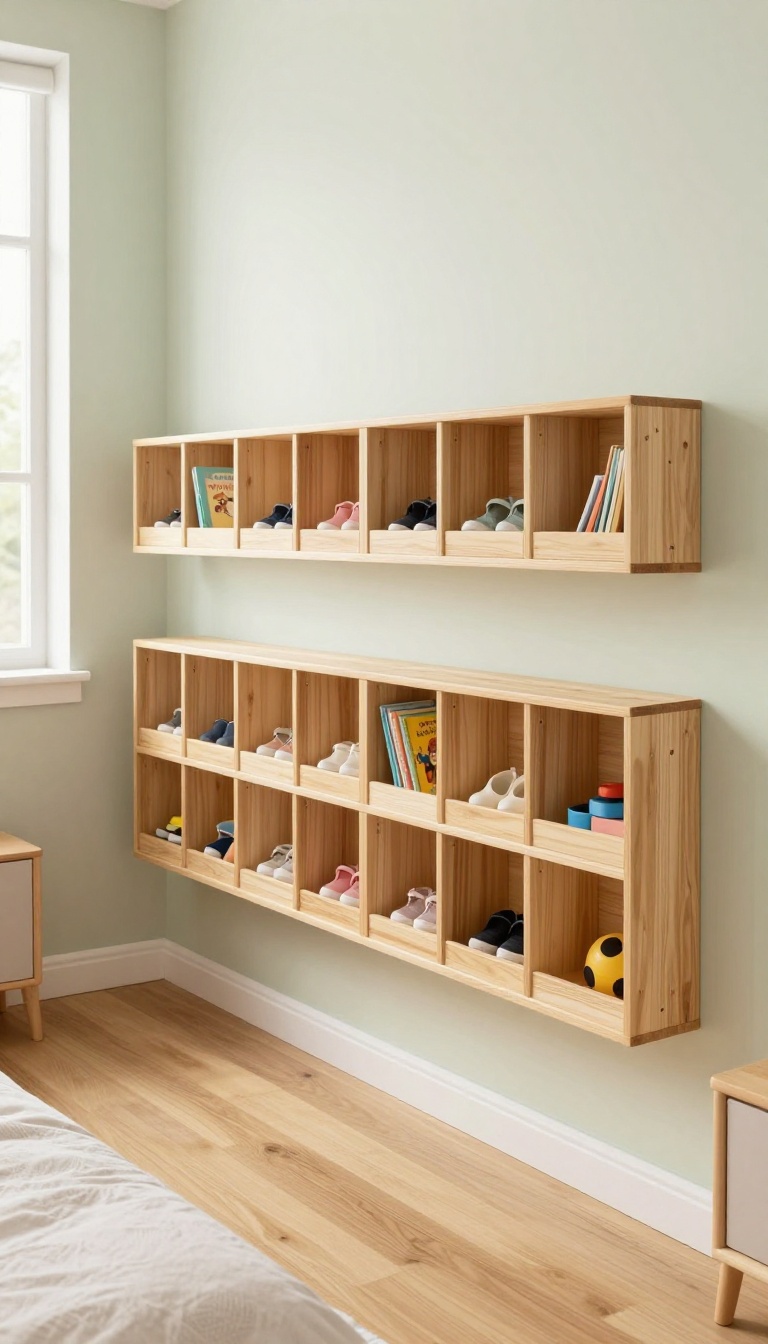
Wall-mounted cubbies give each child a dedicated spot without eating up floor space. Install a row at kid height so even the youngest can reach their own things. Label each cubby with a name, color, or sticker to stop the daily "that's mine" arguments.
A row of individual cubbies turns a blank wall into organized storage that actually gets used. Each child gets a cubby for shoes, books, and small treasures, which keeps clutter contained and makes clean-up a quick drop-and-go. Because the cubbies are mounted at kid height, your kids can grab what they need without asking for help.
That independence cuts down on frustration and keeps the room tidier. You can buy ready-made cubby units or build a simple custom version with plywood and paint. Either way, the goal is the same: one clear spot per kid, no sharing required.
Pick The Right Height
Mount the cubbies low enough that a 4-year-old can reach the bottom shelf, but high enough that they don't become a tripping hazard. A good rule is to keep the bottom edge around 12 to 18 inches off the floor. If your kids range in age, add a taller cubby for the oldest or stack two rows.
Label Without The Fights
Use names, colors, or small icons to mark each cubby. A strip of colored tape on the edge works just as well as a printed label. When everyone knows exactly where their stuff goes, the "where is my other shoe" drama drops fast.
Keep It Clutter-proof
Limit each cubby to a few essentials: one pair of shoes, a couple of books, and a small bin for treasures. If a cubby overflows, it's time to purge. A quick weekly reset keeps the system from collapsing into another junk pile.
5. Curtain Room Dividers for Instant Privacy
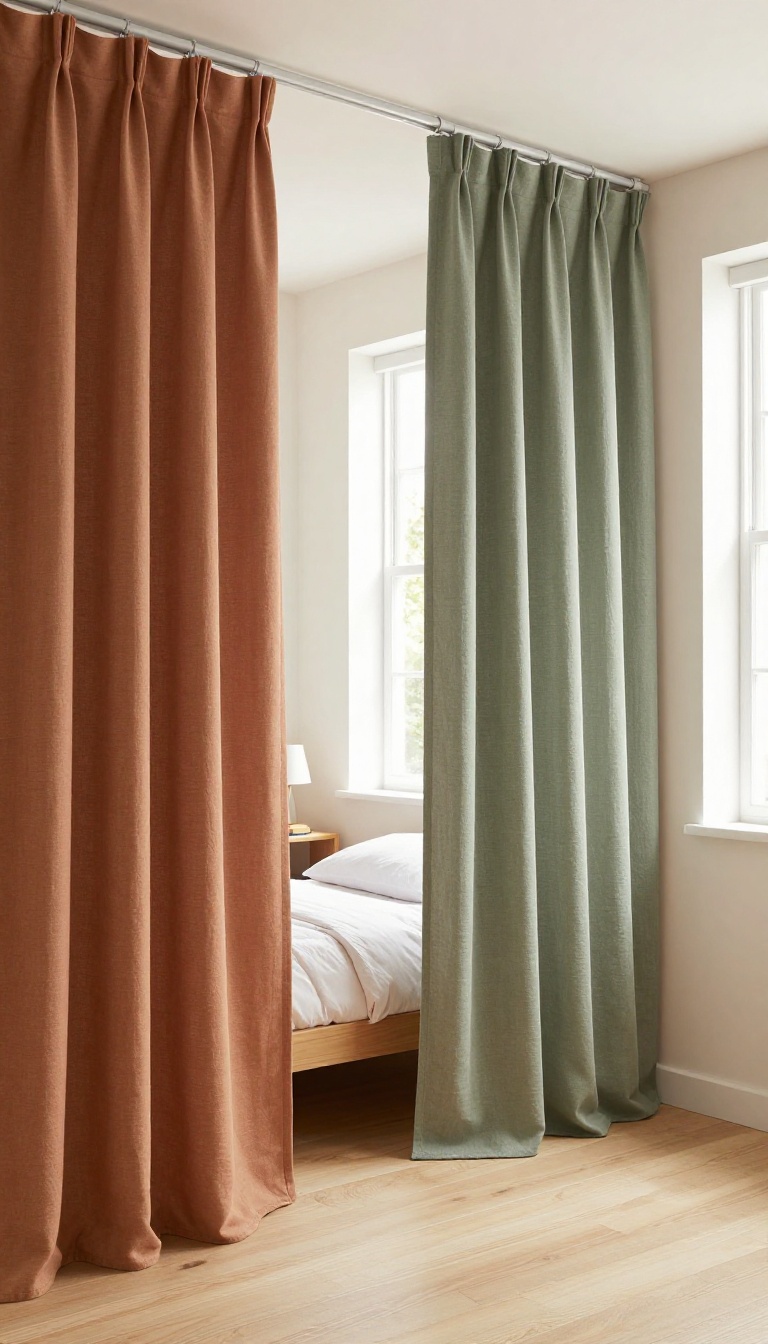
Curtains are the unsung heroes of shared bedrooms. They soften the space, add color, and give each kid a sense of privacy without building a single wall. The best part?
You can install a ceiling track in an afternoon and change the whole vibe of the room. Unlike bulky room dividers that eat up floor space, curtains hang from above and disappear when you want them to. They're perfect for renters, for kids who change their minds about colors, and for parents who want a flexible solution that grows with their family.
When you're dividing a room for three kids, you need boundaries that feel real but don't make the space feel smaller. Curtains strike that balance. They create visual separation, muffle a little noise, and give each child a corner they can call their own.
Plus, they're easy to wash, swap out, and adjust as your kids get older. Here's how to make curtain dividers work in your shared bedroom.
Choosing The Right Fabric
Fabric choice matters more than you think. Lightweight cotton or linen curtains let air flow and keep the room feeling open, but they don't block much sound or light. If you want more privacy, go for a medium-weight fabric like canvas or a double-layer curtain.
Blackout curtains are great for kids who need dark for naps, but they can make the room feel cave-like. A good compromise is a double rod with a sheer layer and a heavier layer, so you can adjust based on time of day. Also, consider washability.
Kids are messy, and curtains will collect dust and the occasional sticky fingerprint. Machine-washable fabrics like polyester blends or cotton canvas are your best bet. Avoid dry-clean-only materials unless you're ready for the hassle.
Installation Tips For A Clean Look
Ceiling-mounted tracks are the most flexible option. They let you create curved or angled dividers that follow the shape of the room. If you're not ready to drill into the ceiling, a tension rod between two walls works for straight lines, but it won't hold heavy fabrics.
For a polished look, mount the track close to the ceiling and let the curtains just barely brush the floor. Use ceiling hooks or adhesive tracks if you're renting. They're sturdy enough for lightweight curtains and won't damage the ceiling.
And always use wall anchors if you're drilling into drywall. A curtain that falls down in the middle of the night is not the kind of drama you want.
Keeping The Room Feeling Open
The biggest fear with curtains is that they'll make the room feel cramped. The trick is to tie them back during the day. Use curtain ties or simple hooks to pull them to the sides, so the room feels like one big space when everyone's awake.
At night, close them for privacy. Choose light colors or sheer fabrics if you want maximum openness. And don't hang curtains all the way to the floor if you have young kids who might trip.
A few inches off the ground keeps things safe and still looks intentional. You can also use curtains to define zones without closing them completely. A half-open curtain signals 'I'm here but I'm not hiding. '
6. Under-Bed Storage Bins on Wheels
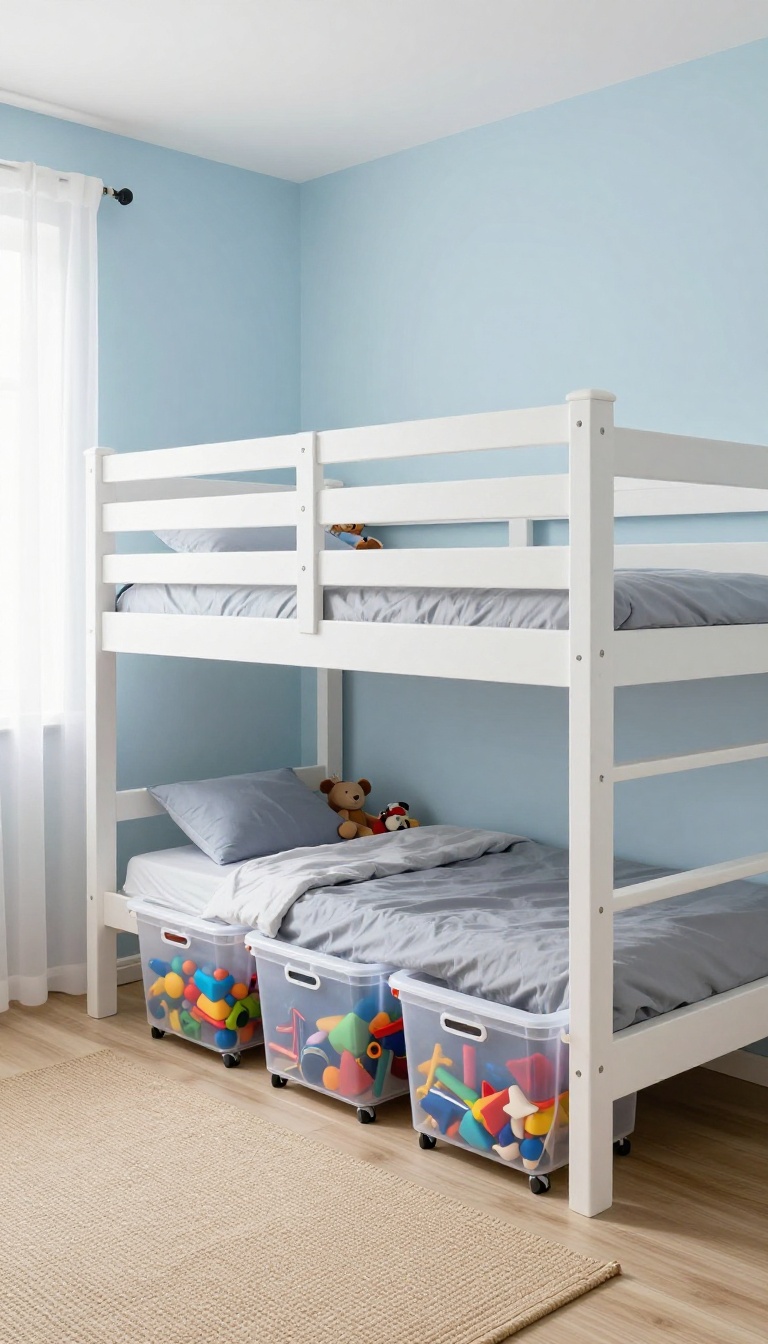
The space under a lower bunk or loft bed is prime real estate that usually gets ignored. Rolling bins turn that dead zone into a functional storage system that kids can actually use. No more digging through piles or kicking things out of the way.
Under-bed storage bins on wheels solve a specific problem: you need more storage, but you don't have more floor. These bins slide in and out easily, so even younger kids can grab what they need without help. They also keep toys, clothes, and extra bedding out of sight, which makes the whole room feel calmer.
The key is picking the right bins and setting up a simple system. Clear bins let kids see what's inside, while solid bins hide the mess. Either way, wheels are non-negotiable—they make the difference between a bin that gets used and one that becomes a permanent dust collector.
Once you've got the bins, a little labeling and rotation keeps everything manageable. Seasonal clothes go in and out without a major overhaul, and each child knows exactly where their stuff lives.
Choosing The Right Bins
Measure the clearance under the bed before you buy anything. You want bins that slide in and out without scraping the frame or getting stuck. Look for low-profile bins with sturdy wheels and handles that are easy for small hands to grip.
Clear plastic bins work well for toys and art supplies because kids can spot what they want without pulling everything out. Fabric bins with lids are better for clothes or items you want to keep dust-free. If you're stacking two bins, make sure the bottom one has a flat top so the upper bin doesn't wobble.
Avoid bins that are too deep or too wide—they become heavy and awkward. A good rule: if your child can't pull it out and push it back on their own, it's too big.
Labeling Without The Mess
Labels make the system work, but they don't have to be fancy. A piece of masking tape and a marker do the job. Write the child's name and what goes inside, like "Mia – Legos" or "Sam – Winter clothes.
" For kids who can't read yet, use a simple drawing or a sticker. A picture of a shirt means clothes, a star means toys. You can also color-code bins by child—one color per kid—so there's no confusion.
If you want something more durable, printable labels with clear tape over them hold up well. Just avoid labeling the bin itself with permanent marker if you plan to reassign it later.
Rotating Seasonal Clothes
Seasonal rotation keeps closets from overflowing and makes getting dressed easier. At the start of each season, pull out the bins with off-season clothes and swap them with what's currently needed. Store out-of-season items in bins that are clearly labeled and easy to access.
Vacuum-seal bags can save even more space inside the bins, but they're not necessary. Just fold clothes neatly and stack them flat. Involve your kids in the swap.
It teaches them to let go of things that no longer fit and to take care of what they have. Plus, they'll know exactly where to find their favorite sweater when the weather turns.
7. A Shared Closet with Three Equal Sections
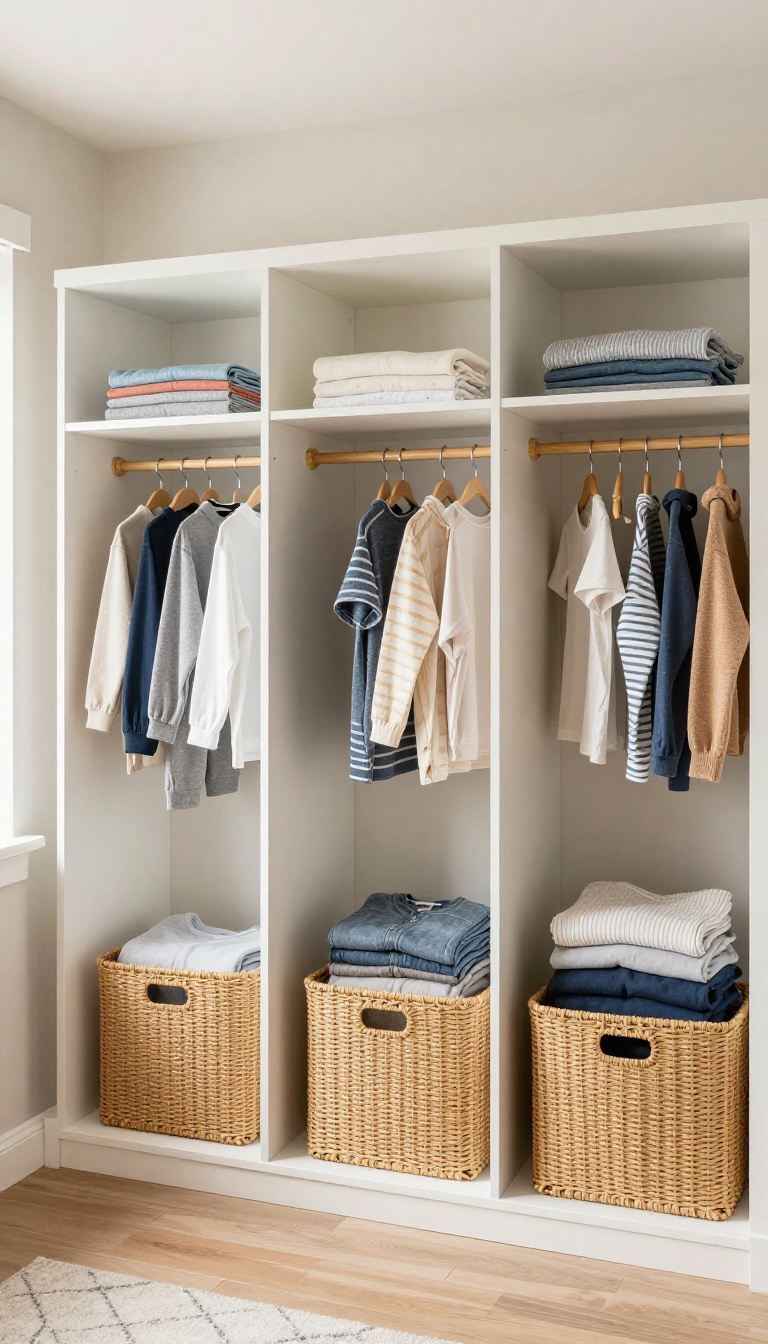
Nothing sparks a sibling standoff faster than a closet with one hanging rod and three kids who all need space. The fix is simple: split that single closet into three vertical columns, each with its own shelf and rod. It’s a weekend project that ends the daily scramble for hangers and gives everyone a fair slice of storage.
Measure the closet’s width, then divide by three. That number tells you how wide each child’s section will be. Even if the columns aren’t perfectly identical, aim for close enough that no one feels shortchanged.
Install vertical dividers first—they set the boundaries and make the rest of the build straightforward. Once the dividers are in, add a hanging rod and at least one shelf to each column. A second shelf up high works for off-season clothes or memory boxes.
Keep the rod at a height your kids can reach without a stool. If they’re younger, lower it and plan to raise it later. Finish by giving each child a slim hamper that fits under the hanging clothes and a dedicated shelf for folded items.
Label the shelves with names or colors so there’s no confusion. The whole setup costs less than a new dresser and takes up zero extra floor space.
Measure And Divide
Grab a tape measure and note the closet’s interior width. Subtract an inch or two for the dividers themselves, then divide what’s left by three. That’s your target column width.
If the numbers come out awkward, adjust slightly—just keep the sections within a few inches of each other so it feels fair.
Install Rods And Shelves
Use a stud finder to locate wall studs, then secure the dividers and rods into solid wood. A rod and one shelf per column is the minimum; two shelves if you have the vertical room. Keep the rod low enough for your shortest child to reach.
You can always raise it as they grow.
Add Personal Bins And Labels
A slim hamper that slides under hanging clothes keeps dirty laundry out of sight. For folded items, assign one shelf per child and add a simple label—first name, initial, or a colored sticker. That small touch stops the “that’s my pile” arguments before they start.
8. Loft Beds with Play Space Below
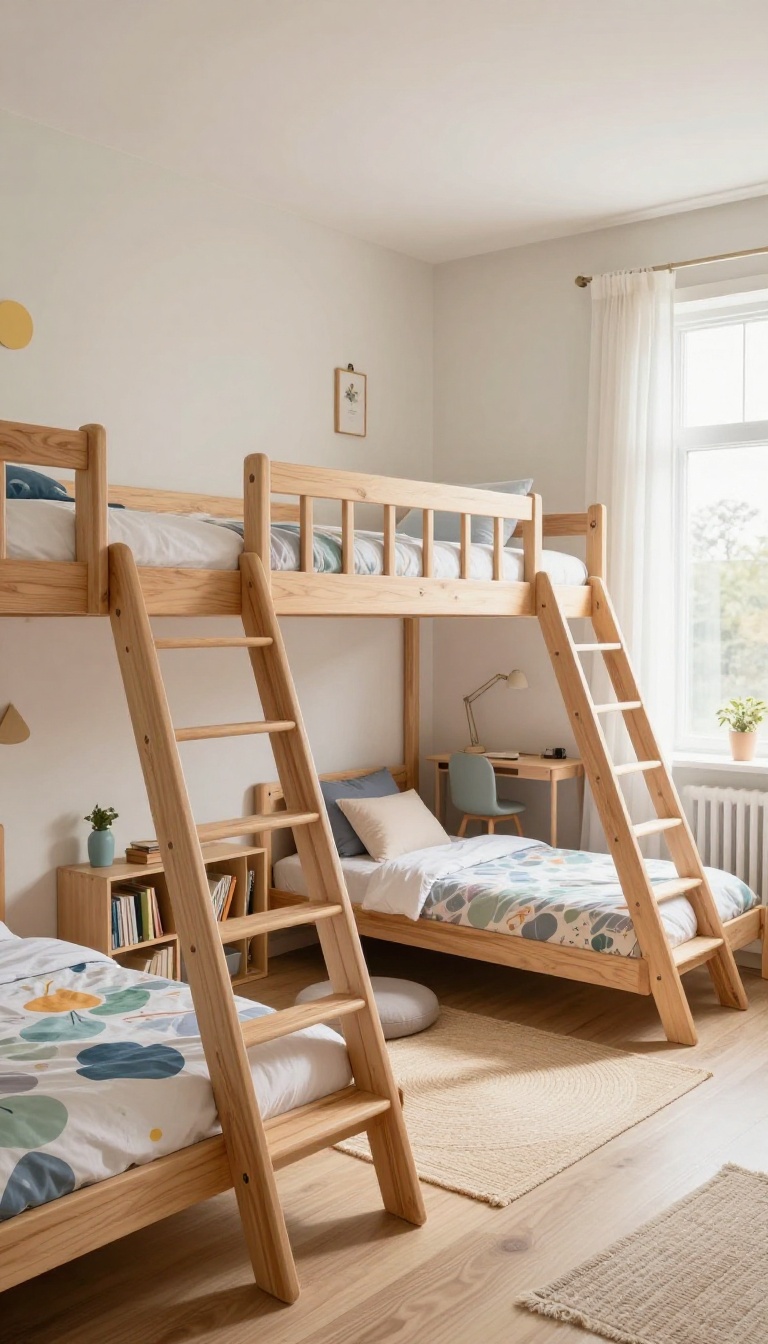
Loft beds turn one bedroom into two levels of usable space. Put two beds up high, and the area underneath becomes a play zone, homework station, or reading nook. It's a smart way to give three kids room to spread out without adding square footage.
The key is getting the setup right so it's safe and actually works for your family.
Loft beds aren't just for sleepovers or dorm rooms. In a shared bedroom, they solve the classic problem of too much stuff and not enough floor. When you raise two beds, you free up the entire footprint below.
That's where the magic happens. But lofts come with real safety considerations. You can't just stack any beds and hope for the best.
Weight limits, ladder placement, and ceiling height all matter. Get those right, and you've got a functional, fun space that three kids can share without stepping on each other.
Why Loft Beds Work For Three Kids
Three kids in one room means someone always needs a spot to call their own. Loft beds create distinct zones without walls. One child sleeps up top, another claims the space below for toys or a desk, and the third has the regular bed.
It's a natural division that cuts down on arguments. The space underneath can be whatever your kids need most. A play kitchen, a Lego table, a beanbag corner, or a small desk with a lamp.
You're basically adding a bonus room inside the bedroom. That's a huge win when you're short on space.
Weight Limits And Safe Ladder Placement
Before you buy or build, check the weight limit on any loft bed. Most standard lofts hold 200 to 250 pounds, but that's for the bed itself, not for kids piling on. If your kids like to wrestle or jump, a loft might not be the best fit.
Always follow the manufacturer's guidelines. Ladder placement is just as important. Put it on a wall that doesn't block the door or a closet.
Make sure the ladder is secure and doesn't wobble. For younger kids, consider a angled ladder with wide steps instead of a vertical one. And never put a loft bed directly under a ceiling fan or a low light fixture.
Making The Space Below Functional
The area under a loft bed can get dark and cave-like. Add a small clip-on light or a floor lamp to brighten it up. Use a rug to define the zone and make it cozier.
If it's a homework nook, a small desk and a stool are all you need. For play space, open bins and low shelves keep toys accessible. You can also hang a curtain or a fabric panel to hide clutter when friends come over.
Just make sure there's enough headroom for your child to sit up comfortably. A good rule is at least 30 inches of clearance between the mattress base and the floor.
9. A Reading Nook That Doubles as a Guest Spot
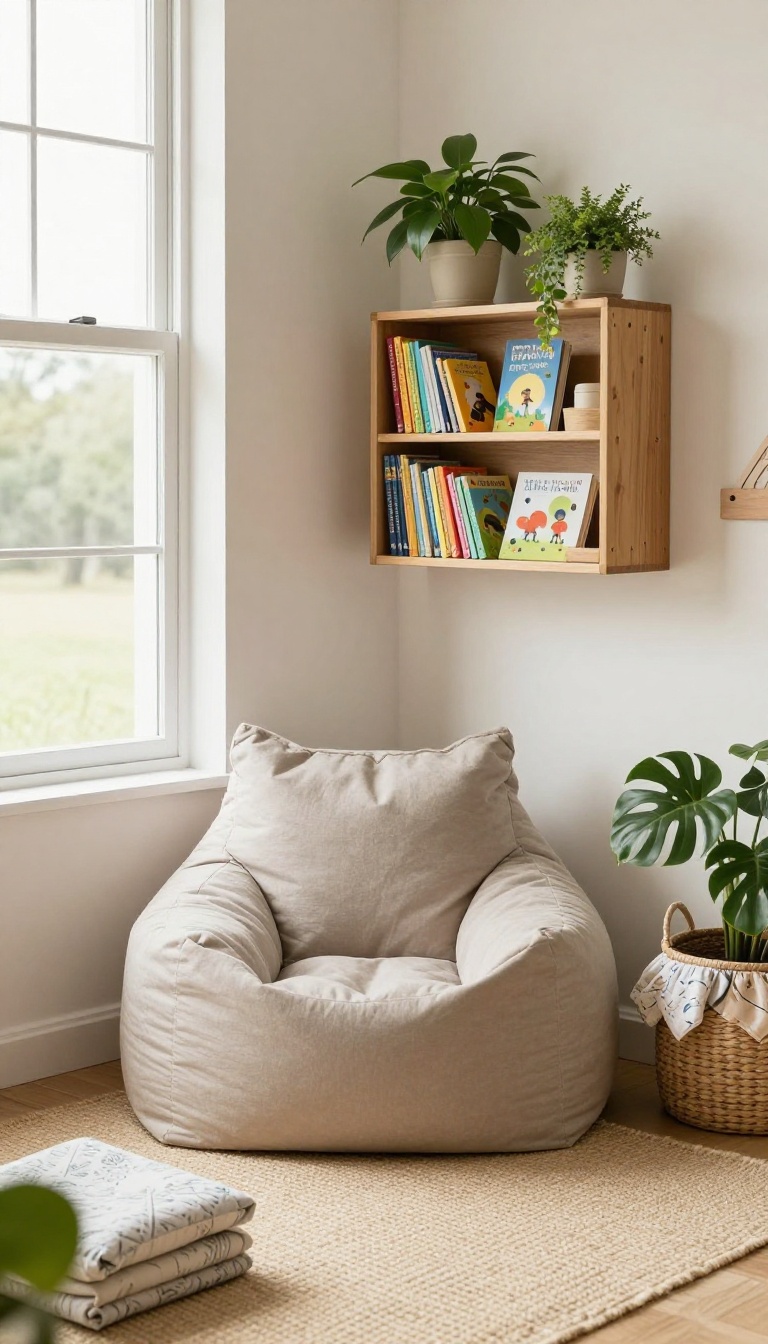
A quiet corner can be more than just a place to read. With the right setup, it becomes a guest bed for sleepovers or visiting relatives. The key is choosing flexible furniture and keeping it near natural light.
Start by picking a corner that gets good daylight, ideally by a window. A beanbag chair or a thick floor cushion works well because it's easy to move when you need the space for sleeping. Add a small bookshelf or a wall-mounted caddy for books, and you've got a cozy reading spot in minutes.
When a guest stays over, swap the beanbag for a foldable mattress or a sleeping pad, and you're done.
Pick The Right Spot
Choose a corner that's away from the main traffic path but still gets natural light. A window nook is ideal, but any corner with a lamp works too. Make sure there's enough room to stretch out a sleeping pad or fold-out cushion.
Choose Flexible Seating
Beanbags are great for lounging but not for sleeping. Look for a convertible floor cushion that unfolds into a mat, or keep a trifold mattress stored nearby. A daybed with a trundle is another option if you have the space and budget.
Store Bedding Nearby
Keep sheets, a pillow, and a blanket in a basket or under the bed so they're ready when needed. A small ottoman with storage works double duty as a footrest and a place to stash bedding. This keeps the nook tidy and guest-ready without last-minute scrambling.
10. Magnetic Walls for Rotating Artwork
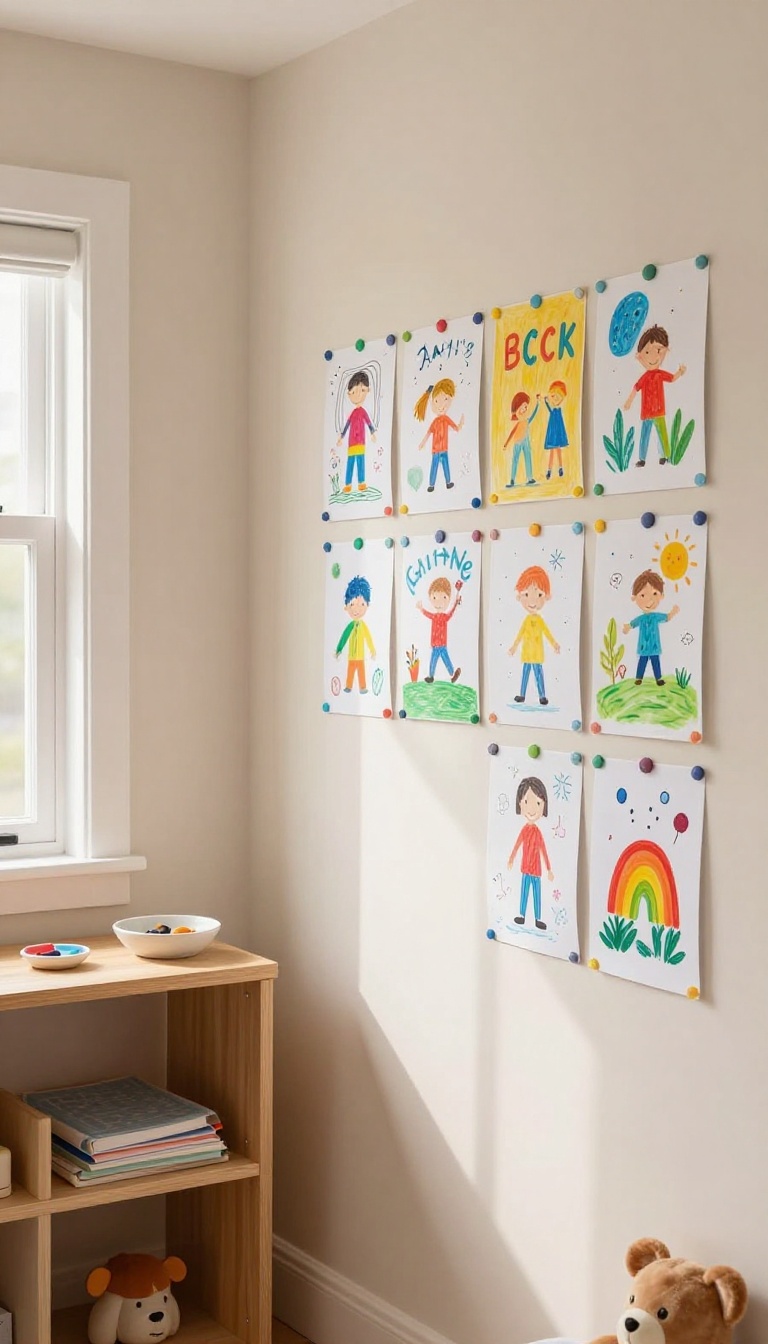
Tape marks, peeling paint, and a wall covered in curling drawings are familiar sights in a shared room. Magnetic primer solves that quietly. Paint one wall with it, add a topcoat in any color, and the whole surface becomes a display space that changes whenever your kids want.
Each child gets a section of the wall as their own gallery. No nails, no sticky residue, no arguments about whose picture gets the best spot. Just magnets, art, and a wall that keeps up with three rotating personalities.
Magnetic primer goes on like regular paint and turns drywall into a surface that holds magnets. You still need a topcoat for color, but the magnet-friendly layer stays underneath. A gallon covers roughly 200 square feet, which is plenty for one bedroom wall.
Apply two or three coats for the strongest hold. Thin coats dry faster and give you a more even magnetic pull than one thick layer. Once the topcoat is on, test a few magnets before you hand the wall over to the kids.
Strong neodymium magnets work best for heavier papers. Standard fridge magnets handle lighter drawings fine. Keep a small dish of magnets on a shelf so nothing gets lost under the bed.
Setting Up The Wall
Pick a wall that gets good light and isn't behind a door. Sand any bumps first, then prime with a magnetic base coat. Two coats of magnetic primer followed by two coats of your chosen color gives a smooth, durable finish.
Let each layer dry fully before adding the next. Rushing this step weakens the magnetic pull and leaves streaks. A weekend project is realistic for one wall if you start Saturday morning.
Dividing Space Between Three Kids
Measure the wall and split it into three equal sections with painter's tape or a thin strip of washi tape. Each child gets a column for their own artwork. That visual boundary cuts down on overlap and gives everyone a sense of ownership.
You can also rotate sections monthly so nobody feels stuck with the smallest or darkest spot. A simple chalk line or removable decal marks the boundaries without permanent commitment.
Keeping It Fresh
Encourage each kid to swap out their display every few weeks. Store older pieces in a labeled folder so the wall stays current and the room doesn't feel cluttered. A small basket of magnets near the wall makes changes easy for everyone.
This setup also works for photos, postcards, and small notes. It's a living display that grows with your kids instead of getting stale.
11. Over-the-Door Organizers for Small Items
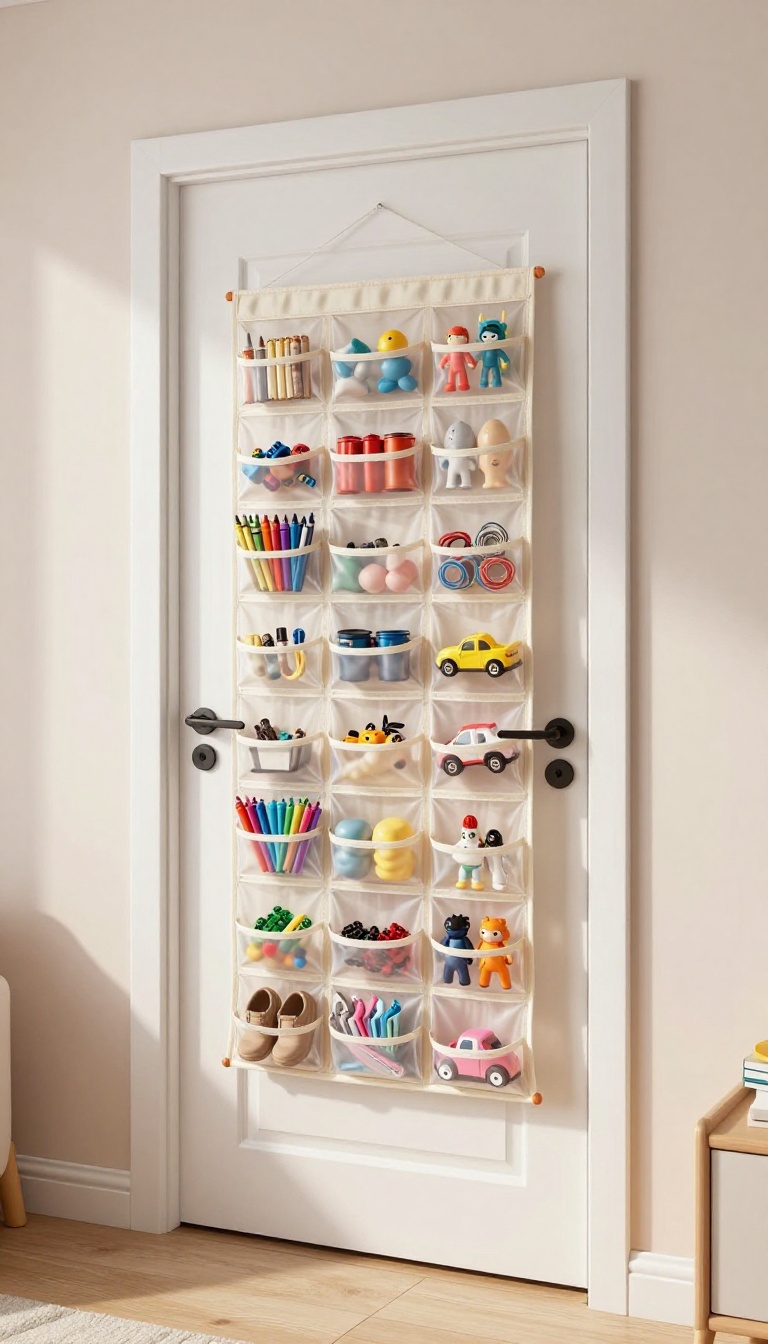
Small stuff is the enemy of a tidy shared bedroom. Hair ties, action figures, crayons, and loose Lego pieces have a way of migrating to the floor, where they become trip hazards and lost treasures. An over-the-door organizer gives all those tiny things a home that doesn't eat up floor space or dresser space.
You probably already have a door that swings into the room and does nothing but sit there. Hang a shoe organizer or a clear-pocket panel on the back of it, and suddenly you've added twenty or more little cubbies without moving a single piece of furniture. It's one of the cheapest, fastest fixes for shared-room chaos.
The beauty of this setup is that it works for almost any age. A five-year-old can toss her hair bows into a low pocket without help. A ten-year-old can keep his Pokémon cards sorted by type.
A teenager can stash phone chargers, earbuds, and lip balm where they won't get buried under a sibling's stuff. You don't need to install anything permanent. Most over-the-door organizers hang from a couple of hooks or brackets that slip over the top of the door.
That means you can move it, swap it out, or take it with you when you rearrange the room. Just make sure the door still closes properly. A bulky organizer can bump against the frame or make the door hard to latch.
Measure the gap at the top of the door before you buy, and look for low-profile options if clearance is tight.
Pick The Right Organizer For Your Kids
Shoe organizers with fabric pockets are the classic choice. They're cheap, come in dozens of colors, and hold everything from socks to small toys. Clear plastic pockets are better if your kids need to see what's inside without digging.
For older kids, a hanging file organizer or a mesh pocket panel can hold notebooks, chargers, and art supplies. Avoid anything with sharp edges or loose strings if you have toddlers. And skip the heavy canvas versions if your door is hollow-core—they can pull the door out of alignment over time.
What To Put In Each Pocket
Assign categories, not just random stuff. One row for hair accessories. One row for small toys or figurines.
One row for school supplies like pencils, erasers, and glue sticks. Bottom pockets work well for items your kids use every day, since they're easy to reach. Label the pockets with a marker or small stickers if your kids are still learning to read.
A simple drawing of a hair tie or a toy car can do the trick. Rotate the contents every few months so the organizer doesn't become a graveyard for broken crayons and mystery parts.
Keep It Tidy Without Nagging
The whole point is to reduce floor clutter, so make it easy to put things back. A quick nightly reset—two minutes before lights out—keeps the organizer from overflowing. If a pocket gets too full, that's a sign you need to purge or move some items elsewhere.
You can also give each child their own column or row if they share the door. That way there's no arguing over whose stuff goes where. A little masking tape with their name or initial makes ownership obvious.
12. A Shared Desk with Three Stools
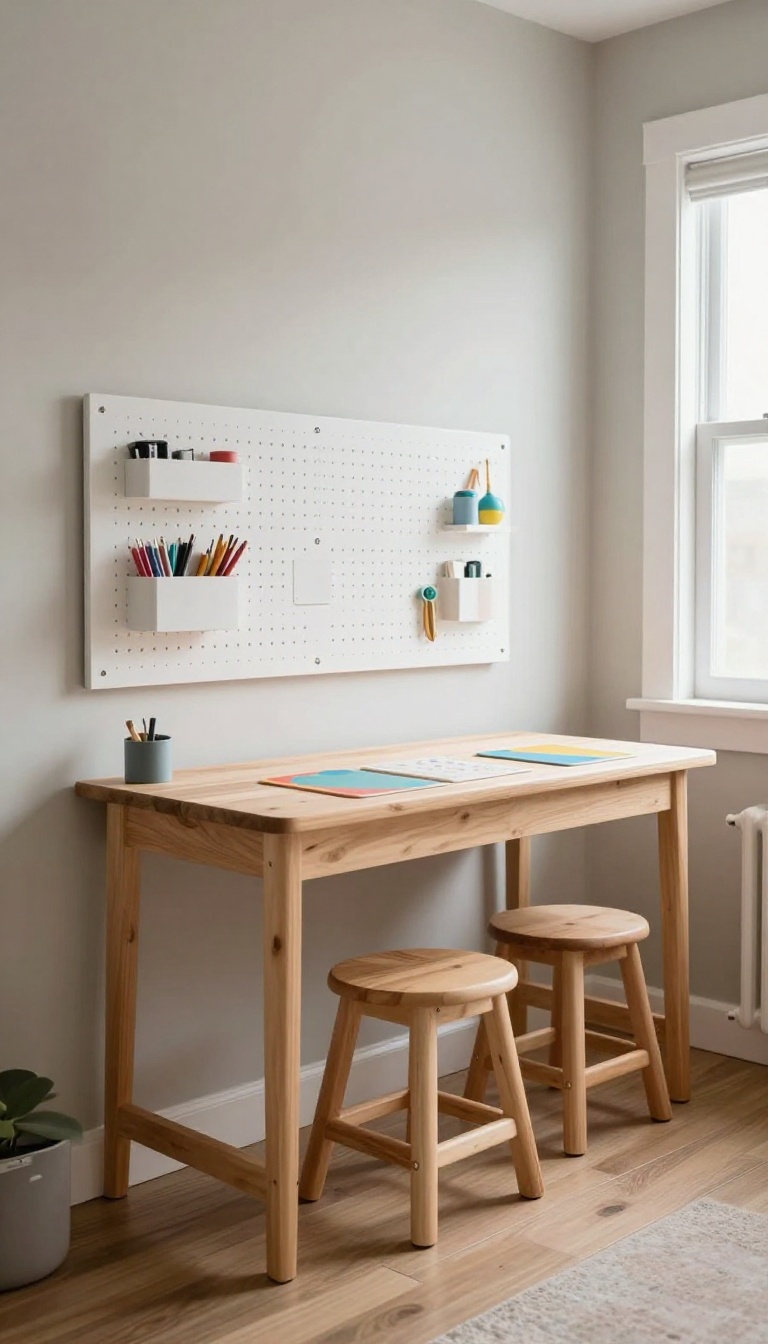
Three kids, one homework hour, and suddenly everyone needs the same outlet, the same ruler, and the same six inches of table. A single long desk fixes most of that before it starts. Run it along one wall, slide three backless stools underneath, and the whole setup disappears when it's not in use.
The backless part matters more than it sounds. Stools tuck fully under the desktop, so the floor stays clear and the room doesn't look like a study hall. Add a pegboard above and the supplies stop migrating to the beds.
The desk itself doesn't have to be fancy. A length of butcher block on two adjustable legs, a repurposed dining table cut down, or two matching IKEA tops pushed together all work. Aim for at least 60 inches of width if you can, which gives each kid a real zone instead of a sliver.
Height is the one thing worth getting right. A desk around 26 to 28 inches tall suits most kids from about age six through early teens, and backless stools at 18 to 24 inches pair with that comfortably. If your three kids span a wide age range, adjustable legs let you raise the whole surface as the youngest grows into it. ### Give Each Kid a Marked Zone Three kids sharing one surface need visible boundaries or the middle spot becomes a battlefield.
Tape off three equal sections underneath, or line up three small desk mats in different colors. Each kid gets a color, and that color follows them to their stool, their bin, and their pegboard hooks. This sounds fussy until you try it.
Once the zones are marked, the arguments shift from who sits where to who left crumbs on whose side, which is at least a solvable problem. ### Pick Stools That Actually Tuck Backless stools work because they slide all the way under, but not all of them do. Measure the clearance under your desk before you buy. A stool with a seat height around 18 inches fits under a standard 28-inch desk with room to spare.
Wooden stools are sturdy and cheap. Metal ones with rubber feet are quieter on hard floors. Skip anything with a back or arms, since those stick out and eat the floor space you're trying to protect. ### Use a Pegboard for Shared Supplies A pegboard above the desk turns a blank wall into storage that doesn't touch the surface.
Mount it so the bottom edge sits about 12 inches above the desktop, high enough that kids can reach the lower hooks without knocking things over. Hang cups for pens and markers, a small bin for scissors and glue, and a hook for each kid's headphones or pencil case. Shared items go in the middle, personal items go on the ends.
Nothing lives on the desk except what's being used right now. ### Keep the Desk Clear Between Sessions A shared desk only stays usable if it resets. Build a two-minute cleanup into the end of homework time. Everything goes back to its pegboard hook or into a labeled bin, and the surface gets a quick wipe.
If your kids resist, make the reset part of the routine rather than a chore. The desk stays clear, the stools stay tucked, and the room goes back to being a bedroom instead of a permanent workspace.
Give Each Kid A Marked Zone
Three kids sharing one surface need visible boundaries or the middle spot becomes a battlefield. Tape off three equal sections underneath, or line up three small desk mats in different colors. Each kid gets a color, and that color follows them to their stool, their bin, and their pegboard hooks.
Pick Stools That Actually Tuck
Backless stools work because they slide all the way under, but not all of them do. Measure the clearance under your desk before you buy. A stool with a seat height around 18 inches fits under a standard 28-inch desk with room to spare.
Wooden stools are sturdy and cheap, and metal ones with rubber feet are quieter on hard floors.
Use A Pegboard For Shared Supplies
A pegboard above the desk turns a blank wall into storage that doesn't touch the surface. Mount it so the bottom edge sits about 12 inches above the desktop. Hang cups for pens and markers, a small bin for scissors and glue, and a hook for each kid's headphones or pencil case.
Shared items go in the middle, personal items go on the ends.
Keep The Desk Clear Between Sessions
A shared desk only stays usable if it resets. Build a two-minute cleanup into the end of homework time. Everything goes back to its pegboard hook or into a labeled bin, and the surface gets a quick wipe.
The desk stays clear, the stools stay tucked, and the room goes back to being a bedroom.
13. Bedside Shelves Instead of Nightstands
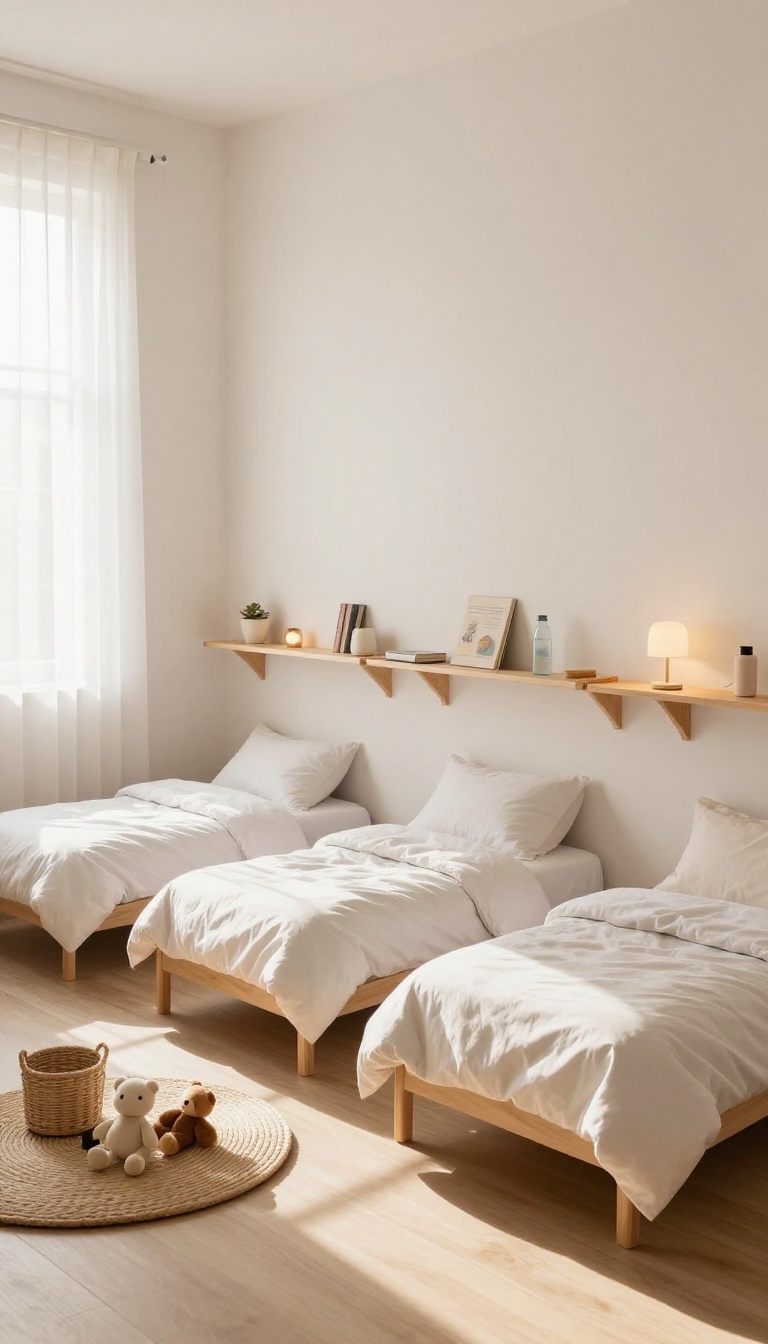
Nightstands eat up a shocking amount of floor space in a shared room. Multiply that by three beds, and you've lost a chunk of the room to furniture that mostly holds a lamp and a half-empty glass of water. Mount narrow floating shelves beside each bed instead, and you give every kid a personal spot without sacrificing an inch of walking room.
The concept is simple: each child gets a slim shelf within arm's reach of their pillow. It holds the essentials—a small lamp, a book, a water bottle—and nothing else. Because it's mounted to the wall, the floor underneath stays clear for shoes, laundry baskets, or the inevitable pile of stuffed animals.
This works especially well when beds are pushed into corners or lined up along one wall. You don't need matching nightstands or a perfectly symmetrical layout. You just need a flat surface at the right height for each kid.
Installation is straightforward, and you can adjust the height as your children grow. A shelf that's too high for a five-year-old today will be just right in a couple of years. That flexibility makes this a long-term solution, not a quick fix.
Choosing The Right Shelf Depth And Height
A depth of 6 to 8 inches is the sweet spot. Deep enough for a standard lamp base and a chapter book, shallow enough that it doesn't jut into the room or bonk heads when kids sit up in bed. Height matters just as much.
Aim for 2 to 4 inches above the mattress top so your child can reach it without stretching. If the bed sits low, mount the shelf a little higher; if it's a loft or bunk, keep it just above the safety rail. Test it with your kid before you drill.
Have them lie down and reach for an imaginary glass of water. That quick check saves you from redoing the job later.
What To Put On (and Keep Off) The Shelf
Keep it minimal: one small lamp, one book, one water bottle. That's it. The moment you allow a stack of comics, a collection of rocks, and three empty snack wrappers, the shelf becomes a mess magnet.
A wall-mounted cup or a tiny clip-on basket can hold small extras like a glasses case or a phone at night. But resist the urge to add more surface area. The whole point is to stay lean.
If your kids share a shelf because their beds are close together, assign clear sides. A strip of washi tape down the middle works as a friendly border and prevents turf wars.
Installation Tips For A Shared Room
Use sturdy wall anchors—these shelves will get leaned on, bumped, and occasionally used as a step. A floating shelf with a hidden bracket looks clean, but a simple L-bracket shelf painted to match the wall is just as functional and often cheaper. If you're renting or don't want to patch holes later, adhesive shelves exist, but they have weight limits.
Stick to lightweight lamps and paperbacks, and check the rating before you trust them with a water bottle. For a polished look, line up all three shelves at the same height if the beds are in a row. If the beds are staggered, mount each shelf to suit the kid who sleeps there.
Function first, symmetry second.
14. Color-Coded Bedding and Towels
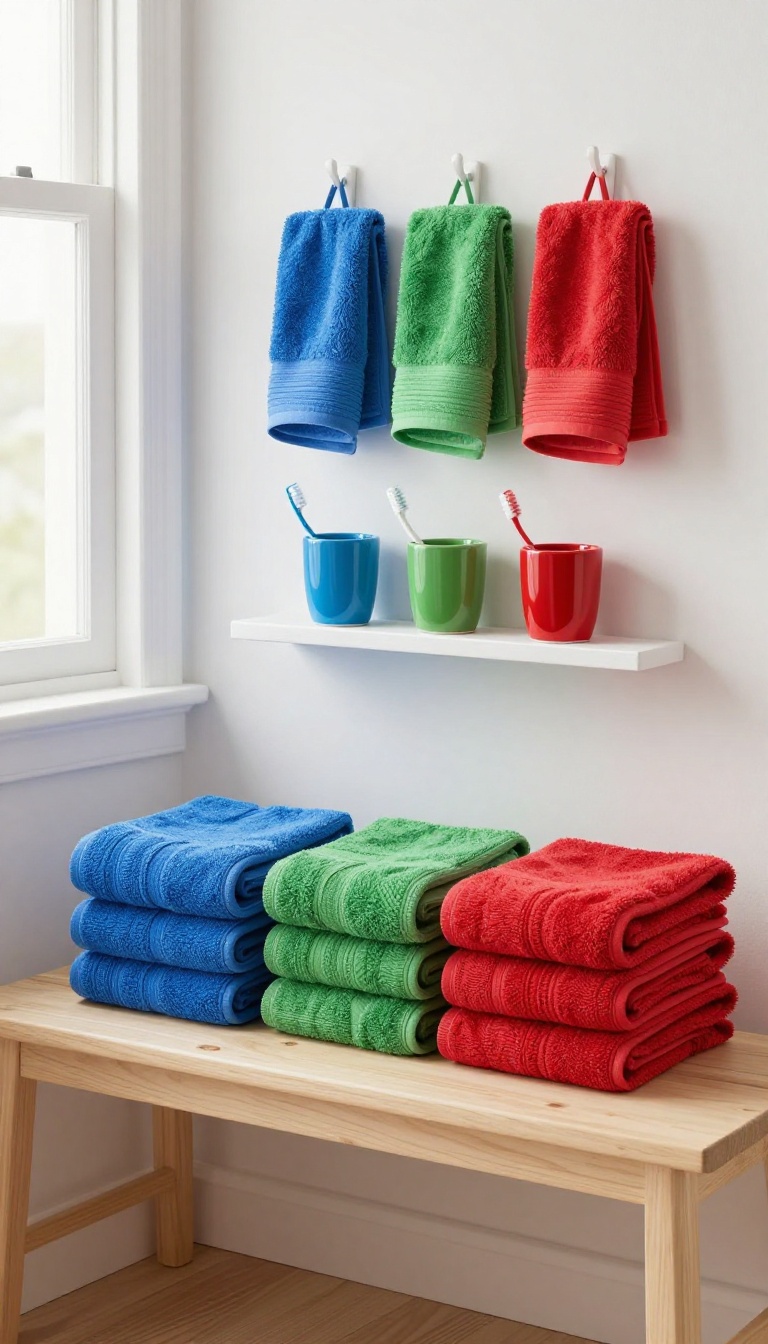
Assigning each child a color for sheets, towels, and toothbrush cups sounds almost too simple to matter. But in a room where three kids share everything from floor space to shelf space, ownership is half the battle. A color turns a generic item into a personal one, and that tiny shift kills a lot of daily friction before it starts.
The system works because it removes decision-making. Nobody has to ask whose towel is on the hook or whose sheets are in the wash. The color answers the question instantly, for kids and parents alike.
You don't need a perfect matching set or a big budget. You need consistency. Pick one color per child, then repeat it across the items that get mixed up most: sheets, pillowcases, towels, and toothbrush cups.
That's it. The rest of the room can stay neutral or shared. The real payoff shows up in two places.
First, the 'that's mine' arguments drop because ownership is visible from across the room. Second, laundry stops being a sorting puzzle. You can fold a basket of towels in minutes when every towel announces its owner.
Start with the items that cause the most conflict. If towels are always disappearing, color-code towels first. If bedtime is a fight over pillows, start with bedding.
You can expand the system later once the first piece proves it works.
Pick Colors That Actually Work
Go with colors that are easy to tell apart at a glance. Blue, green, and red are obvious. Blue, teal, and navy are not.
If two kids want the same color, let one take a shade and the other take a pattern in that shade. Stripes versus solids can do the same job as two different colors. Avoid white and light gray for kids who are messy or young.
They show every stain and defeat the purpose of easy sorting. Darker or mid-tone colors hold up better and still read clearly in a shared closet or drawer.
Where To Apply The System
Bedding is the anchor: fitted sheet, flat sheet, and pillowcase in the assigned color. Towels come next, including a hand towel and a bath towel per child. Toothbrush cups and small bathroom bins are cheap add-ons that reinforce the habit.
You can also color-code storage bins for socks, underwear, or school gear. Keep it limited to items that get mixed up. Overdoing it turns a simple system into a decorating project, and that's when it falls apart.
Make Laundry Day Easier
Teach kids to drop dirty towels and sheets into a hamper by color, or into separate mesh bags if you have the space. Even one shared hamper works if each child's items are easy to spot. When you pull a load out, you already know where everything goes.
This cuts the folding pile into clear stacks. No more holding up a towel and guessing. No more 'whose is this? ' halfway through a basket.
The system saves you a few minutes every wash day, and those minutes add up.
Keep It Flexible As Kids Grow
Colors can change when a child's taste shifts, but try to keep the assignment stable for at least a year. Swapping colors every few months undoes the habit you just built. If a child wants a new color, let them trade with a sibling rather than starting over.
When a child moves out or the room setup changes, you can retire that color or reassign it. The point isn't the color itself. It's the ownership and the speed it brings to daily routines.
15. A Rotating Toy System to Prevent Overflow
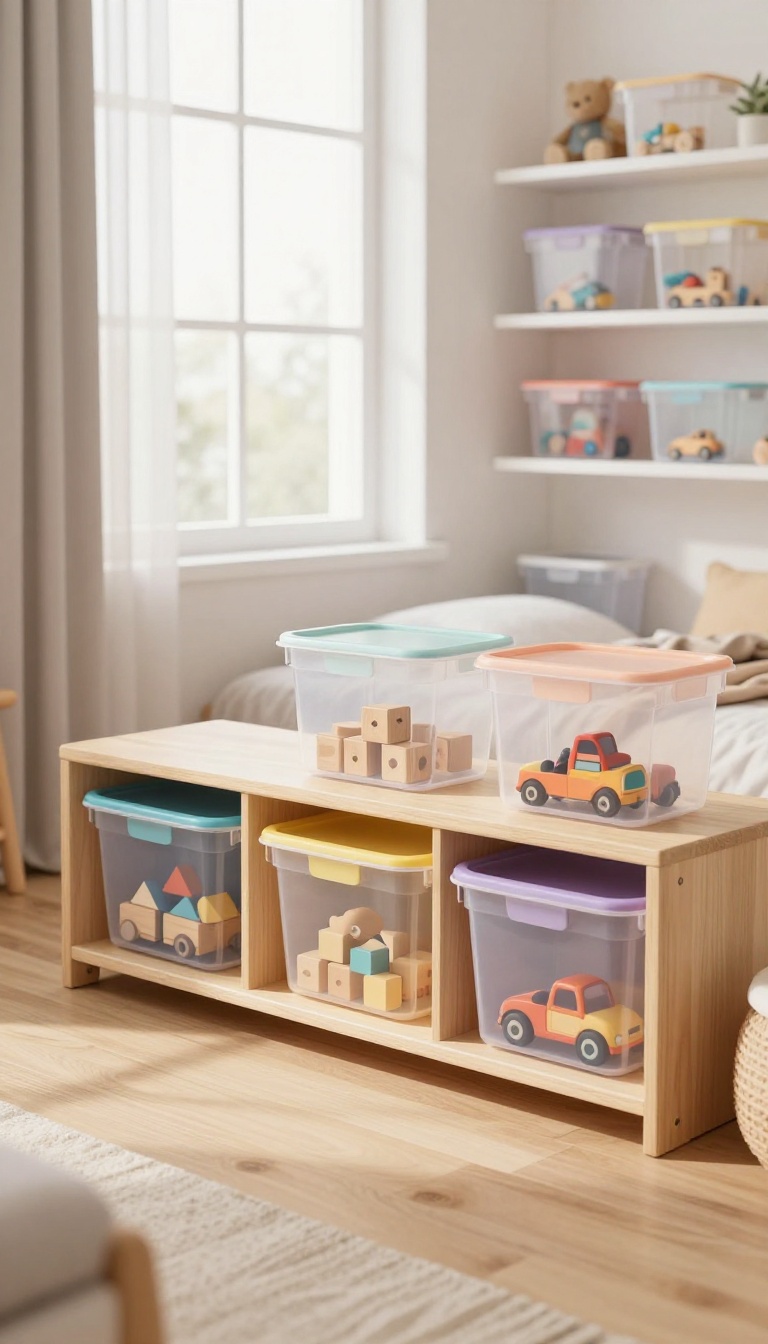
Toys multiply overnight, especially when three kids share one room. The fix isn't banning toys; it's controlling how many are out at once. A simple rotation system keeps the floor clear and makes old toys feel new again.
Here's how it works: pick a small number of toys to stay available—say, one bin per child plus a shared set. Everything else goes into labeled storage bins, out of sight. Every week or two, swap the bins.
Kids get a fresh batch without you buying anything new.
Set Up The Swap
Use clear bins or labeled boxes so kids can see what's inside without digging. Store them on a high shelf, under a bed, or in a closet. Keep a master list taped inside a cabinet door so you remember what's in rotation.
Each child gets their own bin to manage, which cuts down on arguments.
Make It A Routine
Tie rotation to something that already happens, like the first Saturday of the month or after a room clean-up. Set a timer for 15 minutes and let each kid pick what stays and what goes. When the swap is done, the room feels bigger and the 'new' toys get played with right away.
Why It Works
Fewer toys out means less to step on, less to fight over, and way less to clean up. Kids actually play longer with fewer choices because they aren't overwhelmed. And when a toy comes back after a few weeks, it's exciting again—no shopping required.
FAQ
What's the best bed arrangement for three kids in one room?
Triple bunks or a combination of a loft bed and a standard bed with a trundle work best. The key is keeping floor space open and giving each child a defined sleeping spot.
How do I give each child privacy in a shared bedroom?
Use ceiling-mounted curtains, tall bookshelves as dividers, or bunk beds with built-in privacy panels. Even a simple fabric screen can create a sense of personal space.
How can I store clothes for three kids in one closet?
Divide the closet into three vertical sections with shelves and rods. Add labeled bins or baskets for each child, and use under-bed storage for off-season items.
What age is best for triple bunk beds?
Triple bunks are generally safe for kids ages 6 and up, but always check the manufacturer's weight and age guidelines. Younger children should use the lowest bunk.
How do I keep a shared room from feeling cluttered?
Stick to a rotating toy system, use wall-mounted storage, and give each child a designated cubby. Regular decluttering sessions help keep things under control.
Conclusion
Sharing a bedroom doesn't have to mean constant chaos. With smart storage, clear zones, and a few kid-friendly rules, three children can live together without stepping on each other's stuff. Start with one or two changes—like labeled cubbies or a curtain divider—and build from there.
The goal isn't a perfect room; it's a space where everyone feels they have a spot that's theirs. Try one idea this weekend and see how much smoother mornings go.