15 Beautiful Cabin Shower Ideas for a Stylish, Usable Setup
A cabin shower should feel like a natural extension of the outdoors—warm, rugged, and effortlessly inviting. But blending that rustic charm with everyday practicality takes a bit of planning, especially when you're working with wood, stone, and water in a small space.
The good news is you don't need a massive budget or a full gut renovation to get it right. From simple material swaps to smart layout tweaks, these 15 ideas focus on what actually works in a real cabin setting.
Whether you're building from scratch or just refreshing an existing bathroom, each option balances style with durability. Let's look at ways to make your shower both beautiful and genuinely usable.
1. Cedar Plank Walls for That Classic Sauna Feel
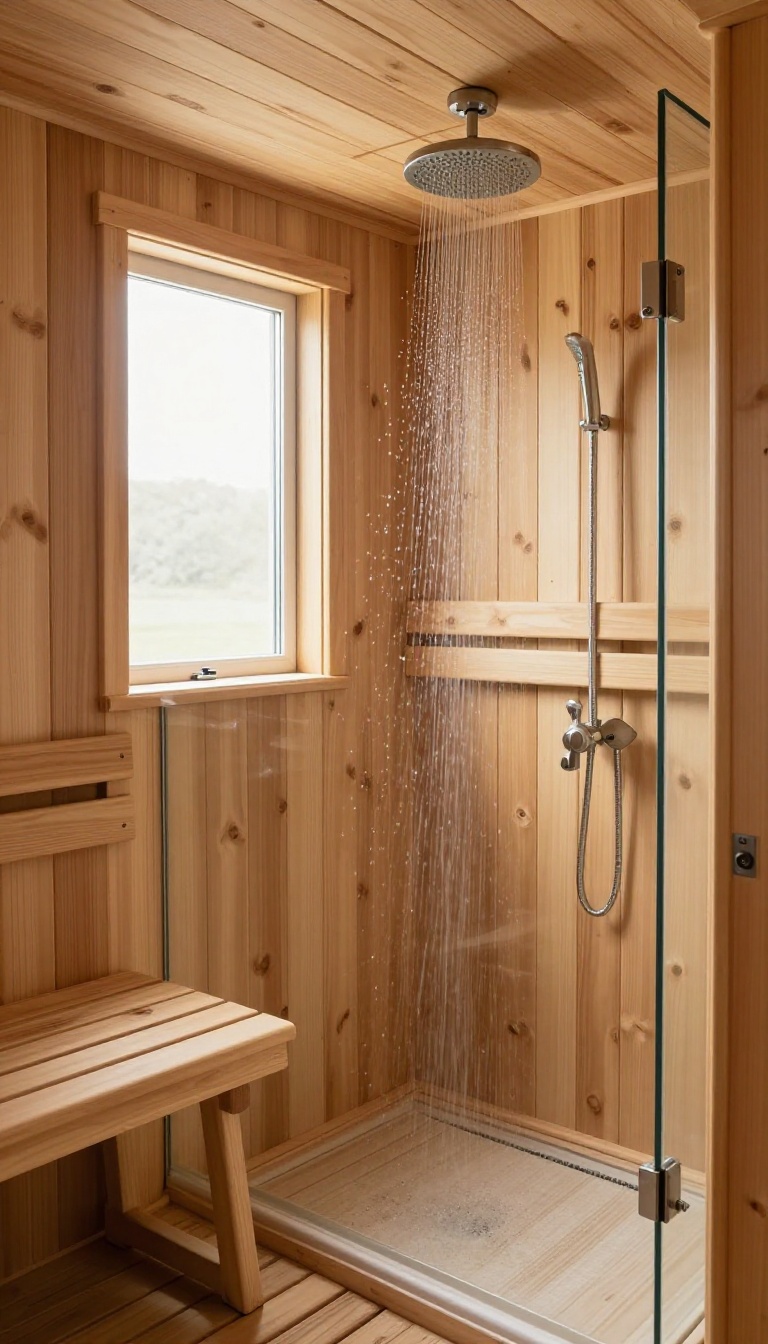
Cedar has a way of making a small space feel like a retreat. Its warm tones and natural grain bring instant coziness, while the subtle scent adds to the experience. In a cabin shower, cedar isn't just about looks—it's also a practical choice because it handles moisture well.
Using cedar on your shower walls creates a seamless connection to the surrounding forest. You can cover all four walls for a full sauna effect, or limit it to one accent wall to keep things lighter. Either way, the wood adds texture and warmth that tile or fiberglass just can't match.
Cedar is naturally resistant to rot and decay, which makes it a smart option for wet areas. It also has a low density, so it doesn't feel as cold underfoot as stone or porcelain. Just remember to seal it properly to protect the finish and keep it looking fresh for years.
Why Cedar Works In Wet Spaces
Cedar contains natural oils that repel moisture and resist mildew. That's why it's a classic choice for saunas and outdoor furniture. In a shower, these same properties help prevent warping and cracking, so your walls stay stable.
You'll still need to apply a waterproof sealant, but cedar requires less maintenance than other woods. It also ages gracefully, developing a silver patina if you leave it unfinished—though most cabin owners prefer to keep that warm reddish tone.
Ways To Style Cedar Walls
You don't have to commit to cedar everywhere. A single accent wall behind the shower bench or near the controls can make a big impact. Pair it with light-colored tile or stone to balance the dark wood.
For a more modern cabin look, use vertical planks with a matte finish. Horizontal boards give a more traditional feel. You can also mix cedar with black metal fixtures or brushed nickel for a stylish contrast.
Sealing And Maintenance Tips
To keep cedar looking its best, apply a high-quality waterproof sealer before installation. Reapply every couple of years, depending on how often you use the shower. Use a squeegee after each shower to minimize water spots and prolong the finish.
Avoid harsh cleaners that can strip the sealant. A mild soap and water solution works fine. With a little care, your cedar walls will stay beautiful and functional for a long time.
2. Rainfall Showerhead with a Wooden Ceiling
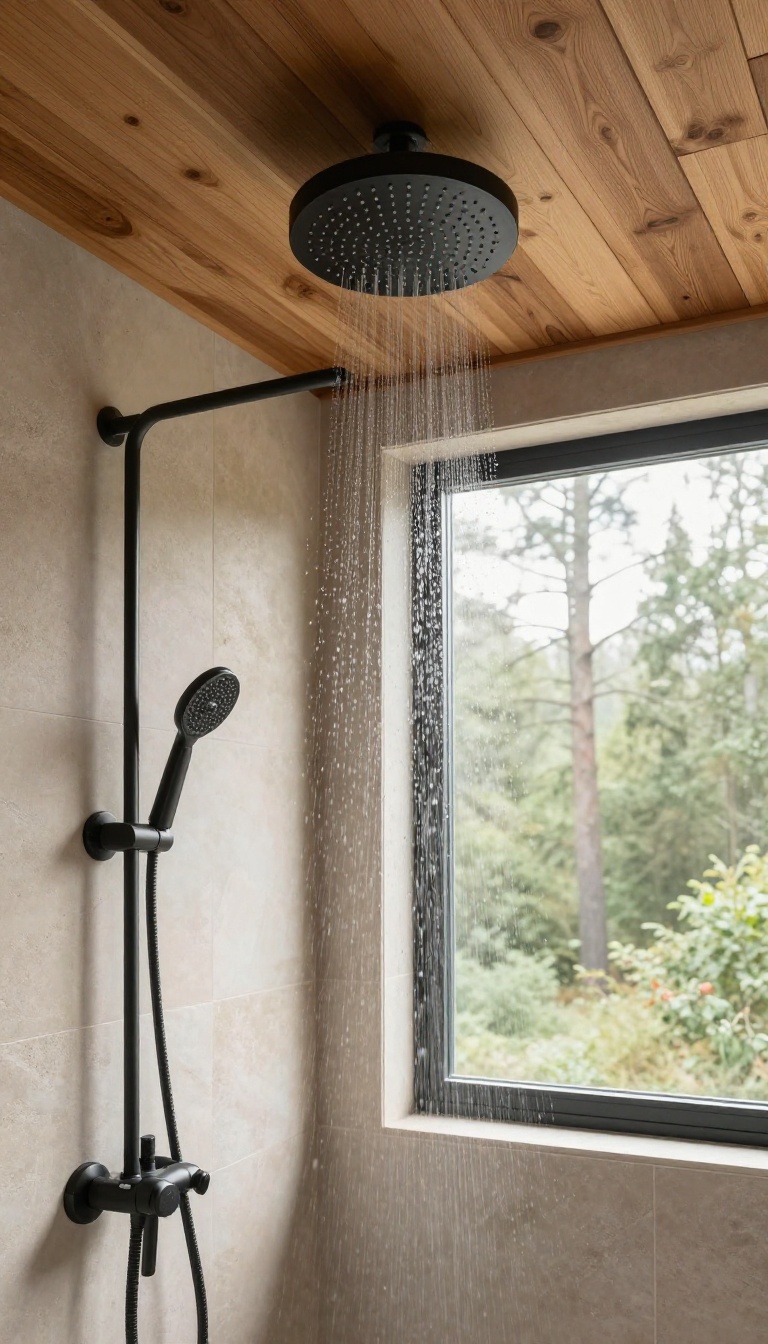
There’s something about the sound of rain on wood that instantly calms the mind. Pairing a large rainfall showerhead with a wood-planked ceiling brings that sensory experience indoors, making every shower feel like a moment in a forest clearing. The wood adds warmth and texture, while the rain shower keeps the experience spa-like and refreshing.
The combination works because it plays on contrasts: the smooth, modern fixture against the organic, rustic ceiling. The wood naturally absorbs sound, softening the noise of falling water, and the wide showerhead creates a gentle, even spray that mimics a real downpour. It’s a simple upgrade that transforms the shower from a utilitarian space into a daily retreat.
Why Wood Works In A Wet Area
You might worry about moisture and wood, but with the right treatment, it’s a durable choice. Use cedar, teak, or thermally modified wood that naturally resists rot and warping. Seal it with a waterproof finish designed for saunas or showers, and ensure proper ventilation to keep the ceiling dry between uses.
Many cabin owners find that wood actually handles humidity better than drywall, which can peel or grow mold.
Picking The Right Rainfall Showerhead
Look for a model with a wide face—at least 8 inches—to get that full-coverage feel. Choose a brushed nickel or matte black finish to complement the wood tones. Consider a handheld combo for flexibility, especially if you need to rinse off kids or pets.
Also, check the flow rate and water pressure in your cabin; some rainfall heads need a minimum pressure to perform well, so a pressure-boosting pump might be worth it.
Lighting And Vents To Complete The Look
To enhance the forest-canopy vibe, add a dimmer switch for your overhead light and maybe a small skylight or a warm LED strip along the ceiling edges. Good ventilation is crucial—install a quiet exhaust fan with a humidity sensor to prevent excess moisture from lingering. This keeps the wood looking great and prevents any musty smells.
3. Stone-Accent Tile for a Rugged, Natural Look
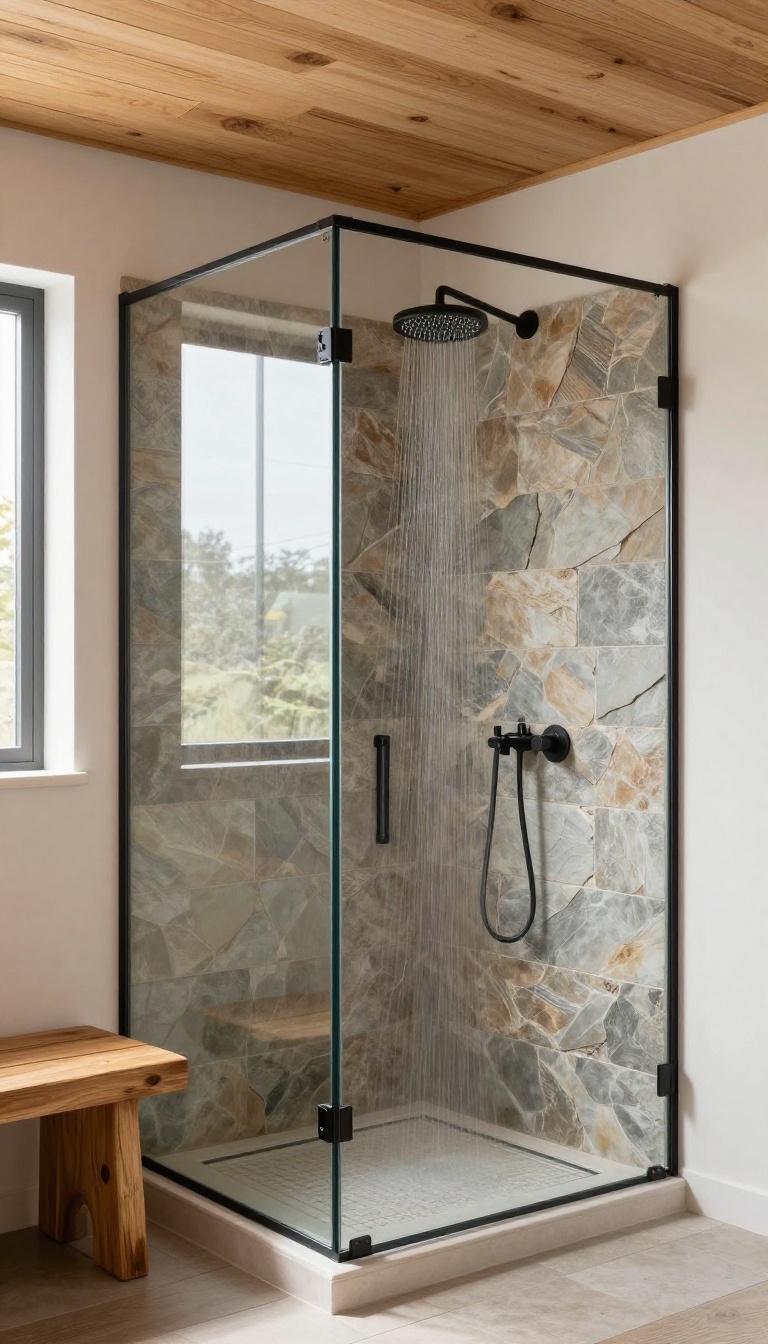
Stone brings an immediate sense of permanence and connection to the landscape, which is exactly what a cabin shower should feel like. Natural stone tiles, such as slate or river rock, offer more than just good looks—they’re built to handle moisture and heavy use. The uneven texture also gives your feet a secure grip, making it a smart choice for a wet environment.
When you choose stone accent tile, you’re not just picking a material—you’re setting the mood for the entire space. The organic variations in color and texture mean no two showers look exactly alike, which adds a one-of-a-kind character that fits perfectly with a cabin’s rustic vibe. Plus, stone is incredibly durable, so it can withstand years of use without losing its charm.
To make the most of this idea, you don’t have to cover every wall. A single accent wall or a niche behind the shower bench can make a big impact without overwhelming the room. Pairing stone with warm wood tones or matte black fixtures creates a balanced, inviting look that feels both natural and refined.
Choosing The Right Stone
Slate and river rock are two of the most popular choices for cabin showers. Slate offers a flat, layered look with subtle color variations, while river rock brings a pebbled, textured surface that’s gentle on your feet. Both are naturally slip-resistant, but river rock is especially grippy when wet.
Consider the overall style of your cabin—slate feels more modern and clean, while river rock leans into a more rustic, organic aesthetic.
Installation Tips
Proper installation is key to ensuring your stone tile lasts. Use a waterproof membrane behind the tile to prevent moisture from seeping into the walls. For river rock, you’ll need to pay extra attention to grout lines—use a sanded grout that matches the stone’s color to create a seamless look.
Sealing the stone after installation is also essential to protect it from stains and water damage.
Maintenance And Care
Stone tile is low-maintenance, but it does require a little care to keep it looking its best. Regularly clean with a pH-neutral cleaner to avoid etching or dulling the surface. Reapply a penetrating sealer every year or two to maintain water resistance.
Avoid harsh chemicals or abrasive scrubbers, as they can damage the stone’s natural finish.
4. Black Fixtures for a Modern Rustic Contrast
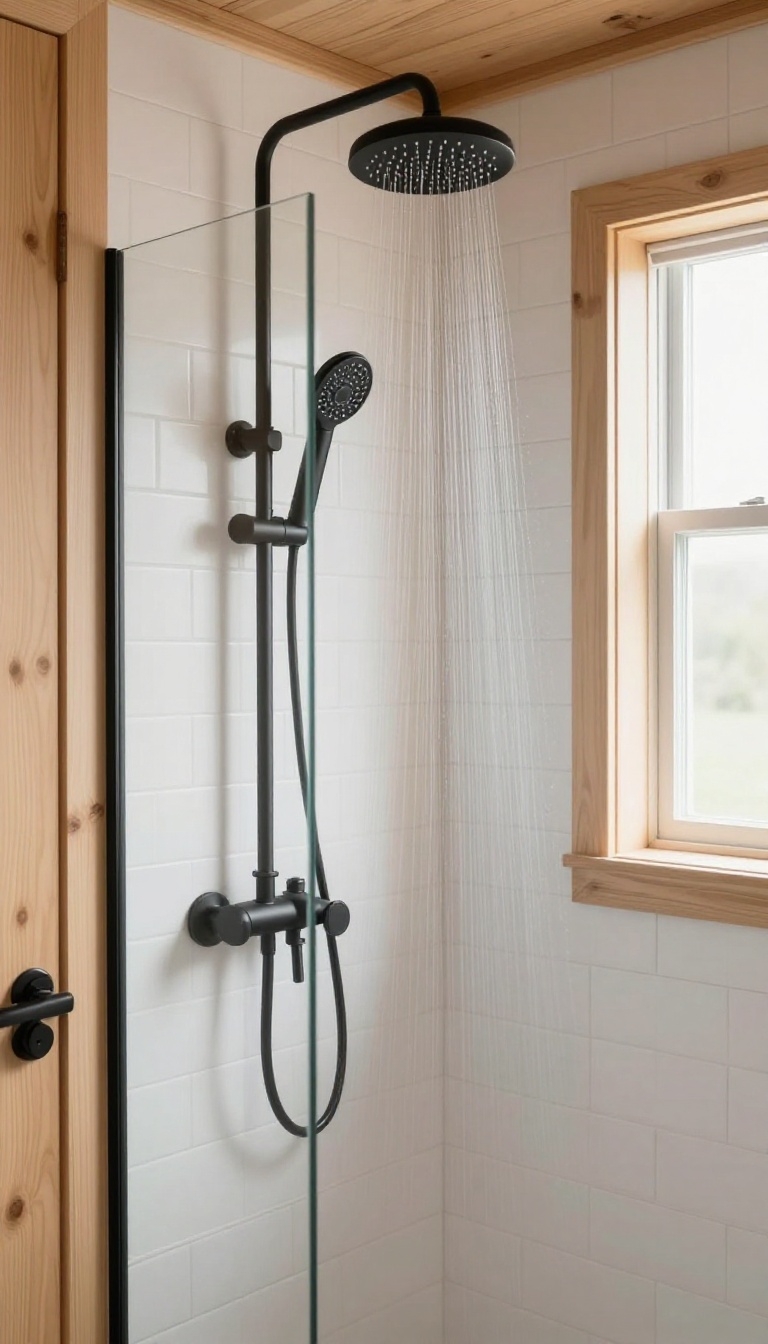
If your cabin shower leans heavily on wood and stone, black fixtures can anchor the look with a crisp, contemporary edge. The dark finish against lighter surfaces creates a visual pop that feels intentional, not accidental. Plus, matte black is surprisingly forgiving—it doesn't show water spots or fingerprints the way chrome or stainless steel does, so it's a smart pick for a busy household.
Mixing black hardware with natural materials is a design trick that works in almost any cabin style. The key is to use it sparingly—think showerhead, faucet, and handles—so it reads as a deliberate accent rather than an afterthought. Here's how to make it work in your space.
Pair With Light Wood Or White Tile
Black fixtures really shine when they're set against a light backdrop. White subway tile or pale oak paneling gives the dark metal a chance to stand out without clashing. The contrast adds depth and makes the shower feel more custom, even if you're working with budget-friendly materials.
Choose The Right Finish
Matte black is the go-to for a modern rustic look, but don't overlook oil-rubbed bronze or blackened steel. These finishes have a slightly warmer, more textured feel that blends well with cabin aesthetics. Just avoid glossy black—it shows water spots and feels more urban than rustic.
Keep The Rest Simple
Since black fixtures are a strong visual element, let them be the star. Skip busy patterns or bold tile colors in the shower. Stick with neutral tones and let the hardware do the talking.
A simple glass door or open shower keeps the focus on the contrast.
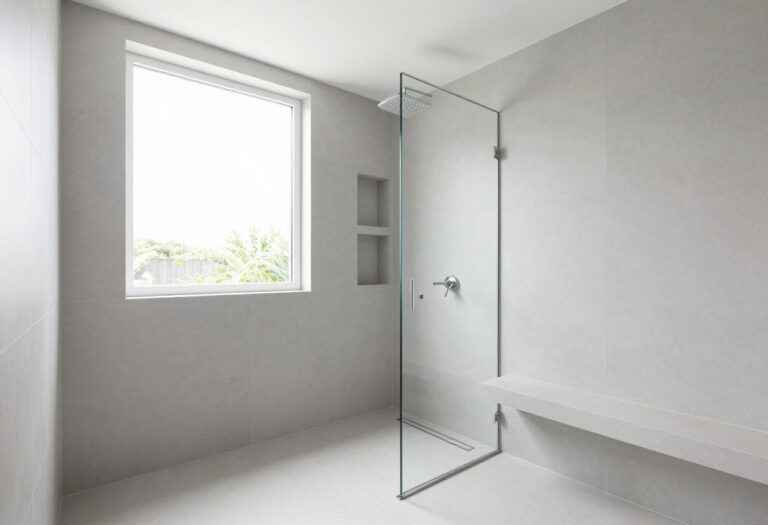
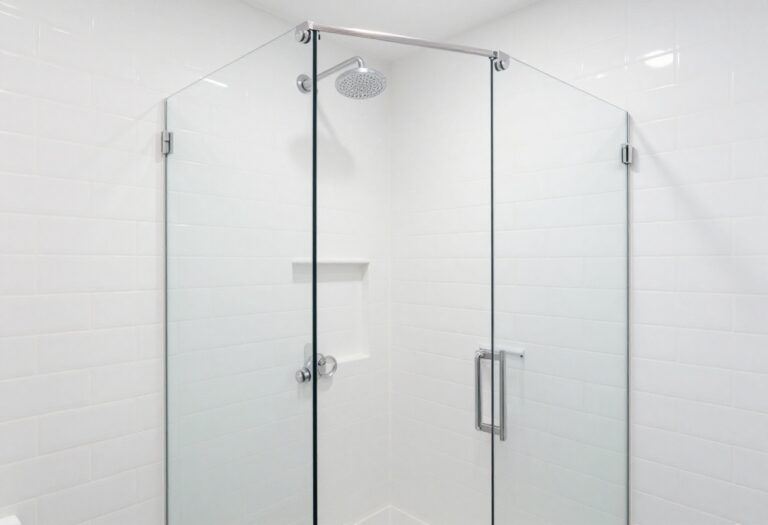
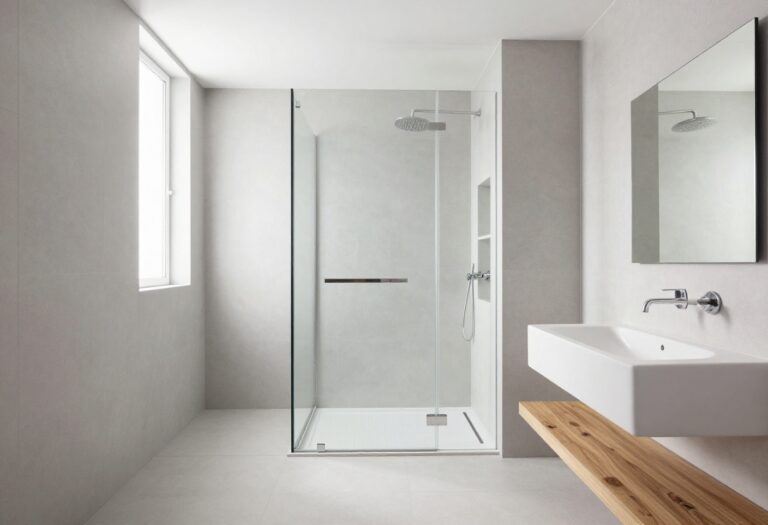
5. Glass Enclosure to Showcase the View
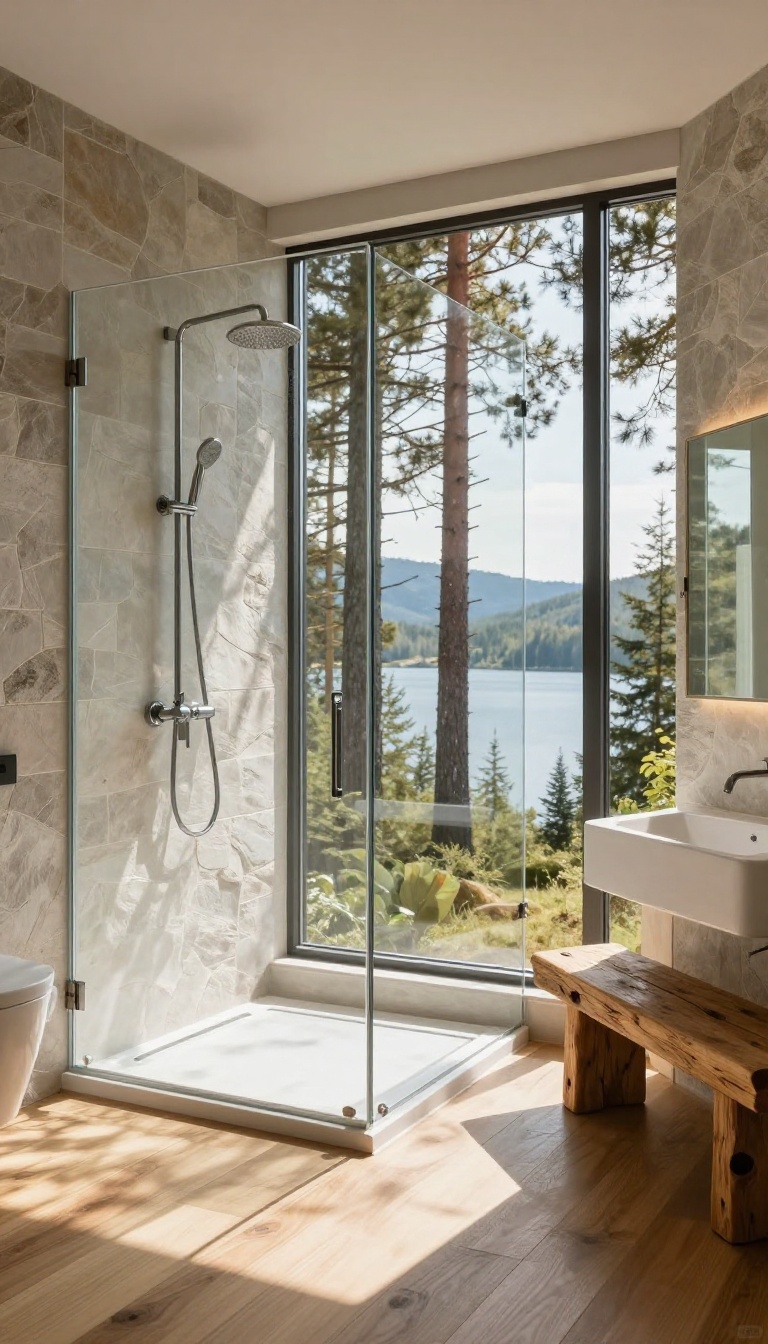
A frameless glass enclosure does more than keep water off the floor—it turns your shower into a front-row seat for the scenery. When you’re surrounded by pines, mountains, or a lake, the last thing you want is a wall blocking the view. Glass lets you soak in the sights while you scrub off the day’s adventures.
It also makes a small bathroom feel twice as open. Natural light pours through, bouncing off tile and wood to brighten the whole space. And if you’re worried about privacy, frosted or tinted glass can give you the best of both worlds—light and openness without feeling exposed.
A frameless glass enclosure is a smart choice for any cabin that boasts a view. Unlike bulky framed units, the minimalist design keeps the eye on the landscape, not the hardware. Plus, it’s surprisingly practical: less metal means less to clean, and the glass can be treated to resist water spots and soap scum.
When planning your glass shower, think about the layout. A corner unit with two glass sides opens up the room, while a single glass panel beside a wall keeps things simple. You can also opt for a half-wall with glass above—it gives you a place to rest a shampoo bottle or a cup of coffee.
The key is to position the glass so you’re facing the view, not the toilet. For durability, choose 3/8-inch or 1/2-inch tempered glass. It’s strong enough for daily use and meets safety standards.
And don’t forget the door—a sliding glass door is great for tight spaces, while a hinged door feels more open. Pair it with a rain showerhead overhead, and you’ll feel like you’re bathing under the open sky.
Choose The Right Glass Type
Clear glass offers the best view, but it shows water spots and fingerprints easily. If you want less upkeep, go with a textured or frosted glass that still lets light through but hides smudges. Tinted glass, like bronze or gray, adds a touch of warmth and cuts glare without blocking the scenery.
Maximize Light And Space
In a small cabin bathroom, a glass enclosure can make the room feel larger by removing visual barriers. To really open things up, use a glass panel that extends floor to ceiling, and keep the area around it uncluttered. A skylight or a window above the shower can double the effect, flooding the space with natural light.
Privacy Without Sacrificing The View
If your shower faces a neighbor or a busy path, you can still enjoy a glass enclosure. Install a privacy film that you can switch out, or use smart glass that turns opaque with the flip of a switch. For a simpler fix, position the glass so it faces the best part of the view, and add a frosted panel on the side that needs privacy.
6. Corner Shower Niche with Recessed Shelving
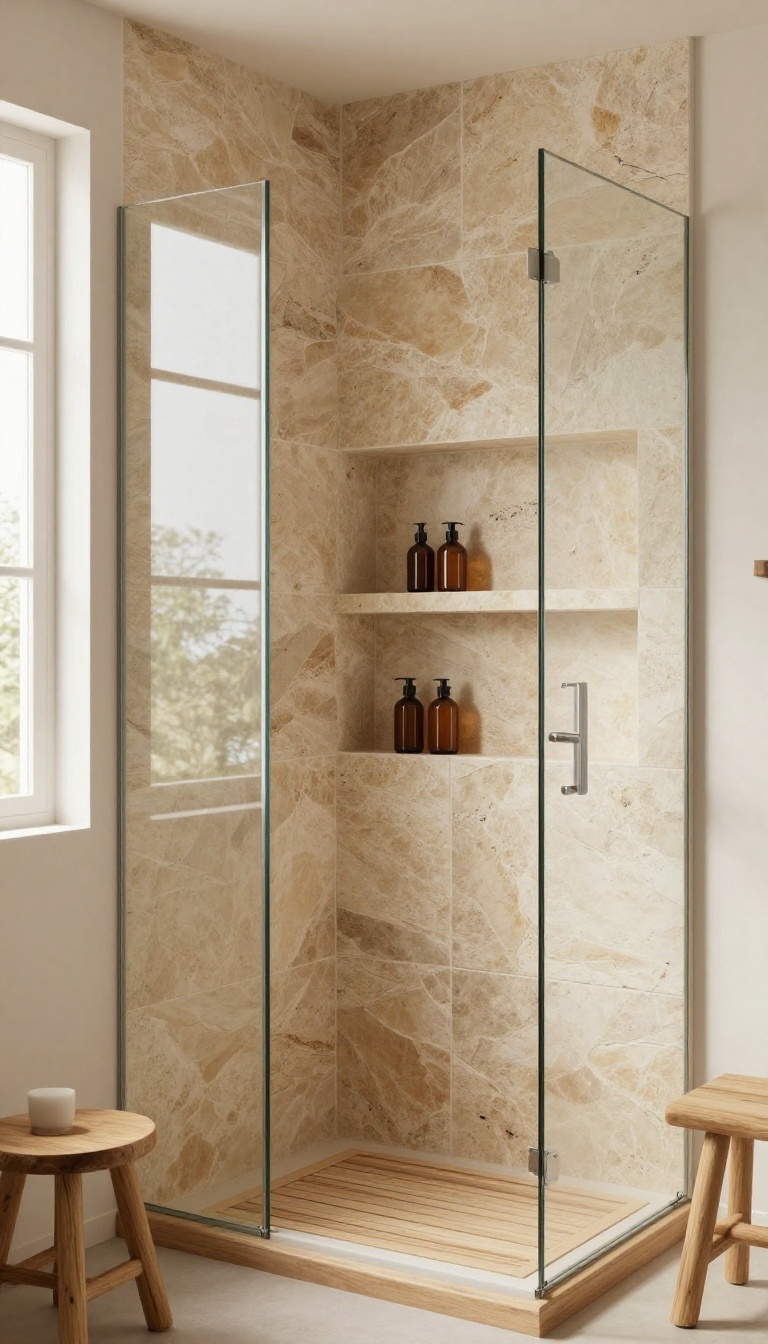
Corners often go unused in a shower, but they’re prime real estate for storage. A recessed niche tucked into the corner keeps shampoo and soap within easy reach without crowding the space. When you tile it with the same material as the walls, it disappears into the design—clean, seamless, and surprisingly roomy.
A corner niche is a smart way to add storage without bolting on bulky shelves or caddies. Because it’s recessed, it doesn’t eat into your standing area, which matters in a compact cabin shower. Plus, the corner placement feels natural and keeps everything neatly organized.
Building a niche into the corner also lets you play with depth and size. You can make it tall for bottles or wide for larger items, and the recessed design keeps it out of the way. Since it’s built into the wall, it’s also easier to clean than a hanging rack—no soap scum hiding behind brackets.
Why A Corner Niche Works In A Cabin Shower
Cabins often have angled ceilings or tight layouts, and corners are usually wasted space. A recessed niche turns that dead zone into something useful. It also keeps the shower floor clear, which is safer and easier to clean.
Plus, the corner placement means you can reach everything without stretching or twisting.
Matching Tile For A Seamless Look
The trick to making the niche feel intentional is to use the same tile as the walls. That way, the niche doesn’t look like an afterthought—it just blends in. If you want a subtle highlight, you can add a thin accent strip or a contrasting back panel, but keeping it simple often looks best in a rustic setting.
Sizing And Placement Tips
Aim for a niche that’s at least 12 inches tall and 6 to 8 inches deep, so bottles fit easily. Place it at chest height or slightly lower, so it’s easy to grab. If you’re planning a double niche, stagger the heights to store tall bottles and small items separately.
Just make sure the niche is sloped slightly toward the shower floor to prevent water pooling.
7. Barn Door Shower Door for a Rustic Touch
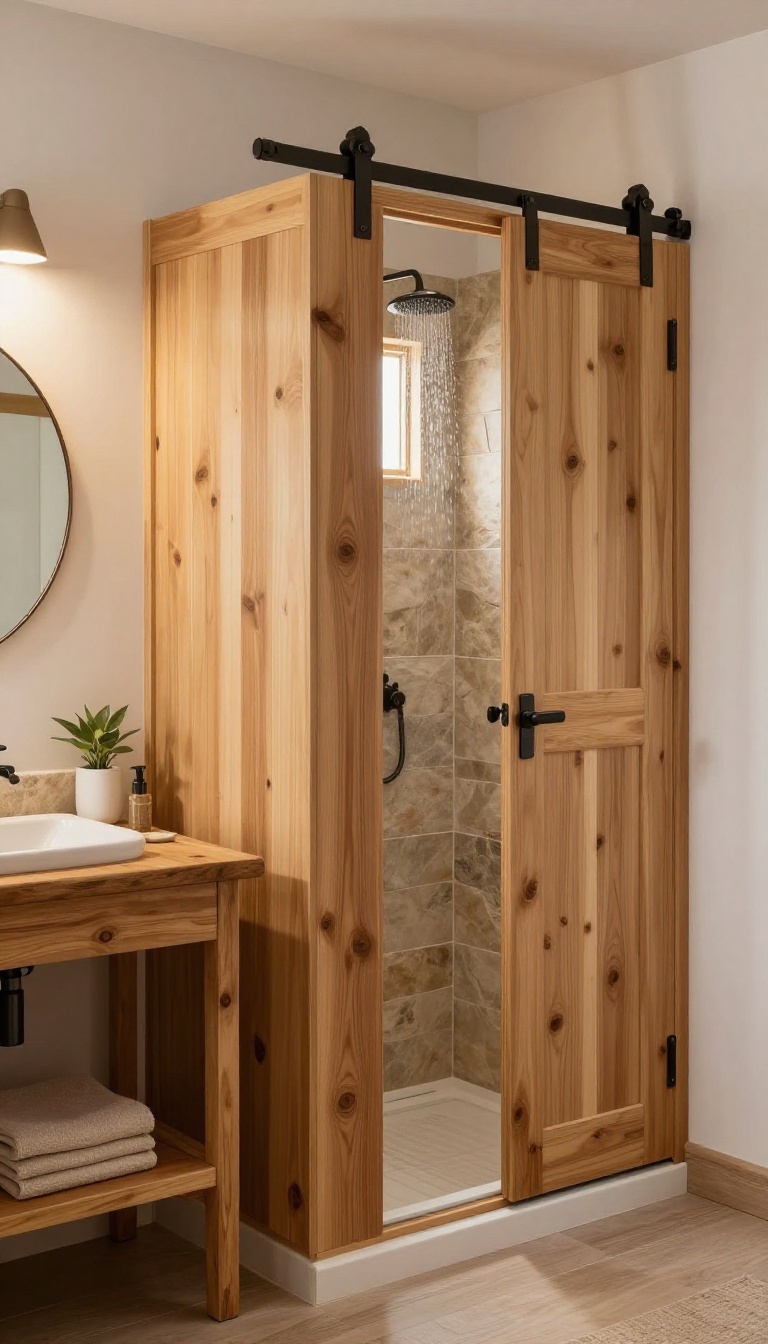
Swapping a traditional swinging door for a sliding barn door instantly changes the feel of a cabin shower. It adds a rugged, farmhouse-style focal point while freeing up floor space that a hinged door would normally need. With the right finish and hardware, it can handle the moisture of a daily shower without losing its charm.
A barn door as a shower enclosure is both a style statement and a practical space-saver. The sliding mechanism means you don’t need to clear a swing radius, which is a huge win in tight bathrooms. Plus, the natural wood grain and metal hardware bring that cozy, rustic vibe right into the shower area.
Choose The Right Wood And Finish
Not all wood is up to the job. Go with naturally moisture-resistant species like cedar, teak, or mahogany, and seal them thoroughly with a waterproof finish. A marine-grade varnish or a high-quality polyurethane will protect the surface from warping and mildew.
Reapply the finish every year or two to keep it looking fresh.
Install Proper Sliding Hardware
The hardware needs to be heavy-duty and rust-resistant. Look for stainless steel or galvanized tracks and rollers rated for the weight of your door. Make sure the track is securely mounted to a stud or reinforced header, because a heavy wood door can be a lot to support.
Smooth, quiet rollers make a big difference in daily use.
Add A Water Barrier At The Bottom
Even with a good door, water can sneak out at the bottom. Install a small threshold or a rubber sweep along the bottom edge to keep water inside the shower. You can also angle the floor slightly toward the drain to prevent pooling.
This keeps your bathroom floor dry and safe.
8. Heated Floor for Cozy Mornings
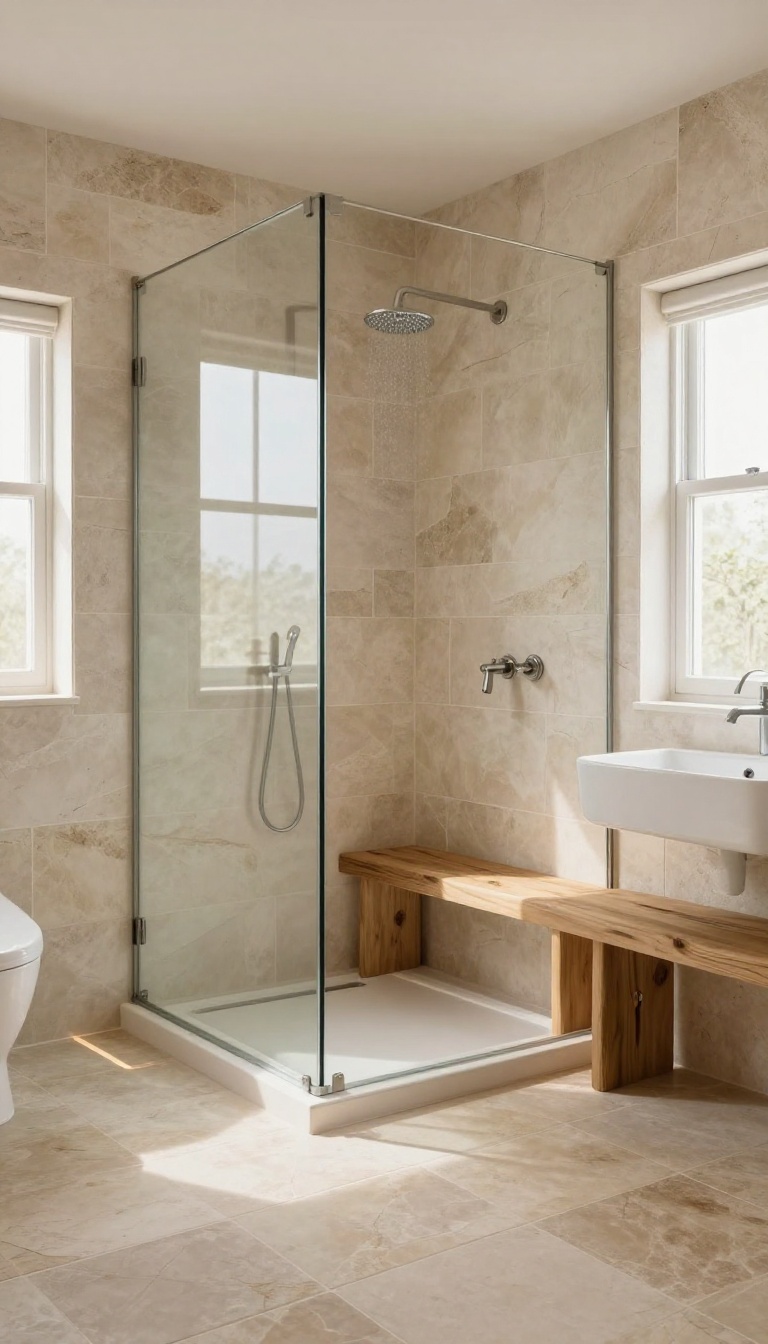
Stepping out of a warm shower onto a cold floor is a jarring way to start the day, especially in a cabin where temperatures can dip overnight. Radiant floor heating solves that problem quietly and efficiently, turning your shower area into a cozy retreat even in the dead of winter. It's a luxury that quickly becomes a necessity once you've experienced it.
Radiant floor heating isn't just about comfort—it also helps dry the floor faster, reducing the risk of slips and keeping the space cleaner. The heat rises evenly, warming the entire bathroom without the stuffiness of a space heater. Plus, it works beautifully with the natural materials common in cabin showers, like stone and tile, which hold heat well and feel great underfoot.
Why It's Worth The Investment
Yes, radiant floor heating costs more upfront than a standard floor, but the payoff is real. You'll save on energy bills because it's more efficient than forced air, and you'll add value to your cabin. The cozy factor is undeniable—imagine stepping onto warm slate on a frosty morning.
It's a small change that elevates the whole shower experience.
Choosing The Right System
There are two main types: electric mats or cables and hydronic (water-based) systems. For a single bathroom, electric systems are simpler and cheaper to install. Hydronic is better if you're heating the whole cabin and already have a boiler.
Look for systems with programmable thermostats so you can warm the floor just before you wake up, saving energy the rest of the day.
Installation Tips For Cabin Builds
If you're building new or renovating, install the heating under the tile or stone with proper insulation beneath to push heat upward. For existing floors, you might need to raise the floor level slightly—factor that into your door clearances. Always hire a licensed electrician for the wiring, and test the system before laying the final surface.
9. Wood-Look Porcelain Tile for Low Maintenance
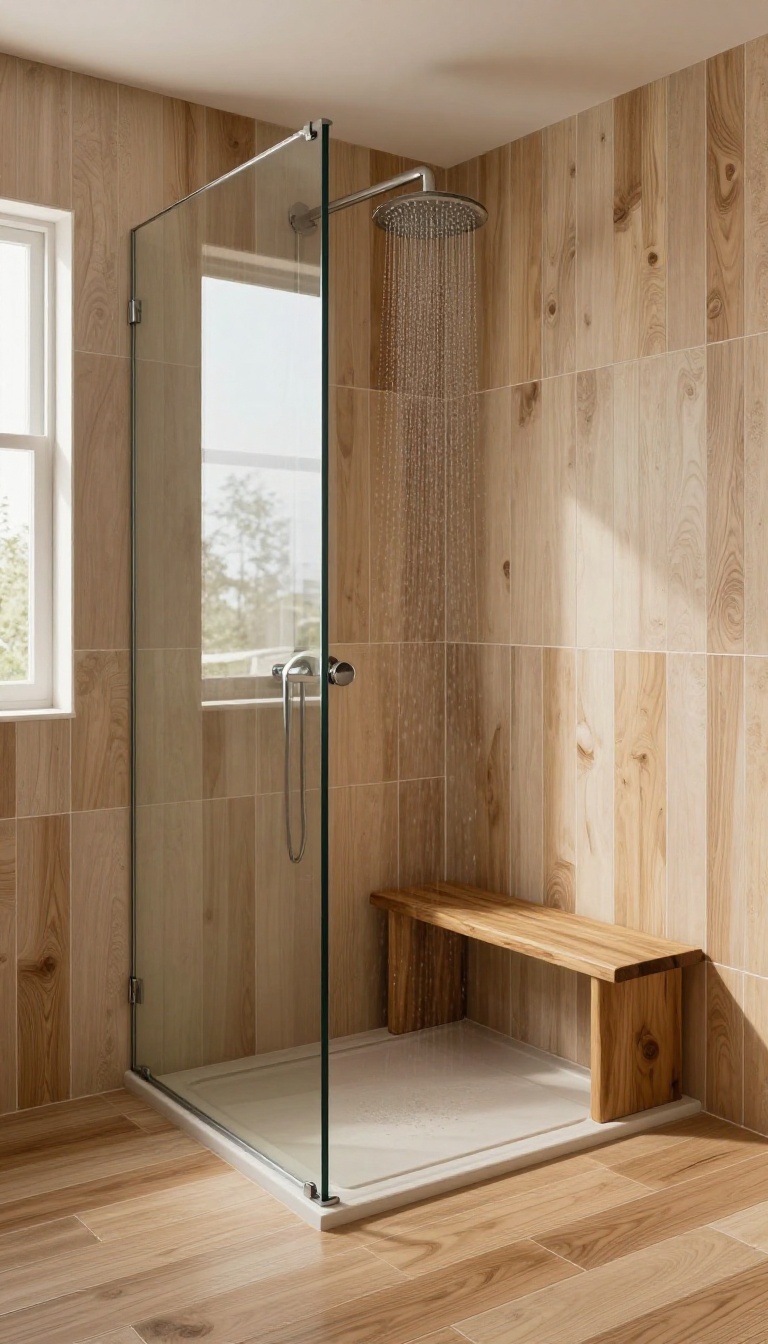
Wood in a shower looks incredible, but it demands constant care to stay mold-free and warp-resistant. If you love the warmth of timber but don't want the hassle, wood-look porcelain tile is the perfect compromise. It gives you that rustic cabin feel without the upkeep.
Porcelain tile that mimics wood grain is a game-changer for cabin showers. It's waterproof, easy to clean, and won't rot or warp, even with constant moisture. You get the visual appeal of wood with the durability of tile, making it ideal for a busy family or a rental property.
Why Porcelain Beats Real Wood
Real wood in a shower requires sealing, regular maintenance, and careful ventilation to prevent damage. Porcelain, on the other hand, is naturally resistant to water and stains. It's also more durable against scratches and dents, so it stays looking new for years with minimal effort.
Choosing The Right Plank Size And Finish
For a more authentic wood look, opt for long planks (like 6×24 inches) with a matte or textured finish. This mimics real hardwood flooring and adds grip underfoot. Avoid glossy finishes, as they can be slippery when wet and look less natural.
Installation Tips For A Seamless Look
Use a staggered or offset pattern to mimic real wood plank installation. Choose a grout color that blends with the tile to make the planks appear more continuous. Also, consider using a large-format tile to reduce grout lines, which simplifies cleaning even further.
10. Freestanding Copper Tub with a Handheld Shower
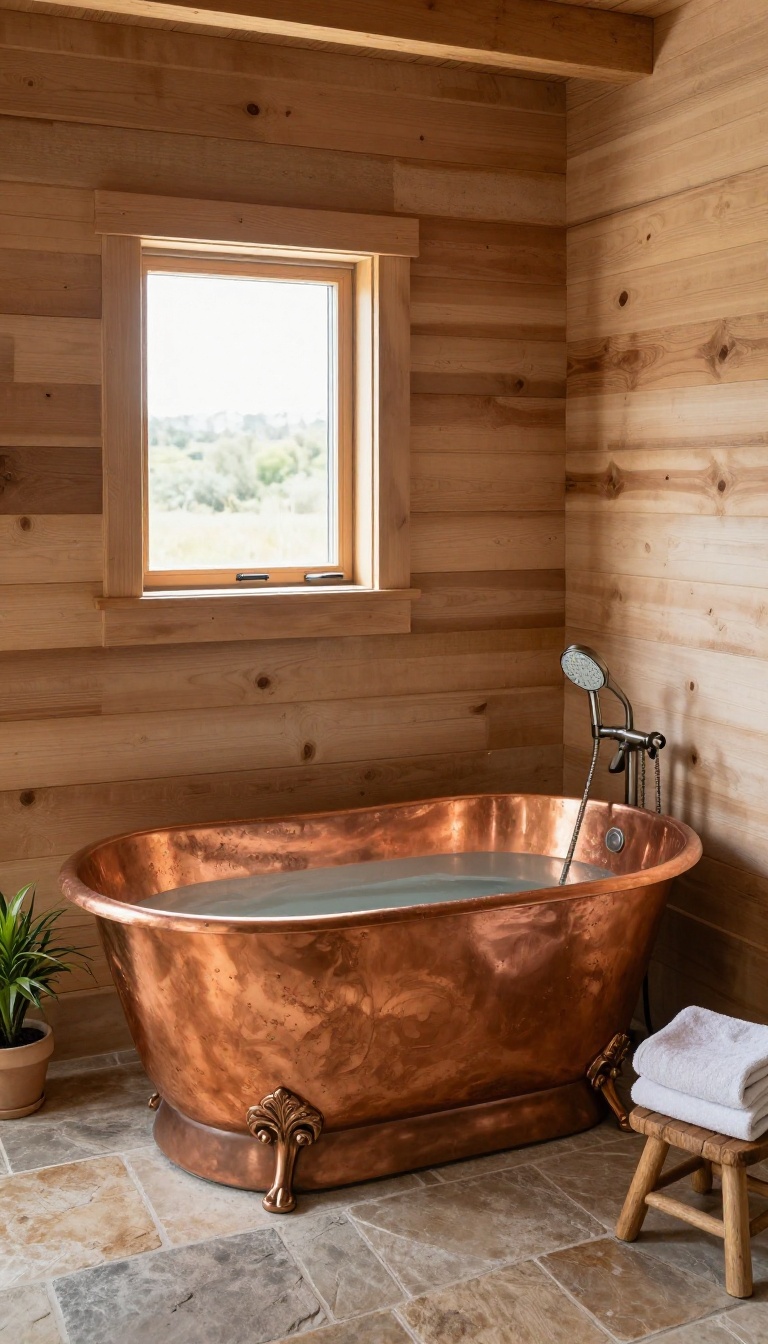
A freestanding copper tub brings a touch of old-world luxury to a cabin, and pairing it with a handheld shower makes it surprisingly practical. The warm, glowing metal fits perfectly with rustic wood and stone, while the flexibility of a handheld sprayer is ideal for rinsing off after a hike or bathing kids and pets. Plus, copper's natural antimicrobial properties add a layer of hygiene that's hard to beat.
The combination of a freestanding tub and a handheld shower is all about versatility. You get the deep-soaking comfort of a tub, but you're not stuck with a fixed overhead shower that can be awkward for washing hair or cleaning the tub itself. A handheld shower lets you control the water exactly where you need it, making it a smart choice for a functional cabin bathroom.
Why Copper Works In A Cabin
Copper isn't just a pretty face. It's naturally antimicrobial, which means it resists bacteria and germs—a huge plus in a moist bathroom environment. Over time, copper develops a rich patina that adds character and blends beautifully with the rustic vibe of a cabin.
It's also durable and can last for decades with proper care, making it a worthwhile investment.
Choosing The Right Handheld Shower
When picking a handheld shower for your copper tub, look for one with a flexible hose and a comfortable grip. A model with multiple spray settings is handy for everything from a gentle rinse to a more powerful spray for cleaning. Consider a wall-mounted holder that keeps the shower head within easy reach, or a deck-mounted option that sits on the tub's edge for a cleaner look.
Placement And Plumbing Tips
Think about where you'll place the handheld shower. A wall-mounted bracket near the tub's faucet is the most common setup, but you can also install a floor-mounted pole for more flexibility. Make sure the water pressure is adequate and the plumbing is properly vented.
If you're unsure about the installation, it's worth hiring a professional to avoid leaks or water damage.
Caring For Your Copper Tub
To keep your copper tub looking its best, wipe it down after each use to prevent water spots and mineral buildup. Use a mild soap and a soft cloth—avoid abrasive cleaners that can scratch the surface. If you want to maintain the shiny finish, apply a copper polish occasionally.
If you prefer the patina look, just let it develop naturally and seal it with a clear lacquer to protect it.
11. Skylight Above the Shower for Natural Light
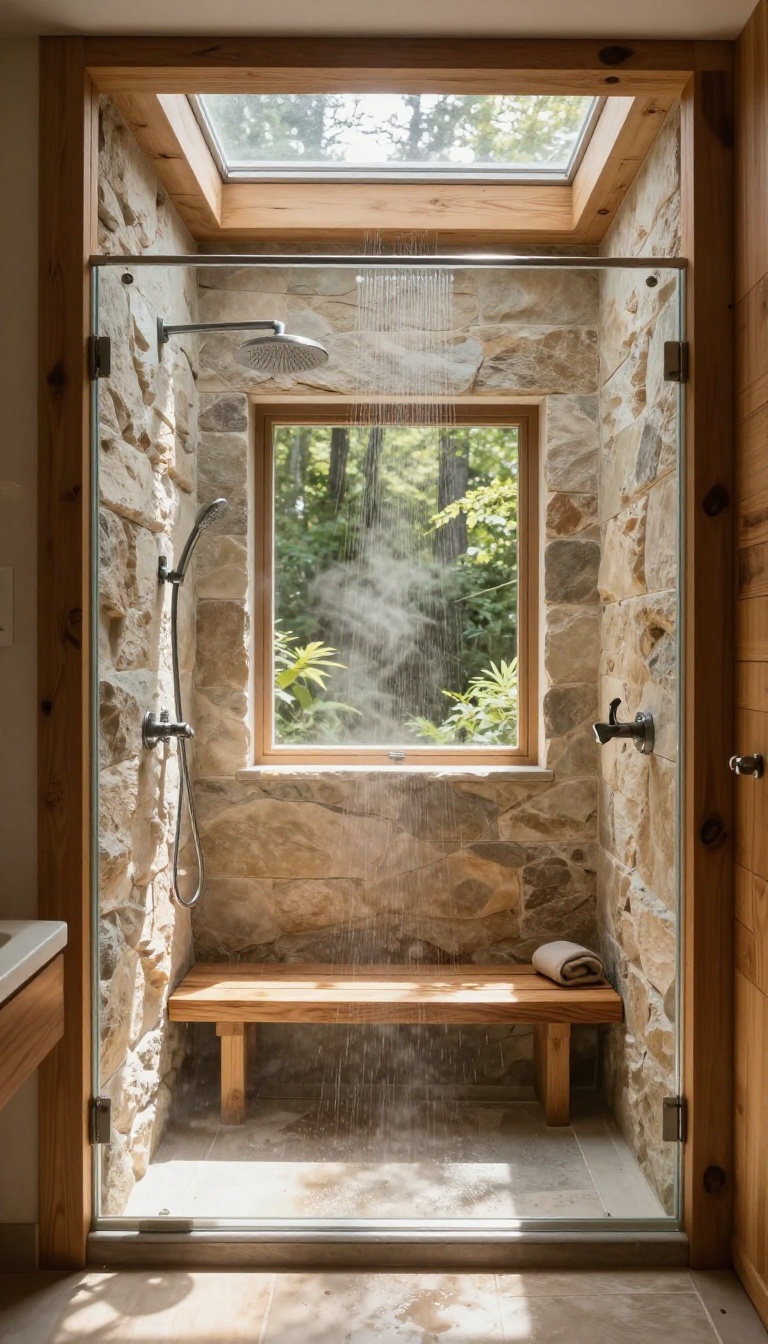
A skylight directly above the shower can transform a dim, enclosed space into the brightest spot in the cabin. It pulls in sunlight and offers a glimpse of the sky, which makes the shower feel less like a cramped corner and more like an open-air retreat. This works especially well in cabins where wall windows are limited or face a shaded area.
Positioning a skylight over the shower is a simple way to bring the outdoors in without sacrificing privacy. The natural light changes throughout the day, giving the space a dynamic feel that artificial lighting can't replicate. Plus, it reduces the need for overhead electric lights during daytime showers, which is a nice energy saver.
Placement And Size Considerations
The size and position of the skylight matter more than you might think. A smaller unit centered above the shower head works well for a focused beam of light, while a larger one can wash the entire stall in brightness. Aim for a spot that gets direct sun for at least a few hours a day, but avoid placing it where it will create harsh glare during your typical shower time.
If privacy is a concern, choose a frosted or tinted skylight to blur the view from above.
Ventilation And Moisture Control
A skylight in a shower needs to handle constant humidity and steam. Look for models with built-in ventilation or a remote-controlled opening feature to let moisture escape. Proper sealing is non-negotiable—make sure the flashing and gaskets are rated for wet areas to prevent leaks.
Adding a small exhaust fan near the skylight can also help keep condensation from building up on the glass.
Material And Finish Options
For a cabin aesthetic, consider a wood-framed skylight that matches your interior beams, or go with a sleek aluminum frame for a more modern look. Tempered glass is a must for safety, and double-glazed panels help with insulation. If you want to soften the light, a light-diffusing film or a skylight with a built-in shade gives you control over brightness.
12. Built-In Wood Bench for Convenience
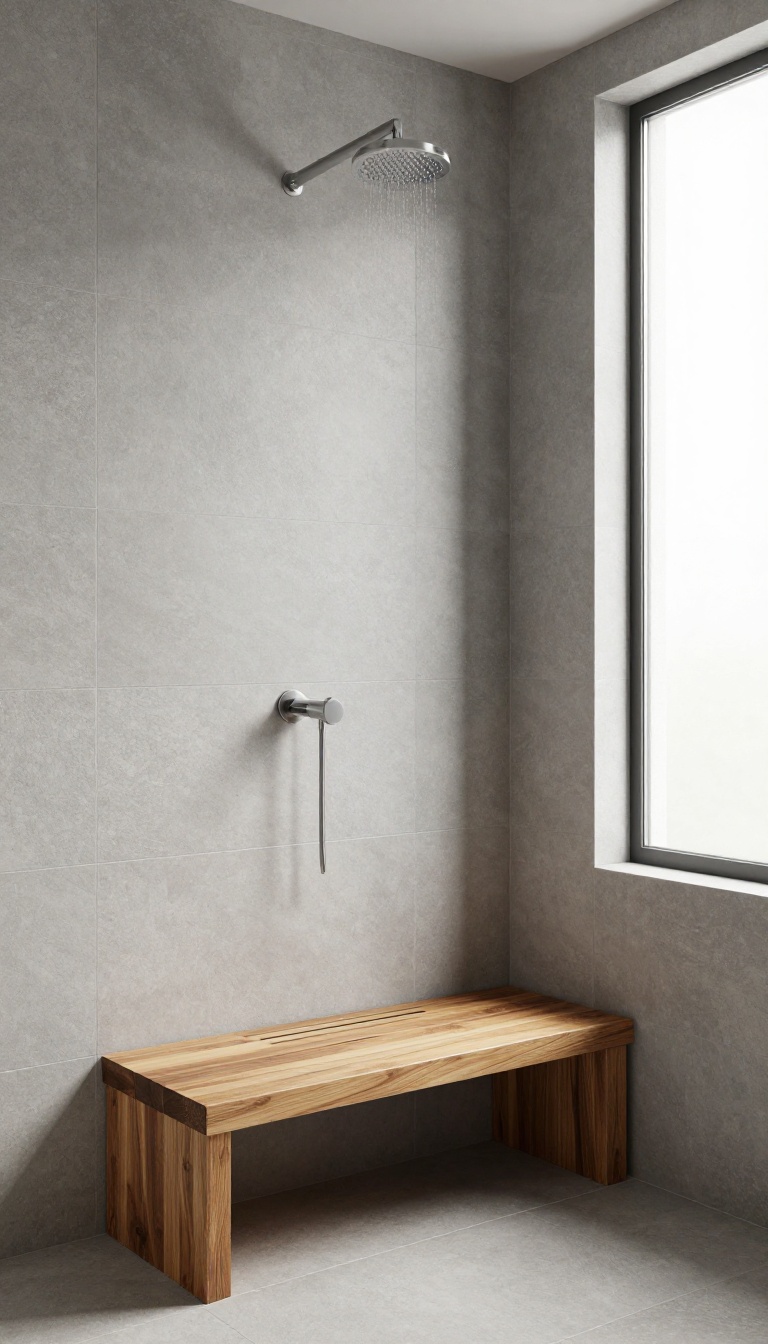
A built-in bench isn't just a luxury—it’s a practical addition that makes your shower more usable every day. Whether you need a place to sit while shaving your legs, rest a foot for balance, or simply pause and enjoy the warmth, a sturdy bench changes how you move through the space. With the right wood and proper drainage, it can handle constant moisture without losing its charm.
Choosing the right wood is the first step. Teak and cedar are the go-to options because they naturally resist moisture and decay. Teak has a tight grain and high oil content, making it almost impervious to water damage.
Cedar is lighter and brings a pleasant aroma, but it’s softer, so it may dent more easily. Both need proper ventilation and drainage to stay in top shape. When building the bench, angle the top slightly toward the drain so water doesn’t pool.
Leave small gaps between the slats or add a few drainage holes to let water flow through. This prevents standing water, which is what causes mold and mildew over time. For installation, you can either build the bench into the wall framing or create a freestanding unit that sits on the shower floor.
Built-in benches feel more seamless and can double as a ledge for shampoo bottles. Freestanding options are easier to remove if you ever change your mind. Don’t forget comfort.
A bench that’s too narrow or too wide can be awkward. Aim for about 16 to 18 inches deep and 18 to 20 inches high. Add a subtle curve to the front edge or a slight backward tilt to make sitting more comfortable.
Finally, think about maintenance. Even with the best wood, you’ll need to reseal it periodically. Use a waterproof sealant designed for outdoor furniture, and clean the bench with a mild soap solution to keep it looking fresh.
With a little care, your built-in bench will stay beautiful for years.
Why A Bench Makes Sense
A bench isn’t just about comfort—it’s about safety and convenience. It gives you a stable place to sit when you need it, which is especially helpful for older adults or anyone with mobility issues. It also provides a handy footrest for shaving or washing hard-to-reach areas.
Plus, it creates a natural spot to set toiletries, keeping them off the floor and within easy reach.
Best Woods For Wet Areas
Teak and cedar are the top picks for a reason. Teak is dense, naturally oily, and resists water like a champ. It’s also less likely to splinter, making it comfortable to sit on.
Cedar is lighter and has a lovely scent, but it’s softer and may need more frequent sealing. If you’re on a budget, look for thermally modified pine or ipe, which are also durable options.
Drainage And Slope Tips
Water sitting on the bench is your enemy. Slope the top slightly toward the drain—about 1/8 inch per foot is enough. Leave a small gap between the wall and the bench so water can escape.
If you’re using slats, space them 1/4 to 1/2 inch apart. This lets water flow through and air circulate, which keeps the wood dry and extends its life.
Styling And Finishing Touches
A bench doesn’t have to be plain. Add a subtle contrast by using a different wood tone than the rest of the shower. Or, keep it simple with a natural finish that shows off the grain.
You can also add a small towel hook or a built-in soap dish nearby. Just remember to keep the design cohesive with your cabin’s overall aesthetic—rustic, modern, or somewhere in between.
13. Mixing Metals for an Eclectic Vibe
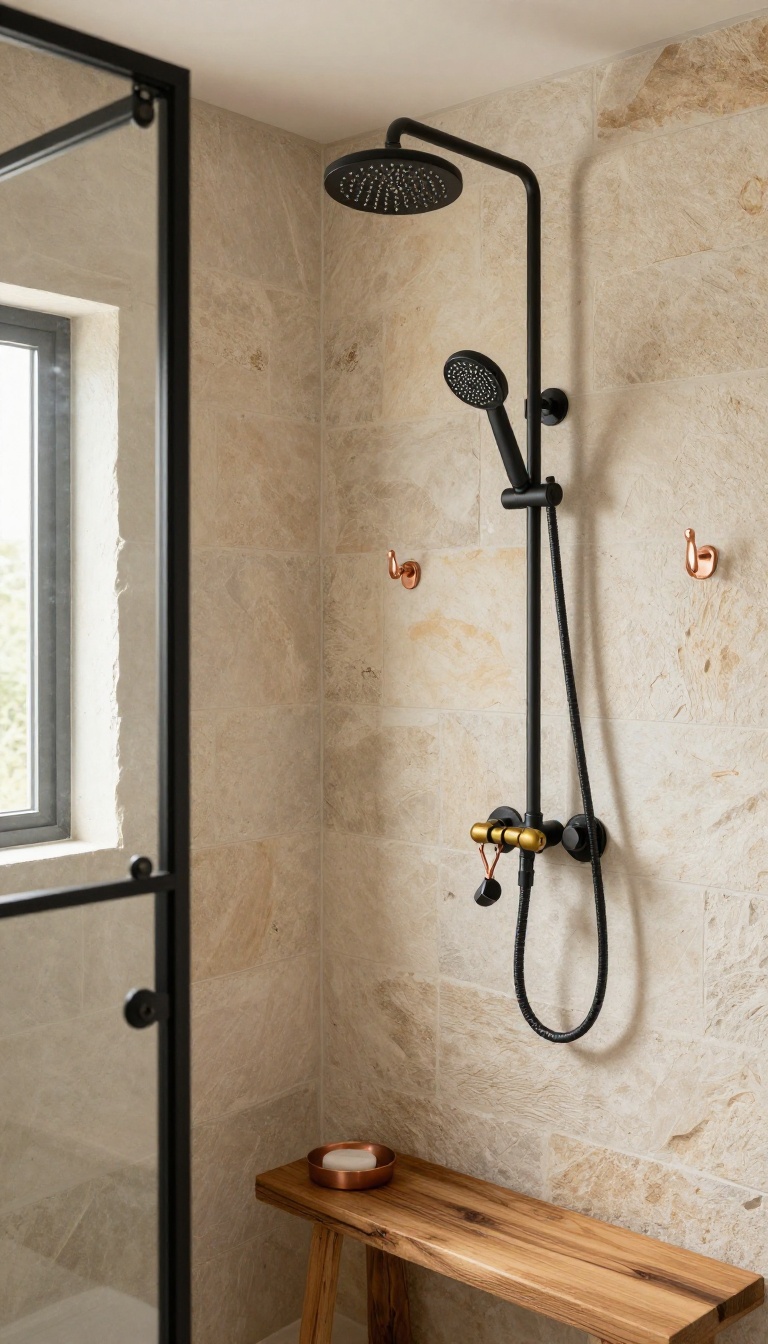
A cabin bathroom often leans on a single finish—brushed nickel or oil-rubbed bronze—for everything. But that can feel a bit flat. Mixing metals, on the other hand, adds layers of personality and a collected-over-time feel that suits the relaxed cabin lifestyle.
Don't be afraid to pair brass, copper, and black finishes in the same shower space. The key is to keep the mix intentional, not random. Choose one dominant finish for large fixtures—like the showerhead or faucet—and use the others for smaller accents, such as the towel bar, shelf, or drain cover.
This creates a cohesive look without feeling chaotic.
Start With A Base Finish
Pick a primary metal for the main fixtures—like a matte black rain showerhead and valve. This grounds the design. Then bring in secondary metals through details: a brass hand shower, copper hooks, or a black-framed glass door.
The contrast feels curated, not accidental.
Use Metal To Highlight Texture
In a rustic cabin, natural materials like stone, wood, and concrete often dominate. Metallic accents can break up that earthy texture and catch the light. A copper shelf against a slate wall, or a brass soap dish on a cedar bench, adds warmth and visual interest without overwhelming the space.
Keep The Mix Balanced
A good rule of thumb is to use three finishes max, with one making up about 60% of the visible metal, another 30%, and the last just 10%. That way, the mix feels deliberate. Also, consider the undertones—warm metals like brass and copper pair well with cool tones like black or stainless steel, creating a balanced contrast.
14. Large Format Tiles for a Modern Cabin Look
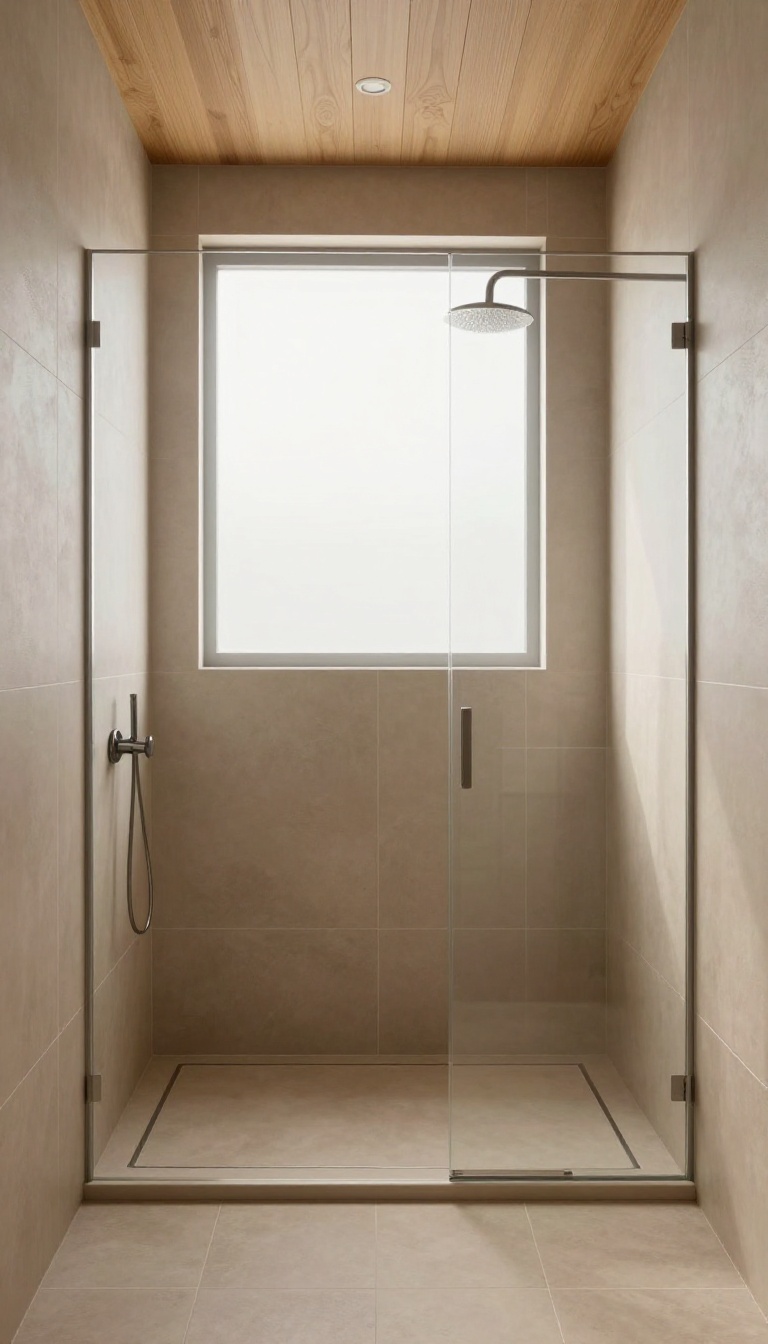
If your cabin leans more contemporary than rustic, large format tiles are a smart way to keep that clean, modern edge without losing the warmth. Big tiles mean fewer grout lines, which translates to less maintenance and a cleaner, more modern appearance. Choose earthy tones to keep the cabin feel.
Large format tiles are a practical upgrade for cabin showers. They reduce grout lines, making cleaning easier and preventing mold buildup in a damp environment. Plus, they visually expand the space, making a small shower feel more open and airy.
Why Bigger Tiles Work In Cabins
Fewer grout lines mean fewer places for soap scum and mildew to hide. Large tiles also create a seamless, spa-like look that pairs well with natural wood accents. In a cabin, this modern touch still feels grounded when you pick matte finishes and earthy colors.
Choosing The Right Material
Porcelain and ceramic are top choices for durability and water resistance. Look for textured or matte surfaces to prevent slips and avoid the cold, glossy feel of polished tile. Natural stone like slate or travertine can work, but they need sealing and more upkeep.
Color And Grout Tips
Stick to warm grays, sandy beiges, or soft browns to maintain the cabin vibe. Use a grout color that closely matches the tile to make the large format effect even more seamless. Darker grout can add contrast but shows less dirt—just keep it consistent.
15. Outdoor Shower with a Privacy Screen
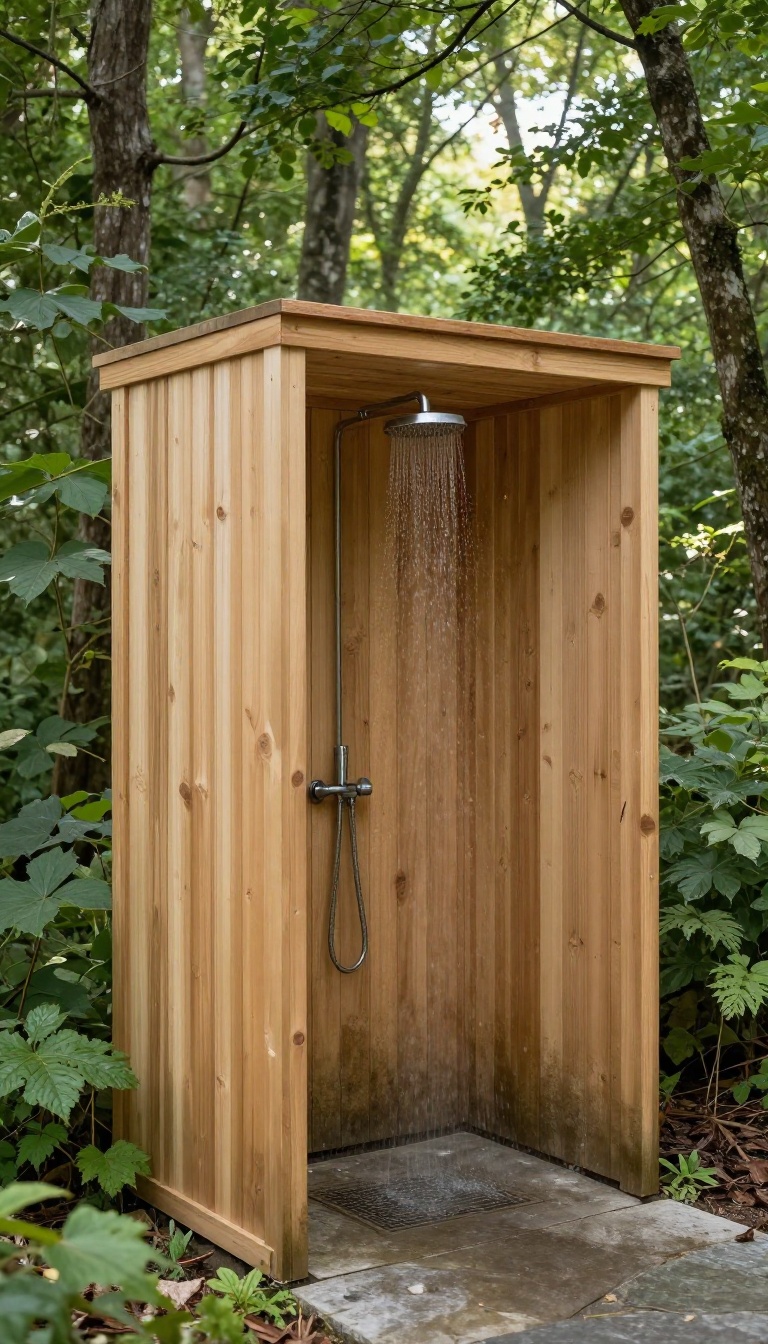
An outdoor shower is the ultimate cabin luxury, letting you rinse off under the open sky while surrounded by nature. With a simple wooden screen for privacy and a basic showerhead, you can create a refreshing, spa-like experience right outside your door. It's a practical addition that keeps dirt and mud out of the cabin, and it's surprisingly easy to set up.
Outdoor showers are more than just a novelty—they're a smart way to keep the cabin clean and make the most of your surroundings. A privacy screen doesn't have to be fancy; a few cedar boards or a freestanding panel can do the job. You'll want to think about water runoff and a stable base, but the payoff is a shower that feels like a natural extension of the outdoors.
Choosing The Right Spot
Pick a location that's close to the cabin for easy access but far enough from windows and doors to give you a sense of seclusion. Consider the sun's path—a morning shower on the east side can be invigorating, while an evening rinse on the west side offers warmer water. Make sure the ground is level and can handle water drainage, and avoid areas with heavy tree cover that might drop debris on you.
Privacy Screen Options
A wooden privacy screen is a classic choice, and you can build one with cedar or redwood that naturally resists moisture. For a more flexible setup, use a freestanding screen on wheels or a hinged panel that can fold flat when not in use. If you prefer a more open feel, a bamboo screen or a lattice with climbing vines adds a natural touch while still offering some cover.
Plumbing And Drainage
You don't need a complex plumbing system—a simple garden hose with a showerhead attachment can work if you have an outdoor spigot. For a more permanent setup, run a line from the cabin's water supply and install a proper drain that leads to a gravel pit or a dry well. Make sure the showerhead is positioned at a comfortable height, and consider adding a mixing valve to control temperature.
Finishing Touches
Add a wooden bench or a small shelf for soap and shampoo, and use outdoor-rated fixtures that can handle the elements. A teak mat or a stone paver base gives you a non-slip surface, and a hook for towels and a robe keeps everything within reach. For extra comfort, install a small outdoor heater or a string of lights to make the space usable even in cooler weather.
FAQ
What is the best material for a cabin shower floor?
Stone or textured porcelain tile are great choices because they offer slip resistance and durability. Avoid smooth tiles that can become slippery when wet.
How can I make a small cabin shower feel larger?
Use light colors, large-format tiles, and a glass enclosure to open up the space. A corner shower or a curbless design can also help.
Do I need a shower door or a curtain?
It depends on your space and style. Glass doors are more modern and keep water in better, while curtains are budget-friendly and easy to change. For a cabin, a rustic curtain can add charm.
Can I use real wood in a cabin shower?
Yes, but you need to choose moisture-resistant woods like cedar or teak and seal them properly. Alternatively, wood-look porcelain tile gives the same aesthetic without the maintenance.
What is the most important thing to consider when designing a cabin shower?
Durability and moisture resistance are key. Since cabins often have high humidity and temperature fluctuations, choose materials that can handle those conditions without warping or mold.
Conclusion
A cabin shower can be both beautiful and practical with the right design choices. Whether you prefer natural wood, rugged stone, or modern fixtures, there's an idea here to match your style and budget. Start with one or two changes and build from there.
Your cabin bathroom should feel like a retreat, not a hassle. With these ideas, you can create a space that's both inviting and easy to live with.