15 Easy Shower Mosaic Tile Ideas for a Fresh, Refined Finish
Planning a shower remodel? Mosaic tiles offer a simple way to add personality and polish without a major overhaul. They come in countless shapes, colors, and materials, so you can match any style.
Whether you want a subtle accent or a bold statement, mosaic tiles work in showers of all sizes. They're also practical, providing slip resistance and easy installation on curved surfaces.
Here are 15 easy shower mosaic tile ideas to inspire your next refresh. Each one is designed to be achievable and impactful, helping you create a space that feels both fresh and refined.
1. Classic Penny Round Mosaic
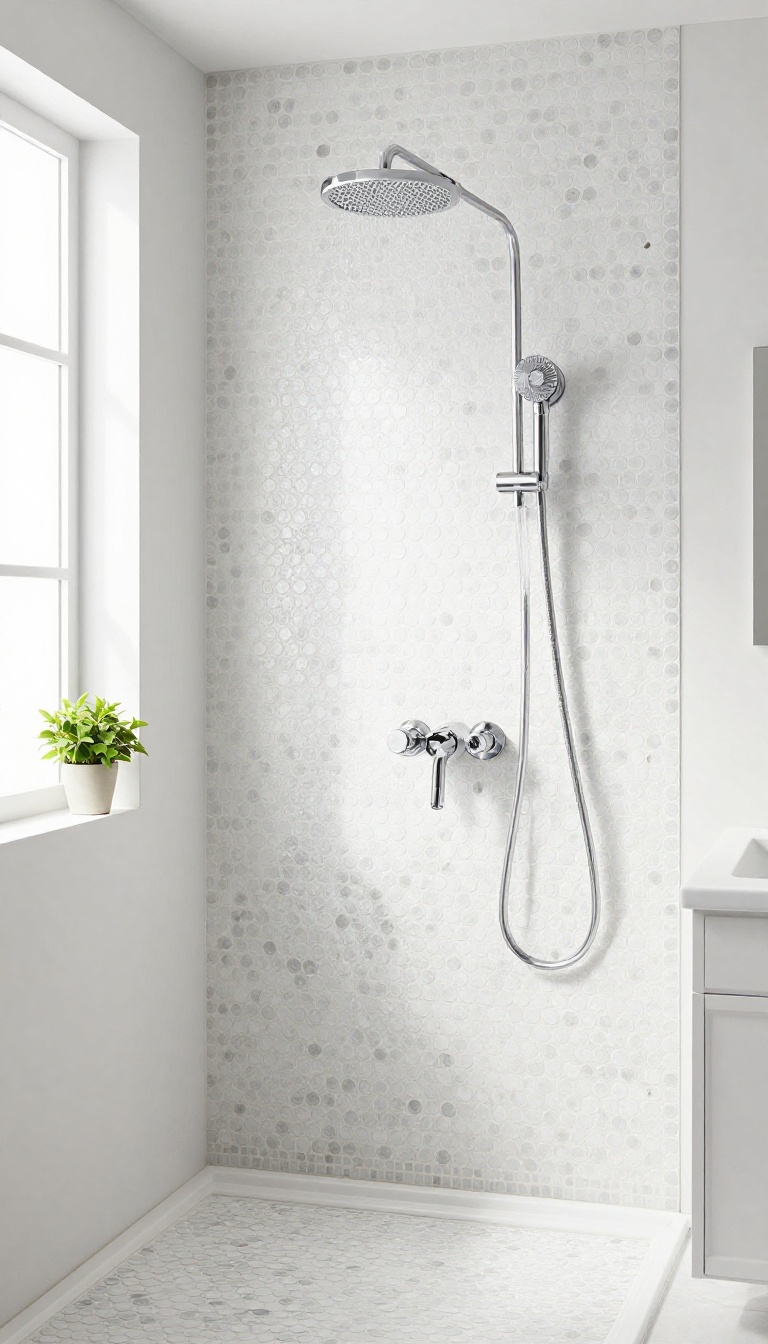
Penny round mosaics are the little circles that have been showing up in showers for over a century. They bring a retro charm that never feels dated, and they work just as well on floors as they do on walls. The small size means lots of grout lines, which translates to great slip resistance underfoot.
You'll find penny rounds in porcelain, ceramic, and even glass, so you can go glossy, matte, or somewhere in between. They come in classic white, but also in bold colors like navy, mint, and charcoal. The uniform shape makes them easy to install on shower floors because they conform to slopes without cutting tiny pieces.
Why Penny Rounds Work In Showers
The dense grout grid gives you traction even when soapy water is running over the surface. That's a big deal for safety, especially in curbless showers. Plus, the repetitive pattern hides water spots and minor wear better than large-format tiles.
Color And Finish Options
Go with a single color for a clean, classic look, or mix two or three shades for a subtle gradient. Matte finishes feel more modern and hide scratches, while glossy options bounce light around and make small showers feel bigger. You can also use a contrasting grout color to make the circles pop.
Installation Tips For Penny Rounds
Use a small-notch trowel and back-butter the sheets to ensure full coverage. Press them firmly into the thinset with a grout float to avoid lippage. Because the sheets are mesh-backed, you can cut them with scissors to fit around drains and corners.
2. Hexagon Tile with a Modern Twist
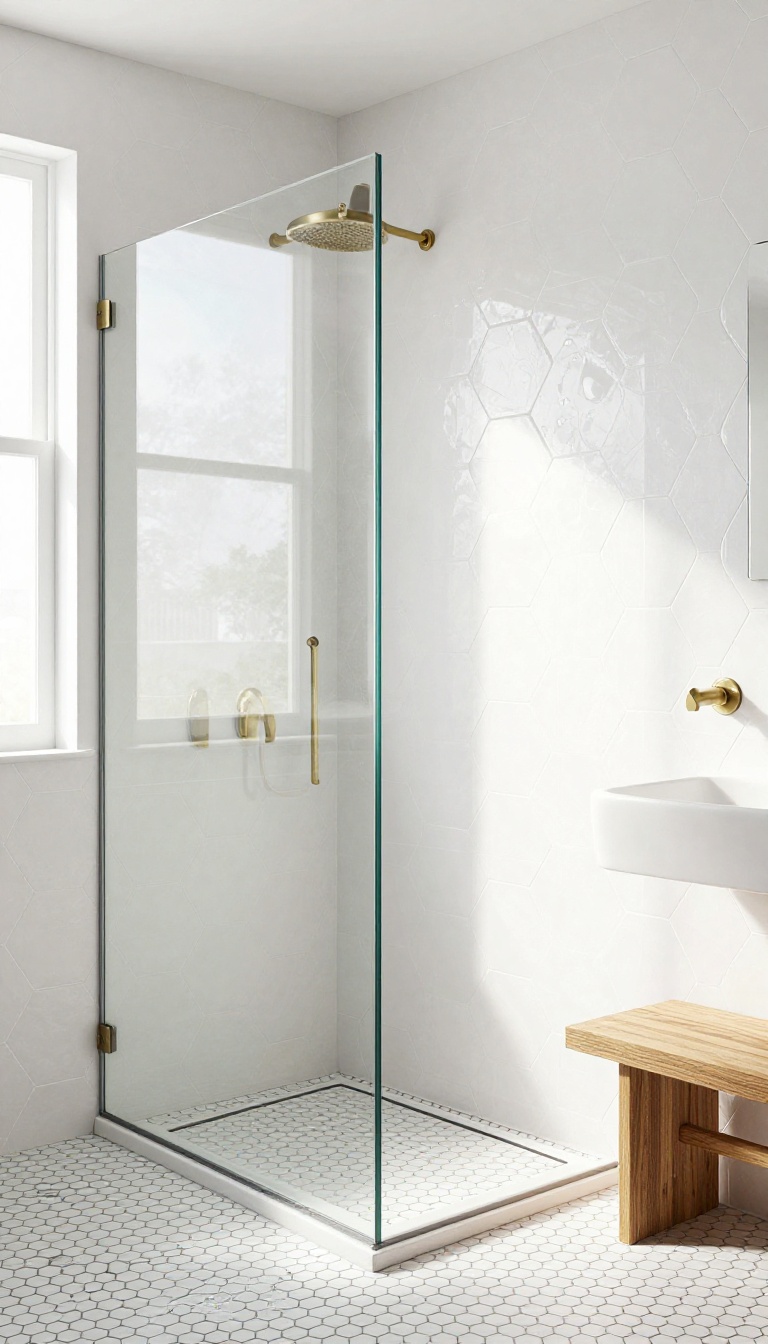
Hexagon mosaics bring a clean, geometric look that feels current without being trendy. They add visual interest through shape alone, so you can keep the color palette simple. This makes them a smart choice if you want a modern shower that still feels warm and inviting.
Hexagon tiles come in a range of sizes, from tiny 1-inch mosaics to larger 4-inch formats. The smaller ones work great for shower floors because the extra grout lines add grip. Larger hexagons make a bold statement on walls without overwhelming the space.
You can also mix sizes for a custom look, though that takes a bit more planning.
Matte Vs. Glossy
Matte hexagons offer a soft, contemporary feel and hide water spots well. They're a practical pick for shower floors since they provide better traction. Glossy hexagons reflect light and make small showers feel bigger, but they can be slippery when wet.
Use glossy on walls and matte on floors for the best of both worlds.
Color And Grout Tricks
A monochrome hexagon pattern in white or gray keeps things classic. For a modern twist, try a dark grout with light tiles to highlight the geometric shape. You can also use a gradient of colors from light to dark for a subtle ombre effect.
Just remember that contrasting grout shows dirt more easily, so it needs regular cleaning.
Where To Use Them
Hexagon mosaics shine on shower floors, accent walls, or even the ceiling for a surprise element. They work well in niches and around benches too. Because they're small, they conform to curved surfaces and slopes with ease.
This makes them a versatile option for almost any shower layout.
3. Subway Tile Mosaic for a Clean Look
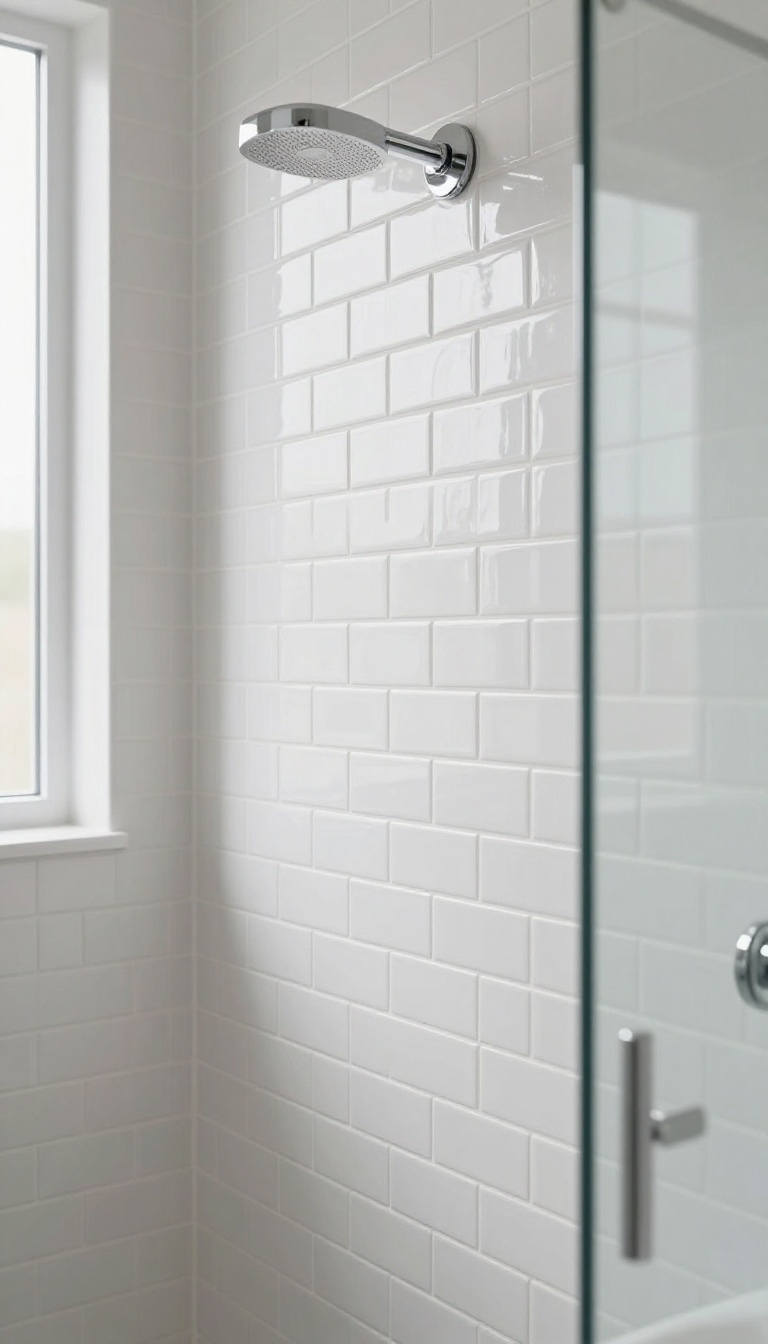
Subway tile has been a go-to for decades, and for good reason. When you shrink it down into a mosaic pattern, you get that same crisp, classic feel in a format that fits showers perfectly. The smaller scale means more grout lines, which adds texture and grip underfoot.
Subway tile mosaics are typically arranged in a running bond pattern, just like their larger counterparts. But because each tile is only about an inch tall, the effect is finer and more detailed. This makes them ideal for shower floors, accent bands, and even full walls.
They're also incredibly easy to clean—no deep crevices or porous surfaces to worry about. And they play well with almost any fixture finish, from polished chrome to matte black.
Why Subway Mosaics Work In Showers
The small size of subway mosaic tiles means more grout lines, which translates to better slip resistance on shower floors. They also conform to slight curves and slopes, so you can use them on a shower bench or a curbed entry without awkward cuts. Plus, the classic brick pattern feels familiar and timeless, so you won't tire of it in a few years.
Choosing Colors And Finishes
White is the obvious choice for a clean look, but don't overlook soft grays, warm beiges, or even muted greens. Glossy finishes reflect light and make small showers feel bigger, while matte finishes offer a more modern, subtle vibe. You can also mix finishes—like glossy tiles with a matte grout—for a bit of contrast without going overboard.
Installation Tips For A Flawless Finish
Because subway mosaics come on mesh-backed sheets, installation goes quickly. Just make sure your shower pan or wall is perfectly level before you start. Use a white thinset mortar to keep light tiles looking bright, and choose a grout color that either blends in for a seamless look or contrasts for a graphic punch.
A grout sealer will keep everything easy to maintain.
4. Herringbone Pattern for Visual Drama
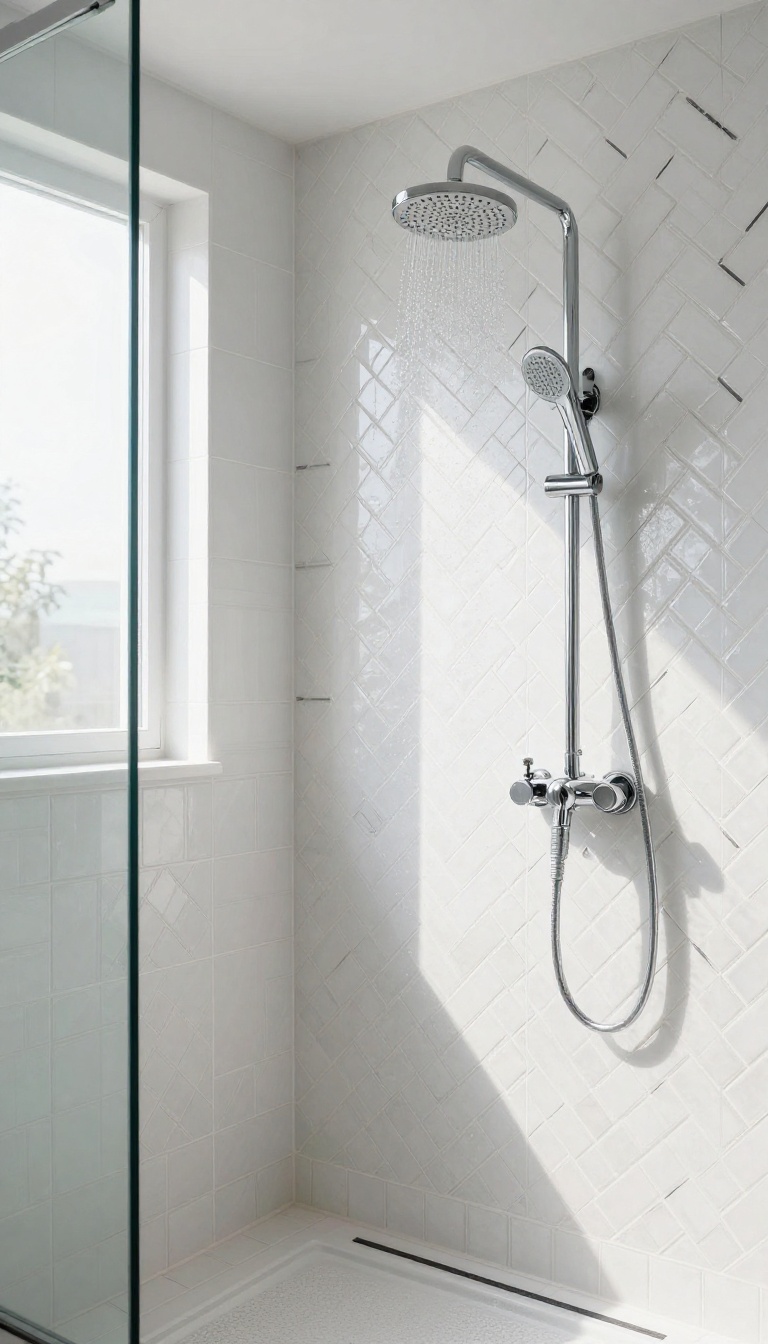
Herringbone takes rectangular tiles and locks them together at 90-degree angles, creating a zigzag that pulls the eye across the wall. It's an old pattern, but it still feels sharp and deliberate in a modern shower. The result is movement without chaos, which is exactly what a small space needs.
This layout shines when you let contrast do the talking. A crisp tile paired with a darker or lighter grout makes the weave pop, while matching grout softens it into something calmer. Either way, you get a wall that looks custom without a custom price tag.
Rectangular mosaics are the only shape that really works here. The tiles need a 2: 1 ratio, like a 1×2 or 2×4, so the ends meet cleanly and the pattern stays true. If the proportions are off, the herringbone turns muddy fast.
You can run the pattern vertically, horizontally, or on a diagonal. Vertical stretches the shower and makes low ceilings feel taller. Horizontal widens a narrow stall.
Diagonal adds the most energy, so save it for a wall you want people to notice. Grout is your secret weapon. A contrasting grout turns the pattern into a graphic statement, while a tonal grout keeps things quiet and seamless.
Pick one and commit, because halfway contrast just looks like a mistake. Installation is the catch. Herringbone eats up more cuts than a straight stack, especially around niches, valves, and corners.
A skilled tiler earns their keep here, and a mosaic sheet version can save hours if you want the look without the labor.
Pick The Right Tile Size
Stick with rectangular mosaics in a 2: 1 ratio so the angles line up. Anything too long or too squat breaks the rhythm and makes the pattern look sloppy. Small-format sheets are easier to install and keep the scale right for a shower wall.
Choose Grout That Contrasts
Contrasting grout is what makes herringbone read as a pattern instead of a texture. Dark grout on light tile, or the reverse, gives you that crisp zigzag. If you want a softer look, go tonal, but don't split the difference.
Plan Around The Fixtures
Herringbone needs careful layout around valves, showerheads, and niches. Map the pattern before the first tile goes up so the cuts land in less obvious spots. A dry layout on the floor saves a lot of regret later.
5. Glass Mosaic for a Spa-Like Glow
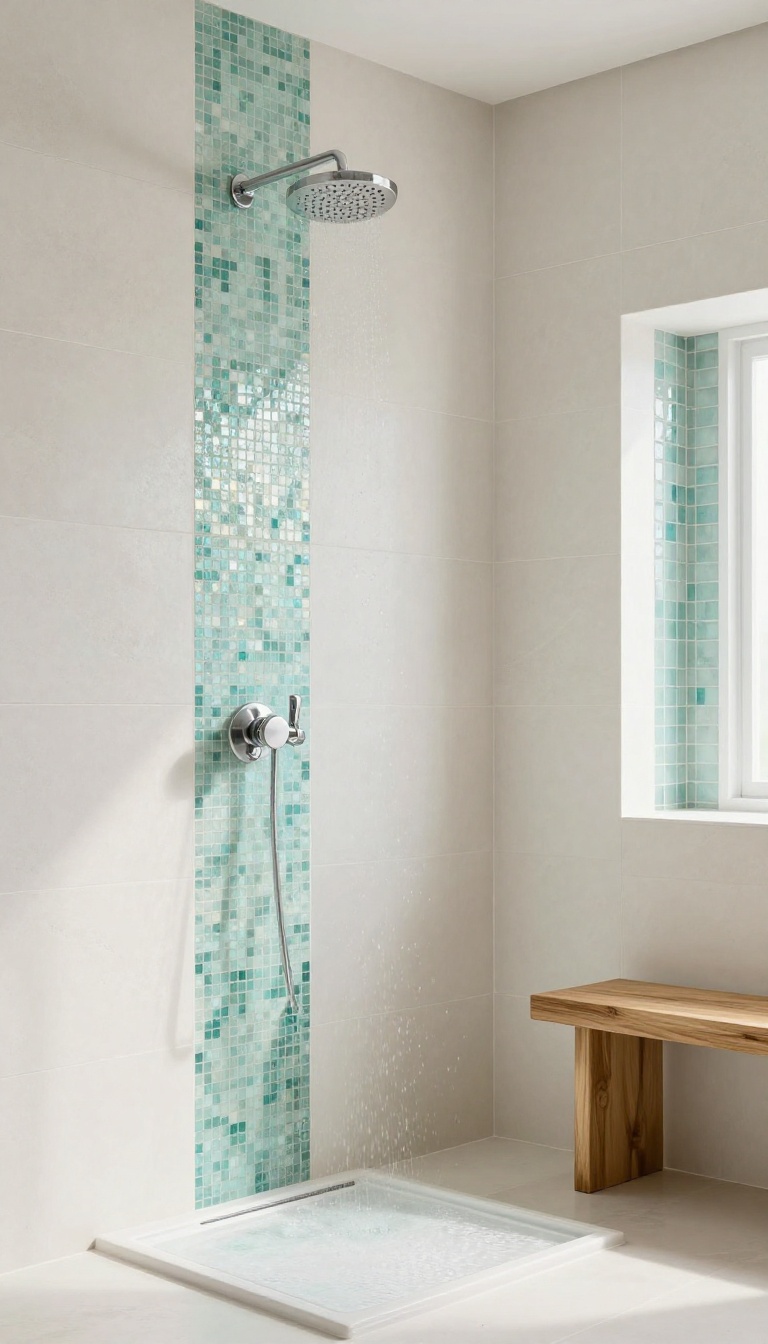
Glass mosaic tiles have a way of catching light that other materials just can't match. They bounce soft reflections around your shower, making the space feel bigger and a whole lot more luxurious. And with options ranging from iridescent to frosted, you can dial in everything from subtle shimmer to full-on glam.
Glass tiles are surprisingly durable and easy to clean, so you get the spa vibe without the high-maintenance fuss. They also come in tons of colors, so you can match your existing fixtures or go bold with a contrasting accent. Whether you're tiling a full wall or just a niche, glass brings a polished finish that feels instantly upgraded.
Pick Your Finish
Iridescent glass shifts color as you move, adding a playful shimmer that feels fancy but not overdone. Frosted glass tones things down with a soft, cloudy look that's great for a calm, relaxing shower. For a sleek, modern feel, try glossy glass in a solid color—it reflects light like a mirror and makes small showers feel bigger.
Where to Use It
A full glass mosaic wall makes a dramatic statement, but it can be a lot of upkeep if you have hard water. Instead, use glass as an accent: a vertical stripe, a border around a niche, or a band above a bench. These spots let you enjoy the glow without committing to an entire wall.
You can also mix glass with matte tiles for a nice contrast that keeps things interesting.
Installation Tips
Glass tiles need a little extra care during installation. Use a white thinset to keep the color true, and make sure your trowel is the right size to avoid excess adhesive showing through. A grout that matches or slightly contrasts the tile will make the mosaic pop.
And always seal the grout to keep that spa-like shine looking fresh for years.
6. Natural Stone Mosaic for Organic Texture
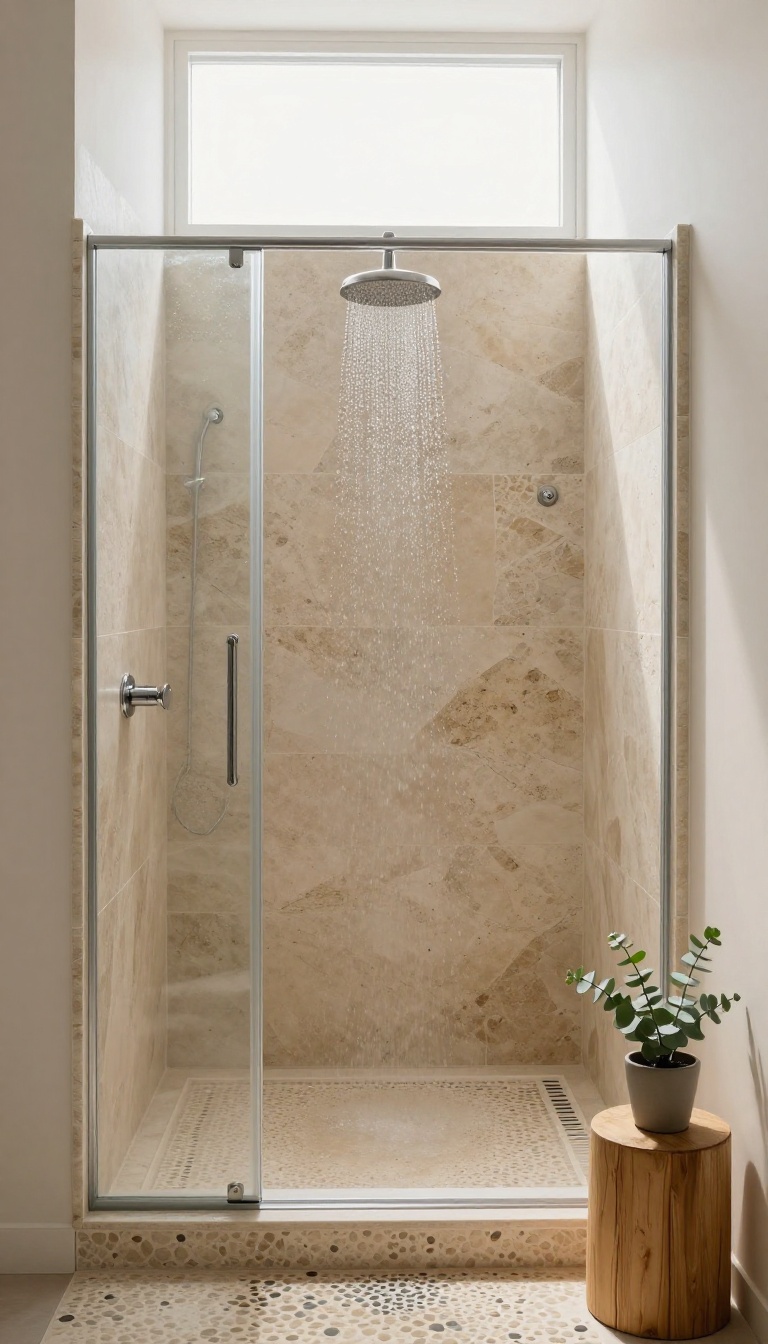
Natural stone mosaics bring a piece of the outdoors inside, turning your shower into a calming, earthy escape. Materials like travertine, pebble, and slate offer unique textures and warm tones that man-made tiles just can't replicate. If you want a shower that feels grounded and serene, this is the idea to steal.
Stone mosaics are exactly what they sound like: small tiles cut from real stone. They come in a range of finishes, from smooth and honed to tumbled and split-face, so you can dial the texture up or down. The natural variation in color and pattern means no two tiles look alike, giving your shower a one-of-a-kind look.
Plus, stone stays cool underfoot and adds a slip-resistant surface, which is a win for safety.
Why Stone Works In Showers
Stone is durable and handles moisture well, especially when sealed properly. It also ages gracefully, developing a patina that adds character over time. Unlike ceramic, stone feels substantial and organic, which instantly warms up a space.
And because it's natural, it pairs beautifully with wood, metal, and plants.
Popular Stone Mosaic Options
Travertine mosaics come in soft beiges and creams, offering a classic, spa-like feel. Pebble mosaics create a river-rock floor that massages your feet and looks stunning. Slate brings darker, moodier tones with a cleft surface that's full of texture.
For a lighter look, try marble mosaics—they add elegance with subtle veining.
Installation And Care Tips
Stone mosaics need a bit more care than porcelain. Seal them before and after grouting to prevent staining and moisture damage. Use a pH-neutral cleaner weekly to keep them looking fresh.
Avoid acidic cleaners, which can etch the stone. With proper maintenance, stone mosaics can last for decades.
7. Geometric Shapes for a Bold Statement
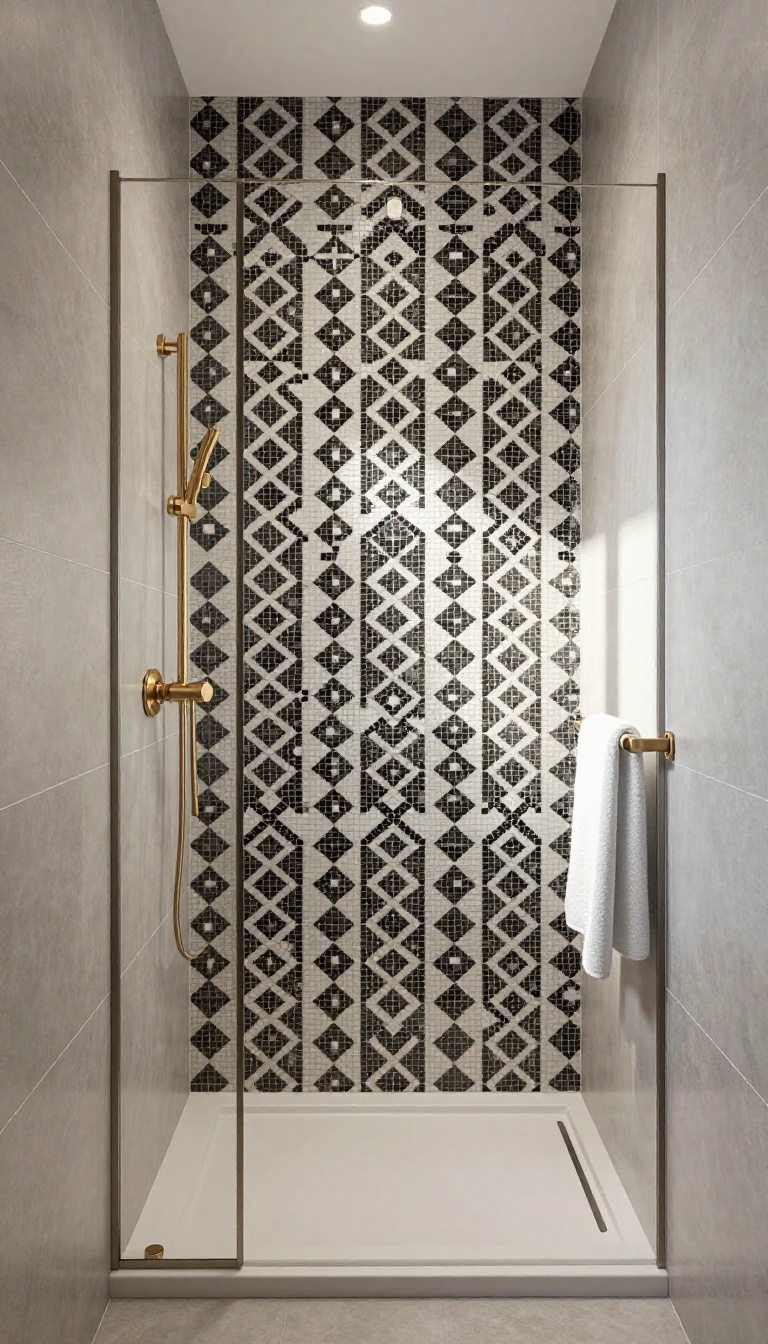
Diamond, chevron, and triangle mosaics bring instant energy to a shower wall. Their sharp angles and repeating patterns create a focal point that feels modern and intentional. The trick is to use them sparingly—one wall is usually plenty.
Geometric mosaics work best when they're treated like artwork. A single accent wall in a sea of neutral tile lets the pattern breathe without overwhelming the space. You get the drama of bold shapes while keeping the rest of the shower calm and functional.
Where To Place Geometric Patterns
The back wall of a shower is the natural spot for a geometric focal point. It's the first thing you see when you walk in, and it doesn't compete with fixtures or shelving. If your shower is small, consider a vertical stripe of geometric tile instead of a full wall.
That way you get the impact without shrinking the room.
Mixing Shapes Without Chaos
Stick to one geometric shape per shower to keep things cohesive. A diamond pattern paired with a plain field tile feels balanced, while mixing chevron and triangles can look busy fast. If you want variety, play with color or finish instead of adding more shapes.
Color And Contrast Tips
High-contrast combinations—like black and white or navy and brass—make geometric patterns pop. For a softer look, try tonal variations of the same color, such as light gray and charcoal. Just remember that bold colors amplify the pattern, so a little goes a long way.
8. Mosaic Accent Strip for Subtle Interest
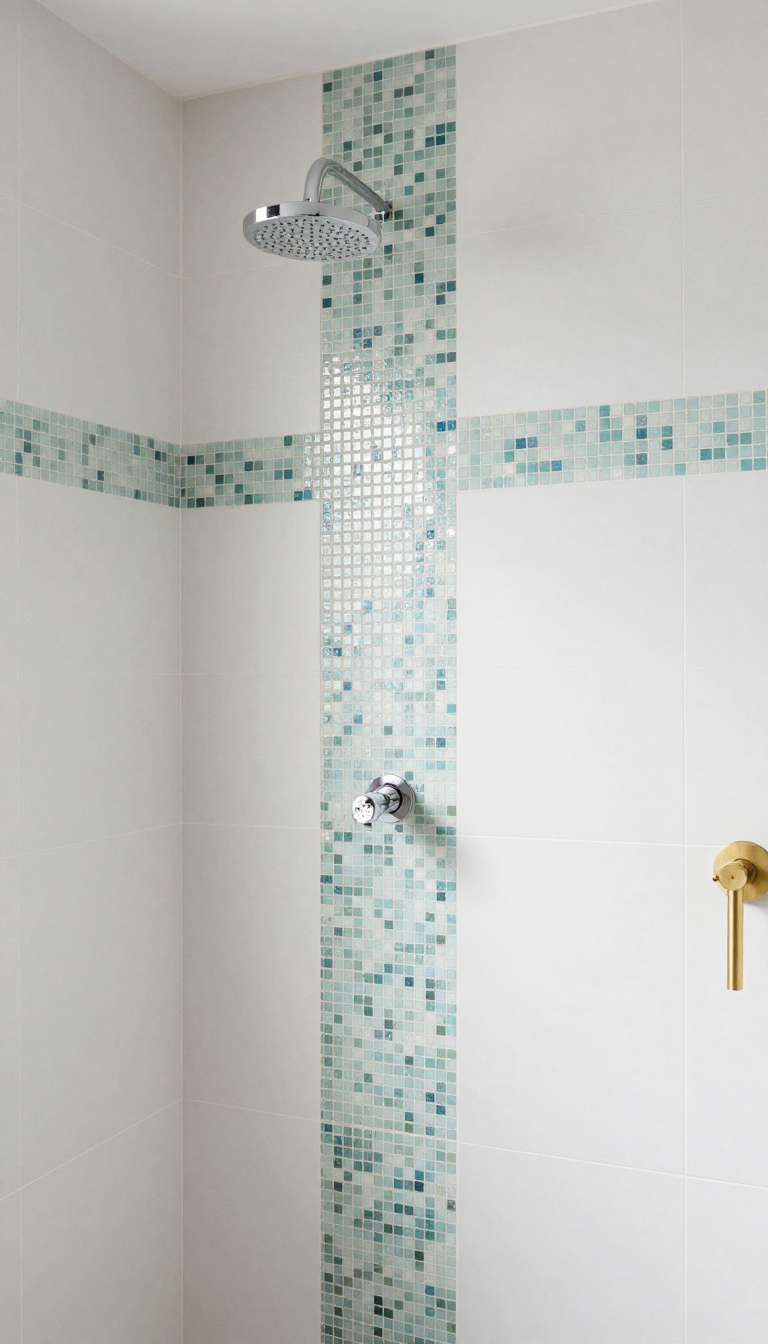
A single band of mosaic tile can do more for a shower than you might expect. It slices through a big field of plain tile and gives the eye somewhere to land, which keeps the space from feeling flat. You get color, texture, or a little shimmer without wrapping the whole wall in it.
The strip works horizontally, vertically, or even as a frame around a niche or bench. Because it's such a small area, you can afford a material or color you'd never use across an entire shower. It's one of the easiest ways to make a simple tile job look intentional.
Placement is what makes or breaks an accent strip. A horizontal band at eye level reads like a deliberate design choice, while one near the ceiling or floor can feel like an afterthought. Vertical strips draw the eye upward and make low ceilings feel taller.
You also want the strip to relate to something else in the shower. Line it up with the top of a niche, the edge of a bench, or the showerhead height so it looks connected rather than random. When the strip echoes an existing line, the whole space feels more resolved.
Where To Run The Strip
A horizontal band about chest or eye height is the classic move. It breaks up tall walls and gives you a natural place to stop one tile and start another. For narrow showers, try a vertical strip instead.
It pulls the eye up and can make a tight stall feel a little more generous. You can also run the strip around the perimeter of a niche to tie it into the wall.
Choosing The Right Mosaic
Keep the strip narrow, usually one to three mosaic sheets tall. Wider bands start to compete with the main tile and lose that subtle quality. Pick a mosaic that shares a color family with your field tile but shifts in finish or tone.
Matte field tile with a glossy glass strip is a simple, reliable contrast. If you want more punch, go for a complementary color, but keep the rest of the shower calm.
Installation And Grout Tips
Plan the strip before you set the first tile. You want full tiles above and below it, not slivers, so adjust your layout early. Use a grout color that matches either the mosaic or the field tile, not both.
Matching the mosaic makes the strip blend in; matching the field tile makes it pop. Either way, seal the grout if you're using glass or stone.
9. Mosaic Shower Floor for Safety and Style
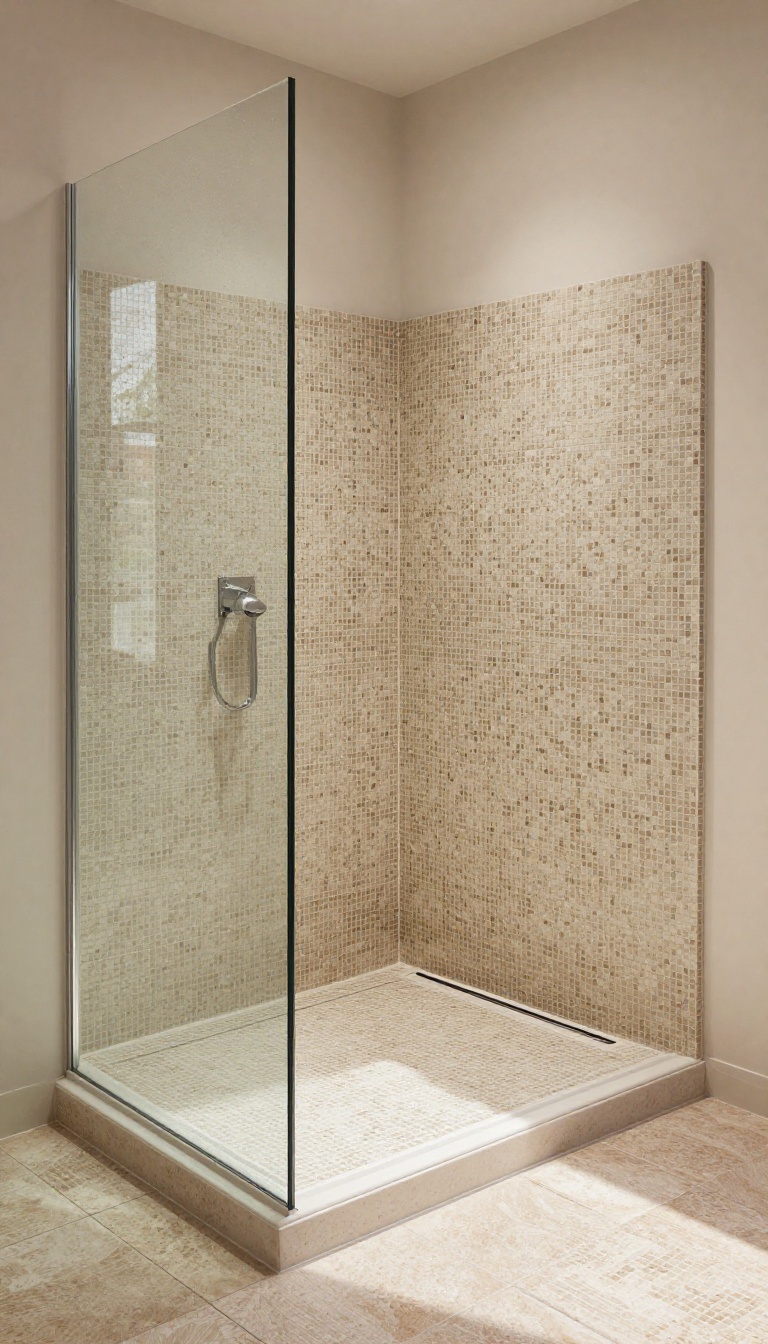
A slippery shower floor is an accident waiting to happen. Small mosaic tiles solve that problem by creating a textured surface that grips wet feet, while still looking polished. They also let you slope the floor gently toward the drain without ugly seams or cuts.
But safety doesn't mean sacrificing style. Mosaic floors come in endless colors and patterns, so you can hide water spots or tie the floor into your wall design. The right choice keeps you steady and makes your shower feel finished.
Mosaic shower floors are a smart upgrade for any bathroom. The tiny tiles flex with the floor's slope, so water drains efficiently and no one slips. You can pick a color that masks soap scum or one that pops against neutral walls.
Either way, you get a floor that works as hard as it looks good.
Why Small Tiles Win On The Floor
Small tiles mean more grout lines, and that's a good thing. Grout adds texture that your feet can grip, even when everything's soapy. Plus, the flexibility of mosaic sheets makes it easy to create a smooth slope to the drain without lippage or puddles.
It's a practical choice that also feels custom.
Pick A Color That Works For You
Light colors show every drop of water, while dark colors hide spots but can feel heavy. A medium tone or a mottled pattern strikes a balance, camouflaging everyday messes without darkening the space. If you want a seamless look, match the floor to your wall tile; for contrast, go a shade or two darker.
Installation Tips For A Flawless Floor
Proper installation is key. Make sure your contractor uses a waterproof membrane and slopes the mortar bed just right. Choose a grout that's mold-resistant and seal it regularly.
With the right prep, your mosaic floor will stay safe and stylish for years.
10. Mosaic Niche for a Custom Touch
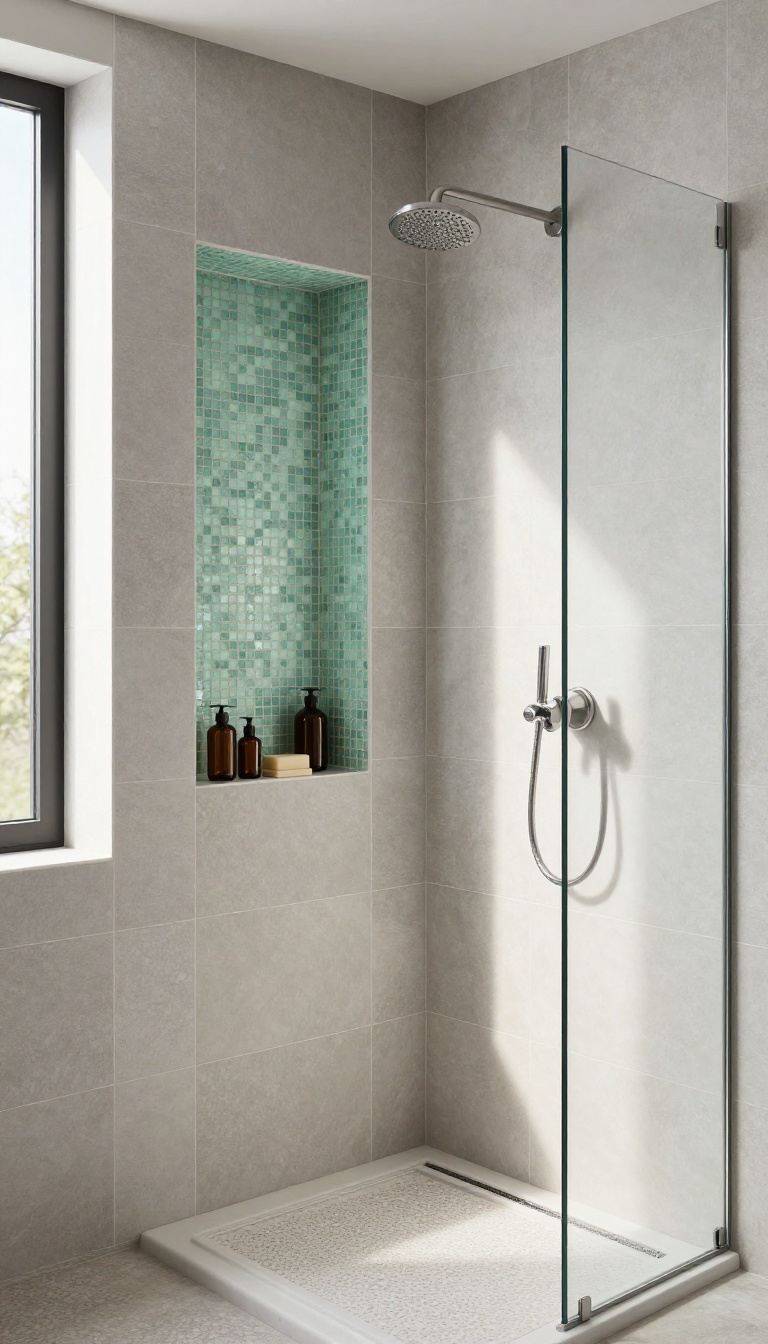
Your shower niche is that built-in shelf that holds shampoo, soap, and whatever else you need. It's also a spot where you can add a custom touch without tiling the entire shower. Lining the back of the niche with mosaic tile turns a purely functional box into a small design moment.
The best part? It's a contained project. You're only dealing with a few square feet, so you can splurge on a special mosaic without blowing your budget.
And because the niche sits at eye level, the detail gets noticed every time you step in.
A mosaic-lined niche works in any shower style. It can blend in with your main tile or stand out as a contrast. Either way, it adds a layer of thoughtfulness that plain tile can't match.
You can use the same mosaic as your shower floor for a cohesive look, or pick something completely different to create a focal point. The key is to treat the niche as its own little canvas. ### Choosing the Right Mosaic for Your Niche Not all mosaics work well in a niche. You want something that's easy to cut and fit around the edges.
Small tiles—like 1-inch hexagons, penny rounds, or thin rectangles—are ideal because they conform to the space without awkward cuts. Glass and ceramic are the most forgiving. They're easy to clean and won't absorb water.
Natural stone, like marble or travertine, looks luxurious but needs sealing to prevent stains. Think about color, too. A dark mosaic in a light shower creates a bold frame.
A light mosaic on a dark wall feels airy and bright. If you want subtle, match the niche to your main tile but change the finish—matte versus glossy. ### Installation Tips for a Clean Look Start by waterproofing the niche just like the rest of your shower. Mosaic tile doesn't replace proper waterproofing; it sits on top of it.
Use a small notched trowel to spread thinset, then press the mosaic sheets into place. A grout float helps you get them level. Because mosaics come on mesh backing, you can cut between tiles to fit corners.
Grout choice matters. A contrasting grout makes each tiny tile pop. A matching grout creates a seamless, monolithic look.
Either way, seal the grout if you're using natural stone. ### Design Ideas That Work Try a marble hexagon mosaic in a white subway tile shower. The hexagons add texture without overwhelming the space. For a pop of color, use a glossy ceramic penny round in a deep blue or green.
It's like a jewel box in your wall. If you have a linear niche, consider a vertical stack of thin glass tiles. They catch the light and draw the eye upward.
You can also mix materials. A border of glass mosaic around a stone mosaic center adds depth and interest. Just keep the palette cohesive so it doesn't feel busy.
Choosing The Right Mosaic For Your Niche
Not all mosaics work well in a niche. You want something that's easy to cut and fit around the edges. Small tiles—like 1-inch hexagons, penny rounds, or thin rectangles—are ideal because they conform to the space without awkward cuts.
Glass and ceramic are the most forgiving. They're easy to clean and won't absorb water. Natural stone, like marble or travertine, looks luxurious but needs sealing to prevent stains.
Think about color, too. A dark mosaic in a light shower creates a bold frame. A light mosaic on a dark wall feels airy and bright.
If you want subtle, match the niche to your main tile but change the finish—matte versus glossy.
Installation Tips For A Clean Look
Start by waterproofing the niche just like the rest of your shower. Mosaic tile doesn't replace proper waterproofing; it sits on top of it. Use a small notched trowel to spread thinset, then press the mosaic sheets into place.
A grout float helps you get them level. Because mosaics come on mesh backing, you can cut between tiles to fit corners. Grout choice matters.
A contrasting grout makes each tiny tile pop. A matching grout creates a seamless, monolithic look. Either way, seal the grout if you're using natural stone.
Design Ideas That Work
Try a marble hexagon mosaic in a white subway tile shower. The hexagons add texture without overwhelming the space. For a pop of color, use a glossy ceramic penny round in a deep blue or green.
It's like a jewel box in your wall. If you have a linear niche, consider a vertical stack of thin glass tiles. They catch the light and draw the eye upward.
You can also mix materials. A border of glass mosaic around a stone mosaic center adds depth and interest. Just keep the palette cohesive so it doesn't feel busy.
11. Mosaic Border for a Finished Edge
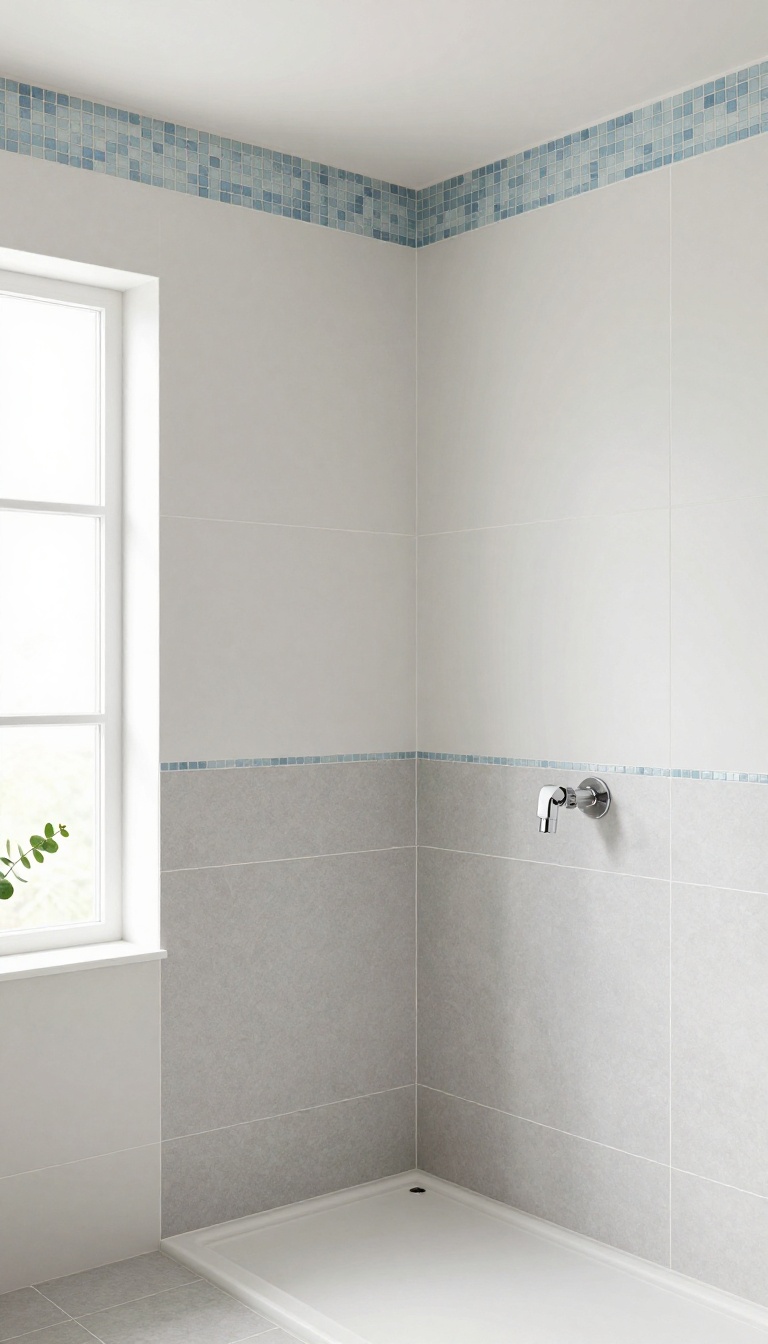
A mosaic border might be the simplest upgrade you can make to a shower. It runs along the perimeter or caps the top of a wainscot, giving the tile a clear stopping point. Instead of a raw edge or a random transition, you get a deliberate frame that looks intentional.
This idea works because it solves a real problem: how to end tile without it looking unfinished. A border tells the eye where the design stops, and it adds a bit of detail without overwhelming the space. You can go subtle or bold, depending on the mosaic you choose.
Borders are one of those details that don't get much attention until they're missing. In a shower, the edges are everywhere: where tile meets drywall, where it meets the ceiling, where a wainscot ends. Without a border, those spots can look abrupt or unfinished.
A mosaic border fixes that by creating a clean line that ties the whole design together. You can use the same mosaic as your accent band or pick something contrasting. Either way, the border acts like a picture frame for your shower walls.
It's a small addition that makes a big difference in how polished the final result feels.
Where To Place A Border
The most common spot is at the top of a wainscot, where the tile ends and painted wall begins. A border there gives a crisp cap and protects the tile edge. You can also run a border around the entire shower perimeter, just below the ceiling or at eye level.
Another option is to frame a niche or a bench with the same mosaic. That creates a cohesive look and draws attention to those features. Just keep the border width consistent so it doesn't look random.
Choosing The Right Mosaic
For a border, smaller mosaics work best because they bend easily and create a tight line. Glass or porcelain mosaics are durable and easy to clean. If you want a natural look, stone mosaics add texture but need sealing.
Match the border to your existing tile for a seamless finish, or use a contrasting color to make it pop. A neutral border keeps things calm, while a metallic or colored one adds a little sparkle. Just make sure the mosaic is rated for wet areas.
Installation Tips For A Clean Edge
Plan your border before you start tiling so you can cut the field tile to fit around it. That way, the border sits flush and the cuts are hidden. Use a level to keep the border straight, especially on long runs.
Grout the border with the same grout as the rest of the shower for a unified look. If you want the border to stand out, use a contrasting grout color. Either way, seal the grout to keep moisture out.
12. Mosaic Bench Top for Cohesion
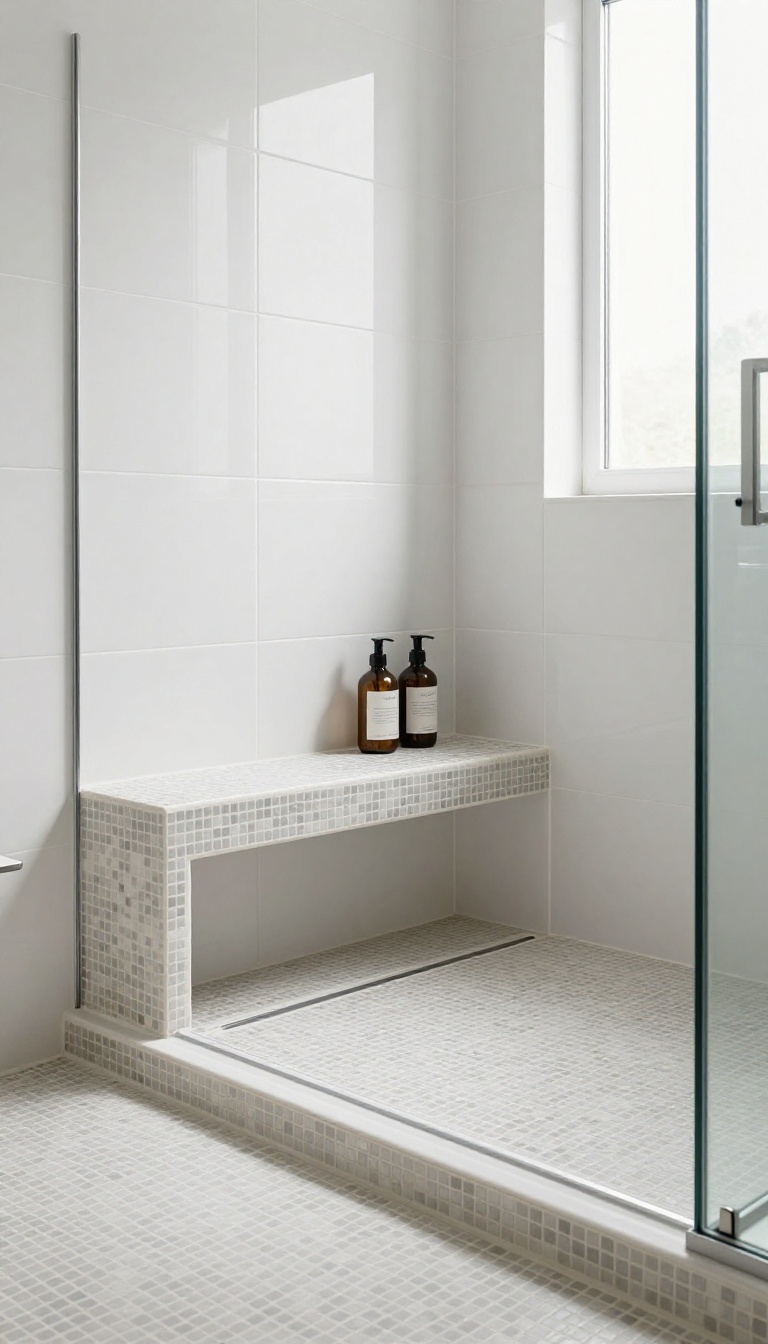
A shower bench often ends up as an afterthought, a plain slab that doesn't quite match the rest of your tile work. But when you cover that bench with mosaic tiles, it becomes a design feature instead of a functional necessity. The result is a more cohesive look, plus a surface that feels better underfoot and easier to keep clean.
Mosaic tiles on a bench top tie together the floor, walls, and any accent bands you've used. They also add grip when the bench gets wet, which is a nice safety bonus. And because mosaics come in small pieces, they conform to the bench's shape without awkward cuts or seams.
Why It Works
A tiled bench top visually connects different elements of your shower. If your floor is mosaic and your walls are large-format tile, covering the bench in the same mosaic creates a bridge between the two. It also eliminates the contrast of a bare stone or acrylic bench, which can look out of place in a fully tiled shower.
Choosing The Right Mosaic
For bench tops, pick a mosaic that matches or complements your shower floor. Porcelain or glass mosaics work well because they're durable and water-resistant. Avoid natural stone unless you seal it regularly, since benches see a lot of water and soap.
A matte finish is a smart choice for traction.
Installation Tips
Make sure the bench is sloped slightly toward the drain so water doesn't pool. Use a waterproof membrane over the bench before tiling, just like you would on the floor. When setting the mosaic, press it firmly into the thinset and use a grout float to fill gaps evenly.
A epoxy grout can help prevent staining and mildew.
Design Variations
You can use the same mosaic as the floor for a seamless look, or choose a contrasting color to make the bench pop. A border of larger tiles around the mosaic edge can frame it nicely. For a subtle touch, try a mosaic that's a shade or two different from the walls.
13. Mosaic Ceiling for a Surprise Element
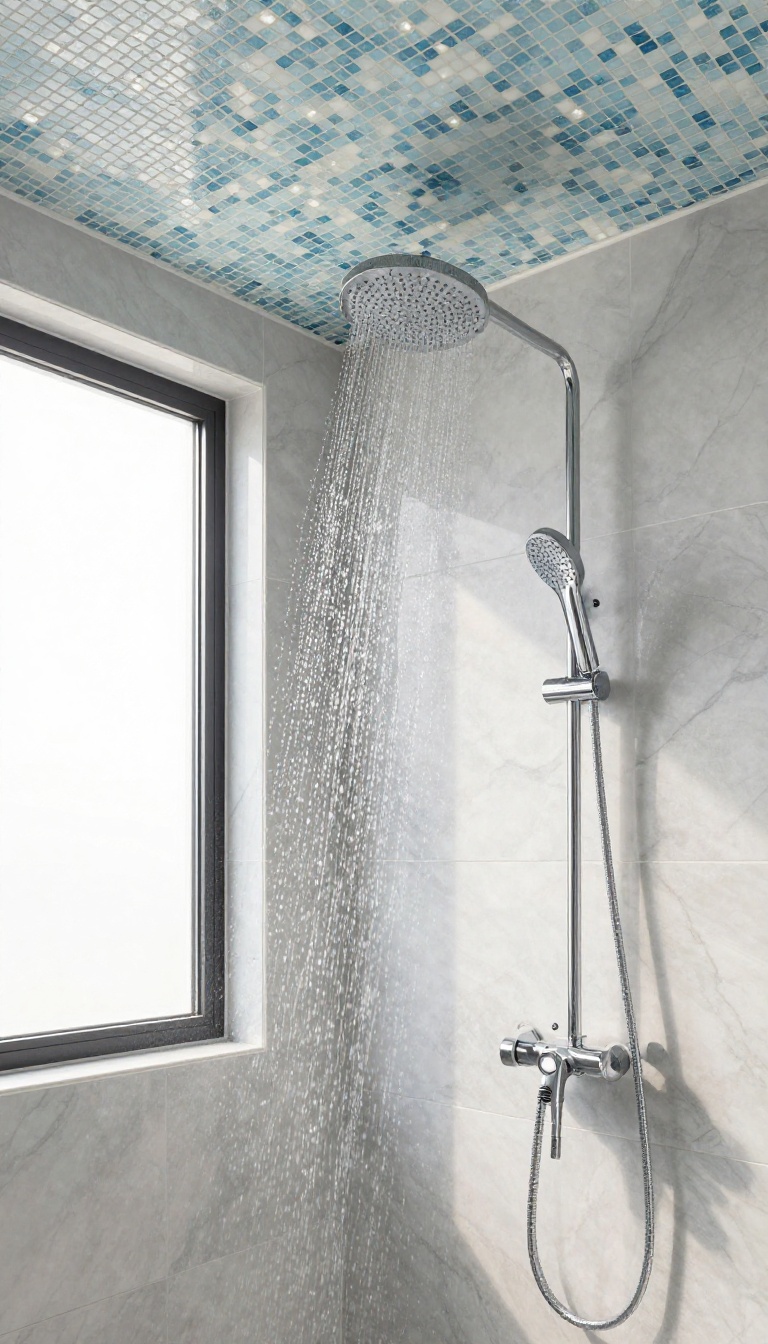
Most people focus on the walls and floor when tiling a shower, but the ceiling is a blank canvas waiting for attention. Covering it with mosaic tile adds an unexpected twist that guests will notice immediately. It also bounces light around and can make the shower feel taller than it actually is.
A tiled ceiling might sound like overkill, but it's one of those details that instantly elevates a shower from standard to custom. Mosaic works especially well up there because the small tiles conform to slight slopes and won't crack under humidity like larger slabs can. Plus, you get a chance to play with color or shimmer in a spot that's usually ignored.
Why It Works
Mosaic ceilings reflect light from above, which brightens the entire shower without adding fixtures. The small scale of the tiles also draws the eye upward, creating an illusion of height. And because mosaic sheets are flexible, they handle the subtle pitch of a shower ceiling without lippage or gaps.
Picking The Right Tile
Go for a material that can handle constant moisture, like glass, porcelain, or ceramic. Glass mosaic is a favorite because it shimmers and resists staining. Avoid natural stone unless you seal it regularly, since steam and soap can wear it down over time.
Installation Tips
Use a modified thinset mortar designed for wet areas and apply it with a notched trowel. Press the mosaic sheets firmly into the mortar and check for coverage. Grout with an epoxy-based grout to prevent mold and make cleaning easier.
If you're not confident working overhead, hire a pro—it's a small area, so labor costs stay reasonable.
14. Mosaic Mix of Materials for Eclectic Style
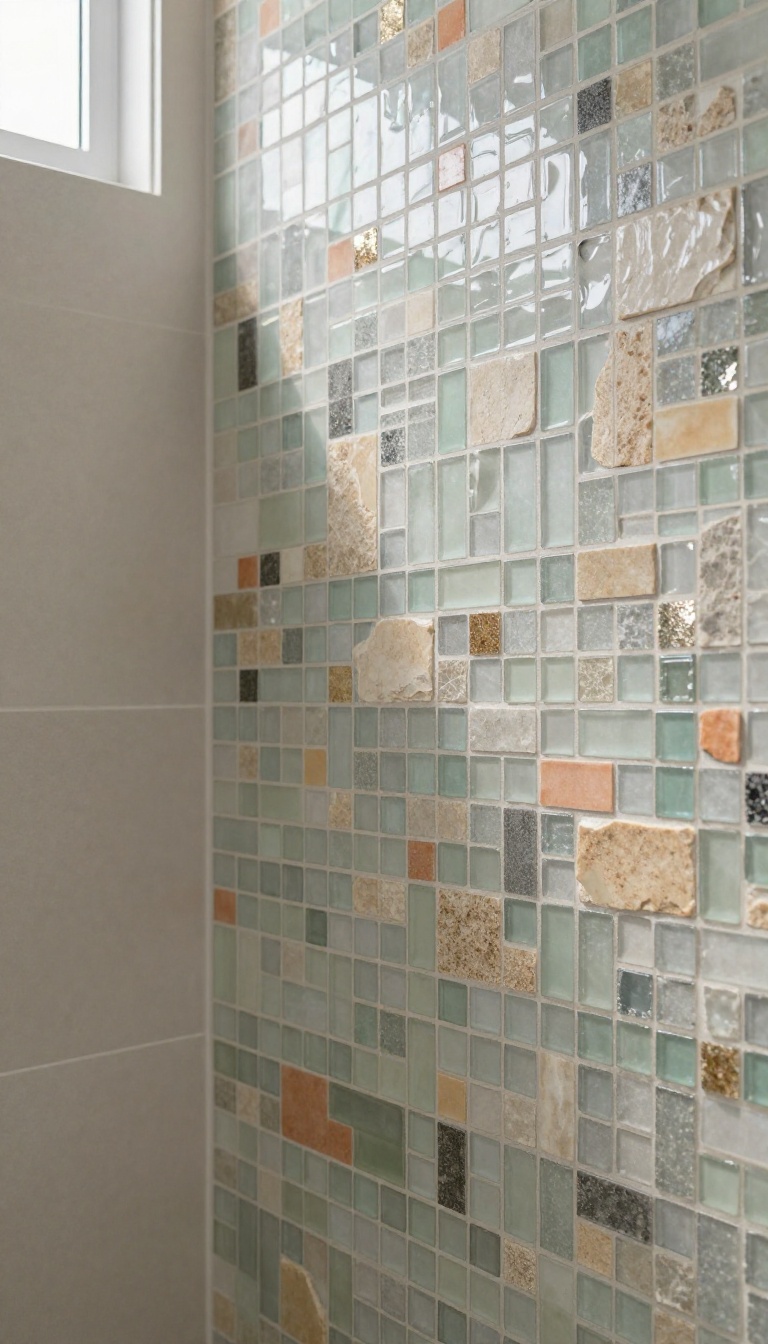
Why stick to one material when you can blend several? Mixing glass, stone, and ceramic mosaics adds depth and character that a single material can't match. It's a playful approach that feels collected over time, not cookie-cutter.
This style shines in modern and bohemian bathrooms, where a little imperfection is welcome. The contrast between shiny glass, matte stone, and smooth ceramic creates a texture you'll want to touch. Plus, it's a great way to use leftover tiles from other projects.
The key to pulling off a mixed-material mosaic is balance. You don't want one material to overpower the others, so aim for a roughly equal mix or let one dominate with the others as accents. Think of it like putting together an outfit: you need a unifying element, whether that's color, shape, or finish.
Start by choosing a color palette. Earthy tones like terracotta, sage, and sand work well for bohemian vibes, while cool grays, whites, and blacks suit modern spaces. Then pick your materials: glass for shine, stone for organic texture, and ceramic for solid color.
You can also throw in a few metallic tiles for a hint of glam. Layout matters, too. A random mix feels eclectic, while a patterned arrangement looks more deliberate.
Either way, keep the grout color consistent to tie everything together. A neutral grout like light gray or white lets the materials speak for themselves.
Choosing Your Mix
Aim for three materials max to avoid visual chaos. Glass, stone, and ceramic are a classic trio because they each bring something different. If you want a subtler look, use two materials and add variation through color or shape.
Placement That Works
Mixed mosaics can go almost anywhere, but they're especially striking as a full wall or a large accent panel. For a smaller dose, use them in a niche or on the shower floor. Just remember that stone needs sealing to protect it from water and soap.
Keeping It Cohesive
Even an eclectic mix needs a common thread. Stick to one color family, repeat a shape, or use the same finish on at least two materials. This prevents the look from feeling random and keeps it intentional.
15. Mosaic in Neutral Tones for Timeless Appeal
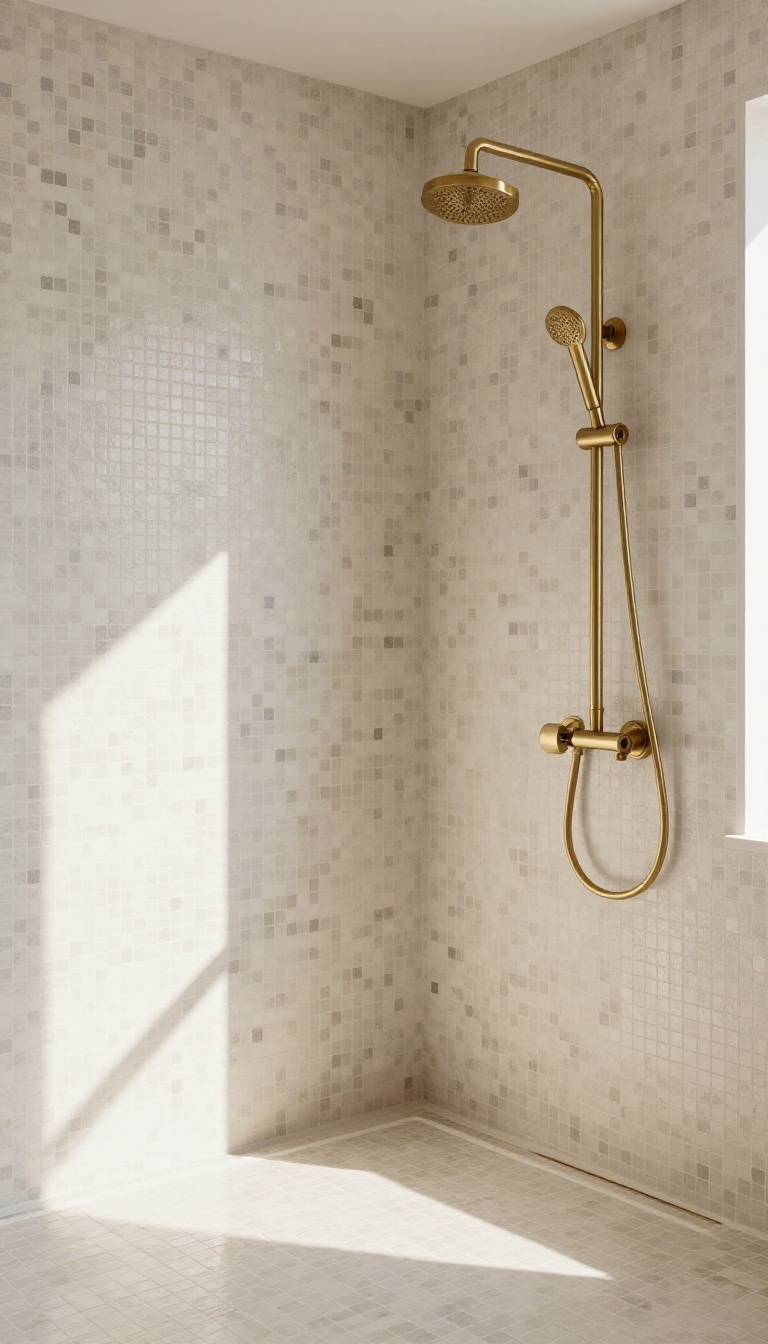
Neutral mosaics—beige, gray, white, and soft taupe—bring a sense of calm that never goes out of style. They create a quiet backdrop that lets your fixtures and accessories take center stage. If you want a shower that feels refined today and ten years from now, this is the route to take.
Neutral tones work because they don't compete. They absorb light, soften shadows, and make even a small shower feel more open. And when you layer in different textures or finishes, the result is anything but boring.
Choosing Your Neutral Palette
Start by picking a base color that matches your bathroom's overall mood. Warm beiges and creams feel cozy, while cool grays and whites lean modern. You can also mix two neutrals—like a light gray field with a slightly darker border—for subtle depth without going bold.
Playing With Texture And Finish
Matte, glossy, honed, and polished finishes all reflect light differently. Combine a glossy mosaic on the shower floor with a matte version on the walls to add visual interest. Even within the same color family, texture keeps things from looking flat.
Letting Fixtures Shine
With a neutral canvas, your showerhead, handles, and shelving become the stars. Brushed brass, matte black, or chrome all pop against a soft background. This approach also makes it easy to swap out accessories later without redoing the tile.
FAQ
What is the best mosaic tile for a shower floor?
Small tiles like penny rounds or hexagons are ideal for shower floors because they provide slip resistance and conform to the slope toward the drain. Porcelain or natural stone mosaics are durable and easy to maintain.
How do I clean mosaic tiles in the shower?
Regular cleaning with a mild pH-neutral cleaner and a soft brush keeps mosaic tiles looking new. Avoid abrasive cleaners that can scratch glass or stone. For grout, use a gentle scrub to prevent mildew.
Can I install mosaic tiles over existing tiles?
Yes, you can install mosaic tiles over existing tiles if the surface is clean, flat, and structurally sound. However, it may raise the floor height and affect fixtures, so it's often better to remove old tiles first.
What grout color should I use with mosaic tiles?
The grout color can dramatically change the look. Matching grout creates a seamless appearance, while contrasting grout highlights the mosaic pattern. For shower floors, a darker grout hides stains better.
Are mosaic tiles expensive?
Mosaic tiles vary in price depending on material and brand. Glass and natural stone tend to be pricier, while ceramic and porcelain are more budget-friendly. However, labor costs can be higher due to the intricate installation.
Conclusion
You do not need every mosaic idea on this list. Pick one that solves your biggest shower annoyance, whether that is a slippery floor, a blank wall, or grout that never looks clean. Install it, live with it for a week, and see what still bugs you.
From there, tweak the scale, color, or layout until it feels right. Small changes stack up fast. Get one mosaic choice right, and the rest of the shower tends to fall into place without much fuss.