10 Living Room TV Wall Ideas: Floating Shelves, Small Spaces
A TV wall can go from an afterthought to the best-looking spot in your living room with a few smart moves. You do not need a full remodel or a custom cabinet budget to make it happen.
Most of the change comes from how you handle shelves, cables, and the space around the screen. Floating shelves hide the clutter that usually piles up under a TV, and they work in rooms of almost any size.
In smaller spaces, a corner layout or a slim console frees up floor you did not know you had. Tall walls get vertical shelving that draws the eye up instead of sideways.
1. Floating Shelves with Hidden Cable Management
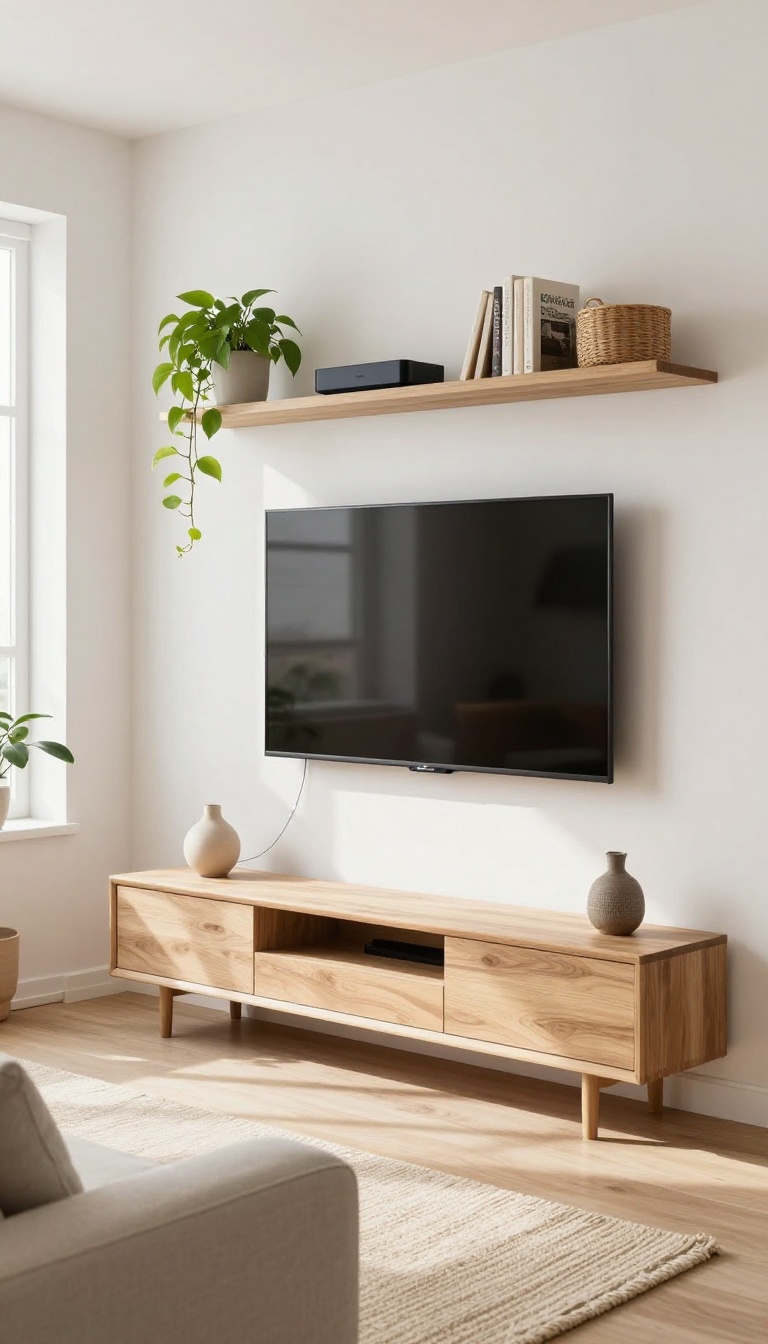
Floating shelves give you display space without the bulk of a cabinet. When you add hidden cable management, you also get a clean look that keeps cords out of sight. This setup works in any living room, from compact apartments to wide-open spaces.
Floating shelves mount directly to the wall with no visible brackets. That means no legs or supports to clutter the area under your TV. The real magic happens when you plan for cables before you install.
Run power and HDMI lines through the wall or use surface-mounted channels that blend with your paint color. A small shelf with a built-in raceway can hold your streaming device and hide its power cord at the same time. The result is a streamlined wall that looks intentional, not improvised.
Pick Shelves With Built-in Channels
Some floating shelves come with a hollow core or a removable back panel. These are designed to route cables behind the shelf itself. Look for models that include cable clips or a channel along the underside.
That way, you can run a power strip or extension cord without seeing a single wire. If you already own solid shelves, you can add adhesive cable raceways to the back edge. They are cheap, paintable, and easy to install in an afternoon.
Plan Your Cable Route Before You Drill
Decide where your TV, cable box, and game console will sit. Then map out the shortest path for each cord to reach an outlet. If you can, install a recessed media box behind the TV to hold excess cable and power bricks.
For renters, a paintable cord cover that sticks to the wall works just as well. Measure twice, drill once, and keep the channels level with the shelf for a seamless look.
Keep Devices Ventilated And Accessible
Hiding cables does not mean trapping heat. Leave a little gap between devices and the wall, or choose shelves with open sides. If you mount a soundbar below the shelf, use short cable ties to keep its cord tidy.
Avoid stacking electronics directly on top of each other. A small basket or bin on the shelf can corral remotes and extra cords without looking messy.
2. Corner TV Wall for Small Rooms
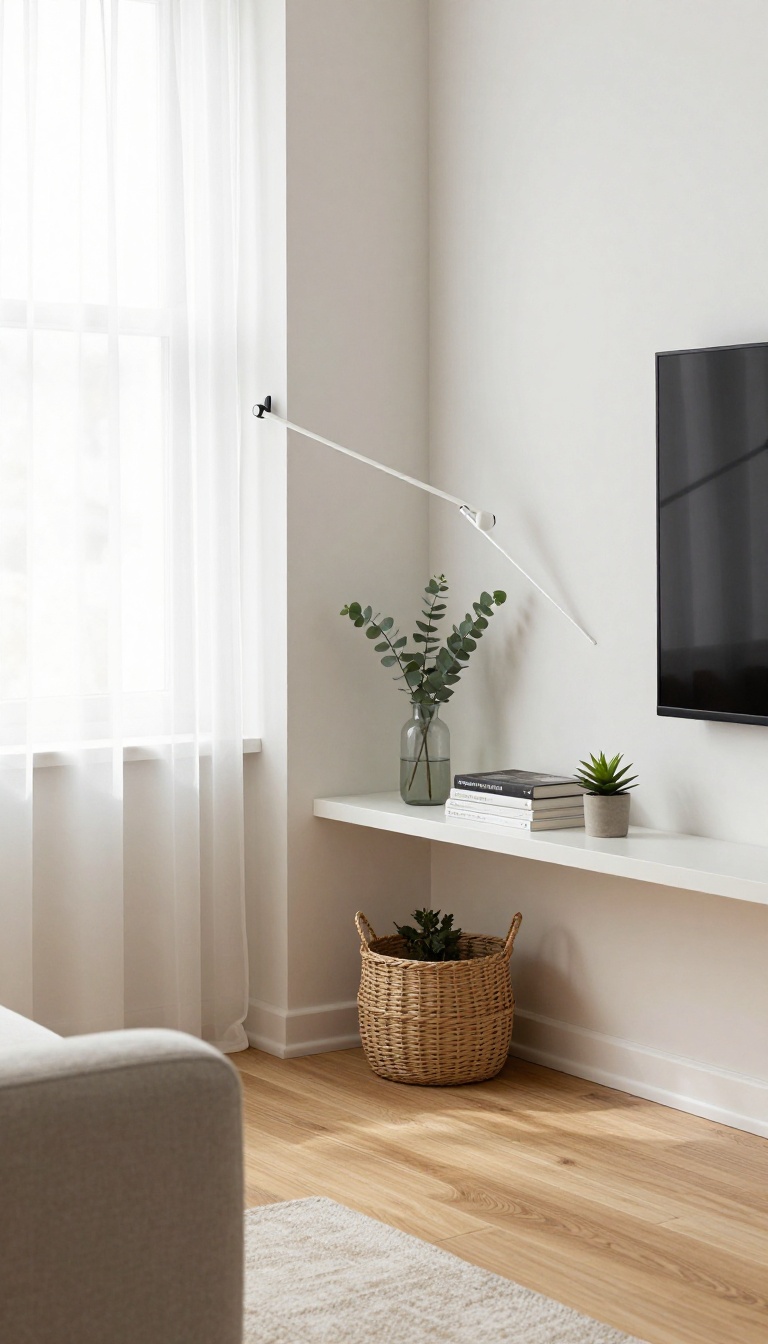
A corner TV wall turns dead space into the most functional spot in a small living room. Instead of fighting for wall space that does not exist, you angle the screen and let the room work around it. This setup keeps walkways clear and gives you a natural viewing nook.
It also hides the awkward gap that corners usually create behind furniture.
The trick is pairing a corner mount with shelves that follow the same angle. Everything lines up, so the wall looks intentional rather than squeezed in. You get storage, display space, and a clear path through the room without giving up seating.
It works in apartments, studios, and any living room where every inch counts.
Pick The Right Corner Mount
A full-motion corner mount lets you pull the TV out and angle it toward your couch. Look for one with a wide swivel range so you can adjust it for different seats. Measure the corner first.
You want the bracket to sit flush without the screen jutting into the room. A mount rated for your TV's weight and size keeps it stable.
Angle The Shelves To Match
Corner shelves should follow the same diagonal as the TV. Floating corner shelves in a wedge or triangle shape fit neatly and avoid wasted gaps. Stack two or three above the screen for decor and one or two below for remotes and small devices.
Keep the shelves shallow so they do not crowd the viewing area.
Keep Cables And Clutter Hidden
Run cables down the corner seam or behind a slim cord cover painted to match the wall. A small basket on a lower shelf holds the extras you do not want on display. If you rent, use adhesive clips instead of drilling.
They hold light cables fine and come off clean when you move.
Make The Nook Feel Cozy
Add a floor lamp or a small plant in the opposite corner to balance the look. A rug under the seating area defines the nook without adding bulk. Warm lighting and a soft throw make the corner feel like a destination, not a leftover space.
Keep the palette simple so the TV wall stays the focus.
3. Gallery Wall Around the TV
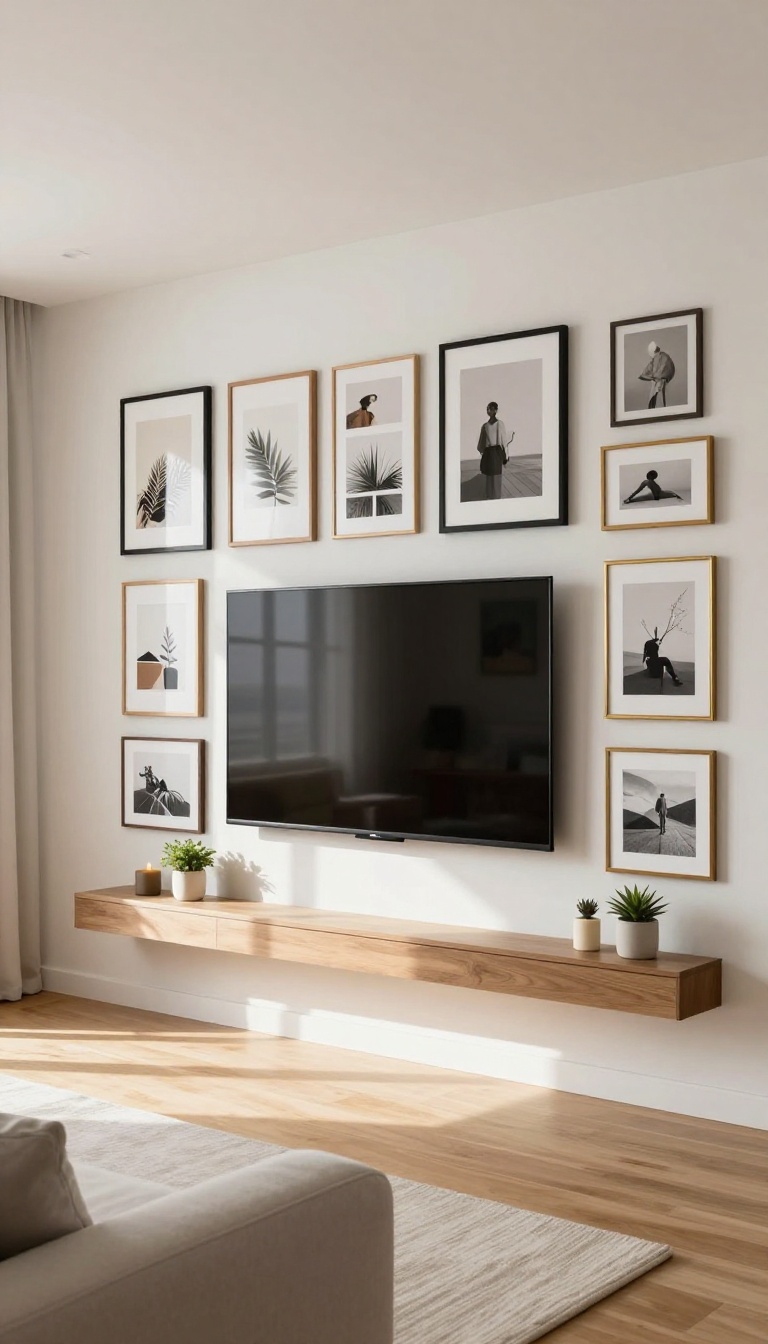
A gallery wall turns the TV into just another piece in a larger arrangement. Instead of a black rectangle floating alone, you get a mix of art, photos, and the screen itself. The trick is treating the TV as one element in the grid, not the centerpiece.
When it is off, the wall still looks intentional and full.
Start by planning the layout on the floor or with paper templates taped to the wall. You want the TV to sit within the same visual rhythm as the frames, not stick out like an afterthought. Keep the spacing between pieces consistent, usually two to three inches.
That gap applies to the TV as well, so it reads as part of the group. Choose frames in one or two finishes to avoid a chaotic look. Black frames echo the TV and help it blend, while wood or brass add warmth.
Mix horizontal and vertical orientations, but keep the overall shape tight. A good gallery wall feels like one unit, not a scattered collection.
Anchor The Tv First
Mount the TV where you want it before hanging anything else. That spot becomes your anchor. From there, build outward and upward with frames.
Keep the bottom edge of the TV aligned with the bottom edge of nearby frames for a clean line. If the TV sits on a console, treat the console top as the base of the gallery. This prevents the common mistake of hanging art too high or too low.
Mix Art, Photos, And Objects
Variety keeps the wall from looking like a showroom. Use a mix of framed art, personal photos, and maybe a small shelf or two. A tiny floating shelf can hold a plant or a candle, breaking up the flatness.
Just avoid placing anything that blocks the screen or reflects light back at you. Keep the TV area clear so it still works when it is on.
Hide The Cords In Plain Sight
Cords can ruin the whole effect. Run them behind the wall if you can, or use a paintable cord cover that matches the wall color. If you are renting, a cord hider that sticks on and can be removed later works well.
Another option is to route cables through a small shelf or a decorative box. The goal is to make the wiring disappear so the gallery wall looks seamless.
4. Built-In Shelving with Closed Storage
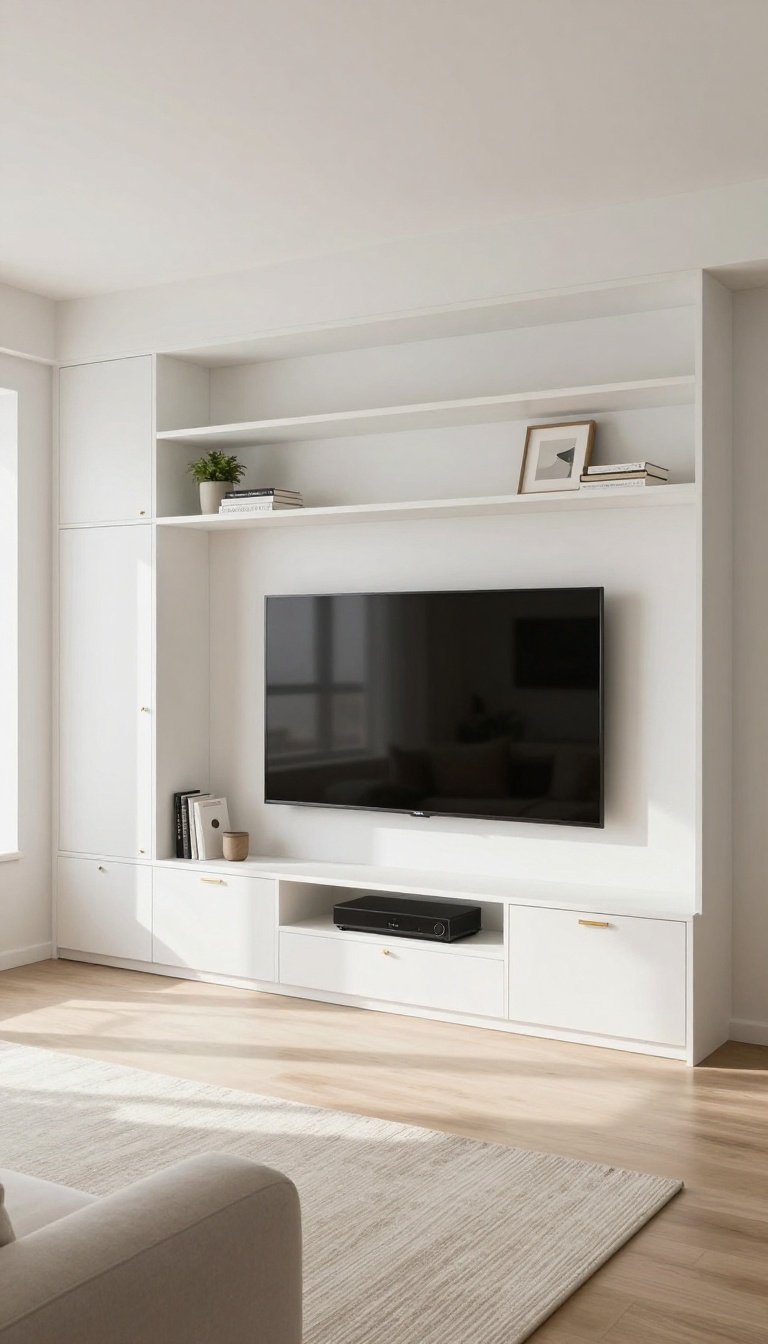
Open shelves look great until every remote, console, and tangled cord is on display. Built-in shelving with closed storage solves that by giving you the best of both worlds. You get open spots for the things you actually want to show off, and cabinets below to swallow the stuff you don't.
The result feels custom, even when it's not.
Built-in shelving is one of those upgrades that makes a TV wall look intentional instead of accidental. The trick is mixing open and closed sections so the wall doesn't turn into one big wall of stuff. Open shelves handle decor and daily-use items.
Closed cabinets handle the ugly stuff: cable boxes, game consoles, spare remotes, and that pile of cords you keep meaning to deal with. You can go full custom with a carpenter, or you can fake it with ready-made cabinets and a few floating shelves above. Either way, the goal is the same: make the TV feel like part of the architecture, not just a screen stuck on drywall.
Plan The Open-to-closed Ratio
A good rule is about one-third open and two-thirds closed. That gives you enough display space for books, plants, or a few framed photos without turning the wall into a dusting nightmare. If you have a lot of media gear, lean heavier on closed storage.
If you mostly stream and own three remotes, you can flip that ratio and show more.
Choose The Right Cabinet Depth
Standard base cabinets run about 24 inches deep, but that can feel bulky under a TV. For a living room, 16 to 18 inches is usually plenty. It holds a receiver, a gaming console, and a soundbar without sticking out into the room.
Measure your deepest piece of gear before you commit.
Hide The Cables, Not The Ventilation
Closed cabinets trap heat, and electronics hate heat. Drill a few ventilation holes in the back or sides, or choose doors with slatted fronts. Run cables through a single grommet hole so everything stays tidy.
A small fan kit is cheap insurance if you're packing in a lot of gear.
Make The Tv Look Intentional
Center the TV within the shelving unit, not floating above it. Leave a few inches of breathing room on each side so it doesn't feel crammed. Paint or stain the built-ins the same color as the wall if you want them to blend, or go darker for contrast.
Either way, the TV stops looking like an afterthought.
5. Floating Console with Under-Lighting
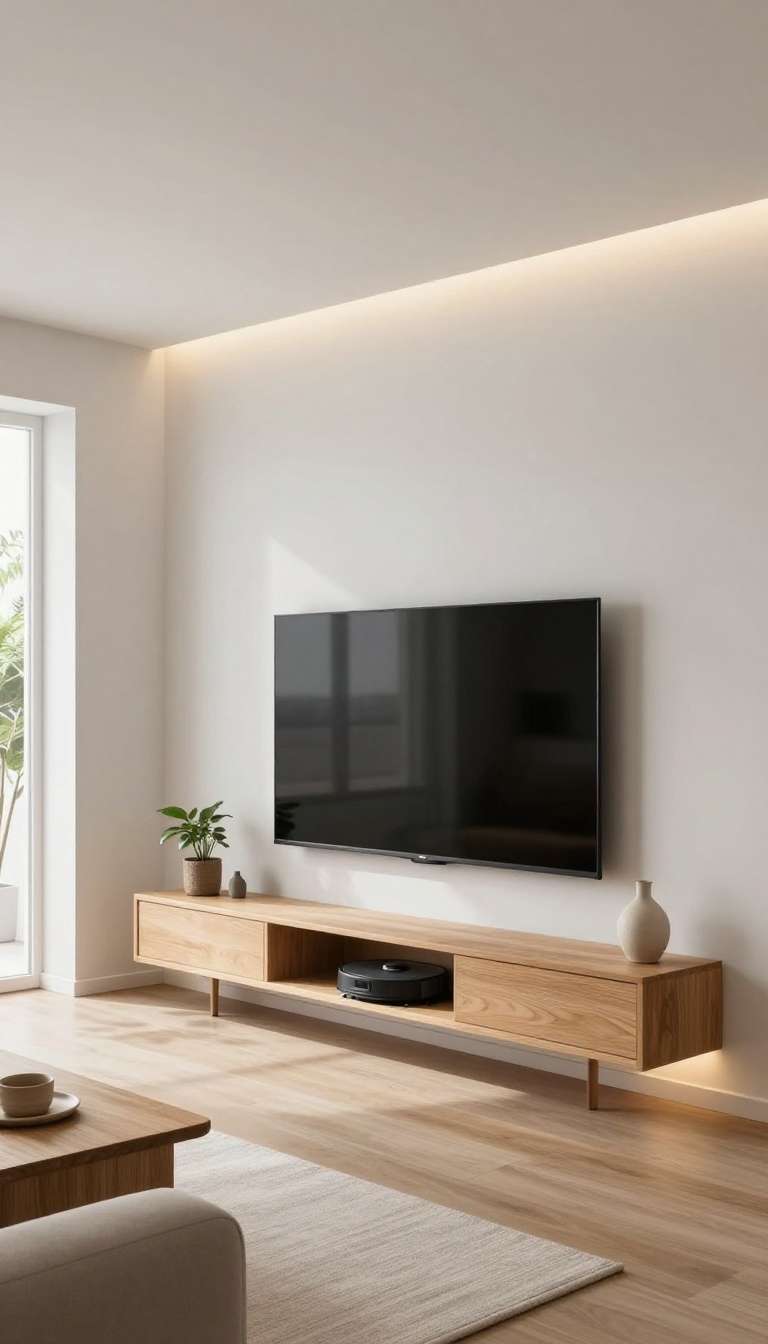
A floating console does more than hold your cable box. It creates a clean line under the TV and makes the whole wall feel lighter. Add LED strip lighting underneath, and you get a soft glow that turns a basic setup into something that looks custom.
The best part? You reclaim the floor space a traditional media cabinet would eat up.
This setup works in almost any living room, but it shines in smaller spaces where every inch counts. You mount a slim console directly to the wall, leaving the area underneath open. That open gap makes the room feel bigger and gives you a spot to slide a basket or a robot vacuum.
The under-lighting is the secret sauce. It washes the wall with a warm or cool glow, depending on your mood, and hides the fact that your console is basically a floating box.
Choosing The Right Console
Look for a console that is at least two inches narrower than your TV on each side. That keeps the proportions balanced. Depth matters too: 12 to 15 inches is plenty for most media gear.
If you have a soundbar, measure its height and add an inch so it does not block the screen. Materials like oak, walnut, or matte black MDF blend with most decors. Avoid glass shelves if you have kids or pets—they show every smudge.
Installing The Led Strip
You want the light to bounce off the wall, not shine in your eyes. Stick the strip to the back edge of the console, facing the wall. That creates a halo effect.
Look for a strip with a dimmer and warm-to-cool white options. Plug it into a smart plug so you can control it with your voice or phone. If you are not comfortable with wiring, go with a plug-in strip and hide the cord behind the console.
For a cleaner look, use a channel to diffuse the light and avoid dotted hotspots.
Hiding Cables And Gear
A floating console leaves cables exposed if you are not careful. Run wires through the wall if you can, or use a paintable cable raceway. For gear, keep it minimal.
A single streaming box and a soundbar are usually enough. If you need more, choose a console with closed drawers or doors. That way, remotes and extra cords stay out of sight.
Velcro ties and adhesive clips keep everything tidy behind the scenes.
Making It Work In Small Rooms
In a tight living room, a floating console is a game-changer. It frees up floor space for a chair, a plant, or just breathing room. Mount it at the same height as your TV's bottom edge, or slightly lower, so the light washes the wall evenly.
If your wall is narrow, go with a shorter console and add a floating shelf above the TV for extra storage. The under-lighting also acts as a nightlight, so you can skip a floor lamp and save even more space.
6. Vertical Shelving for Tall Walls
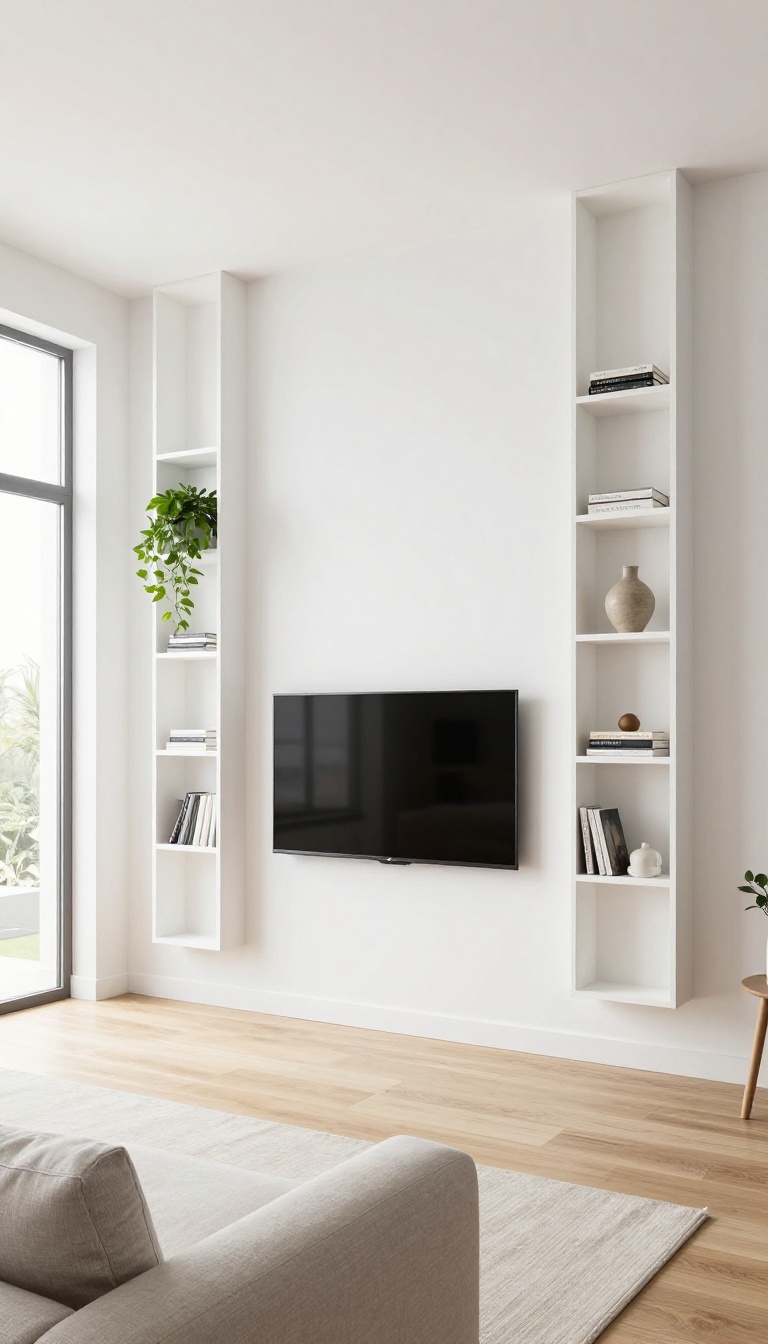
Tall walls can make a TV look small and lost if everything sits at eye level. Vertical shelving fixes that by pulling the eye upward in clean, deliberate columns. The result feels taller, more balanced, and surprisingly functional.
Vertical shelves work because they use height instead of width. In a room with high ceilings, that empty space above the TV is wasted real estate. Two narrow columns of shelves on either side of the screen fill it without crowding the room.
They also give you a place for books, plants, and a few display pieces that would otherwise clutter a coffee table. The key is keeping each column slim and consistent so it reads as one vertical line, not a random stack.
Pick The Right Shelf Depth
Narrow shelves look best here. Aim for 6 to 8 inches deep so they feel light and don't stick out too far. Deeper shelves start to feel like a bookcase and can make the wall look heavy.
If you need storage for larger items, go with a slightly deeper bottom shelf and keep the upper ones shallow.
Line Them Up With The Tv
The shelves should frame the TV, not fight it. Align the top shelf with the top edge of the screen or a few inches above it. Keep the gap between the TV and each column even on both sides.
That symmetry is what makes the whole setup look intentional.
Style Them Without Clutter
Treat each shelf like a small display. Group items in odd numbers, mix heights, and leave some empty space. A trailing plant on the top shelf adds life without blocking the screen.
Rotate pieces every few months so the wall stays interesting.
Hide The Cables
Cables are the enemy of a clean vertical setup. Run them behind the shelves or through a painted cord cover that matches the wall. If you can, put the cable box and console on a lower shelf near an outlet.
That keeps the upper shelves purely for looks.
7. Slat Wall with Integrated Shelves
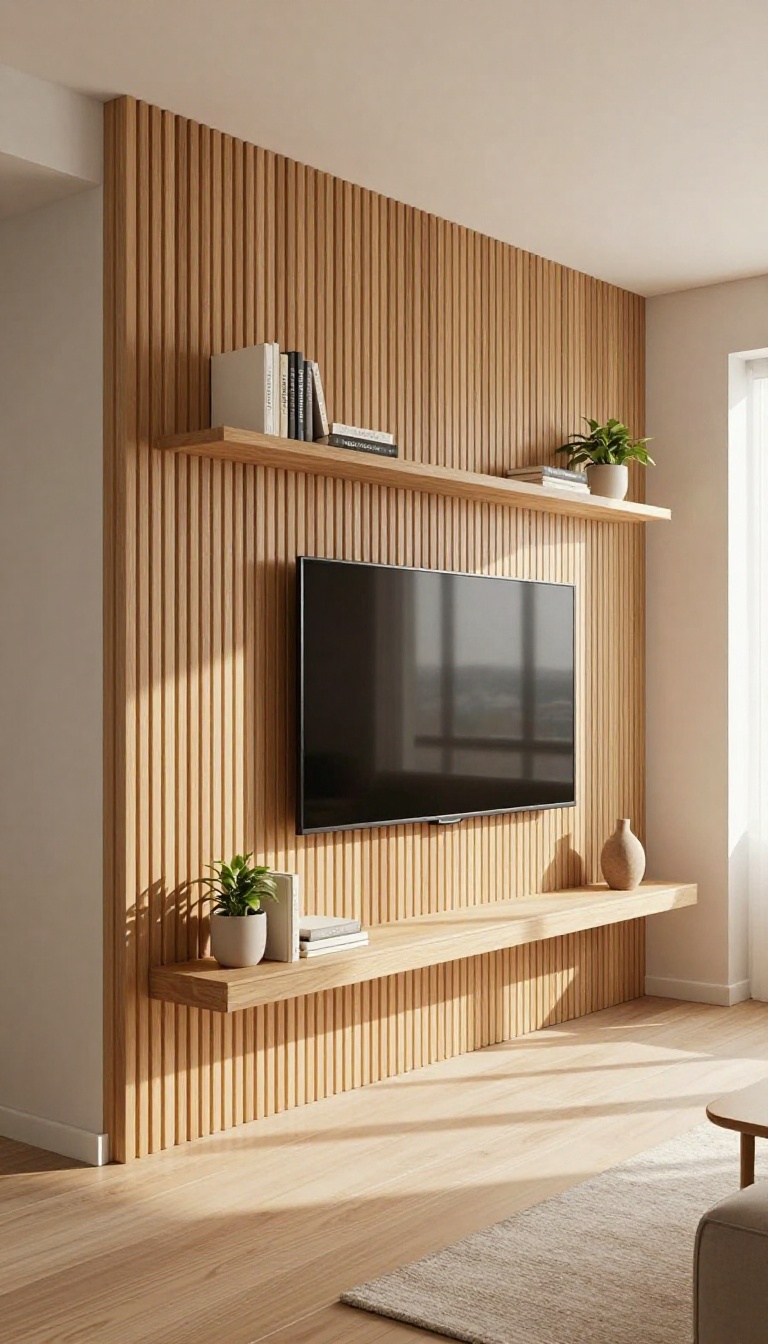
Wood slat walls bring texture, warmth, and a bit of architectural interest to a room that might otherwise feel flat. When you add floating shelves directly to the slats, you get storage that looks built-in without the custom cabinetry price tag. The best part is adjustability.
Slat systems let you move shelves up or down as your gear changes, so you are not stuck with a layout that stops working after a year. This setup works in living rooms of almost any size, but it shines in spaces where you want the TV to feel intentional rather than just mounted on a blank wall.
Slat walls are usually made from vertical wood strips spaced an inch or two apart, mounted on a backing panel or directly to the studs. The gaps between slats create shadow lines that add depth, and they also give you natural anchor points for shelf brackets. You can buy pre-made slat panels or build your own from 1×2 or 1×3 boards.
The DIY route costs less and lets you match the wood tone to your floors or furniture. Either way, the installation is straightforward if you plan the layout before you start drilling. Once the slats are up, floating shelves attach with hidden brackets that screw into the slat backing.
Because the slats run vertically, you can position shelves at any height without worrying about hitting a stud in the wrong spot. That flexibility is what makes this idea so practical for real life.
Choosing The Right Slat Spacing
Slats spaced 1 to 2 inches apart give you a clean look and enough room for bracket hardware. Wider gaps feel more open but can make the wall look sparse behind a large TV. Narrow gaps create a denser, more dramatic texture, though they can collect dust.
For most living rooms, a 1. 5-inch gap hits the sweet spot. It looks balanced, works with standard shelf brackets, and does not overwhelm the TV.
If you are using a soundbar or media box, make sure the gap is wide enough to run cables behind the slats without pinching them.
Shelf Placement Around The Tv
Keep shelves at least 6 to 8 inches away from the top and sides of the TV so the screen does not feel crowded. A single shelf below the TV can hold a soundbar and a few decor pieces, while two or three shelves on one side add visual weight without blocking the view. If you want symmetry, place matching shelves on both sides.
For a more relaxed look, stack shelves on one side and leave the other side open. The slat wall itself provides enough texture that you do not need to fill every inch.
Hiding Cables And Clutter
The gaps between slats are perfect for tucking cables out of sight. Run power and HDMI cords behind the slats and down to a nearby outlet or a small cable box mounted low on the wall. You can also use adhesive cable clips on the back of the slats to keep things neat.
For devices like a streaming stick or game console, add a small shelf with a built-in cable hole or place them on a lower shelf where they are less visible. A woven basket or a lidded box can hide remotes and controllers without looking like storage.
8. Room Divider TV Wall
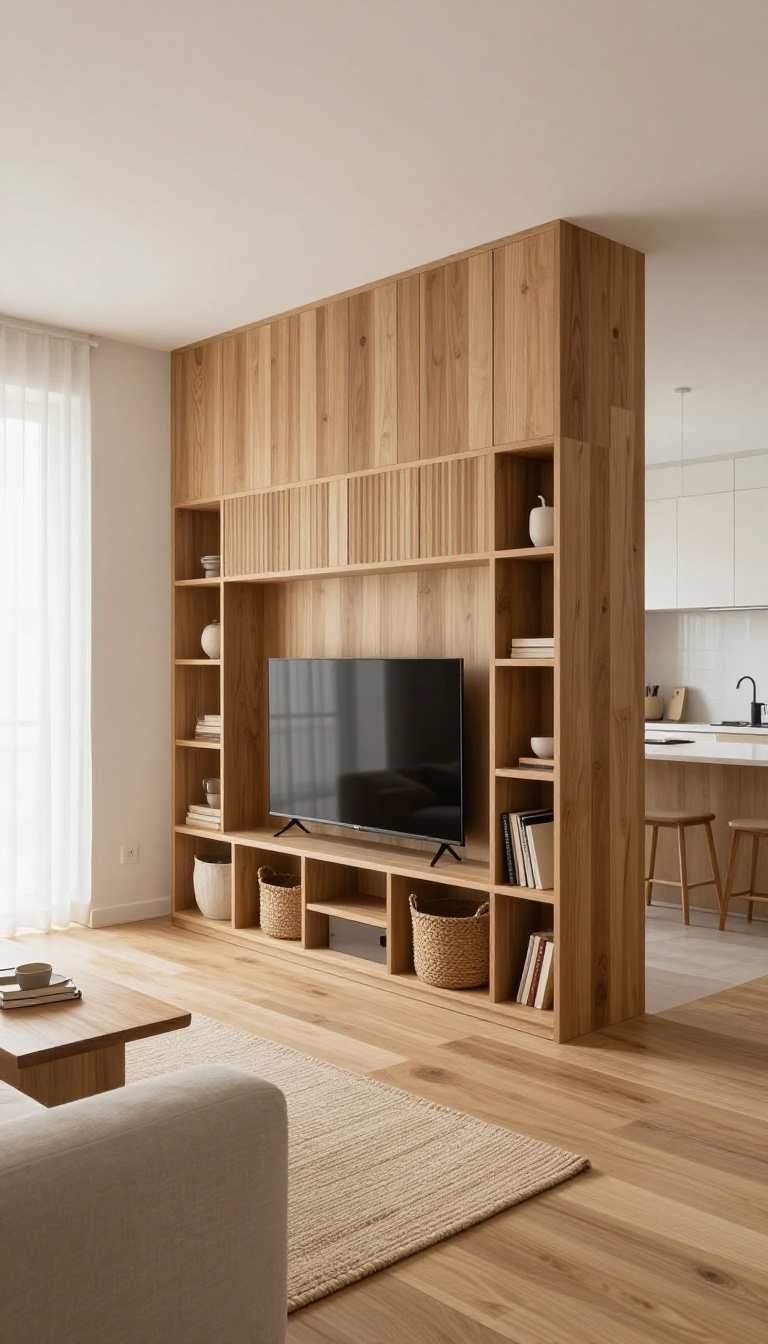
A room divider TV wall solves two problems at once: it gives your screen a proper home and splits open floor space into clear zones. Instead of letting the TV float on a blank wall, you build a partial wall or shelving unit that anchors the room. The result feels intentional, not cramped.
This works especially well in studios, long rectangles, and open-plan layouts where the living area bleeds into the kitchen or bedroom. You get storage, separation, and a focal point without adding a full wall. The trick is keeping it open enough to let light and sightlines pass through.
The idea is simple: a freestanding or semi-attached structure that holds the TV on one side and shelves or storage on the other. It can run floor to ceiling, stop at counter height, or float as a low console with a screen above. The best version matches your room's proportions and how you actually move through the space.
You do not need a contractor for every option. Some builds are as easy as two bookcases back to back with a TV mount in between. Others use slatted panels or open cubbies to keep things airy.
Pick based on how much separation you want and how much stuff you need to hide.
Pick The Right Height And Depth
A full-height divider blocks sightlines completely, which is great for privacy but can make a small room feel tight. Half-height or counter-height units keep the space open while still defining zones. Depth matters too: 12 to 16 inches holds a TV and a few boxes, while 20 inches or more gives you real storage.
Measure your walking paths before you commit.
Make Both Sides Work
The living room side should look finished, with the TV, a soundbar, and maybe a shelf for decor. The back side can be pure function: baskets, books, or closed cabinets. If the divider is open, keep the back tidy because you will see it from the other zone.
Add a finished panel or backing if you want a cleaner look.
Handle Cords And Mounting
Run cables through the divider itself or use a recessed outlet behind the TV. A swivel mount lets you angle the screen toward the sofa or the bed without moving furniture. If you rent, choose a freestanding unit you can take with you.
Anchor anything tall to the wall or floor for safety.
Keep It Light And Airy
Solid dividers can feel heavy in small rooms. Open shelving, vertical slats, or a mix of closed and open sections let light pass through. Paint the divider the same color as your walls to blend it in, or go darker for a bold statement.
Either way, leave some negative space so the room still breathes.
9. Floating Shelves as a Media Console Alternative
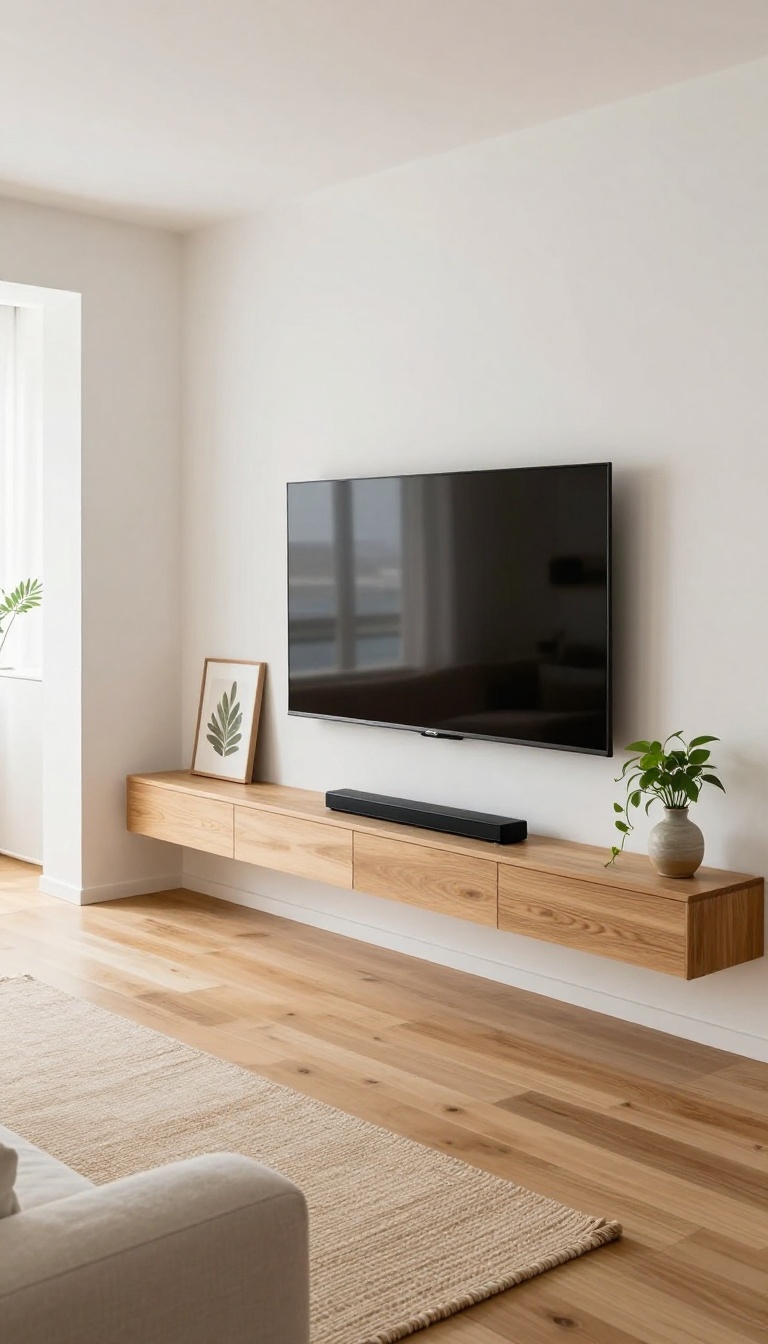
A long floating shelf can replace your media console without losing any function. It holds your soundbar, cable box, and a few decor pieces while keeping the floor completely clear. The room instantly feels bigger and less cluttered.
A long floating shelf can replace your media console without losing any function. It holds your soundbar, cable box, and a few decor pieces while keeping the floor completely clear. The room instantly feels bigger and less cluttered.
You get the same storage surface, just mounted to the wall. That means no bulky cabinet blocking the baseboard and no dust trap underneath. The wall does the work, and your floor stays open for traffic, rugs, or a robot vacuum.
Pick The Right Length And Depth
Measure your TV width and add about 12 to 18 inches on each side. That gives your soundbar room to breathe and keeps the shelf from looking stubby. For depth, 8 to 10 inches is plenty for most soundbars and small boxes.
Go deeper only if you need to fit a cable box or game console. A shelf that’s too deep starts to feel like a bulky console again.
Hide The Cables Without A Cabinet
Run cables through the wall or use a slim raceway painted to match. A small cable box can sit on the shelf, but keep it behind a framed photo or a small plant. If you have a lot of devices, add a second shorter shelf below for extra gear.
That keeps the main shelf looking clean and intentional.
Mount It Solid And Level
Floating shelves need real anchors, not just drywall plugs. Hit at least two studs, or use heavy-duty toggle bolts if studs aren’t where you need them. A level shelf matters more than you think—a slight tilt will make everything slide.
Check the weight limit and stay under it. Soundbars and small electronics are fine, but don’t load it with books.
10. DIY Floating Shelf with Hidden Bracket
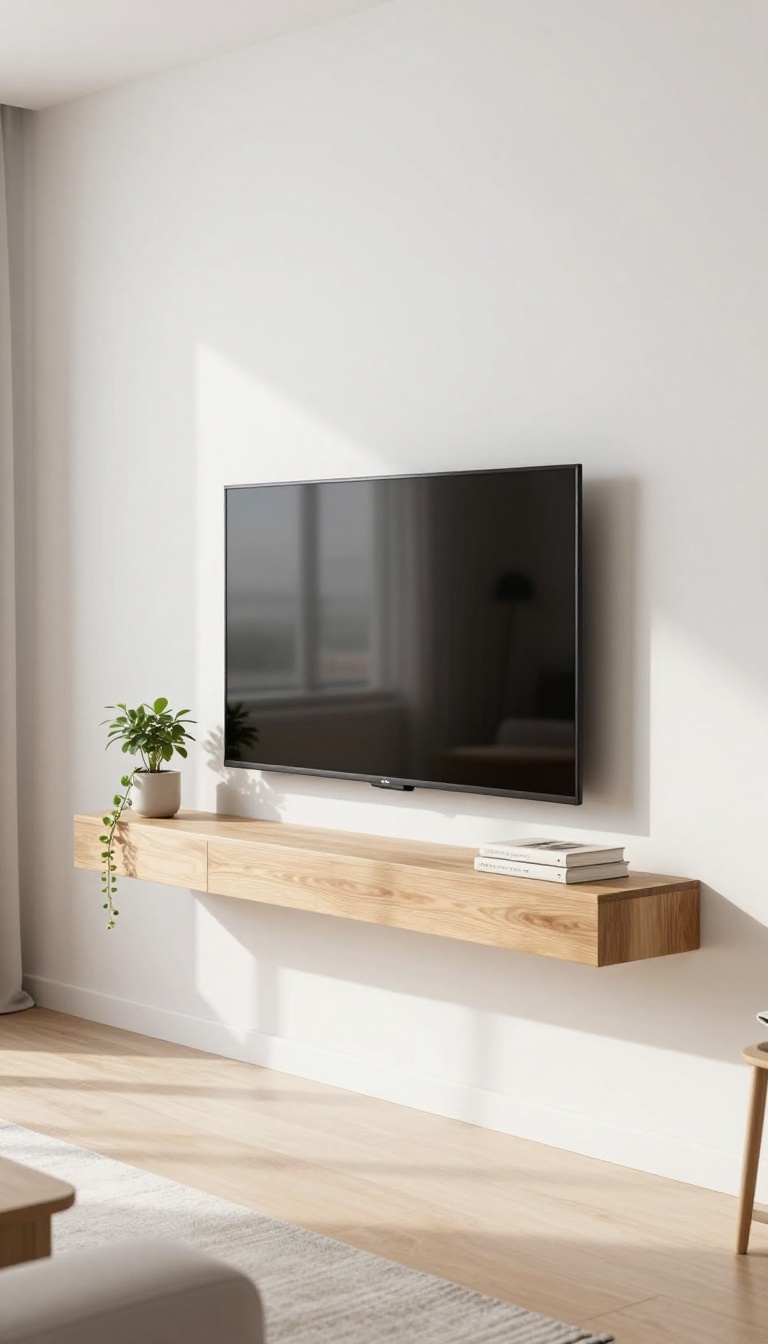
Store-bought floating shelves often come in fixed sizes that leave awkward gaps or cost more than they should. Building your own with a hidden bracket system gives you a custom fit for a fraction of the price. The bracket disappears inside the shelf, so all you see is clean wood and a floating look.
This project works for any skill level. You need basic tools, a stud finder, and a few hours. The result looks like a high-end built-in without the custom cabinet bill.
What You Need
Start with a hidden bracket kit sized for your shelf depth. Most kits include steel rods and a wall plate. You also need a drill, a level, wood screws, and a shelf board.
A 1×8 or 2×8 pine board works well and keeps costs low. Paint or stain it before you install.
Install The Bracket
Find your studs with a stud finder and mark them. Mount the wall plate to the studs using the included screws. Slide the steel rods into the plate.
Check with a level that the rods are straight. If they sag, tighten the plate screws.
Attach The Shelf
Drill holes into the back edge of your shelf board to match the rod spacing. Slide the shelf onto the rods until it sits flush against the wall. Secure it with a small set screw if your kit includes one.
Fill any gaps with paintable caulk and touch up the paint.
FAQ
How high should I mount floating shelves above a TV?
Leave at least 12 to 18 inches of space between the top of the TV and the bottom shelf to avoid a cramped look and allow for ventilation.
Can I install floating shelves on any wall?
You can, but you need to find studs or use heavy-duty anchors. For drywall without studs, use toggle bolts rated for the weight.
What's the best way to hide cables behind a floating shelf?
Run cables through the wall if possible, or use adhesive cable clips and a cable raceway painted to match the wall.
Are floating shelves strong enough to hold a TV?
No, floating shelves are not designed to hold a TV. Always mount the TV directly to the wall or on a sturdy stand.
How can I make a small living room TV wall look bigger?
Use light-colored shelves, avoid bulky furniture, and incorporate mirrors or glass elements to reflect light and create an illusion of space.
Conclusion
Transforming your TV wall doesn't have to be complicated or expensive. With floating shelves and smart storage, you can turn that blank space into a functional and stylish focal point. Pick one idea that fits your space and budget, and start small.
Even a single shelf can make a big difference in how your living room feels. Your TV wall can be both practical and beautiful—it just takes a little planning and the right approach.