10 Open Kitchen Ideas with Living Room Spaces That Flow
An open kitchen and living room can either feel like one generous, breathable space or a noisy, cluttered blur. The difference usually comes down to a handful of deliberate moves, not a full remodel. Get those right and the whole room starts working harder for you.
You don't need matching cabinets or a designer budget to pull this off. A half-wall here, a mobile island there, or lighting that separates zones without a single wall can change everything.
Some fixes cost almost nothing, and a few take an afternoon. The ten ideas ahead cover galley layouts, island bridges, two-tone cabinets, and color drenching.
1. The Galley Kitchen with a Living Room View
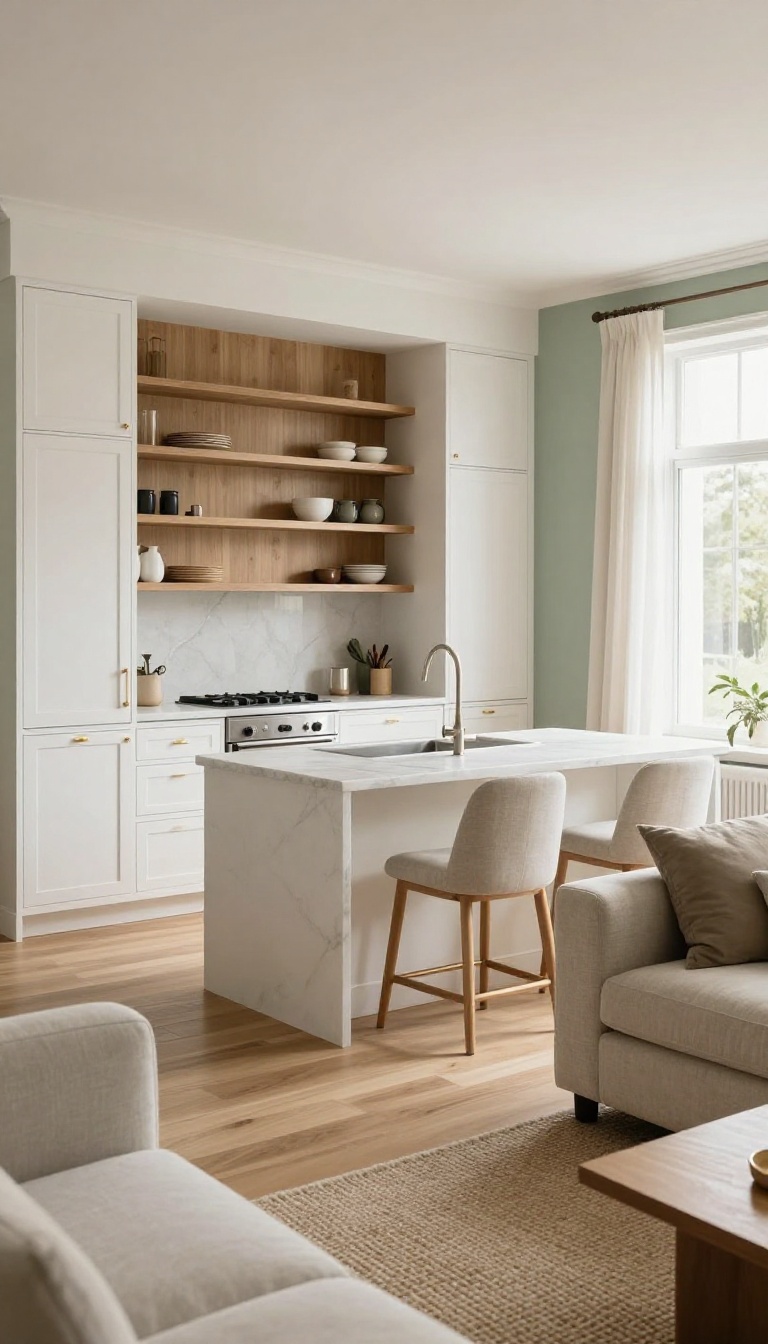
A galley kitchen usually gets a bad rap for feeling cramped and cut off. But when you tear down the wall that faces your living area, that narrow layout suddenly becomes an asset. You get a straight shot of sightlines, easy conversation with guests, and a kitchen that feels twice as wide without adding a single square foot.
The trick is to keep the working triangle tight while opening up the view. You still want your sink, stove, and fridge within a few steps of each other, but now the cook can see the couch, the TV, and whoever's walking through the front door. A peninsula with bar seating does most of the heavy lifting here.
It gives you a spot to set down groceries or serve drinks, and it marks the edge of the kitchen without putting a wall back up. You don't need to knock down every wall, either. Removing just the upper half of the wall facing the living room creates a pass-through that keeps the galley feel but adds connection.
If you can't remove any wall, a counter-height opening or a wide doorway can get you most of the way there.
Why The Galley Layout Works Better Open
Galley kitchens are efficient because everything sits in two parallel runs. Opening one side to the living room turns that efficiency into a social advantage. You're not walking around a corner to check on the game or talk to a friend.
You're right there, still in your lane. The narrow footprint also means less floor to cover, so you can splurge on nicer materials without blowing your budget. And because the kitchen doesn't sprawl, the living room keeps its own identity instead of feeling like an afterthought.
Peninsula Vs. Island In A Narrow Space
A full island usually won't fit in a true galley, and forcing one in makes both zones feel tight. A peninsula attached to one run gives you the same surface area without stealing walkway space. It also creates a natural landing spot for bar stools on the living room side.
If you want the look of an island without the bulk, try a narrow rolling cart or a slim console table. You can move it out of the way when you're cooking and pull it back when guests arrive.
Lighting And Sightlines That Keep It Open
Once the wall is gone, lighting becomes your main tool for separating zones. Pendant lights over the peninsula tell the eye where the kitchen ends and the living room begins. Recessed lights in the kitchen and a floor lamp in the living area do the same thing after dark.
Keep your sightline clear by choosing a low-profile backsplash and open shelving instead of tall upper cabinets. If you need storage, go high on the wall opposite the living room, not on the open side.
2. Island as the Bridge Between Kitchen and Lounge
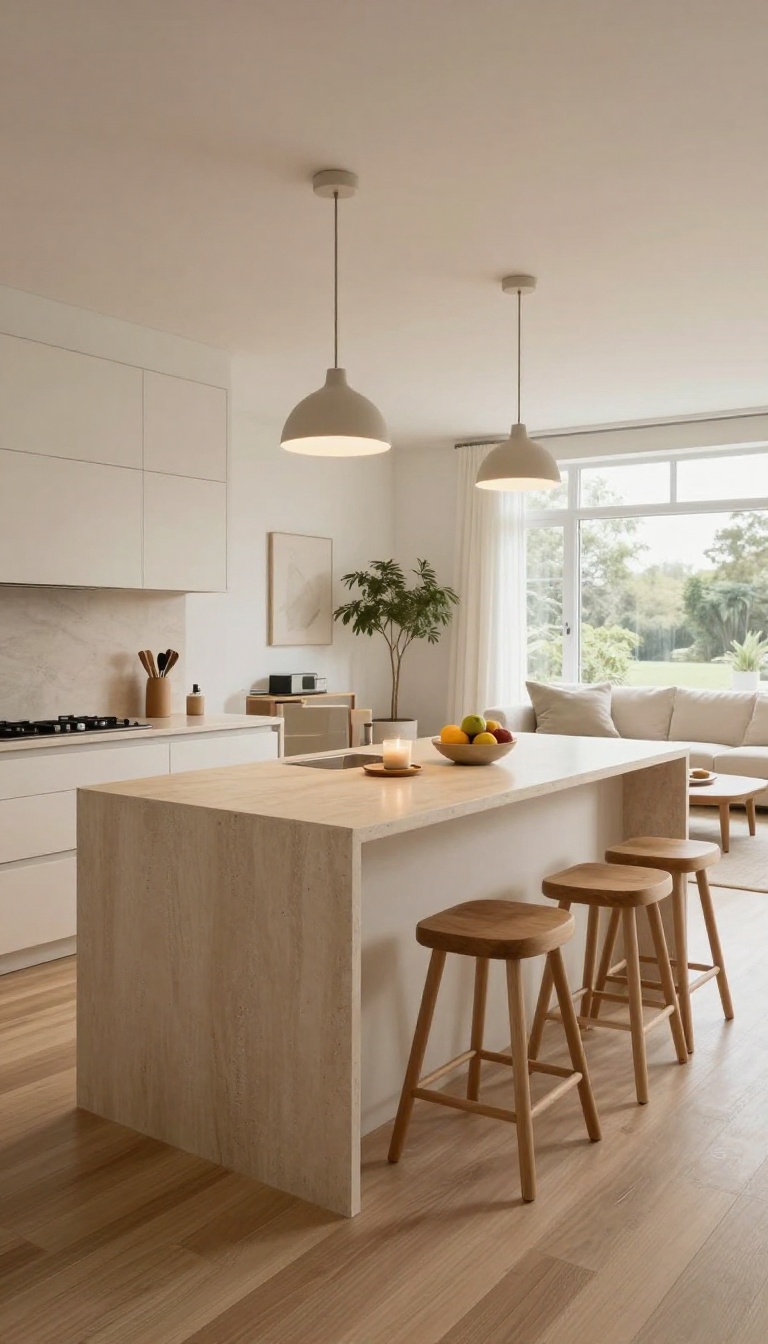
An island can do more than prep work. When you seat it on the living room side, it becomes the handshake between cooking and hanging out. The trick is keeping the top clear and using light to mark the shift.
Done right, the island feels like a natural gathering spot, not a barrier.
A big island with stools on the lounge side solves two problems at once. It gives the kitchen a clear edge without a wall, and it gives the living room a place to land. The surface should stay mostly empty.
A fruit bowl, a candle, maybe a small tray. That's it. Clutter on the island makes the whole room feel messy.
Pendant lights above the island anchor the transition. They tell your eye where the kitchen ends and the lounge begins, even when the floor is one continuous run.
Pick The Right Island Size
You want at least 36 inches of walkway on the kitchen side and 42 inches on the seating side. Anything tighter and people will bump chairs when they stand up. A 7-foot island seats three comfortably.
If your space is narrow, go with a 5-foot island and two stools. It still reads as a bridge without swallowing the room.
Seat It On The Lounge Side
Stools on the living room side let people face the cook or face the TV, depending on the mood. That flexibility is what makes the island a social hub. Choose backless stools if you want them to tuck away.
Low backs work if you want a little support without blocking sightlines.
Let Pendants Do The Dividing
Hang two or three pendants 30 to 36 inches above the island. They create a warm pool of light that separates zones without a single wall. Keep the shades simple and the bulbs warm.
You want the light to feel like a welcome mat, not a spotlight.
3. Two-Tone Cabinets for a Visual Split
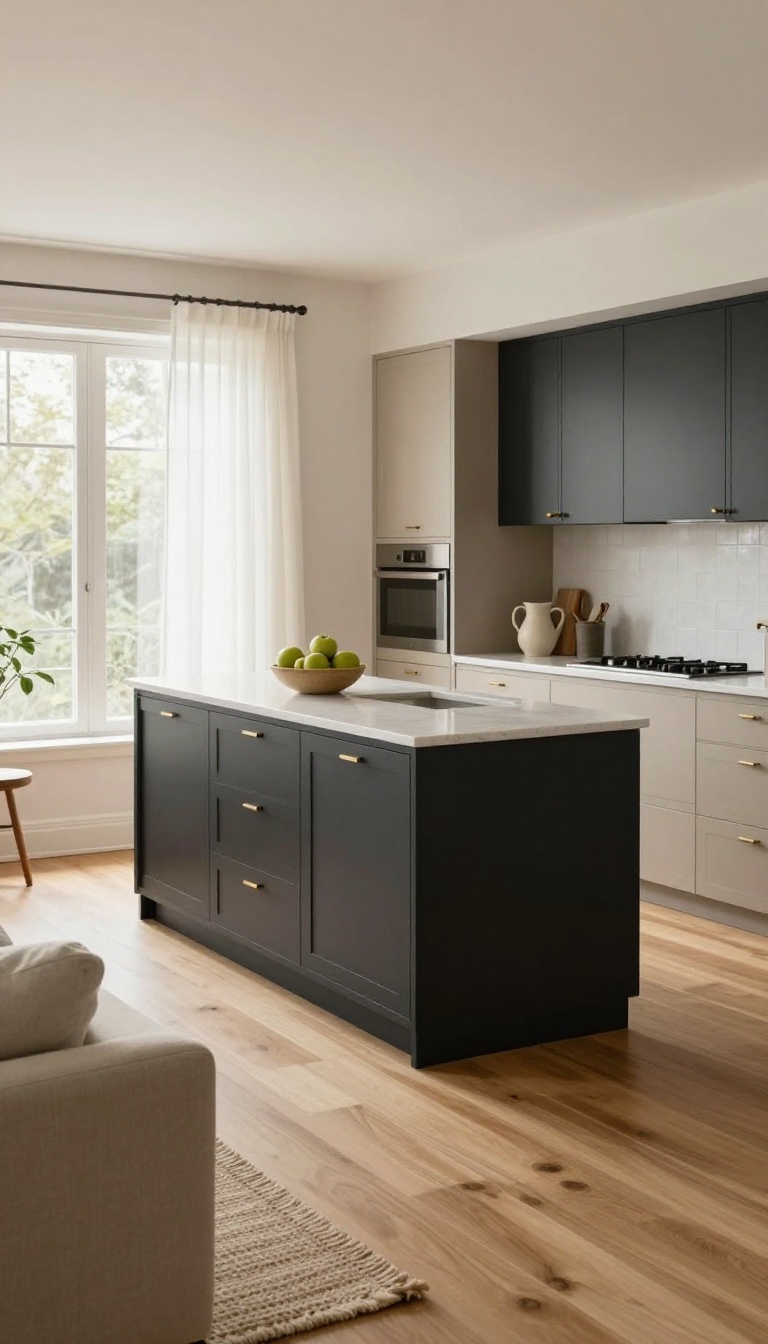
Cabinets take up a lot of visual real estate in an open kitchen, so they're a smart place to draw an invisible line between cooking and lounging. Paint the kitchen run in a deeper shade and the living-room-facing side in something lighter, and the eye reads two rooms even though the floor never changes. It's a simple trick that adds depth without adding a single wall.
The split works because dark colors pull forward and light colors recede. Your brain registers the shift as a change in zone, so you get separation without blocking sightlines or light. Best of all, it's just paint and maybe a few new doors, which means you can test the idea before committing to anything permanent.
Two-tone cabinets aren't about matching swatches perfectly. They're about giving each side of the room its own mood while keeping the same cabinet style, hardware, and countertop so the space still feels like one home. The contrast does the dividing for you.
Start with the cabinets you already have. If they're in good shape, a fresh coat of paint on both sides costs far less than replacing them. If you're buying new, order the same door profile in two finishes and let the color do the heavy lifting.
Pick Your Anchor Color First
Choose the darker shade for the kitchen side, since cooking zones benefit from a grounded, slightly moody feel. Charcoal, deep navy, forest green, and warm espresso all work well and hide splatters better than white. Then pick a lighter tone for the living room side that shares an undertone with the dark one.
A warm gray with a warm charcoal, or a soft sage with a deep green, keeps the pairing from looking accidental. Test both colors on large poster boards and tape them to the cabinets for a full day before you buy paint.
Where To Make The Switch
The cleanest split happens at a natural corner or at the end of the upper cabinet run. If your kitchen has a peninsula or island, paint the back of it in the lighter color so it faces the living room, and keep the front dark. Avoid splitting a single cabinet door down the middle.
That reads as a mistake, not a design choice. Instead, let one full cabinet box or one full wall of cabinets carry each color so the transition looks intentional.
Keep Everything Else Consistent
Let the cabinet color be the only thing that changes. Use the same hardware finish on both sides, the same countertop material, and the same backsplash so the contrast stays clean rather than chaotic. If you want a little extra separation, repeat the lighter color on the living room side in a throw pillow, rug, or shelf accessory.
That small echo ties the two zones together without making them look identical.
4. A Breakfast Bar That Doubles as a Sofa Back
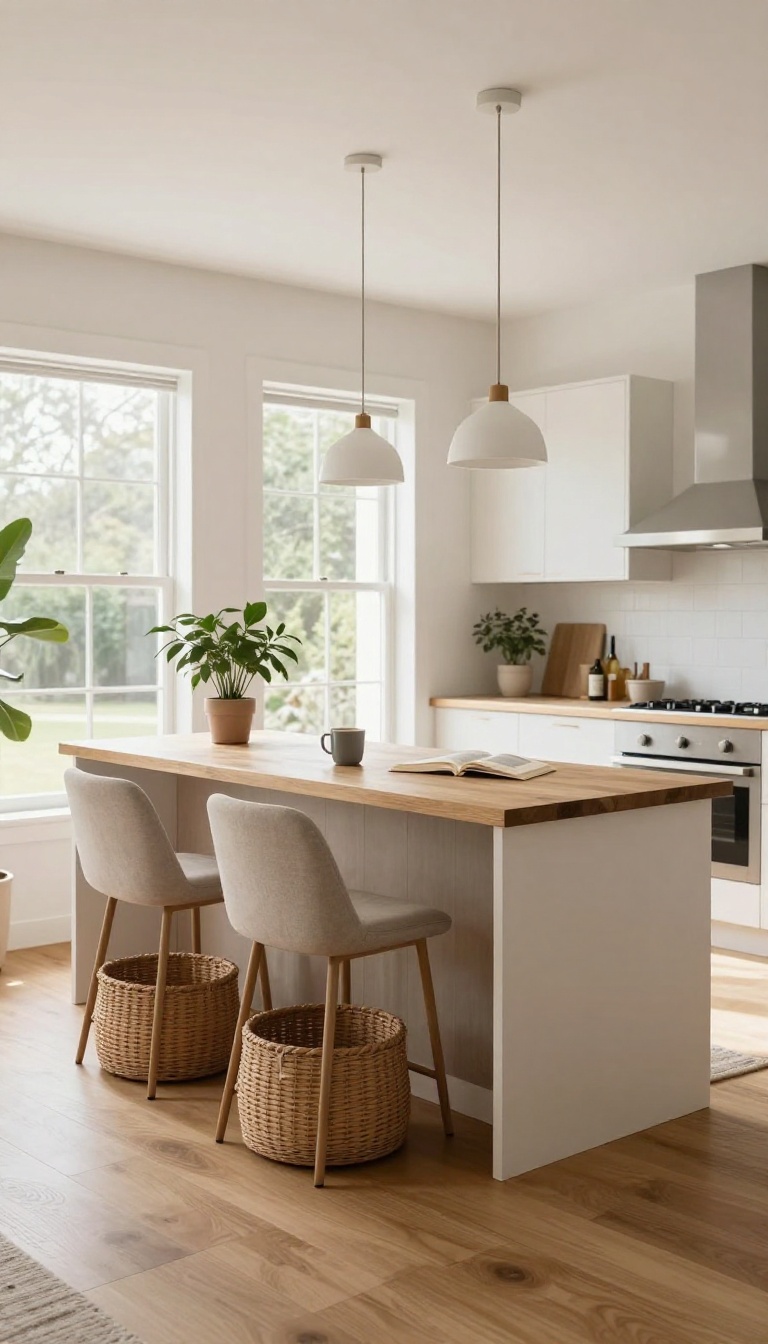
A raised bar counter tucked right behind the sofa solves two problems at once. It gives the kitchen a casual place to eat and gives the living room a solid, intentional backrest. Instead of a floating couch in the middle of nowhere, you get a cozy nook with a clear boundary.
The best part? You're not adding a wall or losing floor space.
This move works because it turns a dead zone into a functional edge. The sofa no longer faces an open void; it faces the kitchen with purpose. And the bar side becomes a natural spot for morning coffee, laptop sessions, or a quick bowl of cereal.
It's a simple build, too—just a counter-height surface with a little overhang on the sofa side.
Why It Works
A bar behind the sofa creates a visual and physical divider without blocking light or conversation. It tells your brain where the living room ends and the kitchen begins, even in a wide-open plan. And because it's counter height, it doesn't feel like a wall—it feels like furniture.
How To Build It
You can use a ready-made bar cabinet, a low bookshelf with a butcher-block top, or a custom pony wall with a stone cap. Keep the sofa-side overhang around 8 to 12 inches so you have room for a drink or a book. Add an outlet on the bar side for chargers and small appliances.
Storage And Style
The bar base is prime real estate for baskets, bar stools, or closed cabinets. Choose a finish that ties the two rooms together—wood tones for warmth, white for a clean look, or black for a modern edge. A couple of pendant lights above the bar seal the deal.
5. Open Shelving to Keep Things Airy
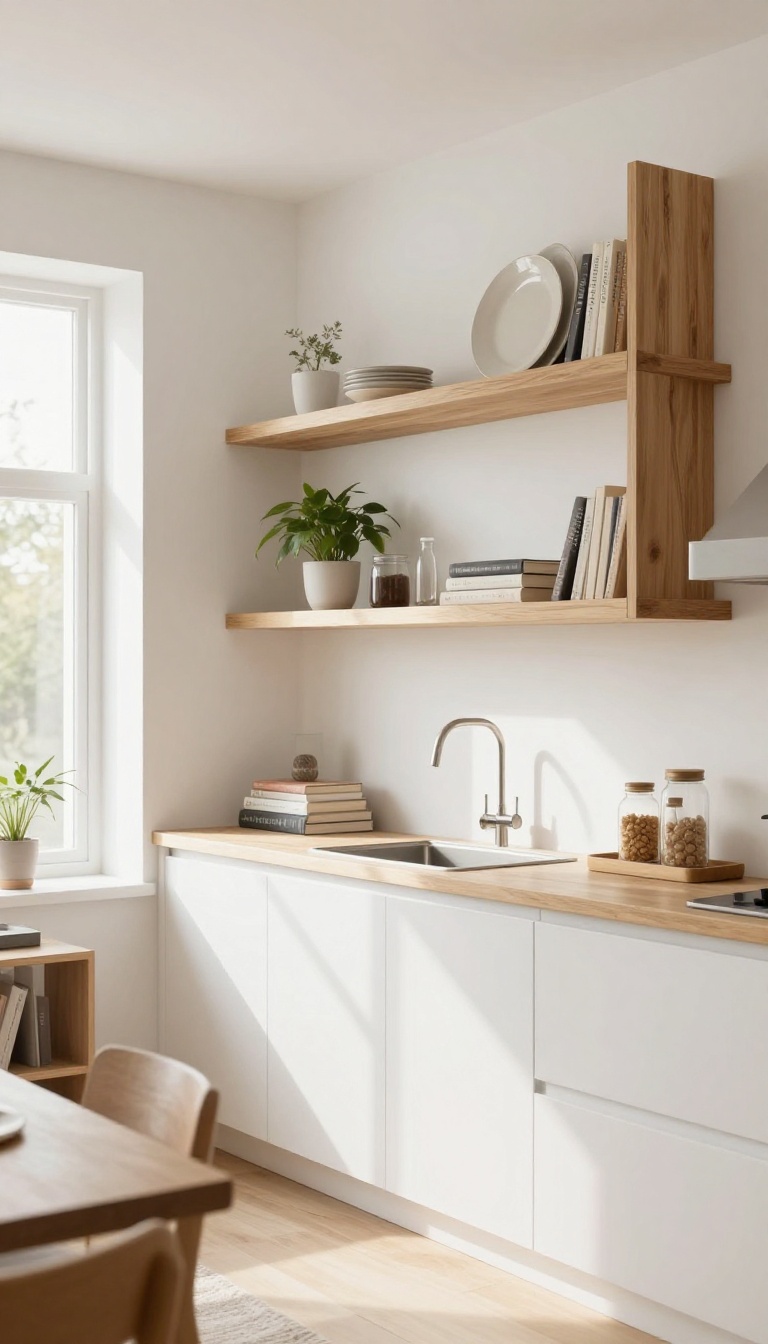
Upper cabinets can make an open kitchen feel closed off, especially on the side that faces the living room. Swap them for open shelves and suddenly the wall breathes. You get storage that doesn't block sightlines, and the room feels bigger without moving a single wall.
The trick is to treat those shelves as a display, not a dumping ground. Everyday dishes, a few plants, a stack of cookbooks—things that look good and get used. That way the kitchen stays functional while blending into the living area.
Open shelving works best when it's intentional. You're not just removing cabinet doors; you're curating what people see from the sofa. Keep it simple and you'll wonder why you didn't do it sooner.
Pick Shelves That Match The Room
Wood floating shelves warm up a white kitchen and tie into a living room's wood tones. Metal brackets feel more industrial, while glass shelves nearly disappear. Choose a style that already shows up in your living space so the two zones feel related.
Style Shelves Like A Display
Group items by color or material instead of lining everything up. Put the pretty stuff at eye level and the everyday plates lower. Leave some empty space—clutter kills the airy effect you're after.
Keep It Practical
Open shelves collect dust and grease, so only store things you use often and can wash. A quick wipe every week keeps them looking fresh. If you cook a lot, keep the messiest items behind closed doors elsewhere.
6. Matching Flooring for a Seamless Look
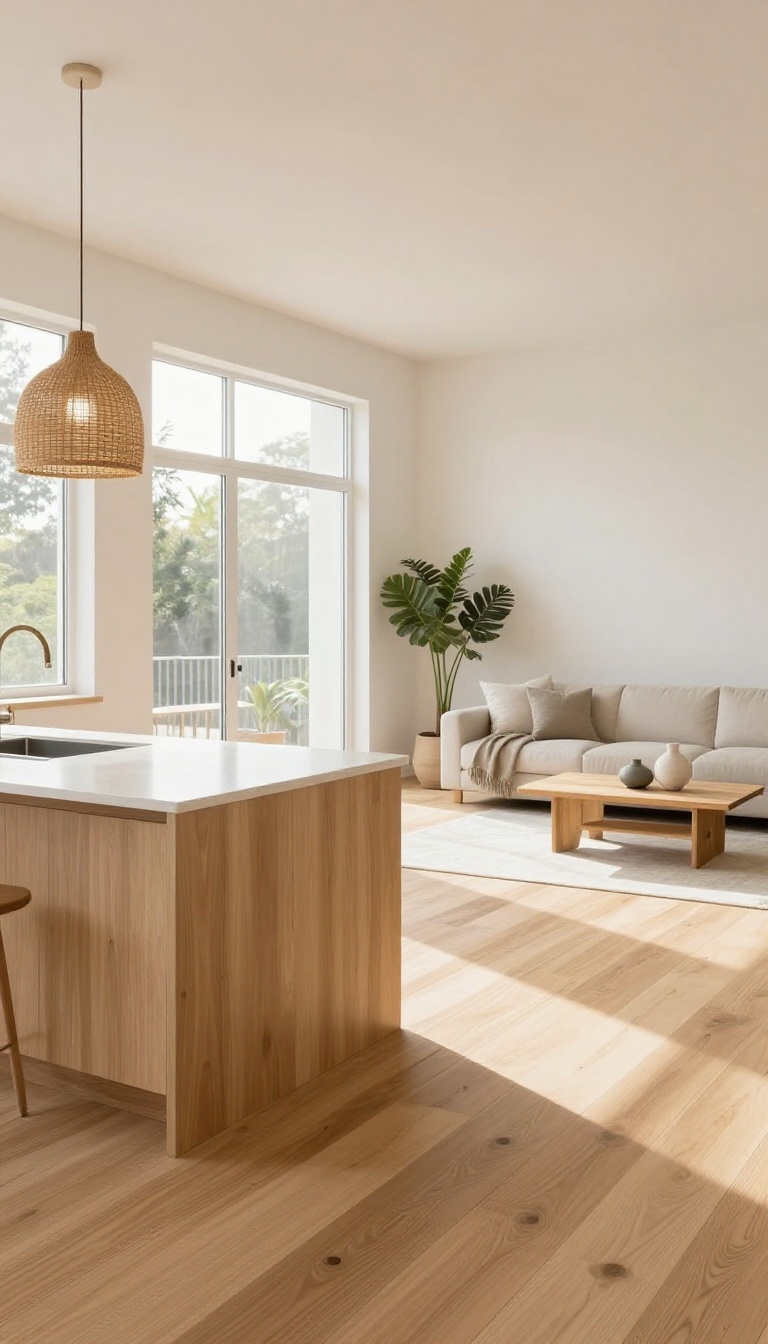
Flooring is the quietest design decision in the room, and it does more heavy lifting than almost anything else. Run one material straight through the kitchen and living area and the two spaces read as a single, larger room. Change it up, and you've built a border without a single wall.
That's the whole trick. Continuity expands, contrast divides. Neither is wrong — you just want to pick on purpose instead of letting the flooring guy pick for you.
Here's how to make either version look intentional.
The simplest version of this idea is also the most effective: pick one flooring and commit to it everywhere. Hardwood, luxury vinyl plank, large-format tile, polished concrete — the material matters less than the repetition. When the same surface runs under the island, past the sofa, and out to the hallway, your eye has nothing to stop on.
The room feels wider, calmer, and more expensive than it probably was. There's a practical bonus too. No transition strips to trip over, no thresholds collecting crumbs, and one cleaning routine for the whole floor.
If you have kids, pets, or a robot vacuum, this is the layout that just works.
When You Want A Change Anyway
Maybe you love tile in the kitchen and wood in the living room, and you're not budging. That's fine — just keep the tones close. A warm oak plank next to a warm greige tile reads as a deliberate pairing.
A cool gray tile next to honey oak reads as a mistake. Stick to the same undertone family and the transition feels like a choice, not an accident. The eye still travels, it just travels more slowly.
The Transition Strip Trick
If you do switch materials, don't leave a raw seam. A slim metal or wood transition strip gives the change a clean edge and stops the floor from looking unfinished. Keep it low-profile so it doesn't become a trip hazard or a visual speed bump.
Match the strip to the darker of the two floors, or to your cabinet hardware if you want it to disappear. It's a small detail that makes the whole thing look planned.
Same Tone, Different Finish
Another way to get separation without a hard break: use the same color family in two different finishes. Matte tile in the kitchen, satin-finished wood in the living room. Same warmth, different texture.
You get a subtle cue that the zones have changed, but the room still flows. It's the design equivalent of a whisper instead of a shout.
7. Layered Lighting for Each Zone
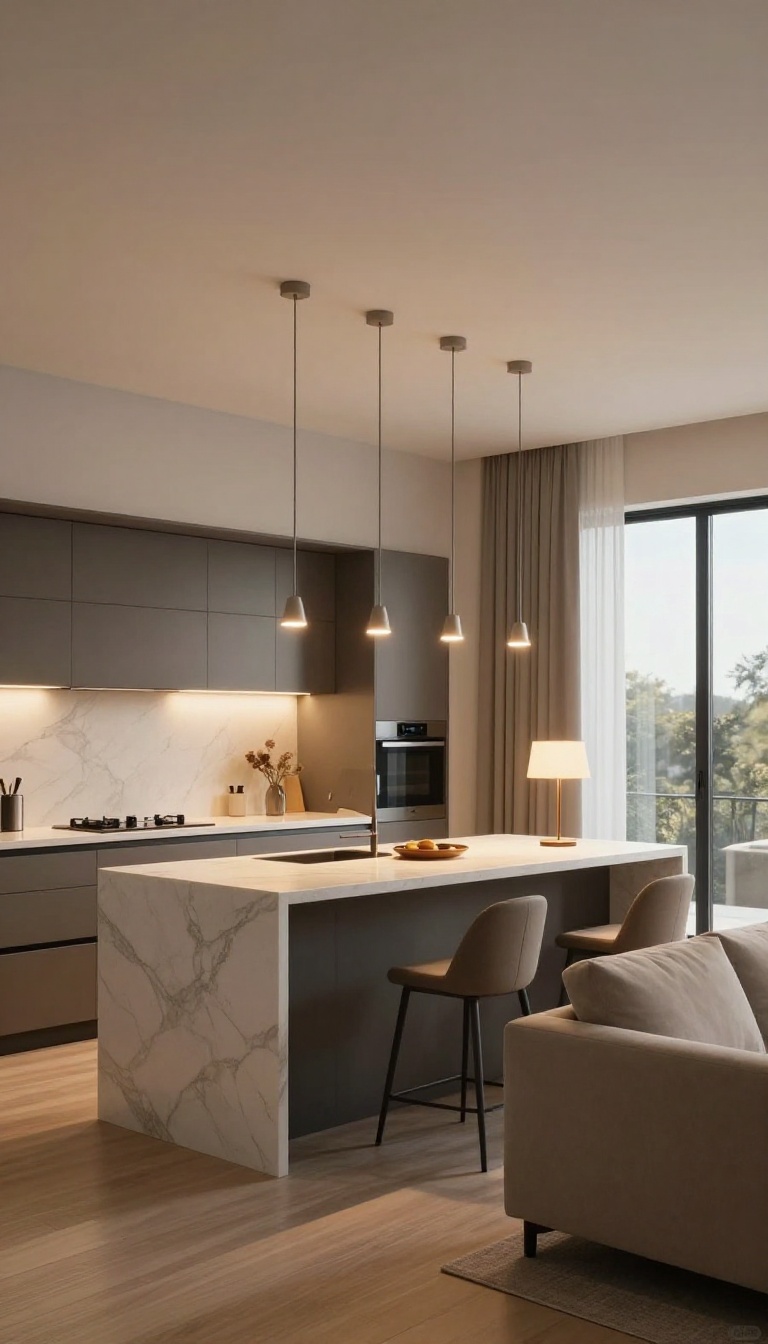
Lighting does more than brighten a room—it draws invisible lines between cooking, dining, and lounging. In an open layout, a single overhead fixture flattens everything into one big blur. Layer your light sources instead, and each zone gets its own distinct mood and purpose.
Start with a base layer of recessed lights spread evenly across the ceiling. They give you overall brightness without calling attention to themselves. Then add task and accent layers that anchor specific activities.
The goal is pools of light, not a flood.
Recessed Lights: The Even Base
Recessed cans should be your first layer, spaced about four to six feet apart. Put them on a dimmer so you can lower the overall brightness when you want a cozier feel. Avoid placing them directly over the island or sofa—that creates harsh shadows.
Instead, aim them slightly toward walls or cabinets to wash surfaces with soft light.
Pendants Over The Island
Hang two or three pendants above your island, about 30 to 36 inches from the countertop. They instantly say 'this is the kitchen zone' without a single wall. Choose a style that complements your living room fixtures but doesn't match exactly—a little contrast keeps things interesting.
Put them on their own switch so you can turn them off when you're just lounging.
A Floor Lamp Near The Sofa
A floor lamp beside the sofa creates a warm pocket of light for reading or chatting. Pick one with a shade that directs light downward and inward, not up into the room. This simple addition separates the living area from the kitchen even when the pendants are off.
It's an easy, affordable way to define the lounge zone.
8. A Half-Wall with a Built-In Bench
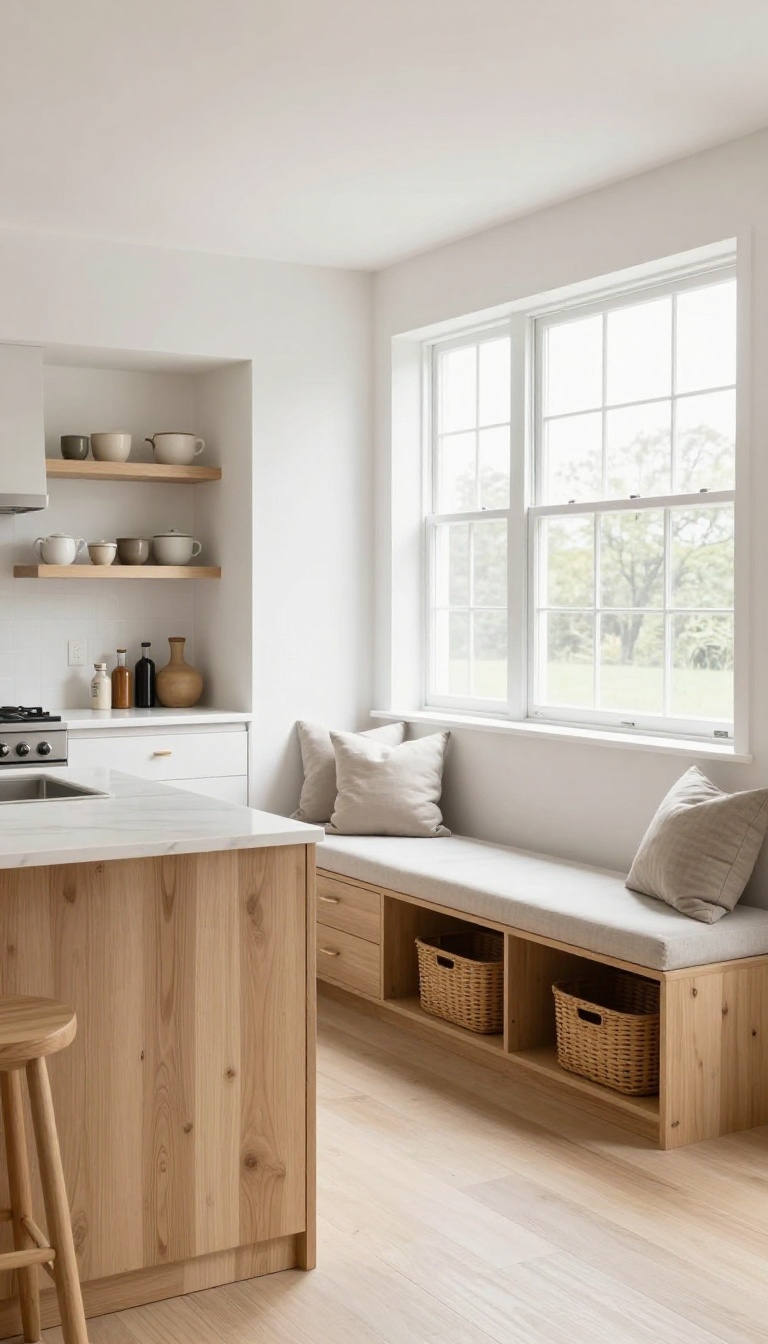
A half-wall splits the kitchen from the living room without closing either one off. The real magic happens when you add a built-in bench on the living side. Suddenly that divider earns its keep as seating, storage, and a natural gathering spot.
The wall itself only needs to be about 36 to 42 inches tall, just enough to hide lower cabinets and a countertop from the sofa. On the kitchen side, it can hold a prep surface or a row of drawers. On the living side, it becomes the backrest for a bench that runs the length of the wall.
That bench turns dead space into a place where people actually want to sit.
Why It Works
A half-wall gives you visual separation without blocking sightlines or light. The bench adds function to what would otherwise be a plain divider. You get extra seating for dinners, parties, or lazy Sunday mornings.
And because the bench sits low, the room still feels open above it.
Storage That Pulls Its Weight
Build the bench with flip-up tops or pull-out drawers, and you gain hidden storage for board games, blankets, or shoes. If the bench faces the living room, use baskets or bins underneath for easy access. On the kitchen side, the half-wall can have shallow cabinets for spices or serving pieces.
Every inch works twice as hard.
Materials And Details That Matter
Cap the half-wall with a durable countertop material that matches the kitchen, like quartz or butcher block. For the bench, choose a wipeable fabric or leather cushion that can handle spills. Add a few throw pillows for comfort, but keep them easy to move.
A slim outlet on the living side lets you plug in a lamp or charge a phone.
Sizing It Right
Leave at least 36 inches of walkway between the bench and any furniture behind it. The bench depth should be around 18 to 20 inches for comfortable sitting. Keep the half-wall height below eye level when you're standing in the kitchen, so you can still chat with people in the living room.
Test the layout with painter's tape before you commit.
9. The One-Wall Kitchen with a Mobile Island
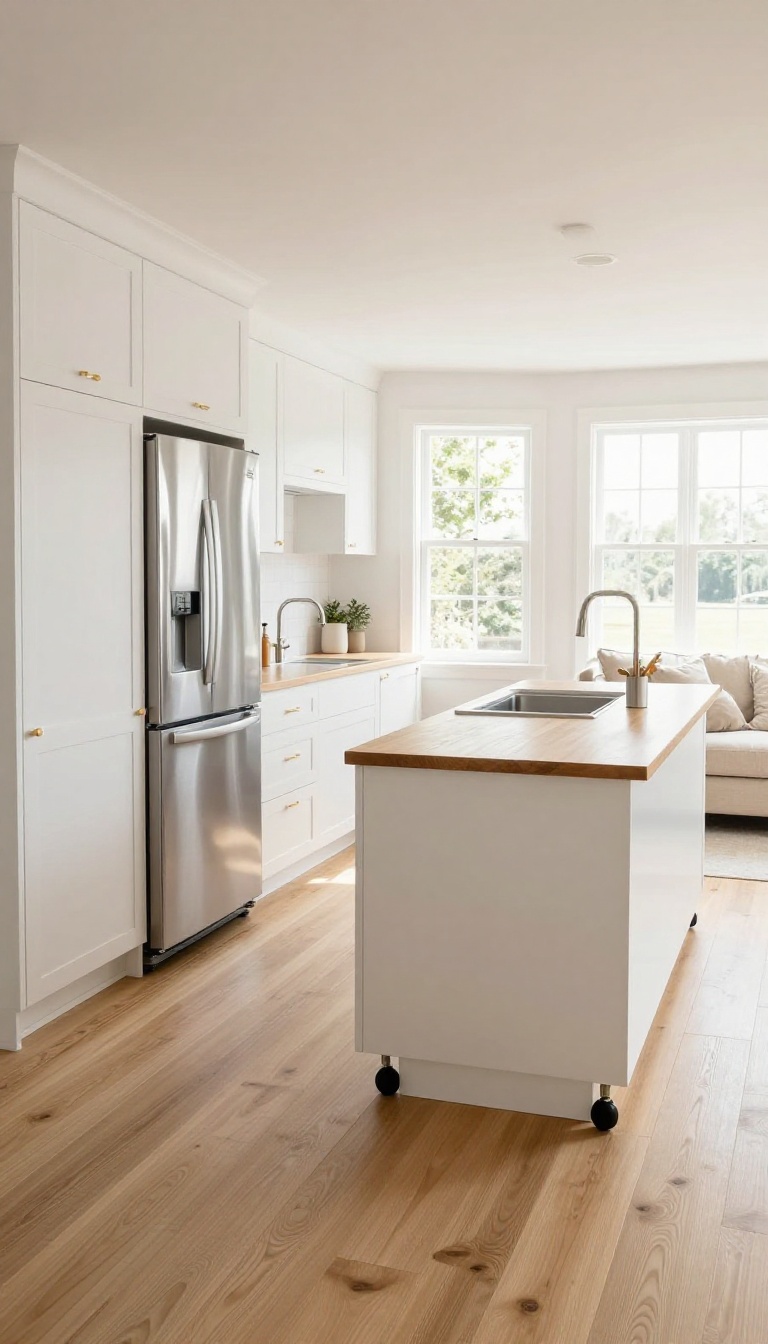
Tight floor plans don't have to mean giving up an open feel. When square footage is limited, lining everything up along a single wall keeps the kitchen from spilling into the living area. A rolling island adds workspace and storage on demand, then disappears when you need the room to breathe.
It's a simple swap that makes a small footprint feel twice as flexible.
The one-wall kitchen—sometimes called a single-wall or pullman layout—puts your fridge, sink, and stove in a straight line. That leaves the rest of the room open for living. But without an island, prep space gets cramped fast.
A mobile island solves that by giving you a surface that shows up when you're cooking and slides out of the way when you're not. The trick is picking the right one and using it smartly.
Pick A Cart That Actually Rolls
Look for locking casters and a narrow profile—around 24 to 30 inches deep. A butcher-block top gives you a sturdy prep surface, and shelves or drawers below hold utensils, cutting boards, or a small appliance. Avoid heavy marble or stone tops; they make the cart hard to move.
If you can, test the wheels on your flooring before buying. Hardwood and tile are easy; thick carpet is not.
Park It Where You Need It
During meal prep, pull the island parallel to the kitchen wall. That creates a tight work triangle without blocking traffic. When you're done, roll it against the wall or tuck it beside the sofa as a slim console.
Some people even use it as a temporary dining table for two. The key is keeping a clear path between the kitchen and living room at all times.
Keep The Wall Itself Uncluttered
Since everything lives on one wall, visual clutter builds fast. Choose a single finish for cabinets and use closed storage instead of open shelves. A slim, low-profile hood keeps sightlines open.
If you have upper cabinets, stop them a foot below the ceiling to avoid a heavy look. And leave at least one open counter section for the mobile island to dock into.
10. Color Drenching for a Cohesive Feel
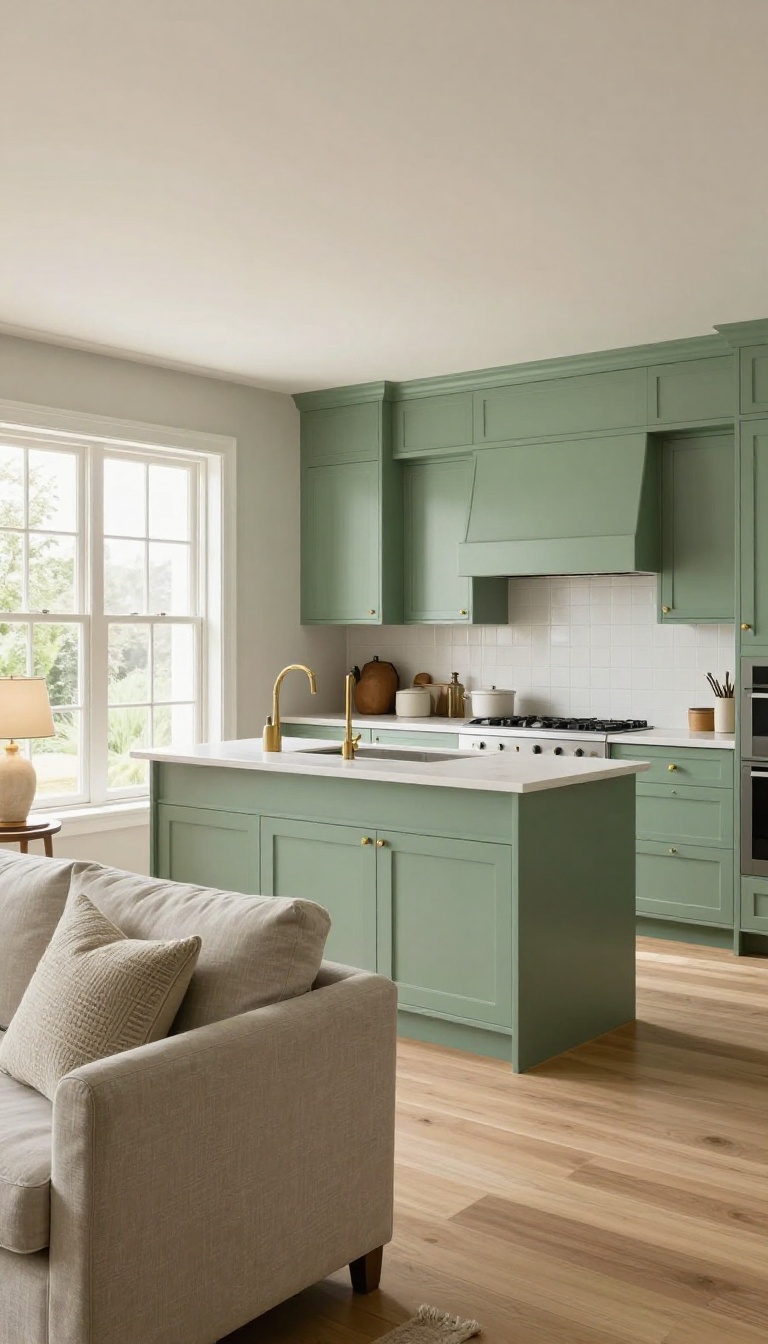
Color drenching means painting everything—walls, trim, ceiling, and even cabinets—in the same color. When you apply that to an open kitchen and living room, the boundary between the two spaces softens. It's a bold move that makes the whole area feel intentional and larger.
Most open-plan homes use color to separate zones: white cabinets here, a gray accent wall there. That works, but it also creates visual stops that remind you where one room ends and another begins. Color drenching removes those stops.
By wrapping the kitchen and living room in one hue, your eye travels without interruption, and the space reads as a single, generous volume. It's especially effective in smaller homes where every foot counts. The trick is picking a color that works in both task lighting and relaxed evening light, then committing fully.
Pick A Hue That Works Everywhere
Not every color drenches well. You want something that feels calm in the kitchen but cozy in the living room. Soft greens, warm grays, and muted blues are safe bets.
Avoid stark whites—they can look clinical when overused—and very dark shades unless the room gets tons of natural light. Test the color on a cabinet door and a wall section. Check it at noon and again at night with lamps on.
If it still feels good, you're ready.
Don't Forget The Fifth Wall
The ceiling is the most overlooked surface in color drenching. Painting it the same shade as the walls and cabinets makes the room feel taller and more enveloping. It also hides the visual line where wall meets ceiling, which is exactly what you want in an open plan.
Use a flat or matte finish on the ceiling to avoid glare. In kitchens, a satin or semi-gloss on cabinets keeps them wipeable without breaking the monochrome look.
Break It Up With Texture, Not Color
When everything is one color, texture becomes your best friend. Add a chunky knit throw on the sofa, a woven jute rug under the dining table, or leather bar stools with visible grain. These variations keep the space from feeling flat without introducing new hues.
You can also mix metals—brushed brass hardware on cabinets, a matte black faucet—as long as the finish family stays consistent. The goal is depth, not distraction.
FAQ
What is the best way to separate an open kitchen from a living room?
Use furniture like a sofa back or island, change flooring materials, or add a half-wall. You can also use rugs and lighting to define zones without blocking sightlines.
How do I keep kitchen noise and smells out of the living room?
Install a powerful range hood and consider a ceiling-mounted air purifier. Soft furnishings like rugs and curtains can help absorb sound.
Can I have an open kitchen if I love to cook strong-smelling food?
Yes, but invest in a high-CFM range hood and ventilate well. You can also use a portable induction cooktop for strong odors and keep the main kitchen for lighter cooking.
What flooring works best for an open kitchen and living room?
Hardwood, luxury vinyl plank, or large-format tile are all good choices. They're durable, easy to clean, and come in styles that suit both areas.
How can I make a small open kitchen and living room feel bigger?
Use light colors, keep counters clear, and choose multi-functional furniture. Mirrors and glass backsplashes can also reflect light and create an illusion of space.
Conclusion
The payoff of an open kitchen and living room is real: better light, easier hosting, and a space that finally works the way you actually live. You do not need to knock down every wall or buy all new furniture to get there. Pick one idea that solves your biggest headache, whether that is a cluttered island, a dark corner, or a dining table nobody uses.
Live with that change for a week, then layer in the next one. Two or three moves done well will always beat a rushed weekend of shopping.