15 Undersink Drawer Kitchen Organization Ideas for Easy Pull-Out Storage
You bend down, open the cabinet under the sink, and a bottle of cleaner topples out. It's a dark, cramped space where things go to disappear. But with a few pull-out drawer solutions, that chaos can become some of the most functional storage in your kitchen.
Pull-out drawers turn dead space into easy-access zones. No more digging through piles of sponges or playing Tetris with spray bottles. These 15 ideas will help you reclaim that cabinet and make your morning routine smoother.
Whether you rent or own, there's a solution here for every budget and skill level. Let's dive into the best ways to organize under the sink with drawers that slide right out.
1. Sliding Wire Baskets for Quick Access
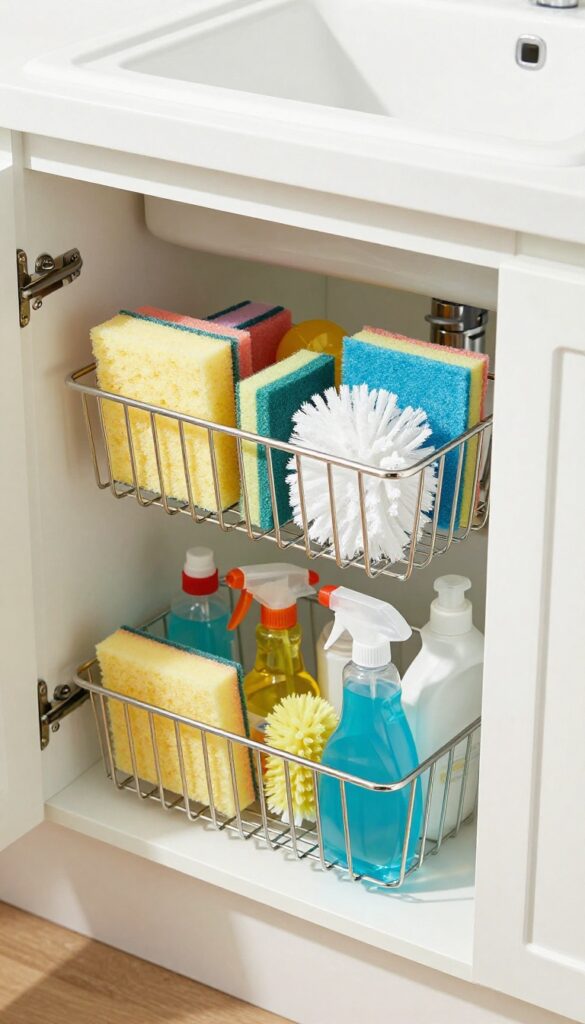
Wire baskets mounted on drawer slides turn your under-sink cabinet into a pull-out pantry for cleaning supplies. They let you see everything at a glance and grab what you need without bending or digging. Plus, the open design allows air to circulate, which helps prevent mildew and odors.
Start by measuring your cabinet's width, depth, and height. Standard wire baskets come in sizes that fit most single or double sink cabinets. Mount the slides on the cabinet floor or sides, then attach the baskets.
Use them for sponges, scrub brushes, small spray bottles, and even dish soap. The baskets keep items upright and visible, so you never lose a bottle again.
Choosing The Right Baskets
Look for coated wire baskets to avoid rust. Stainless steel is best, but epoxy-coated works well too. Make sure the basket depth allows clearance for the sink trap.
Measure the trap location and choose baskets that slide around it or use a cutout.
Installation Tips
Use a level to ensure slides are parallel. Pre-drill holes for screws to avoid splitting particleboard cabinets. If you have a double sink, consider two narrow baskets side by side.
For deep cabinets, stack two baskets on separate slides for double the storage.
What To Store
Keep everyday items like dish soap, scrub brushes, and sponges in the front basket. Use the back for backup supplies like extra sponges, gloves, or small cleaning tablets. Avoid heavy bottles that could tip the basket.
2. Tiered Pull-Out Trays for Bottles
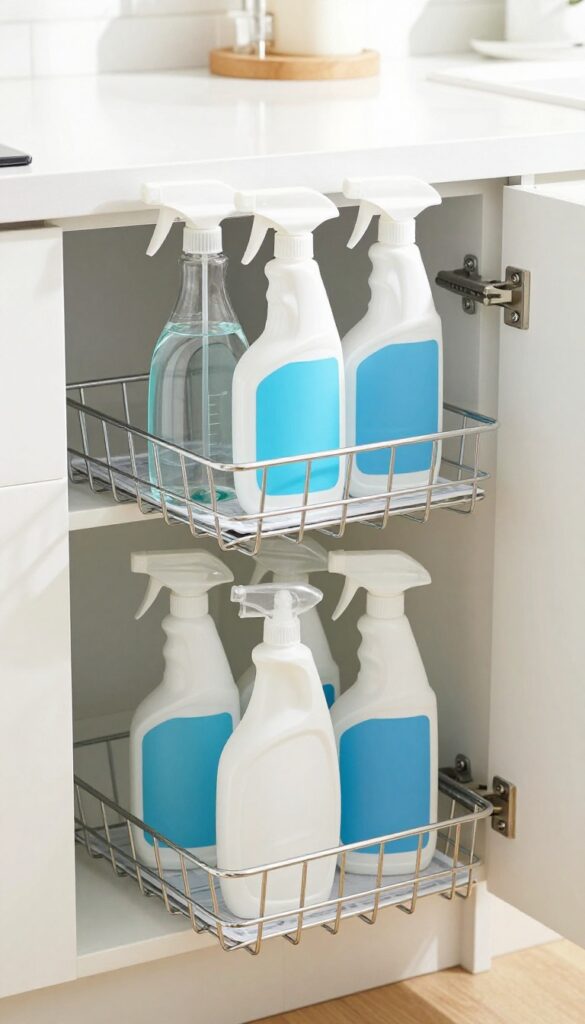
Tall spray bottles are the worst offenders under the sink. They tip over, block everything else, and make you wrestle with the cabinet every time you need a quick spritz. A tiered pull-out tray system solves that by giving each bottle its own dedicated spot, upright and easy to grab.
A two-tier sliding tray system keeps tall spray bottles upright and accessible. The top tier holds everyday cleaners, while the bottom stores backups or larger containers. This setup makes the most of vertical space and eliminates the dreaded bottle domino effect.
Why Two Tiers Work Best
One deep drawer might seem enough, but it still requires stacking. Two shallow tiers let you see everything at a glance. The top tier is your go-to for daily use—glass cleaner, all-purpose spray, disinfectant.
The bottom tier holds refills, floor cleaner, or that specialty polish you only use once a month.
Measuring And Installing
Measure the height of your tallest bottle first. Most under-sink cabinets have enough vertical clearance for two tiers if you keep bottles under 12 inches. Buy pre-made sliding wire baskets or build your own with wood and full-extension slides.
Attach the slides to the cabinet sides, not the bottom, so the trays slide smoothly even with weight.
Keeping Bottles From Tipping
Add non-slip shelf liners or small adhesive bumpers to each tray. For extra stability, install a thin wooden or metal rail along the back edge of each tier. That little lip stops bottles from sliding off when you pull the tray out quickly.
3. Custom Cutlery Inserts for Cleaning Tools
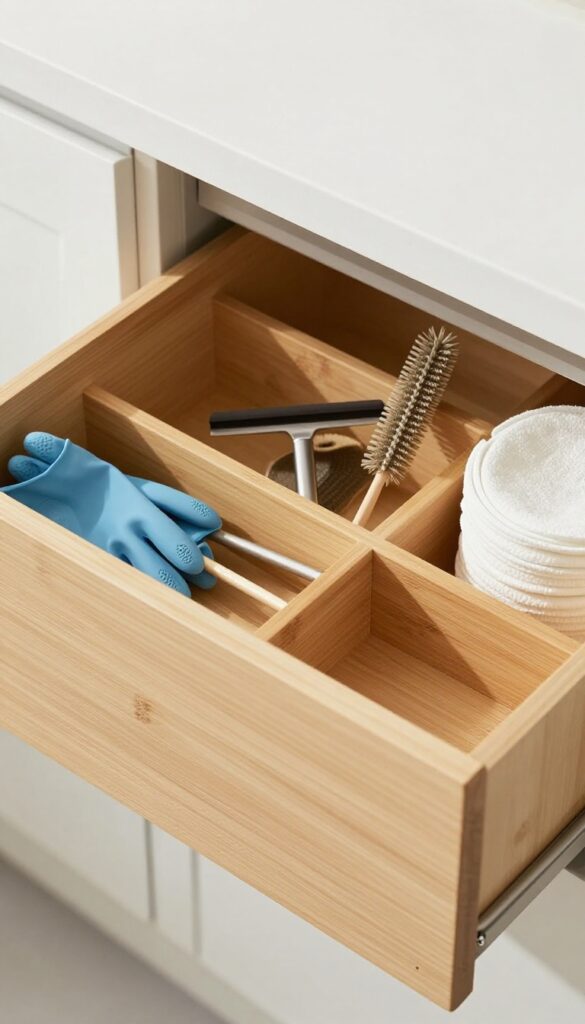
A bamboo cutlery organizer isn't just for forks and knives. Drop one into your undersink drawer and watch it transform into a dedicated station for brushes, gloves, and small tools. The divided slots keep everything upright and separated, so you can grab a scrub brush without knocking over the spray bottle.
This trick works best in a shallow drawer (3 to 4 inches deep) that sits right under the sink. If you don't have a drawer, you can mount a pull-out tray and place the organizer on top. The key is choosing an insert with adjustable dividers or multiple compartments to fit your specific tools.
Choosing The Right Organizer
Look for a bamboo or plastic cutlery tray that's at least 12 inches wide. Avoid metal ones that can rust in damp conditions. Measure your drawer depth first—most standard cutlery inserts are about 2 inches deep, which leaves room for taller items like spray nozzles.
What To Store Where
Use the long compartment for bottle brushes and narrow tools. The square sections are perfect for rubber gloves, scrub pads, and a small squeegee. Keep a dedicated slot for a microfiber cloth you can grab for quick counter wipes.
Keeping It Clean
Line the bottom of the organizer with a silicone mat or a thin towel to catch drips. Every few weeks, pull out the tray and rinse it in the sink. Bamboo needs to dry thoroughly to prevent mold, so make sure your drawer has some airflow.
4. Pull-Out Trash and Recycling Bins
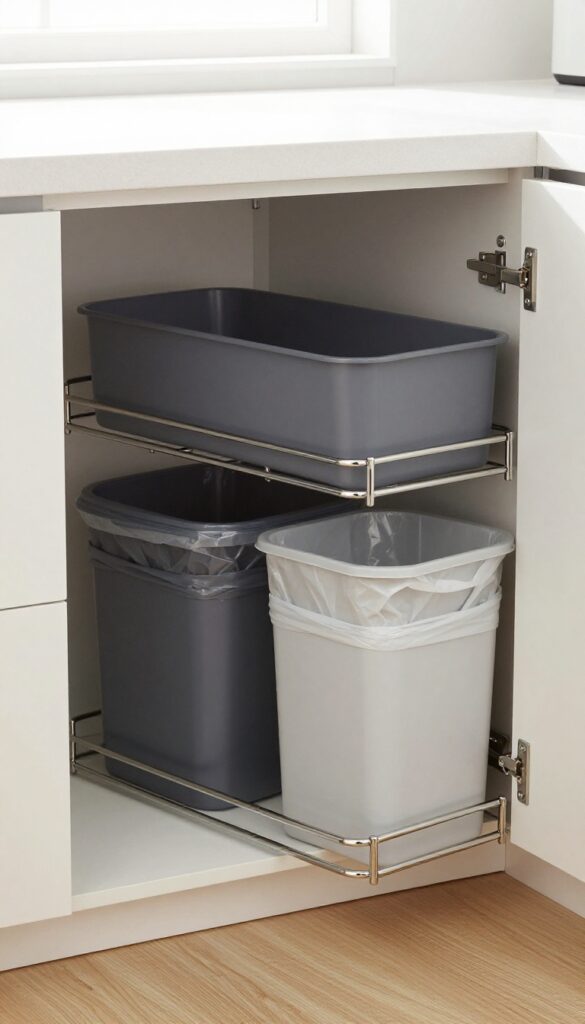
Trash cans under the sink often get shoved to the back, making you stretch and fumble with bags. A pull-out system changes that entirely. By mounting two bins on a sliding frame, you keep waste hidden but within easy reach.
Plus, the bins lift out for quick cleaning—no more scrubbing around a fixed can.
A pull-out trash and recycling setup is one of the most practical upgrades for an under-sink cabinet. It keeps smells contained, frees up floor space, and makes taking out the trash a one-handed operation. The key is choosing bins that fit your cabinet depth and a slide mechanism that glides smoothly even when fully loaded.
Choosing The Right Bin Size
Measure your cabinet width and depth before buying. Standard under-sink cabinets are about 15–18 inches deep, so look for bins around 10–12 inches wide each. Rectangular bins maximize space better than round ones.
Some kits come with adjustable dividers so you can customize the layout for your specific cabinet.
Installation Tips For A Smooth Slide
Most pull-out trash systems use full-extension drawer slides rated for at least 50 pounds. Mount the slides to the cabinet floor or side walls, making sure they're level. Attach the bin frame to the slides, then drop the bins in.
Test the movement before loading—if it sticks, adjust the slide alignment slightly.
Keeping It Clean And Odor-free
Line each bin with a bag that fits snugly—no sagging. Use a small trash can deodorizer or a baking soda pouch at the bottom to absorb smells. Once a week, remove the bins and wipe down the frame and cabinet floor with a disinfectant.
The removable bins make this chore quick and thorough.
5. Under-Sink Drawer with a Cutout for Pipes
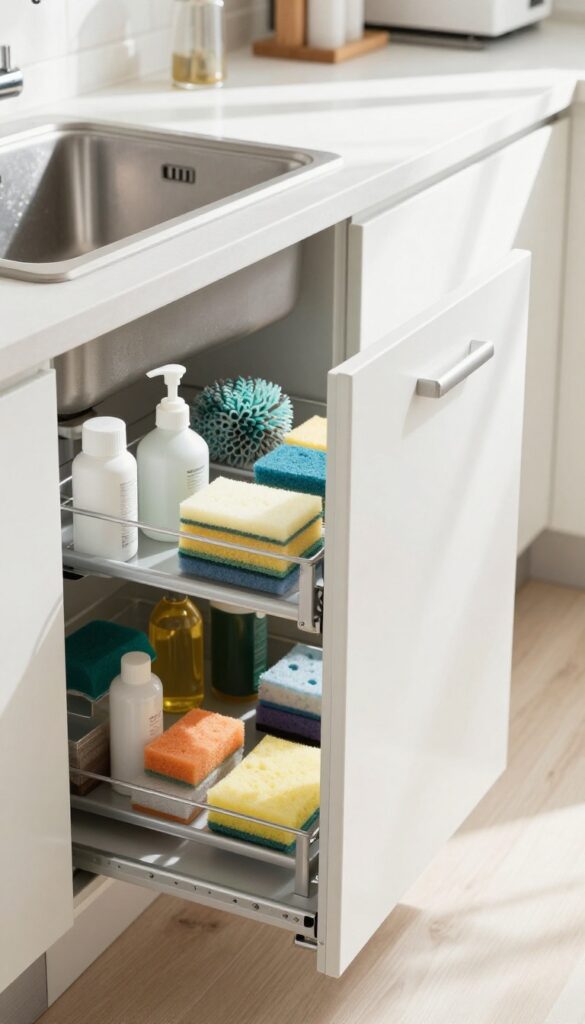
Plumbing takes up a lot of room under the sink, but you can work around it. A custom drawer with a cutout for pipes fits right into the awkward space, giving you a smooth pull-out tray that doesn't bump into anything. It's a smart way to turn a frustrating corner into organized storage.
Building a drawer around pipes might sound tricky, but it's actually straightforward. You measure the pipe locations, cut notches in the drawer front and back, and install slides that clear the plumbing. The result is a shallow drawer that glides out easily, perfect for sponges, scrub brushes, and small bottles.
You can even add a removable liner for easy cleaning.
Measuring And Cutting The Notch
Start by measuring the exact position and diameter of your pipes. Transfer those measurements to the drawer box, then cut a U-shaped or rectangular notch. Use a jigsaw for clean cuts, and sand the edges smooth.
Test-fit the drawer before installing slides to ensure it slides without catching.
Choosing The Right Slides
Standard side-mount slides may interfere with pipes, so consider undermount slides or heavy-duty bottom-mount slides. They keep the drawer stable and allow full extension. Make sure the slides are rated for the weight of your cleaning supplies.
Finishing Touches
Paint or seal the drawer to protect against moisture. Add a handle or a cutout pull for easy opening. A shallow drawer works best—deep drawers may hit the trap.
Keep it around 3-4 inches deep for maximum clearance.
6. Magnetic Strips for Metal Tools
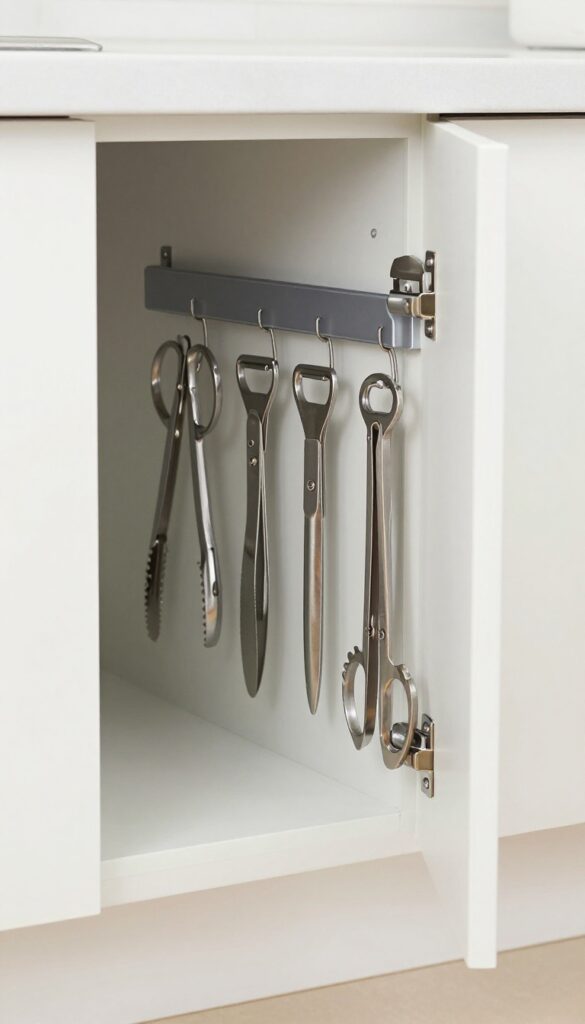
Metal kitchen tools have a way of cluttering drawers and tangling together. A magnetic strip tucked under the sink changes that entirely. It keeps scissors, tongs, and bottle openers visible and within reach without taking up any drawer space.
Magnetic strips are a clever, low-cost solution for small metal items that often get lost in the shuffle. By mounting one inside the cabinet door or on a pull-out panel, you instantly free up drawer space and make these tools easy to grab. This works especially well for items you use daily but don't need in bulk, like a good pair of kitchen shears or a wine key.
Plus, it keeps sharp objects safely out of the way of little hands.
Where To Mount The Strip
The inside of the cabinet door is the most popular spot because it's easy to reach when you open the door. If your cabinet has a pull-out drawer or panel, attaching the strip to the side or front of that panel works great too. Just make sure the strip is level and securely fastened with strong adhesive or screws, especially if you plan to hold heavier items.
What To Store On It
Stick to metal tools that you use regularly under the sink: kitchen scissors, tongs, bottle openers, vegetable peelers, and even small measuring spoons. Avoid storing knives or anything that could be dangerous if it falls off. Also, keep the strip away from water sources to prevent rust, though most stainless steel tools are fine.
Installation Tips
Most magnetic strips come with adhesive backing, but for a more permanent hold, use screws. Measure the strip's length and position it so it doesn't interfere with the cabinet closure. If your cabinet door is thin, opt for a low-profile strip.
Clean the surface with rubbing alcohol before mounting to ensure a strong bond.
7. Pull-Out Pegboard for Hanging Supplies
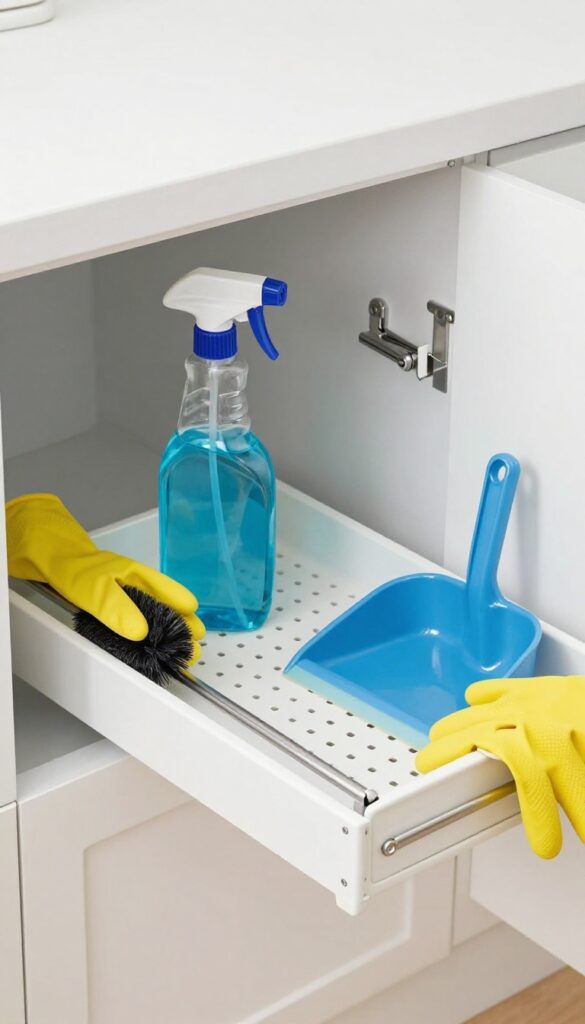
Spray bottles, brushes, and gloves often end up in a jumble under the sink. A pull-out pegboard gives each item a dedicated spot that's easy to see and grab. Mount a small pegboard on a sliding frame, and you can rearrange the pegs as your needs change.
A pull-out pegboard turns wasted vertical space into a flexible storage wall. It keeps frequently used items within reach and prevents them from tipping over. Plus, you can customize the layout without any tools.
How To Build It
Start with a piece of pegboard cut to fit your cabinet's width and depth. Attach it to a simple drawer slide mechanism or use a pre-made pull-out base. Secure the pegboard to the sliding frame with screws or brackets, making sure it's stable when fully extended.
What To Hang
Use pegboard hooks and baskets to hang spray bottles, scrub brushes, gloves, and small dustpans. For taller items, choose longer hooks or add a small shelf. You can also attach a small bin for sponges or steel wool.
Tips For Success
Measure your cabinet carefully, accounting for plumbing pipes. Use a waterproof pegboard or seal it with polyurethane to protect against moisture. Install the slides on the sides or bottom of the cabinet, depending on your layout.
8. Stackable Pull-Out Bins for Deep Cabinets
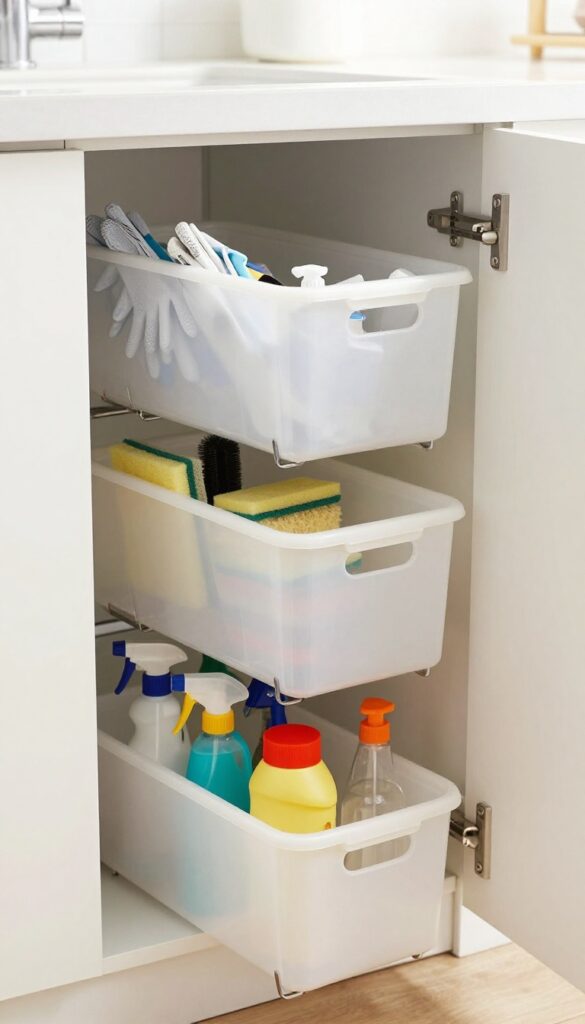
Deep cabinets under the sink can feel like a black hole—items at the back are forgotten until you move everything out. Stackable pull-out bins solve this by letting you layer storage vertically while keeping each bin accessible. Each bin slides out independently on its own rails, so you can grab what you need from the back without disturbing the front row.
These bins work especially well for tall items like spray bottles or cleaning caddies. You can stack two or three bins, each dedicated to a category: one for sponges and brushes, another for extra soap, and a top bin for gloves and small tools. The independent sliding action means you can pull out just the middle bin without the others moving.
Choosing The Right Bin Size
Measure your cabinet depth and height before buying. Look for bins that are narrow enough to fit around plumbing but deep enough to hold standard bottles. Many stackable pull-out sets come in adjustable widths, so you can customize the fit.
Installation Tips
Attach the slide rails to the cabinet floor or sides, depending on your setup. Use a level to ensure bins slide smoothly. If you have a garbage disposal or pipes in the way, consider a U-shaped bin that wraps around the plumbing.
Keeping Bins Organized
Label each bin with its contents to avoid rummaging. Use small dividers inside bins to keep items upright. For cleaning supplies, group by use: all-purpose cleaners in one bin, dish soaps in another.
9. Slim Pull-Out Drawer for Cleaning Cloths
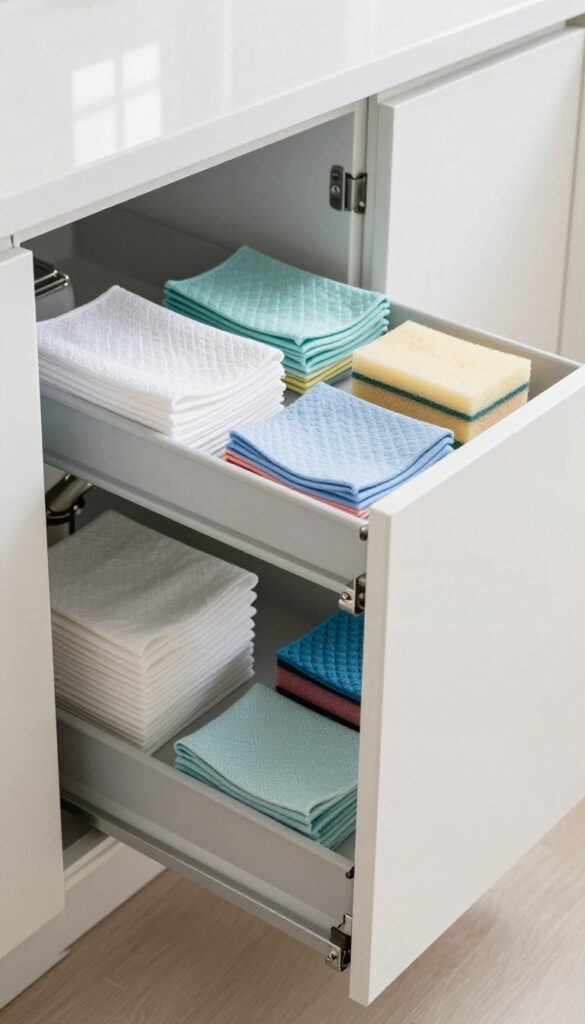
Cleaning cloths and sponges often end up tossed in a damp pile under the sink. A slim pull-out drawer changes that by giving them a dedicated, dry home. This narrow drawer fits beside the plumbing, so it doesn't interfere with pipes or larger items.
Installing a slim drawer is simpler than you might think. Measure the gap between your sink base cabinet's side wall and the plumbing. Most under-sink spaces have a 3- to 6-inch gap that's perfect for a narrow drawer.
You can buy a ready-made pull-out unit or build a simple wooden tray on drawer slides. Attach it to the cabinet floor or side for stability. Use it to store folded dishcloths, microfiber cloths, sponges, and scrub pads.
The drawer keeps them dry and separate from wet items like spray bottles, so they stay fresh longer.
Measure First
Before buying anything, measure the width between the plumbing and the cabinet side wall. Also check the depth so the drawer doesn't hit the back wall. A gap of at least 3 inches is enough for a slim drawer.
Choose The Right Slides
Soft-close drawer slides are worth the extra cost—they prevent slamming in tight spaces. For a slim drawer, look for side-mount slides that are narrow enough to fit. Or use undermount slides if you have room.
Keep It Dry
Line the drawer with a waterproof mat or silicone liner. This protects the wood or metal from moisture. Air out cloths before folding them, and replace sponges regularly to avoid mildew.
10. Under-Sink Drawer with a Built-In Drying Rack
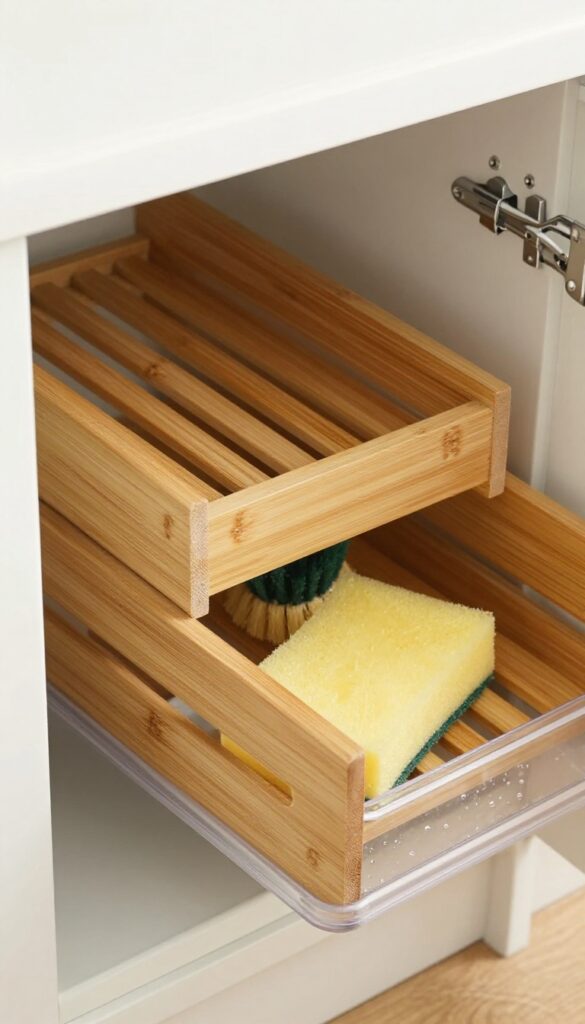
Wet sponges and brushes sitting in a puddle under the sink can lead to mildew and musty smells. A pull-out drawer with a built-in drying rack solves that problem elegantly. The slatted bamboo top lets air circulate, while a removable tray below catches drips so your cabinet stays dry.
This idea combines a custom pull-out drawer with a slatted bamboo insert that acts as a drying rack. The drawer slides out smoothly, giving you easy access to sponges, scrub brushes, and dish gloves. The bamboo slats elevate items off the tray, allowing water to drain away.
The tray slides out for easy cleaning, preventing grime buildup. It's a simple upgrade that keeps your under-sink area organized and hygienic.
Why Bamboo Works Best
Bamboo is naturally moisture-resistant and doesn't warp as easily as other woods. It also has antimicrobial properties, which help prevent mold and bacteria growth. The slatted design promotes airflow, speeding up drying time for your cleaning tools.
Easy Diy Or Ready-made Options
You can build this drawer yourself with a bamboo cutting board, a drawer slide kit, and a shallow plastic tray. Or buy a pre-made under-sink drying rack system that fits standard cabinet sizes. Either way, it's a weekend project that pays off in daily convenience.
Placement Tips For Maximum Drainage
Position the drawer so it's slightly tilted toward the back or side, allowing water to flow into the tray rather than pooling. Use a silicone mat under the tray to catch any overflow. Check the tray weekly and rinse it out to keep odors away.
11. Pull-Out Caddy for Cleaning Supplies
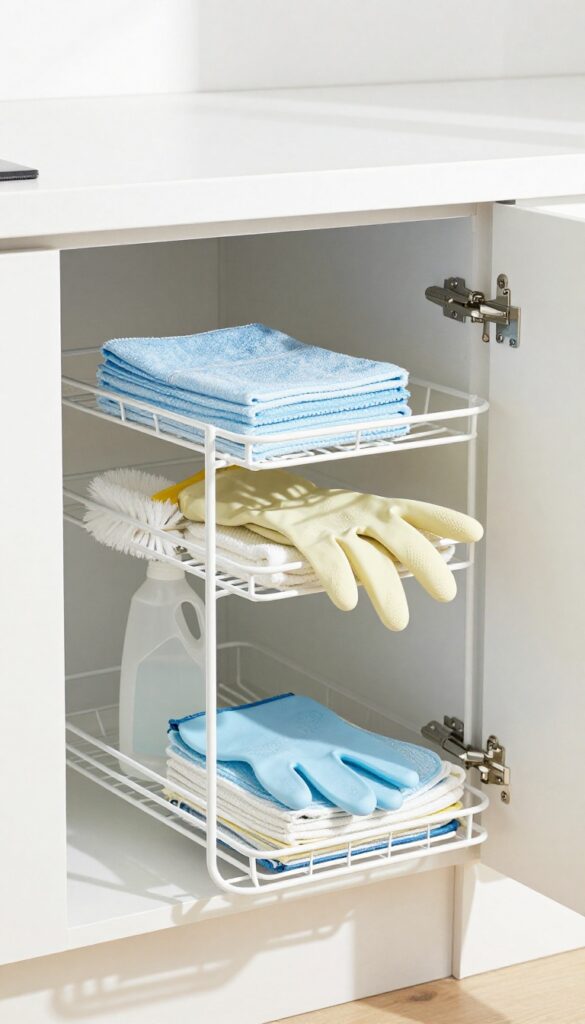
A handled caddy that slides out on rails turns your cleaning stash into a portable station. Fill it with all-purpose cleaner, rags, and gloves, then grab the handle and carry it to another room. No more hauling armfuls of bottles or making multiple trips back and forth.
This idea works especially well if you have a deep single cabinet under the sink. A caddy on rails keeps everything corralled and easy to access. When you need to clean the bathroom or living room, just lift the caddy off its track and go.
It's like having a cleaning kit that lives in the kitchen but travels wherever messes happen.
Choosing The Right Caddy
Look for a caddy with a sturdy handle and a base that fits your cabinet width. Some come with adjustable dividers to keep bottles upright. A plastic or coated wire caddy resists moisture better than wood.
Measure the depth of your cabinet so the caddy slides out fully without hitting the plumbing.
Installation Tips
Mount the rails to the cabinet floor or sides, depending on your space. Use a level to ensure smooth sliding. If you have a garbage disposal or pipes in the way, a shallow caddy that sits in front of the plumbing works great.
Some caddies come with a lip that hooks onto the cabinet edge for easy removal.
What To Store In It
Keep daily essentials like spray cleaner, microfiber cloths, scrub brush, and rubber gloves. Add a small caddy insert for sponges and a mini spray bottle of glass cleaner. Avoid storing heavy bottles that could tip the caddy.
Rotate seasonal items like window cleaner in spring or disinfectant during cold months.
12. Drawer Dividers for Small Items
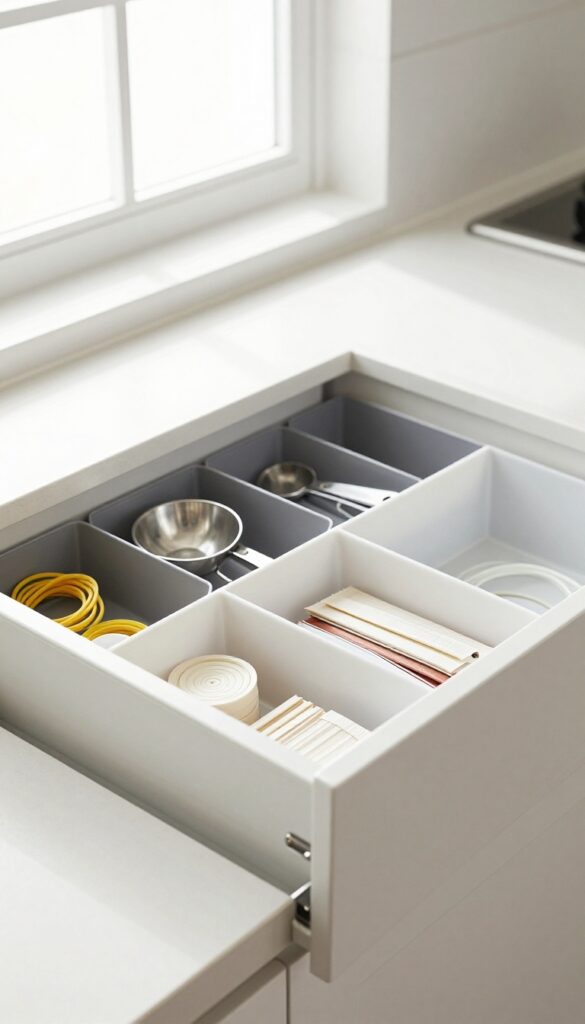
Even with pull-out drawers, tiny items can turn into a jumbled mess if they don't have their own homes. Twist ties, rubber bands, measuring spoons, and those little plastic clips from bread bags—they all seem to multiply in the dark. Adjustable dividers solve that by creating custom compartments inside your drawer, so every small thing has a designated spot.
Adjustable dividers are a simple, low-cost upgrade that makes a huge difference. They slide into place to create sections of any size, so you can fit a narrow slot for skewers and a wider one for spice packets. No more digging through a pile to find the tiny funnel or the missing measuring spoon.
Everything stays put and easy to grab.
Why Dividers Beat Bins
Bins can work, but they often shift around or waste space. Dividers lock into the drawer's sides or a grid system, so they don't move when you open and close the drawer. That means your compartments stay exactly where you set them.
Plus, you can reconfigure them anytime your storage needs change.
Best Materials For Under-sink Dividers
Plastic or coated metal dividers are ideal because they resist moisture and are easy to wipe clean. Avoid raw wood or particleboard, which can swell or warp in a damp environment. Look for expandable dividers with rubber ends that grip the drawer walls without slipping.
How To Arrange Your Compartments
Group items by how often you use them. Keep frequently used tools like measuring spoons and scissors in the front compartments. Reserve the back sections for backup supplies like extra rubber bands or rarely used gadgets.
This layout saves you from rummaging and keeps your drawer organized long-term.
13. Pull-Out Spice Rack for Under-Sink Storage
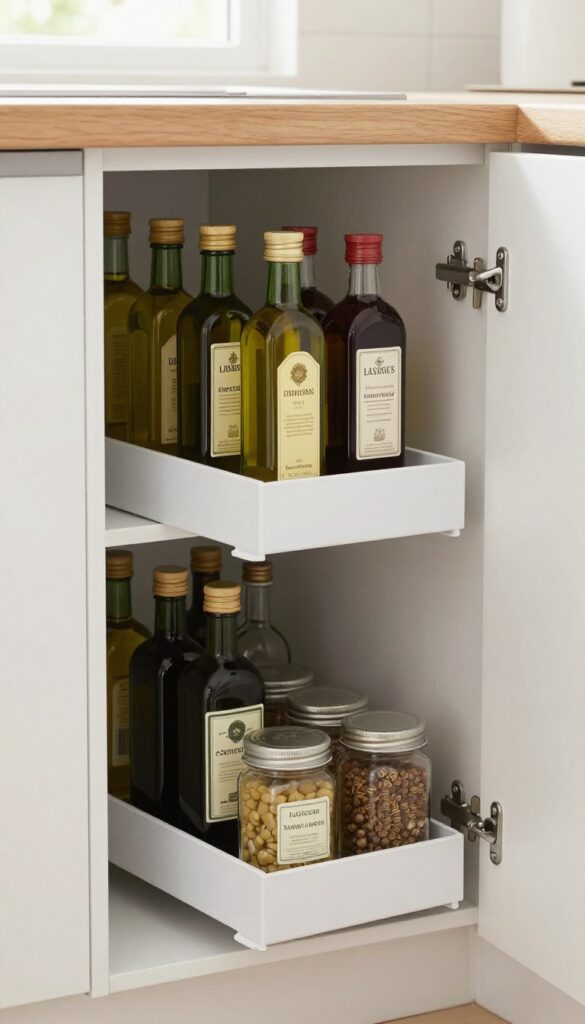
If your under-sink area stays dry, it can double as a pantry overflow spot. A narrow pull-out spice rack is perfect for storing oils, vinegars, and spices. The dark, cool environment helps preserve flavor, and the slide-out design makes everything easy to grab.
A pull-out spice rack turns wasted vertical space into a functional pantry extension. Measure the width of your cabinet and choose a rack that fits snugly. You can install a simple wire basket on drawer slides or buy a pre-made spice rack kit.
This setup works especially well for frequently used items like olive oil, soy sauce, and dried herbs. Just make sure the area stays dry to prevent moisture damage.
Choosing The Right Rack
Look for a rack with adjustable dividers or tiers to accommodate different bottle sizes. A two-tier design maximizes space without making bottles hard to reach. Stainless steel or coated wire resists rust better in humid conditions.
Installation Tips
Mount the slides to the bottom of the cabinet or to the sides, depending on your rack's design. Use a level to ensure the rack slides out smoothly. If you're renting, consider a tension-mounted rack that doesn't require drilling.
What To Store
Keep everyday cooking oils, vinegars, and spice jars within easy reach. Avoid storing items that need refrigeration or are prone to spoilage. Label the tops of spice jars for quick identification when the rack is pulled out.
14. Under-Sink Drawer with a Cutting Board Slot
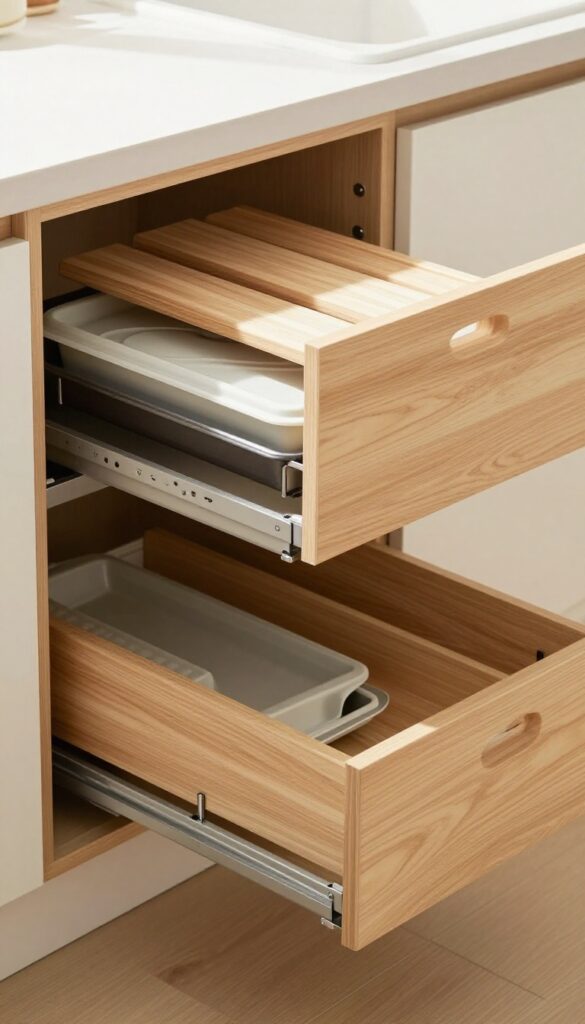
Cutting boards and baking sheets are notorious for sliding around and getting stuck under the sink. A drawer with a dedicated vertical slot changes everything. It keeps cutting boards upright and accessible, while the rest of the drawer neatly cradles trays and pans.
Everything slides out smoothly so you can grab what you need without a wrestling match.
This design works best with a custom or semi-custom pull-out drawer. The vertical slot is typically a narrow channel built into the back or side of the drawer, wide enough for standard cutting boards. The remaining space is divided with adjustable dividers or simple dowels to keep baking sheets and trays standing on edge.
When you pull the drawer open, everything is visible and within reach.
Why It Works
Cutting boards are bulky and awkward to stack. A vertical slot holds them securely, preventing them from sliding into other items. The drawer’s full extension means you can see every tray at a glance, no digging required.
This setup also keeps boards and trays dry, reducing the risk of mildew.
Diy Vs. Prefab Options
If you’re handy, you can retrofit an existing drawer by adding a wooden divider to create the slot. Prefab pull-out drawer kits with adjustable dividers are also available at most home improvement stores. For a seamless look, consider a custom drawer from a cabinet maker, especially if you have non-standard board sizes.
Pro Tips For Maximum Use
Measure your tallest cutting board before building or buying. Leave a little extra height so boards slide in and out easily. Use non-slip liner on the drawer bottom to keep trays from shifting.
If you store heavy baking sheets, reinforce the drawer slides with heavy-duty hardware rated for at least 75 pounds.
15. DIY Pull-Out Drawer from a Repurposed Dresser Drawer
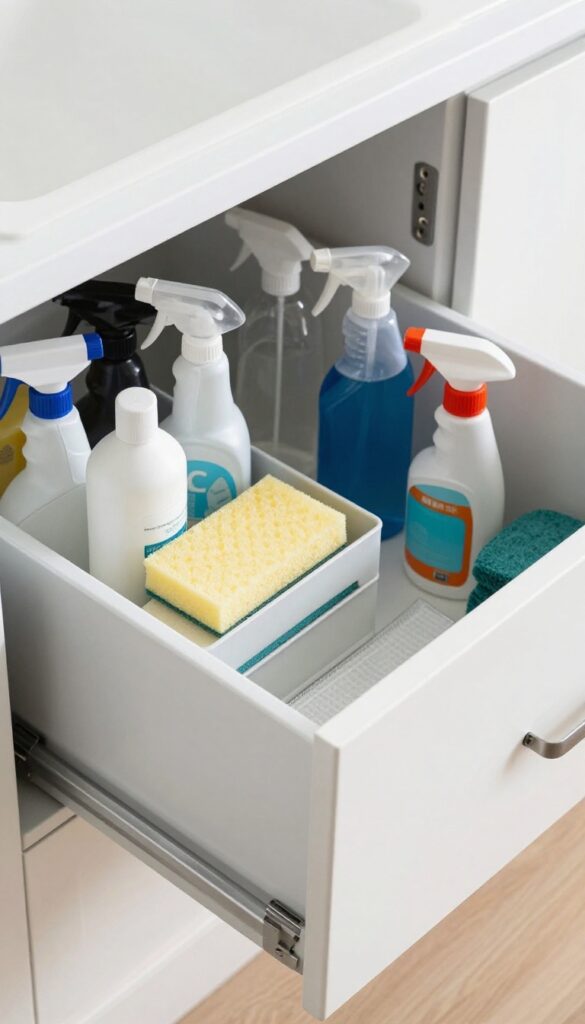
If you've got an old dresser drawer gathering dust in the garage, you're sitting on a free storage upgrade. With a bit of woodworking, that orphaned drawer can slide right under your sink and hold all your cleaning supplies. It's a low-cost, high-satisfaction project that looks custom once you match the front panel to your cabinets.
Finding The Right Drawer
Look for a drawer that's slightly narrower and shorter than your under-sink cabinet's interior. Solid wood drawers are easiest to work with, but sturdy plywood ones work too. Avoid anything warped or with water damage.
Adding Slides And A Front Panel
Attach side-mounted drawer slides to the drawer and cabinet sides. Then cut a piece of plywood or MDF to match your cabinet door style. Paint or stain it to match, and screw it onto the drawer front.
Now it blends right in.
Customizing The Interior
Add dividers or small bins inside the drawer to keep spray bottles upright and sponges separated. A liner on the bottom makes cleanup easy if anything leaks.
FAQ
Can I install pull-out drawers under the sink if I have plumbing in the way?
Yes, many pull-out systems are designed to fit around pipes. You can use a drawer with a cutout or install sliding baskets that sit on either side of the plumbing.
What is the best material for under-sink drawers?
Water-resistant materials like bamboo, coated wire, or plastic are ideal. Avoid raw wood unless it's sealed, as moisture can cause warping.
How much does it cost to add pull-out drawers under the sink?
Costs vary from $20 for a simple wire basket kit to $200+ for custom drawer systems. DIY options can be even cheaper if you repurpose existing items.
Do I need to hire a professional to install under-sink drawers?
Not necessarily. Many pull-out kits are DIY-friendly with basic tools. However, if you need custom cuts or complex plumbing adjustments, a handyman might be helpful.
How do I keep under-sink drawers clean and dry?
Use a liner or mat at the bottom of the drawer, and ensure good ventilation. Wipe up spills immediately, and consider adding a small dehumidifier if moisture is a problem.
Conclusion
An organized undersink cabinet can transform your kitchen workflow. Start with just one or two ideas from this list—maybe a pull-out trash bin or tiered shelves for cleaning supplies—and see how much easier meal prep and cleanup become. Small changes add up fast.
Before you know it, every pot, pan, and bottle will have a designated spot. You'll stop wrestling with cluttered cabinets and start enjoying a kitchen that works for you. Pick the idea that solves your biggest undersink frustration and give it a try this weekend.