13 Bedroom Wardrobe Design Ideas for Stylish Storage
A wardrobe is usually the biggest piece of furniture in the bedroom, yet it often gets the least thought. You pick a size, shove the doors shut, and live with whatever chaos hides inside. That works fine until the room starts feeling cramped and the clutter creeps out anyway.
The fix usually costs less than a full closet remodel. Sometimes it's a smarter door style, better interior layout, or a unit that pulls double duty as a desk or room divider.
These 13 ideas cover tight corners, awkward angles, and walls you thought were useless. Pick the ones that match your space and budget, then steal the details that fit.
1. Built-In Wardrobes That Use Every Inch
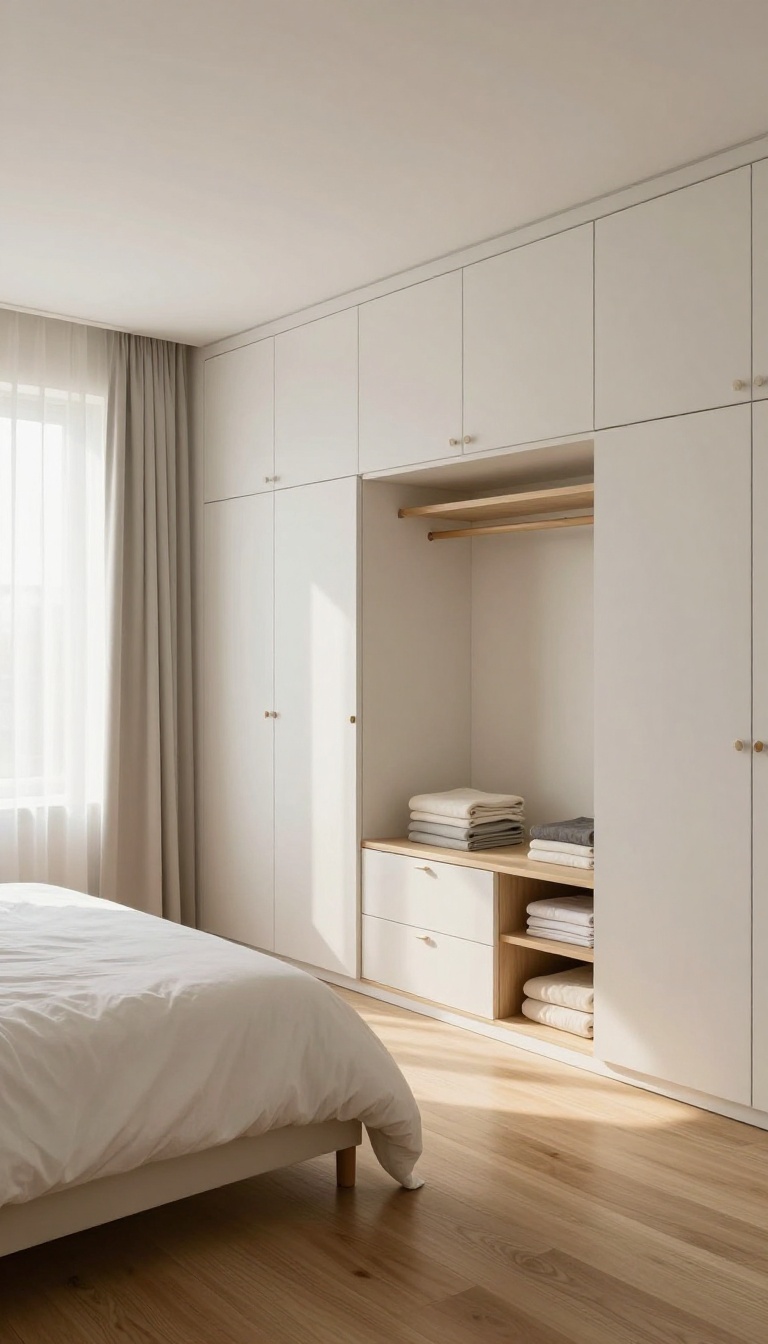
Built-in wardrobes turn dead space into storage that looks like it was always meant to be there. They fit around sloped ceilings, tuck into corners, and stretch wall to wall without leaving gaps. The result feels less like furniture and more like part of the room.
Custom built-ins solve the problem of awkward architecture. A standard wardrobe leaves wasted space above, beside, or behind it. A built-in fills those gaps with drawers, shelves, or hanging rods.
You get more storage without adding bulk to the room. The key is planning the interior around what you actually own, not just what looks good on a showroom floor.
Measure The Awkward Spots First
Sloped ceilings, chimney breasts, and recessed alcoves are prime real estate for built-ins. Measure the height at the lowest point and the depth at the narrowest spot. Then design the unit to follow those lines.
A carpenter can angle the top or notch the side so the wardrobe sits flush. That turns a frustrating corner into a useful feature.
Plan The Inside Around Your Stuff
Count your long-hang items, short-hang items, shoes, and folded clothes. Give each category its own zone. A mix of hanging rods, drawers, and adjustable shelves keeps everything visible.
Add a pull-out tray for jewelry or ties if you have the depth. The goal is to open the doors and see exactly what you need.
Choose Doors That Disappear
Sliding doors save floor space and suit built-ins that run wall to wall. Handleless push-to-open fronts keep the look clean and modern. If you prefer a traditional feel, shaker-style doors with slim handles work just as well.
Match the finish to your skirting boards or wall color so the unit blends in rather than shouting for attention.
2. Reach-In Closets with Smart Interior Layouts
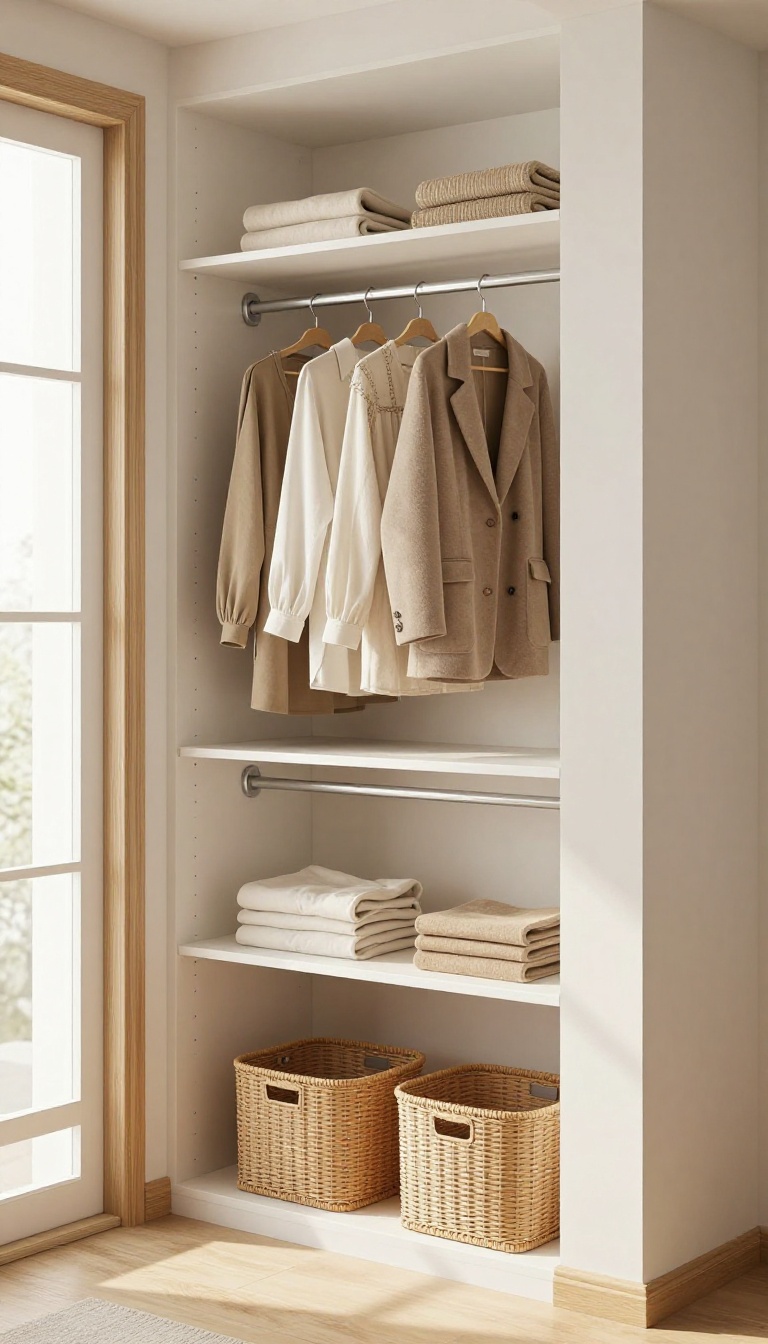
Most bedrooms come with a standard reach-in closet, and most people treat it like a black hole. You hang a few things, stack some shoes on the floor, and call it done. But the inside of that closet is where the real opportunity lives.
A reach-in doesn't need more square footage to hold way more stuff. It needs a better plan. Adjustable shelves, a second rod, and a few pull-out baskets can double your usable space without touching the walls.
The best part? You can do most of this in a weekend with basic tools. Here's how to make that narrow closet earn its keep.
Reach-in closets usually fail for one reason: they were built with a single rod and one high shelf. That setup wastes the bottom half of the closet and leaves the top shelf too high to reach comfortably. Smart layouts split the space into zones.
You give long items their own tall section, double up on rods for shirts and folded pants, and add shelves or baskets for everything that doesn't hang. Measure first, then plan. Grab the width, depth, and height of your closet, and note where the door swings.
That tells you what will actually fit and what will just get in your way.
Double Up On Hanging Space
A second rod is the single biggest upgrade you can make. Hang one rod at standard height for dresses and coats, then add a lower rod beneath it for shirts, skirts, and folded pants on hangers. You can buy a rod that mounts to the closet sides or use a hanging rod kit that clips onto an existing shelf.
Just leave at least 40 inches between rods so clothes don't crush together. If your closet is short, skip the double rod on one side and keep a full-height section for long items. Mixing heights keeps everything accessible.
Add Adjustable Shelves And Baskets
Fixed shelves force you to fit your stuff to the shelf. Adjustable shelves let you move them as your needs change. Look for a track system or shelf pins that let you reposition shelves in seconds.
Pull-out baskets are the secret weapon here. They slide out like drawers, so you can actually see what's in the back. Use them for socks, workout gear, or anything that usually ends up in a pile.
Keep the top shelf for things you rarely touch, like seasonal blankets or luggage. The middle shelves should hold daily items at eye level.
Use The Door And Floor Wisely
The back of the closet door is free real estate. Add an over-the-door rack for shoes, belts, or scarves. It costs almost nothing and keeps small items off the floor.
The floor should stay mostly clear. A low basket or two for shoes is fine, but don't let it become a dumping ground. If you have space, a slim rolling cart can hold laundry supplies or off-season items.
Leave a little breathing room near the door so you can step in and reach both sides without a fight.
3. Open Shelving for a Boutique Feel
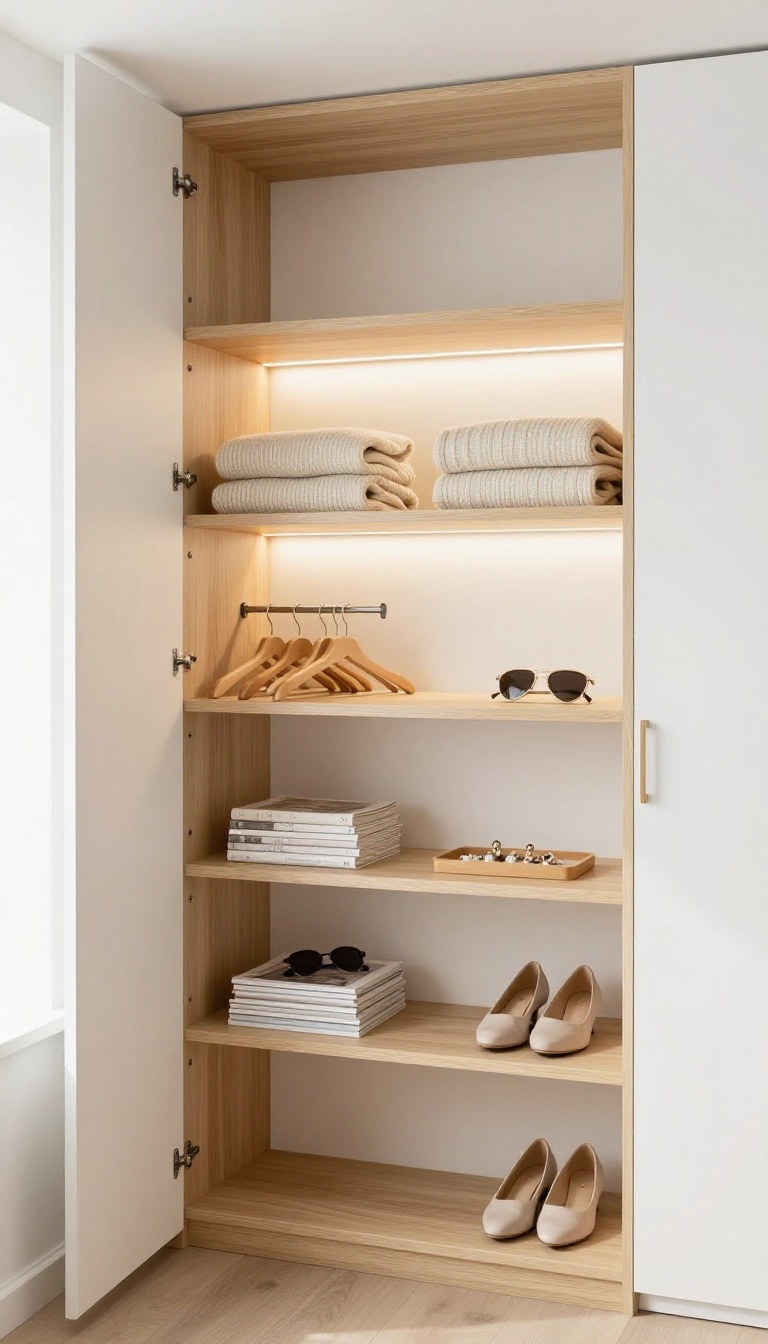
Open shelving gives your wardrobe a boutique vibe by turning everyday pieces into a display. Instead of hiding everything behind doors, you show off folded knits, stacked shoes, and a few favorite accessories. The catch is that open shelves demand a little styling discipline, or they quickly look like a messy pile.
The trick is to treat your shelves like a store display: edit, group, and leave some breathing room. You don't need to be a stylist, but you do need a system that keeps things looking intentional. Start by deciding what deserves to be seen and what should stay hidden.
What To Display (and What To Hide)
Not everything belongs on an open shelf. Keep the visual noise down by displaying items that are either beautiful or used daily. Folded sweaters in neutral tones, a stack of magazines, or a row of matching hangers can look great.
Hide anything that's purely functional and ugly: old gym clothes, mismatched socks, or worn-out shoes. A good rule: if it doesn't look good or get used often, it goes behind a door or in a drawer.
Styling Tricks That Keep It Tidy
Group items in odd numbers and vary the heights to create rhythm. Use small trays or baskets to corral tiny items like jewelry or sunglasses. Leave at least a third of each shelf empty so your display can breathe.
And don't forget to dust regularly—open shelves collect dust faster than closed ones.
Shelf Spacing And Lighting
Adjustable shelves let you customize spacing for different items: tall boots, folded jeans, or handbags. Add a small LED strip or puck light to highlight your display and make the wardrobe feel like a boutique. Warm white light (around 3000K) flatters clothing and adds a cozy glow.
4. Sliding Doors for Tight Spaces
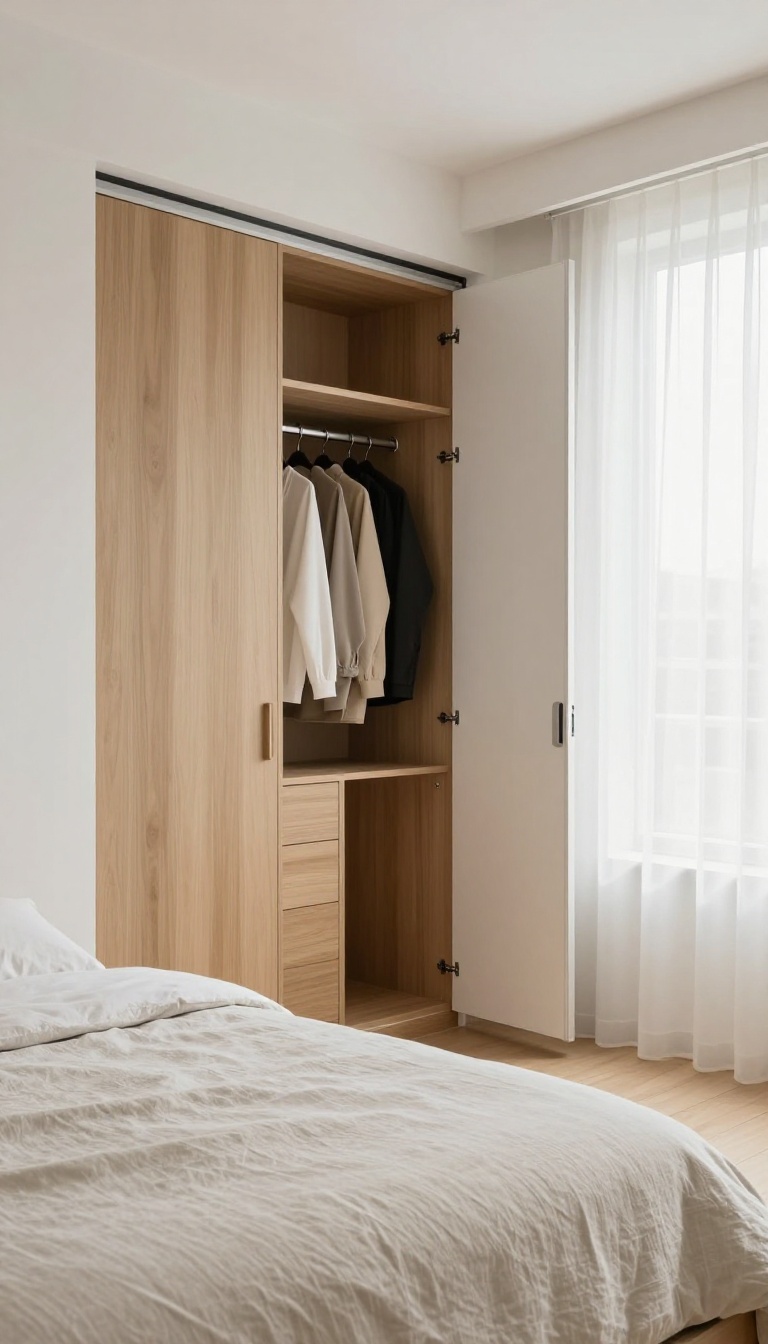
Swinging wardrobe doors need clearance to open, which can eat up precious floor space in a small bedroom. Sliding doors eliminate that problem by moving side to side instead of out into the room. They also add a clean, modern look that can make your wardrobe feel more like a design feature than an afterthought.
Sliding doors are a smart solution when every inch counts. They glide along a track and don't block walkways or bump into furniture. You can choose from a variety of styles, from sleek mirrored panels to rustic barn doors, so they fit almost any decor.
Why They Work In Small Rooms
In tight bedrooms, a swinging door can be a hazard. It might hit the bed or force you to rearrange furniture just to open it. Sliding doors need only a few inches of wall space and keep the floor plan open.
They're also great for narrow alcoves where a hinged door would be impossible.
Barn Door Style For A Rustic Touch
Barn doors bring a warm, farmhouse feel to any space. They hang from a metal track above the wardrobe and slide to one side. This style works well in rooms with a casual or industrial vibe.
Just make sure the wall where the door slides is clear of outlets or light switches.
Mirrored Sliding Doors To Fake More Space
Mirrored doors reflect light and make the room feel larger. They also double as a full-length mirror, which is handy in a small bedroom. Choose high-quality mirrors to avoid distortion, and keep them clean for the best effect.
They can make a cramped corner feel twice as big.
5. Mirrored Wardrobes That Double as Vanity
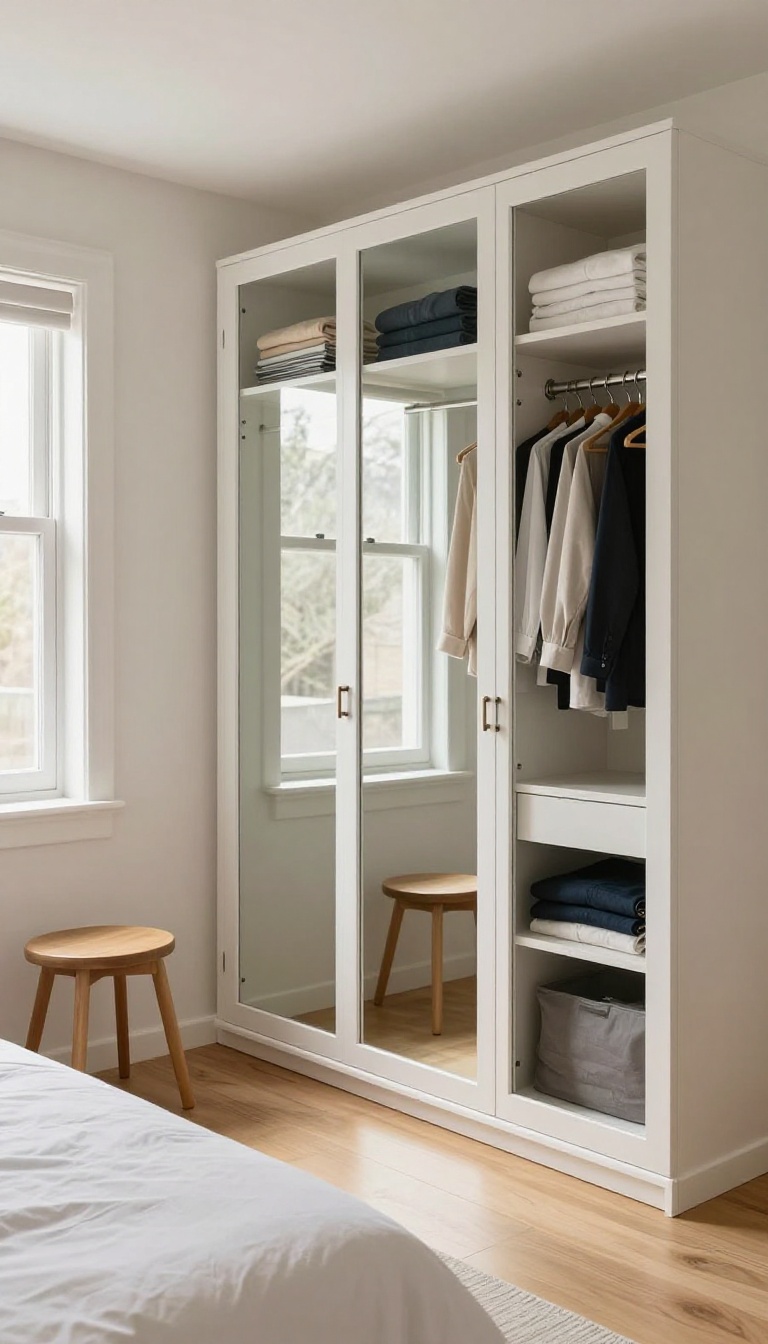
Mirrored wardrobe doors solve two problems at once: they make the room feel brighter and give you a full-length mirror without stealing wall space. Instead of hanging a separate mirror on a cramped wall, the wardrobe itself becomes your getting-ready station. This works especially well in smaller bedrooms where every square foot counts.
You get the storage you need plus a spot to check your outfit, all in one footprint.
A mirrored wardrobe isn't just a pretty face. The reflective surface bounces natural light around the room, which can make even a dim bedroom feel more open. And because the mirror is attached to the doors, you're not sacrificing a single inch of floor or wall space for a standalone vanity mirror.
You can go full mirror on every door or mix it up with a few mirrored panels and the rest in a solid finish. The key is to think about how you'll actually use the space. If you get dressed in a hurry, a full-length mirror on the door you open most often makes sense.
If you like to sit while doing your makeup, consider a wardrobe with a pull-out shelf or a nearby stool. Maintenance is simple: a microfiber cloth and a streak-free cleaner keep the glass clear. Just be mindful of fingerprints if the doors are near a high-traffic path.
A quick wipe every few days keeps them looking sharp.
Light And Space Benefits
Mirrors reflect both natural and artificial light, so a dark corner suddenly feels less cave-like. In a small room, that can mean the difference between cozy and claustrophobic. The reflection also adds depth, making the wardrobe feel less like a bulky block and more like part of the architecture.
Choosing The Right Mirror Style
Full-length mirrors on every door give a clean, modern look. If you want something softer, try mirrored panels framed in wood or metal. For a custom feel, mix clear mirror with frosted or tinted glass.
Just make sure the mirror doesn't face your bed directly if you're sensitive to light or movement at night.
Making It Work As A Vanity
To turn your mirrored wardrobe into a vanity, add a slim console or floating shelf nearby for makeup and accessories. A small stool that tucks under the shelf keeps the floor clear. If your wardrobe has interior lighting, even better—you'll get a glow that makes your reflection look its best.
6. Wardrobe with Integrated Lighting
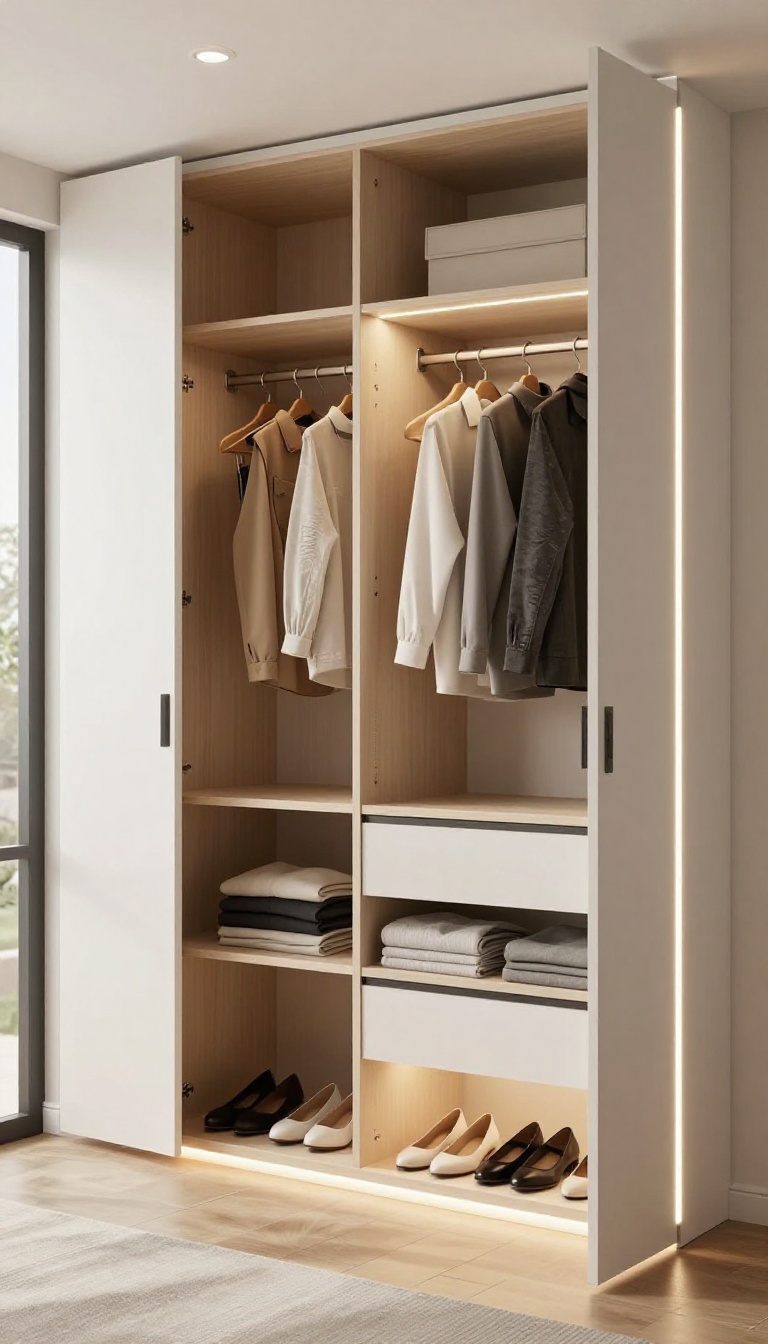
Digging through a dark closet at 6 a. m. is a special kind of frustrating. You can't tell navy from black, and you wake up your partner with a phone flashlight. Integrated lighting fixes that with a flip of a switch or a wave of your hand.
It also makes your wardrobe look intentional. A soft glow inside highlights your clothes like a boutique display, while a strip under the door adds a modern touch to the bedroom. The best part?
You don't need an electrician for most setups.
LED strips and puck lights are the two main options, and both are affordable and easy to install. LED strips come in adhesive rolls and can be cut to fit shelves, drawers, and hanging rods. Puck lights are small round discs that screw or stick into place, and they work well for spotlighting specific areas like shoes or handbags.
You can power them with batteries, plug them into a nearby outlet, or hardwire them if you're already renovating. Battery-powered versions are the simplest for renters, while hardwired setups give you a cleaner look with no cords. Motion sensors and door switches are cheap add-ons that turn the lights on automatically when you open the wardrobe.
Where To Place The Lights
Start with the interior. Run a strip along the underside of each shelf so it shines down on the clothes below. Add a vertical strip on the side wall to light up hanging garments, or place puck lights above a shoe rack.
For the exterior, a strip under the bottom edge of the wardrobe creates a floating effect and doubles as a nightlight. You can also add lights inside drawers so you can see socks and accessories without pulling everything out.
Warm Vs. Cool Light
Warm white (around 2700K to 3000K) makes your clothes look rich and cozy, and it's easier on your eyes in the morning. Cool white (4000K to 5000K) feels crisp and modern, and it helps you see true colors if you're matching outfits. If you're unsure, go with warm white for the interior and a slightly cooler tone for task areas like a mirror or vanity section.
Dimmable options let you adjust the mood from functional to relaxing.
Smart Controls And Extras
A basic door switch is the most practical upgrade. Open the door, and the lights come on. Close it, and they turn off.
No forgetting to hit a switch. If you want more control, look for motion-sensor lights or smart LED strips that connect to an app or voice assistant. You can set schedules, change colors, or dim them from your phone.
Just make sure the wiring or batteries are easy to reach for maintenance.
7. Modular Units You Can Rearrange
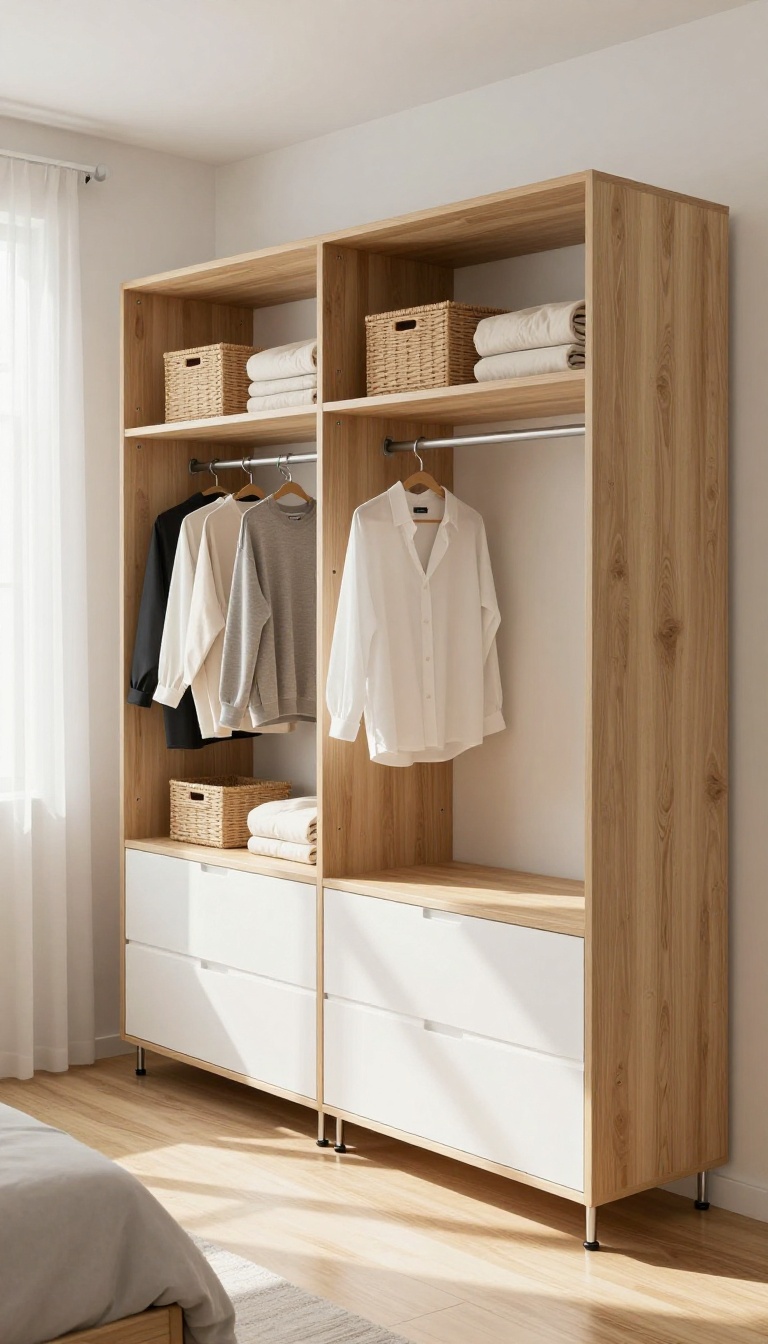
Modular wardrobes are built from separate pieces that stack, lock together, or stand alone. You can start with a basic frame and a few shelves, then add drawers, hanging rods, or shoe racks whenever you need them. The best part?
You can rearrange the whole setup without hiring a carpenter or buying a new wardrobe. These systems work in almost any bedroom because they adapt to your space and your stuff. Whether you live in a rental or plan to move in a few years, modular units let you take your storage with you.
They're also great for kids' rooms, where needs change fast as they grow.
Modular wardrobes are like building blocks for your bedroom. Each section is a separate box that you can place side by side or stack on top of each other. Some units come with adjustable feet so they stay stable on uneven floors.
Others have connectors that keep everything tight and wobble-free. You don't have to commit to a full wall of storage right away. Start with two or three modules, see how they work, then add more later.
This is perfect if you're on a budget or just testing what works in your room. Many brands sell individual pieces, so you can expand gradually. When you move, you can break the units down and reconfigure them in your new place.
No built-in closet required. That flexibility is why modular systems are so popular in apartments and rental homes. ### Mix and Match Components Think of each module as a blank canvas. You can choose from shelves, drawers, hanging rods, baskets, and even pull-out trays.
Some systems let you swap components without tools—just lift and click. That means you can turn a shelf unit into a drawer unit in seconds. For example, if you need more hanging space for dresses, replace a shelf with a rod.
If you suddenly have a pile of folded sweaters, add a stack of drawers. The goal is to keep your wardrobe working for you, not against you. Many modular brands also offer inserts like jewelry trays or tie racks.
These small additions make a big difference in keeping things tidy. And because they're modular, you can move them around as your collection grows or shrinks. ### Stack Them High or Wide Modular units don't have to line up in a single row. You can stack them vertically to use tall walls, or spread them out horizontally along a low wall.
In a small room, a tall stack saves floor space and draws the eye upward. If you have a sloped ceiling or a window, you can work around it by using shorter modules. Some units are designed to sit on top of each other with a simple bracket.
Just make sure the base is level and the stack is secure. For a custom look, mix open shelves with closed cabinets. Open shelves keep the room feeling airy, while closed doors hide clutter.
You can also leave a gap between modules to create a niche for a hamper or a mirror. ### Rearrange Without Tools One of the biggest perks of modular systems is that you can change them up without a screwdriver. Many use a simple pin-and-hole system for shelves, so you just move the pegs to adjust heights. Drawers often slide out and can be swapped with another module.
This is a game-changer for renters or anyone who likes to redecorate often. You can move a whole unit to another wall in minutes. If you get bored with the layout, just shuffle the pieces around.
It also makes cleaning easier. You can pull out a module to vacuum behind it or wipe it down. No more struggling to reach behind a heavy built-in.
Just be careful not to overload tall stacks. Keep heavier items in lower modules and lighter stuff up top. And always follow the manufacturer's weight limits for each piece.
Mix And Match Components
Think of each module as a blank canvas. You can choose from shelves, drawers, hanging rods, baskets, and even pull-out trays. Some systems let you swap components without tools—just lift and click.
That means you can turn a shelf unit into a drawer unit in seconds. For example, if you need more hanging space for dresses, replace a shelf with a rod. If you suddenly have a pile of folded sweaters, add a stack of drawers.
The goal is to keep your wardrobe working for you, not against you. Many modular brands also offer inserts like jewelry trays or tie racks. These small additions make a big difference in keeping things tidy.
And because they're modular, you can move them around as your collection grows or shrinks.
Stack Them High Or Wide
Modular units don't have to line up in a single row. You can stack them vertically to use tall walls, or spread them out horizontally along a low wall. In a small room, a tall stack saves floor space and draws the eye upward.
If you have a sloped ceiling or a window, you can work around it by using shorter modules. Some units are designed to sit on top of each other with a simple bracket. Just make sure the base is level and the stack is secure.
For a custom look, mix open shelves with closed cabinets. Open shelves keep the room feeling airy, while closed doors hide clutter. You can also leave a gap between modules to create a niche for a hamper or a mirror.
Rearrange Without Tools
One of the biggest perks of modular systems is that you can change them up without a screwdriver. Many use a simple pin-and-hole system for shelves, so you just move the pegs to adjust heights. Drawers often slide out and can be swapped with another module.
This is a game-changer for renters or anyone who likes to redecorate often. You can move a whole unit to another wall in minutes. If you get bored with the layout, just shuffle the pieces around.
It also makes cleaning easier. You can pull out a module to vacuum behind it or wipe it down. No more struggling to reach behind a heavy built-in.
Just be careful not to overload tall stacks. Keep heavier items in lower modules and lighter stuff up top. And always follow the manufacturer's weight limits for each piece.
8. Corner Wardrobes for Awkward Angles
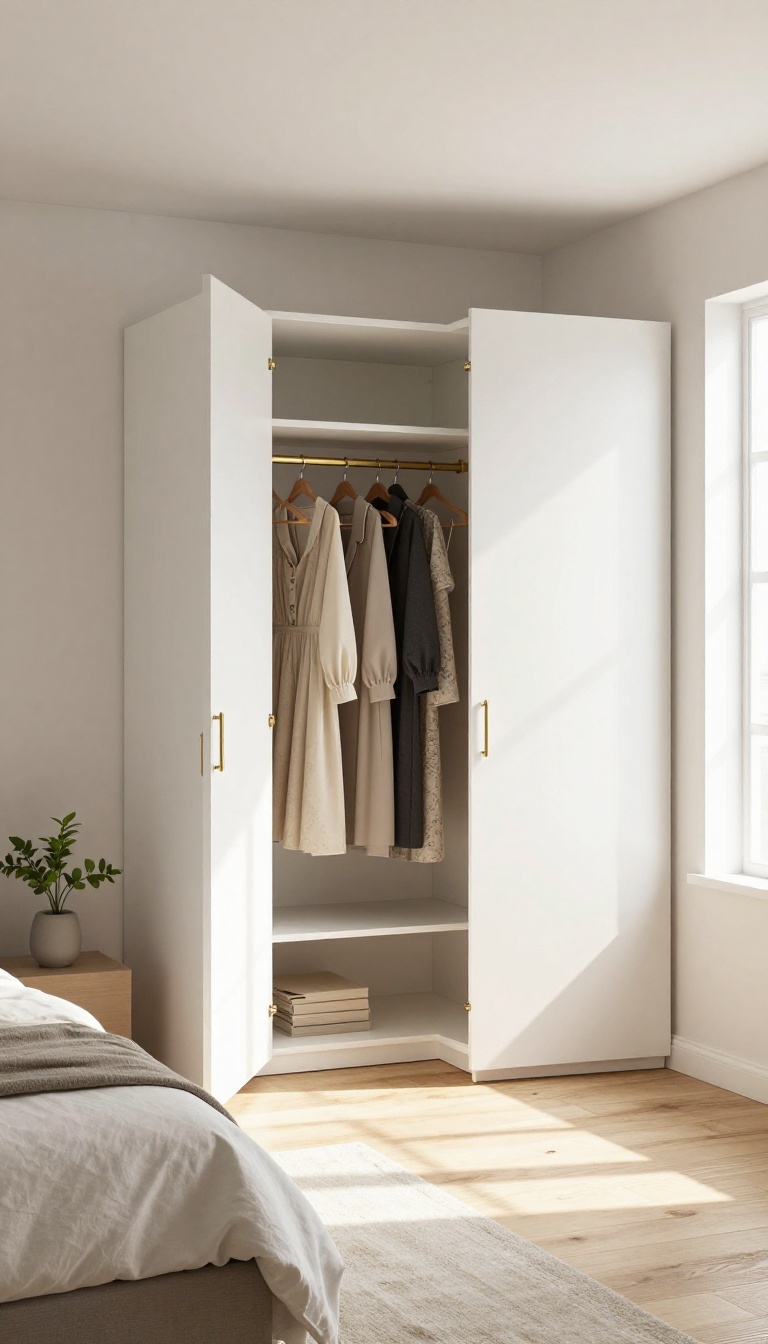
Most bedrooms have at least one corner that sits empty because no standard furniture fits it. A corner wardrobe turns that dead zone into serious storage. It often holds more hanging space than a flat wall unit, because the L-shape wraps around where two walls meet.
You stop losing that awkward angle to dust bunnies and start using every inch. The result feels custom without the custom price tag.
Corner wardrobes come in two main styles: angled fronts that cut across the corner, and L-shaped units that follow both walls. The angled version is simpler and works in almost any room. The L-shaped version gives you more interior room but needs careful measuring so the doors still open freely.
Either way, the goal is the same: capture the space a flat closet leaves behind. You get deeper hanging sections, more shelf area, and a layout that actually matches how you get dressed.
Angled Vs. L-shaped
An angled corner wardrobe has a single front panel that sits diagonally across the corner. It looks tidy and needs less floor clearance than you might expect. The trade-off is a smaller interior compared to an L-shaped design.
L-shaped wardrobes run along both walls and meet in the corner. They hold more, but the corner itself can become a black hole if you don't plan the interior. Add a rotating carousel or deep shelves there so nothing gets lost.
Make The Interior Work
Corner units often have a deep, awkward zone right at the back. Use it for long-hanging items like dresses or coats, or install pull-out racks that bring everything within reach. A lazy Susan shelf works well for shoes and accessories.
Keep the most-used items near the front edges. Reserve the deep corner for seasonal clothes or luggage you only touch a few times a year.
Watch The Doors
Hinged doors on a corner wardrobe can clash with each other or with nearby furniture. Bi-fold or sliding doors solve that problem by moving along the frame instead of swinging out. If you choose hinged, make sure each door can open at least 90 degrees.
Also check ceiling height and any sloped walls. A corner unit that fits flush looks intentional; one that leaves gaps looks like a mistake.
9. Wardrobe as a Room Divider
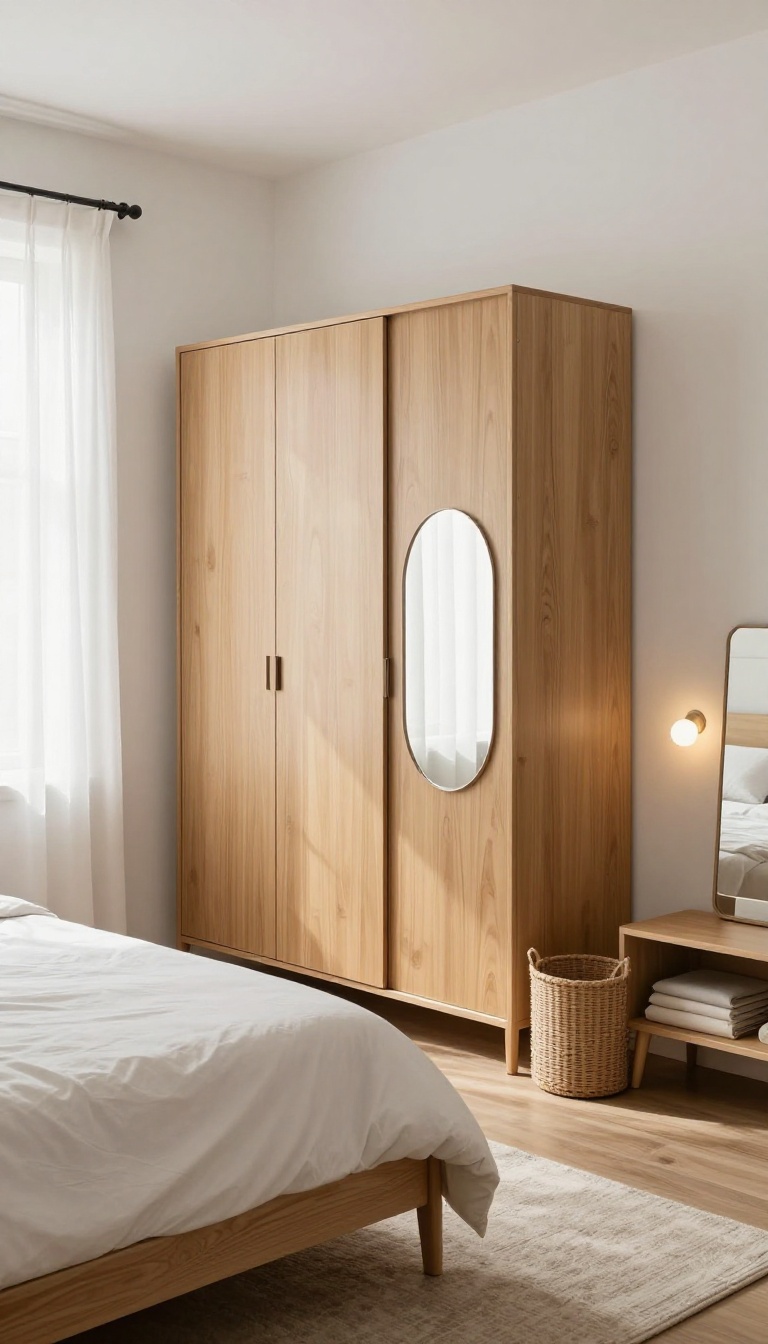
In a studio apartment or a shared bedroom, every square foot counts. A freestanding wardrobe placed in the middle of the room can split it into two distinct zones—one for sleeping, one for dressing—without the cost or permanence of building a wall. The trick is choosing a unit that looks good from both sides.
A plain back panel facing the bed will kill the vibe fast, so you need a design that treats the rear as a second front. Done right, this setup adds storage and privacy at the same time. It also gives you a natural spot to hang a mirror, mount a light, or stash laundry baskets out of sight.
A double-sided wardrobe works best when it's at least 24 inches deep and tall enough to block sightlines—usually 72 inches or more. You want it to feel like a wall, not a piece of furniture you forgot to push against the wall. Placement matters more than size.
Angle it perpendicular to the main wall so it creates a clear path around both sides. If the room is narrow, leave at least 30 inches of walking space on each side so you don't feel boxed in. For renters, a freestanding unit with a finished back is the easiest win.
No drilling, no patching, no landlord drama. Just make sure the back panel is painted, paneled, or wrapped in peel-and-stick wallpaper so it looks intentional from the sleeping side.
Pick A Unit That Looks Good From Behind
Most wardrobes have a raw particleboard back that's ugly from the wrong angle. Look for models with a finished rear panel, or buy a separate back panel kit. If you're handy, a sheet of beadboard or a peel-and-stick wallpaper in a subtle pattern can turn the back into a feature.
Just avoid anything too busy—it's still a bedroom, not a gallery wall.
Use The Divider To Define Zones
Once the wardrobe is in place, treat each side as its own mini-room. On the sleeping side, keep it calm: a small nightstand, a lamp, maybe a rug. On the dressing side, add a slim mirror, a hook for robes, and a basket for dirty clothes.
The contrast in function makes the whole space feel bigger, not smaller.
Secure It And Keep It Breathable
A tall wardrobe can tip if someone leans on it, so anchor it to the floor or ceiling with an anti-tip kit. Also leave a few inches of gap at the top and bottom for air to move. That prevents musty smells and keeps the back panel from warping in humid rooms.
10. Hidden Wardrobes Behind Paneling
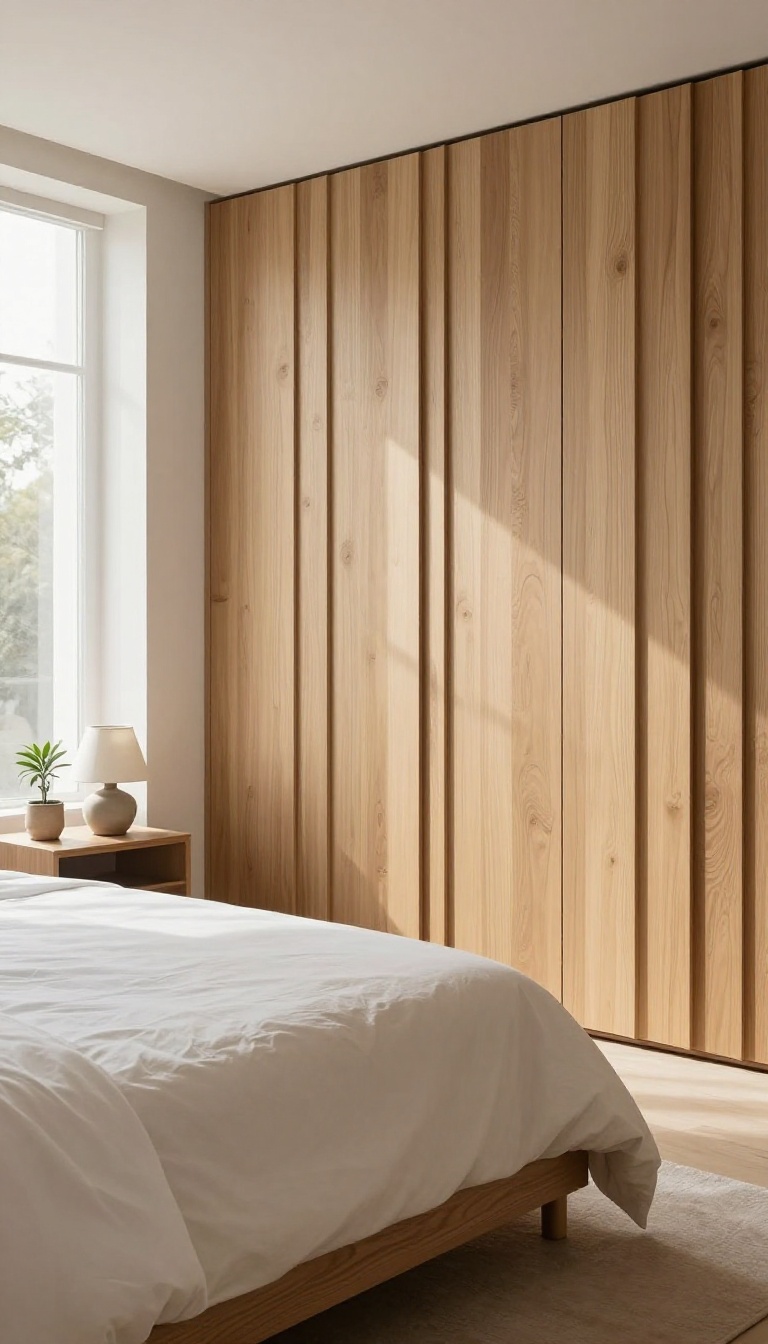
A wall that looks like a wall but opens to reveal a full wardrobe is the kind of detail that makes a bedroom feel designed rather than furnished. The idea is simple: you cover the closet opening with paneling that matches the surrounding wall, so the storage disappears into the architecture. When the doors are shut, there's no visual clutter, no mismatched furniture, just a clean surface.
It's a trick that works in modern flats, traditional homes, and just about everything in between.
The magic here is in the disguise. You're not hiding the wardrobe because it's ugly—you're hiding it because the room looks calmer when the storage isn't shouting for attention. Paneling can be as simple as flat MDF painted the same color as the wall, or as detailed as tongue-and-groove boards, slatted wood, or even a full accent wall of vertical trim.
The wardrobe itself sits behind that skin, usually built in so the depth is flush with the wall. The result is a seamless plane that reads as architecture, not furniture. What makes this work is the lack of visual interruption.
Standard wardrobe doors have frames, handles, and gaps that break up the wall. Hidden doors, when done well, have none of that. The paneling runs continuously, and the seams are either invisible or deliberately part of the pattern.
You get the storage you need without the bedroom feeling like a dressing room. It's especially useful in smaller rooms where a bulky wardrobe would dominate the space.
How To Make The Doors Disappear
The key is matching the door surface to the wall surface exactly. Same paint, same finish, same texture. If your wall is smooth drywall, use smooth panels.
If it's textured, replicate that texture on the door. Push-to-open latches or magnetic catches eliminate handles, so there's nothing to grab. For a truly seamless look, run the paneling across the entire wall, including the door, so the pattern doesn't stop at the edges.
A slight shadow gap around the door can actually help it read as a deliberate design feature rather than a mistake.
Best Spots For A Hidden Wardrobe
The most natural place is a recessed wall or a bump-out that already exists. If you're building new walls, plan a shallow cavity for the wardrobe and cover it with paneling. In older homes, a chimney breast or an alcove can be framed in and turned into hidden storage.
You can also hide a wardrobe behind a paneled headboard wall, so the bed wall becomes a full storage unit. Just make sure the doors can open fully without hitting the bed or other furniture.
What To Watch Out For
Hidden doors need space to swing or slide, so plan the clearance before you commit. If the room is tight, use sliding panels or pocket doors that tuck into the wall. Also, keep the interior organized because you'll be opening the whole wall to get to it—no quick grab-and-go.
And label or color-code shelves if you share the wardrobe, so everyone knows where things live. Finally, don't skimp on the hardware; cheap hinges will sag and ruin the seamless look.
11. Wardrobe with a Built-In Desk Nook
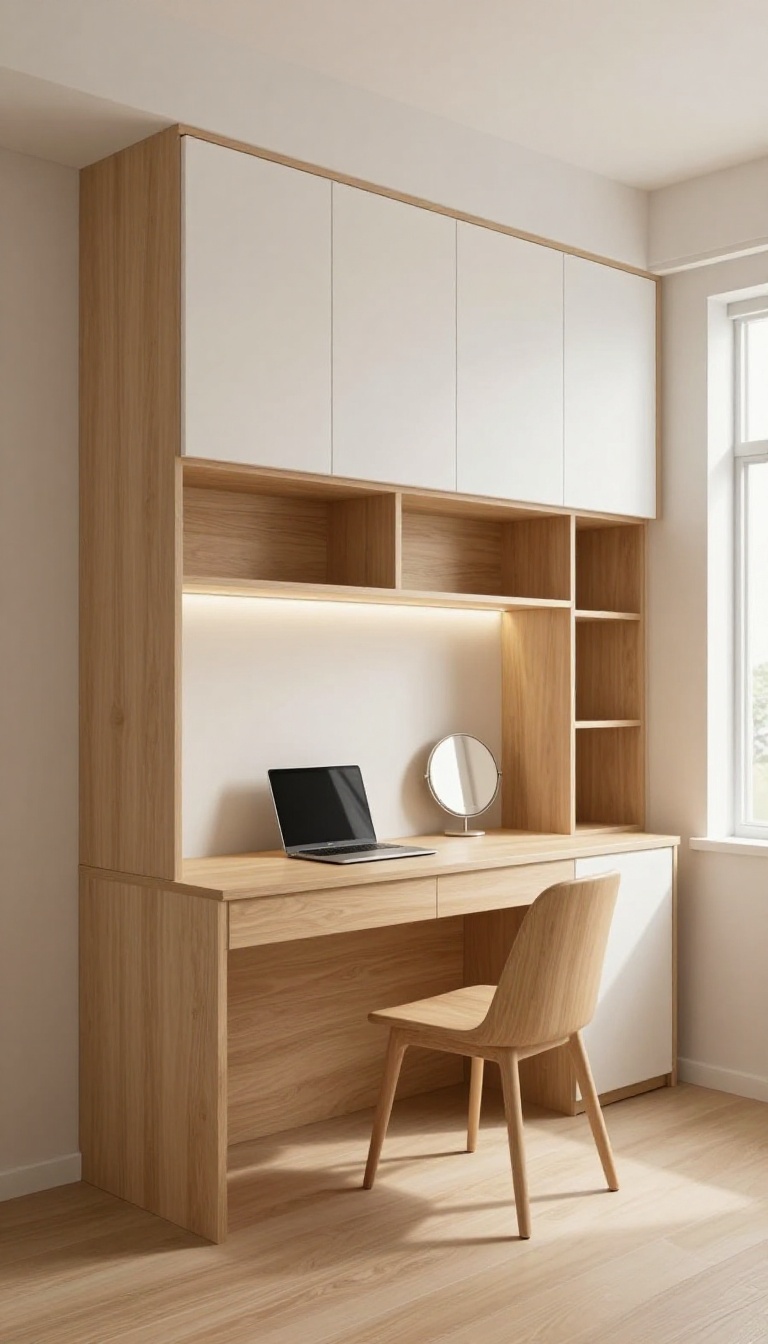
A wardrobe that swallows a small desk sounds like a compromise until you actually use one. The idea is simple: carve out a section of the unit, usually 30 to 40 inches wide, and turn it into a spot for a laptop, a mirror, or a morning routine. You keep the storage you need and gain a surface you'd otherwise squeeze in somewhere awkward.
It works in bedrooms that are too small for a separate desk and too busy for a vanity to sit out in the open. The trick is planning the nook before the wardrobe goes in, not after. Get the proportions and lighting right and it feels intentional rather than improvised.
Sizing The Nook So It Actually Works
Leave at least 30 inches of width and 24 inches of depth for the desk surface. Anything tighter and you'll avoid sitting there. Match the counter height to a standard desk, around 29 to 30 inches, so a normal chair fits underneath.
If kids will use it, drop it a few inches lower. Keep the surrounding wardrobe shallow on that side. Deep hanging space next to a desk eats the elbow room you need.
Desk, Vanity, Or Both
A flip-up mirror turns the same surface into a vanity without taking extra floor space. Store makeup in a shallow drawer right below. If you work from home, add a cable grommet and one outlet inside the nook.
Chargers stay hidden and the surface stays clear. Pick one primary use. A desk that's also a dumping ground for clothes stops being either one.
Lighting And Storage That Pull Their Weight
Overhead room light rarely lands where you need it. Add a slim LED strip under the upper shelf or a wall-mounted sconce beside the nook. Use the space above the desk for open shelves or a closed cabinet.
Open shelves look lighter, but closed doors hide the mess on busy weeks. A single deep drawer under the desk handles paperwork, chargers, and the random stuff that piles up.
Making It Look Built-in
Run the same door fronts and finish across the whole unit, including the nook surround. Mixed finishes make it read as an add-on. Skip the chair when you photograph it.
A simple stool or a pulled-in chair keeps the line clean. If the wardrobe sits against a wall, add a matching side panel so the desk doesn't look like it's floating.
12. Color-Blocked or Two-Tone Wardrobes
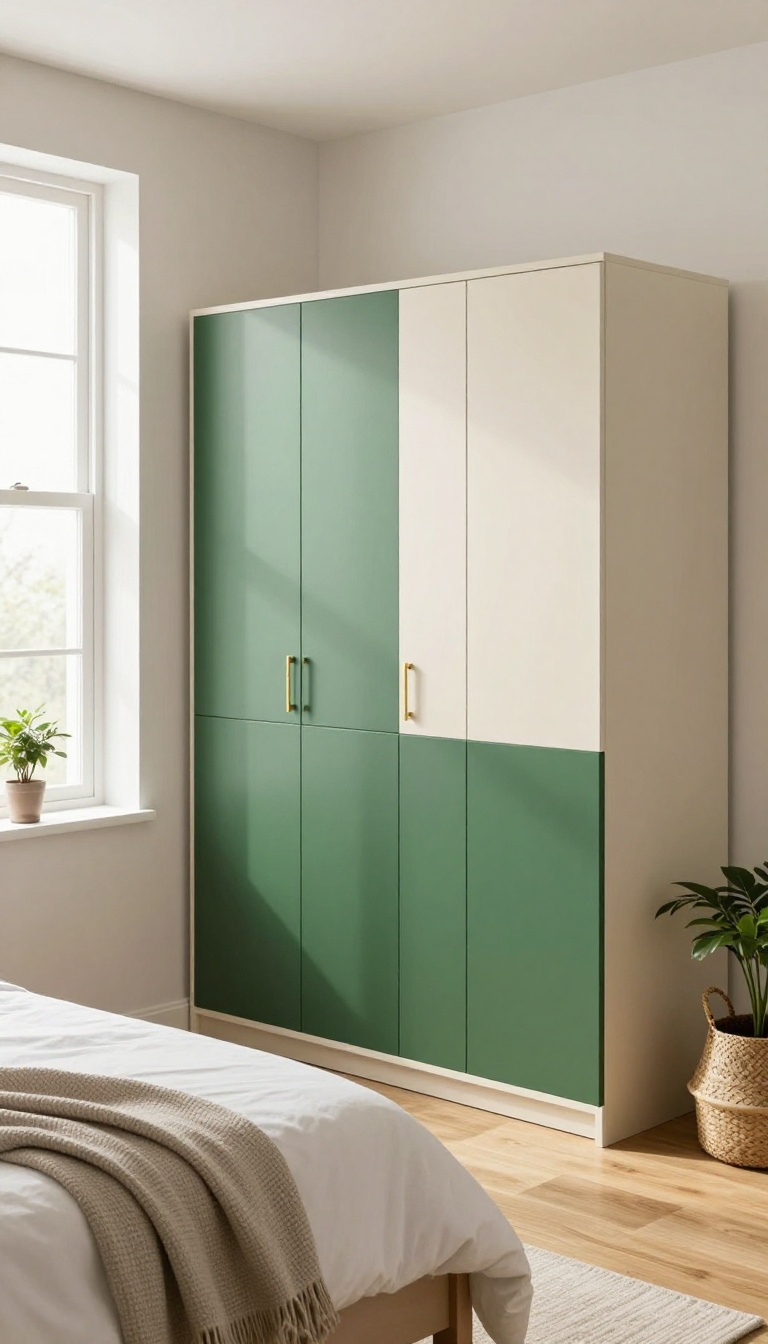
Paint is the cheapest way to make a basic wardrobe look custom. A two-tone or color-blocked design splits the unit into distinct zones, so your eye reads it as a deliberate piece instead of a big box. You get a focal point without tearing out walls or buying new furniture.
The trick is picking the split line and the colors on purpose, not by accident.
Most wardrobes are one flat color from top to bottom, which is exactly why they disappear into the background. Color blocking flips that by treating the doors, frame, and sides as separate surfaces. You can go bold with contrasting paint, or subtle with two tones of the same hue.
Either way, the wardrobe starts doing design work for the room.
Where To Draw The Line
The split usually follows a natural seam: the top row of doors versus the bottom, or the frame versus the door fronts. A horizontal break at the midpoint makes the unit feel grounded. A vertical split down the center works better on wide wardrobes, especially when one side sits near a window or door.
If your wardrobe has a built-in bench or open shelf, use that as the dividing line. The goal is a split that looks intentional from across the room.
Choosing Colors That Hold Up
Contrast is the point, but you still want the two tones to live together. A safe combo is a deep shade on the bottom and a light neutral on top, which keeps the visual weight low. For something punchier, pair a saturated color with a muted version of the same family.
Skip two brights that fight each other unless you really know the room can handle it. Test the colors on a door panel first, because wardrobe lighting is different from wall lighting.
Two-tone With Materials, Not Just Paint
You do not have to stop at paint. Mixing materials gives you the same split effect with more texture. Wood doors with a painted frame look warm and modern.
Matte fronts with a glossy trim add a quiet shine. Even swapping the hardware to a contrasting metal counts as a two-tone move. Just keep the split consistent, so the eye knows where one material ends and the next begins.
Making It Look Built-in
A color-blocked wardrobe reads as custom when the paint wraps the sides and the top, not just the doors. Carry the wall color onto the frame so the unit feels like part of the room. If the wardrobe sits in a niche, paint the niche the same color as the darker tone.
That little trick hides the gaps and makes the whole thing look planned. Finish with handles that match one of the two tones, and the piece looks like it was made for the space.
13. Budget-Friendly IKEA Hacks and DIY Upgrades
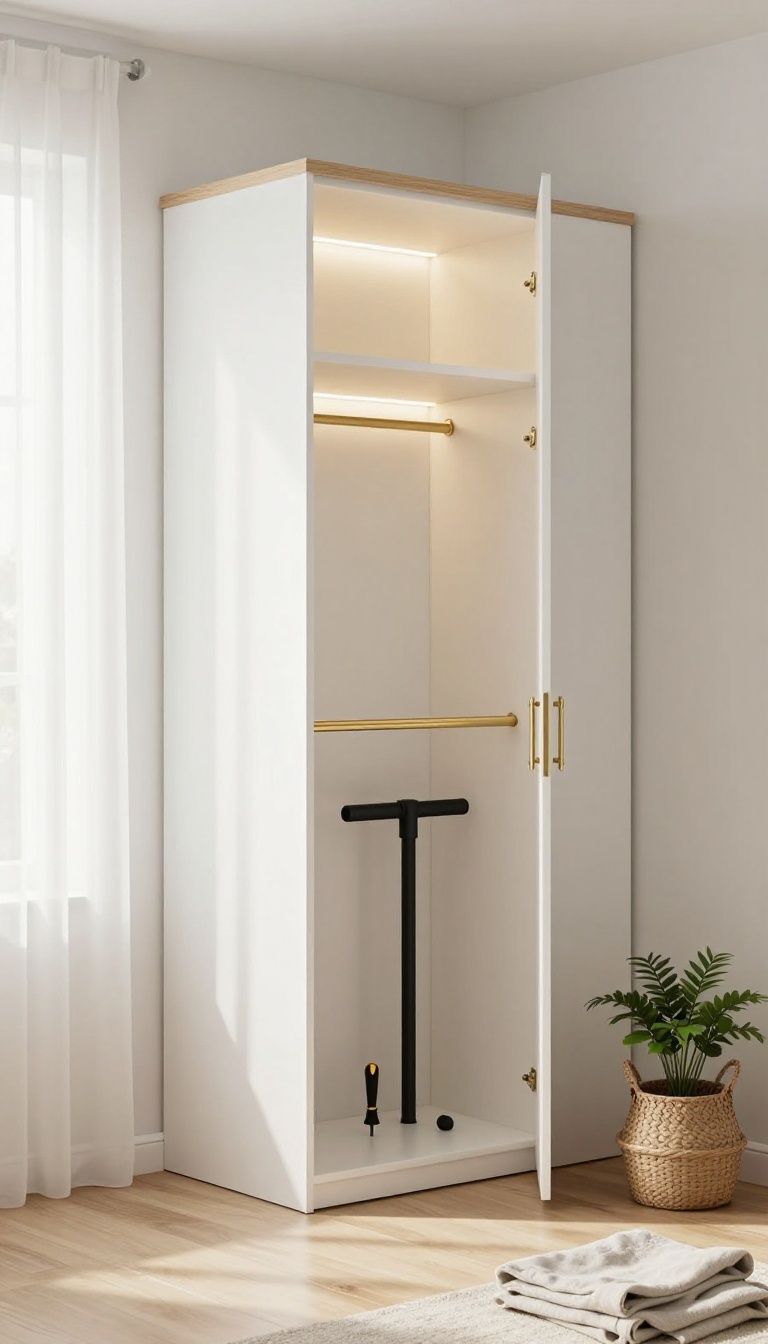
You don't need a custom closet budget to get a custom look. A basic IKEA wardrobe can go from flat-pack to high-end with a few cheap swaps. The trick is knowing which upgrades give you the biggest visual payoff for the least cash.
The frame stays the same. You're just changing the parts people actually see and touch. That's where the savings live.
Swap The Hardware
Stock handles and knobs are the fastest giveaway that a wardrobe came from a big-box store. Replacing them takes ten minutes and a screwdriver. Leather pulls, brass bars, or matte black T-bars can make a $200 unit look like a boutique find.
Buy hardware in bulk online and you'll spend less than $40 for a full set.
Add Trim And Molding
A strip of wood trim along the top or sides hides the seams and gives the wardrobe a built-in feel. Use lightweight MDF or pine, cut to size, and attach with construction adhesive or small nails. Paint it to match the doors and the whole piece reads as one solid unit.
This is the upgrade that fools guests every time.
Paint Or Wrap The Doors
If the finish feels dated, paint is your friend. Lightly sand, prime, and roll on a durable cabinet paint in a color that matches your walls or a bold accent. For a renter-friendly option, use peel-and-stick wallpaper or vinyl wrap on flat door panels.
Both cost under $50 and can be changed when you're bored.
Upgrade The Inside
Don't forget the interior. Add adhesive LED strip lights along the top shelf for a high-end glow. Install a few extra shelves or a pull-out drawer insert to tame small items.
A cheap mirror on the inside of one door makes the whole thing feel bigger and more functional.
FAQ
What is the most space-efficient wardrobe design for a small bedroom?
Built-in or corner wardrobes with sliding doors typically use space most efficiently, especially when paired with adjustable interior shelving.
How can I make a cheap wardrobe look more expensive?
Swap out basic handles, add trim or molding, and paint it a custom color. These small changes cost little but make a big visual difference.
Do open wardrobes make a room look cluttered?
They can if not styled well. Use matching hangers, baskets, and keep only your best-looking items visible to maintain a tidy look.
What lighting works best inside a wardrobe?
LED strip lights or puck lights are ideal—they're low-profile, energy-efficient, and can be motion-activated for convenience.
How do I choose between a built-in and a freestanding wardrobe?
Built-ins offer a seamless look and maximize space but cost more. Freestanding units are cheaper and movable, making them better for renters.
Conclusion
You do not need to try all thirteen ideas at once. Pick the one that solves your biggest daily frustration, whether that is a closet that overflows or a floor that never stays clear, and live with it for a week before adding anything else.
Most wardrobe upgrades come down to using the space you already have a little better. Start small, pay attention to what actually works in your routine, and let the rest of the room follow.