10 Classic Shower Tile Ideas with a Look That Feels Complete
A finished shower doesn't need trendy tile to look expensive. The right classic pattern pulls the whole bathroom together, so you stop noticing the grout lines and start enjoying the space.
These ten ideas have stood the test of time for a reason. They work in small bathrooms and large ones, and they play well with almost any fixture or paint color you already have.
Each pick below comes with real-world details: where it shines, what it costs, and how to keep it looking sharp. No fluff, just tile that makes your shower feel complete.
1. Classic White Subway Tile with Dark Grout
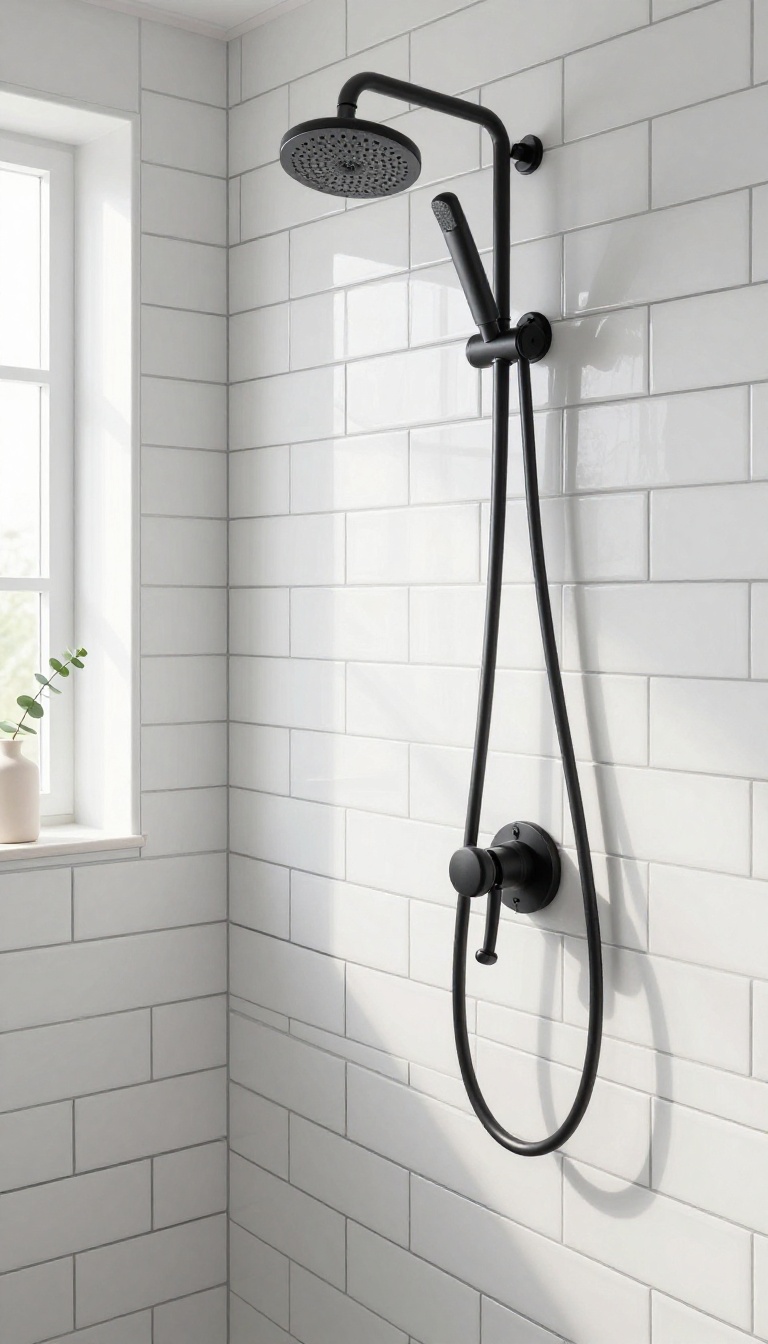
White subway tile is the little black dress of shower design. It never goes out of style, works with everything, and looks clean without trying too hard. But swap the standard white grout for charcoal or black, and suddenly that plain tile has a crisp, graphic edge that makes the whole shower feel intentional.
It's a small change with a big payoff.
You've seen subway tile a million times, but there's a reason it keeps showing up. The 3×6-inch format is affordable, easy to install, and creates a clean horizontal rhythm that makes small showers feel wider. With dark grout, every tile pops.
The contrast turns a simple wall into a feature without adding busy patterns or bold colors. And here's the bonus: dark grout doesn't show water spots or soap scum the way white grout does. It stays looking fresh with less scrubbing, which matters in a room that gets wet every day.
Why Dark Grout Works
White tile with white grout can blur into a flat, washed-out surface. Dark grout defines each tile, so the pattern reads clearly even from across the room. It also adds a subtle industrial or modern touch that plays well with matte black fixtures, chrome, or brushed nickel.
If you want a timeless look with a little personality, this is the easiest way to get it.
Installation And Layout Tips
Stick with a classic running bond (brick) pattern for the most timeless feel. Stacked or herringbone layouts work too, but they cost more in labor. Make sure your installer uses a grout that's rated for wet areas and seals it properly.
A 1/8-inch grout line is standard, but 1/16-inch gives a tighter, more modern look. Just know that thinner lines can be trickier to keep clean if the grout isn't sealed.
Keeping It Sharp
Dark grout hides a lot, but it's not maintenance-free. Use a squeegee after every shower to cut down on soap film. Once a week, spray the walls with a mild cleaner and let it sit before wiping.
Avoid harsh acids that can dull the grout over time. With basic care, this combo looks just as good in five years as it did on day one.
2. Soft Gray Hexagon Tile for a Calm, Even Look
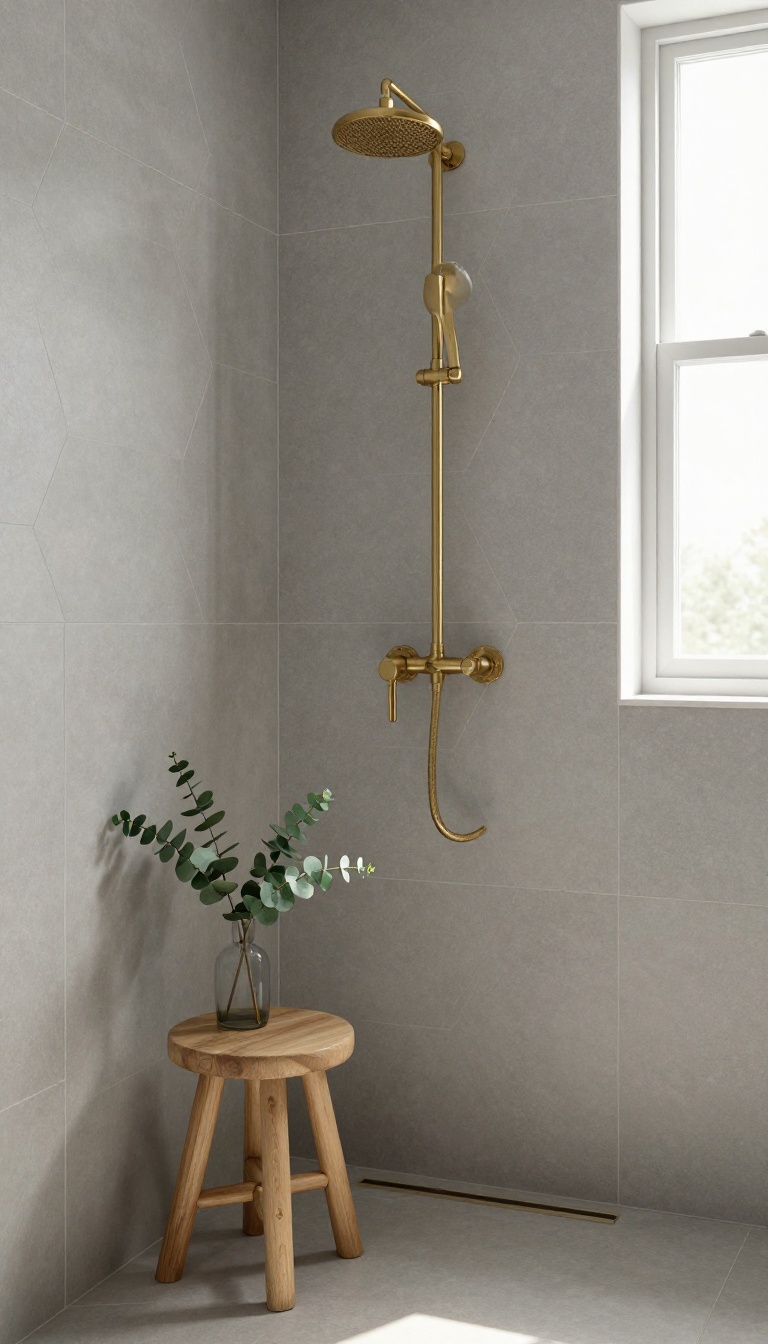
Hexagon tile brings a quiet kind of geometry to a shower wall. It's interesting without being loud, and in a soft gray, it reads more spa than busy. The result is a wall that feels even and settled, not flat or forgettable.
Soft gray hexagon tile works because it sits in the middle. It's not stark white, so it doesn't feel clinical, and it's not dark, so it doesn't shrink the room. The shape adds just enough pattern to keep your eye moving, but the low-contrast color keeps things calm.
That combination is why it shows up in so many spa bathrooms and high-end rentals. Matte finishes are the usual pick here. They soak up light instead of bouncing it, which softens the whole shower.
A glossy gray hex can look a little slick or commercial, so if you want that even, quiet look, matte is the safer bet. You'll also hide water spots better, which matters in a shower that gets used every day. The trick is keeping it from going boring.
Gray hex on every surface with no variation can feel like a flat gray box. You need one or two moves to give the wall some depth without breaking the calm.
Why Matte Gray Hex Feels Spa-like
Matte gray hexagons mimic the look of natural stone without the upkeep. The soft finish diffuses light, so shadows are gentle and the wall never glares. It's the same reason spas use honed stone and matte ceramics: the eye relaxes when there's nothing shiny to track.
Gray also plays well with warm and cool tones. Pair it with warm brass fixtures and it feels cozy. Pair it with chrome or brushed nickel and it leans crisp and modern.
That flexibility is what makes it a classic rather than a trend.
How To Avoid A Flat, Boring Wall
Add a vertical accent strip of contrasting tile, like a slim band of white or warm beige, running from floor to ceiling. It breaks up the gray without turning the shower into a pattern party. Another option: use a slightly darker gray hex on the shower floor and a lighter gray on the walls.
The subtle shift adds depth and helps define the space. You can also run the hexagons in a different orientation on one wall, like a vertical stack, to create a quiet focal point. Keep the grout close to the tile color.
A light gray grout on gray hex keeps the wall looking seamless and even. Contrasting grout will make every hexagon pop, which is the opposite of calm.
Sizing And Layout Tips
Small hexagons, around 1 to 2 inches, give a finer, more mosaic-like look. They're great for shower floors and small walls but can feel busy on a large wall. Larger hexagons, 4 to 6 inches, read more modern and cover space faster.
For a balanced look, run the hex pattern on the main wall and use a simple large-format tile on the side walls. Or keep the hex on the floor and use a plain field tile on the walls. Mixing scales keeps the shower from feeling one-note.
3. Honed Carrara Marble with a Simple Stacked Layout
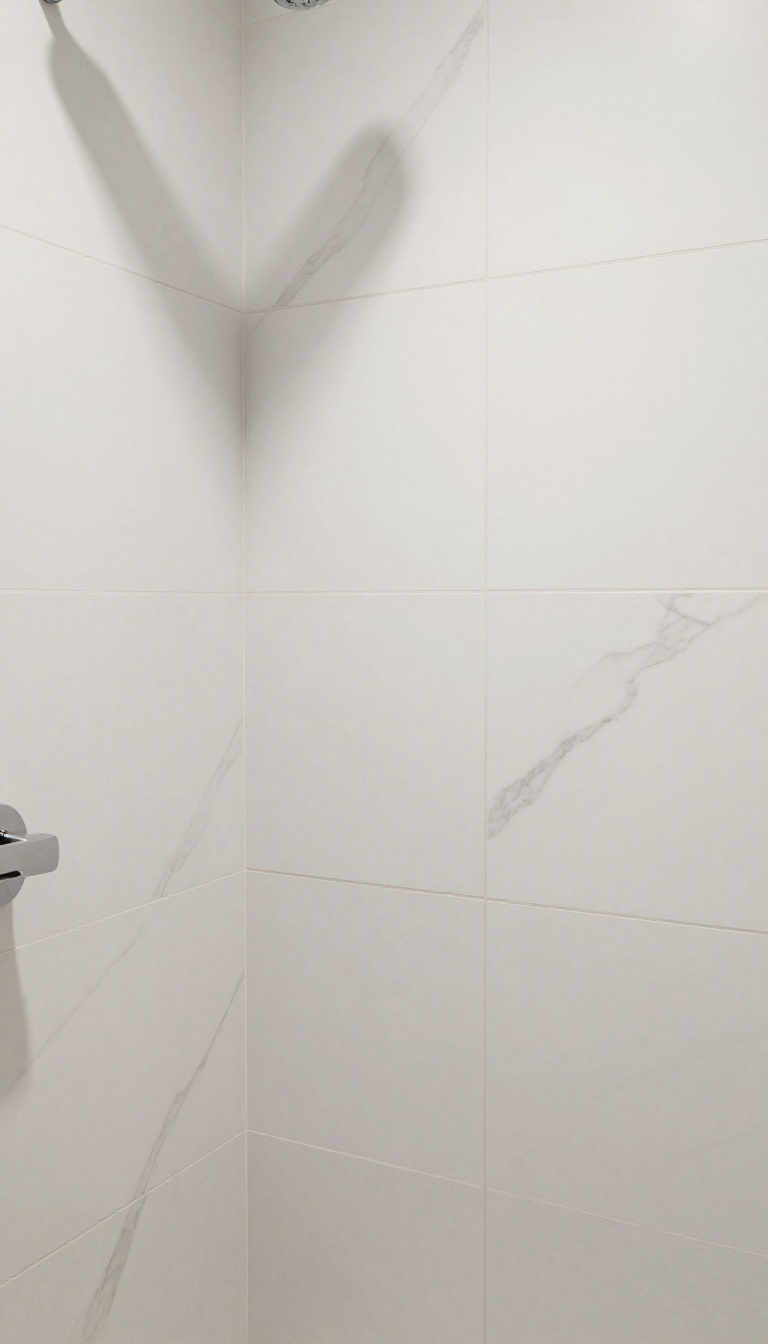
Carrara marble has been a symbol of luxury since Michelangelo chiseled it into David. In a shower, its soft white background and feathery gray veins add instant elegance without shouting. But the layout you choose can make or break the look.
A simple stacked pattern—where tiles align in a straight grid—keeps the natural drama of the stone in check and feels surprisingly modern.
Stacked layouts are having a moment, and it's easy to see why. They're clean, orderly, and let the marble do the talking. Unlike a traditional brick pattern, a straight stack creates continuous vertical and horizontal lines that make small showers feel taller and larger showers feel more architectural.
The repetition of the grid also highlights the subtle variations in each tile, turning the wall into a quiet gallery of natural stone.
Why A Stacked Layout Works
A stacked pattern (also called a straight set or grid) places tiles directly on top of each other, with all grout lines aligned. This creates a strong sense of order that contrasts beautifully with the organic movement of marble. It's a favorite in modern and minimalist bathrooms because it feels intentional and uncluttered.
In a shower, the vertical lines can even make the ceiling seem higher, which is a nice bonus in tight spaces.
Choosing The Right Tile Size
For a stacked look, larger tiles often work best. Think 4×12, 6×12, or even 12×24 inches. The bigger the tile, the fewer grout lines, and the more seamless the wall appears.
A 3×6-inch tile can also work, but it may read as more traditional. Just keep the proportions in mind: a very long, narrow tile in a stack can feel busy, while a square tile in a stack feels more geometric. Sample a few sizes on your wall before committing.
Sealing And Daily Care
Marble is porous, so sealing is non-negotiable—especially in a wet environment. Have your installer apply a penetrating sealer after installation and reapply every six to twelve months. For daily care, skip acidic cleaners like vinegar or lemon; they'll etch the surface.
Instead, use a pH-neutral stone cleaner and a soft cloth. A squeegee after each shower takes ten seconds and keeps water spots from becoming a problem. With a little routine, honed Carrara will stay beautiful for decades.
4. Glossy White Square Tile with a Matching Grout Line
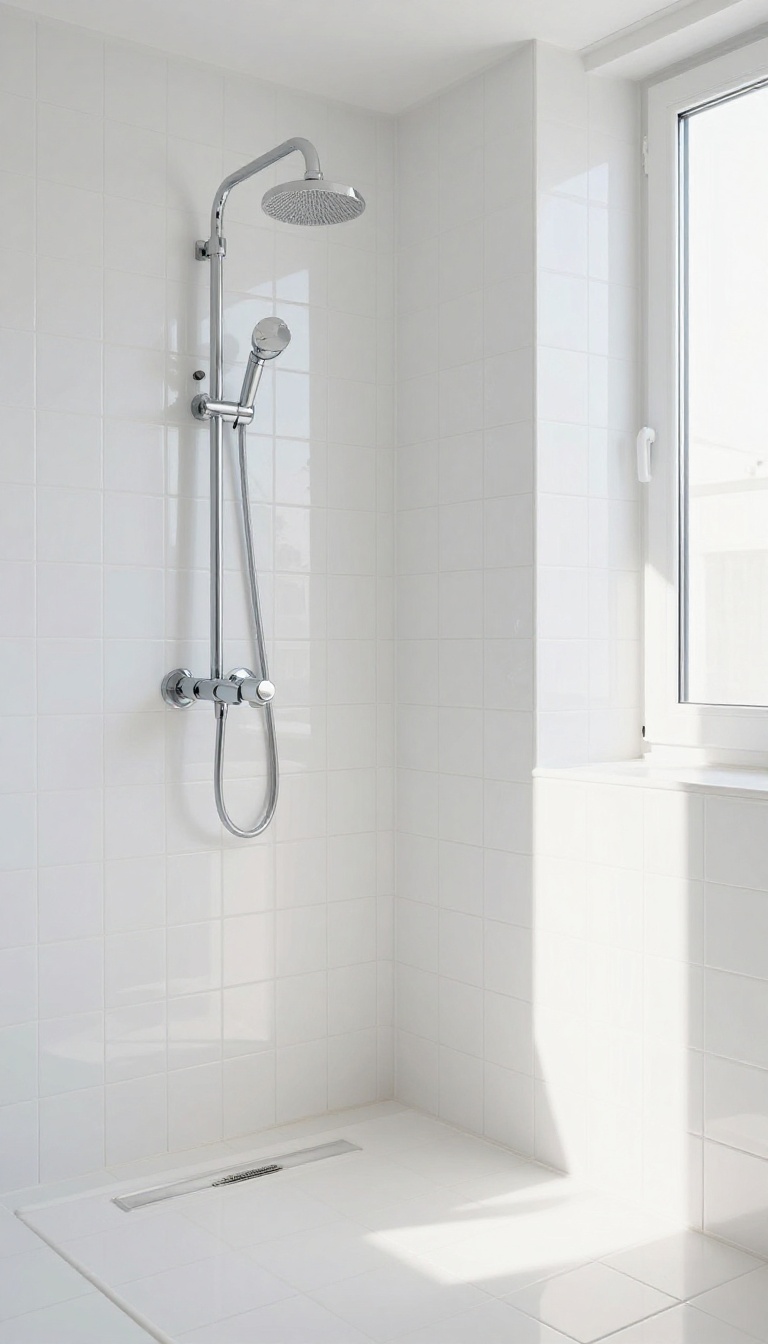
Glossy white square tile with matching grout is the quiet overachiever of shower design. It reflects light, disappears into the background, and makes even a cramped stall feel open and airy. The trick is the grout: when it blends with the tile, the wall reads as one smooth surface instead of a grid.
This look works because it removes visual noise. White tile already bounces light around, and matching grout keeps your eye from stopping at every seam. The result is a clean, uninterrupted plane that feels calm and intentional.
You'll see it in everything from modern apartments to old-school bathrooms that got a smart refresh. It doesn't shout for attention, which is exactly why it holds up year after year.
Why Matching Grout Changes Everything
Contrasting grout turns tile into a pattern. Matching grout turns it into a surface. That single choice can make a 3×3 shower feel bigger and a busy bathroom feel quieter.
It also hides minor layout imperfections, since your eye isn't tracing every line.
Sizes And Finishes That Work Best
Stick with squares between 4×4 and 6×6 inches for a classic look that doesn't overwhelm small spaces. Glossy is the default for light reflection, but a matte white with matching grout gives you a softer, more contemporary feel. Either way, keep the grout color within one shade of the tile.
Cost And Upkeep
Glossy white ceramic is one of the most affordable options out there, often $2 to $6 per square foot. Matching grout costs the same as any other color, so the savings come from not needing a designer to coordinate contrast. Clean it weekly with a gentle cleaner, and it stays bright for years.
Where It Shines And Where It Doesn't
It's a hero in small showers, rentals, and bathrooms with bold fixtures or colorful vanities. Skip it if you want a rustic, handmade look or if you're tiling a floor that needs grip. On walls, though, it's hard to beat for a seamless, finished feel.
5. Beveled Edge Subway Tile for Subtle Dimension
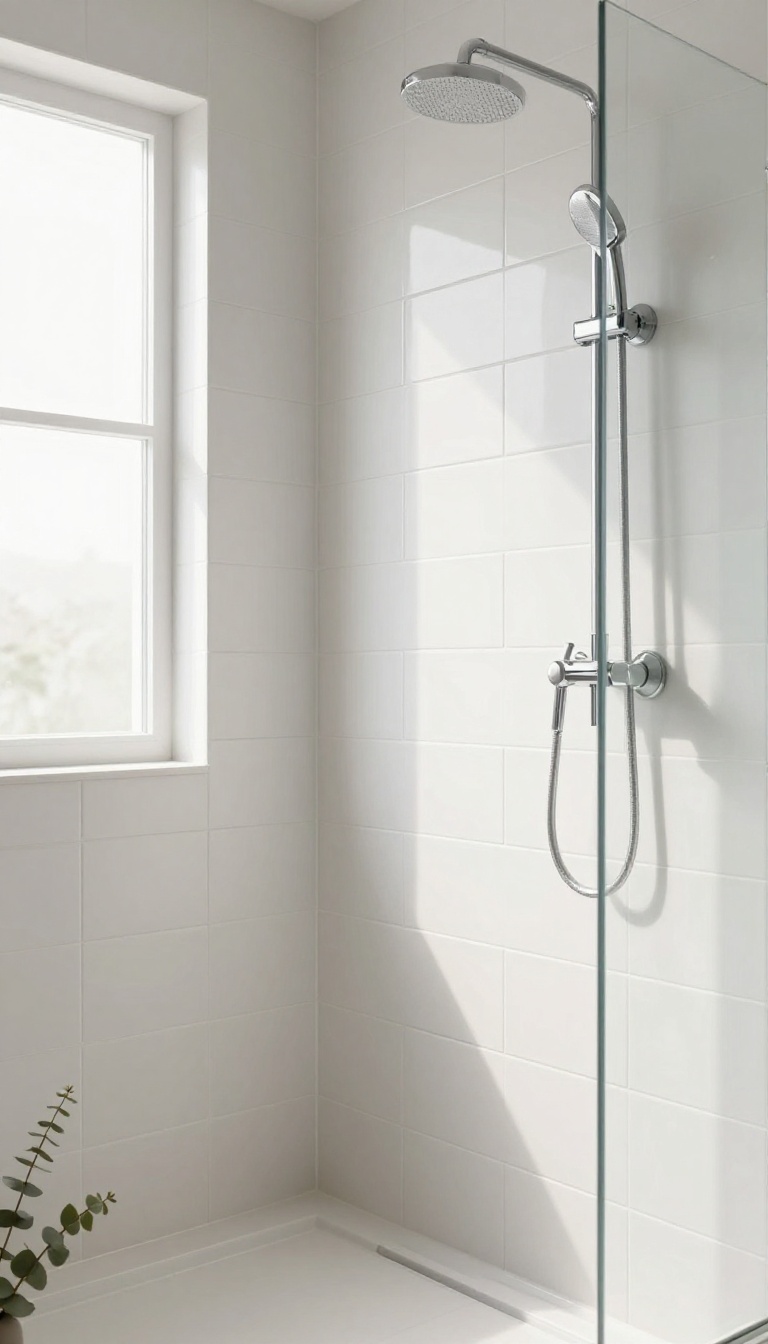
Beveled edge subway tile takes a familiar shape and gives it a quiet upgrade. The angled edges catch light from every direction, so the wall shifts as you move around the shower. You get depth and texture without a busy pattern fighting for attention.
It’s a smart pick when you want classic subway tile but something feels a little flat. The bevel adds just enough shadow play to make the surface interesting, yet it still reads clean and traditional. That balance is why it works in both old houses and new builds.
Best of all, it’s forgiving. The beveled edge softens the look of slightly uneven walls and imperfect cuts, which is a real bonus in older bathrooms.
Beveled subway tile is like regular subway tile that went to finishing school. The edges are angled instead of flat, creating a subtle ridge that runs along every grout line. When light hits those ridges, you get a soft glow and a bit of shadow that makes the wall feel dimensional.
That dimension is the whole point. You’re not adding color or a bold motif—you’re adding light play. It’s the difference between a wall that looks like a flat sticker and one that has a little life to it.
Because the bevel is subtle, it doesn’t overwhelm a small shower. It also doesn’t compete with other elements, so you can pair it with a patterned floor or a statement fixture without the space feeling chaotic. It’s classic, but with a wink.
Where Beveled Tile Works Best
Beveled subway tile shines on shower walls, especially in smaller bathrooms where you want visual interest without shrinking the room. It’s also a great choice for a tub surround or a wainscoting detail that wraps around the room. Skip it on the shower floor.
The beveled edges create tiny ledges that can trap water and soap scum, and the texture can be slippery. Keep the floor simple with a matte, flat tile instead. If you have a niche or a bench, beveled tile can highlight those features nicely.
The light catches the edges and draws the eye exactly where you want it.
How It Hides Imperfections
Older homes rarely have perfectly plumb walls, and that’s where beveled tile earns its keep. The angled edges create a soft transition between tiles, so minor lippage—where one tile sits slightly higher than its neighbor—becomes much less noticeable. Even in new construction, the bevel distracts from tiny variations in grout width or tile alignment.
It’s like a built-in camouflage for the stuff you’d otherwise obsess over. That forgiveness means you can use a standard installer and still get a clean-looking result. You don’t need laser-perfect walls to make this tile look good.
Pairing With Vintage Fixtures
Beveled subway tile has a natural affinity for vintage-style fixtures. Think polished chrome or unlacquered brass showerheads, a classic cross-handle faucet, or a pedestal sink nearby. The tile’s old-school shape and subtle shine complement that aesthetic without feeling themed.
It also plays well with hex or penny tile floors, which are another vintage staple. The combination feels collected over time rather than bought all at once. For a cohesive look, choose a grout color that’s close to the tile.
White tile with white grout keeps the focus on the bevel’s texture, while a light gray grout adds a bit more definition if you want the pattern to read stronger.
6. Warm Sand and Beige Tones for a Soft, Natural Feel
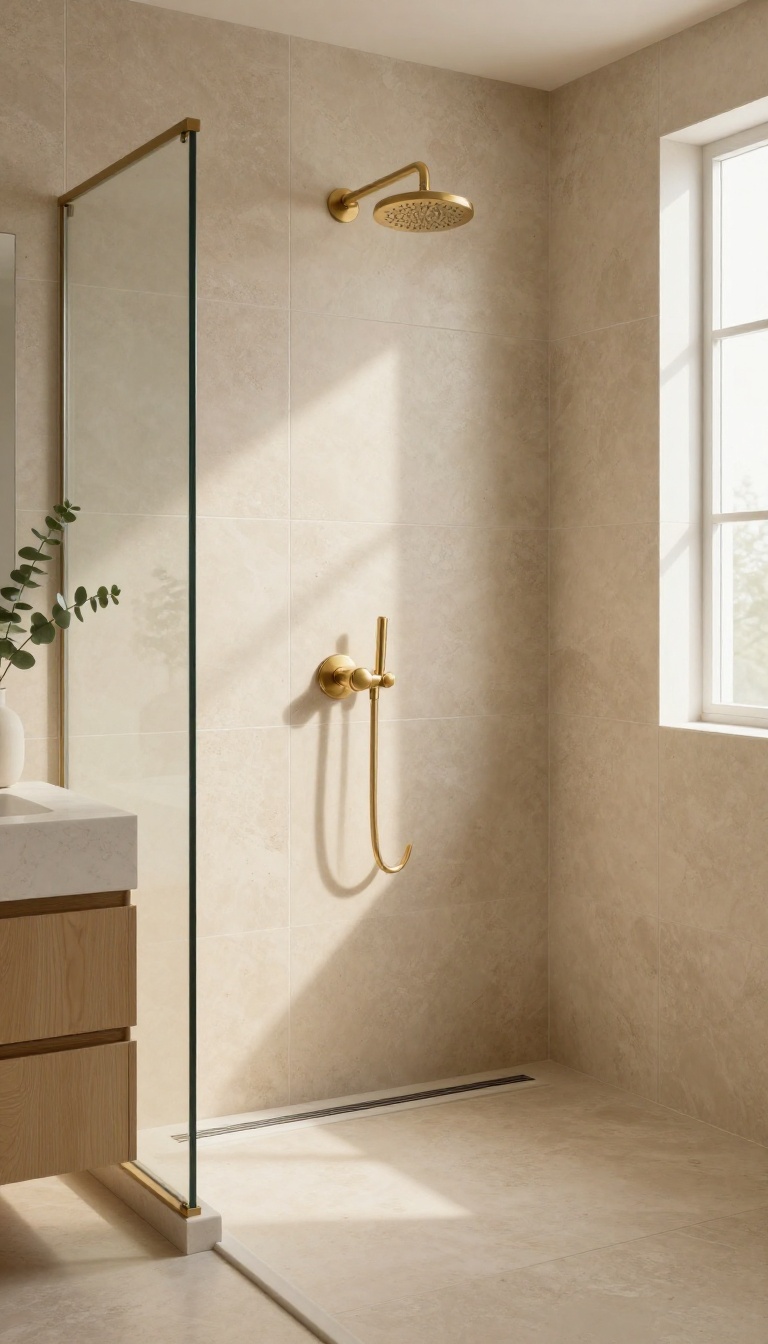
White and gray get most of the attention, but warm neutrals deserve a spot in the classic column too. Sand, beige, and travertine-inspired tiles bring a softness that cooler palettes can't match. They make a shower feel like a retreat instead of a sterile box.
These tones work because they mimic natural stone without the maintenance. A travertine-look porcelain tile, for example, gives you that earthy, organic vibe with none of the sealing or scrubbing. The warmth also plays nicely with wood vanities, brass fixtures, and almost any paint color you already love.
It's a forgiving choice that hides water spots better than bright white, and it never feels dated.
Why Warm Neutrals Work
Warm neutrals reflect light in a way that feels golden rather than harsh. That means your shower looks inviting even on gray mornings. They also create a seamless transition from the shower to the rest of the bathroom, especially if you use the same tile on the floor.
Best Tile Options To Consider
Travertine-look porcelain is the go-to for this look. It comes in large-format slabs or classic 12×24 tiles, and the veining is subtle enough to stay timeless. Limestone and sandstone finishes are other solid picks.
If you want a bit more texture, a tumbled edge on a beige ceramic tile adds character without going rustic.
Pairing And Maintenance Tips
Stick with a grout color that's one shade darker than the tile to keep things soft and cohesive. Matte finishes hide water spots better than glossy ones, so they're ideal for busy showers. For cleaning, a mild pH-neutral cleaner is all you need—no harsh scrubbing required.
7. Penny Round Tile with a Vintage, Finished Edge
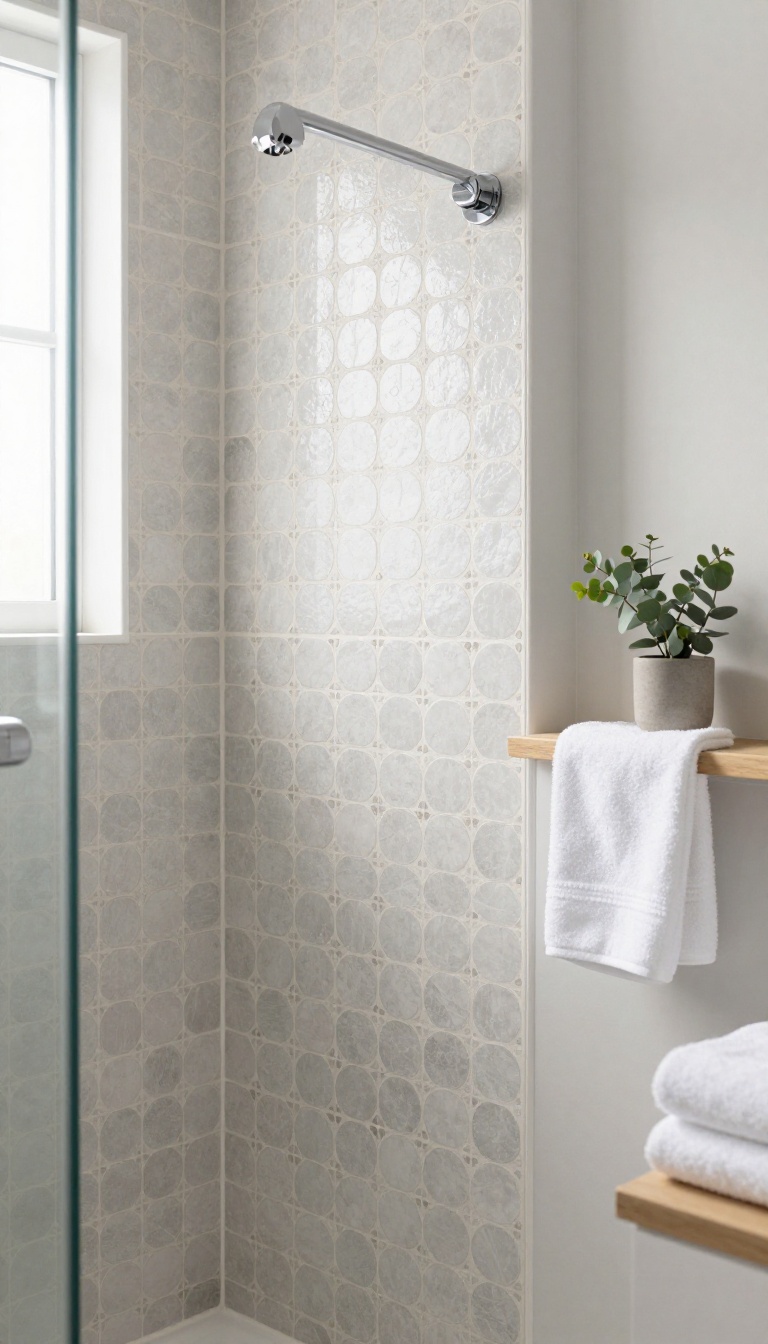
Penny round tile brings a playful, retro vibe that still feels fresh today. The tiny circles create a textured surface that hides water spots and adds a finished look to any shower. With the right grout and layout, you get a floor or wall that's both charming and practical.
Penny rounds are small, usually about three-quarters of an inch in diameter, and they come on mesh-backed sheets for easy installation. That sheet layout is key to a clean look. You want the circles to line up in a neat grid or offset pattern without visible seams.
A good installer will stagger the sheets so the pattern flows naturally. On the floor, penny rounds offer great slip resistance because of all those grout lines. That makes them a smart choice for shower floors, especially in homes with kids or older adults.
On walls, they add a vintage touch that pairs well with subway tile or a simple border. The finished edge comes from how you treat the borders and grout. A clean, consistent edge around the perimeter makes the whole shower look intentional and complete.
Grout Color Makes Or Breaks The Look
Grout color changes everything with penny rounds. A light grout makes the circles blend into a soft, almost seamless surface. Dark grout highlights each penny and creates a bold, graphic pattern.
For a classic vintage feel, go with a warm gray or off-white. If you want more contrast, charcoal or black grout gives a modern edge. Just remember that dark grout shows soap scum more, so it needs a little extra cleaning.
Sheet Layout And Pattern Options
Penny rounds come in a few standard layouts: straight grid, offset (like bricks), and sometimes a hexagon-like arrangement. The straight grid feels more formal and orderly. Offset adds a bit of movement and is more forgiving if the walls aren't perfectly square.
Whichever you choose, check that the sheets are aligned before the thinset sets. A slight shift can make the whole wall look off. Also, plan where the sheets end at the edges so you don't end up with tiny slivers of tile.
Keeping The Floor Safe And Slip-resistant
The small size of penny rounds naturally creates more grout lines, which gives you better traction than large-format tiles. But you can boost safety even more with a matte finish or a textured surface. Avoid polished penny rounds on the floor—they can be slick when wet.
A simple tip: test a sample with wet hands to see how it feels. Also, make sure the grout is slightly recessed, not flush, to give your feet something to grip.
Installation Tips For A Flawless Finish
Penny rounds are fiddly to install because there are so many small pieces. Hire a pro if you're not confident, or budget extra time if you're DIYing. Use a small notched trowel and press the sheets firmly into the thinset.
A grout float helps you work the grout into all those tiny gaps. After grouting, buff the surface with a microfiber cloth to remove haze. The result is a smooth, finished look that feels vintage but not dated.
8. Large-Format Matte Tile with Minimal Grout Lines
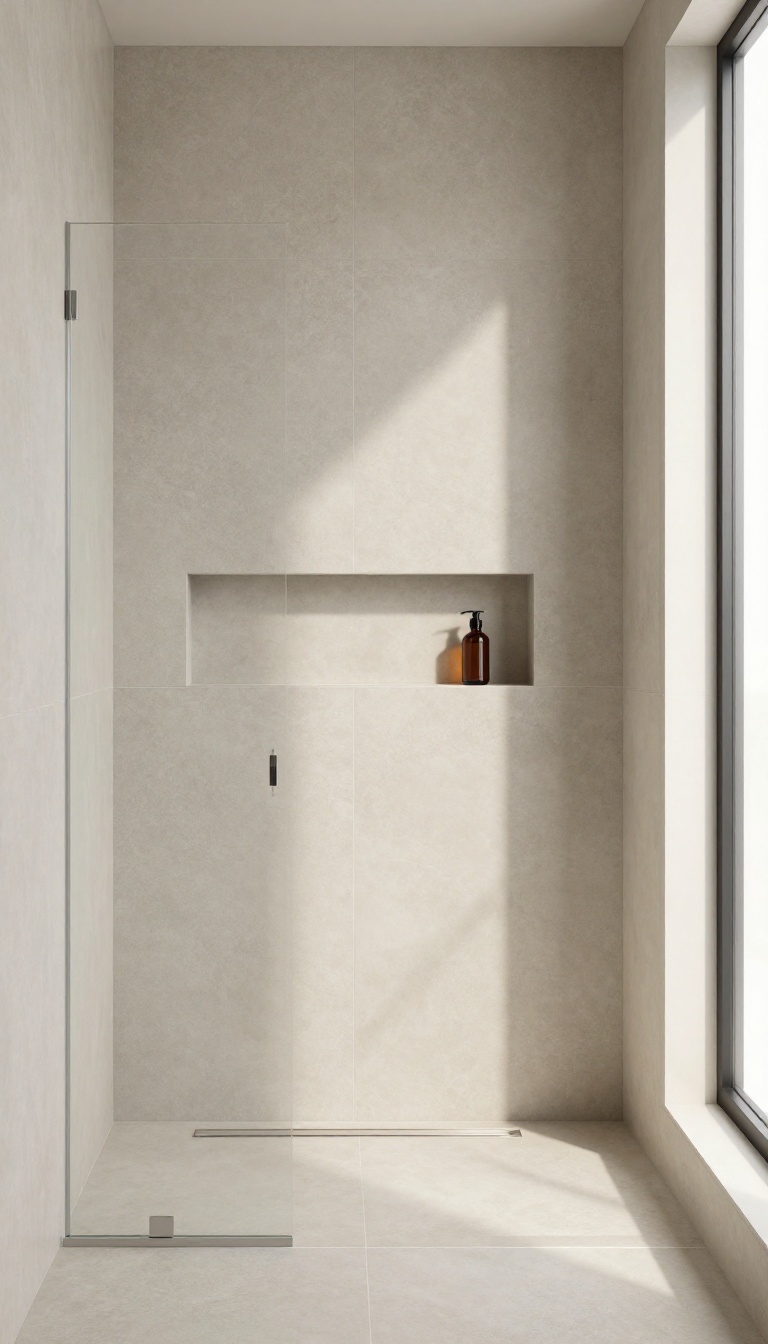
Large-format matte tile has a way of making a shower feel instantly more polished. The bigger the tile, the fewer grout lines you see, and that translates to a cleaner, more modern look. It’s a classic choice that never feels dated, and it works in just about any bathroom style.
But it’s not just about looks. Fewer grout lines mean less scrubbing and a surface that feels smoother underfoot. In this section, we’ll cover why 12×24 matte tiles are a sweet spot, how they handle slopes and niches, and what to watch for during installation.
Large-format matte tile, typically 12×24 inches or larger, gives you that seamless, high-end look without the fuss. The matte finish hides water spots and soap scum better than glossy tiles, so your shower stays looking fresh with minimal effort. And because there’s less grout, there’s less chance for mold and mildew to take hold.
These tiles come in a range of colors, from soft whites and greiges to deep charcoals. The matte surface adds a subtle texture that feels warm and inviting, not cold or sterile. It’s a practical choice that doesn’t sacrifice style.
When you use large tiles, the grout lines become almost invisible if you match the grout color closely. That creates a continuous, monolithic look that makes even a small shower feel bigger. It’s a trick designers use all the time to make spaces feel more expansive.
But large tiles aren’t just for walls. They can work on the shower floor too, though you’ll need to consider the slope. We’ll get into that in a bit.
First, let’s talk about why 12×24 is such a popular size.
Why 12×24 Matte Tiles Hit The Sweet Spot
Twelve by twenty-four inches is large enough to reduce grout lines significantly, but still manageable for most shower walls. It’s a standard size, so it’s widely available and often more affordable than oversized slabs. You get the benefits of large-format tile without the heavy lifting or specialized installation that comes with even bigger pieces.
This size also gives you flexibility in layout. You can run them vertically to make ceilings look higher, or horizontally to widen the space. Stack them in a grid for a clean, modern grid, or offset them like subway tile for a subtle twist.
Either way, the matte finish keeps things feeling soft and contemporary.
Handling Slopes And Niches Like A Pro
Shower floors need a slope toward the drain, and large tiles can be tricky to slope without lippage. The solution is to cut the tiles into smaller pieces around the drain, or use a linear drain that allows for a single slope. A linear drain is a great match for large-format tile because it minimizes cuts and keeps the floor looking clean.
Niches are another spot where large tiles need some planning. You can either frame the niche with the same tile for a seamless look, or use a contrasting material to make it pop. Just make sure the niche is properly waterproofed and sloped so water doesn’t pool.
A little forethought during layout goes a long way.
Installation Tips For A Flawless Finish
Large-format tile requires a flat substrate. Any bumps or dips will show up as lippage, where one tile edge sits higher than the next. A leveling clip system can help keep everything flush, but the real key is prepping the walls and floor properly.
Use a thinset mortar designed for large tiles, and back-butter each piece to ensure full coverage. This prevents hollow spots and keeps the tile firmly bonded. Also, choose a grout that matches the tile color as closely as possible.
Epoxy grout is a smart choice for showers because it resists stains and doesn’t need sealing. With the right prep, your large-format matte tile shower will look flawless for years.
9. Classic Basketweave Pattern for Timeless Texture
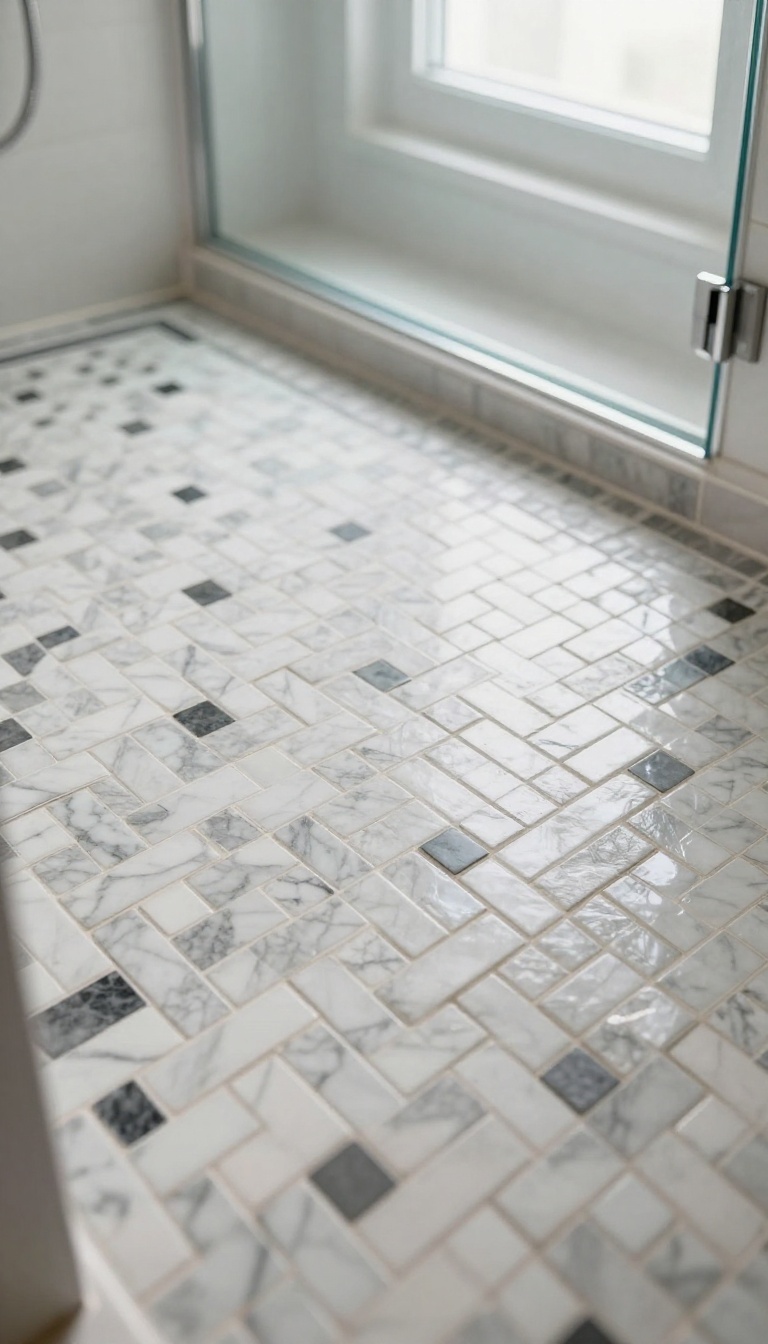
Basketweave tile has been around for centuries, and it still looks fresh because the pattern does the heavy lifting. Small rectangles weave over and under each other, creating a subtle checkerboard effect that adds depth without shouting. It’s a classic that works in almost any shower, from vintage-inspired to modern minimalist.
The magic of basketweave is how it balances order and movement. The interlocking shapes keep your eye moving, but the overall grid stays calm and organized. That makes it a great choice for shower floors, where you want a little grip and a lot of style.
It also shines on accent walls or as a full-wall treatment when you want texture without a busy pattern.
Where Basketweave Works Best
Shower floors are the natural home for basketweave. The smaller tiles mean more grout lines, which add slip resistance—a practical bonus. It’s also a classic choice for bathroom floors outside the shower, tying the whole room together.
On walls, use it as a full-height feature or a wainscoting-style accent. It can feel overwhelming on every surface, so pick one area to let it shine.
Color Combos That Feel Complete
The classic look is white tiles with black or dark gray accents, often in a marble or matte finish. That contrast creates crisp definition and works with almost any fixture color. For a softer feel, try warm grays, creams, or even soft greens and blues.
Mixing a matte and glossy finish in the same color adds subtle depth without changing the palette.
Installation And Maintenance Tips
Basketweave comes in sheets, which makes installation faster and keeps the pattern consistent. But it still requires careful alignment, so hire a pro if you’re not confident. Grout color matters: a matching grout blends the pattern, while a contrasting grout highlights it.
For cleaning, a soft brush and mild cleaner keep the texture looking sharp without scratching.
10. Vertical Stacked Tile to Make Showers Feel Taller
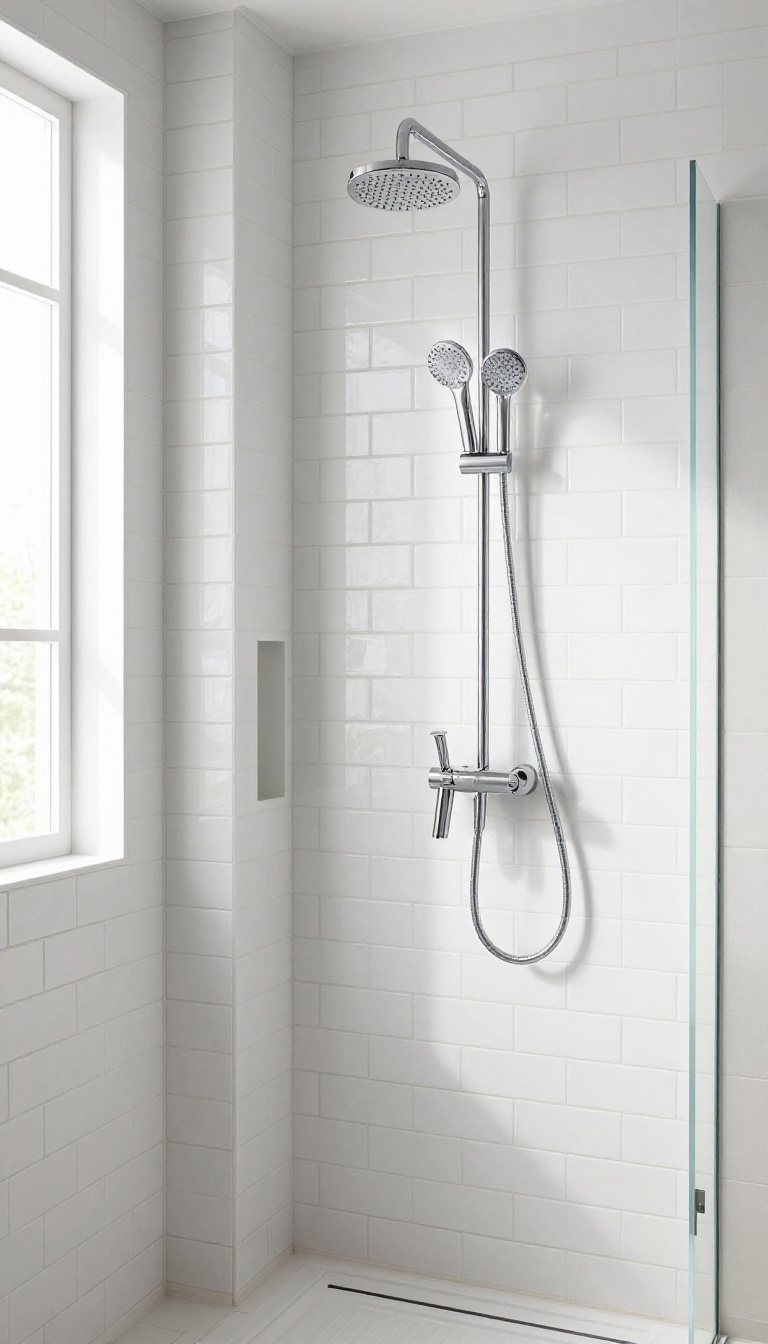
Turn a standard subway tile ninety degrees and something surprising happens: the shower grows. Vertical stacked tile draws the eye upward, making even a low ceiling feel a little more generous. It’s a small change with a big payoff, and it works with almost any tile you already like.
The trick is keeping the lines clean. Because the pattern is so simple, any wobble in the installation or messy edge shows up fast. Get those details right, though, and you end up with a shower that feels taller, calmer, and completely finished.
Vertical stacking is exactly what it sounds like: you set rectangular tiles in a straight column, one above the other, instead of offsetting them like traditional brick. The grout lines run vertically from floor to ceiling, and that continuous line is what creates the height illusion. It’s a classic look that never really went out of style—it just gets rediscovered every few years.
This layout shines in showers with standard eight-foot ceilings, but it’s also a smart fix for basements or attic bathrooms where headroom is tight. The vertical lines pull your gaze up, so you notice the height of the room instead of the width. And because the pattern is so minimal, it lets your tile color or texture take center stage.
Where Vertical Stacking Works Best
Small showers benefit the most. When you’re standing in a tight three-by-three stall, vertical lines make the walls feel like they’re stretching upward instead of closing in. It’s also a great choice for shower niches and accent walls, where the pattern can run uninterrupted from floor to ceiling.
If you have a shower with a bench or a curb, keep the vertical lines going right through. Stopping and starting the pattern breaks the illusion. And if your ceiling is sloped, run the tile all the way up to the highest point—it’ll make the slope feel intentional rather than awkward.
Tile Sizes And Materials That Shine
Subway tiles are the go-to, but you’re not limited to three-by-six. Try two-by-eight or four-by-twelve for a more modern proportion. The taller the tile, the fewer grout lines you’ll have, which means less visual clutter and an even cleaner look.
Ceramic and porcelain are the usual suspects, but don’t overlook glass or natural stone. Glass reflects light and can make the shower feel brighter, while marble or travertine adds a subtle luxury. Just remember that natural stone needs sealing, and glass shows water spots more easily—so factor in your cleaning routine.
Finishing Edges Without The Fuss
The edges are where vertical stacked tile either looks custom or looks like a weekend project. Use bullnose tiles, which have a rounded finished edge, to cap the ends of the tile run. If bullnose isn’t available in your tile, a matching metal trim profile works just as well and comes in finishes like brushed nickel or matte black.
For a truly seamless look, miter the edges—cutting the tiles at a 45-degree angle so they meet in a clean corner. It takes skill, so it’s worth hiring a pro if you’re not comfortable. And always plan your layout so you don’t end up with a skinny sliver of tile at the ceiling or floor.
A little math upfront saves a lot of frustration later.
FAQ
What makes a shower tile look 'complete'?
A complete look comes from consistency. Stick to one or two tile shapes, repeat your grout color, and finish edges with trim or bullnose. When the tile, grout, and fixtures feel related, the shower reads as finished rather than pieced together.
Are classic tile ideas still in style?
Yes. Classic patterns like subway, hex, and basketweave have been used for decades because they are flexible and timeless. They outlast trendy tiles and are easy to update later with paint, fixtures, or accessories.
What grout color should I choose for a classic shower?
It depends on the look. White grout creates a seamless, soft feel. Dark grout adds contrast and hides stains better.
For a safe middle ground, pick a grout one or two shades lighter or darker than your tile.
How do I keep classic shower tile looking new?
Squeegee after each use, clean weekly with a pH-neutral cleaner, and reseal natural stone once a year. Avoid harsh acidic cleaners on marble or travertine. Good ventilation also prevents mildew in grout lines.
Can I mix two classic tile ideas in one shower?
Absolutely. A common approach is a simple wall tile with a patterned floor or a contrasting niche. Keep the palette tight, usually two to three colors, and repeat one material to tie the space together.
Conclusion
A complete-looking shower usually comes down to a few deliberate choices: one strong tile idea, a grout color that supports it, and finishes that repeat instead of compete. Nail those three and the space reads finished even before the towels go up. Start with the idea that fits your layout and budget, then build outward from there.
You can always swap a niche, a bench, or a border later. Get the tile right first, and everything else falls into place.