23 Floor Cleaning Solution Ideas for Every Surface
Scrubbing floors shouldn't feel like a chemistry experiment gone wrong. Whether you're battling greasy kitchen tiles or dull hardwood, the right cleaner makes all the difference.
We've gathered 23 practical solutions tailored to every surface in your home, from natural stone to delicate laminate.
Each idea tackles a specific problem—like streak-free glass or whitening grout—so you can skip the guesswork and get back to enjoying your clean space.
1. Vinegar and Water for General Tile Cleaning
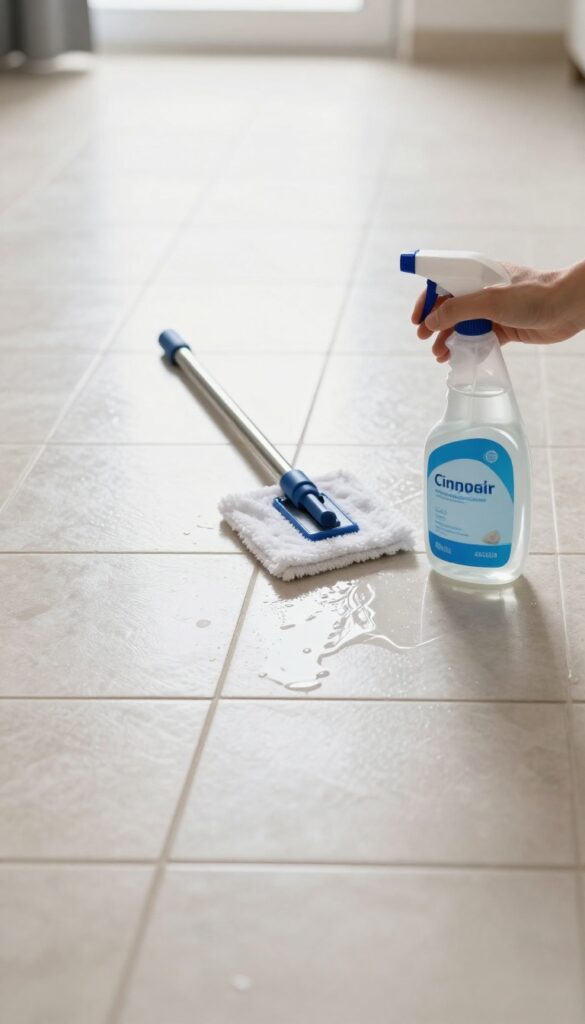
A simple mix of equal parts white vinegar and warm water is a go‑to for routine tile maintenance. It cuts through everyday grime and soap scum without leaving behind harsh chemical residues. Best of all, it’s safe for ceramic and porcelain tiles when used regularly.
This classic solution works wonders on glazed tiles, leaving them streak‑free and shiny. Just spray it on, let it sit for a minute, then wipe with a damp microfiber mop. Avoid using vinegar on unglazed or natural stone tiles, as the acid can etch the surface over time.
Why It Works So Well
Vinegar is a mild acid that breaks down alkaline deposits like soap scum and hard‑water stains. When diluted, it’s gentle enough for weekly cleaning but still effective. The water helps rinse away loosened dirt, and the combination evaporates quickly, reducing streaks.
Best Practices For Application
Always test in an inconspicuous area first. Use a spray bottle for even coverage, and avoid soaking grout lines—excess moisture can weaken them over time. For best results, mop with a clean, damp microfiber cloth afterward to pick up any residue.
When To Skip This Mix
Skip vinegar on natural stone (marble, travertine, slate) and unglazed tiles. The acid can dull the finish or cause pitting. Also avoid it on waxed or sealed floors, as it can strip the protective layer.
Stick to pH‑neutral cleaners for those surfaces.
2. Rubbing Alcohol for Streak-Free Glass Tile
Glass tile backsplashes and shower walls look stunning, but they also show every fingerprint, water spot, and smudge. Commercial glass cleaners work, but they often leave a hazy film if not buffed perfectly. Rubbing alcohol solves that problem with a simple, fast-evaporating formula that leaves glass tile sparkling with zero streaks.
To make this cleaner, mix 1 cup of water with 1 tablespoon of rubbing alcohol (70% or higher is fine). Pour it into a spray bottle and shake gently. Spray the solution onto your glass tile, then wipe with a microfiber cloth.
The alcohol breaks down grease and grime quickly, and because it evaporates so fast, there’s no time for streaks to form. No buffing required.
Why Alcohol Beats Vinegar On Glass
Vinegar is a great all-purpose cleaner, but on glass tile it can leave a dull film if not rinsed thoroughly. Rubbing alcohol evaporates completely, leaving nothing behind. It also cuts through soap scum and hard water spots better than vinegar alone.
Plus, it dries in seconds, so you can admire your work immediately.
Best Practices For A Perfect Shine
Always use a clean, lint-free microfiber cloth. Paper towels can leave tiny fibers and streaks. Work in small sections, spraying and wiping before the solution dries.
For stubborn spots, let the solution sit for 10–15 seconds before wiping. Avoid using this mixture on natural stone or unsealed grout, as alcohol can dry them out.
When To Add A Drop Of Dish Soap
If your glass tile has greasy residue from cooking or lotions, add one drop of clear dish soap to the alcohol-water mix. The soap helps lift oils, while the alcohol ensures no soapy film remains. Just be careful not to overdo it—too much soap leaves a residue.
One drop is all you need.
3. Hydrogen Peroxide for Grout Whitening
Grout lines are magnets for dirt, grease, and mildew. Before you know it, that bright white grout looks dingy and tired. Hydrogen peroxide combined with baking soda creates a powerful paste that lifts stains without bleaching the surrounding tile.
It's a gentle yet effective solution that works on ceramic, porcelain, and natural stone tiles.
This method relies on the natural bleaching and disinfecting properties of hydrogen peroxide. The baking soda provides gentle abrasion to scrub away grime without scratching. Together, they form a thick paste that clings to vertical grout lines and penetrates deep into porous surfaces.
Mixing The Paste
In a small bowl, combine 1/2 cup of baking soda with 1/4 cup of 3% hydrogen peroxide. Stir until it forms a spreadable paste. If it's too thick, add a few more drops of hydrogen peroxide.
The consistency should be similar to toothpaste.
Application And Scrubbing
Apply the paste directly onto the grout lines using a small brush, an old toothbrush, or a grout brush. Let it sit for 5–10 minutes to allow the hydrogen peroxide to work on stains. Then scrub gently in circular motions.
For stubborn stains, let the paste sit longer or apply a second coat.
Rinsing And Drying
After scrubbing, wipe away the paste with a damp cloth or sponge. Rinse the area with clean water to remove any residue. Dry the tiles with a soft towel to prevent water spots.
Your grout should look noticeably brighter and cleaner.
4. Dish Soap and Warm Water for Vinyl Floors
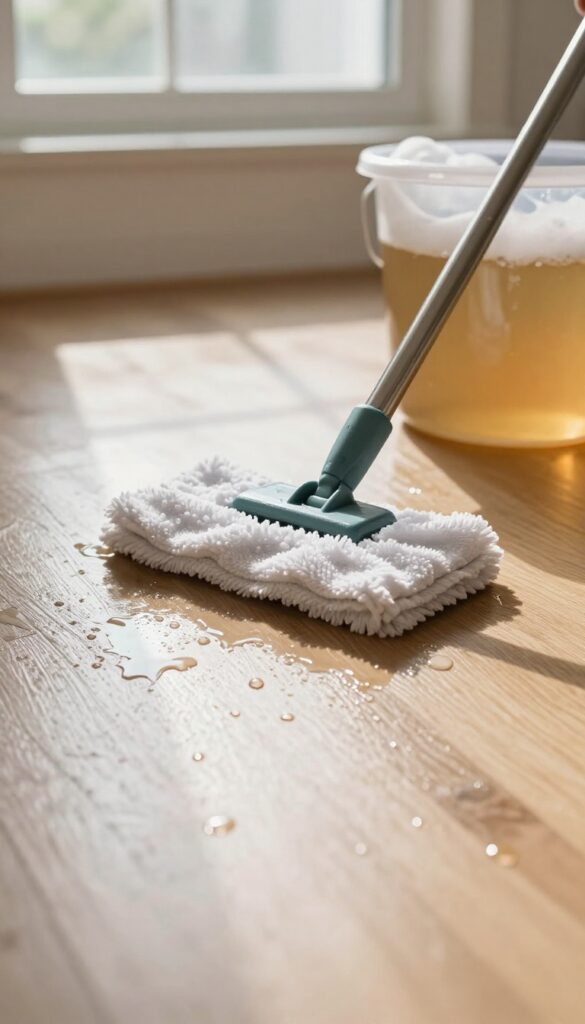
Vinyl flooring is durable, but it doesn't like harsh chemicals. The protective layer can get dulled by ammonia or bleach, leaving it looking tired. A gentle mix of dish soap and warm water is all you need to keep it clean and glossy.
Why Vinyl Needs A Gentle Touch
Vinyl flooring has a clear wear layer that shields it from scratches and stains. Strong cleaners can break down that layer over time, causing it to yellow or become cloudy. Dish soap is mild enough to lift dirt without damaging the finish.
How To Mix And Apply
Fill a bucket with warm water and add just a few drops of liquid dish soap. Too much soap leaves a residue that attracts more dirt. Dip a microfiber mop, wring it well, and wipe the floor in sections.
Rinse the mop often to avoid spreading grime.
Drying And Maintenance Tips
After cleaning, go over the floor with a dry microfiber cloth or let it air dry. Standing water can seep into seams and cause peeling. For weekly upkeep, a quick damp mop with plain warm water is enough.
Deep clean with soap only when needed.
5. White Vinegar and Olive Oil for Hardwood Shine
Hardwood floors can lose their glow over time, especially after repeated mopping with harsh chemicals. A simple blend of white vinegar, water, and a tiny amount of olive oil can restore that natural luster without leaving a greasy residue. This old-school trick polishes the wood while gently cleaning it, making your floors look refreshed and cared for.
Mix 1 cup of white vinegar with 1 gallon of warm water, then add just 1 teaspoon of olive oil. Stir well and apply with a damp (not wet) mop. The vinegar cuts through dirt and grime, while the oil adds a subtle sheen.
Avoid over-oiling—too much can attract dust. Use this solution sparingly, about once a month, to maintain a healthy shine without buildup.
Why It Works
White vinegar is acidic enough to break down dirt and grease but gentle on wood finishes. Olive oil acts as a natural polish, filling in tiny scratches and adding a soft glow. Together, they create a cleaner that's both effective and safe for most sealed hardwood floors.
Application Tips
Always test on an inconspicuous area first. Use a microfiber mop and wring it out thoroughly—excess moisture can damage wood. Mop in the direction of the grain and let the floor air dry.
For best results, avoid walking on the floor for 30 minutes after mopping.
When To Skip This Method
Do not use this solution on unsealed or waxed hardwood floors, as the vinegar can strip the finish and the oil may cause uneven spots. Stick to manufacturer-recommended products for those surfaces. Also, avoid this mix if your floor has deep scratches or damaged sealant.
6. Tea Bags for Dark Hardwood Stains
Dark hardwood floors look elegant, but even minor scratches and scuffs can stand out like a sore thumb. Before you reach for a pricey touch-up kit, check your pantry. Black tea, the same stuff you drink every morning, can help darken those light marks and blend them back into the wood.
The tannins in black tea act as a natural stain, gently deepening the color of exposed wood fibers. It’s a simple, chemical-free fix that works surprisingly well on minor surface damage.
Why Black Tea Works On Dark Wood
Black tea is rich in tannins—organic compounds that bind to wood fibers and add color. When you apply cooled tea to a scratch, the tannins soak into the raw wood, darkening it to match the surrounding finish. This works best on dark-stained or naturally dark woods like walnut, mahogany, or dark oak.
The effect is subtle but effective for light surface scratches that haven’t penetrated the stain.
How To Apply Tea To Scratches
Start by brewing two black tea bags in one cup of boiling water. Let the tea steep for at least 10 minutes to get a strong concentration, then allow it to cool completely. Dip a soft cloth or cotton swab into the tea, wring out any excess, and gently rub it into the scratch.
Work in the direction of the wood grain. Let it dry for an hour, then check the color. Repeat if needed.
Once you’re satisfied, buff the area with a dry cloth and apply a thin layer of furniture polish or hardwood floor wax to seal it.
When To Skip This Method
This trick is only for light surface scratches on dark hardwood. Deep gouges that go through the stain or into the bare wood will need a wood filler and refinishing. Also avoid using tea on unfinished or raw wood—it can cause uneven staining.
And don’t try this on light-colored floors; the tea will leave a dark mark that’s hard to reverse. Test on an inconspicuous spot first to make sure the color matches.
7. Club Soda for Fresh Spills on Laminate
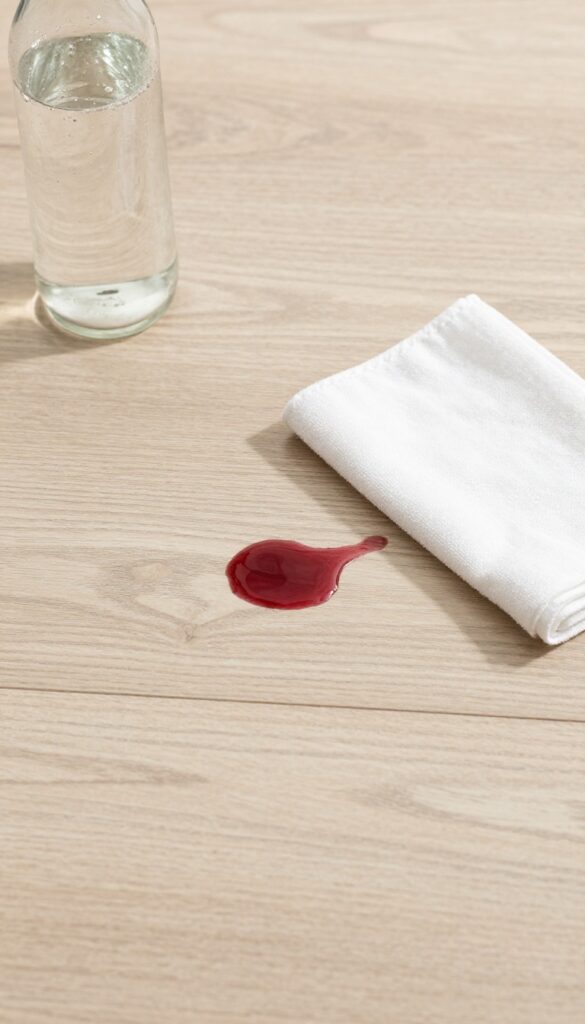
Laminate flooring is a champ at mimicking wood or stone, but it has one major weakness: moisture. Too much water can seep between the planks, causing swelling or warping that's nearly impossible to reverse. That's why club soda is such a clever hack for fresh spills.
The carbonation in club soda helps lift dirt and liquid away from the surface without the need for scrubbing or excessive moisture. When you blot—never rub—you avoid pushing the spill deeper into the seams. This method works best on fresh spills like juice, wine, or coffee, before they have a chance to set.
Why Club Soda Works
Club soda contains carbonic acid, which creates gentle bubbles that help dislodge particles from the laminate's protective layer. Unlike plain water, the bubbles lift the spill so you can blot it up quickly, leaving minimal moisture behind. It's also free of harsh chemicals that could dull the finish over time.
How To Use It Right
Pour a small amount of club soda directly onto the spill—just enough to cover it. Let it fizz for a few seconds, then blot with a clean, dry microfiber cloth. Repeat if needed, but always blot, never rub.
Finish by drying the area with a fresh cloth to remove any remaining moisture.
When To Skip This Method
Club soda is not a cleaner for dried-on stains or heavy grime. For those, you'll need a laminate-specific cleaner. Also, avoid using club soda on unsealed or damaged laminate, as the carbonation could worsen existing issues.
Stick to fresh spills only.
8. Rubbing Alcohol and Vinegar for Laminate Streaks
Laminate flooring can be tricky. You mop it, it dries, and suddenly you're left with a hazy, streaky mess. That's because many all-purpose cleaners leave a residue that shows up once the water evaporates.
The fix is simpler than you think: a quick mix of rubbing alcohol, water, and a splash of vinegar. It evaporates fast and leaves no trace behind.
The problem with laminate is that it's essentially a printed layer sealed with a clear coat. When you use too much water or a soapy cleaner, the residue sits on top and dries into visible streaks. Rubbing alcohol cuts through that residue and speeds up drying, while vinegar helps dissolve any remaining grime.
The result is a clean, streak-free shine without the hassle of buffing.
The Perfect Ratio
Mix equal parts rubbing alcohol (70% isopropyl) and water in a spray bottle. Add a tablespoon of white vinegar per cup of solution. Shake gently to combine.
That's it. No need for fancy store-bought products. This ratio is strong enough to clean but gentle enough for daily use on sealed laminate.
How To Apply Without Overwetting
Laminate hates standing water, so spray the solution lightly onto a microfiber mop pad rather than directly onto the floor. Mop in the direction of the planks to avoid pushing water into the seams. Work in small sections, and let the floor air dry.
Because alcohol evaporates quickly, you'll see a streak-free finish in minutes.
When To Skip The Vinegar
If your laminate has a wax coating (rare but possible), vinegar can dull it over time. Test a small hidden area first. If the finish looks cloudy after drying, omit the vinegar and just use alcohol and water.
The alcohol alone still prevents streaks and dries clear.
9. Baking Soda Paste for Carpet Stains
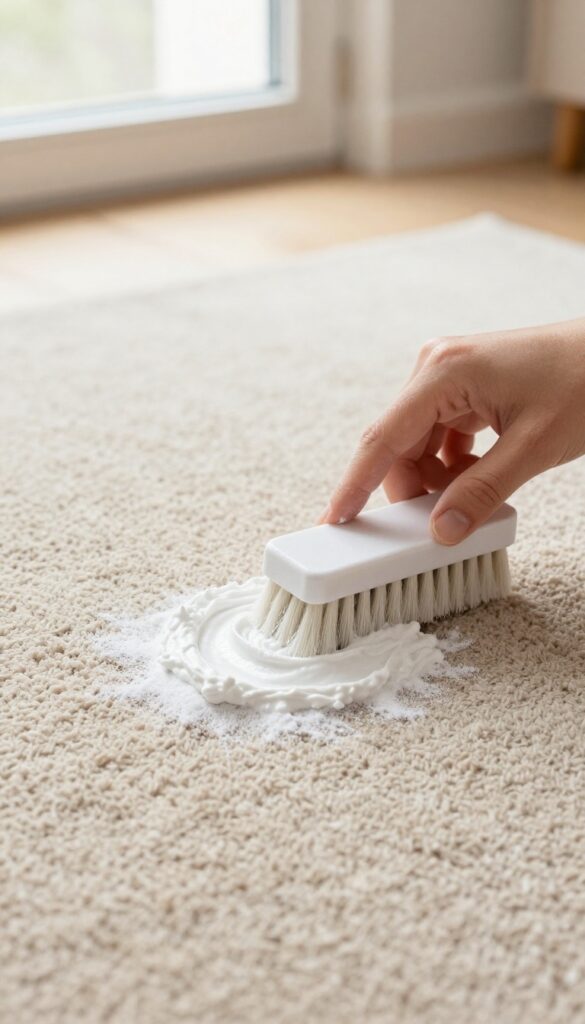
Carpet stains are inevitable, but you don't need harsh chemicals to tackle them. Baking soda, a pantry staple, works wonders on fresh spills and set-in spots alike. Mixed with water into a paste, it gently lifts dirt and neutralizes odors without damaging fibers.
To make the paste, combine three parts baking soda with one part water until it forms a spreadable consistency. Apply it directly to the stain, let it sit for 15 minutes, then scrub gently with a soft brush or cloth. Blot away the residue with a damp towel, and vacuum once dry.
This method works best on fresh stains like coffee, wine, or pet accidents, but can also lighten older marks with repeated applications.
Why Baking Soda Works
Baking soda is mildly alkaline, which helps break down acidic stains and odors. Its fine, absorbent particles pull moisture and grime from carpet fibers, making it a gentle yet effective cleaner. Plus, it's non-toxic and safe for pets and kids.
Tips For Best Results
Always test the paste on an inconspicuous area first to ensure colorfastness. For stubborn stains, let the paste dry completely before vacuuming. Avoid rubbing too hard, as that can push the stain deeper into the carpet.
10. Cornstarch for Greasy Kitchen Floor Spots
Grease spills on tile or vinyl can be stubborn. Cornstarch is a gentle, natural solution that absorbs grease without scratching. Sprinkle it on the spot, let it sit for 10 minutes, then sweep and mop as usual.
It's simple, cheap, and effective.
Cornstarch works by soaking up the grease so it lifts away easily. No harsh scrubbing needed. This method is safe for all sealed tile and vinyl floors.
Just be sure to sweep thoroughly before mopping to avoid a pasty residue.
Why Cornstarch Works
Cornstarch is a fine powder with high absorbency. It clings to grease molecules, making them easier to remove. Unlike abrasive cleaners, it won't dull your floor's finish.
Plus, it's non-toxic and safe around kids and pets.
Step-by-step Application
First, blot up any excess grease with a paper towel. Then, generously sprinkle cornstarch over the spot. Let it sit for 10–15 minutes—longer for tough stains.
Sweep up the powder, then mop with a mild floor cleaner. Repeat if needed.
Tips For Best Results
Use a thick layer of cornstarch to fully cover the stain. Avoid rubbing it in, as that can spread the grease. For dried-on spots, dampen the area slightly first.
Always test on an inconspicuous area if you're unsure about your floor's sealant.
11. Lemon Juice for Sticky Residue on Linoleum
Linoleum is a classic, durable flooring choice, but its porous nature means sticky spills and adhesive residue can become a real headache. Instead of reaching for harsh solvents that might damage the surface, a simple kitchen staple—lemon juice—can cut through the gunk safely and effectively. The natural acidity breaks down sticky bonds without stripping the finish or leaving behind a harmful film.
When you're dealing with price tags, tape residue, or stubborn food spills on linoleum, lemon juice offers a gentle yet powerful solution. It's cheap, non-toxic, and leaves a fresh scent behind. Here's how to use it properly to avoid any unintended damage.
Why Lemon Juice Works On Linoleum
Lemon juice contains citric acid, a natural solvent that dissolves sticky adhesives and dried-on messes. Unlike bleach or ammonia, it won't discolor or dull the linoleum's surface. The mild acidity also helps lift dirt without excessive scrubbing, which can wear down the protective wax layer over time.
How To Apply It Safely
Start by mixing equal parts fresh lemon juice and warm water in a spray bottle. Spray the sticky area lightly and let it sit for 2–3 minutes. Then, gently rub with a soft cloth or sponge.
For tougher residue, apply undiluted lemon juice directly to a cloth and dab the spot. Avoid letting the juice pool or sit for too long, as prolonged exposure could affect the sealant.
Rinsing And Drying Tips
After the residue is gone, rinse the area with a damp cloth to remove any leftover acid. Dry thoroughly with a clean towel to prevent water spots or moisture from seeping into the seams. For extra shine, you can follow up with a linoleum-safe polish or a few drops of mineral oil on a soft cloth.
12. Castile Soap for Natural Stone Floors
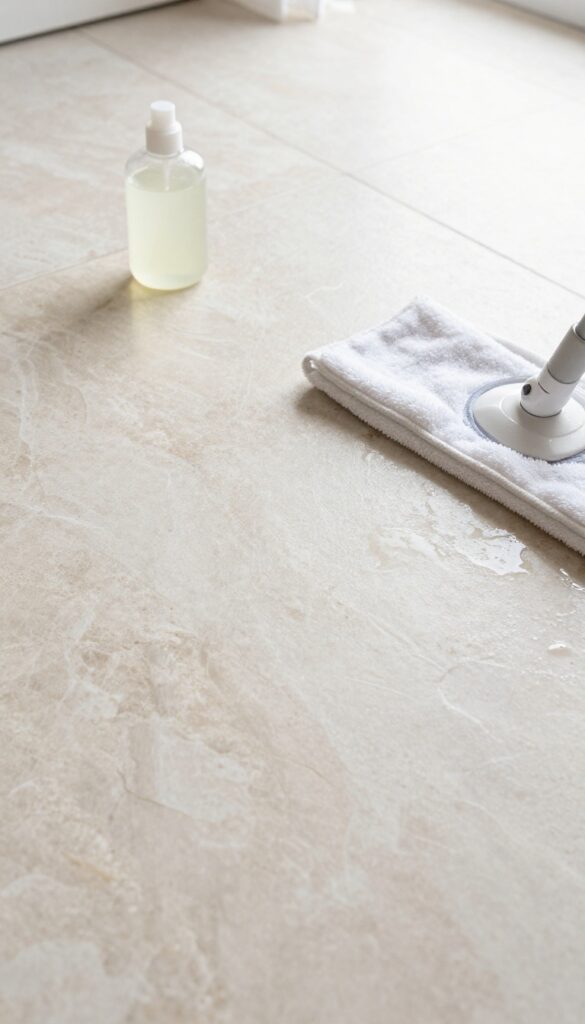
Natural stone like marble, slate, or travertine brings elegance to any home, but it demands a gentle touch. Harsh chemicals or acidic cleaners can etch the surface, leaving permanent dull spots. Castile soap, a plant-based, pH-neutral cleaner, offers a safe way to lift dirt without damaging the stone's delicate finish.
To use castile soap on stone floors, dilute just a few drops in a bucket of warm water—about 1 teaspoon per gallon. Mop with a well-wrung microfiber mop to avoid leaving excess moisture, which can seep into porous stone. Rinse with plain water afterward to prevent any soap residue from dulling the surface.
For best results, dry the floor with a soft cloth to avoid water spots.
Why Ph Matters
Stone surfaces are sensitive to pH imbalances. Acidic cleaners (like vinegar or lemon) can etch and corrode the stone, while alkaline cleaners can leave a film or cause discoloration. Castile soap is pH-neutral, meaning it won't react with the stone's minerals.
This makes it a safe choice for regular maintenance cleaning.
Choosing The Right Castile Soap
Not all castile soaps are created equal. Look for unscented, liquid castile soap without added essential oils or dyes, which could stain lighter stones. Brands like Dr.
Bronner's offer a pure, unscented option. Avoid any soap with abrasive particles or thickeners that might scratch the surface.
Spot Cleaning Stains
For stubborn spots on stone, create a paste by mixing castile soap with baking soda. Apply it to the stain, let it sit for 5 minutes, then gently scrub with a soft brush. Rinse thoroughly and dry.
This method works well for organic stains like coffee or wine without harming the stone.
13. Borax for Tough Grout Lines
Grout lines are notorious for trapping dirt and grime, often looking dingy no matter how much you scrub. Borax, a natural mineral powder, offers a simple solution. Mixed into a paste with water, it becomes a gentle abrasive that lifts embedded dirt without scratching tiles.
Why Borax Works
Borax has a mild alkalinity that helps break down grease and organic stains. Its fine crystalline structure scrubs away dirt without being harsh on grout or surrounding tiles. Plus, it's non-toxic and safe for most surfaces.
How To Make And Apply The Paste
Mix three parts borax with one part water to form a thick paste. Apply it to the grout lines using an old toothbrush or a grout brush. Let it sit for 10 minutes, then scrub in circular motions.
Rinse with water and wipe dry.
Tips For Best Results
For extra stubborn stains, add a splash of white vinegar to the paste. Test on an inconspicuous area first, especially on colored grout. Always rinse thoroughly to avoid residue.
14. Salt for Red Wine Spills on Carpet
Red wine on a light carpet can feel like a disaster, but a common kitchen ingredient can save the day. Salt is a powerful absorbent that pulls the wine out before it sets into the fibers. Acting fast is key—the quicker you pour, the better the results.
When a red wine spill happens, don't panic. Grab the salt shaker or a box of table salt and pour a generous layer over the entire stain. Let it sit for at least 10 minutes—the salt will turn pink as it absorbs the wine.
Vacuum up the salt, then treat any remaining stain with a mix of club soda and a drop of dish soap. Blot gently, don't rub.
Why Salt Works So Well
Salt is hygroscopic, meaning it draws liquid into itself. For fresh spills, it acts like a sponge, pulling the wine out of carpet fibers before it bonds. This prevents the deep-set staining that often happens with acidic drinks like red wine.
Step-by-step Rescue
First, blot excess wine with a clean cloth (don't rub). Then cover the stain completely with salt. Wait 10-15 minutes.
Vacuum thoroughly. If a shadow remains, mix 1 part club soda with 1 part water, apply, and blot until the stain lifts.
What If The Stain Has Dried?
Dried stains need a different approach. Make a paste of salt and water, apply it to the stain, and let it sit for 30 minutes. Scrub gently with a soft brush, then rinse with club soda.
Repeat if needed—salt can still lift old stains, but it takes patience.
15. Dishwasher Detergent for Vinyl Floor Stains
Vinyl flooring is tough, but it's not invincible. Rubber mats, spilled curry, or even a dropped marker can leave behind a stubborn stain that refuses to budge with regular cleaners. Before you reach for harsh chemicals, try a simple trick using powdered dishwasher detergent.
Powdered dishwasher detergent contains enzymes and bleaching agents that break down organic stains without damaging vinyl's protective layer. It's gentle enough for regular use but strong enough for those set-in marks that other cleaners miss.
How To Mix And Apply
Dissolve one tablespoon of powdered dishwasher detergent in a gallon of warm water. Stir until fully dissolved to avoid scratching the floor. Dip a soft mop or cloth into the solution, wring it out well, and apply it to the stained area.
Let it sit for five minutes before scrubbing gently with a soft-bristle brush. Rinse thoroughly with clean water and dry with a towel.
Best Uses And Precautions
This method works best on light-colored vinyl and glossy finishes. Avoid using it on matte or textured vinyl, as the residue can dull the surface. Always test on an inconspicuous spot first.
Do not use on unsealed vinyl or areas with peeling layers, as moisture can worsen damage.
Why It Works So Well
Dishwasher detergent is formulated to break down food proteins and dyes, which are common sources of vinyl stains. The oxygen bleach lifts color without bleaching the floor itself, while the enzymes digest sticky residues. It's a surprisingly effective solution that uses something you probably already have in your kitchen.
16. Mineral Oil for Scratched Hardwood
Hardwood floors add warmth to any room, but they're prone to light scratches from furniture legs, pet claws, or daily traffic. Before you call a refinisher, grab a bottle of mineral oil from your kitchen cabinet. This simple trick can make those scratches nearly invisible.
Mineral oil works because it fills the scratch with a clear, non-toxic liquid that matches the wood's natural sheen. Unlike wax or polish, it won't build up or attract dirt. It's safe for finished hardwood and costs pennies per use.
How To Apply Mineral Oil
Clean the scratched area with a damp cloth and let it dry completely. Dip a cotton swab or soft cloth into mineral oil and rub it along the scratch, following the wood grain. Apply gentle pressure so the oil seeps into the groove.
Wipe away any excess with a dry cloth. Let it sit for 10 minutes, then buff the area lightly.
When To Use This Method
This works best for shallow surface scratches that haven't penetrated the stain or finish. Deep gouges or scratches that reveal raw wood may need a touch-up marker or filler. Test the oil on an inconspicuous spot first to ensure it doesn't darken the wood more than you'd like.
Long-term Care Tips
Reapply mineral oil every few months if scratches reappear. Avoid using it on waxed or oil-finished floors without checking the manufacturer's recommendation. For extra protection, place felt pads under furniture legs and trim your pet's nails regularly.
17. Vodka for Disinfecting Laminate
Laminate flooring is durable and affordable, but it's also sensitive to moisture and harsh chemicals. Bleach and abrasive cleaners can warp or dull the surface. That's where vodka comes in—or isopropyl alcohol if you prefer.
Both kill germs effectively without soaking into the seams or leaving residue. A quick spritz and a dry wipe leave laminate clean and streak-free.
Vodka's high alcohol content (at least 80 proof) makes it a natural disinfectant. It evaporates fast, so moisture doesn't linger on laminate. Mix one part vodka with three parts water in a spray bottle.
Lightly mist the floor, then wipe with a microfiber mop or cloth. For sticky spots, add a drop of dish soap. Avoid drenching the floor—damp is fine, wet is not.
This method works for regular cleaning and is safe for homes with kids or pets since vodka is nontoxic once it dries.
Why Vodka Works
Alcohol disrupts the cell membranes of bacteria and viruses, making it an effective disinfectant. On laminate, it evaporates quickly, preventing moisture from seeping into the seams and causing swelling or warping. Unlike vinegar or bleach, vodka leaves no strong odor after drying.
How To Apply It
Fill a spray bottle with 1/4 cup vodka and 3/4 cup water. Shake gently. Spray a fine mist over a small section of the floor—about 3×3 feet.
Immediately wipe with a dry microfiber mop or cloth, using a figure-eight motion to avoid streaks. Repeat until the whole floor is done. For extra grime, add a drop of liquid dish soap.
When To Skip This Method
If your laminate has unsealed edges or deep scratches, avoid any liquid cleaner—even vodka. Stick to vacuuming and dry dusting in those areas. Also, test on an inconspicuous spot first to ensure the alcohol doesn't affect the finish.
Some cheaper laminates may react poorly to alcohol.
18. Cream of Tartar for Aluminum Oxide Stains on Tile
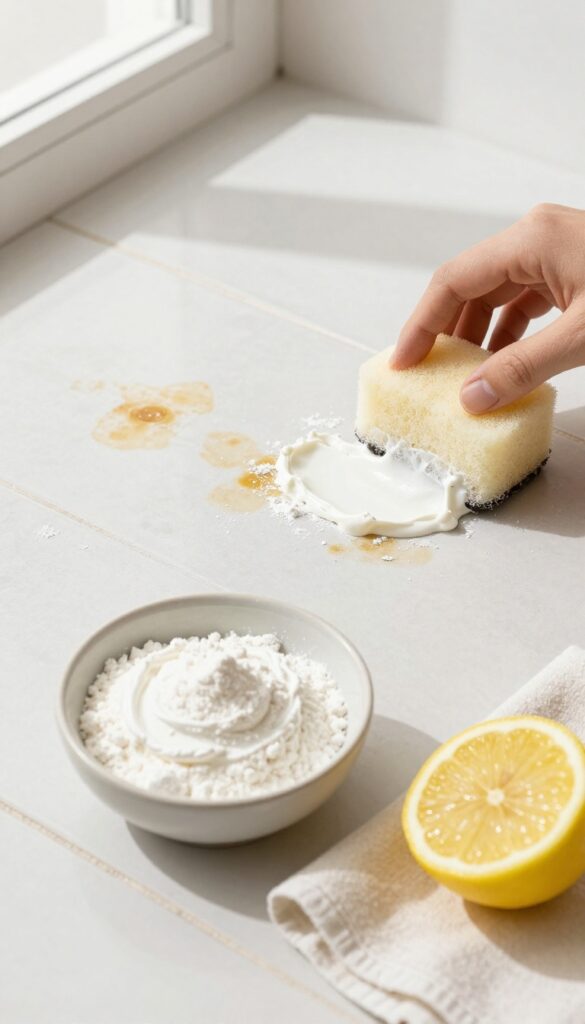
Some tile develops a stubborn white powdery residue that just won't budge with regular cleaners. That's aluminum oxide, and it's a common issue on unglazed or matte tile. Cream of tartar, a pantry staple, teams up with lemon juice to break down that oxidation without harsh scrubbing.
Aluminum oxide stains look like a white haze or chalky film on tile surfaces, especially on quarry tile, saltillo, or other porous varieties. The combination of cream of tartar (an acidic salt) and lemon juice creates a mild chemical reaction that lifts the oxidation. This method is gentle enough for most tiles but always test in an inconspicuous spot first.
Mixing The Paste
Combine 2 tablespoons of cream of tartar with enough lemon juice to form a thick paste. Stir until smooth. The paste should be spreadable but not runny.
For larger areas, scale up the recipe while keeping the same ratio.
Application And Dwell Time
Apply the paste over the stained area using a soft cloth or sponge. Let it sit for 10–15 minutes. The longer dwell time allows the acid to react with the aluminum oxide.
Avoid letting it dry completely; if it starts to dry, mist lightly with water.
Rinsing And Aftercare
Scrub gently with a soft brush or sponge, then rinse thoroughly with clean water. Wipe away any residue with a damp cloth. For stubborn spots, repeat the process.
After cleaning, seal the tile if recommended by the manufacturer to prevent future staining.
19. Baby Oil for Shiny Vinyl Floors
Vinyl flooring is a workhorse—it handles moisture, resists stains, and stands up to heavy foot traffic. But over time, even the best vinyl can lose its luster and start looking tired. The solution might already be in your nursery cabinet.
A few drops of baby oil mixed into your mop water can restore that just-installed sheen. Baby oil is a mineral oil blend that lightly coats the surface, filling micro-scratches and creating a subtle gloss. It also acts as a dust repellent, so your floors stay cleaner longer.
Just be sure to use it sparingly—too much can leave a slippery residue. Test in an inconspicuous spot first, and avoid using on textured or matte-finish vinyl, as it may alter the appearance.
How To Apply
Add 2–3 drops of baby oil to a bucket of warm water. Mop as usual, then buff dry with a clean microfiber cloth for an even shine. Don't pour oil directly onto the floor—it can pool and create uneven spots.
When To Use This Method
This trick works best for smooth, glossy vinyl that's lost its shine but isn't heavily scratched or damaged. It's a quick refresh between deep cleans or before guests arrive.
Safety And Maintenance Tips
Baby oil can make floors slick, so walk carefully until the floor is completely dry. Avoid using on vinyl that has a textured or embossed surface, as oil can collect in the grooves and attract dirt. Stick to monthly applications to prevent buildup.
20. OxiClean for Set-In Carpet Stains
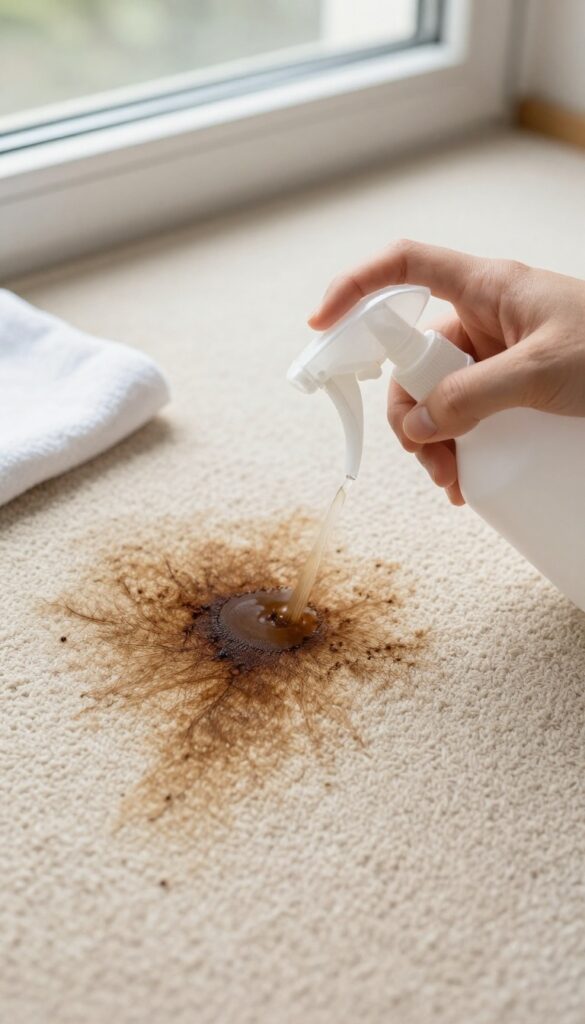
Old carpet stains can feel permanent, but oxygen bleach offers a second chance. OxiClean mixed with warm water creates an oxidizing reaction that breaks down proteins and lifts deep-set discoloration without harsh scrubbing. This method works wonders on organic stains like coffee, wine, or pet accidents that have had time to settle.
To tackle set-in stains, mix OxiClean powder with warm water according to package directions until fully dissolved. Apply the solution directly to the stain and let it sit for at least 15 minutes—longer for older stains. Blot with a clean cloth, then rinse with cold water and blot dry.
Avoid over-wetting to prevent mold growth. For stubborn spots, gently agitate with a soft brush before blotting.
Why Oxygen Bleach Works
OxiClean contains sodium percarbonate, which releases hydrogen peroxide when mixed with water. This breaks down stain molecules safely, making it effective on protein-based stains without damaging carpet fibers. It's also color-safe for most synthetic carpets.
Step-by-step Application
- Vacuum the area first. 2.
Mix OxiClean with warm water (follow label ratios). 3. Apply to stain, ensuring full coverage.
- Let sit 15-30 minutes. 5.
Blot with a clean white cloth. 6. Rinse with cold water and blot dry.
Repeat if needed.
Safety And Precautions
Always test on an inconspicuous area first. Avoid using on wool or silk carpets, as oxygen bleach can damage natural fibers. Wear gloves to protect your skin, and ensure proper ventilation.
21. Glycerin for Sticky Laminate Residue
Laminate floors are low-maintenance, but they can turn sticky over time—especially after spills or using the wrong cleaner. That tacky film isn't just unpleasant; it attracts dirt and makes your floor look dull. Glycerin, a gentle humectant, cuts through that residue without harming the laminate's protective layer.
Mix 1 tablespoon of glycerin with 1 cup of warm water. Dampen a microfiber mop (not soaking wet) and go over the sticky area. The glycerin lifts the residue, and the water evaporates clean.
No rinsing needed. For stubborn spots, let the solution sit for a minute before wiping. Always test on a hidden corner first.
Why Glycerin Works
Glycerin is a natural byproduct of soap-making. It's hygroscopic, meaning it attracts moisture, which helps loosen sticky residues without harsh scrubbing. Unlike vinegar or ammonia, glycerin won't dull or warp laminate.
Best Practices For Application
Use a spray bottle for small areas or a mop for larger sections. Work in a well-ventilated space. Avoid over-saturating—laminate is sensitive to standing water.
Dry the floor with a clean cloth if you notice any streaks.
When To Skip This Method
If your laminate is waxed or has a matte finish, glycerin might leave a slight sheen. Test in an inconspicuous spot. Also, don't use it on unsealed laminate—the moisture could seep into the seams.
22. WD-40 for Scuff Marks on Tile
Black scuff marks from shoes or furniture legs can make pristine tile look worn and messy. Regular cleaners often fail to lift that stubborn rubbery residue. WD-40, the classic lubricant, cuts through scuff marks with surprising ease.
A quick spray, a short wait, and a wipe—that's all it takes to restore your tile's original shine.
Why It Works
WD-40 is a solvent that breaks down the rubbery compounds in scuff marks. It penetrates the mark and loosens its bond with the tile surface, allowing you to wipe it away without scrubbing. This makes it especially effective on glazed ceramic, porcelain, and vinyl tile.
How To Apply
Spray a small amount of WD-40 directly onto the scuff mark. Let it sit for about a minute—don't let it dry. Then wipe with a clean, dry cloth.
For stubborn marks, gently rub with a soft sponge or microfiber cloth. No need to rinse, but you can follow with a damp cloth if you prefer.
Safety Tips
WD-40 can leave a slight residue that might make floors slippery, so wipe thoroughly. Avoid using on unsealed natural stone or unglazed tile, as the solvent can penetrate and cause damage. Always test in an inconspicuous area first.
Keep the area well-ventilated during use.
23. Steam Cleaning for Deep Sanitizing (No Chemicals)
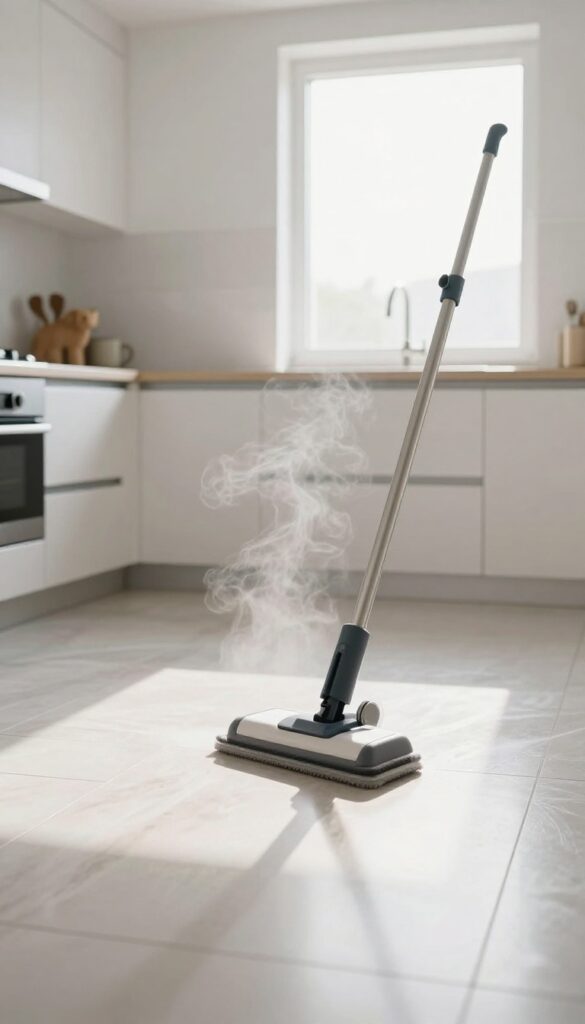
Steam cleaning is the ultimate hack for anyone who wants a deep clean without bringing harsh chemicals into their home. A steam mop uses high-temperature vapor to lift dirt, kill bacteria, and sanitize sealed hard floors. It's especially great for homes with kids or pets, where you want a safe, residue-free finish.
Steam mops work by heating water to around 200°F, producing steam that loosens grime and kills up to 99. 9% of germs. They're ideal for sealed tile, vinyl, laminate, and even some engineered hardwood.
Because there's no soap or chemical residue, floors dry quickly and stay streak-free. However, steam is not for every surface. Unsealed hardwood, bamboo, or natural stone like marble can be damaged by moisture and heat.
Always check your floor's warranty and test in an inconspicuous area first. For delicate surfaces, use a microfiber mop with a gentle cleaner instead. Another tip: let the steam do the work.
Glide the mop slowly so the heat has time to break down sticky spots. For extra sanitizing, add a few drops of essential oil to the water tank—just make sure it's safe for your mop model.
Best Surfaces For Steam Mops
Sealed ceramic, porcelain tile, vinyl plank, and laminate are perfect candidates. The steam won't warp or discolor these materials if used correctly. For grout lines, steam can blast away embedded dirt without scrubbing.
Surfaces To Avoid
Skip steam on unsealed hardwood, cork, bamboo, and natural stone. The moisture can seep into cracks, causing swelling or etching. Also avoid waxed or oiled floors—steam will strip the finish.
Pro Tips For Best Results
Vacuum or sweep first to remove loose debris. Use distilled water to prevent mineral buildup in your mop. Move the mop in straight lines overlapping slightly, and don't let the steam sit in one spot too long.
When To Steam Clean
Steam mops are great for weekly or bi-weekly deep cleans. They're especially useful in kitchens and bathrooms where germs thrive. For high-traffic areas, a quick steam can refresh floors between deeper scrubs.
FAQ
Can I use vinegar on all floor types?
No. Vinegar is too acidic for natural stone, hardwood, and some laminate. Stick to pH-neutral cleaners for those surfaces.
How often should I mop my floors?
High-traffic areas like kitchens and entryways benefit from weekly mopping. Low-traffic rooms can go every two weeks.
What's the best way to dry floors after mopping?
Use a microfiber mop that wrings out well. For hardwood and laminate, follow with a dry microfiber cloth to prevent moisture damage.
How do I remove sticky residue from floor cleaning products?
Mix a few drops of dish soap with warm water and wipe the area. For stubborn residue, use rubbing alcohol on a cloth.
Is steam mopping safe for laminate floors?
Only if the laminate is sealed and the manufacturer approves. Excess steam can warp laminate boards. Check your warranty first.
Conclusion
Keeping your floors clean doesn't have to be complicated. With the right solution for each surface, you can tackle dirt and stains effectively without damaging materials.
Try a few of these ideas to see what works best in your home. Your floors will thank you, and you'll save time and money by using the right approach from the start.