11 Master Bath Walk-In Shower Ideas for a Crisp, Custom Look
Most master bath showers fail on the details, not the square footage. A slippery curb, a drain that pools water, and shampoo bottles crowding the floor add up to a daily annoyance you eventually stop noticing. Fix those first, then the custom look follows on its own.
That's the order these eleven ideas follow. Each one solves something real, from a seamless curbless entry to a floating bench that earns its footprint. You'll also find the finishing touches, like heated floors and a towel warmer, that make a master bath feel finished.
Some projects are weekend-friendly, and a few need a contractor. Pick what fits your space and budget, then skip the rest without guilt.
1. Go Curbless for a Seamless Entry
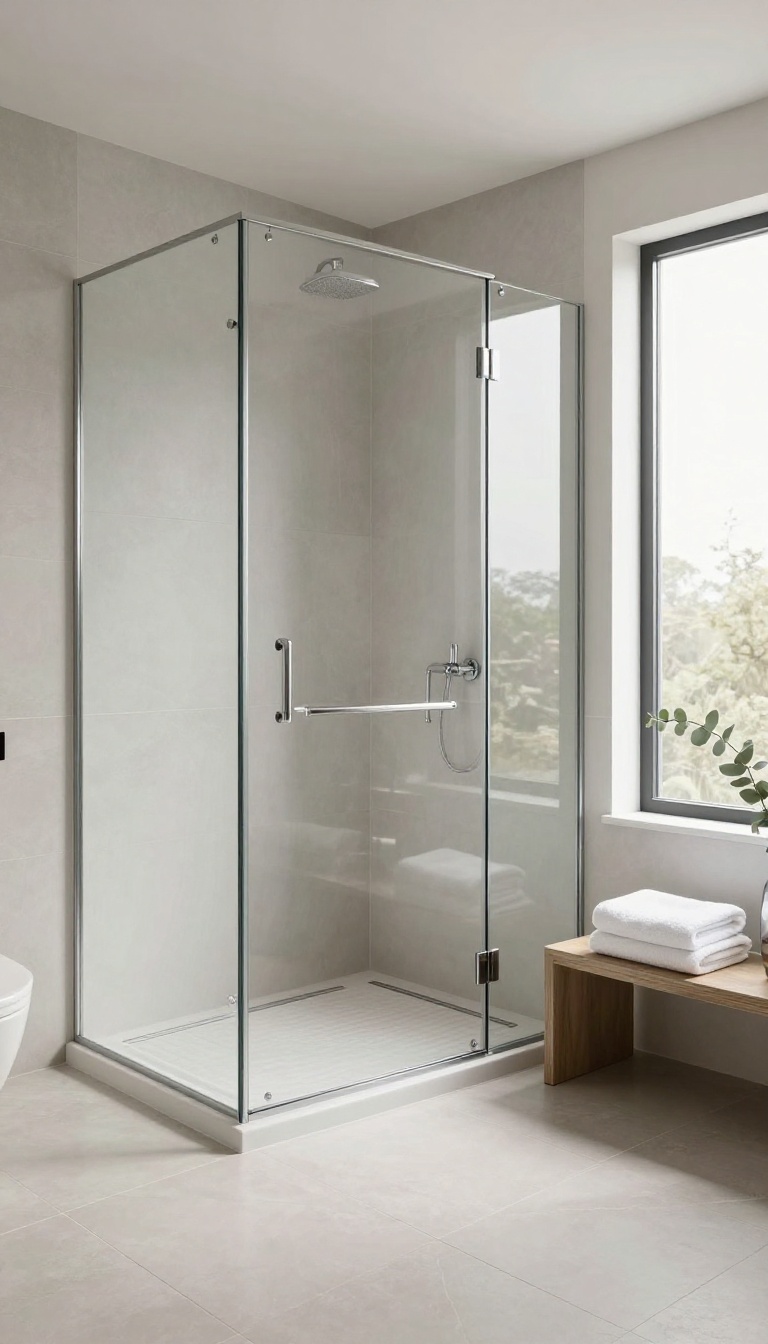
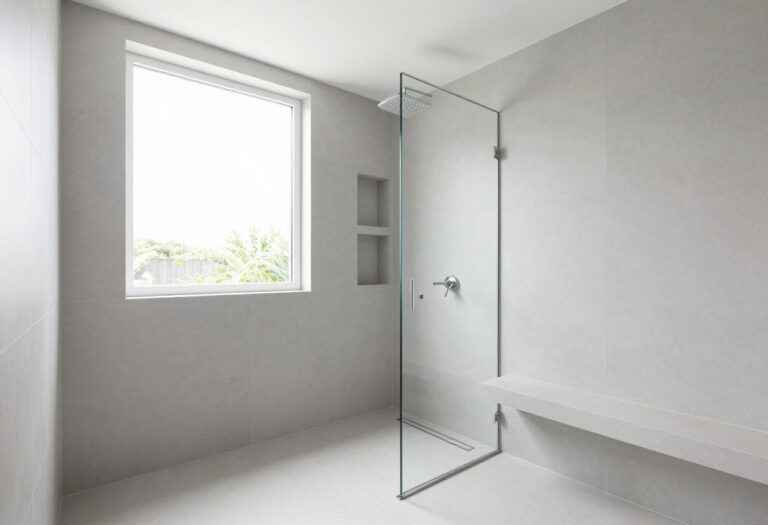
A curb is the one part of a shower that never stops being in the way. It catches your toe on the way in, collects soap scum on the way out, and quietly tells your eye that the shower is a box sitting inside the bathroom. Take it away and the whole room reads as one continuous surface, which is why curbless showers keep showing up in the master baths people screenshot and save.
The trade-off is that a curbless shower asks more of the build than a standard pan does. Water has to go somewhere, the floor has to slope correctly, and the framing underneath needs to cooperate. Get those three things right and the result is a shower that feels bigger than its dimensions and easier to use every single day.
Why The Missing Curb Matters
Stepping over a six-inch curb sounds minor until you're doing it half-asleep at 6 a. m. or helping a parent steady themselves on a wet tile floor. A flush entry removes that trip hazard entirely and makes the shower usable for anyone who walks, rolls, or shuffles in. The visual payoff is just as real.
A continuous floor line pulls the shower into the room instead of fencing it off, so a modest master bath stops feeling chopped into zones.
Linear Drains Do The Heavy Lifting
A standard center drain needs a four-way slope, which is hard to hide when there's no curb to dam the water. A linear drain sits along one wall or at the entry and lets the whole floor pitch in a single direction. That means one clean slope, larger-format tile without a bunch of cuts, and no puddle forming in the corner.
Placement matters. A wall-side linear drain keeps the entry dry and hides the grate from the doorway. An entry-side drain looks sharp but puts the wet zone right where you step, so think about which trade-off you'd rather live with.
Waterproofing Isn't Optional Here
Without a curb, there's no backup barrier if water gets past the tile. The waterproofing layer becomes the only thing standing between your shower and the joists below, so it has to be continuous and it has to tie into the drain flange correctly. That usually means a bonded sheet membrane or a liquid-applied system over a sloped substrate, plus a proper pre-slope underneath.
This is the part to hire out if you're not already comfortable with waterproofing. A curbless shower done wrong doesn't leak a little. It leaks into the ceiling below.
What It Costs And When To Skip It
Expect to pay more than a standard curb install. You're looking at extra framing, a recessed subfloor or a thickened floor build-up, a pricier drain, and more labor. On a slab, it often means cutting and re-pouring concrete.
If your budget is tight or your floor structure won't allow a recess, a low-profile curb with a matching tile face gets you most of the look for far less. It's not the same thing, but it's honest about what your house can actually do.
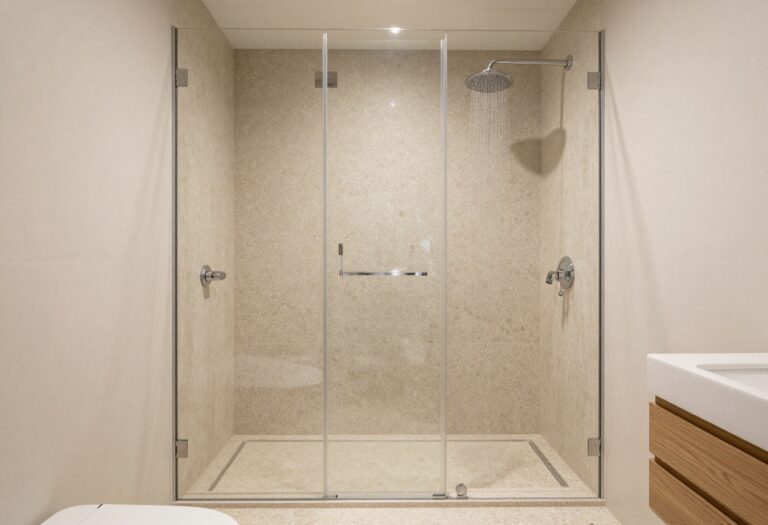
2. Choose a Low-Profile Linear Drain
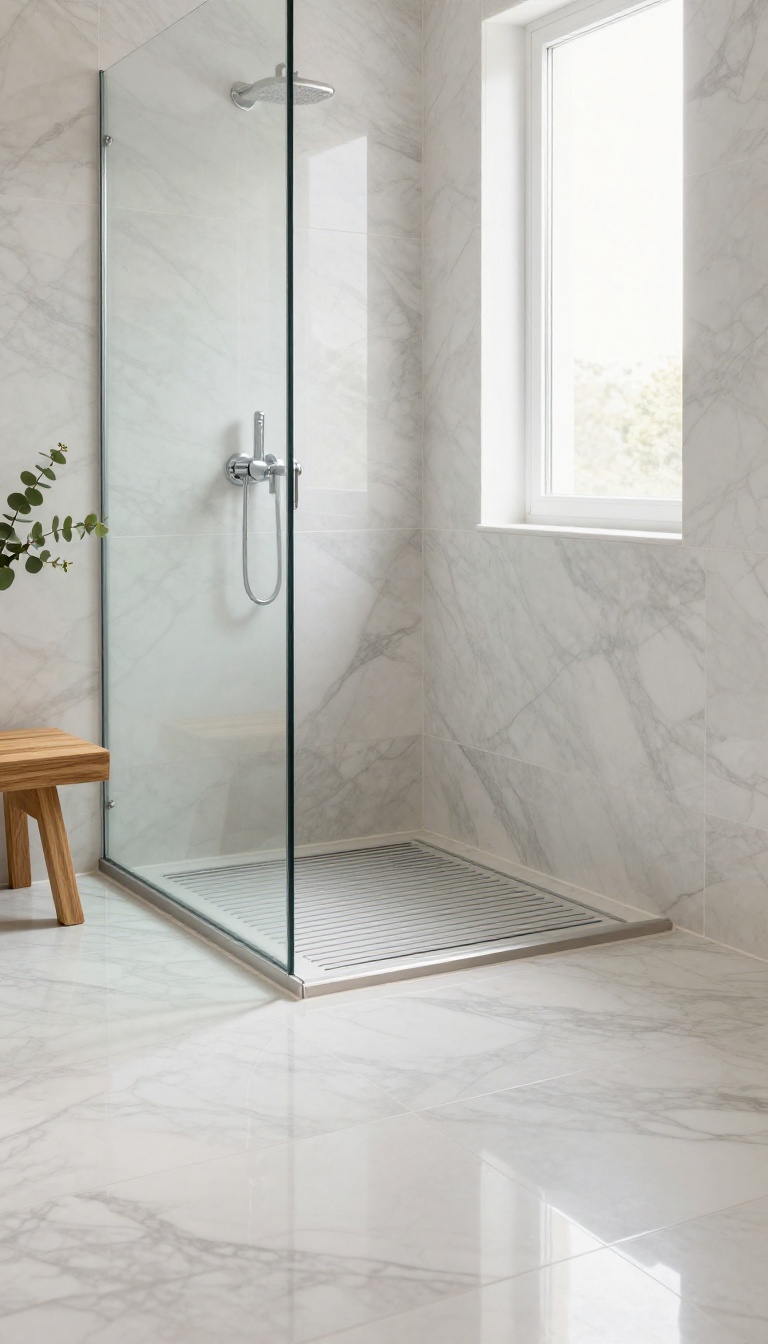
A linear drain sits flush with the tile and runs along one wall or across the shower floor. It replaces the bulky center drain that forces you to cut small tiles around a circle. The result is a cleaner floor plane and a more modern look.
Linear drains also handle water better in some layouts. They create a single slope instead of four, so water moves in one direction. That means fewer puddles and less standing water near the edges.
You can use larger tiles, too. No more mosaic squares just to fit around a drain. That alone changes the whole feel of the shower.
A linear drain is one of those upgrades that looks simple but changes everything. It sits flush with the tile, so the floor reads as one continuous surface. No center drain breaking up the pattern, no awkward cuts around a circle.
Most people notice the difference right away. The shower feels bigger because your eye doesn't stop at a metal grate in the middle. It just sees tile, then wall, then glass.
But it's not just about looks. A linear drain can improve drainage because the floor slopes in one direction. Water flows toward the drain instead of pooling in corners.
That means less standing water and fewer slippery spots. You also get more freedom with tile size. Large-format tiles work because you don't have to cut around a center drain.
That means fewer grout lines and a smoother surface. Installation costs more than a standard drain, and you need a pro who knows what they're doing. But if you want a crisp, custom look, this is one of the best places to start.
Why Linear Drains Look Better
A linear drain disappears into the floor. It's a thin slot, not a big metal circle. That keeps the tile pattern intact and makes the shower feel more open.
You can place it at the back wall or along the entrance. Either way, it stays out of sight and out of the way. The floor looks like a single sheet of tile, which is about as clean as it gets.
Tile Options That Work
Large tiles are the main draw here. You can use 12×24 or even bigger without worrying about slope. The drain runs along one edge, so the floor slopes gently in that direction.
If you like the look of a single slab, a linear drain makes that possible. You get fewer grout lines, which means less scrubbing and a more seamless look. Just make sure the tile is rated for wet areas.
Installation And Cost
Linear drains cost more upfront. The drain itself runs $100 to $500, and labor is higher because the slope is trickier. You need a pro who has done them before.
But the payoff is a shower that drains better and looks custom. If you're already remodeling, the extra cost is often worth it. Just budget for it early so it doesn't blow your numbers.
3. Add a Built-In Niche for Shampoo and Soap
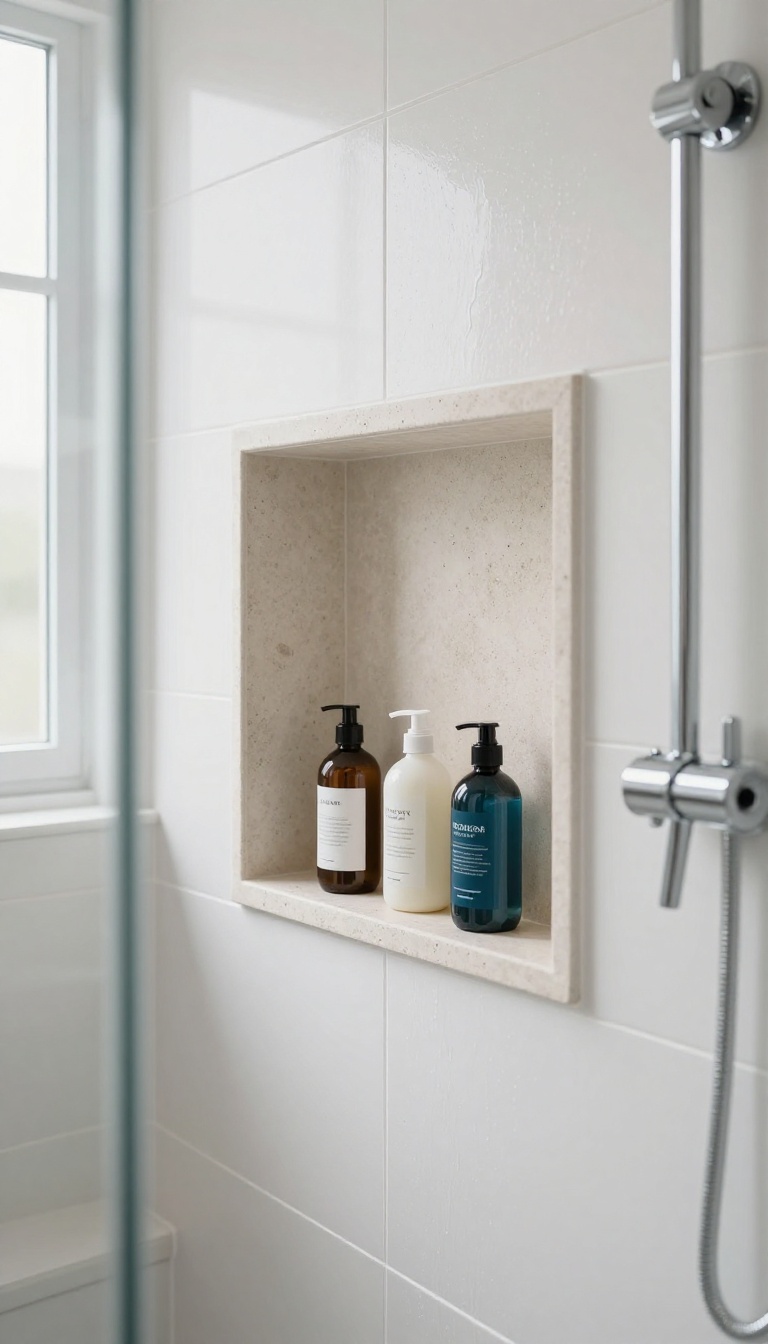
Bottles lined up on the shower floor look messy and collect soap scum fast. A recessed niche built into the wall gives every bottle a home and instantly makes the shower read as custom. It's one of the cheapest upgrades on this list that still looks expensive.
A niche is just a framed opening in the wall, finished with the same tile as the shower and sealed against water. Because it sits between the studs, it doesn't steal any floor space or elbow room. You get storage without a single shelf sticking out into the spray.
Where To Put It
Mount the niche at chest height on the wall opposite the showerhead so water doesn't blast directly into it. If your shower is a walk-in with a bench, a niche above the bench works well for larger bottles. Skip the corner where the spray hits hardest, and keep it within arm's reach when you're standing under the water.
Sizing That Actually Works
A single niche around 12 inches wide by 24 inches tall handles most families. If you use big pump bottles, go 14 to 16 inches wide so they don't tip. A second small niche for soap and razors keeps the main one from turning into a jumble.
Details That Keep It Crisp
Slope the bottom shelf slightly toward the shower so water drains instead of pooling. Line the niche with a contrasting tile or a slab for a clean, hotel-like look. Seal the edges well, and skip glass shelves, which just add another surface to scrub.
4. Install a Floating Bench for Spa Vibes
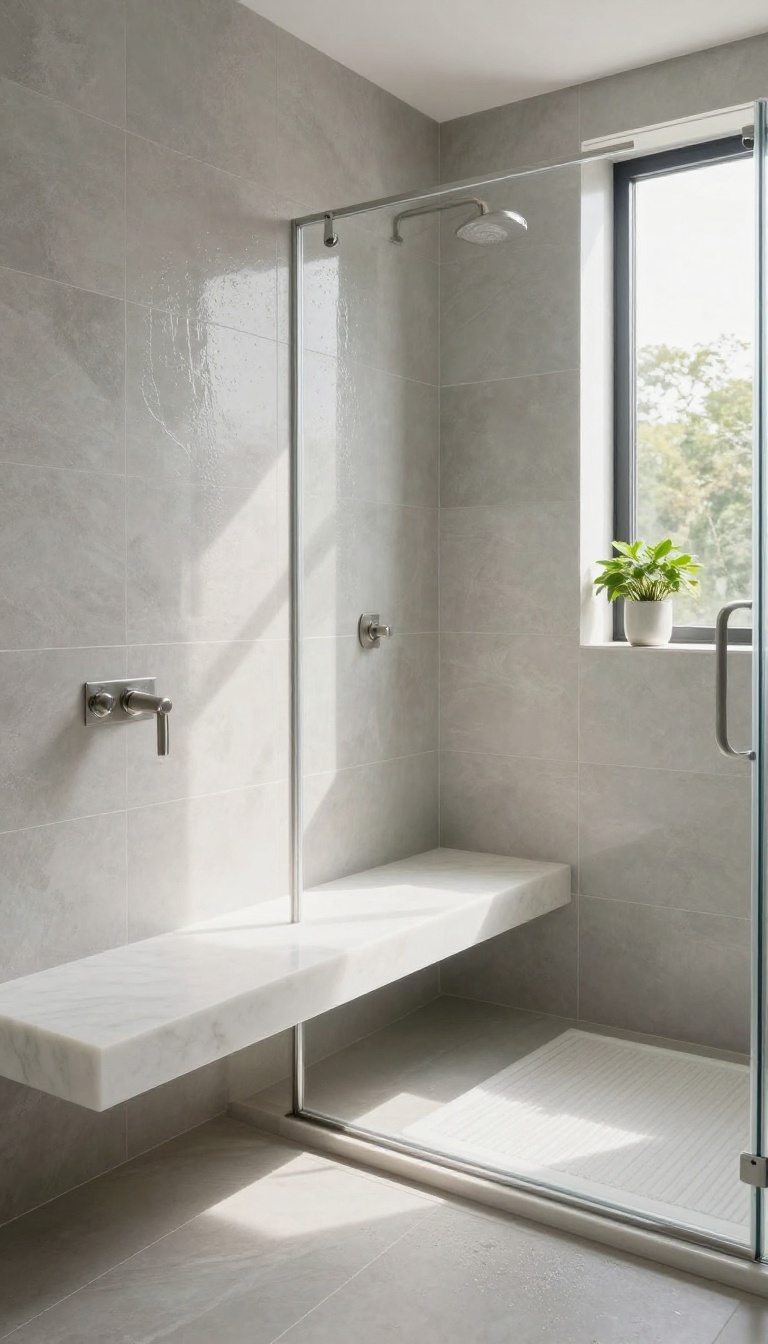
Floor space in a shower is precious, and a built-in bench eats a big chunk of it. A floating bench mounts to the wall and leaves the floor open underneath, so the shower still feels roomy. It gives you a spot to sit, shave, or just steam without turning the whole stall into a furniture showroom.
The look reads custom because it is. A slab of quartz, marble, or teak hovers at seat height with nothing touching the tile below. That gap keeps the floor visually light and makes squeegeeing a two-second job instead of a chore.
You get the spa feel without the bulk of a traditional bench.
Pick A Material That Handles Water
Quartz and solid-surface slabs are the low-maintenance winners because they resist stains and never need sealing. Natural stone looks stunning but wants a sealer every year or so. Teak brings warmth and grip, though it needs oiling to stay rich.
Match the material to how much upkeep you actually want.
Get The Height And Depth Right
Most benches sit 17 to 19 inches off the floor, which feels natural for sitting and shaving. Depth usually runs 14 to 16 inches, enough to perch on without blocking the shower spray. If you plan to use it as a footrest, go a little lower and shallower.
Test the numbers with a tape measure before the fabricator cuts anything.
Mount It So It Lasts
A floating bench needs blocking in the wall framing, so this is a during-remodel move, not a weekend add-on. Your contractor ties the bracket into studs or adds a steel support, then waterproofs over it. Done right, it holds serious weight and never sags.
Skip the blocking and you will regret it the first time someone sits down hard.
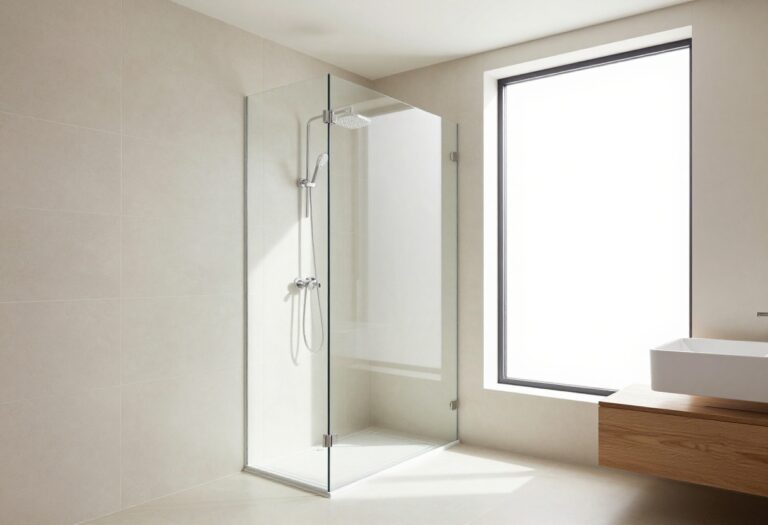
5. Use a Frameless Glass Panel for Openness
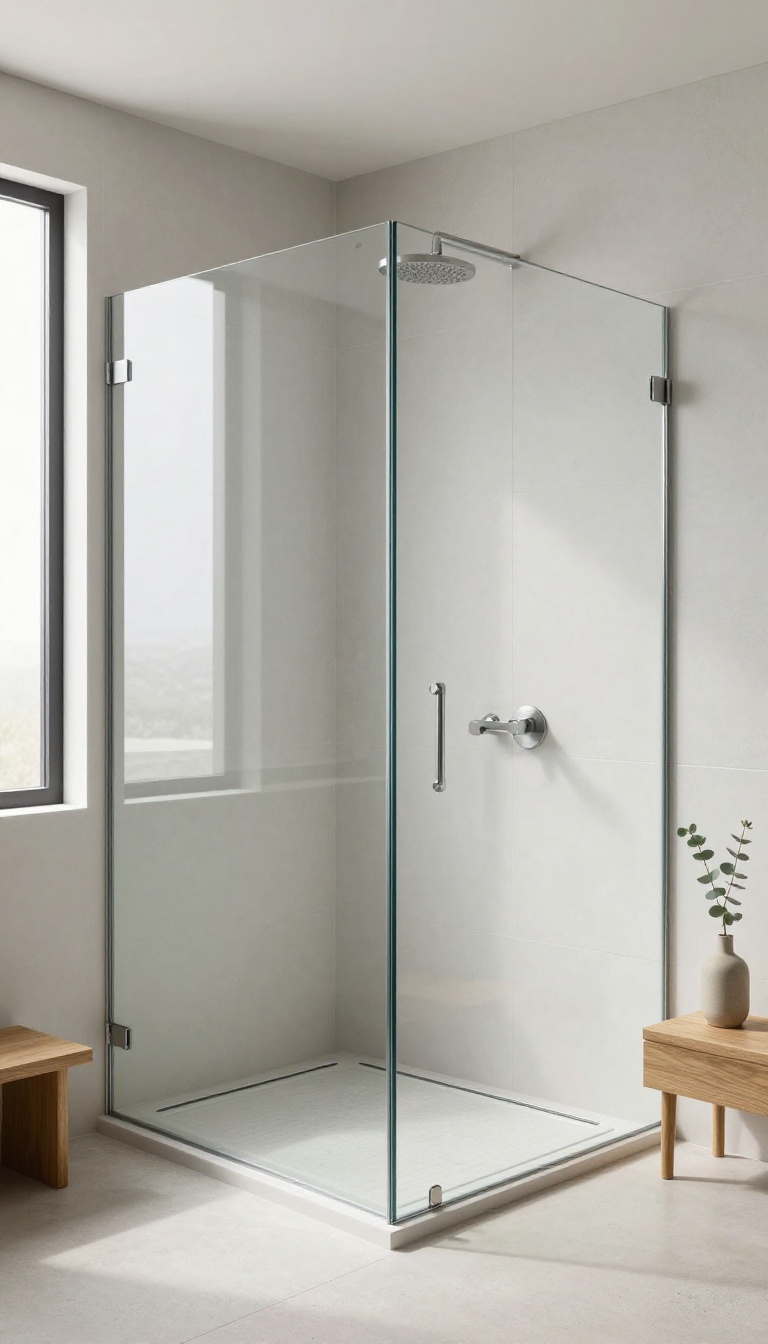
Glass with no metal frame around the edges does one simple thing well: it gets out of the way. Your eye reads the tile and the fixtures instead of a chunky border, so even a standard 4-by-5 shower feels bigger than it is. It also means fewer tracks and channels where soap scum likes to hide.
The tradeoff is that frameless glass is heavier and pricier than a framed panel, and it needs solid blocking behind the walls to hold it. Get the hardware and thickness right, though, and it's one of the cleanest upgrades you can make.
Pick The Right Glass Thickness
Most frameless panels run 3/8 inch or 1/2 inch thick. Go with 3/8 inch for a fixed panel that doesn't move, since it's lighter and cheaper. Step up to 1/2 inch for a swinging door, where the extra rigidity keeps the glass from flexing every time you open it.
Anything thinner than 3/8 inch will feel flimsy and may not meet local code. Ask your glass shop what your area requires before you order.
Hardware That Holds Up
Frameless doesn't mean hardware-free. You still need hinges, clips, and a handle, and those small parts carry all the weight. Brushed nickel and matte black hide water spots better than polished chrome, which shows every drip.
Look for solid brass hinges rather than zinc. They cost a bit more but won't sag after a few years of daily use. A header bar across the top adds stability on wider openings, though it cuts into the clean look.
Seal It Without The Bulk
A frameless panel still needs a seal at the bottom and along the hinge side, or water will find its way onto the floor. Clear silicone sweeps stay invisible and do the job. Replace them when they get cloudy, since that's usually what makes an otherwise clean shower look tired.
Skip the heavy plastic channel if you can. A thin, well-placed sweep keeps the open feel while still keeping water where it belongs.
Cleaning Gets Easier
No frame means no crevices for mildew to settle into. A quick squeegee after each shower handles most of it, and a weekly wipe with a mild cleaner keeps hard water from building up. If spotting bothers you, ask about a hydrophobic coating when you order.
It's a small add-on that makes the glass shed water instead of holding it.
6. Pick a Statement Tile for the Back Wall
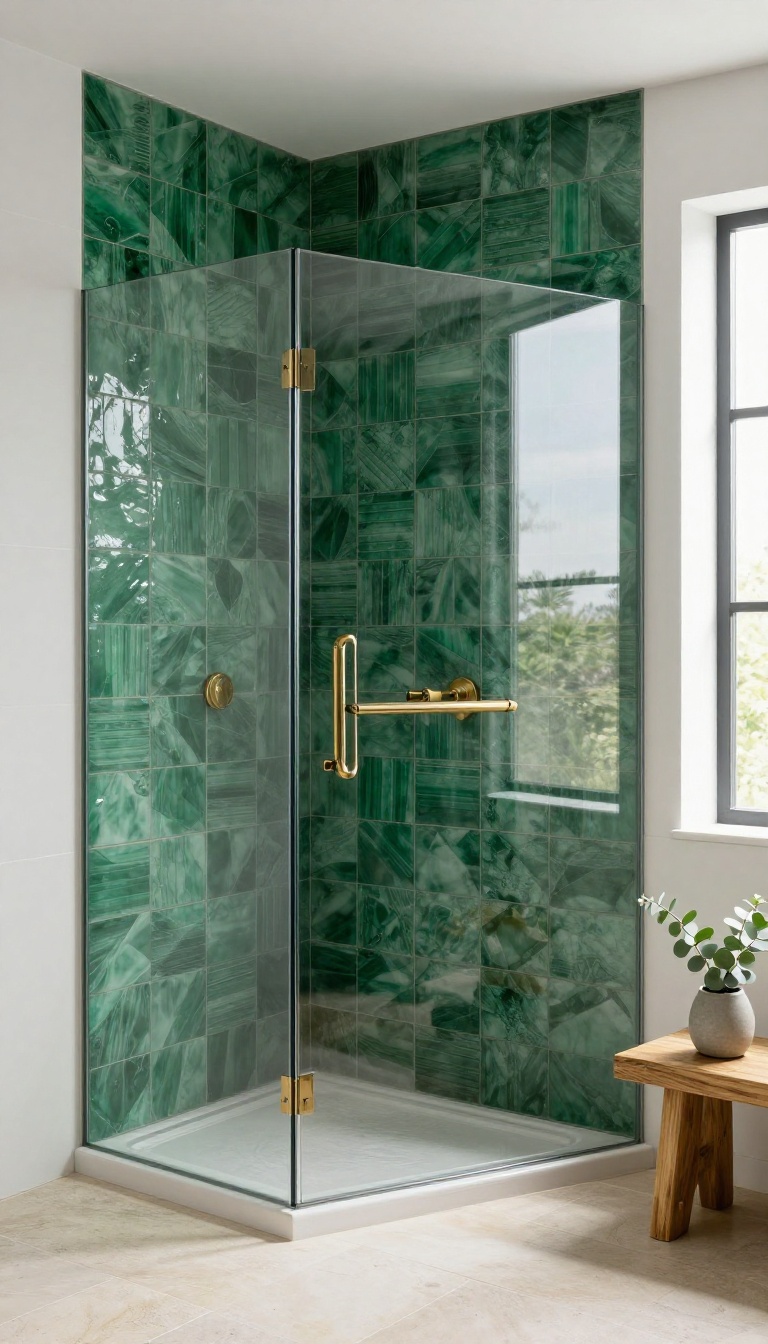
The back wall of your walk-in shower is the one surface you see every single day, so it might as well say something. A statement tile turns that wall into a focal point without making the whole bathroom feel loud. The trick is keeping the boldness contained to one plane while the other walls stay calm and quiet.
You can go big with color, pattern, or texture, but you do not have to commit to all three. Pick one lane and let the rest of the shower support it. Done right, this is the kind of detail guests notice and you never get tired of.
A statement wall works because it breaks up the visual monotony of a fully tiled shower. When every surface matches, the eye has nowhere to land. Give it one destination and the whole space feels more designed.
The back wall is also the safest place for a bold choice. It sits furthest from the entry, so it reads as a deliberate accent rather than an assault of pattern the second you walk in. You get the drama without the regret.
Keep the side walls and floor in a neutral, larger-format tile. That contrast is what makes the statement wall pop instead of competing with it. Think of it as the lead singer and the rest of the shower as the band.
Materials That Hold Up
Porcelain and ceramic are the workhorses here. They handle water, steam, and cleaning products without fuss, and they come in every color and pattern you can imagine. A glazed porcelain with a bold graphic print gives you the look of encaustic cement without the sealing headaches.
Natural stone like marble, travertine, or slate brings a richness that tile can't quite match. Just know that stone needs sealing and a gentler cleaning routine. If you love the look but not the upkeep, a marble-look porcelain gets you close with none of the drama.
Glass tile is another option, especially if you want shimmer and depth. It reflects light beautifully in a shower, but it shows water spots more than matte finishes. A quick squeegee after each use keeps it looking sharp.
Patterns With Impact
A bold geometric pattern, like hexagons or picket tiles, adds movement and energy to the wall. It works best when the rest of the shower is plain, so the pattern gets room to breathe. Keep the grout color close to the tile if you want a seamless look, or go high-contrast if you want the pattern to shout.
Vertical stack or herringbone layouts create a different kind of statement. They play with direction and draw the eye up, which can make a shower feel taller. A glossy finish on a simple subway tile laid in herringbone is a classic move that never feels dated.
If you want something truly custom, look at hand-painted or screen-printed tiles. A single mural or a gradient of color across the back wall turns the shower into a piece of art. Just be sure to order extras in case of breakage during install.
Color And Finish Choices
Deep greens, blues, and blacks are having a moment in master baths, and they look incredible on a shower back wall. A matte finish on a dark tile feels modern and moody without being too shiny. Pair it with brass or black fixtures and you've got a look that feels intentional.
If dark feels too heavy, try a soft pastel or a warm terracotta. These colors add personality while keeping the space light and airy. A glossy finish will bounce light around and make the shower feel brighter.
Texture is another way to make a statement without color. A 3D wave tile or a ribbed surface adds shadow and depth that changes as the light shifts. It's subtle but undeniably custom.
7. Incorporate a Skylight or High Window
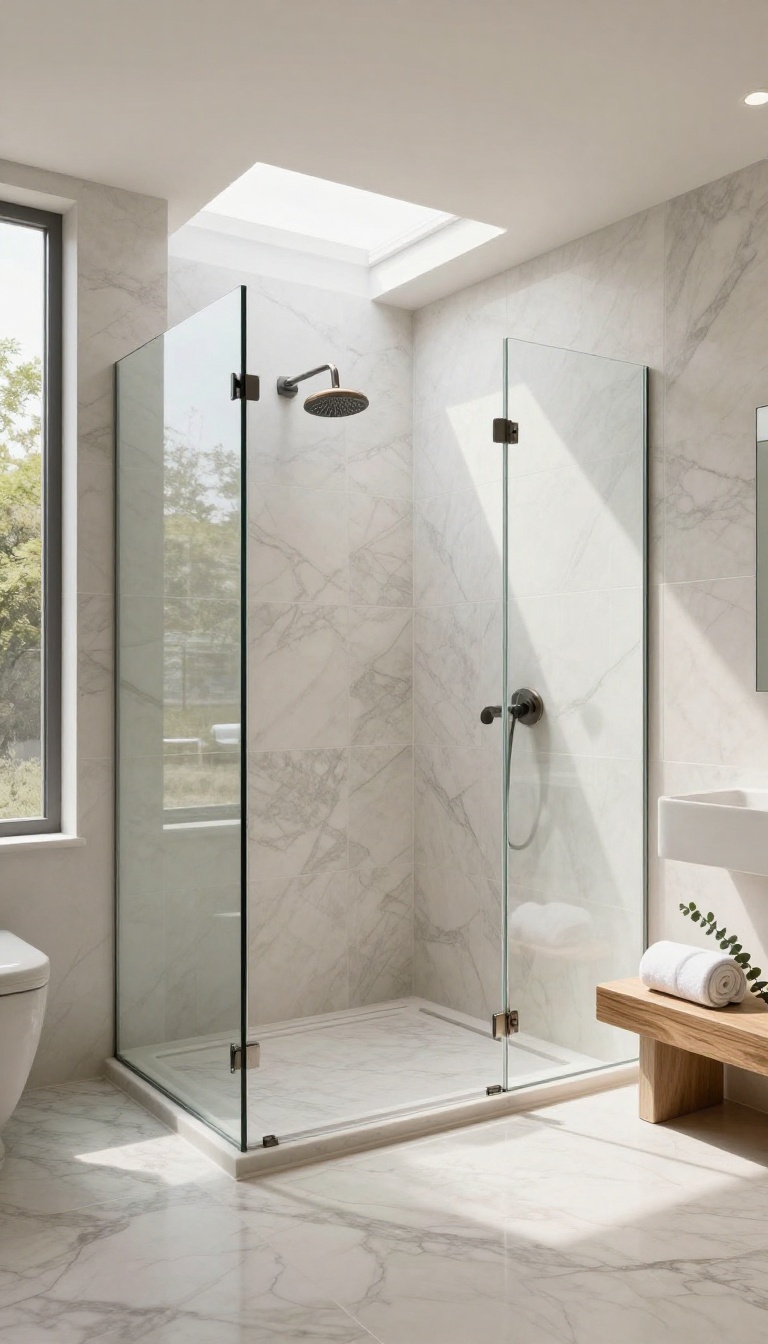
A walk-in shower with no natural light can feel like a cave, even with the best tile and fixtures. Adding a skylight or a high window changes that in a hurry. You get daylight, better airflow, and a space that feels bigger without moving a single wall.
Natural light does more than look pretty. It makes the shower feel open, helps with ventilation, and can even reduce the need for artificial lights during the day. But you can't just cut a hole anywhere.
Placement, privacy, and moisture control all matter. Get those right, and this upgrade becomes one of the best decisions in your master bath.
Skylight Vs. High Window: Which Fits Your Bath?
A skylight brings light straight down into the shower, which is great for dark bathrooms with no exterior wall. It also lets steam escape if you choose a vented model. A high window works better when you have an exterior wall and want a view or a breeze.
Both options keep you covered from street level, so privacy stays intact. If your shower sits against an interior wall, a skylight is often the only way to get real daylight in.
Placement Tips That Actually Work
Put the skylight or window directly above the shower or slightly offset toward the center of the room. That way, light spreads across the tile instead of hitting one spot. Keep it at least a foot away from the showerhead to avoid constant water spray.
For windows, aim for a sill height of 5 feet or higher so nobody can see in. And check that the frame won't interfere with your shower door swing.
Privacy And Ventilation Perks
High placement solves privacy without frosting or blinds. You get unobstructed light and a clear view of the sky. If you go with an operable window or vented skylight, you also get natural ventilation.
That means less steam, less mildew, and a shower that dries out faster. Just make sure the opening is out of reach or has a screen to keep bugs out.
Moisture And Installation Realities
Any opening in a shower ceiling or wall needs proper flashing, sealing, and moisture-resistant materials. Skylights should be rated for high humidity and installed by a pro. Windows need tempered glass if they're within a certain distance of the floor.
Expect to pay more for the structural work than the fixture itself. But the payoff is a brighter, better-ventilated shower you'll enjoy every day.
8. Add a Handheld Showerhead on a Slide Bar
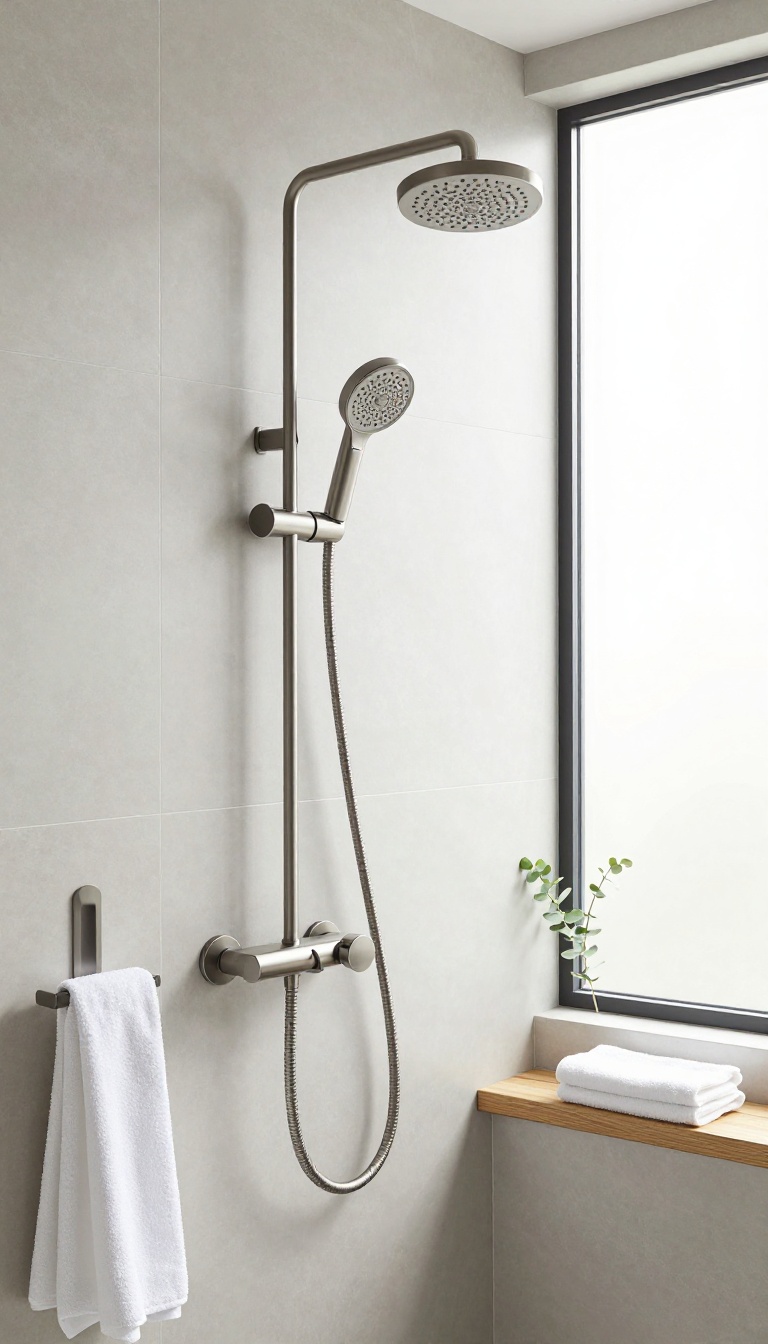
A fixed showerhead does one thing: it sprays from a single spot. That works until you need to rinse a dog, wash the walls, or help a kid who can't reach the stream. A handheld showerhead on a slide bar fixes all of that without adding clutter.
The bar mounts vertically on the wall, and the handheld clicks into a bracket that slides up and down. You get adjustable height for different users and a detachable wand for cleaning. It's a small upgrade that makes the whole shower more usable.
Slide bars come in standard lengths, usually 24 to 30 inches, and mount with two screws into a stud or heavy-duty anchor. Most kits include the bar, bracket, hose, and handheld head. You can also buy the pieces separately if you want a specific finish or spray pattern.
The real benefit is flexibility. Tall users raise the head; shorter users lower it. Kids can pull it down to their level.
And when it's time to scrub the tile, you just lift the wand off the bracket and point it where you need it. Finish options range from chrome and brushed nickel to matte black and oil-rubbed bronze. Match your other fixtures or mix metals deliberately.
Either way, the bar itself is slim enough that it doesn't dominate the wall.
Pick The Right Bar Length
A 24-inch bar suits most standard showers, but if you have a tall family or a high ceiling, go with 30 inches. Measure from your shoulder height to the top of your head, then add a few inches of travel. The bar should let the handheld sit at least a foot above and below that range.
If you're installing it yourself, check for studs before you drill. A bar that pulls loose from drywall is a headache you don't want. Use a stud finder and mark your holes carefully.
Finish And Spray Options
Chrome is the classic choice, easy to clean and budget-friendly. Brushed nickel hides water spots better. Matte black makes a bold statement but shows soap scum, so plan to wipe it down more often.
For spray patterns, look for a handheld with at least three settings: a wide spray, a concentrated massage, and a soft rinse. Some models add a pause button, which is handy when you're soaping up and don't want to waste water.
Installation Tips
Most slide bars install in under an hour with basic tools. You'll need a drill, a level, and a screwdriver. Some kits include a template for hole spacing, which keeps things straight.
If you're replacing an existing showerhead, you can often reuse the same arm. Just unscrew the old head, screw on the new handheld's hose, and mount the bar. Turn the water on slowly to check for leaks at the connections.
9. Choose a Warm, Neutral Color Palette
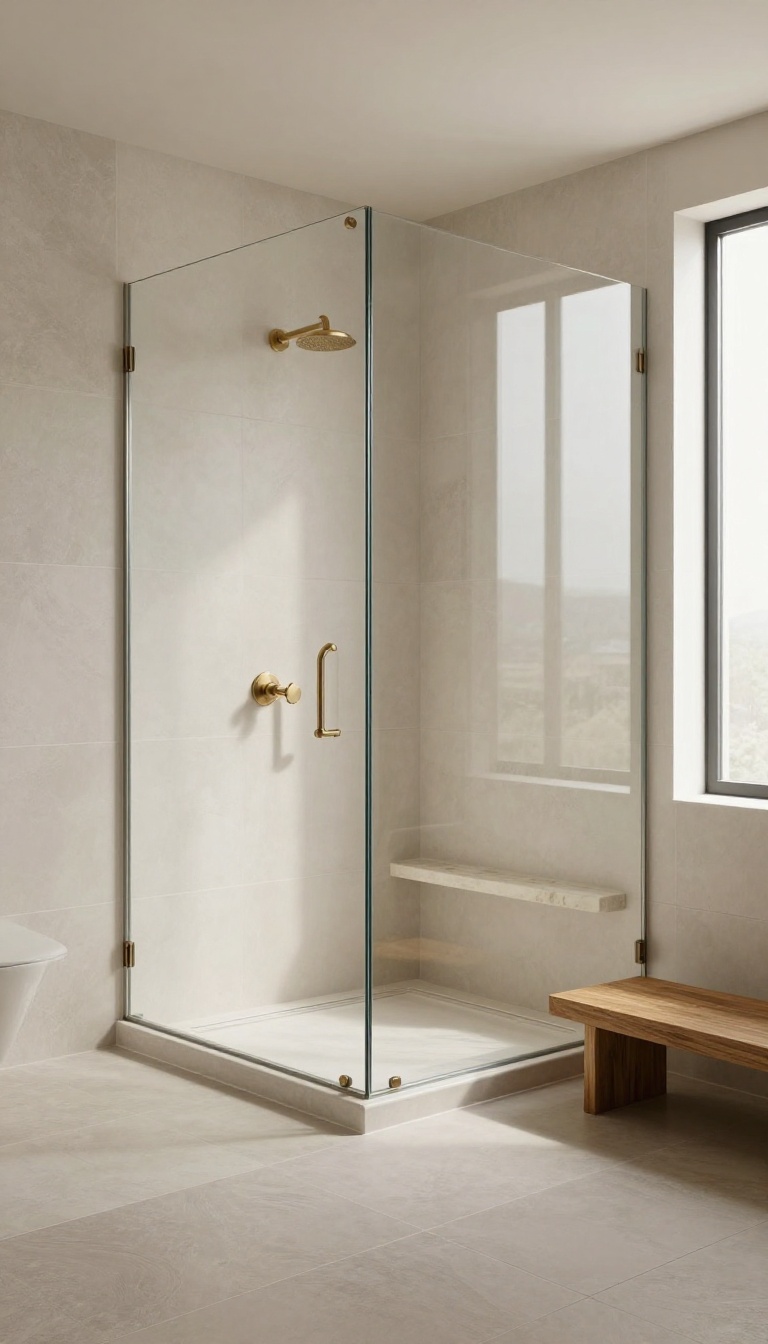
Soft whites, greiges, and warm grays keep a walk-in shower looking crisp without feeling cold. They also play well with natural stone, wood accents, and brushed metals, so you can layer in texture without fighting the color. The goal is a palette that feels calm in the morning and still sharp at night under artificial light.
Neutral doesn't mean boring. It means you're choosing tones that let the architecture and materials do the talking. In a master bath, that usually translates to a base of warm white or light greige on the walls, a slightly deeper tone on the floor, and one accent that adds depth.
The trick is keeping the undertones consistent so nothing looks pink next to something that reads yellow. Start with your tile, because it's the hardest thing to change later. Then match paint and fixtures to it, not the other way around.
If you're working with a contractor, ask for large sample boards and view them in your actual bathroom light before you commit.
Pick Your Base Tile First
Large-format porcelain or ceramic in a warm white or light greige is a safe, crisp starting point. Look for tiles labeled 'warm' rather than 'cool' if you want to avoid a blue cast. A matte finish hides water spots better than glossy, and it feels more custom underfoot.
Pair Paint With Tile Undertones
Once your tile is set, choose a paint color that shares its undertone. A warm gray tile usually pairs well with a greige paint like Sherwin-Williams Agreeable Gray or Benjamin Moore Revere Pewter. Test swatches on the actual wall and check them at different times of day.
Add Depth With One Accent
A single darker element keeps the palette from washing out. That could be a charcoal floor tile, a warm wood bench, or black-framed glass. Keep it to one accent so the shower still feels open and airy.
10. Integrate Smart Storage with a Half Wall
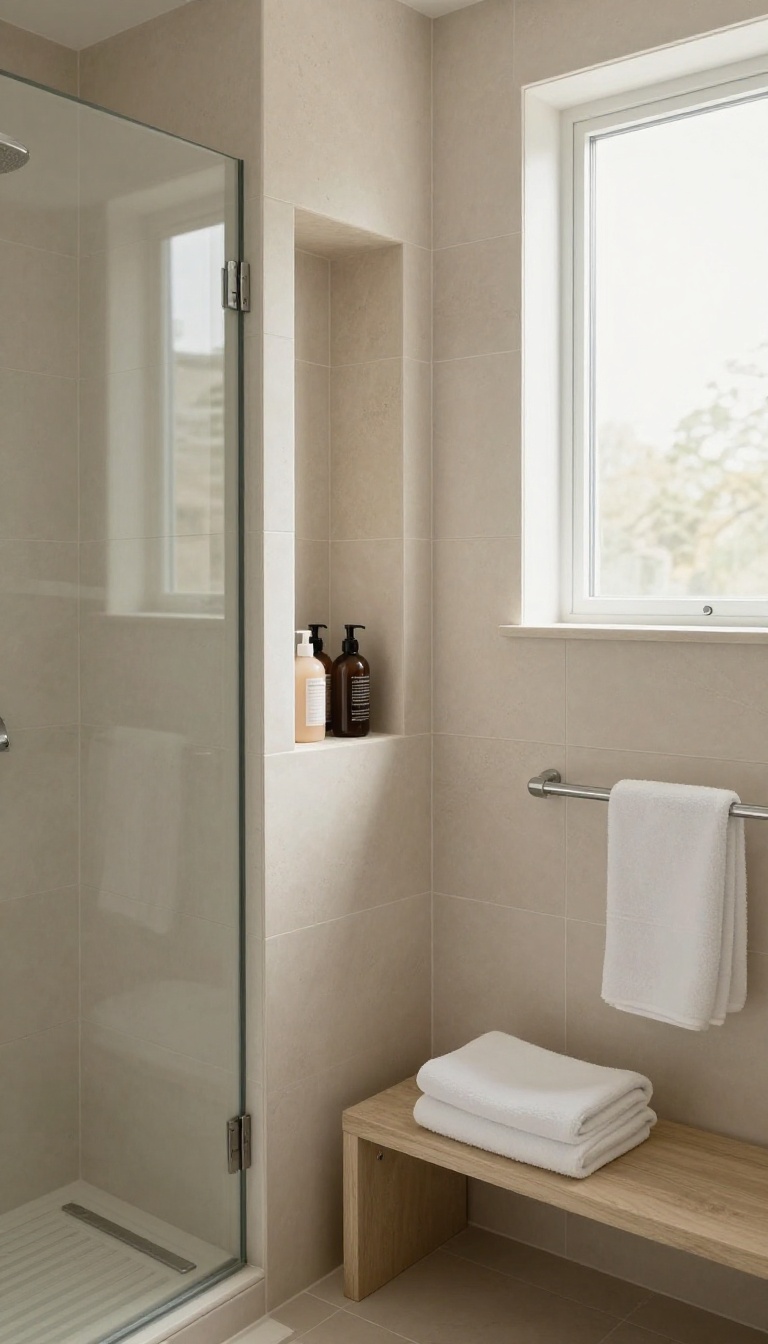
A half wall does double duty in a walk-in shower: it hides your toiletries from view and adds a bit of privacy without closing things in. The trick is making it look intentional, not like a leftover stub. With the right height, top, and styling, it becomes a custom feature that earns its place.
The half wall usually sits between the shower and the rest of the bathroom, or at the entry to block splashes. It's typically 42 to 48 inches tall, which is high enough to conceal bottles on a bench but low enough to keep sightlines open. You can build it from the same tile as the shower walls or use a contrasting material for a furniture-like look.
The real magic happens when you carve out a niche on the shower side. That niche becomes your shampoo shelf, so you don't need a hanging caddy or a corner basket. On the dry side, the wall can hold a towel bar or hooks.
Just make sure the wall is thick enough to support a recessed niche, usually 4 to 6 inches deep. If you're working with a skinny wall, go with a surface-mounted shelf instead. Either way, plan the niche placement before the tile goes up.
You want it at a comfortable reach, around 36 to 48 inches off the shower floor.
Choosing The Right Height And Depth
A half wall that's too low won't hide anything, and one that's too high feels like a full wall. Aim for 42 to 48 inches from the shower floor. That height blocks water spray and gives you privacy without cutting off light.
For depth, a standard 2×4 framed wall gives you about 3. 5 inches, which is too shallow for a recessed niche. Bump it out to 2×6 framing for a 5.
5-inch wall. That's deep enough for a niche that holds large bottles. If you can't go deeper, use a surface-mounted caddy or a slim shelf that sits on top of the half wall.
Topping It Off: Caps And Materials
The top of the half wall takes a beating from water and soap, so choose a material that can handle it. A solid stone cap, like quartz or granite, is a popular pick because it's waterproof and easy to wipe down. You can also use the same tile as the walls and finish it with a bullnose edge.
Just make sure the cap slopes slightly toward the shower so water runs off. For a seamless look, run the cap the full length of the wall and have it overhang by a half inch on both sides. That little detail keeps drips off the dry side.
Styling The Shower Side And The Dry Side
On the shower side, keep it simple. A niche with a few bottles looks clean; a cluttered shelf looks messy. Use matching bottles or decant your products into a set.
On the dry side, treat the half wall like a mini ledge. A small plant, a candle, or a folded towel adds warmth. If you have the space, hang a robe hook or a hand towel ring on the dry side.
Just avoid putting anything fragile where it might get splashed. The goal is a wall that works hard but looks effortless.
11. Finish with Heated Floors and a Towel Warmer
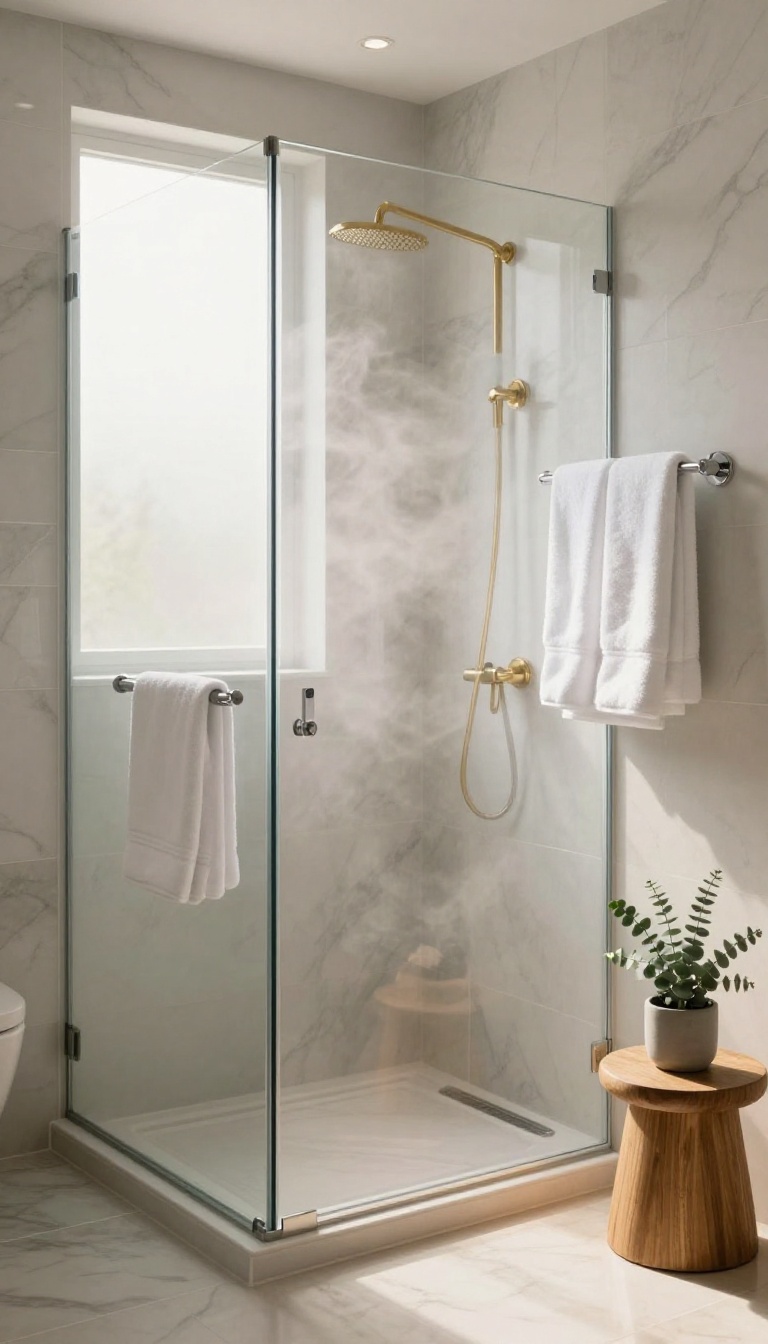
Stepping out of a warm shower onto a cold tile floor is a small shock you don't need every morning. Heated floors and a towel warmer fix that in one move, and they add a layer of polish that reads as custom. You can retrofit both or plan them into a new build, and either way the payoff is daily.
These aren't luxury extras that sit unused. They're the kind of upgrades you feel every single day, especially in winter or in a bathroom that never quite warms up. The good news is you don't have to rip up your whole floor to get them.
Heated floors come in two main flavors: electric mats and hydronic systems. Electric mats are thinner, easier to retrofit, and run on a thermostat you can program. Hydronic systems circulate warm water through tubing and cost more upfront, but they're efficient for large spaces and new construction.
Towel warmers are simpler. You can choose a hardwired model that mounts to the wall or a plug-in version that hangs on a rack. Hardwired looks cleaner, but a plug-in works fine if you have an outlet nearby and don't mind the cord.
Both upgrades pair well with the rest of your shower setup. If you're already tiling the floor or opening a wall for plumbing, that's the moment to add them. Doing it later costs more and makes more mess.
Retrofit Vs. New Build
In a new build, you can lay heating mats under the tile before you set it, and run wiring for a hardwired towel warmer while the walls are open. That's the cleanest, most affordable time to do it. For a retrofit, electric floor heating mats are your best friend.
They're thin enough to go under most existing tile if you're willing to pull it up, or you can use a low-profile mat over a concrete slab. Some companies make mats that fit under floating floors, too. If you're not ready to tear up the floor, a plug-in towel warmer is a zero-demo upgrade.
Just check the outlet placement so the cord doesn't dangle over a wet zone.
What It Costs And What You Save
Electric floor heating for a typical master bath runs about $5 to $12 per square foot installed, depending on the mat and labor. Hydronic systems cost more, often $15 to $25 per square foot, but they're cheaper to run over time. Towel warmers range from $100 for a basic plug-in to $600 or more for a hardwired designer model.
Installation adds another $150 to $400 if you need an electrician. You won't recoup the cost at resale, but you will feel it every morning. Think of it as a comfort upgrade, not an investment play.
Installation Tips That Matter
Always put the floor heating on its own thermostat with a floor sensor. That keeps the temperature steady and prevents overheating under rugs or mats. For towel warmers, mount them within reach of the shower but outside the direct spray zone.
You want to grab a warm towel without stepping into a puddle. If you're doing both, run the wiring before you close up the walls. It's a small extra step that saves a lot of hassle later.
Pairing With Your Shower Design
Heated floors work best with large-format tile because there are fewer grout lines to interrupt the heat. They also feel great with a curbless shower, where the floor flows right into the drying area. A towel warmer can double as a design moment.
Choose a finish that matches your shower fixtures, like matte black or brushed nickel, and it looks intentional instead of added on. Keep the thermostat and any switches in a dry spot, ideally near the entrance. That way you can warm things up before you even step in.
FAQ
How much does a walk-in shower remodel cost?
Costs vary widely based on size, materials, and labor. A basic update might start around $3, 000, while a high-end custom shower can exceed $15, 000. Get multiple quotes and prioritize what matters most to you.
Do I need a curb for a walk-in shower?
Not necessarily. Curbless showers are possible with proper waterproofing and a linear drain. They improve accessibility and create a seamless look, but they require careful planning and installation.
What is the best tile for a walk-in shower floor?
Porcelain or ceramic mosaic tiles with a matte finish offer good slip resistance and are easy to clean. Avoid polished tiles on the floor, as they can be slippery when wet.
How do I keep a frameless glass shower clean?
Use a squeegee after each use and clean with a mild, non-abrasive cleaner. Applying a hydrophobic coating can also help repel water and reduce spots.
Can I add a bench to an existing walk-in shower?
Yes, you can add a freestanding bench or a floating bench if the wall framing supports it. Consult a contractor to ensure proper installation and waterproofing.
Conclusion
A crisp, custom shower usually comes down to two or three well-chosen moves, not all eleven. Start with the idea that fixes your biggest daily annoyance, whether that is water pooling on the floor, bottles crowding the corner, or a layout that fights your morning. Then stop and live with it for a week before adding anything else.
You can always swap the hardware, tweak the lighting, or add a niche later. Get the glass, tile, and storage right first, and the rest of the bathroom tends to fall into place on its own.