12 Clever Modern Pantry Ideas That Make Groceries Easier
You just got back from the grocery store, bags everywhere, and now you have to find room for everything. The canned goods pile up, the spices disappear into a dark corner, and you end up buying duplicates because you forgot what you already had. Sound familiar?
A modern pantry isn't about fancy renovations or matching jars. It's about creating a system that actually works with your shopping and cooking habits. Small tweaks can save you time, money, and frustration.
These 12 ideas focus on real-world solutions—from better shelving layouts to digital tools that track your inventory. No fluff, just practical changes that make groceries easier from the moment you unpack.
1. Pull-Out Drawers Instead of Deep Shelves
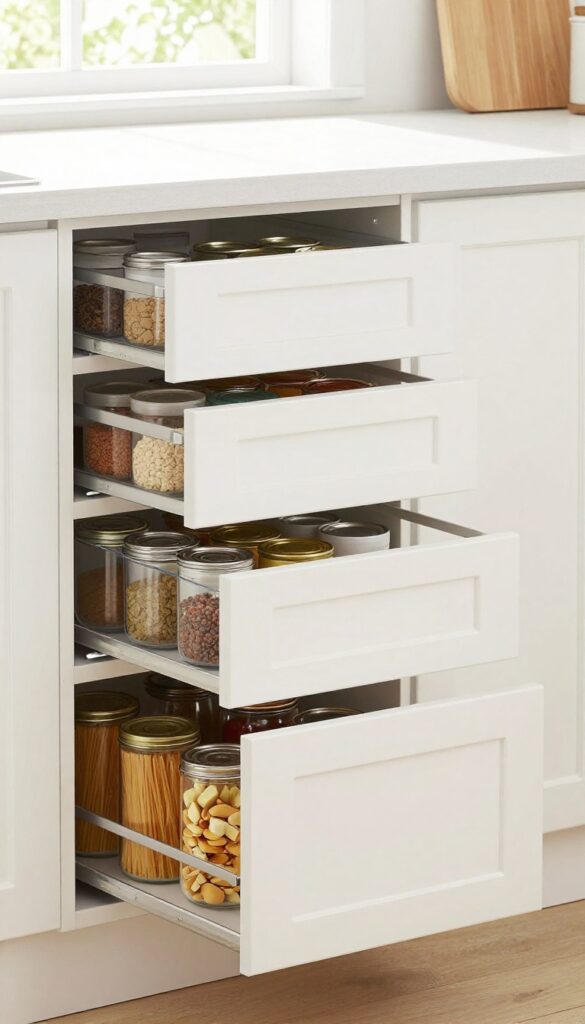
Deep shelves are the enemy of an organized pantry. You stack cans in front, push older items to the back, and before long you're buying another jar of pasta sauce you already have. Pull-out drawers change that completely.
They slide out fully so every single item is visible and reachable. No more digging, no more forgotten cans expiring in the shadows.
Standard pantry shelving is usually 16 to 24 inches deep. That's plenty of space, but it's wasted when you can't see what's behind the front row. Full-extension drawer slides let you access the entire depth.
You can install them in existing cabinets or build a custom pantry with drawer units. The key is to match drawer height to what you're storing—shallow drawers for spices and cans, deeper ones for cereal boxes and bags of flour.
Better Visibility, Less Waste
When everything is visible at a glance, you naturally use what you have first. That means fewer duplicate purchases and less food spoilage. Pull-out drawers also make it easy to group items by category—baking supplies in one drawer, canned vegetables in another.
You can even add clear bins or dividers inside the drawers to keep small items from sliding around.
Diy Or Pro Installation?
If you're handy, converting a shelf to a pull-out drawer is a weekend project. You'll need drawer slides, a plywood base, and a face panel. Many hardware stores sell retrofit kits with pre-cut parts.
For a built-in look, hire a carpenter. Either way, the investment pays off in daily convenience. Start with the shelf that gives you the most trouble—probably the one where cans disappear into the void.
2. Clear Bins with Labels for Like Items
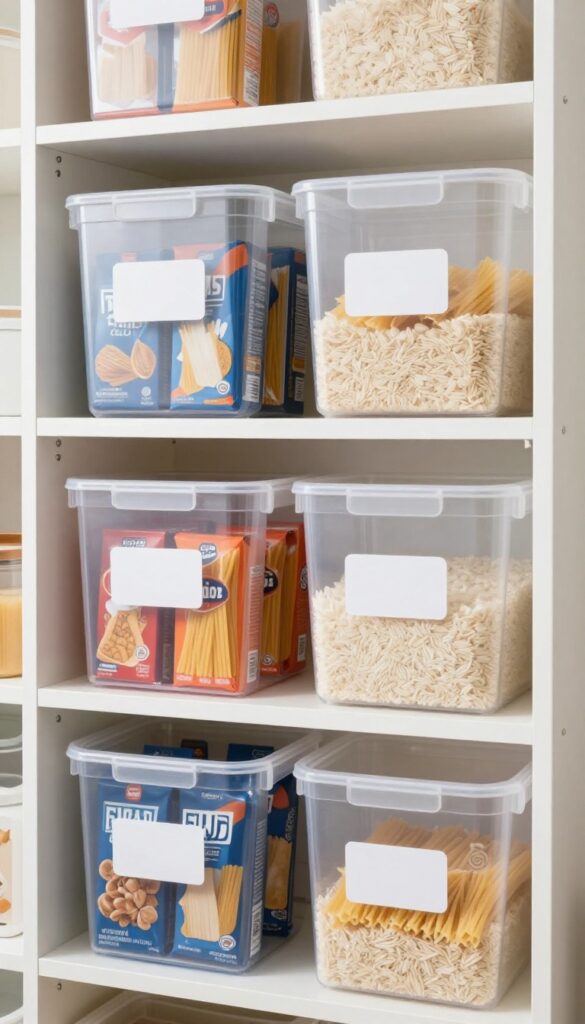
Grouping similar items together is one of the simplest ways to tame pantry chaos. When everything from pasta to snacks has a designated home, you can grab what you need without digging through piles. Clear bins with labels take this a step further—you can see at a glance what's inside, and labels make restocking a breeze.
It's a small investment that pays off every time you unpack groceries or cook dinner.
Start by sorting your pantry into categories: baking supplies, snacks, pasta and rice, canned goods, breakfast items, and so on. Then choose clear plastic bins that fit your shelves—rectangular ones maximize space. Label each bin clearly (use a label maker or simple chalkboard tags) and stick to the system.
When you buy new items, place them in the correct bin right away. This not only keeps things tidy but also helps you track inventory—you'll know when you're running low on rice or granola bars.
Choosing The Right Bins
Opt for sturdy, clear bins with smooth interiors so nothing gets stuck. Measure your shelf depth and height before buying. Bins with handles or cutouts make it easier to pull them out.
Avoid opaque or decorative bins—they defeat the purpose of visibility.
Labeling For Efficiency
Use labels that are easy to read and update. Chalkboard labels or removable sticker labels work well. Include the category name and maybe a note like “restock when half empty. ” Place labels on the front or side so you can see them without pulling the bin out.
Maintaining The System
Once a month, check all bins for expired items and wipe them down. Resist the urge to toss items in randomly—if a bin gets too full, consider splitting into two bins. The goal is to make restocking and cooking effortless, not to add more work.
3. A Dedicated 'First In, First Out' Zone
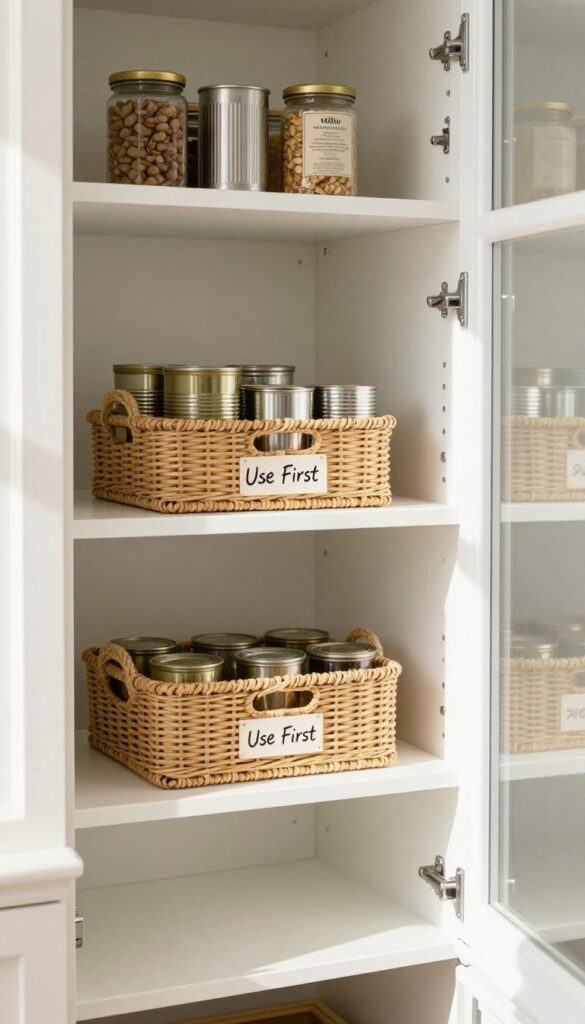
We've all been there: you find a can of beans buried in the back that expired three months ago. A 'first in, first out' zone puts older items front and center so they get used before they spoil. This small shift in how you organize can dramatically cut down on food waste and save you money.
Set up a specific shelf or bin—maybe in your most accessible spot—for items that need to be used soon. When you unpack groceries, move older items forward and place new ones behind. This simple rotation habit ensures nothing gets forgotten.
Where To Put It
Choose a spot you see every day, like an eye-level shelf or the top of a counter. If your pantry is deep, use a shallow bin or a lazy Susan to keep older items visible. The goal is to make it effortless to grab the soon-to-expire items first.
What Goes In The Zone
Focus on items with clear expiration dates: canned goods, boxed mixes, jarred sauces, and produce. For dry goods like pasta or rice, write the purchase date on the bag with a marker. This zone works best for things you tend to buy in bulk or forget about.
How To Maintain It
Make it a habit to check the zone every time you cook. Use a small whiteboard or a sticky note to list what's inside. When you buy replacements, always put the new ones behind the old.
Over time, this becomes second nature and your food waste will drop noticeably.
4. Adjustable Shelf Risers for Cans and Jars
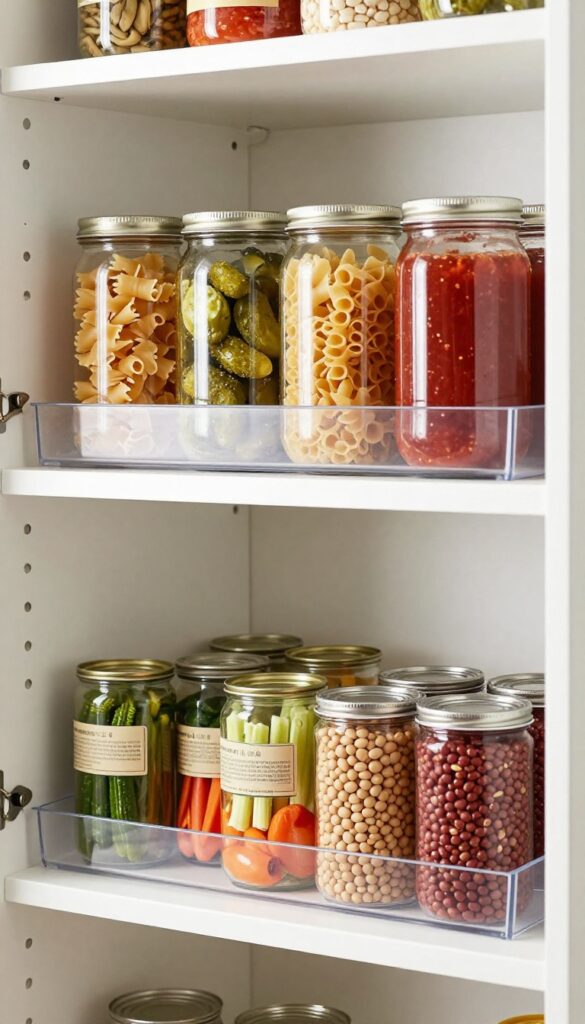
Cans and jars are the worst offenders when it comes to pantry disorganization. They roll around, get shoved to the back, and before you know it, you're buying a third can of diced tomatoes. Shelf risers solve this by creating multiple tiers so every item has its own visible spot.
These simple plastic or metal inserts turn one flat shelf into two or three levels. You can see every label at a glance, and grabbing a can from the back row is as easy as reaching for the front. No more digging or forgetting what you have.
Tiered risers are especially useful for deep shelves where items tend to get lost. By elevating the back row, you create stadium seating for your canned goods. This not only improves visibility but also prevents you from buying duplicates because you can actually see everything you own.
Why Risers Work Better Than Stacking
Stacking cans directly on top of each other is unstable and often leads to toppling towers. Risers provide a stable platform that keeps each can in its place. They also make it easy to rotate stock—just place newer items in the back and older ones in the front.
Choosing The Right Riser Size
Measure your shelf depth and height before buying. Standard risers work for most shelves, but you can find adjustable ones that expand to fit. For tall jars, look for risers with a higher back step to accommodate their height without overcrowding.
Where To Place Them For Maximum Impact
Focus on shelves where you store canned vegetables, beans, sauces, and jars of pasta sauce or pickles. Avoid using risers for items that are already easy to see, like spices or small boxes. The goal is to tame the chaos of round, slippery containers.
5. A Wall-Mounted Spice Rack Inside the Door
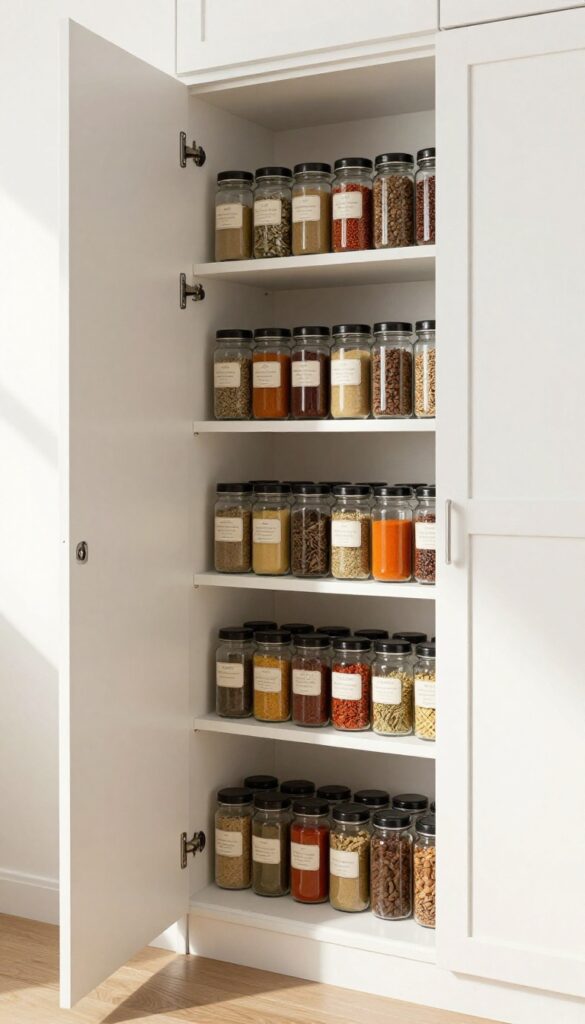
Spices are some of the most frequently used items in a pantry, yet they often end up buried in a cabinet or scattered across shelves. Mounting a slim spice rack on the inside of the pantry door turns wasted vertical space into prime real estate. You'll see everything at a glance, grab what you need, and never buy a duplicate jar again.
This simple upgrade works best with a narrow, tiered rack that attaches with adhesive strips or screws. Choose one with adjustable shelves or magnetic tins so you can rearrange as your collection grows. Organize spices by frequency of use—keep everyday staples like salt, pepper, and garlic powder at eye level, and tuck specialty blends toward the top or bottom.
Why The Door Works Best
Pantry doors are often overlooked real estate. A door-mounted rack keeps spices accessible without taking up shelf space needed for canned goods or dry staples. Plus, it's easy to install—no major renovation required.
Just measure the door's clearance to ensure the rack won't bump into shelves when closed.
How To Organize By Frequency
Group spices into three tiers: daily use (salt, pepper, cumin, paprika), weekly use (oregano, thyme, chili powder), and occasional use (allspice, cardamom, saffron). Label each jar with the name on the lid for quick scanning. If you cook different cuisines often, create zones—Mexican spices together, Italian spices together—so you can grab a handful at once.
Tips For A Clean Look
Use uniform jars or tins for a cohesive appearance. Magnetic spice tins stick directly to a metal strip, eliminating the need for shelves. Clear jars let you see contents, but opaque tins with labels keep things sleek.
Avoid overfilling—leave a little space so you can easily slide jars in and out.
6. A Barcode Scanner App for Inventory Tracking
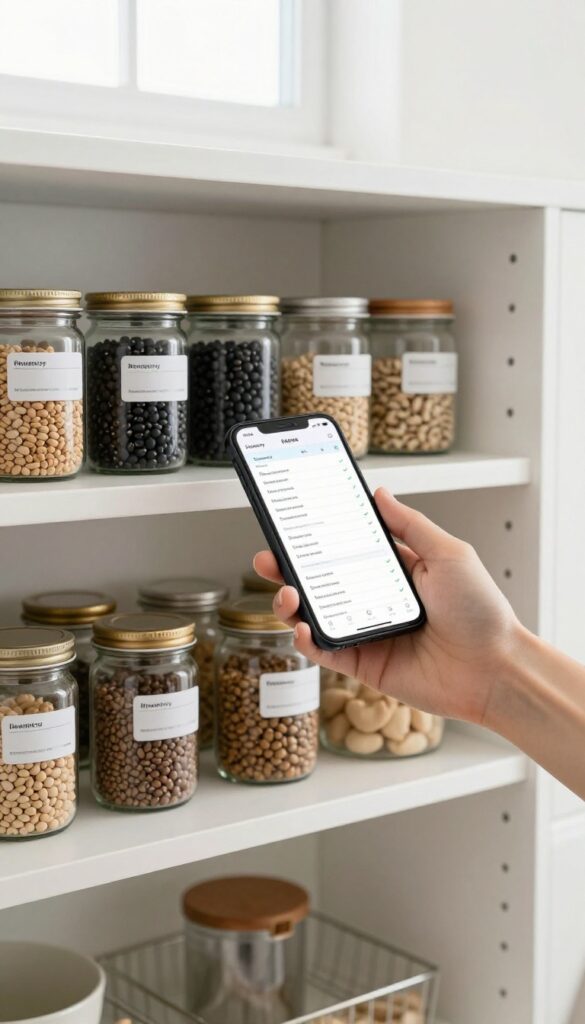
You unpack groceries, stack cans, close the cabinet, and two days later you're at the store wondering if you still have black beans. That guessing game ends with a barcode scanner app. These tools turn your phone into a pantry manager, so you always know what's in stock.
A barcode scanner app like Pantry Check or Out of Milk lets you scan items as you put them away. The app builds a live inventory and syncs with your shopping list. When you use something, remove it from the app.
When you run low, add it to your list. No more duplicates, no more forgotten ingredients.
How It Works
Open the app, point your camera at the barcode, and tap. The product name, quantity, and even expiration date are stored automatically. Most apps let you organize by category or location, like 'canned goods' or 'pantry shelf two'.
You can also manually add items without barcodes, like bulk bin rice.
Sync With Your Shopping List
The real magic is the two-way sync. When you scan an item into inventory, it can be removed from your shopping list. When you finish a jar of pasta sauce, mark it as used and the app adds it to your list.
Some apps even share lists with family members, so everyone knows what's needed.
Reduce Food Waste
Seeing your inventory at a glance helps you plan meals around what you already have. You can sort by expiration date to use items before they go bad. That forgotten can of coconut milk finally gets its moment.
Less waste means more money in your pocket.
7. A 'Snack Station' with Baskets for Kids
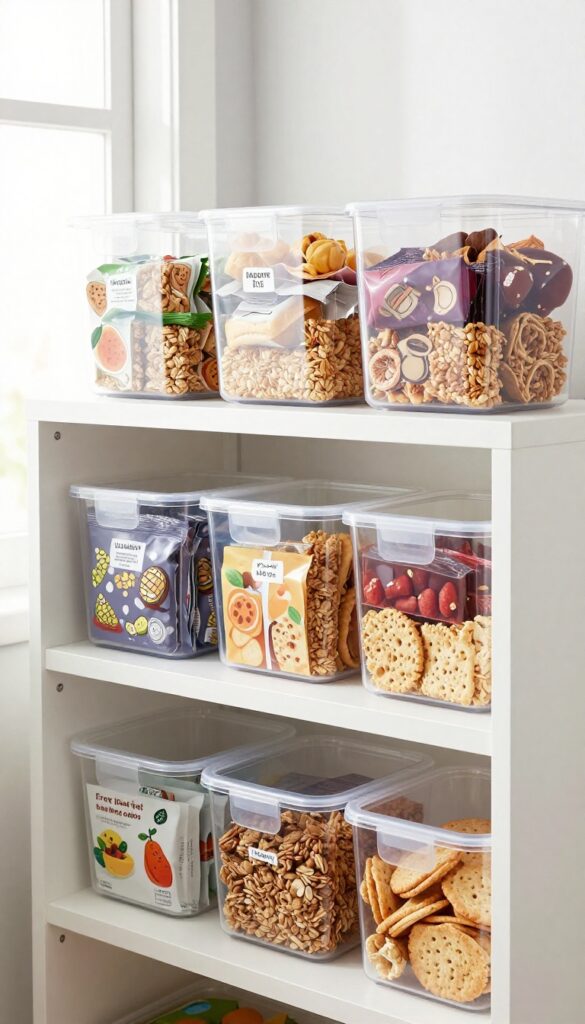
Kids love to snack, but letting them loose in the pantry often leads to half-eaten bags and crumbs everywhere. The solution is simple: create a dedicated snack station they can access on their own. This not only gives them independence but also keeps the rest of your pantry organized.
Designate a low shelf or a set of clear bins for pre-portioned snacks. Fill them with things like granola bars, fruit pouches, crackers, and nuts. You can use small containers or reusable bags to portion out chips or cookies.
The key is to make it easy for little hands to grab and go without rummaging through the entire pantry. This also helps with portion control and reduces waste.
Choose The Right Spot
Pick a shelf that's at your child's eye level. If you have adjustable shelving, lower one section. Alternatively, use a rolling cart or a small basket on the floor.
The goal is accessibility without a stool.
Keep It Stocked And Simple
Rotate snacks weekly and involve your kids in restocking. Use clear bins so they can see what's available. Label bins with pictures or words for non-readers.
This builds independence and reduces the 'Mom, where are the snacks? ' questions.
Set Some Ground Rules
Decide how many snacks per day and communicate it clearly. You might use a visual chart or a simple 'two snacks a day' rule. This prevents the snack station from becoming a free-for-all while still giving kids control.
8. Over-the-Door Wire Baskets for Bulk Items
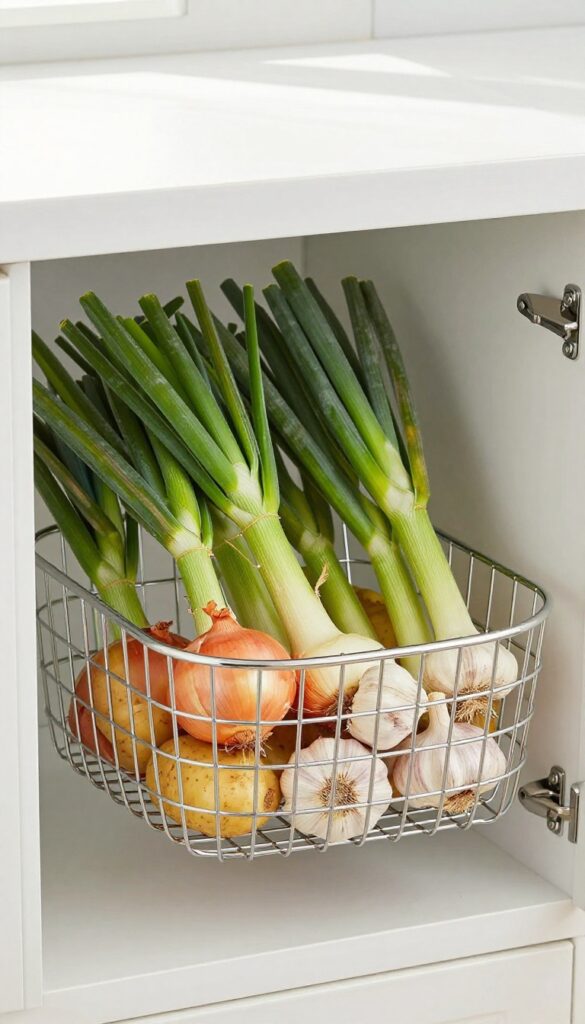
Onions, potatoes, and garlic need airflow to stay fresh, but they often end up in plastic bags or dark cabinets where they spoil faster. An over-the-door wire basket system solves this by giving them a ventilated home that's easy to reach. No more digging through a bin or finding sprouted potatoes at the back of a shelf.
These baskets hang on the back of a pantry door or a cabinet door, using the vertical space that's usually wasted. The open wire design allows air to circulate, which helps prevent moisture buildup and extends the life of your produce. You can grab what you need without moving other items, and the baskets are transparent enough to see what's inside at a glance.
Choose The Right Size And Depth
Measure your door clearance before buying. Standard wire baskets come in depths from 3 to 6 inches, so make sure they won't bump into shelves or other items when the door closes. For bulk onions or potatoes, go with deeper baskets that can hold several pounds.
Lighter items like garlic or shallots work well in shallower tiers.
Layer By Rotation
Use the oldest produce first by placing new bags at the bottom of the basket and pulling from the top. This simple rotation habit cuts down on waste. If you buy in bulk, consider labeling each basket with the purchase date using a piece of chalk or a sticky note.
Combine With Mesh Bags For Smaller Items
For loose garlic cloves or small shallots, drop them into a mesh produce bag before placing them in the wire basket. This keeps them from falling through the gaps while still allowing airflow. It also makes it easy to grab a handful without chasing rolling cloves around the pantry.
9. A Lazy Susan for Oils, Vinegars, and Condiments
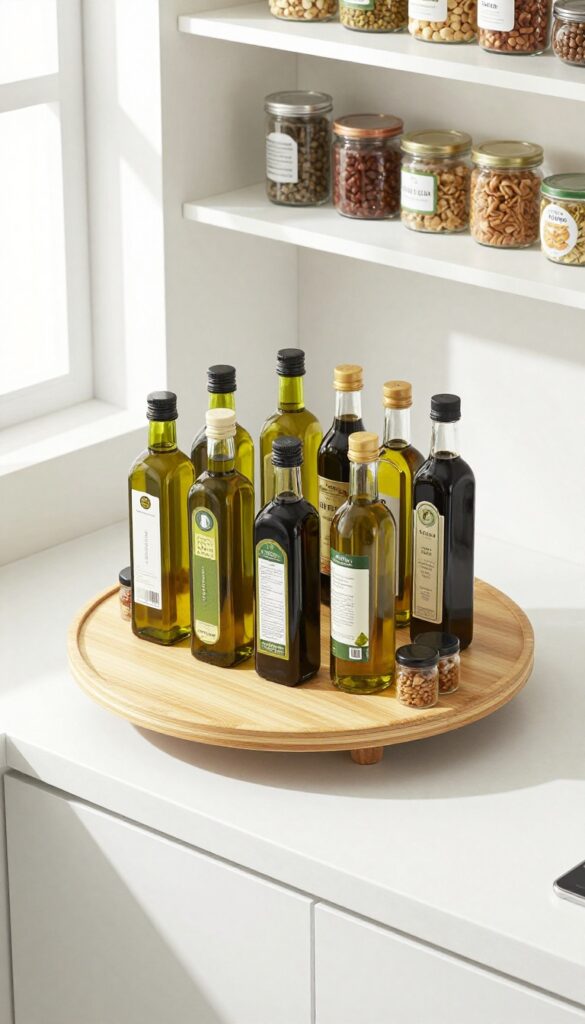
Oils, vinegars, and condiments come in all shapes and sizes, and they tend to crowd together on a shelf. Reaching the bottle in the back often means moving three others out of the way. A large lazy Susan solves that by letting you spin the whole collection with one hand.
A lazy Susan isn't just for spices or canned goods. It works especially well for tall, slippery bottles that are easy to knock over. Place one on a sturdy shelf near your cooking area, and group your most-used oils and vinegars on it.
You'll grab what you need without any digging.
Choose The Right Size And Material
Look for a lazy Susan that's at least 12 inches in diameter so it can hold several bottles without feeling cramped. A non-slip surface or raised lip helps keep bottles in place when you spin it. Bamboo or plastic options are lightweight and easy to clean.
Group By Frequency Of Use
Put everyday items like olive oil, soy sauce, and vinegar on the lazy Susan. Less-used bottles like sesame oil or fish sauce can stay on a regular shelf. This way, the spin shelf stays clutter-free and only holds what you reach for regularly.
Keep It Accessible
Place the lazy Susan at eye level or just below, so you can see all the labels at a glance. If your pantry has deep shelves, a lazy Susan is a game-changer—it turns wasted back space into usable area. Just spin and grab.
10. A Weekly Meal Prep Shelf with Pre-Portioned Containers
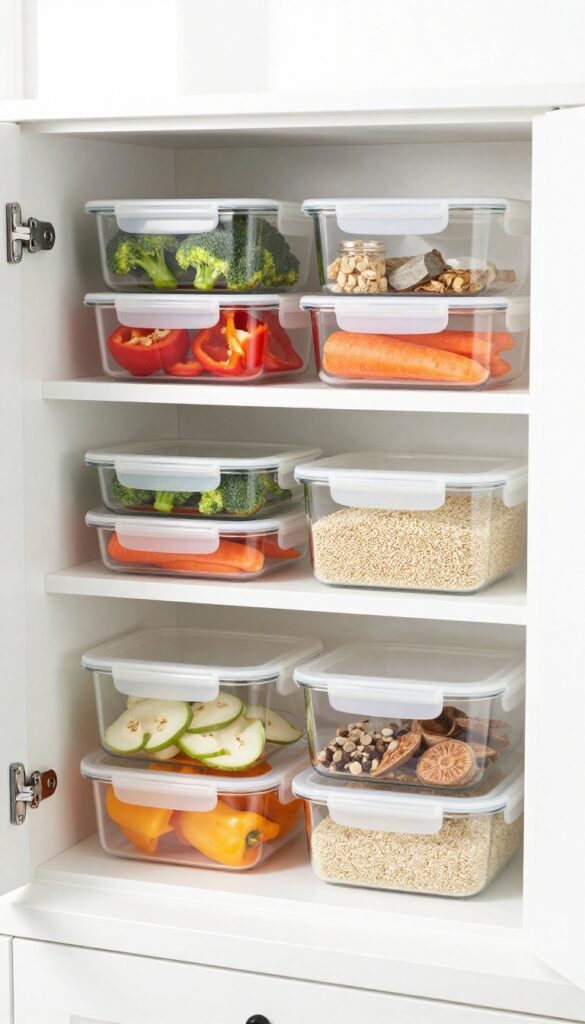
Dedicate one shelf to pre-portioned meal prep ingredients, and weeknight cooking becomes a breeze. Clear containers with chopped veggies, cooked grains, and pre-measured spices let you grab what you need without digging through the fridge or pantry. This system cuts down on decision fatigue and makes healthy eating more automatic.
A meal prep shelf turns your pantry into a ready-to-cook station. By storing prepped components in clear, stackable containers, you can see exactly what's available and assemble meals in minutes. It also helps reduce food waste because you're using ingredients before they spoil.
Choose The Right Containers
Opt for clear, airtight containers that stack easily. Glass or BPA-free plastic works well. Use uniform sizes for grains and legumes, and wider containers for chopped veggies.
Label each with the prep date so you know what's fresh.
Prep Once, Eat All Week
Set aside an hour after grocery shopping to wash, chop, and portion. Cook a batch of quinoa, brown rice, or farro. Store them in the pantry shelf (if shelf-stable) or fridge.
Having these ready means you can throw together a grain bowl, stir-fry, or salad in under 15 minutes.
Keep It Organized With A Rotation System
Place newer prepped items behind older ones so you use the oldest first. Dedicate a small section for pre-portioned spice blends or sauce packets. This shelf becomes your go-to for quick meals, and you'll find yourself cooking more often.
11. A 'Donate' Bin for Unwanted or Expired Items
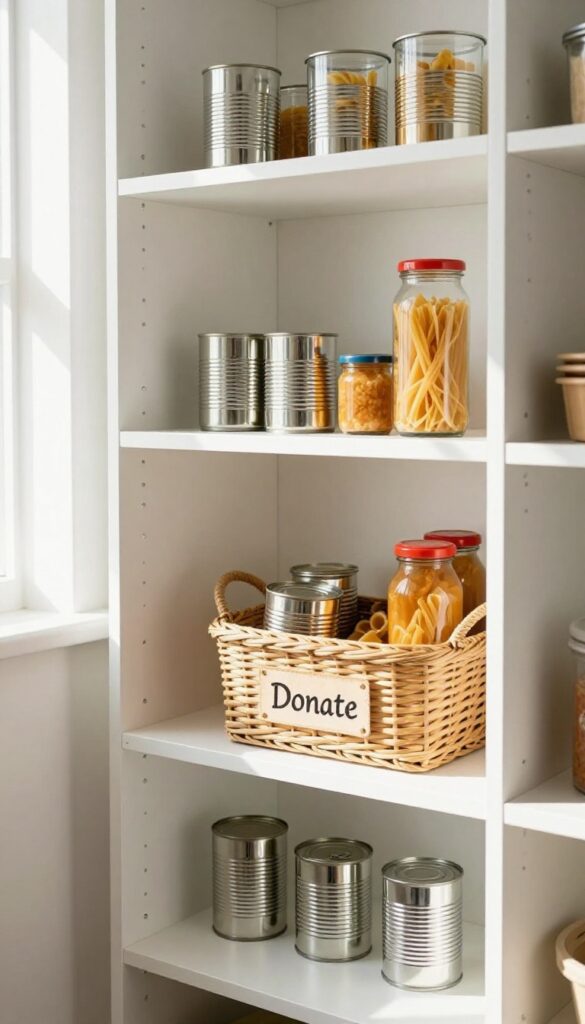
It happens to everyone—you buy a jar of pasta sauce that sounded good at the store, then realize you don't actually like it. Or you find a box of crackers that expired three months ago. Instead of letting those items clutter your shelves, set up a small donate bin right in the pantry.
A dedicated bin for unwanted or expired items makes it easy to keep your pantry clean and organized. When you restock or do a weekly check, toss anything you won't use into the bin. Non-perishable items that are still good can go to a food bank or shelter.
Expired items get thrown out. This simple habit prevents clutter and ensures your pantry only holds things you'll actually eat.
Where To Place It
Pick a spot that's visible but not in the way. A bottom shelf, a corner, or even a small basket on the door works well. The key is to make it easy to reach whenever you spot something that needs to go.
What Goes In
Canned goods, dry pasta, unopened sauces, spices, and other non-perishables that are still within their best-by date. Check labels for damage or bulging cans. For expired items, toss them immediately—don't let them sit in the bin.
Donation Tips
Find a local food bank or shelter that accepts non-perishable food. Many have drop-off bins or scheduled pickups. Keep a list of accepted items nearby so you know what's eligible.
Some places also accept personal care items like soap or toothpaste.
12. A Magnetic Grocery List on the Fridge or Door
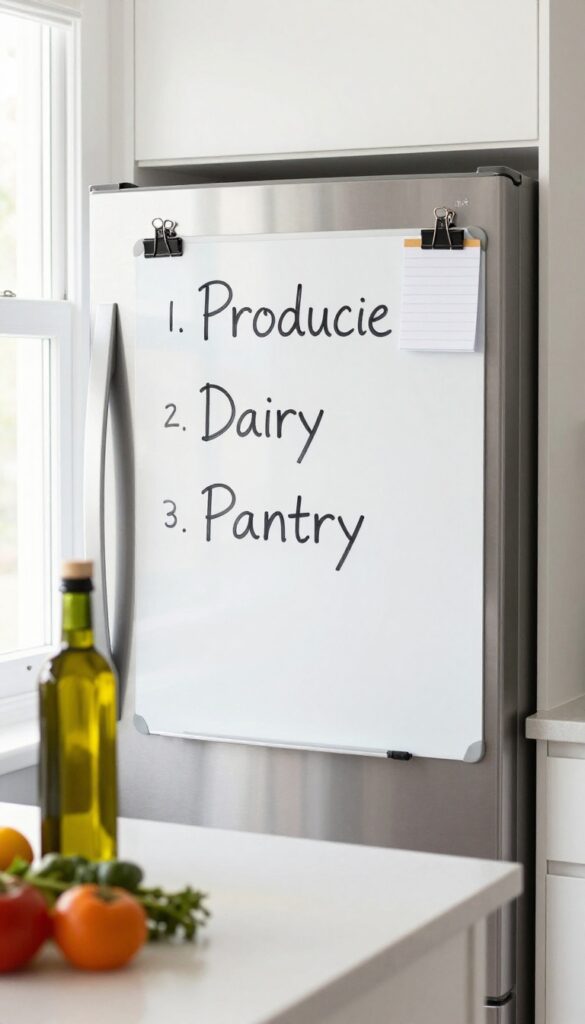
Forgetting to buy olive oil again? A magnetic grocery list right where you'll see it daily solves that. Attach a whiteboard or notepad to the fridge or pantry door so you can jot down items the moment you run out.
It syncs your household's needs and makes shopping trips more efficient.
This simple system prevents duplicate purchases and saves mental energy. No more rummaging through cabinets to check what's missing—just glance at the list. It works for families, roommates, or solo cooks who want to streamline their routine.
Why It Works
The key is visibility. When the list is front and center, everyone adds items immediately. No more relying on memory or sticky notes that get lost.
Plus, it reduces impulse buys because you stick to what's actually needed.
Setup Tips
Choose a magnetic whiteboard that's easy to wipe clean, or use a notepad with a magnetic back. Divide the board into sections like 'Produce, ' 'Dairy, ' 'Pantry, ' etc. , to organize as you write. Keep a dry-erase marker attached with a magnet so it's always handy.
Digital Alternative
If you prefer digital, use a shared app like AnyList or Google Keep on a tablet mounted magnetically. Voice assistants like Alexa can also add items to a shopping list. The key is making it frictionless so you actually use it.
FAQ
How do I start organizing my pantry without spending a lot?
Start by emptying everything, grouping like items, and using what you already have—like shoeboxes or plastic containers—as temporary bins. Then add affordable solutions like clear bins and labels gradually.
What's the best way to store spices to keep them fresh?
Store spices in airtight containers away from heat, light, and moisture. A door-mounted rack or a drawer insert works well. Label the lids and arrange them alphabetically or by cuisine.
How can I avoid buying duplicates of items I already have?
Use a pantry inventory app that tracks what you have. Alternatively, keep a running list on the pantry door and check it before shopping. Grouping similar items together also helps you see what's there.
What's the ideal pantry layout for a small kitchen?
Maximize vertical space with adjustable shelves, use door-mounted racks, and opt for pull-out drawers or bins. Keep frequently used items at eye level and store bulk or rarely used items on higher or lower shelves.
How often should I clean and reorganize my pantry?
Aim for a deep clean and reorganization every 3-4 months. Wipe down shelves, check expiration dates, and adjust your system based on what you actually use. A quick tidy-up after each grocery trip helps maintain order.
Conclusion
A well-organized pantry doesn't have to be a weekend project or a costly remodel. Start with one or two ideas that address your biggest pain points—like losing items in the back or buying duplicates—and build from there. Small changes add up.
Before you know it, unpacking groceries becomes quicker, cooking feels less chaotic, and you actually use what you buy. Your future self will thank you every time you open that pantry door.