15 Outdoor Shower Floor Ideas for Relaxed Rinses in the Sun
Outdoor showers are all about that easy, open-air feeling—but the floor can make or break the experience. Nobody wants to stand on a slippery surface or a puddle of cold water. The right flooring keeps things safe, drains fast, and looks good while doing it.
You don't need a huge budget or a contractor to upgrade your shower floor. Many of these ideas are DIY-friendly, and some are surprisingly affordable.
Whether you're building from scratch or refreshing an existing setup, there's a solution here that fits your space and your wallet. From classic teak to modern composite, each option brings its own vibe and practical perks.
1. Classic Teak Wood Slats
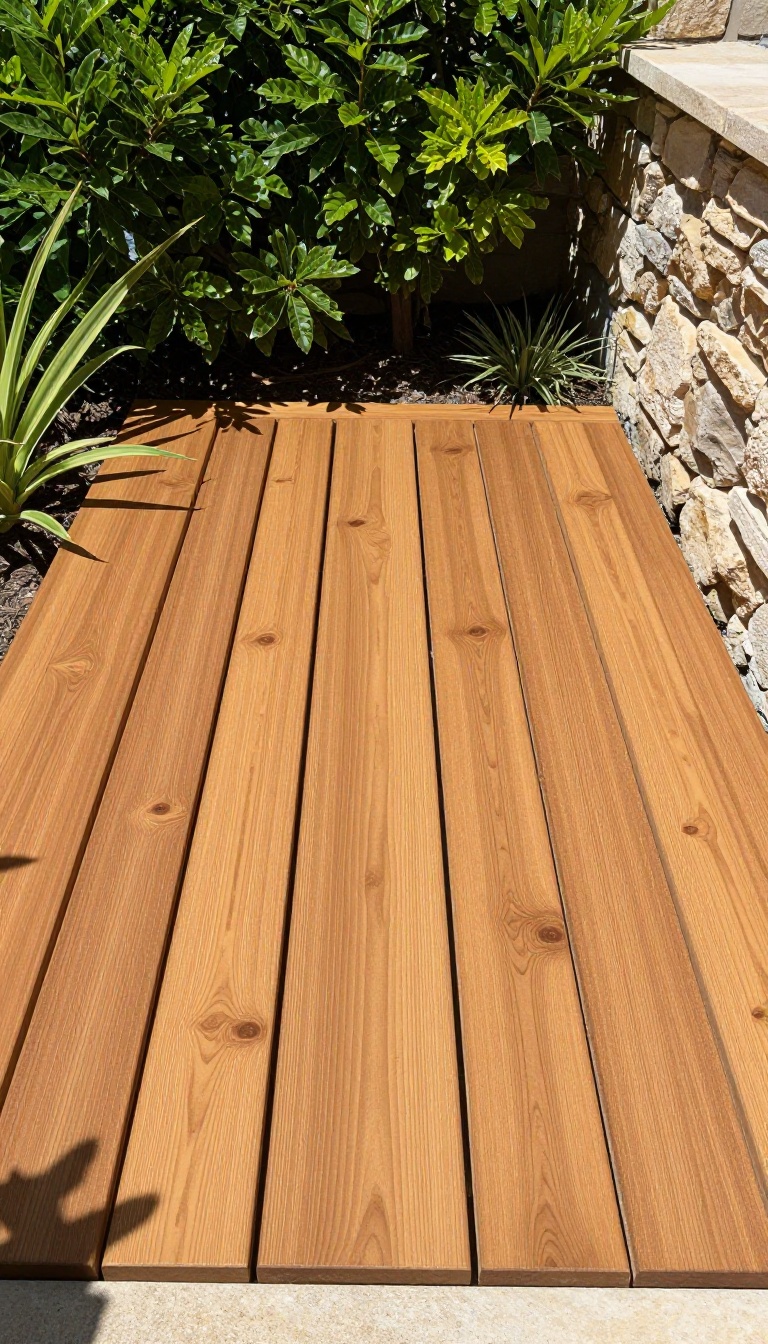
Teak has been a go-to for outdoor showers for good reason. Its natural oils make it highly water-resistant, so it holds up beautifully against constant moisture and sun. Plus, the warm honey-brown tones bring a spa-like feel to any backyard.
A slatted teak floor lets water pass straight through, keeping the surface dry and slip-resistant. The wood stays cool underfoot even on hot days, which makes rinsing off after a swim feel that much better. Over time, teak weathers to a soft silver-gray, though you can oil it to keep that rich color if you prefer.
Why Teak Works So Well
Teak contains natural rubber and oils that repel water, so it won't rot or warp like other woods. It's also dense and durable, meaning it can handle heavy foot traffic and constant exposure without falling apart. That's why you see it on boat decks and high-end outdoor showers alike.
Installation And Maintenance Tips
You can lay teak slats over a concrete pad or a gravel base, leaving small gaps between boards for drainage. To keep them looking fresh, scrub with mild soap and water a few times a year. If you want to preserve the golden hue, apply a teak sealer every season.
What To Watch Out For
Teak is pricier than many other options, so it's a bit of an investment. Also, slatted floors can let small items like soap or shampoo bottles slip through, so consider a removable tray or a wider gap between slats. But honestly, the look and feel are worth it.
2. Pressure-Treated Pine Grates
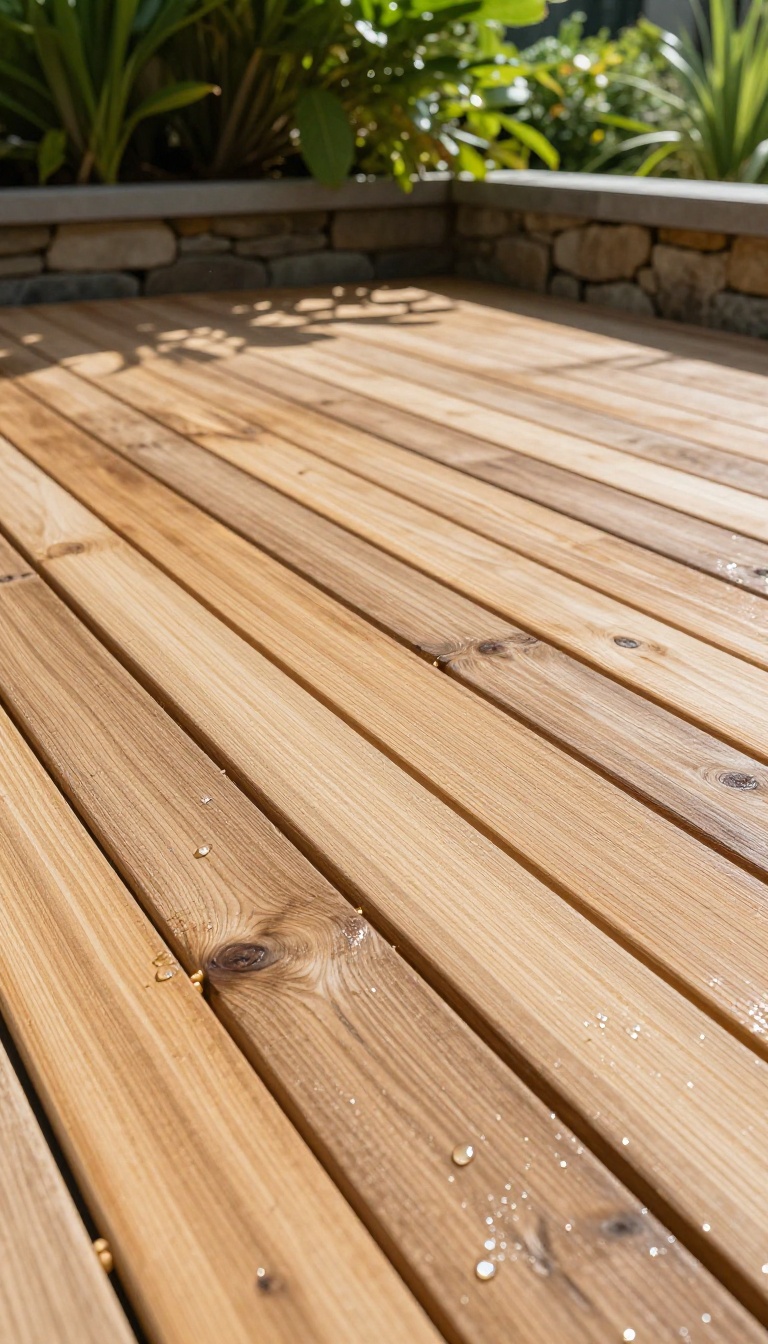
If teak's price tag makes you wince, pressure-treated pine grates are a solid stand-in that still gets the job done. They're easy on the wallet and surprisingly simple to build yourself, even if you're not a seasoned DIYer. Plus, they offer the same open-slat design that lets water flow through quickly, so you're not standing in a puddle.
Pressure-treated pine is lumber that's been infused with preservatives to resist rot, decay, and insects. That makes it a practical choice for outdoor use, especially in damp environments. The grates themselves are typically made from 2x4s or 2x6s spaced about a quarter-inch apart, which allows water to drain while still giving you a stable surface to stand on.
They're lightweight, easy to cut, and can be assembled in an afternoon with basic tools. And when they eventually wear out, replacing a few boards is a fraction of the cost of a new teak grate.
Why Pine Grates Work
The main appeal is cost—you can build a full grate for a fraction of what teak would run. But they're also practical: the slatted design keeps water moving, and the pressure treatment means they'll hold up for years with minimal care. They're also easy to customize to fit your shower footprint perfectly, whether that's a small corner or a spacious open-air stall.
Building Your Own Grates
Start by measuring your shower area and cutting your boards to length. Use a circular saw or miter saw for clean cuts. Lay the boards side by side with a small gap (use a scrap piece of wood as a spacer), then attach cross supports underneath with galvanized screws.
Sand the edges to avoid splinters, and you're done. It's a straightforward weekend project that doesn't require advanced carpentry skills.
Caring For Pine Grates
Even though the wood is pressure-treated, a little upkeep goes a long way. Rinse off soap residue after each use and give the grate a good scrub with a brush every few weeks to prevent mildew. If you notice any rough spots, a quick sanding will keep it smooth.
You can also apply a water-repellent sealer once a year to extend its life, though it's not strictly necessary.
3. Pebble Tile Mosaic
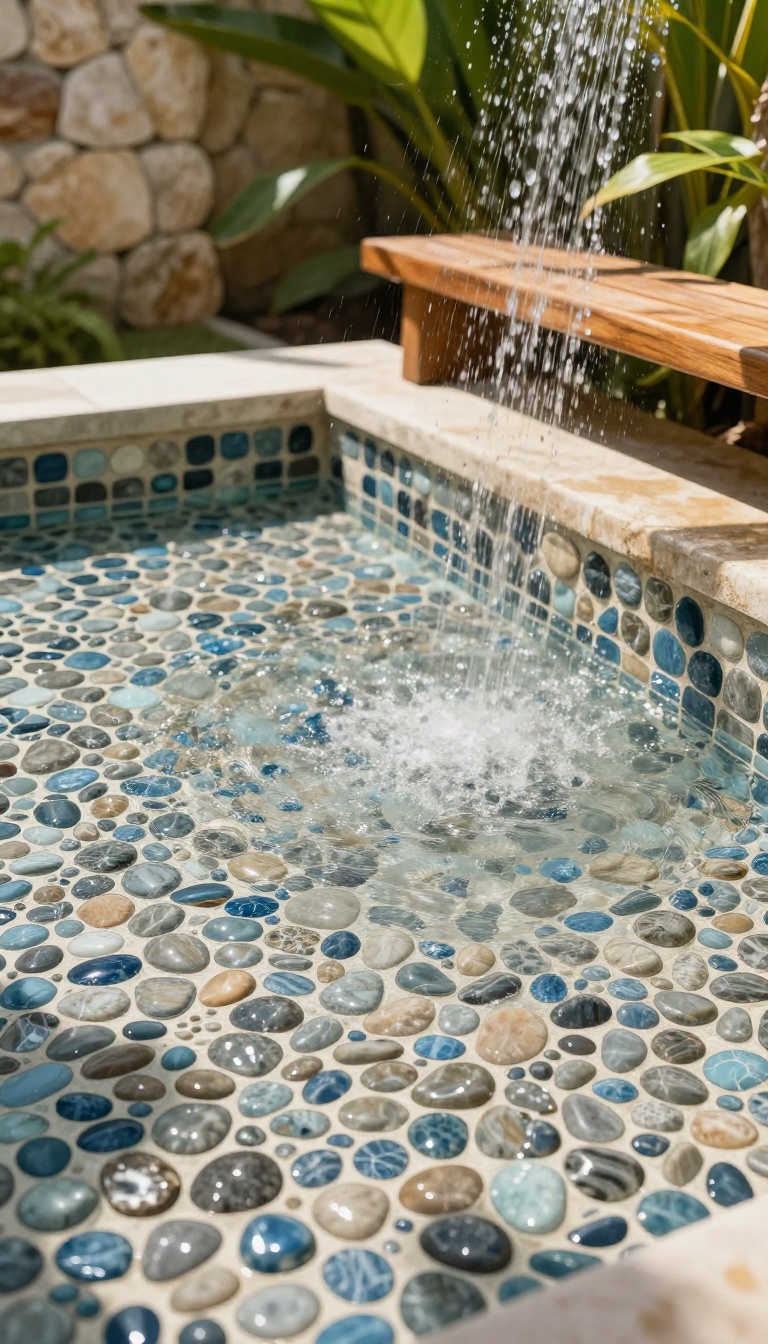
If you want that natural, spa-like feel underfoot, pebble tile is a standout choice. These smooth river stones set in mesh sheets create a textured surface that's gentle on bare feet and drains water quickly. The key is proper sealing—unsealed grout can trap moisture and lead to mold, especially in a wet outdoor environment.
Pebble mosaic flooring brings an organic, earthy vibe to your outdoor shower. The stones are typically tumbled and rounded, so they feel comfortable to stand on, and the gaps between them allow water to flow through easily. This makes them a practical option that doesn't sacrifice style.
You can find pebble tiles in various colors, from warm grays to cool blues, so you can match your shower to the surrounding landscape.
Why Pebble Tiles Work Outdoors
Pebble tiles are naturally slip-resistant because of their uneven surface, which is a huge plus in a wet shower. They also handle temperature changes well, so they won't crack in freezing weather. Plus, the texture provides a gentle massage for your feet, adding to the relaxing experience.
Installation And Grout Tips
You can install pebble tiles over a concrete slab or a mortar bed. Use a flexible thin-set adhesive designed for outdoor use. When it comes to grout, choose a sanded, epoxy-based grout that resists moisture and mold.
Seal the grout lines with a penetrating sealer after installation, and reapply every year or two to keep them protected.
Keeping It Clean And Fresh
To prevent soap scum and algae buildup, rinse the floor with a hose after each use. A stiff brush and a mild cleaner can handle tougher spots. Avoid harsh chemicals that can degrade the sealer.
With minimal upkeep, your pebble floor will stay beautiful for years.
4. Concrete Pavers with Spacing
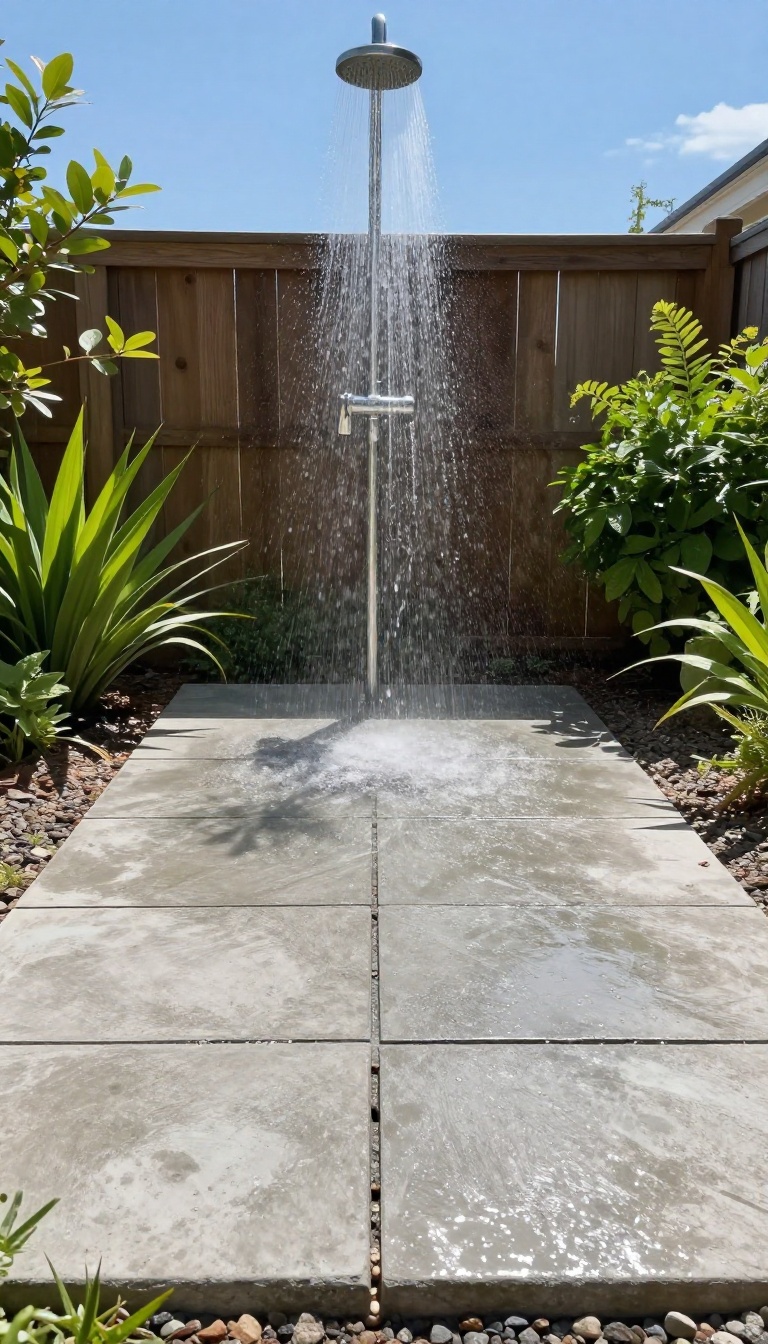
Concrete pavers bring a clean, modern look that’s tough enough for years of outdoor use. When you leave small gaps between them, water drains straight into the ground below, so you’re not standing in a puddle. It’s a simple system that’s easy to install and even easier to maintain—just sweep or hose it down.
Concrete pavers are a practical choice because they’re durable, affordable, and available in many shapes and sizes. The key is spacing them properly to allow water to flow through the gaps. You can set them on a bed of gravel or sand, which also helps with drainage.
This setup works well for both permanent and temporary shower areas, and you can adjust the layout to fit your space.
Why Spacing Matters
The gaps between pavers aren’t just for looks—they’re essential for drainage. Water seeps through the cracks and into the ground, preventing puddles and slippery surfaces. This also reduces the chance of mold or mildew buildup, keeping your shower area fresher.
Choosing The Right Pavers
Go for large, thick pavers that can handle foot traffic and weather. Textured surfaces add grip, which is important when soap and water are involved. You can pick from smooth, brushed, or patterned finishes to match your style.
Just make sure they’re rated for outdoor use.
Installation Tips
Start by leveling the ground and adding a layer of crushed stone or gravel. Place the pavers with even gaps—about 1/4 to 1/2 inch works well. You can leave them loose or fill the gaps with small pebbles to keep them in place.
This method is flexible and easy to adjust later.
5. Natural Flagstone
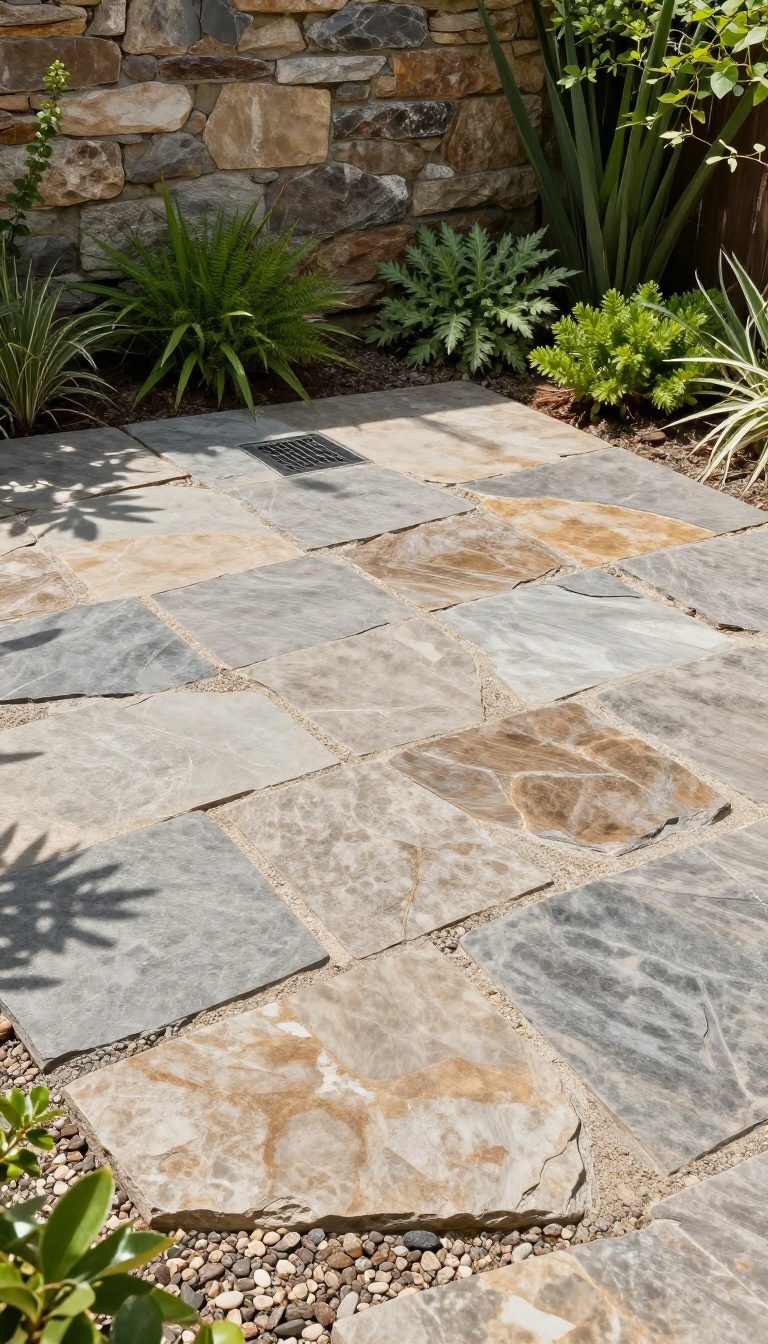
Irregular flagstone pieces bring a rugged, organic charm that blends beautifully with gardens and stone walls. Each slab is unique, so your shower floor becomes a one-of-a-kind mosaic. Setting them on a gravel base ensures water drains quickly, while sealing the stone keeps it slip-resistant and easier to clean.
Flagstone is a timeless choice for outdoor showers, offering both durability and a natural aesthetic. The uneven shapes and earthy tones create a rustic look that feels like a hidden retreat. Proper installation is key to preventing shifting and ensuring good drainage.
Choosing The Right Stone
Look for flagstone with a naturally rough or cleft surface—that texture gives better grip when wet. Common types include bluestone, quartzite, and sandstone. Bluestone is dense and long-lasting, while sandstone has a softer, warmer look but may need more frequent sealing.
Pick stones in varied sizes and shapes for a more organic pattern.
Laying The Base For Drainage
Start with a compacted gravel base, about 4 to 6 inches deep, to allow water to filter through easily. Place the flagstone pieces with small gaps between them, then fill those gaps with pea gravel or fine crushed stone. This keeps the floor stable while letting water flow away, preventing puddles and slippery spots.
Sealing And Maintenance
Apply a high-quality penetrating sealer designed for natural stone. It helps prevent staining and reduces slipperiness without changing the look. Reapply every year or two, depending on weather exposure.
Sweep off debris regularly and rinse with a hose to keep the floor clean. Avoid harsh chemicals that could damage the stone or surrounding plants.
6. Gravel and River Rock
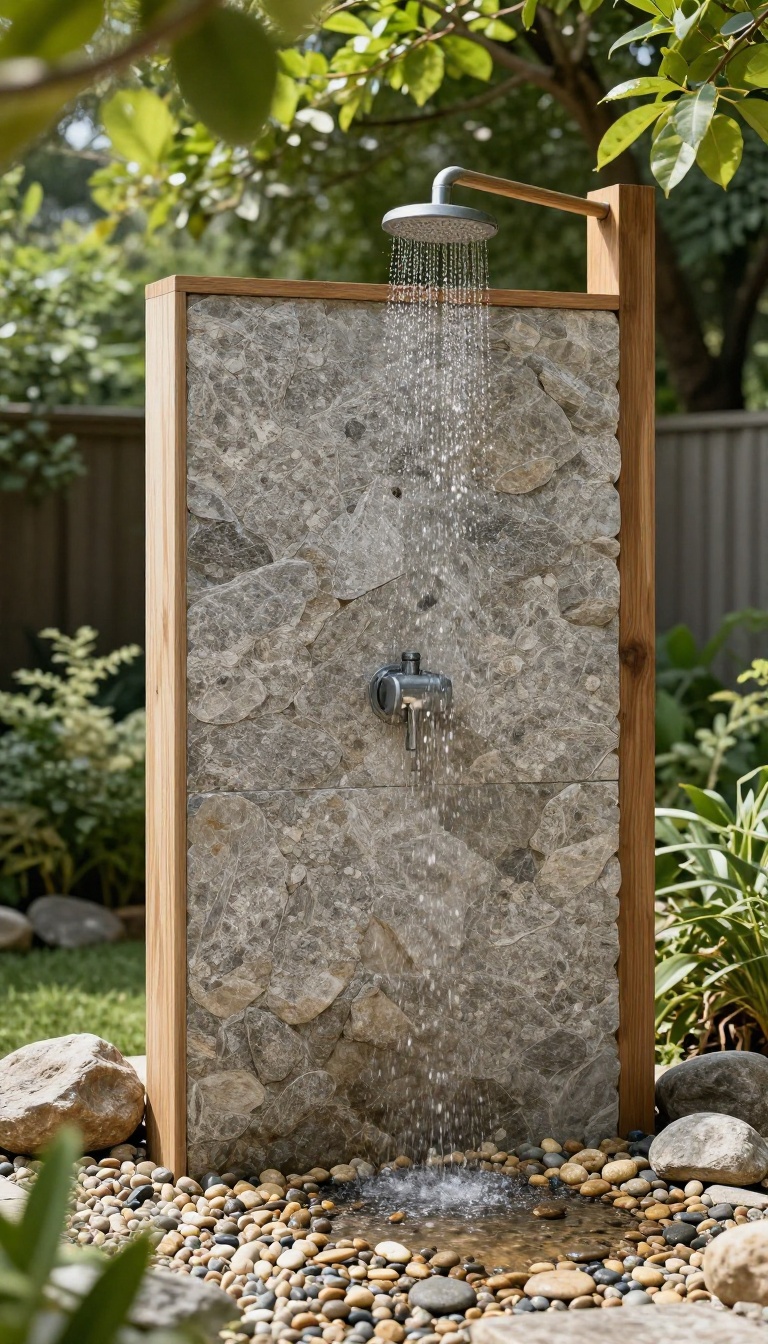
Loose gravel and river rock bring a natural, minimalist look that blends right into your yard. The stones drain instantly, so you never stand in a puddle, and the texture gives your feet a gentle massage while you rinse off. It’s a budget-friendly option that feels more like a beach or creek bed than a typical shower floor.
A gravel or river rock floor is one of the simplest and most affordable ways to create a functional outdoor shower base. The key is proper preparation: lay down a weed barrier fabric, then spread a few inches of pea gravel or smooth river rock. The stones allow water to seep through quickly, and the fabric keeps mud and weeds from working their way up.
You can also mix in larger stones for visual interest or create a border with edging to keep the rocks contained.
Why Gravel Works So Well
Gravel and river rock are naturally porous, so water disappears almost instantly—no more standing in a cold puddle. The uneven surface also provides good traction, even when wet, which is a big safety win. Plus, it’s one of the most affordable options out there, especially if you have a local landscape supply yard.
Choosing The Right Stone
Pea gravel is the classic choice because it’s smooth and comfortable underfoot. River rock, with its larger, rounded stones, feels more spa-like but can be harder to walk on barefoot. For a compromise, mix a layer of pea gravel with a few larger river rocks scattered around.
Stick to stones that are 1–2 inches in size—anything bigger gets uncomfortable.
Installation Tips
Start by excavating the area to about 4–6 inches deep. Lay down a heavy-duty geotextile fabric, then add a base layer of crushed stone for drainage. Top it with your chosen gravel or river rock.
Use edging (like metal or plastic landscape edging) to keep the stones in place. This setup lasts for years with minimal upkeep—just rake the stones occasionally to keep them even.
7. Plastic Deck Tiles
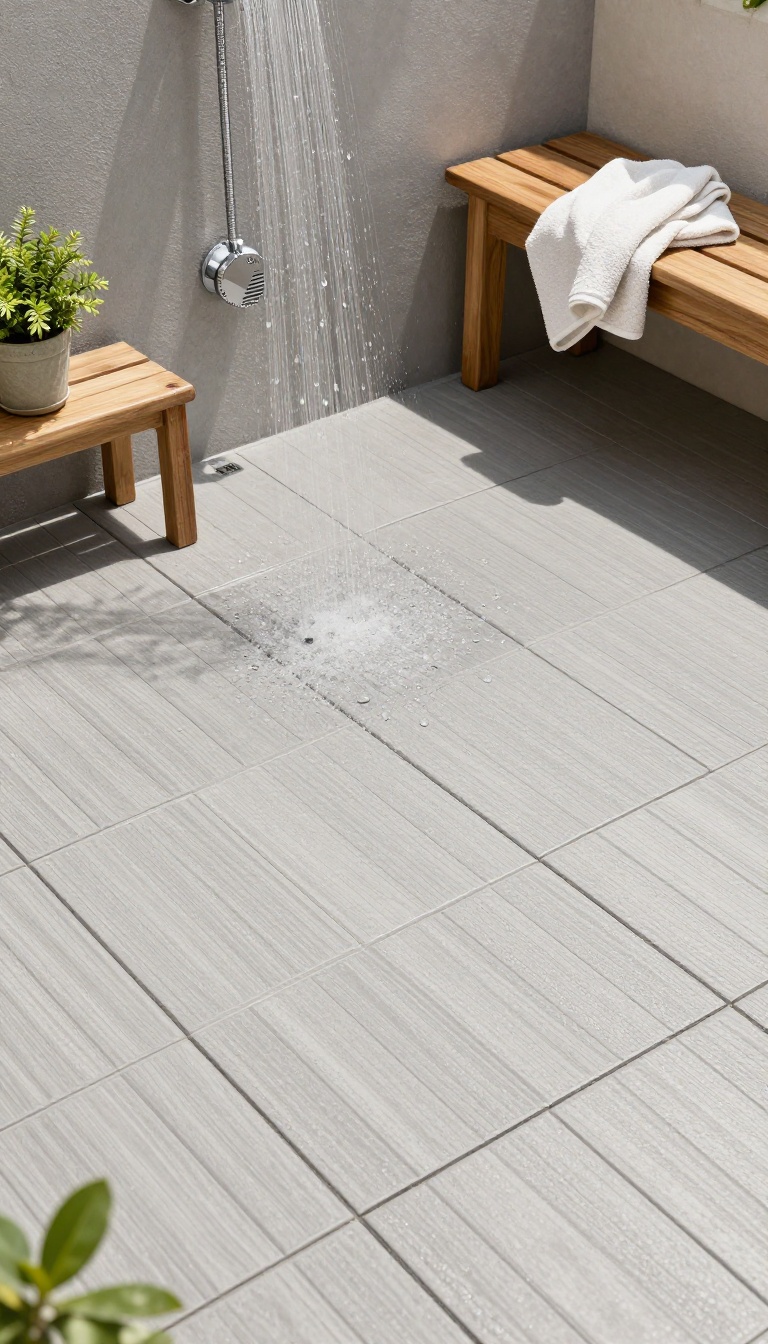
Plastic deck tiles are the quick-change artists of outdoor shower flooring. They come in interlocking squares that you simply snap together—no tools, no glue, no fuss. If you want a floor that can go from flat to functional in minutes, this is your pick.
These tiles are built for wet areas, with a grid pattern that sheds water fast and gives your feet plenty of grip. And because they're lightweight, you can pull them up for a quick rinse or a full cleanup whenever you need.
Plastic deck tiles are all about convenience. They're a favorite for renters, campers, and anyone who wants a temporary setup that still feels solid. The snap-together design means you can cover an awkward space in no time, and the tiles are tough enough to handle constant soaking and foot traffic.
One of the best parts? They're easy to clean. Just lift them out, hose them down, and let them dry in the sun.
No special treatments, no sealing, no scrubbing grout. If a tile gets damaged, you can replace just that one piece without tearing up the whole floor.
Why They Work So Well Outdoors
The grid pattern isn't just for looks—it's a functional design that lets water pass right through, so you're never standing in a puddle. The plastic material resists mold and mildew, and it won't rot or warp like wood. Plus, the surface is textured to give you traction even when it's wet, which is a big safety win.
Installation And Customization
You can lay these tiles directly on grass, dirt, or a concrete pad. They're perfect for uneven ground because they flex a little to find their own level. Mix and match colors or patterns to create a unique look, or stick with a neutral tone that blends into your backyard.
If you need to fit around a drain or a post, you can trim the tiles with a utility knife.
Maintenance And Longevity
Keeping plastic deck tiles in good shape is a breeze. A quick rinse with a hose usually does the trick, and for deeper cleaning, you can scrub them with a brush and mild soap. They're UV-resistant, so they won't fade quickly, and they're built to handle years of sun and rain.
Just remember to lift them occasionally to let the area underneath dry out and prevent any musty smells.
8. Cedar Decking
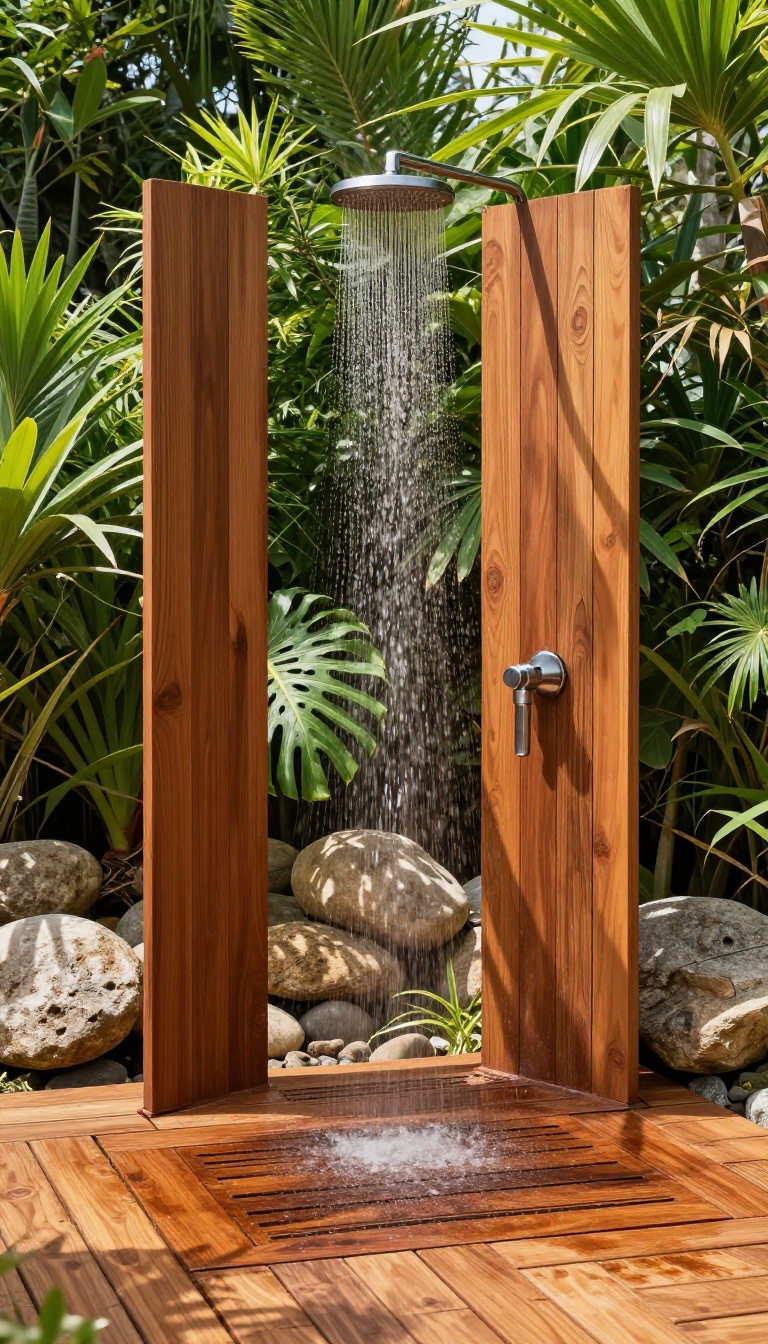
Cedar brings a warm, reddish tone that feels right at home in a backyard or beachside setting. It's naturally resistant to rot and insects, which makes it a smart pick for a wet area. Like teak, cedar works best as slats with gaps so water can drain through easily.
Cedar decking is a classic choice for outdoor showers because it combines durability with a soft, natural look. The wood ages to a silvery gray if left untreated, or you can keep it rich with a sealer. Either way, it stays comfortable underfoot and doesn't get slippery like some smooth surfaces.
When installing cedar, space the slats about a quarter-inch apart to let water flow through. That gap also helps air circulate, which keeps the wood drier and prevents mildew. You can build a simple frame or buy pre-made cedar deck tiles for a quicker setup.
Why Cedar Works So Well
Cedar's natural oils make it resistant to moisture damage and pests, so it holds up in humid or coastal climates. It's also lighter than many hardwoods, which makes it easier to handle if you're DIYing. The warm color adds a cozy, organic feel that blends with plants and stone.
Installation Tips
Start with a level base, like gravel or concrete pavers, to promote drainage. Lay the slats perpendicular to the water flow for best runoff. Use stainless steel or galvanized screws to avoid rust stains.
Leave a small gap between boards—about 1/8 to 1/4 inch—to prevent water pooling.
Maintenance And Longevity
Cedar can last for years outdoors, but it needs some care. Sweep off debris regularly and rinse with a hose. If you want to keep the reddish color, apply a UV-protective sealer once a year.
If you let it gray naturally, it still looks great and requires less upkeep.
9. Bamboo Mats
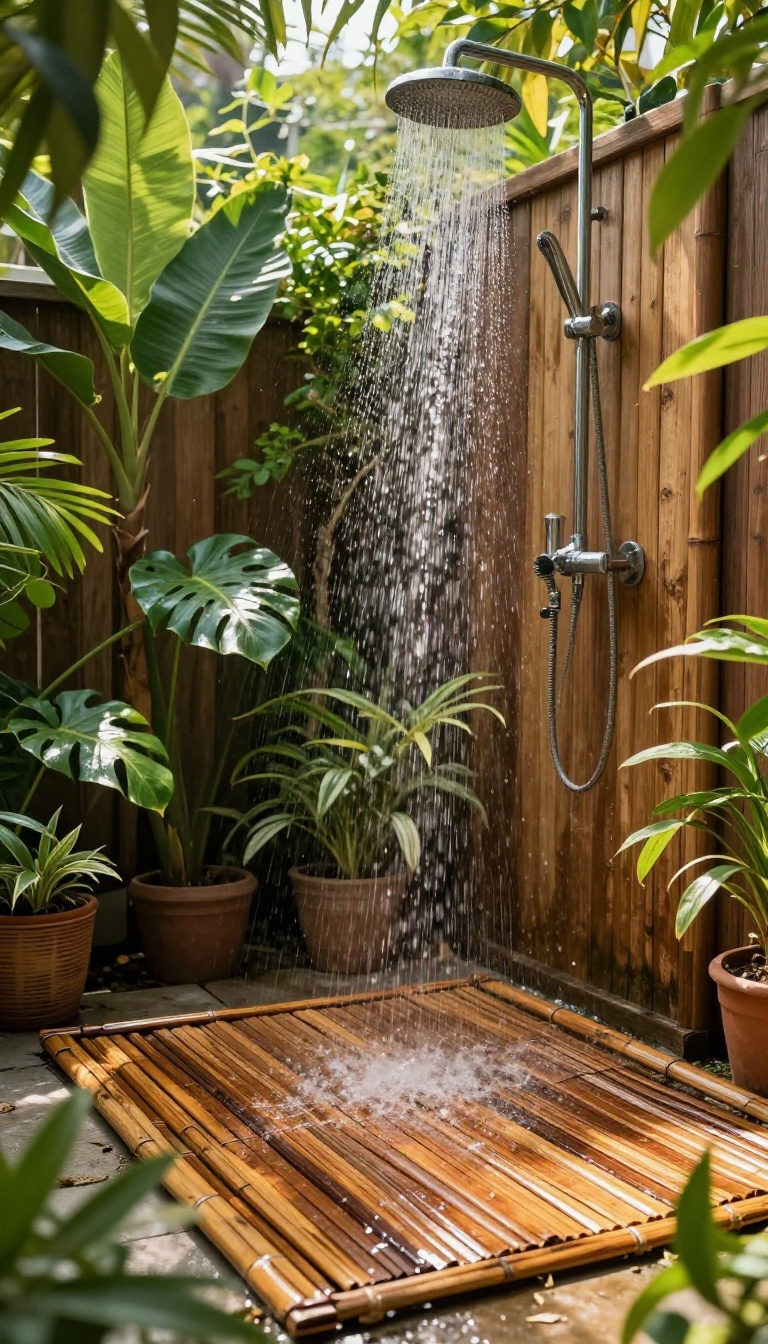
Bamboo mats are a fantastic option if you want something that’s easy to set up and just as easy to store. They roll out flat, giving you a comfortable surface underfoot, and they bring a natural, spa-like vibe to your outdoor shower. Plus, bamboo is a sustainable choice, so you can feel good about your footprint.
Bamboo mats are a quick, temporary solution that works especially well for renters or anyone who wants to test out a look before committing. They’re lightweight and portable, so you can move them around or take them with you if you relocate. The slatted design allows water to drain through, but the mat itself needs regular drying to prevent mildew from taking hold.
Why Bamboo Works
Bamboo is naturally water-resistant and has a smooth, warm texture that feels great on bare feet. It’s also renewable and fast-growing, making it an eco-friendly pick. The slats let water pass through, so you won’t be standing in a puddle, and the mat adds a touch of organic style that blends with most outdoor settings.
Caring For Your Mat
To keep your bamboo mat in top shape, hang it up or lean it against a wall after each use so it can dry completely. Avoid leaving it in direct sunlight for long periods, as that can cause cracking. A quick rinse with fresh water now and then helps remove soap residue and salt if you’re near the coast.
With proper care, a bamboo mat can last for years.
When To Choose Bamboo Mats
Bamboo mats are ideal if you want a no-fuss solution that doesn’t require any installation. They’re perfect for seasonal setups—like a summer shower you take down in the fall—or for trying out a natural look before investing in permanent flooring. Just be prepared to give them a little TLC to keep them fresh.
10. Rubber Tiles
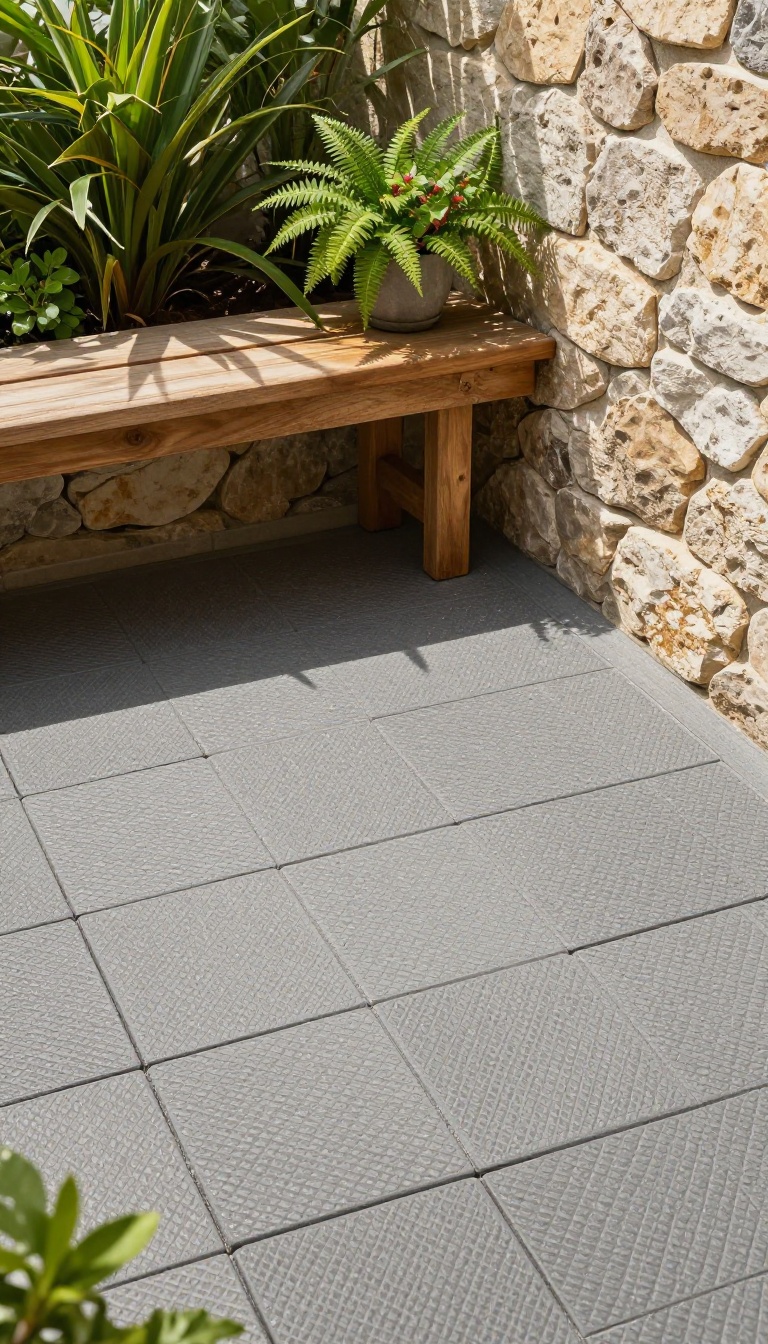
If you want a floor that feels as good barefoot as it looks, rubber tiles are a surprisingly smart pick. These interlocking squares, often found in gyms, bring serious grip and a bit of bounce underfoot. They’re also a cinch to install—no special tools or adhesives needed.
Rubber tiles are all about practicality without sacrificing comfort. The surface stays warm in the sun, doesn’t get slippery when wet, and holds up against constant water exposure. Plus, the cushioning is a nice bonus if you’re standing for a while rinsing off after a long day.
Why Rubber Works Outdoors
Rubber is naturally water-resistant and won’t rot or warp like wood. The textured surface gives your feet a solid grip, even with soapy water around. And because the tiles interlock, they stay put without needing to be screwed down.
Installation And Maintenance
Lay them over a flat, well-drained base like concrete or compacted gravel. They click together in minutes, and you can cut them with a utility knife for a custom fit. Cleaning is simple—just hose them down or sweep away debris.
Style And Comfort Perks
Rubber tiles come in a range of colors and patterns, so you can match your outdoor vibe. The slight give reduces fatigue on your feet and legs, making your shower feel more like a spa. Plus, they’re easy to remove and replace if one gets damaged.
11. Exposed Aggregate Concrete
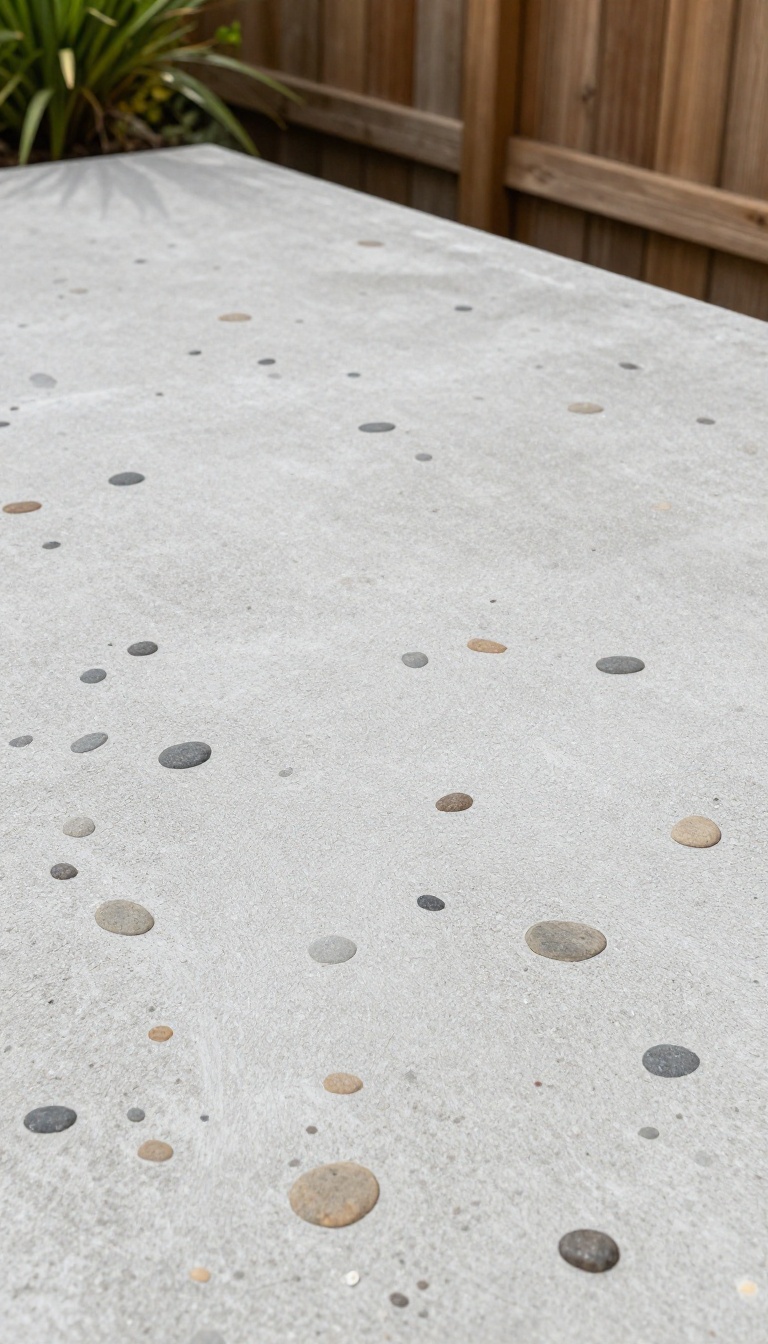
If you’re after a floor that’s built to last and looks sharp without trying too hard, exposed aggregate concrete is a solid contender. This isn’t your basic gray slab—it’s a poured surface with tiny pebbles scattered through it, giving you a natural, textured finish that feels great underfoot. The bonus?
It’s about as low-maintenance as it gets, and you can tint the concrete to match your outdoor vibe.
Exposed aggregate concrete is made by pouring concrete and then washing away the top layer of cement paste to reveal the stones beneath. The result is a rugged, non-slip surface that handles water and weather like a champ. Because it’s poured in place, you can shape it to fit your shower area perfectly, whether that’s a small corner or a spacious open-air nook.
It’s a permanent solution, so it’s best for setups you don’t plan to move. But if you’re ready to commit, this floor will serve you for decades with almost zero upkeep.
Why It Works For Outdoor Showers
The texture from the exposed pebbles gives you excellent traction, even when the surface is wet. That’s a big deal for an outdoor shower where water and soap are always in play. Plus, the small gaps between the stones help water drain quickly, so you’re not standing in a puddle.
It also handles temperature swings and UV rays without cracking or fading, making it a reliable choice for year-round use.
Customization Options
You’re not stuck with plain gray. You can choose the size, color, and type of aggregate—think smooth river rock, crushed granite, or even recycled glass for a bit of sparkle. The concrete itself can be tinted to blend with your patio or stand out as a feature.
You can also add a border or pattern to give it a more polished look. The possibilities are pretty wide, so you can make it your own.
Installation And Maintenance
This is a job best left to a pro, since it involves pouring, leveling, and washing the surface at just the right time. It’s not a weekend DIY unless you’ve got experience with concrete work. Once it’s in, though, maintenance is a breeze.
A quick rinse with a hose and an occasional scrub with a mild cleaner keeps it looking fresh. Sealing it every few years helps protect the surface and makes cleanup even easier.
12. Slate Tiles
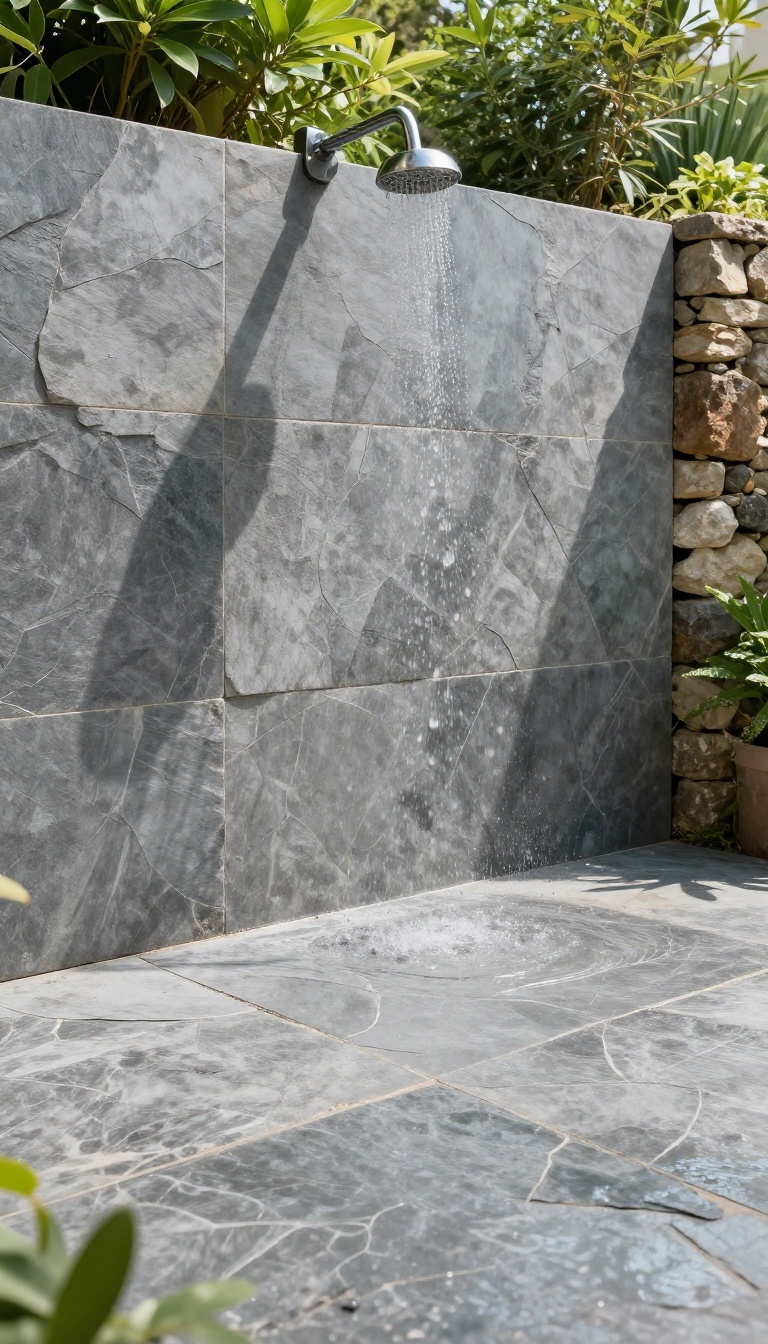
Slate brings a natural, rugged elegance that's hard to beat. Its cleft surface provides excellent grip, even when wet, making it a safe choice for bare feet. Plus, the earthy tones blend seamlessly with outdoor surroundings.
Slate is a metamorphic rock that splits into flat, textured tiles. That natural cleft surface isn't just for looks—it gives your feet something to hold onto. The irregular texture also helps prevent slips, which is exactly what you want in an outdoor shower.
When choosing slate, go for large-format tiles. Fewer grout lines mean less maintenance and a cleaner look. Wide grout lines, about a quarter-inch, allow water to drain quickly between tiles.
Just make sure the subfloor has a slight slope toward the drain so water doesn't pool. Sealing is key. Slate is porous, so it can absorb water and stain over time.
Use a high-quality penetrating sealer designed for natural stone. Reapply every year or two, depending on wear and weather. With proper care, slate will last for decades and develop a beautiful patina.
Why Slate Works Outdoors
Slate's natural cleft surface offers superior traction compared to smooth tiles. It's also frost-resistant, so it won't crack in freezing temperatures. The muted colors—grays, greens, purples—blend well with gardens and stone walls, giving your shower an organic, upscale feel.
Installation Tips For Slate
Install slate over a concrete slab or a sturdy deck with proper waterproofing. Use a flexible thin-set mortar to accommodate slight movement. Keep grout lines wide and use sanded grout for better stability.
Always check for lippage—uneven edges—to avoid tripping hazards.
Sealing And Maintenance
Seal slate with a penetrating sealer before use and reapply as needed. Clean with a mild pH-neutral cleaner and a soft brush. Avoid acidic or abrasive cleaners that can etch the surface.
Sweep regularly to keep dirt and debris from grinding into the stone.
13. Recycled Composite Decking
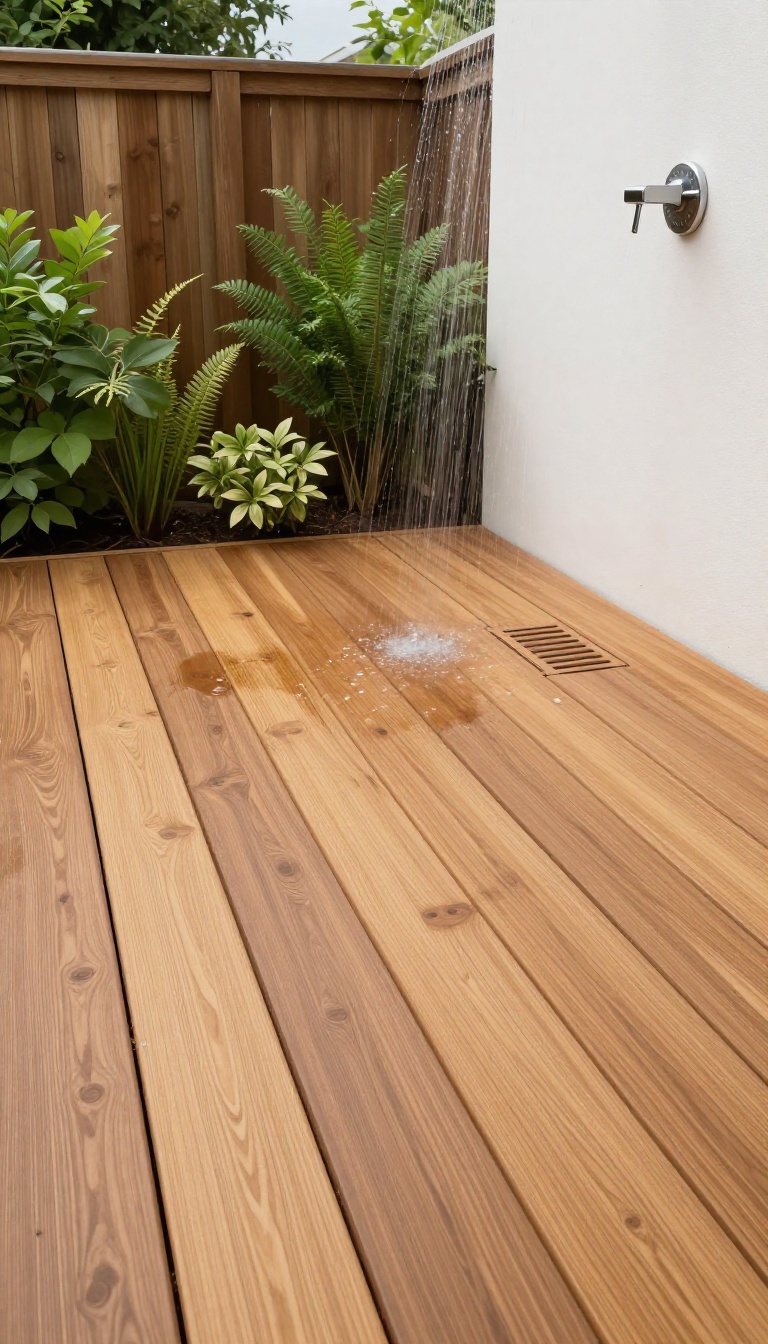
If you like the look of wood but not the upkeep, composite decking is a smart swap. These boards blend wood fibers with recycled plastic, so they shrug off moisture, stains, and sun damage without needing yearly sealing or staining. For an outdoor shower floor, that means less time maintaining and more time enjoying.
Composite slats give you the warmth of wood without the splinters, warping, or constant refinishing. They're also eco-friendly, since they're made from recycled materials. The surface stays cooler than dark rubber under bare feet, and the slight texture provides grip even when wet.
Why Composite Works For Showers
Composite decking is naturally resistant to water, mold, and mildew, so it won't rot or degrade like traditional wood. The plastic content keeps it from absorbing water, which also stops it from swelling or cracking. Plus, the color stays true for years, even with constant sun exposure.
Installation Tips
You can install composite boards over a concrete slab or a wooden frame, just like a deck. Leave small gaps between boards for drainage, and use stainless steel screws or hidden fasteners to avoid rust. If you're working over soil, lay a weed barrier and gravel base first to promote drainage.
Style And Color Options
Composite comes in a range of wood tones, from light teak to deep walnut, so you can match your shower to your outdoor space. Some boards have a wood-grain texture that looks surprisingly realistic. You can mix and match colors for a custom pattern or keep it uniform for a clean look.
14. Stone Pavers with Grass Joints
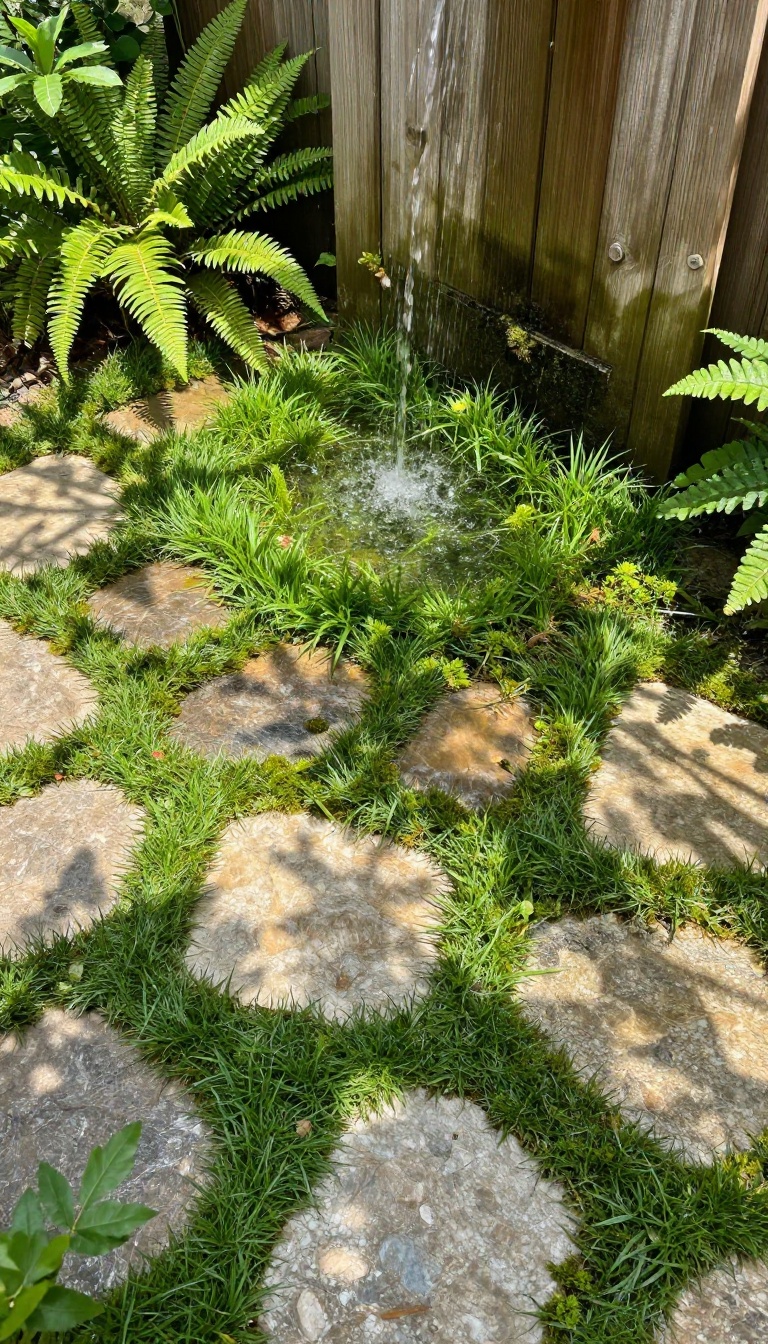
Stone pavers with grass joints bring a soft, natural touch to your outdoor shower. The gaps between the pavers are filled with soil and grass, which absorbs water and adds a lush, green element. This combination creates a floor that feels grounded and organic, almost like a garden path you can shower on.
This idea works best in a semi-shaded or shaded spot where grass can thrive. It’s a great choice if you want your shower to blend seamlessly into the surrounding landscape. The grass softens the look, and the pavers provide a stable, non-slip surface.
Plus, the grass helps with drainage, so you won’t be standing in a puddle.
Why Grass Joints Work
Grass joints aren't just pretty—they're practical. The grass absorbs water and helps it percolate into the soil, reducing runoff. It also cools the area naturally, making it comfortable on hot days.
And because the grass is living, it adds a fresh, vibrant feel that hard surfaces can't match.
Installation Tips
Start by leveling the ground and laying a base of crushed stone. Set your pavers with gaps of about 1 to 2 inches. Fill the gaps with a mix of topsoil and grass seed, or use small sod plugs.
Water regularly until the grass is established. Choose a grass variety that tolerates foot traffic and moisture, like fescue or Bermuda.
Maintenance And Care
Keep the grass trimmed short to maintain a tidy look. Pull any weeds that pop up in the joints. Occasionally, you may need to top up the soil if it settles.
If the grass thins out, reseed or replace small sections. It's a low-maintenance option that gets easier as the grass matures.
15. Porcelain Tiles with Wood-Look Finish
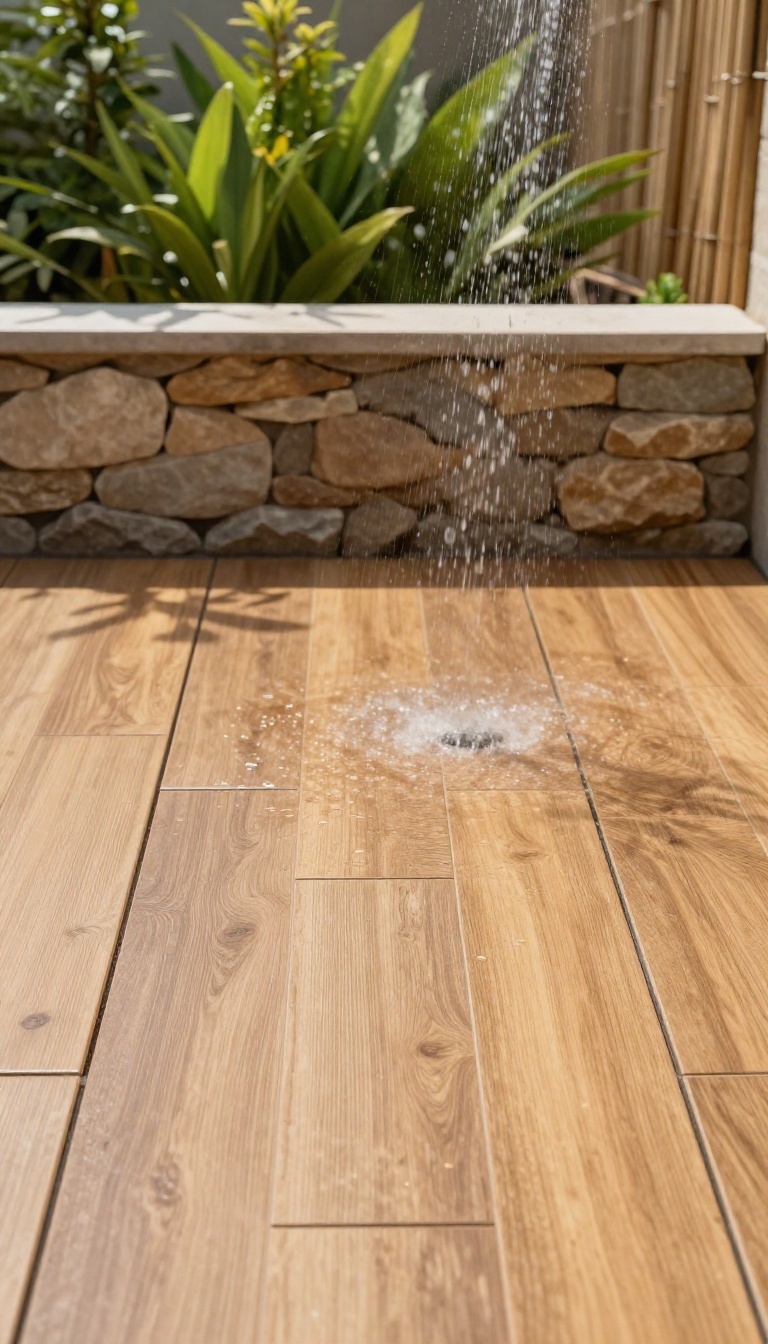
Wood-look porcelain tiles bring the warmth of timber without the constant oiling, warping, or splintering. They're a favorite for outdoor showers that want that resort feel but with real-world durability. And because they're porcelain, they stand up to sun, rain, and even frost without breaking a sweat.
These tiles are designed to mimic the grain and texture of real wood, so they look convincing up close. The finish is typically matte or lightly textured, which helps with slip resistance—crucial when soap and water are involved. Plus, they're far more forgiving than actual wood when it comes to moisture and temperature swings.
Why Choose Wood-look Porcelain?
Real teak is gorgeous, but it demands maintenance: oiling, sanding, and replacing warped boards. Porcelain gives you that same natural warmth with none of the fuss. It's also scratch-resistant, so it holds up to sand, dirt, and whatever else you drag in from the beach or garden.
Installation Tips For A Seamless Look
Use a large-format tile (like 6×24 or 8×48 inches) to mimic deck boards and reduce grout lines. Lay them in a staggered pattern for a more authentic wood-plank feel. Make sure to use outdoor-rated thin-set and grout, and leave a slight gap for expansion.
If you're going over concrete, a decoupling membrane helps prevent cracks.
Slip Resistance And Safety
Look for tiles with a PEI rating of 3 or higher and a textured surface. Some wood-look porcelains have a subtle grain that provides extra grip. You can also ask for a matte finish rather than glossy—it's safer and hides water spots better.
For extra peace of mind, choose tiles with an R11 slip rating or higher.
FAQ
What is the best outdoor shower floor material for drainage?
Gravel or river rock drains fastest because water flows through the gaps instantly. Slatted wood (like teak) also drains well, as long as the slats are spaced properly.
How do I prevent my outdoor shower floor from getting slippery?
Choose textured materials like pebble tiles, exposed aggregate, or rubber tiles. Also, ensure proper drainage so water doesn't pool, and consider adding a non-slip sealant to smooth surfaces.
Can I install an outdoor shower floor over grass?
Yes, but you'll need a stable base. Lay a weed barrier and a layer of gravel or sand, then place your chosen flooring on top. For a temporary option, a portable deck tile or mat works directly on grass.
How much does an outdoor shower floor cost?
Costs vary widely. Budget options like pressure-treated pine grates or plastic deck tiles can be under $100, while natural stone or composite decking may run $300–$800 or more, depending on size and quality.
Do outdoor shower floors require special maintenance?
Wood floors need occasional sanding and sealing to prevent rot. Stone and concrete should be sealed to resist staining and mold. Plastic, rubber, and composite options are the lowest maintenance—just rinse or sweep.
Conclusion
Choosing the right outdoor shower floor comes down to your budget, style, and how much maintenance you're willing to take on. Whether you go with a simple gravel base or a polished teak grate, the goal is a safe, comfortable spot to rinse off under the sun.
Take your time to weigh the options, and don't be afraid to mix materials—like a stone border with a wood center. With the right floor, your outdoor shower will feel like a little escape every time you step in.