20 Rug Cleaning Tips for Stains, Odor, and Soft Fibers
You come home after a long day, kick off your shoes, and notice that mysterious dark spot near the coffee table. Maybe it's last week's red wine, or perhaps your dog had an accident. Either way, your rug is telling you it needs some TLC.
Rugs take a beating—foot traffic, spills, pet accidents, and dust all settle deep into the fibers. But you don't need harsh chemicals or expensive professional services to keep them looking great.
These 20 rug cleaning tips cover everything from stubborn stains to lingering odors and delicate materials. Whether you have a plush wool rug or a synthetic runner, you'll find practical solutions that actually work.
1. Blot Spills Immediately, Don't Rub
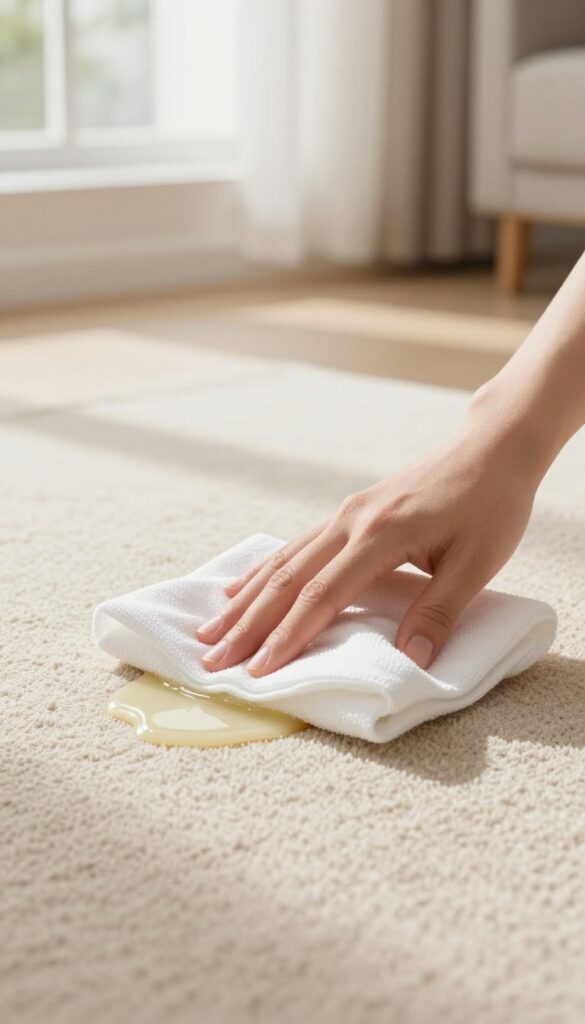
Spills happen. The moment liquid hits your rug, your first instinct might be to grab a paper towel and scrub. That's exactly what you shouldn't do.
Rubbing grinds the stain deeper into the fibers and can damage the rug's texture.
Blotting is the only way to go. Take a clean, white cloth or paper towel—colored ones can transfer dye—and press down firmly on the spill. Start at the outer edge and work inward to keep the stain from spreading.
Keep blotting, switching to a dry part of the cloth, until no more liquid transfers. This simple step can prevent a permanent mark.
Why Rubbing Makes It Worse
When you rub, you're essentially pushing the stain particles deeper between the fibers. The friction can also fray or mat down the rug pile, especially on soft fibers like wool or viscose. Blotting lifts the liquid out instead of forcing it in.
The Right Cloth Matters
Use a white cloth or paper towel to avoid color bleeding. Microfiber cloths work well because they're absorbent and lint-free. Avoid anything rough like terry cloth or old t-shirts with prints—they can scratch delicate fibers.
Blotting Technique For Different Spills
For watery spills like soda or juice, blot until barely damp. For oily spills like salad dressing, first blot the excess, then apply a dry absorbent like cornstarch or baking soda to pull up the grease before cleaning. Always work from the outside in.
2. Use Club Soda for Fresh Red Wine Stains
Red wine and rugs have a long history of disaster. But if you catch it fast, club soda is your best friend. The carbonation helps lift the wine from the fibers before it sets.
No scrubbing, no harsh chemicals—just a fizzy rescue mission.
Why Club Soda Works
Club soda contains carbonic acid, which creates bubbles that push the wine particles up and out of the rug fibers. The salt in club soda also helps draw out moisture. It's gentle enough for delicate rugs but effective on fresh stains.
Step-by-step Blotting
Pour club soda directly onto the stain until it's saturated. Let it fizz for about 10 seconds. Then blot—don't rub—with a clean white towel.
Rubbing pushes the wine deeper. Repeat until the stain lifts. You'll see the color transfer to the towel.
When To Call It Quits
If the stain is still visible after several rounds, stop and let the rug dry completely. Some stains may need a second treatment once dry. Never use club soda on an old set-in stain—it's only for fresh spills.
3. Hydrogen Peroxide for Dried Blood Stains
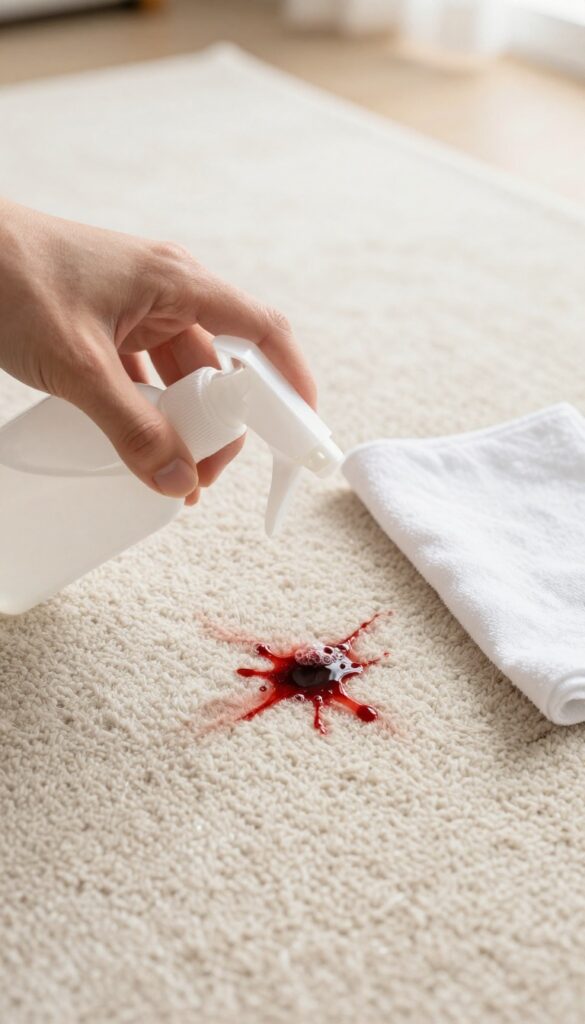
Blood stains are tricky because they set quickly, especially if they've had time to dry. But hydrogen peroxide can break down the proteins in blood, making it lift right out. Just make sure you're using the right concentration and testing first.
How It Works
Hydrogen peroxide (3%) releases oxygen bubbles that lift dried blood from fibers without harsh scrubbing. It's gentle enough for most synthetic rugs but can bleach natural dyes, so always test in an inconspicuous spot first.
Step-by-step Application
Pour a small amount of 3% hydrogen peroxide directly onto the stain. Let it sit for 5-10 minutes until it stops bubbling. Blot with a clean, damp cloth—don't rub, or you'll push the stain deeper.
Repeat if needed, then rinse with cold water and blot dry.
When To Avoid This Method
Avoid hydrogen peroxide on wool, silk, or antique rugs, as it can damage delicate fibers or cause discoloration. For those materials, use cold water and mild dish soap instead.
4. Dish Soap and Vinegar for Grease and Oil
Grease and oil stains are among the toughest to remove from rugs. They can come from cooking splatters, oily food spills, or even body oils from bare feet. The good news is that a simple mixture of dish soap and white vinegar can break down the grease without damaging the fibers.
This solution is gentle enough for most synthetic and wool rugs, but always test on a hidden area first.
To tackle a grease or oil stain, mix one teaspoon of dish soap with one tablespoon of white vinegar and two cups of warm water. Dab the solution onto the stain using a clean cloth, working from the outside in to prevent spreading. Blot gently—don't rub, as that can push the grease deeper.
Rinse the area with a cloth dampened with plain water to remove any soap residue. Repeat if necessary, then blot dry with a towel.
Why This Combo Works
Dish soap is designed to cut through grease, while vinegar helps neutralize odors and break down the oil's bond with the fibers. Together, they create a powerful yet safe cleaning agent. The warm water helps activate the soap and vinegar, making it easier to lift the stain.
Blotting Technique Matters
Always blot, never scrub. Scrubbing can fray the fibers and spread the stain. Use a white cloth or paper towel to avoid color transfer.
Press down firmly to absorb the grease, then lift straight up. Repeat with fresh areas of the cloth until no more stain transfers.
When To Call For Backup
For set-in or large grease stains, this method might need multiple applications. If the stain persists, consider using a commercial degreaser or a paste of baking soda and water. For delicate rugs like silk or antique wool, professional cleaning is safer.
5. Baking Soda for Pet Urine Odor
Pet urine is one of the toughest odors to tackle because it seeps deep into rug fibers and padding. While enzymatic cleaners are great, baking soda offers a simple, non-toxic first line of defense. It works by absorbing moisture and neutralizing odors without harsh chemicals.
After blotting up as much urine as possible, sprinkle baking soda generously over the area. Let it sit overnight to absorb odors, then vacuum thoroughly.
Why Baking Soda Works
Baking soda is a natural deodorizer that neutralizes acidic odors like urine. It also draws out moisture, which helps prevent the urine from setting deeper into the rug. This makes it especially effective for fresh accidents.
Step-by-step Application
First, blot the urine with paper towels until the spot is damp, not soaked. Then, cover the area with a thick layer of baking soda—about 1/4 inch deep. Let it sit for at least 8 hours, preferably overnight.
Finally, vacuum thoroughly, repeating if the odor persists.
When To Upgrade To An Enzyme Cleaner
Baking soda handles surface odors well, but for old or deep-set urine stains, an enzymatic cleaner may be needed. If the smell returns after vacuuming, apply an enzyme cleaner to break down the uric acid crystals. Baking soda can still be used as a follow-up to absorb residual moisture.
6. Enzyme Cleaner for Biological Stains
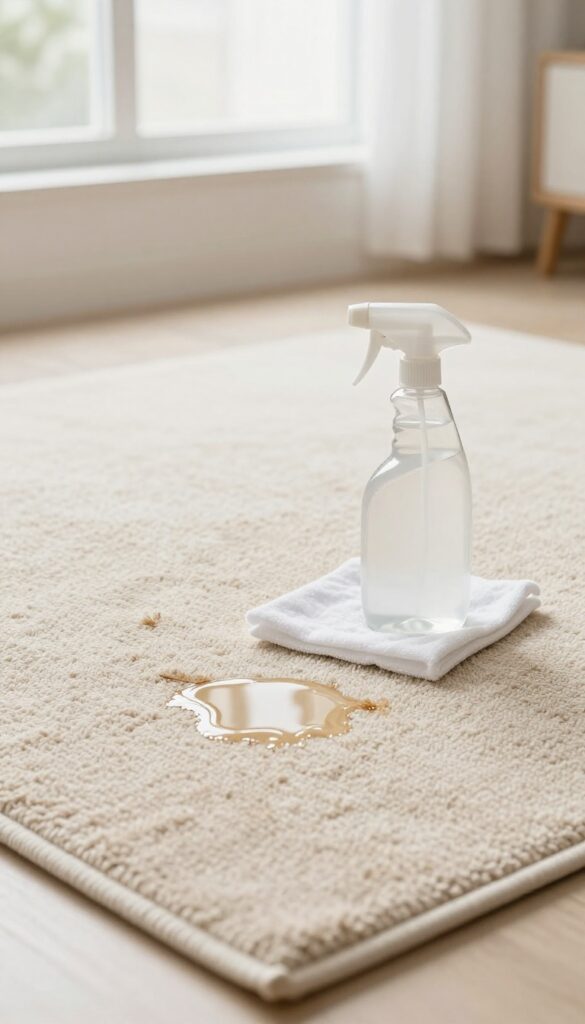
Biological stains like urine, vomit, or blood are tough because they contain proteins that bond with rug fibers. Standard cleaners often fail to break these bonds, leaving behind residue and odor. Enzyme cleaners, however, use natural proteins to digest the stain at a molecular level, making them highly effective and safe for most rugs.
Enzyme cleaners are a game-changer for biological stains. They work by breaking down proteins into smaller, water-soluble compounds that can be easily blotted away. This method not only removes the stain but also eliminates the odor at its source, unlike many chemical cleaners that just mask smells.
How Enzyme Cleaners Work
Enzymes are biological catalysts that target specific types of stains. Protease enzymes break down protein-based stains like blood or urine, while lipase tackles fats and oils. When you spray an enzyme cleaner on a fresh stain, the enzymes get to work immediately, breaking the stain into tiny particles that won't stick to fibers.
Step-by-step Application
First, blot up as much of the stain as possible with a clean cloth. Then, spray the enzyme cleaner generously over the stain, making sure it saturates the fibers. Let it sit for 10–15 minutes—this dwell time is crucial for the enzymes to work.
After that, blot the area with a damp cloth to remove the loosened stain, and repeat if needed.
Tips For Best Results
Always test the cleaner on a hidden area first, especially on delicate fibers like wool or silk. Use enzyme cleaners on fresh stains for best results; dried stains may require multiple applications. Avoid using hot water or steam cleaners after enzyme treatment, as heat can deactivate the enzymes.
7. Freeze Gum or Wax, Then Scrape
Chewing gum and candle wax are two of the most annoying things to find stuck in your rug. They cling to fibers like glue, and pulling at them only makes the mess worse. But there's a simple trick that works every time: freeze it solid, then scrape it off.
When gum or wax gets embedded in carpet fibers, heat just makes it spread. Cold is your best friend here. By freezing the substance, you make it brittle so it breaks away cleanly without pulling fibers.
This method works on synthetic and natural rugs alike, as long as you're gentle with the scraping.
The Ice Cube Method
Grab a few ice cubes and place them in a resealable plastic bag. Hold the bag directly over the gum or wax for about 30 seconds to a minute. You'll feel it harden.
Don't use loose ice—melting water can spread the stain or damage certain rug fibers.
Scraping The Right Way
Once the gum or wax is frozen solid, use a dull knife or a plastic scraper to gently lift it off. Work from the edges toward the center. Avoid sharp blades—they can cut the rug fibers.
If any residue remains, dab it with a cloth soaked in rubbing alcohol, then blot dry.
What To Do With Stubborn Residue
Sometimes a little bit of wax or gum stays behind. In that case, place a paper towel over the area and run a warm iron over it (on low heat). The heat will melt the residue into the towel.
Just be careful not to overheat synthetic fibers. Test on an inconspicuous spot first.
8. Shaving Cream for Ink Stains
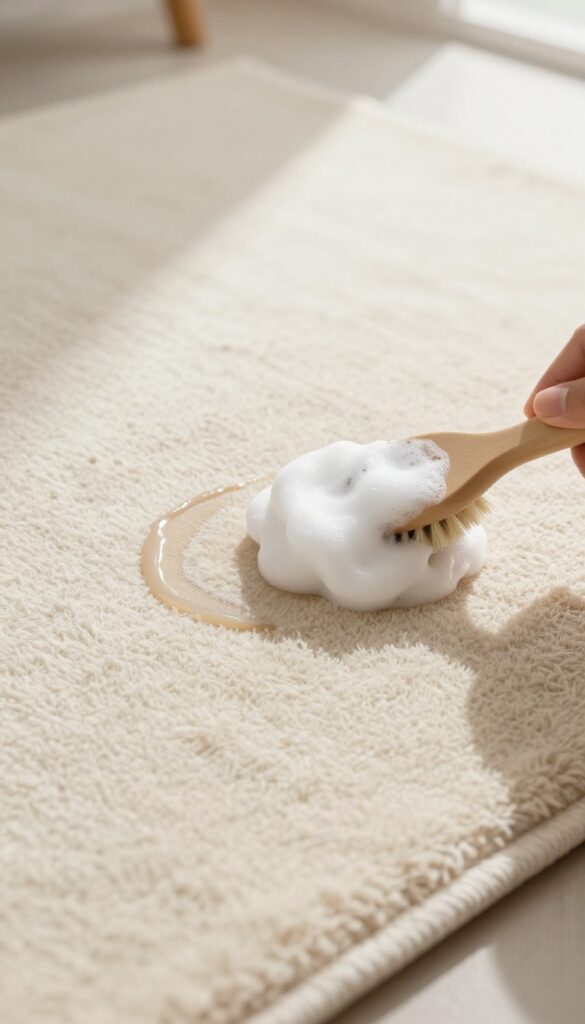
Ink stains on a rug can feel like a disaster, especially if a pen leaks or a marker rolls off the table. The good news is that shaving cream—the foamy kind, not gel—can lift ink without harming your rug fibers. This trick works on most synthetic and wool rugs, but always test a hidden spot first.
Shaving cream contains surfactants that break down ink particles, making them easy to blot away. It's gentle enough for delicate fibers like wool or viscose, yet effective on stubborn ballpoint or fountain pen ink. The foam also helps suspend the ink so it doesn't spread further into the rug.
Why Shaving Cream Works
Shaving cream is a mild detergent foam that penetrates the stain without saturating the rug. Its thick consistency clings to fibers, allowing the cleaning agents to work on the ink without soaking through to the backing. This makes it ideal for area rugs and wall-to-wall carpeting.
Step-by-step Application
First, blot up any excess ink with a dry paper towel. Then, apply a generous dollop of shaving cream directly onto the stain. Use a clean cloth or soft brush to gently work it into the fibers.
Let it sit for 30 minutes—the foam will start to disappear as it lifts the ink. Finally, blot with a damp cloth until no more ink transfers. Repeat if needed, then let the area air dry.
What To Avoid
Don't rub the stain—blotting prevents it from spreading. Avoid gel shaving creams, which contain oils that can leave a residue. Also, skip this method on silk or antique rugs; those require professional cleaning.
Always check for colorfastness on a hidden corner before treating the stain.
9. Vacuum Both Sides of the Rug
Most people only vacuum the top of their rug, but that leaves a surprising amount of dirt trapped deep in the fibers. Flipping your rug over and vacuuming the backside dislodges grit and debris that have worked their way through. It's a simple step that doubles your cleaning power with zero extra cost.
When you vacuum only the top, you're just skimming the surface. Dirt, dust, and even tiny food particles settle through the rug and get trapped near the backing. Over time, that trapped grit can wear down fibers from the inside out.
By flipping the rug and vacuuming the back first, you loosen that hidden debris so it falls out or gets sucked away. Then when you flip it back and vacuum the front, you're getting a much deeper clean. This is especially effective for rugs with thick pile or those in high-traffic areas.
How To Flip A Large Rug
If your rug is too heavy or large to flip alone, fold it in half or roll it up carefully. Vacuum the exposed back section, then shift the rug to reach the rest. For wall-to-wall carpet, you can't flip it, but you can vacuum along the edges and use a crevice tool to get underneath any loose sections.
When To Vacuum The Back
Make this a habit every time you vacuum, or at least once a month. It's especially important after a spill or if you've had pets or shoes on the rug. You'll be surprised how much dirt comes out—sometimes more than from the front.
What About The Rug Pad?
If you have a rug pad underneath, flip the rug and vacuum the pad too. Dust and allergens collect there. A clean pad extends the life of both the rug and the pad.
10. Use a Carpet Rake for High-Traffic Areas
High-traffic areas like hallways and living room walkways take a beating. Over time, foot traffic flattens rug fibers and grinds dirt deep into the pile. A carpet rake is a simple tool that reverses that damage.
It lifts matted fibers, redistributes them, and brings embedded dirt to the surface so your vacuum can actually grab it. This is especially helpful for berber or looped rugs where dirt hides deep in the loops.
Using a carpet rake is straightforward. Start by raking in one direction, then switch to perpendicular strokes to lift fibers from all angles. Focus on the paths where people walk most.
After raking, vacuum thoroughly to remove the loosened dirt. For best results, rake before each deep vacuuming session, especially in high-traffic zones. This simple step can extend the life of your rug and keep it looking fresher between professional cleanings.
Why Raking Works
When you walk on a rug, you compress the fibers and push dirt deeper. A carpet rake's stiff tines penetrate the pile and lift fibers back up, breaking up compacted soil. This exposes hidden grit that your vacuum alone can't reach.
Raking also helps prevent matting and wear patterns, keeping the rug's appearance uniform.
Best Rakes For Different Rugs
For plush or cut-pile rugs, a rake with flexible rubber tines works well without damaging fibers. For looped or berber rugs, choose a rake with metal tines that can dig into the loops without snagging. Avoid aggressive rakes on delicate wool or antique rugs—test in an inconspicuous area first.
When To Rake
Rake before vacuuming, not after. Aim to rake high-traffic areas once a week, or more often if you have kids or pets. For low-traffic areas, once a month is sufficient.
Over-raking can wear fibers, so stick to a moderate schedule.
11. Steam Clean Without a Machine
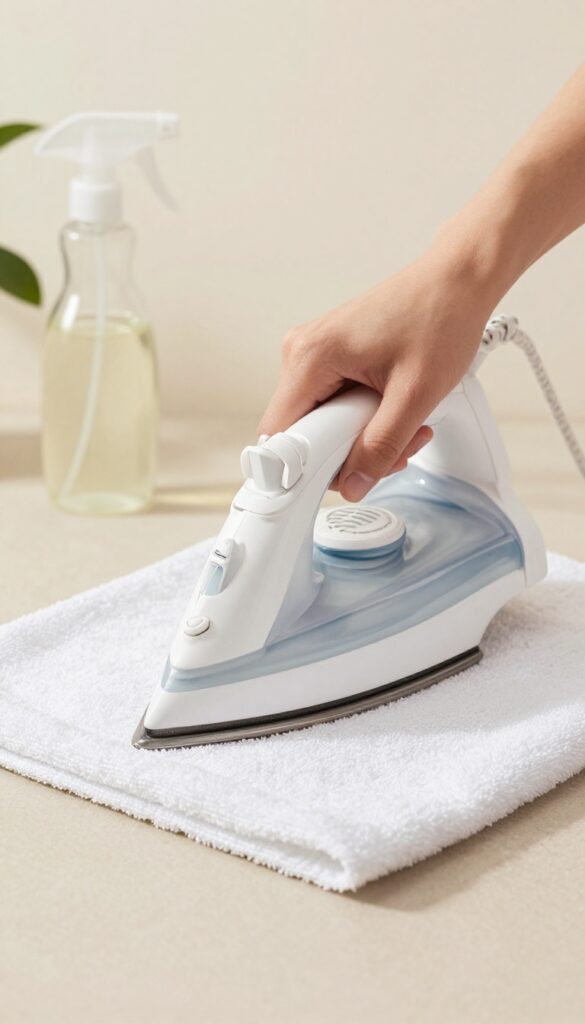
Not everyone owns a steam cleaner, but that doesn't mean you can't get the deep-cleaning benefits of steam. With a few household items, you can create steam that lifts dirt and kills bacteria without renting or buying expensive equipment. It's a game-changer for freshening up rugs between deep cleans.
What You'll Need
Grab a spray bottle, white vinegar, water, a clean towel, and a clothes iron. That's it. The vinegar helps break down grime and neutralize odors, while the heat does the heavy lifting.
Step-by-step Process
Mix equal parts water and white vinegar in the spray bottle. Lightly mist the area you want to treat—don't soak it. Place a damp (not dripping) towel over the spot, then run a hot iron over the towel in slow circles.
The heat creates steam that penetrates the fibers, loosening dirt and killing germs. Let the rug dry completely afterward.
When To Use This Method
This works best for spot cleaning high-traffic areas, freshening up synthetic rugs, or treating light stains. Avoid it on delicate fibers like wool or silk, as heat can cause damage. Always test a hidden area first.
12. Cornstarch for Greasy Spots on Wool
Greasy spots on a wool rug can be tricky. Oil-based stains don't lift with water, and scrubbing too hard can ruin the delicate fibers. Cornstarch offers a gentle, effective solution that pulls the grease out without any damage.
Cornstarch works like a dry sponge for oil. When you sprinkle it on a fresh greasy spot, it starts absorbing the oil immediately. Letting it sit for 15 minutes gives it time to pull the grease deep from the fibers.
Then a simple vacuum lifts everything away, leaving your rug clean and residue-free.
Why Cornstarch Works On Wool
Wool fibers are protein-based and sensitive to harsh chemicals and abrasive scrubbing. Cornstarch is a gentle, natural absorbent that doesn't react with the wool or cause fading. It simply soaks up the oil, making it easy to remove without friction.
Step-by-step: Using Cornstarch On Grease
First, blot up any excess grease with a paper towel. Then generously sprinkle cornstarch over the entire spot, covering it completely. Let it sit for 15 minutes—longer for stubborn stains.
Finally, vacuum the area thoroughly. For best results, use a brush attachment to lift the cornstarch from the fibers.
When To Repeat The Process
If the spot is still visible after vacuuming, repeat the process. Older grease stains may need two or three treatments. Between applications, gently fluff the fibers with your fingers to help the cornstarch reach deeper layers.
13. Test Cleaners on a Hidden Area First
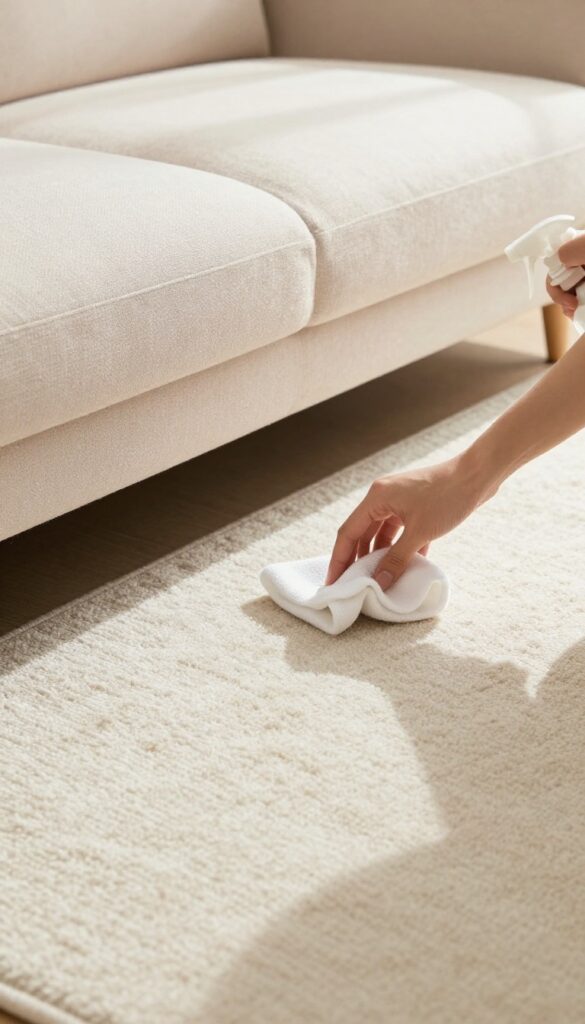
Before you douse that stain with a homemade or store-bought cleaner, take a minute to test it somewhere no one will see. Rugs are made of all kinds of fibers and dyes, and what works on one might ruin another. A quick patch test can save you from a bigger headache.
Testing a cleaner on a hidden spot is the smartest way to avoid accidental discoloration or fiber damage. Find an inconspicuous area, like under a sofa leg or in a corner, and apply a small amount of your chosen solution. Blot it gently, then wait for it to dry completely.
If the color looks the same and the fibers feel fine, you're good to go. If not, try a different cleaner or dilute it further. This simple step is especially important for delicate fibers like wool, silk, or vintage rugs, which can react unpredictably to strong chemicals.
Why Testing Matters
Even natural cleaners like vinegar or dish soap can cause color bleeding or fading on some rugs. Dyes vary widely, and a cleaner that's safe for synthetic fibers might strip color from wool. Testing first gives you peace of mind and prevents permanent damage.
How To Perform A Patch Test
Dampen a white cloth with your cleaning solution and blot a small hidden area. Press firmly enough to transfer moisture but don't soak the rug. Let it air dry completely, then check for any color change or texture change.
If the cloth picks up dye, don't use that cleaner on the visible stain.
What To Do If The Test Fails
If the test shows discoloration, stop using that cleaner. Try a milder alternative, like plain water or a specially formulated rug cleaner designed for your rug's fiber type. For delicate or antique rugs, consider consulting a professional instead.
14. Use a Wet/Dry Vacuum for Deep Rinsing
Shampooing or spot cleaning a rug leaves behind a lot of moisture. If you don't extract it properly, that trapped water can lead to mold, mildew, and a musty smell. A wet/dry vacuum is the perfect tool for the job—it pulls out the dirty water and leaves your rug much drier.
After you've scrubbed a stain or applied a cleaning solution, it's time to rinse and extract. A wet/dry vacuum makes this step fast and effective. It's especially useful for thick or shag rugs that hold onto water like a sponge.
Here's how to use it correctly.
Why Extraction Matters
Leaving cleaning solution in your rug can attract dirt and cause discoloration over time. More importantly, excess moisture creates a breeding ground for mold and bacteria. Extracting the water with a wet/dry vacuum prevents these issues and speeds up drying from days to hours.
Step-by-step: Using A Wet/dry Vac
First, remove the filter and attach the squeegee or floor nozzle. Work in overlapping passes, going both with and against the nap. For heavy saturation, you might need to empty the tank and repeat.
Don't press too hard—let the vacuum do the work.
Drying After Extraction
Once you've removed as much water as possible, open windows or turn on fans to circulate air. If the rug is small enough, hang it outside. Even after vacuuming, a thick rug may still feel damp—give it a full day to dry before walking on it.
15. Dry Rugs Flat and Off the Floor
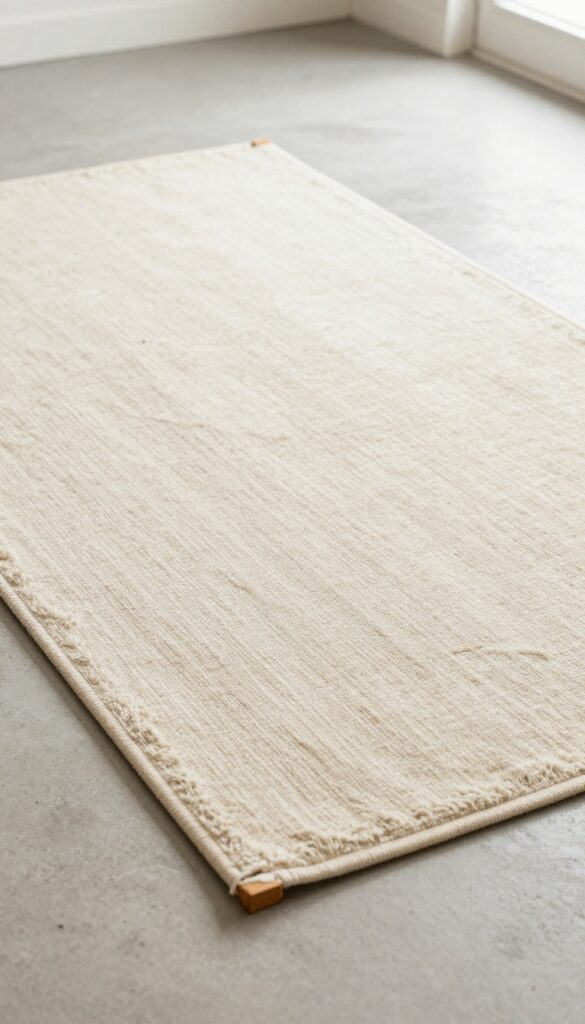
You've scrubbed, rinsed, and blotted—now comes the make-or-break step: drying. Rushing this part can undo all your hard work, leaving you with mildew, musty smells, or even fiber damage. The key is to let the rug dry completely, but not on the floor where moisture gets trapped underneath.
After cleaning, lay the rug flat on a clean, dry surface—like a patio, driveway, or large tarp. Elevate it using blocks, bricks, or a drying rack to allow air to circulate underneath. This prevents moisture from getting trapped between the rug and the ground, which is a recipe for mildew and odors.
If you're drying indoors, place the rug over a clean, dry towel and flip it periodically. Avoid direct sunlight for delicate fibers like wool or silk, as UV rays can cause fading. For synthetic rugs, a bit of sun can speed things up.
Use fans or a dehumidifier to accelerate drying in humid climates. Never put a wet rug back on the floor until it's completely dry—this can take 24 to 48 hours depending on thickness and air flow.
Why Elevation Matters
When a rug sits directly on the floor after washing, the bottom stays damp for much longer. That trapped moisture creates a perfect breeding ground for mold and mildew. Elevating the rug with blocks or a rack allows air to flow freely underneath, cutting drying time in half and preventing musty smells.
Best Surfaces For Drying
Outdoors, a clean concrete patio or deck works well. Indoors, lay the rug over a large towel on a hard floor—avoid carpet, which will wick moisture back into the rug. If you have a drying rack designed for rugs, even better.
Just make sure the surface is clean and dry before you start.
Speeding Up The Process
Use box fans or a dehumidifier to move air across the rug. Flip the rug every few hours to ensure both sides dry evenly. For thicker rugs, you might need to rotate them or prop them up at an angle.
Patience is key—don't put the rug back until it's bone dry, especially the backing.
16. Rotate Your Rug Every Six Months
Most people lay a rug down and forget about it—until one side starts looking faded and worn. Sunlight and foot traffic aren't evenly distributed, so certain areas age faster. Rotating your rug every six months is a simple habit that keeps colors vibrant and fibers intact.
Rotating your rug evens out wear and sun exposure. This simple habit extends the life of your rug and keeps colors from fading unevenly. It's one of the easiest maintenance tricks that costs nothing but a few minutes of your time.
Why Rotation Matters
Direct sunlight bleaches dyes over time, while heavy foot traffic crushes fibers. By rotating, you spread that damage across the entire rug instead of letting one spot take the brunt. This is especially important for rugs near windows, doors, or high-traffic hallways.
How To Rotate Properly
For rectangular rugs, simply spin it 180 degrees so the end that was near the wall now faces the room. For round rugs, give it a quarter turn. If your rug has a directional pattern or pile, rotate it along with flipping if the rug is double-sided.
Mark the back with a small piece of tape to remember which end was where.
When To Rotate
Set a reminder on your calendar for every six months—try spring and fall when you're already doing seasonal cleaning. If you notice uneven fading or wear earlier, rotate more often. In rooms with intense sunlight, consider rotating every three months.
17. Use a Rug Pad to Reduce Wear
You might think a rug pad is just an extra expense, but it's one of the smartest investments for your rug's longevity. It cushions the rug, prevents slipping, and reduces friction that causes fiber damage. Plus, it improves airflow underneath, which helps prevent moisture buildup and mold.
A rug pad acts like a shock absorber for your rug. It takes the brunt of foot traffic, so the rug fibers don't get crushed as quickly. This is especially important for high-pile or soft rugs that mat down easily.
The pad also keeps the rug from sliding around, which reduces fraying at the edges and prevents tripping hazards. Another key benefit is airflow. Without a pad, rugs can trap moisture against the floor, especially in humid climates or over hardwood.
This can lead to musty odors or even mold growth. A good pad allows air to circulate, keeping the underside dry and fresh. When choosing a rug pad, look for one that's slightly smaller than your rug so it doesn't stick out.
Felt pads are great for cushioning, while rubber pads offer strong grip. Avoid pads that are too thick, as they can create a tripping hazard or cause the rug to buckle.
Prolongs Fiber Life
The constant pressure from footsteps and furniture can flatten rug fibers over time. A rug pad distributes this pressure more evenly, reducing wear patterns. This is especially helpful for wool and silk rugs that are more delicate.
Prevents Slipping And Fraying
A rug that shifts around not only looks messy but also damages its edges. The friction from sliding can cause the binding or fringe to loosen. A non-slip pad keeps everything in place, protecting the rug's structure.
Improves Air Circulation
Moisture trapped under a rug can lead to mildew and odors. A rug pad lifts the rug slightly off the floor, allowing air to flow underneath. This is crucial for rugs placed on concrete or in basements.
18. Sprinkle Salt on Mud Before Cleaning
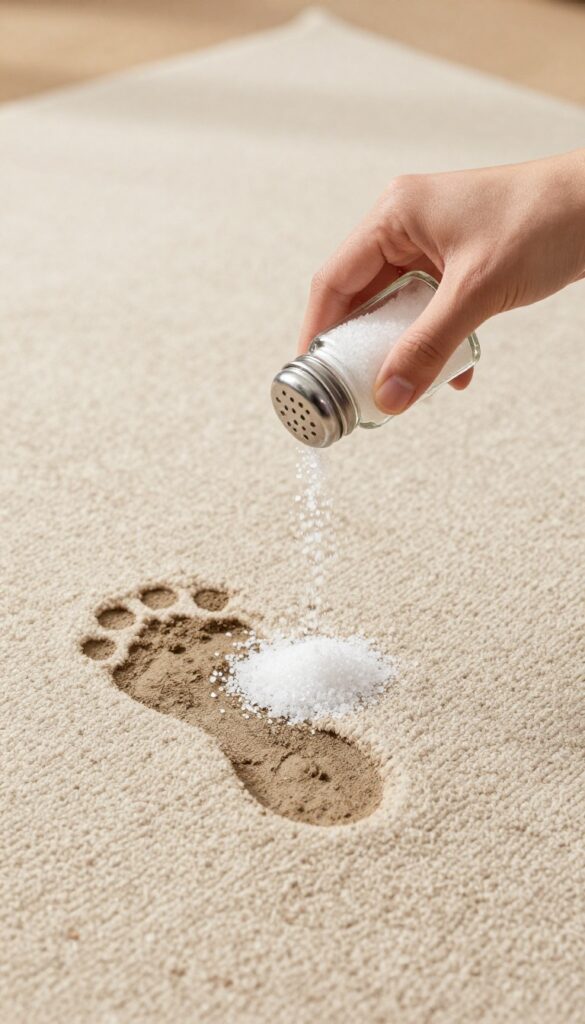
Muddy footprints on a rug are frustrating, especially when they've had time to dry. Instead of scrubbing and spreading the mess, reach for your salt shaker. This kitchen staple can loosen dried mud without damaging the fibers.
Salt is a natural desiccant—it pulls moisture out of materials. When sprinkled over dried mud, it rehydrates the dirt just enough to make it crumble away easily. This method is gentle on all rug types, including delicate wool and silk, because it avoids harsh scrubbing.
Why Salt Works On Dried Mud
Mud is a mix of soil and water. When it dries, the water evaporates and leaves behind a hard, crusty layer. Salt absorbs any residual moisture in the mud, softening it so it can be brushed off without embedding dirt deeper into the rug.
How To Apply Salt For Best Results
Start by letting the mud dry completely—don't try this on wet mud. Cover the dried spot with a generous layer of table salt or kosher salt. Let it sit for 10 to 15 minutes.
You'll see the salt darken as it absorbs moisture. Then, use a stiff brush or a vacuum with a brush attachment to lift the salt and mud away.
When To Avoid This Method
Avoid using salt on very delicate or vintage rugs where the fibers might be brittle. Also, skip this if the mud contains chemical residues (like from a garden treated with pesticides). In those cases, stick to a gentle rug cleaner.
19. Professional Cleaning for Antique or Silk Rugs
Not every rug problem can be solved with a spray bottle and a microfiber cloth. Antique rugs and silk pieces are in a league of their own—they require expert handling. One wrong move with a DIY cleaner can fade dyes, weaken fibers, or even cause the rug to fall apart.
That's why professional cleaning isn't just a luxury; it's a necessity for preserving these delicate investments.
Delicate rugs like silk or antique wool require professional care. Attempting DIY cleaning can cause irreversible damage. Have them professionally cleaned every 1–2 years.
Why Diy Is Risky
Silk fibers are extremely sensitive to moisture and alkaline cleaners. Even mild dish soap can strip natural oils, leaving the rug brittle. Antique rugs often have unstable dyes that bleed or run when wet.
Professionals use pH-neutral solutions and controlled drying to avoid shrinkage or color loss.
What Professionals Do Differently
They start with a thorough inspection to test colorfastness and fiber strength. Then they use specialized techniques like dry foam cleaning or gentle immersion for silk. For antique rugs, they often hand-wash with cool water and mild detergents, then block-stretch the rug to maintain its shape.
How Often To Schedule
For silk rugs, aim for professional cleaning every 1–2 years, depending on foot traffic. Antique rugs can go 2–3 years if they're in low-traffic areas. In between, vacuum gently with a brushless attachment and rotate the rug to even out wear.
20. Regular Maintenance Prevents Deep Stains
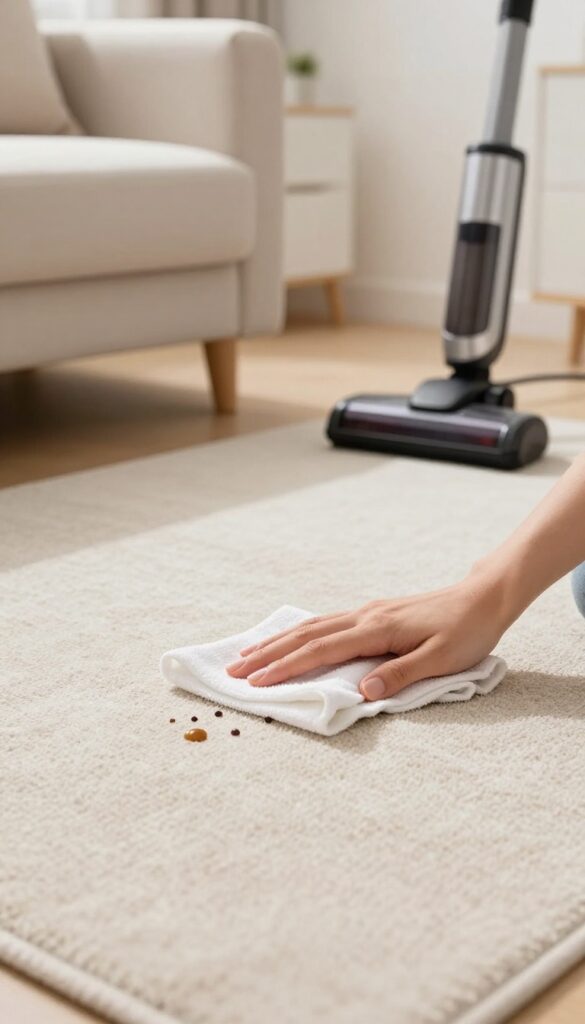
You've tackled stains, banished odors, and babied delicate fibers—now let's talk about keeping your rug in top shape without constant rescue missions. The secret is simple: regular maintenance stops problems before they start. A little consistent care goes a long way, saving you time, money, and frustration down the road.
Vacuuming is your first line of defense. Do it at least once a week, and more often in high-traffic areas. Use a vacuum with adjustable height and no beater bar for delicate rugs.
Treat spills immediately—blot, don't rub, and use a mild cleaner. Schedule a deep clean every 12–18 months, either with a rental machine or a professional. This routine keeps dirt from embedding and fibers from matting.
Vacuum Like A Pro
Set a weekly reminder to vacuum your rug. For high-traffic zones, go over them twice. Use slow, overlapping passes to lift dirt from deep within the fibers.
If your rug is delicate, switch to suction-only mode to avoid fraying.
Spot Clean On The Spot
The moment a spill happens, grab a clean cloth and blot—never scrub. Work from the edges inward to prevent spreading. Use a mild dish soap and water solution for most stains, then rinse with a damp cloth and blot dry.
Schedule Deep Cleaning
Even with regular vacuuming, dirt accumulates. Every 12 to 18 months, give your rug a thorough wash. You can rent a steam cleaner or hire a pro.
Always test a small area first and let the rug dry completely to prevent mold.
FAQ
Can I use bleach on my rug to remove stains?
Bleach is too harsh for most rugs and can cause discoloration or fiber damage. Stick to gentler options like hydrogen peroxide or vinegar for stain removal.
How often should I deep clean my rug?
Deep clean your rug every 12 to 18 months, or more frequently if you have pets or heavy foot traffic. Spot clean stains as they happen.
What's the best way to remove pet odor from a rug?
Blot up fresh urine, then sprinkle baking soda over the area and let it sit overnight. Vacuum thoroughly. For stubborn odors, use an enzyme cleaner designed for pet stains.
Can I machine wash my rug?
Only if the care label says it's machine washable. Small cotton or synthetic rugs may be washable, but wool, silk, or large rugs should be cleaned by hand or professionally.
How do I dry a rug quickly after cleaning?
Use a wet/dry vacuum to extract as much water as possible, then place the rug flat in a well-ventilated area. Use fans or a dehumidifier to speed up drying.
Conclusion
You don't have to deep-clean every rug in one afternoon. Start with the worst stain or the rug that gets the most foot traffic, and try a couple of these methods with supplies you already have. Even a quick spot treatment can make a surprising difference.
Consistency matters more than intensity. A weekly vacuum and prompt attention to spills will keep your rugs looking and smelling fresh for years. Pick the tips that fit your lifestyle and give them a shot this weekend.