13 Small Kitchen Island Ideas With Seating That Fit Well
A kitchen island with seating sounds like a dream, but when your square footage is tight, it can feel impossible. The good news is that compact islands are not only possible—they can be the most functional piece in your kitchen.
With the right proportions and a few clever choices, you can carve out extra counter space, storage, and a cozy spot for a quick meal or morning coffee. Modern design loves clean lines and smart solutions, and small islands deliver both.
Whether you're working with a galley kitchen, an L-shaped layout, or an open-plan studio, there's a seating-friendly island that fits without overwhelming the room.
1. Slim Rolling Cart With a Fold-Down Counter
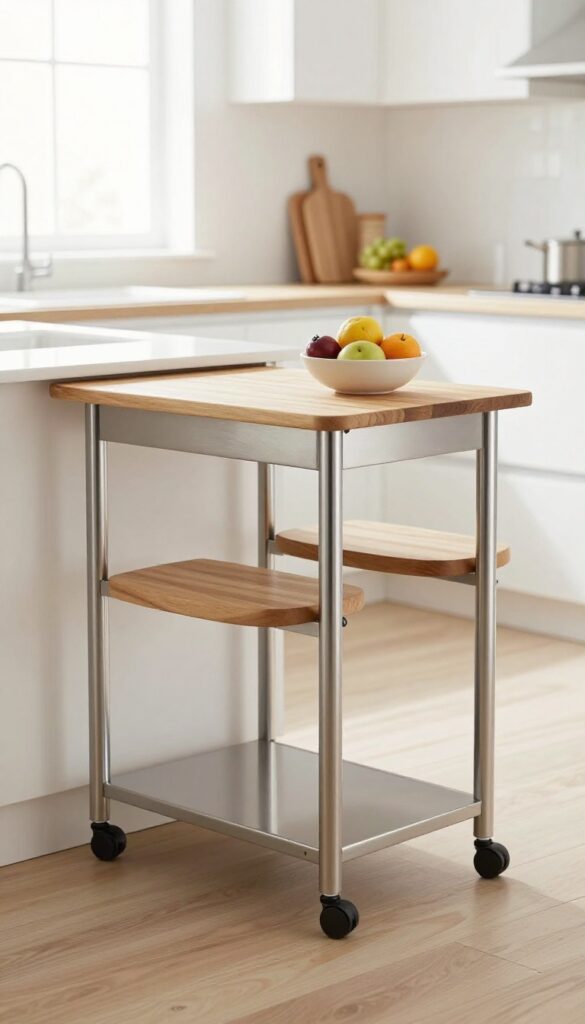
A narrow rolling cart with a fold-down leaf creates an instant island that tucks away when not in use. Perfect for tiny kitchens, it offers a prep surface and space for two stools. The clean lines and compact footprint keep the room feeling open and uncluttered.
This idea works best in galley or L-shaped kitchens where floor space is tight. The cart’s slim profile—usually 12 to 18 inches deep—slides neatly against a wall or between cabinets. When you need extra counter space, flip up the leaf and pull out a couple of backless stools.
The look stays modern and minimal, especially if you choose a cart with a stainless steel or butcher-block top and a matte black or white frame. Add a small cutting board or a bowl of fruit on top to make it feel intentional, not temporary.
Best Colors And Materials
- Stick with neutral or metallic finishes to keep the cart from competing with your main cabinetry. A white or light wood cart blends into the background, while a black or brass one adds a subtle accent. Butcher-block tops warm up the space and double as a chopping board.
- For a sleeker look, go with stainless steel or quartz—easy to clean and very durable.
Layout And Storage Tip
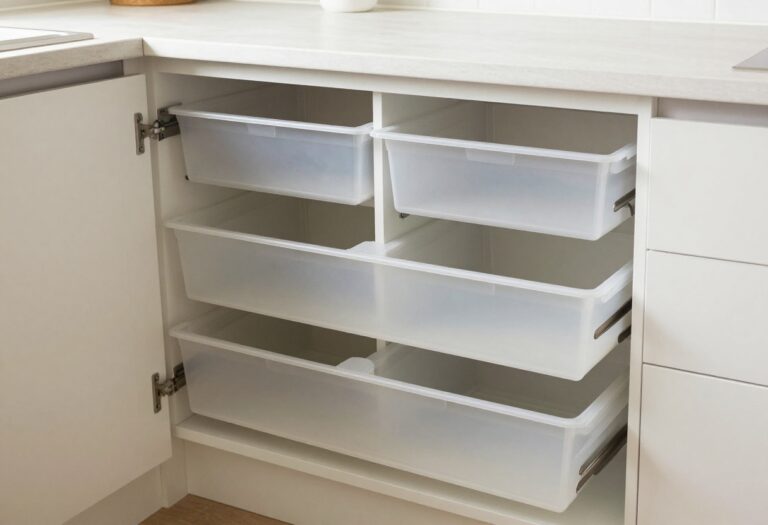
- Position the cart near your main prep zone so the fold-down leaf extends toward the work triangle. Use the lower shelf for everyday items like mixing bowls, cookbooks, or a small trash bin. If the cart has drawers, store utensils or linens there.
- Keep the top clear except for a few decorative pieces to maintain the airy feel.
Small-space Fix
Choose a cart with locking casters so it stays put when you’re using it, but rolls easily for cleaning or reconfiguring. Look for a model with a fold-down leaf that locks into place—safety first, especially if you’ll be prepping hot food. A magnetic knife strip on the side can free up drawer space.
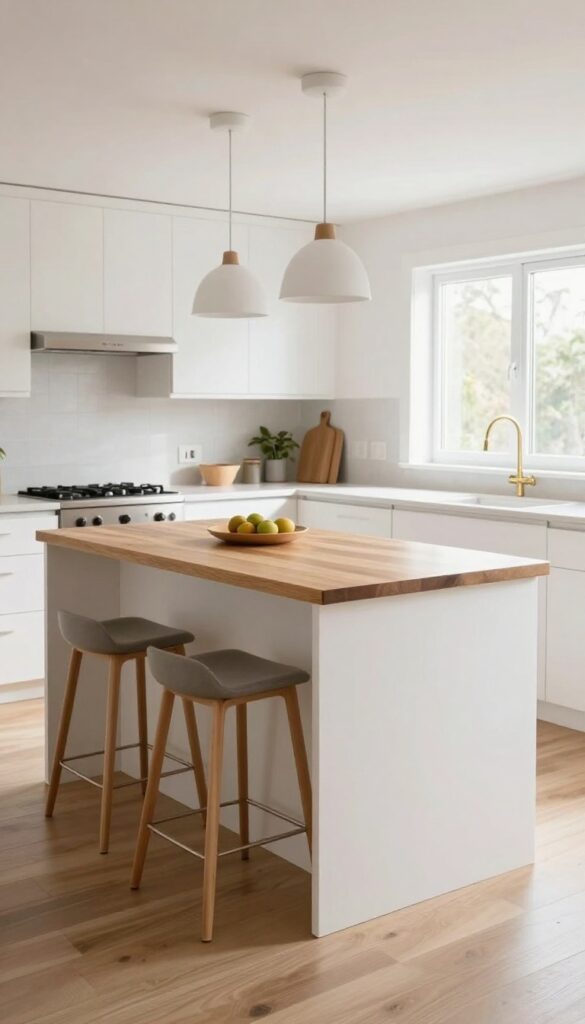
2. Butcher Block on Casters With Stool Storage
A butcher block island on wheels brings together practicality and warmth in a way that feels both intentional and flexible. The thick wood surface is built to handle everything from chopping to casual meals, while the open base tucks stools neatly out of sight when they're not in use. In a modern kitchen, the natural grain of the wood softens sleek cabinets and hard surfaces, creating a balanced, inviting focal point.
This island works especially well in galley or L-shaped kitchens where permanent islands would block traffic. Because it rolls, you can reposition it for extra prep space during cooking or push it aside for cleaning. The stools stored underneath keep the floor clear and the kitchen looking tidy.
Choose a butcher block with a warm honey or walnut finish to contrast with cool-toned countertops or cabinets. For a cohesive look, match the island's hardware to your existing cabinet pulls or faucet finish.
Best Materials
Look for a butcher block made from maple or oak for durability and a classic grain pattern. The base should be solid wood or metal with locking casters to keep the island steady during use. If you want to save money, an unfinished butcher block can be sealed with food-safe mineral oil or a polyurethane finish for easy maintenance.
Storage Tip
Maximize the open space below by choosing stools that stack or nest. Consider adding a slim shelf or a small drawer on one side of the island for storing kitchen towels, utensils, or cutting boards. This keeps essentials within reach without cluttering the top.
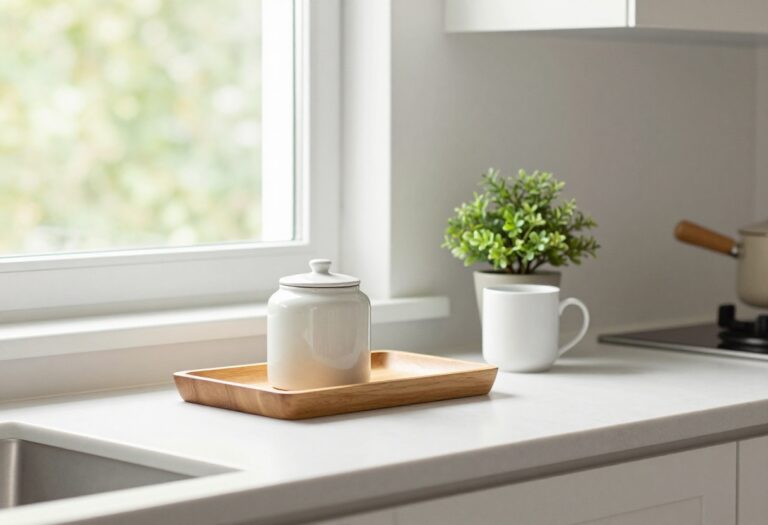
Styling Note
Keep the top relatively clear to show off the wood grain. A simple wooden fruit bowl, a small vase with fresh herbs, or a single ceramic pitcher adds character without overwhelming the surface. For a modern touch, pair the island with sleek, low-back stools in black or natural wood.
3. Two-Tier Island With a Lower Breakfast Bar
A split-level island does double duty without making your kitchen feel cramped. The raised countertop hides mixing bowls and dirty dishes from view, while the lower tier invites guests to pull up a stool and chat. It's a smart way to carve out separate zones for cooking and casual dining, even in a compact layout.
This design works best when the lower breakfast bar extends about 12 inches beyond the upper counter, giving knees plenty of room. Go with a waterfall edge on the lower tier for a seamless look, or add a subtle overhang for a more traditional feel. The height difference also creates a natural visual break, making the island feel like two pieces of furniture in one.
Best Materials
Quartz or solid-surface countertops keep the split-level look clean and easy to maintain. For the upper tier, a lighter shade like white or soft gray minimizes visual weight. The lower bar can take a darker tone—charcoal or navy—to ground the design and hide stains from morning coffee.
Layout Tip
Place the lower breakfast bar on the side facing your dining area or living room so guests can sit without interrupting your workflow. Leave at least 36 inches of clearance behind the stools for easy movement. If space is tight, opt for backless stools that tuck completely under the lower counter.
Finishing Touch
Add a slim LED strip under the upper tier's overhang to softly illuminate the breakfast bar. Warm white light (2700K) keeps the mood cozy, while a dimmer switch lets you adjust brightness from meal prep to late-night snacks.
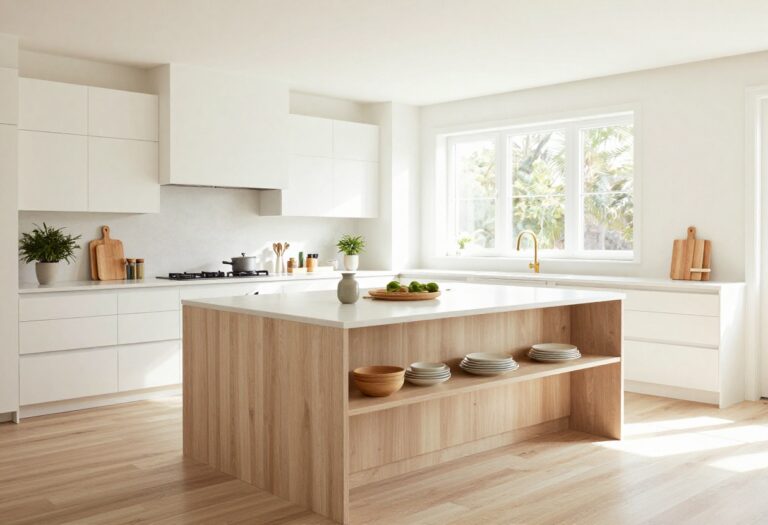
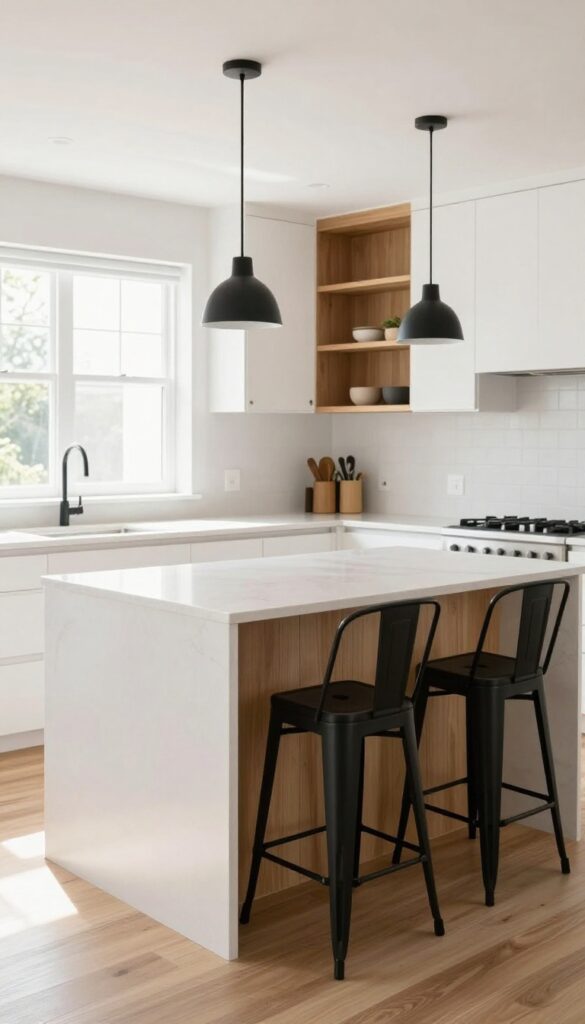
4. Open Shelf Island With Slim Counter Stools
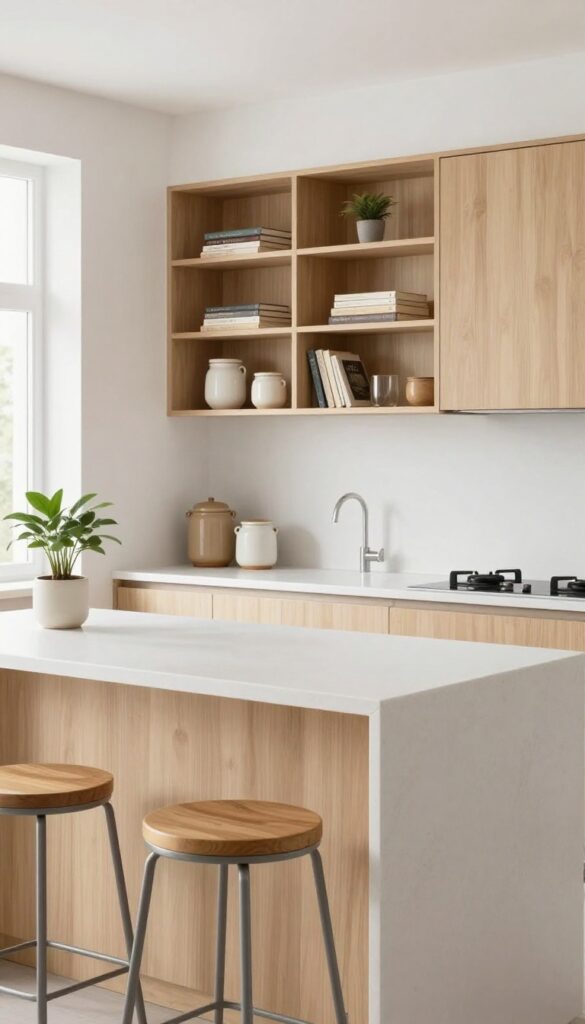
An island doesn’t have to be a solid block. By swapping closed cabinetry on one side for open shelving, you keep cookbooks and woven baskets within easy reach while maintaining an airy, uncluttered feel. The overhang accommodates two slim stools, making it a perfect spot for a quick breakfast or a glass of wine while you cook.
This setup works especially well in narrow kitchens where a bulky island would feel oppressive.
Open shelving on one side keeps cookbooks and baskets accessible, while the overhang seats two slim stools. The airy look prevents visual clutter.
Best Materials
Go with a light wood like birch or ash for the shelving to keep the look warm but not heavy. Pair it with a white or pale quartz countertop to reflect light. The stools should be slim and simple—metal frames with wooden seats in a matching tone work beautifully.
Shelf Styling Tip
Stick to a curated mix of a few cookbooks, a small plant, and a couple of ceramic jars. Leave plenty of breathing room between items—overcrowding defeats the purpose of open shelving. Use matching baskets for bulkier items like napkins or pantry overflow.
Small-space Fix
If your kitchen is tight on width, choose a counter-depth island (around 24 inches deep) and stools that tuck fully underneath when not in use. This keeps the walkway clear and the room feeling spacious.
5. Peninsula Extension From Existing Cabinetry

A peninsula is basically an island that hugs your existing cabinets, extending the counter into an L or G shape. It gives you that coveted breakfast bar without claiming extra floor space. The outer edge becomes a casual dining spot, while the inner side keeps your prep zone intact.
It’s a smart move for galley or L-shaped kitchens where a full island would feel cramped.
The beauty of a peninsula is that it uses the cabinet run you already have. You’re not adding a standalone structure; you’re just extending the countertop and adding support. This keeps the kitchen open and avoids the traffic-jam feeling that sometimes comes with islands.
The seating tucks neatly under the overhang, so it doesn’t block the walkway. It’s a practical solution that feels custom and intentional.
Best Layout Fit
Peninsulas work best in kitchens where the main counter runs along one wall and you have room to extend into the room without blocking the path to the sink or fridge. Aim for at least 36 inches of clearance on the seating side so chairs can slide out easily. If your kitchen is narrow, consider a narrower countertop depth (24 inches instead of 30) to keep the aisle comfortable.
Seating And Overhang
- For comfortable seating, the overhang should be 12 to 15 inches. Counter-height stools (24 to 26 inches tall) are standard, but bar-height stools (28 to 30 inches) work if the counter is higher. Leave about 24 inches of counter width per stool so everyone has elbow room.
- A waterfall edge on the overhang side adds a clean, modern look and protects the cabinet face from scuffs.
Styling And Finishes
- Keep the peninsula countertop continuous with the main counter for a seamless look. If you want contrast, choose a different material for the seating side—like a warm butcher block on the overhang while the rest is quartz. Under-cabinet lighting on the inner side helps with prep, and a couple of pendant lights above the seating area define the zone.
- Use the end of the peninsula for a towel bar or a slim trash pullout.
6. Narrow Island With a Single Pull-Out Table
When floor space is tight, a slim island with a hidden pull-out table feels like a clever secret weapon. The main structure stays compact—just deep enough for a countertop and a few inches of storage—while a narrow table slides out from one side to create an instant dining spot. Push it back in when you're done, and the kitchen opens right up again.
It's a smart solution for studio apartments or galley kitchens where every inch counts.
This design keeps the island footprint minimal, usually around 18 to 24 inches wide, so it doesn't block traffic flow. The pull-out table extends about 12 to 18 inches, giving one or two people a comfortable place to eat without needing a separate dining area. Finish the island in a light wood or crisp white to keep the space feeling airy, and add a couple of sleek bar stools that tuck neatly underneath when not in use.
Best Materials
Go for a durable countertop like quartz or butcher block that can handle both prep work and casual dining. The pull-out mechanism should glide smoothly—metal slides with a soft-close feature are worth the investment. Match the island base to your cabinetry for a cohesive look, or choose a contrasting color to make it a focal point.
Small-space Fix
Mount the pull-out table on heavy-duty drawer slides so it feels sturdy when extended. Add a slim drawer or open shelf on the opposite side for storing placemats, napkins, or small kitchen tools. Keep the area around the island clear to make the pull-out motion easy and natural.
Finishing Touch
Hang a single pendant light directly above the island to define the dining zone. Choose a fixture with a slender profile, like a linear metal shade or a glass globe, to keep the visual weight light. A warm bulb around 2700K makes the space feel cozy during meals.
7. Glass-Top Island for Visual Lightness
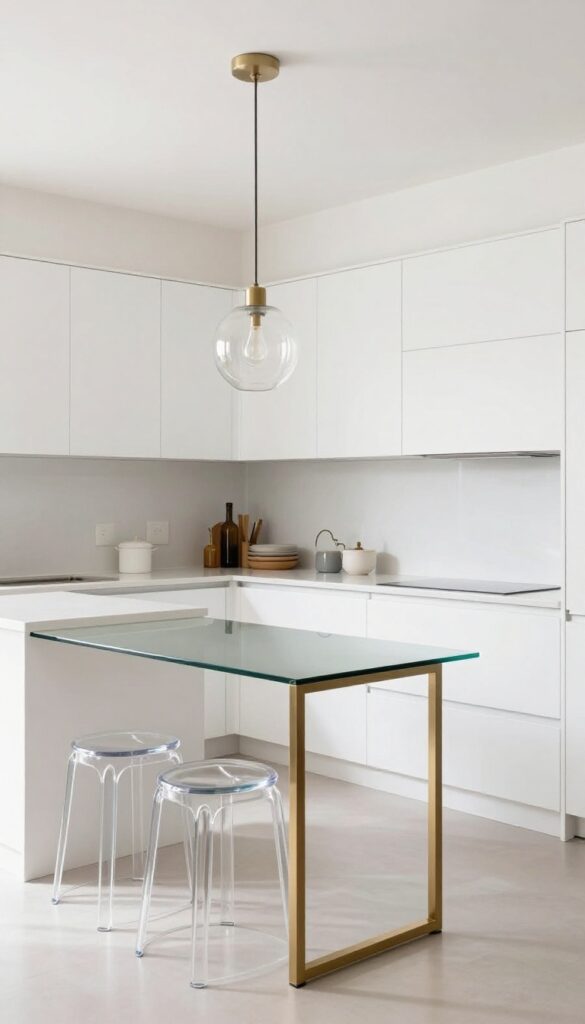
A glass-topped island with a metal base feels almost invisible, making the room appear larger. Pair with clear acrylic stools for an ultra-modern look.
A glass-topped island with a metal base feels almost invisible, making the room appear larger. Pair with clear acrylic stools for an ultra-modern look.
Best Materials
Tempered glass is a must for safety and durability. A stainless steel or brushed brass base adds a sleek, industrial touch. For the stools, clear acrylic keeps the airy feel.
Small-space Fix
In a narrow kitchen, a glass-topped island with a slim metal base doesn't block sightlines, helping the space feel open. Keep the top free of clutter to maintain the illusion of lightness.
Finishing Touch
Add a single pendant light with a minimalist glass or metal shade above the island. This draws the eye up and reinforces the clean, transparent aesthetic.
8. Corner Island With Wraparound Seating
A corner island with wraparound seating turns an awkward layout into a cozy hangout spot. By tucking the island into a corner and extending counter space on two sides, you create a natural breakfast nook that feels intimate without being cramped. This setup works especially well in narrow or L-shaped kitchens where a traditional island would block flow.
The beauty of a corner island is how it uses space that often goes wasted. With seating wrapping around two sides, you get a dedicated dining area that doesn't interrupt the main work triangle. Keep the countertop clean and uncluttered to let the clean lines shine.
A waterfall edge on the open side adds a modern touch, while the corner placement keeps traffic moving smoothly behind seated guests.
Best Layout Tip
Position the island so the open side faces the main cooking zone, allowing easy conversation between cook and guests. Leave at least 36 inches of clearance on the seating sides for comfortable chair pull-out and movement.
Material Pairing
Pair a light wood or white quartz countertop with slim metal or acrylic bar stools to keep the look airy. A matte black or brass pendant light above the seating area adds warmth and defines the zone without overwhelming the space.
Storage Idea
Use the back of the island (the wall side) for open shelving or shallow cabinets to store small appliances or cookbooks. This keeps everyday items within reach without crowding the seating area.
9. Foldable Wall-Mounted Drop-Leaf Island
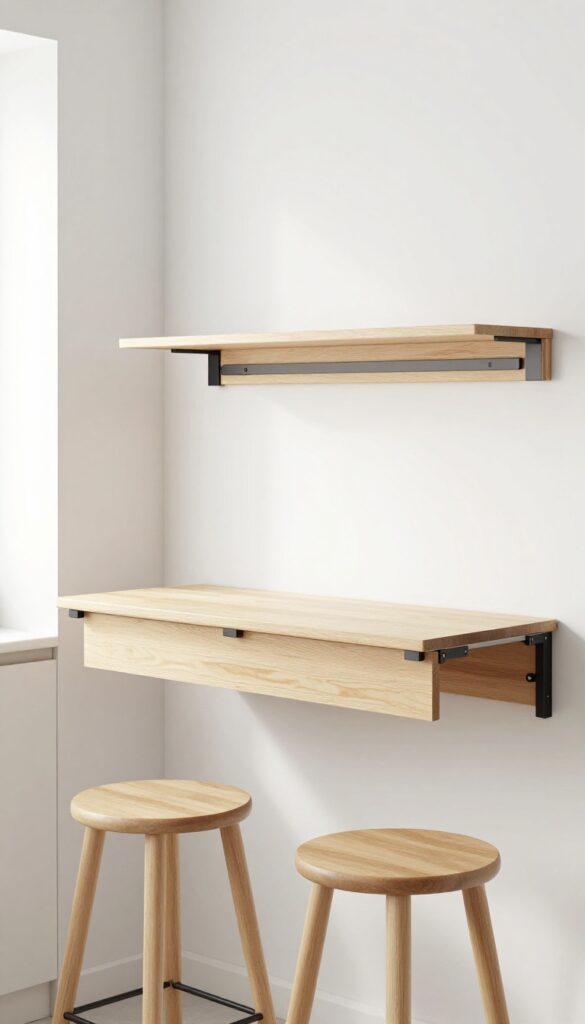
A kitchen island that disappears when you don’t need it? That’s the magic of a drop-leaf table attached to the wall. When folded down, it creates a compact island with room for two stools.
When not in use, it folds flat against the wall, freeing up precious floor space. This is a smart, modern solution for micro kitchens where every inch counts.
The foldable wall-mounted drop-leaf island is the ultimate space-saver for tiny kitchens. It gives you a dedicated prep area and a spot for quick meals without permanently taking over the room. The clean lines and minimal footprint align perfectly with a modern, uncluttered aesthetic.
Choose a sleek white or light wood top to keep the look airy, and add a couple of slim stools that tuck underneath when folded.
Best Materials
- Go with a solid wood or high-quality laminate top in a light finish like birch or white oak. These materials are durable, easy to clean, and keep the island feeling light. Avoid dark or heavy woods that could make the space feel cramped.
- For the frame and hardware, matte black or brushed nickel hinges and brackets add a subtle modern touch.
Layout Tip
- Install the drop-leaf at counter height (36 inches) so it works both as a prep surface and a dining spot. Leave at least 36 inches of clearance in front for stool seating and walkway flow. Position it on a wall near your main counter to create a seamless work triangle.
- If possible, add a power strip or USB outlet on the wall above for charging devices.
Small-space Fix
- Maximize functionality by adding a slim shelf or magnetic knife strip on the wall above the folded leaf. When the island is down, these become part of your workspace. Use a fold-down bracket with a locking mechanism for safety and stability.
- Pair with backless or foldable stools that can be stored elsewhere when not in use.
10. Island With Built-In Wine Rack and Stool Nook
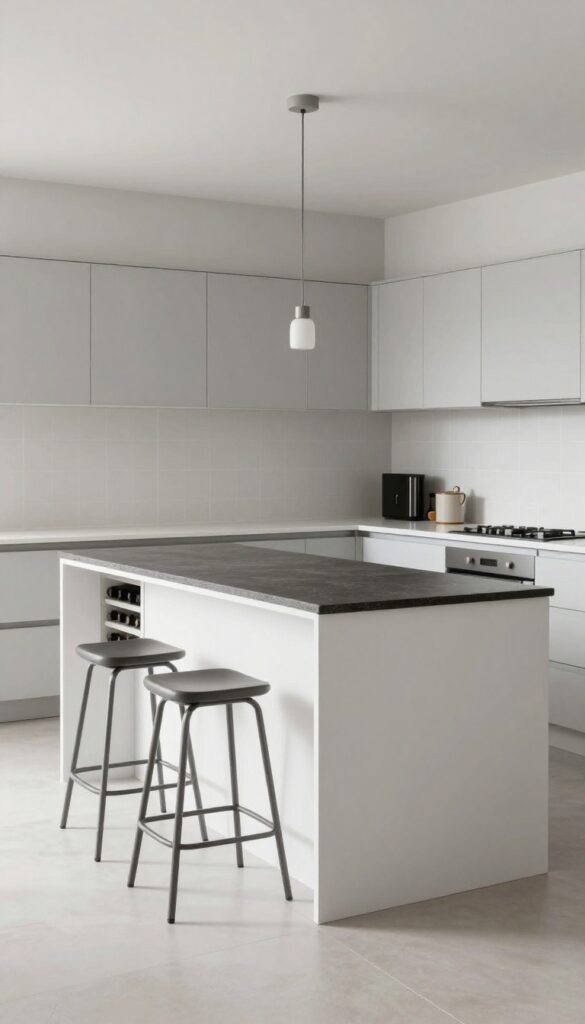
A compact island can do double duty when you carve out a wine rack on one end and a cozy nook for two stools on the other. This setup feels intentional and polished, turning a small footprint into a spot for both storage and casual dining. The built-in look keeps everything streamlined, so your kitchen stays clean and clutter-free.
This idea works especially well in galley or L-shaped kitchens where every inch counts. By tucking the wine rack into the end panel, you keep bottles within easy reach without taking up counter space. The cutout for stools creates a natural hangout zone, perfect for quick breakfasts or chatting while you cook.
Choose a slim countertop overhang of about 12 inches so the stools tuck neatly underneath when not in use. The result is a multifunctional island that feels custom and intentional, not cramped.
Best Materials
Go with a durable quartz or butcher block countertop that can handle spills and daily use. For the base, painted wood in a matte finish keeps the look modern and clean. White or light gray cabinets help the island blend in, while a darker countertop adds contrast.
Layout Tip
Position the stool nook on the side facing your main work area so it feels connected to the kitchen action. Leave at least 36 inches of clearance behind the stools for easy movement. If your kitchen is narrow, consider a rolling island that can be moved when needed.
Finishing Touch
Add a couple of low-profile bar stools with a slim metal frame to keep the visual weight light. A small pendant light directly above the seating area defines the zone and adds warmth. Keep the wine rack stocked with a few favorite bottles for a lived-in feel.
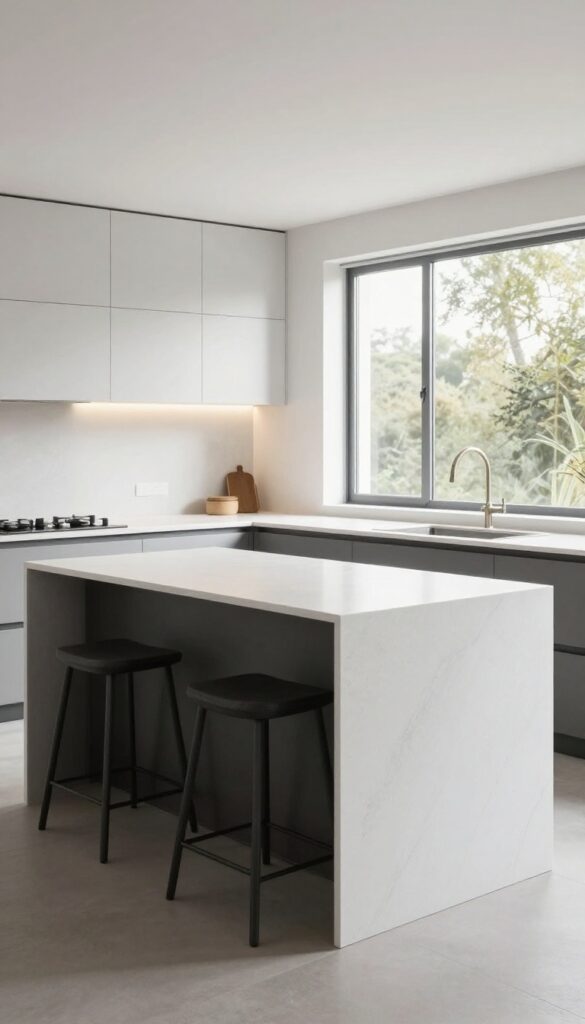
11. Minimalist Concrete Island With Cantilevered Seating
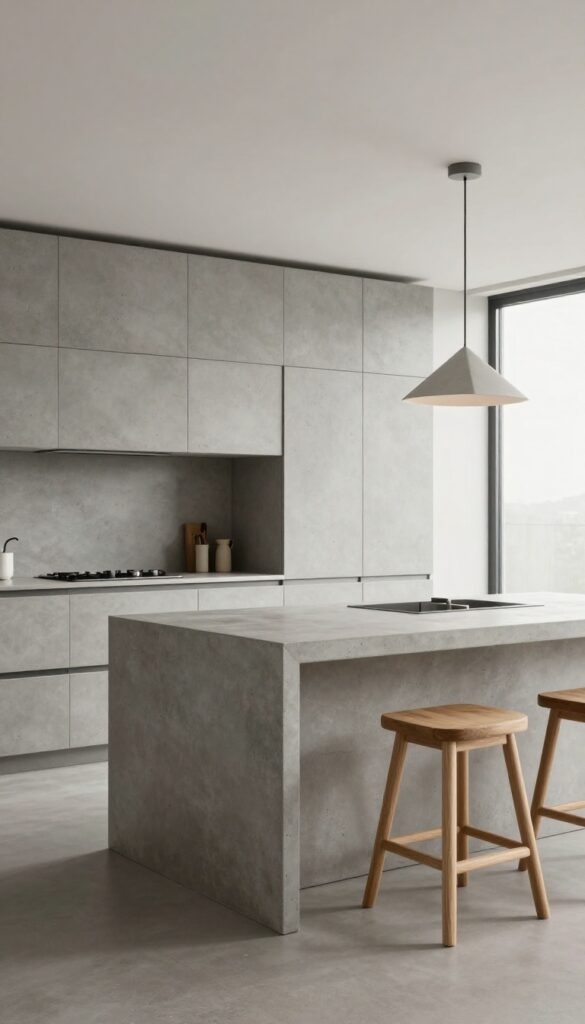
A concrete island doesn't have to feel heavy or cold. When you pair a sleek concrete countertop with a cantilevered overhang, you get seating that feels like it's floating. This setup seats two comfortably without any table legs getting in the way, which keeps the floor clear and the space open.
The raw, industrial texture of concrete adds just enough contrast to a clean, modern kitchen without overwhelming it.
The cantilevered design is a smart space-saver for smaller kitchens. Instead of a bulky base that eats up floor area, the countertop extends out to create a breakfast bar. This keeps the island footprint compact while still offering a spot for quick meals or morning coffee.
The concrete surface is also naturally durable and easy to wipe down, making it practical for daily use. Pair it with warm wood stools or sleek metal ones to balance the cool gray tones.
Best Materials
- Concrete is the star here, but you can choose between a poured-in-place finish or a precast slab. Poured concrete gives a seamless look, while precast offers more control over the finish. For the stools, go with light oak or black metal to keep the minimalist vibe.
- Avoid heavy upholstered seats—they'll clash with the industrial feel.
Layout Tip
Position the cantilevered side facing an open area, not a wall. This way, the overhang doesn't block traffic flow and feels like a natural extension of the island. Leave at least 36 inches of clearance behind the stools so people can move around easily.
Finishing Touch
Add a single pendant light with a simple geometric shape above the seating area. The light fixture should be low enough to define the zone but high enough not to hit heads. A matte black or brass finish works well with concrete's raw texture.
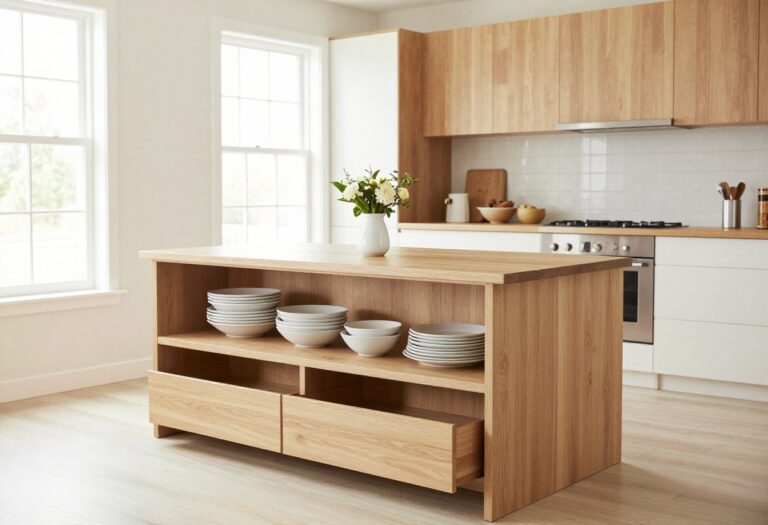
12. Island With a Lower Shelf for Stool Parking
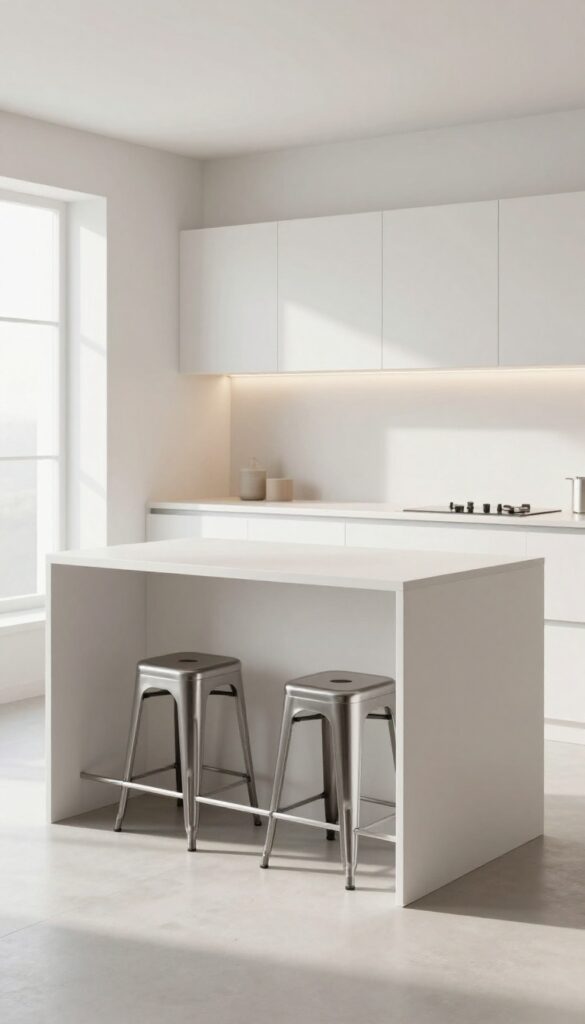
A kitchen island with a built-in lower shelf isn't just a clever storage trick—it's a game-changer for small spaces. When stools slide underneath, the floor stays clear and the whole kitchen feels more open. This setup keeps your island looking sleek and intentional, not cluttered.
The key is designing the shelf at just the right height so stools tuck away completely. You get the seating you need without sacrificing walkway space. It's especially useful in galley kitchens or tight layouts where every inch matters.
The clean lines also reinforce a modern, uncluttered look.
Best Materials
Go with a matte wood or white laminate for the shelf to keep the look light and airy. Pair it with metal or acrylic stools that don't feel bulky. A slim profile on both the shelf and stools ensures the whole island stays visually light.
Layout Tip
Measure your stool height carefully before building. The shelf should sit about 6–8 inches above the floor so stools slide in easily. Leave at least 12 inches of clearance between the shelf and the countertop for comfortable legroom.
Finishing Touch
Add a thin strip of under-shelf LED lighting to create a floating effect. It makes the island feel lighter and adds a soft glow that's practical for late-night snacking or just ambience.
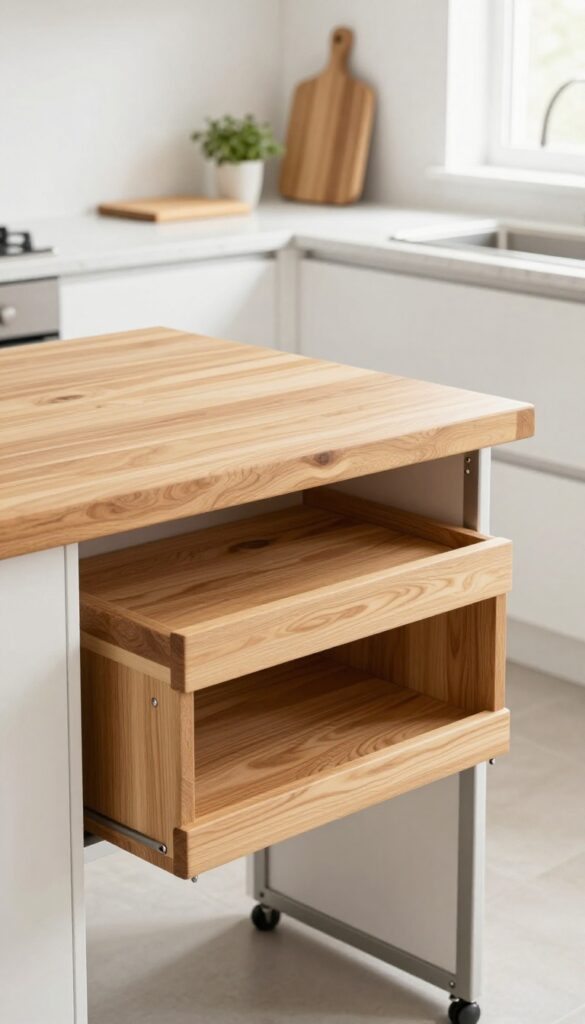
13. Multi-Functional Island With Cutting Board and Drawers
A kitchen island that works as hard as you do is worth every inch of floor space. This design packs in a built-in cutting board, utensil drawers, and a pull-out trash bin, so everything you need for prep is right where you need it. A slim overhang on one side lets one or two people sit for a quick meal or coffee, keeping the island compact but incredibly useful.
It's the kind of smart, space-saving solution that makes a small kitchen feel more capable and less cluttered.
The heart of this idea is the built-in cutting board, which slides out or sits flush with the countertop, giving you a dedicated prep surface that disappears when not in use. Utensil drawers below keep knives, spatulas, and spoons organized and within arm's reach, while a pull-out trash bin hides waste out of sight. The overhang is just deep enough for two stools, so the island stays slim and doesn't overwhelm the room.
Choose a clean, modern look with a white quartz countertop and matte gray cabinetry, or go for a warmer feel with butcher block and soft white paint. Either way, the streamlined design keeps the kitchen feeling open and airy.
Best Materials
- Quartz or solid-surface countertops work well for the main surface because they're durable and easy to clean. For the cutting board, look for a removable teak or maple insert that can be washed separately. Cabinetry should be flat-front and handleless for a sleek look, or use slim metal pulls.
- A matte finish on the cabinets hides fingerprints and adds a soft touch.
Layout Tip
Position the island so the seating overhang faces the main work zone, not the wall. This keeps the cook connected to anyone sitting and prevents traffic flow from being blocked. Aim for at least 36 inches of clearance around the island for comfortable movement.
Small-space Fix
If your kitchen is very narrow, consider a rolling island with locking casters. You can tuck it against the counter when not in use and pull it out for prep or dining. The built-in cutting board and drawers still work, and the mobility adds flexibility.
FAQ
How much space do I need for a small kitchen island with seating?
You need at least 36 inches of clearance around the island for comfortable movement and seating. For a small island, aim for a width of 24 to 30 inches and a length of 36 to 48 inches.
What type of seating works best for a small island?
Slim, backless stools or counter-height chairs that tuck completely under the overhang save space. Look for stools with a small footprint and a clean silhouette.
Can I add an island to a galley kitchen?
Yes, but keep it narrow and mobile. A rolling cart or a peninsula extension works better than a fixed island in a galley layout to maintain walkways.
What materials are best for a modern small island?
Light woods, white or gray quartz, stainless steel, and glass keep the look clean and airy. Avoid heavy dark materials that can overwhelm a small space.
How can I make a small island feel like it belongs in the kitchen?
Match the island's finish to your existing cabinetry or countertops, or choose a complementary accent color. Adding a pendant light above anchors it visually.
Conclusion
Small kitchens don't have to sacrifice style or function. With the right island and seating, you can turn a cramped cooking area into a welcoming hub for meals and conversation. Each of these ideas proves that good design works with your space, not against it.
Pick the concept that fits your layout and lifestyle, then add your personal touches—like a sleek pendant light or a few bar stools. Your kitchen will feel bigger, smarter, and more inviting in no time.