11 Smart River Rock Shower Ideas for a Crisp, Cohesive Space
River rock in the shower isn't just about looks—it solves real problems like slippery floors and boring, flat walls. These stones add texture that grips wet feet and creates a natural, spa-like feel that tile alone can't match.
Whether you're tackling a full remodel or just refreshing one corner, the ideas here focus on practical upgrades that hold up to moisture and daily use. From floors that drain quickly to accents that break up plain surfaces, each option brings function and character.
Let's explore how to work river rock into your space without overdoing it.
1. Pebble Floor Mats for Slip Resistance
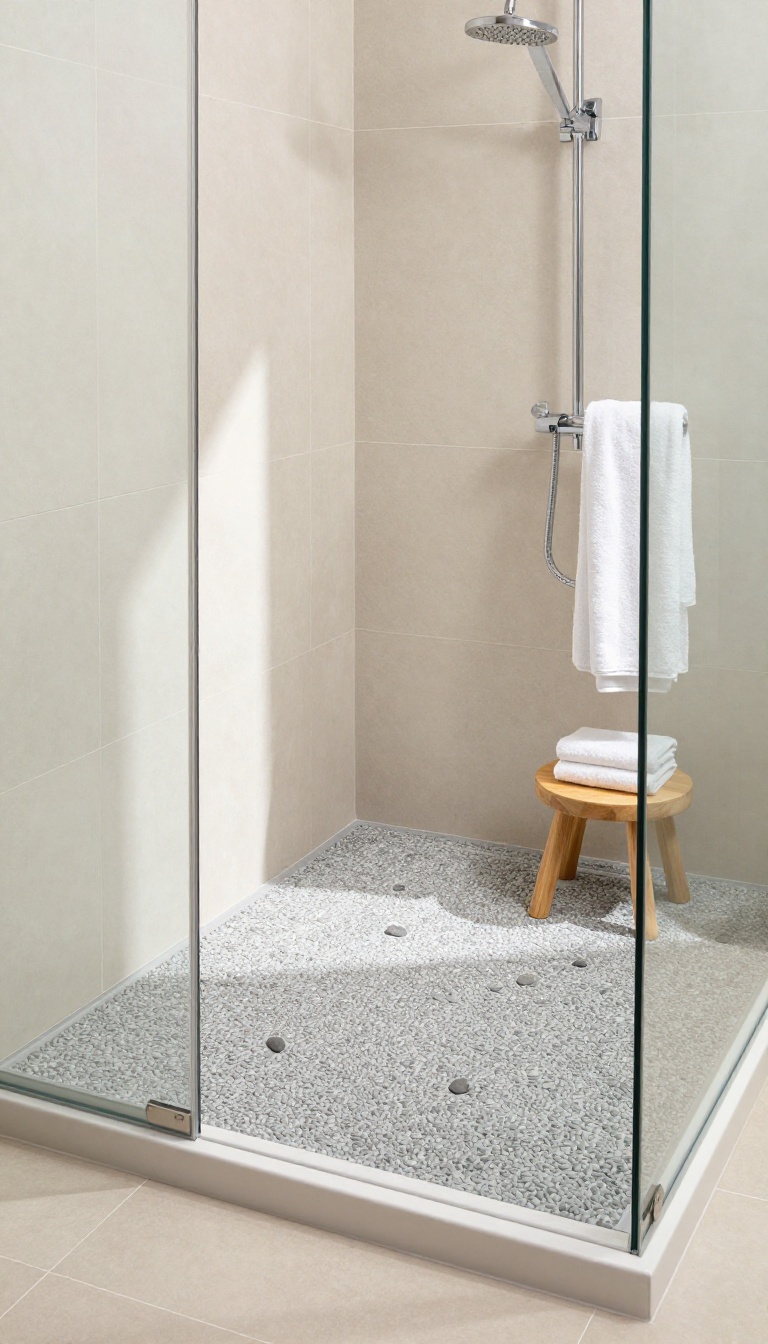
Pebble floor mats are an easy way to bring river rock texture into your shower without a full renovation. They sit directly on the existing floor, giving you that natural stone feel underfoot while adding a layer of grip where you need it most. These mats are especially handy for families or anyone who wants a quick upgrade that still looks intentional.
A pebble mat turns a slippery shower floor into a secure, massaging surface. The rounded stones create natural drainage channels, so water doesn't pool, and the texture gives your feet something to hold onto. Plus, they're portable—you can take them out to rinse or replace them when they wear out.
Choosing The Right Mat Size And Shape
Measure your shower floor before you buy. A mat that's too small won't cover the high-traffic area, while one that's too large might curl at the edges. Rectangular mats work well for most showers, but you can find round or custom shapes for corner spaces.
Look for mats with a rubber or non-slip backing to keep them from sliding around.
Cleaning And Maintenance Tips
Pebble mats need regular cleaning to prevent soap scum and mildew. Rinse them after each use and give them a deep clean once a week with a mild soap or vinegar solution. Let them air dry completely before putting them back.
If you notice any loose stones, reattach them with waterproof adhesive to extend the mat's life.
Style Pairings And Placement Ideas
These mats look best when they complement the rest of the shower. Pair them with neutral tile or natural wood accents for a cohesive spa vibe. Place one right outside the shower too, so you step onto the same texture as you dry off.
You can also layer a smaller mat near the shower bench for extra comfort.
2. River Rock Accent Wall Behind the Bench
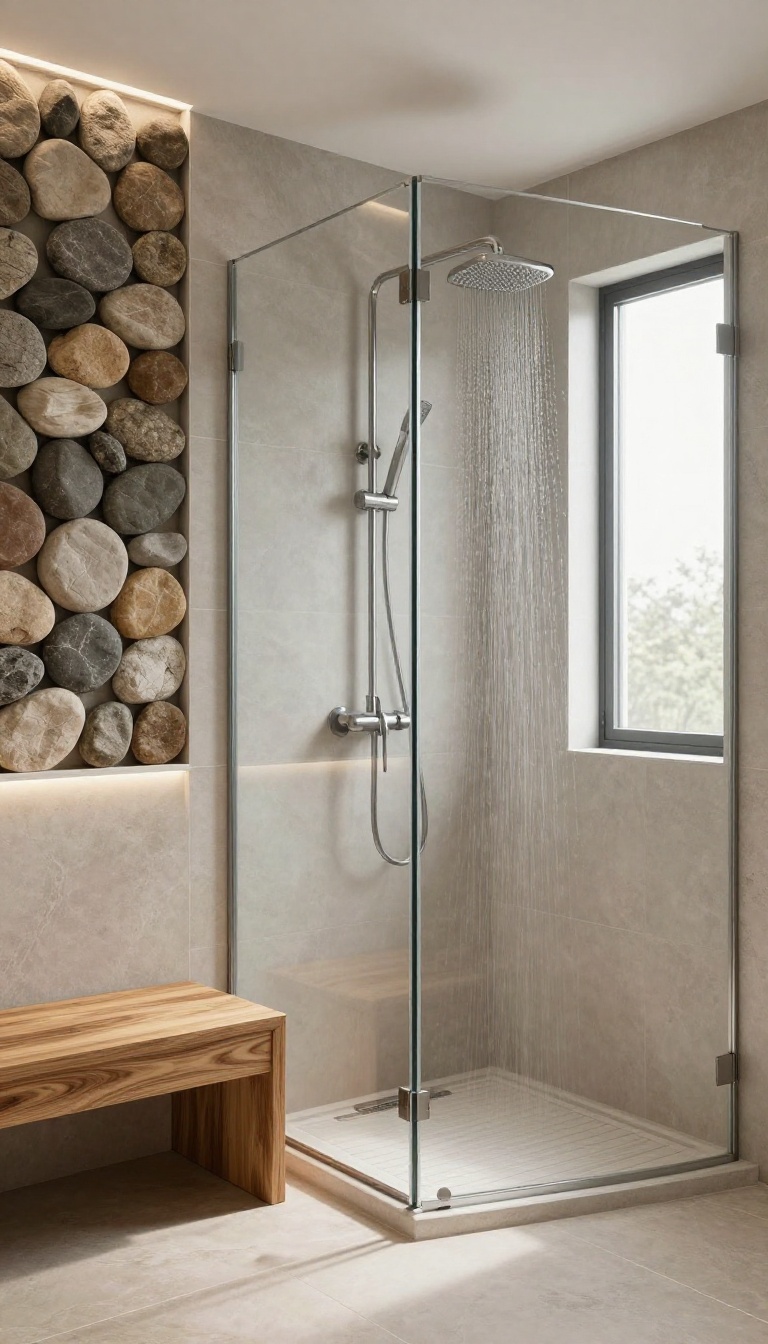
A river rock accent wall behind a shower bench turns an often-overlooked corner into a striking focal point. The natural texture breaks up large expanses of tile and adds a sense of depth that flat surfaces lack. Plus, the stones' irregular surface helps hide soap scum and water spots, so maintenance becomes less of a chore.
This idea works especially well in larger showers where a bench provides a natural resting spot. The accent wall draws the eye and gives the space a spa-like feel, while the bench offers a practical place to sit or place toiletries. The contrast between smooth bench materials and rough river rock creates a pleasing tactile and visual balance.
Choosing The Right Stones
Opt for flat, smooth river rocks that are uniform in size—about 1 to 2 inches across. This makes installation easier and creates a more cohesive look. Avoid overly jagged stones, which can be uncomfortable against the skin.
Consider mixing shades of gray, tan, and brown for a natural, earthy palette that complements most bathroom fixtures.
Installation Tips
Use a waterproof membrane behind the accent wall to protect against moisture. Apply a high-quality thin-set mortar and press each stone firmly, leaving consistent gaps for grout. After the mortar sets, fill the gaps with sanded grout that matches the stone color.
Seal the entire wall with a penetrating sealer to prevent water absorption and make cleaning easier.
Design Pairings
Pair the accent wall with a bench made of teak, stone, or concrete for a natural contrast. Keep the rest of the shower simple—use large-format tiles in neutral tones so the river rock remains the star. Add warm, dimmable lighting to highlight the texture and create a relaxing ambiance.
3. Mosaic River Rock Shower Floor
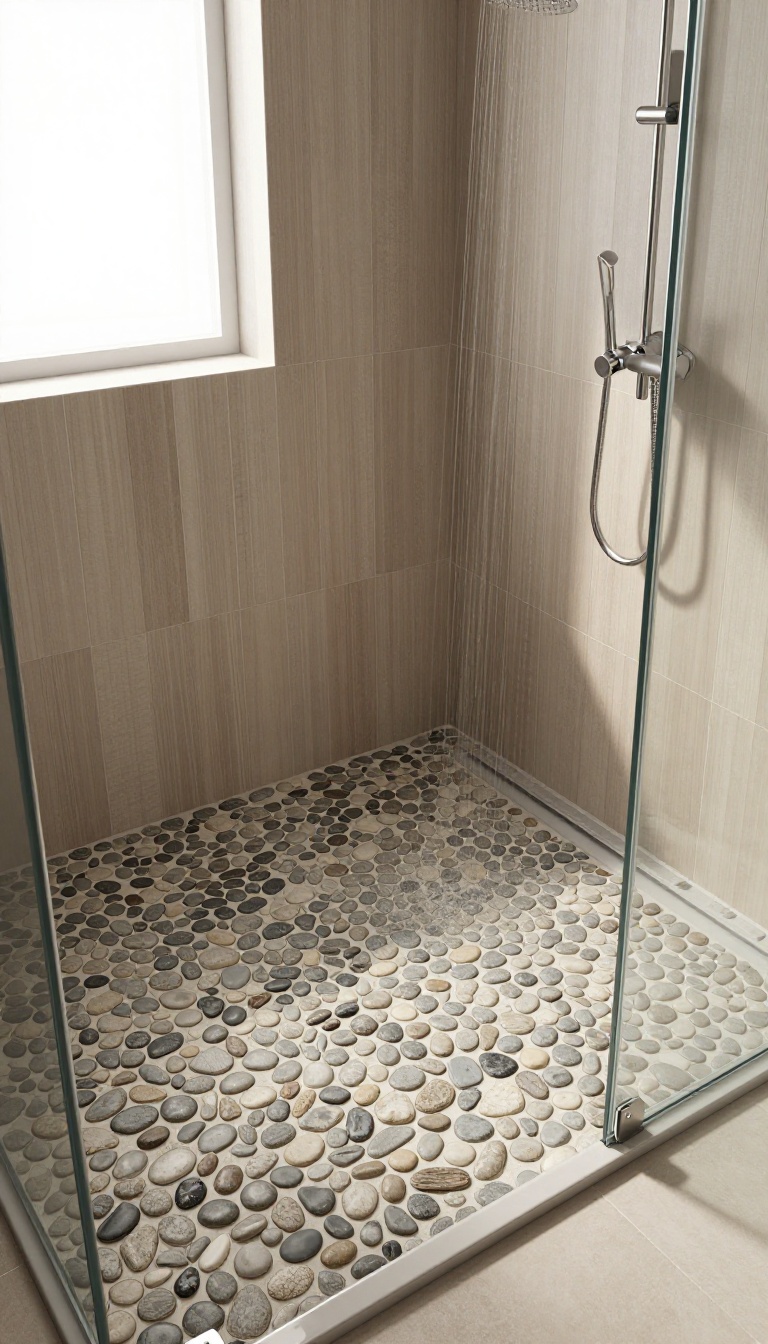
A full river rock mosaic floor takes the pebble concept to the next level, covering the entire surface with smooth, rounded stones set in a durable grout. This isn't just about looks—it creates a continuous, textured plane that feels great underfoot and channels water away efficiently. The result is a shower floor that's both functional and visually striking, with a natural, organic character that ties the whole space together.
When you commit to a river rock mosaic floor, you're choosing a surface that works with water, not against it. The stones are typically mounted on mesh sheets, making installation easier, but the real payoff is in the drainage. Water slips through the gaps between the rocks, so puddles don't linger, and the uneven surface helps prevent slips.
Plus, the natural variation in color and shape adds depth that plain tile can't replicate. One thing to keep in mind is the grout. Use a sanded grout that matches the stones or contrasts subtly, and seal everything properly to keep moisture out.
The floor will need a bit more cleaning than smooth tile, but a quick rinse and occasional scrub keeps it looking fresh. If you're worried about the feel, test a sample first—most people love the massage-like sensation, but it's not for everyone. A river rock floor also pairs well with other natural elements, like a wood-look tile on the walls or a rainfall showerhead.
It's a bold choice, but one that pays off in both comfort and style.
Why A Full Mosaic Works Better Than A Mat
A peel-and-stick mat is a quick fix, but a full mosaic floor is a permanent solution. The mat sits on top of the existing surface, which can trap water and create a moisture barrier. A real mosaic is integrated into the shower pan, so it drains properly and won't shift or peel.
Plus, it looks intentional—not like an afterthought.
Choosing The Right Stone Size And Color
River rocks come in various sizes, from small pebbles to larger stones. For a shower floor, you want a mix that feels comfortable underfoot—too large and they're awkward, too small and they're hard to clean. Aim for stones around 1 to 2 inches in diameter.
Color-wise, think about the overall palette: warm earth tones for a rustic feel, or cool grays for a more modern spa vibe.
Installation And Grouting Tips
Installing a river rock mosaic isn't a DIY job for everyone, but if you're handy, it's doable. Use a flexible thin-set mortar and press the sheets firmly into place. After the mortar sets, apply grout with a rubber float, making sure to fill all the gaps.
Wipe off excess grout before it dries, then seal the entire floor with a penetrating sealer. This protects the stones and grout from moisture and stains.
4. River Rock Border Around Tile
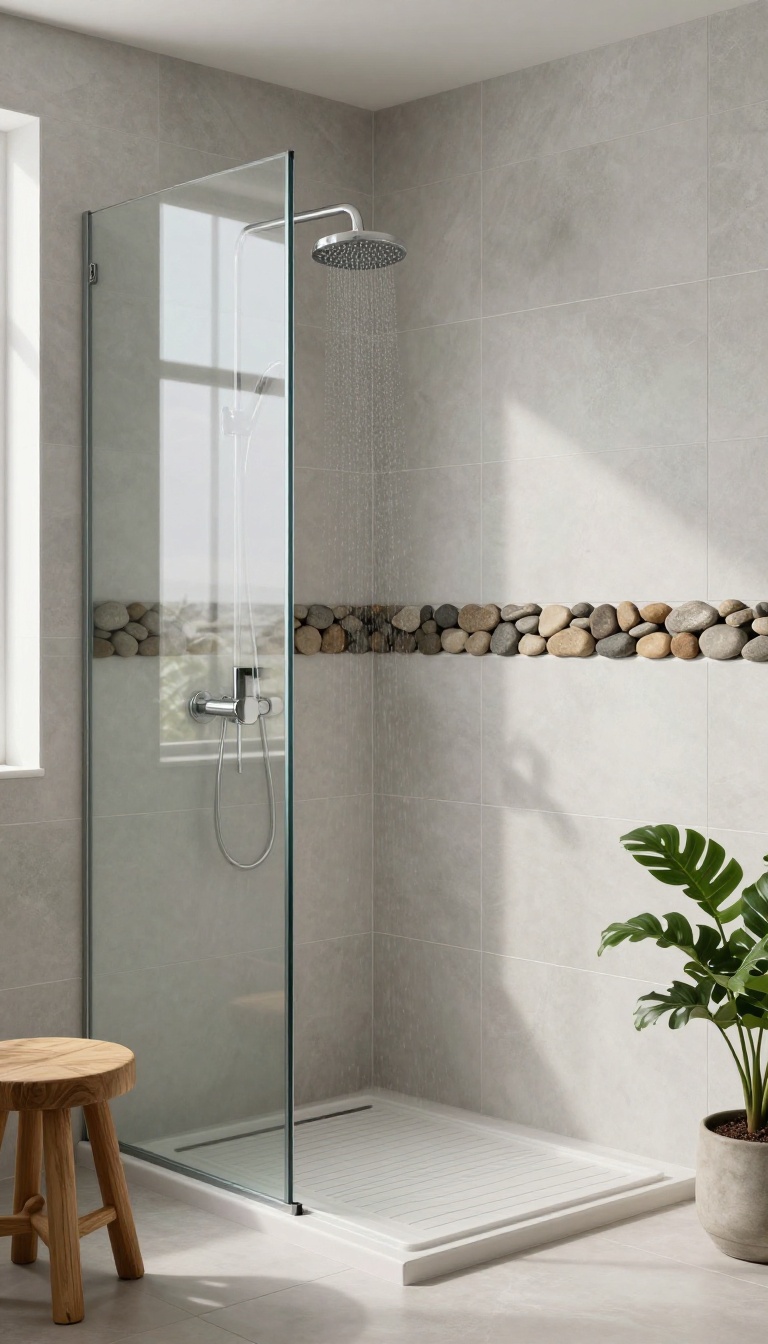
A river rock border is a clever way to add texture without committing to a full pebble wall or floor. It frames your tile work and gives the eye a natural stopping point, which makes the whole shower feel more intentional and polished. You can use it to outline a niche, define a shower pan, or create a horizontal band that breaks up large-format tiles.
Start by choosing a border width that suits your space. A narrow strip, around two to three inches, works well for a subtle accent, while a wider band makes a bolder statement. The key is to keep the border proportional to the tile size and the overall shower dimensions.
If you're working with large tiles, a thicker border can help balance the scale.
Where To Place The Border
The most common spot is around the shower niche, which instantly makes that recessed shelf feel like a custom feature. You can also run a border along the top of the tile wainscot or at the transition point where the wall meets the floor. Another option is to frame the entire shower area, like a picture frame, which works especially well in walk-in showers with a single tiled wall.
Choosing The Right Stones
For a border, you want stones that are relatively flat and uniform in size so they sit flush with the surrounding tile. Look for river rock mesh sheets that are pre-assembled, which makes installation easier and ensures a consistent pattern. If you're mixing colors, pick stones that complement your tile rather than compete with it.
Earthy tones like browns, grays, and tans work with most palettes.
Installation Tips
Install the border after the main tile is set but before grouting, so you can adjust the height and alignment. Use a thin-set mortar that's suitable for natural stone, and back-butter each stone to ensure good adhesion. Once the mortar dries, apply grout that matches your tile or choose a contrasting color to make the border pop.
Seal the river rock after grouting to protect it from moisture and staining.
5. River Rock Shower Niche Backsplash
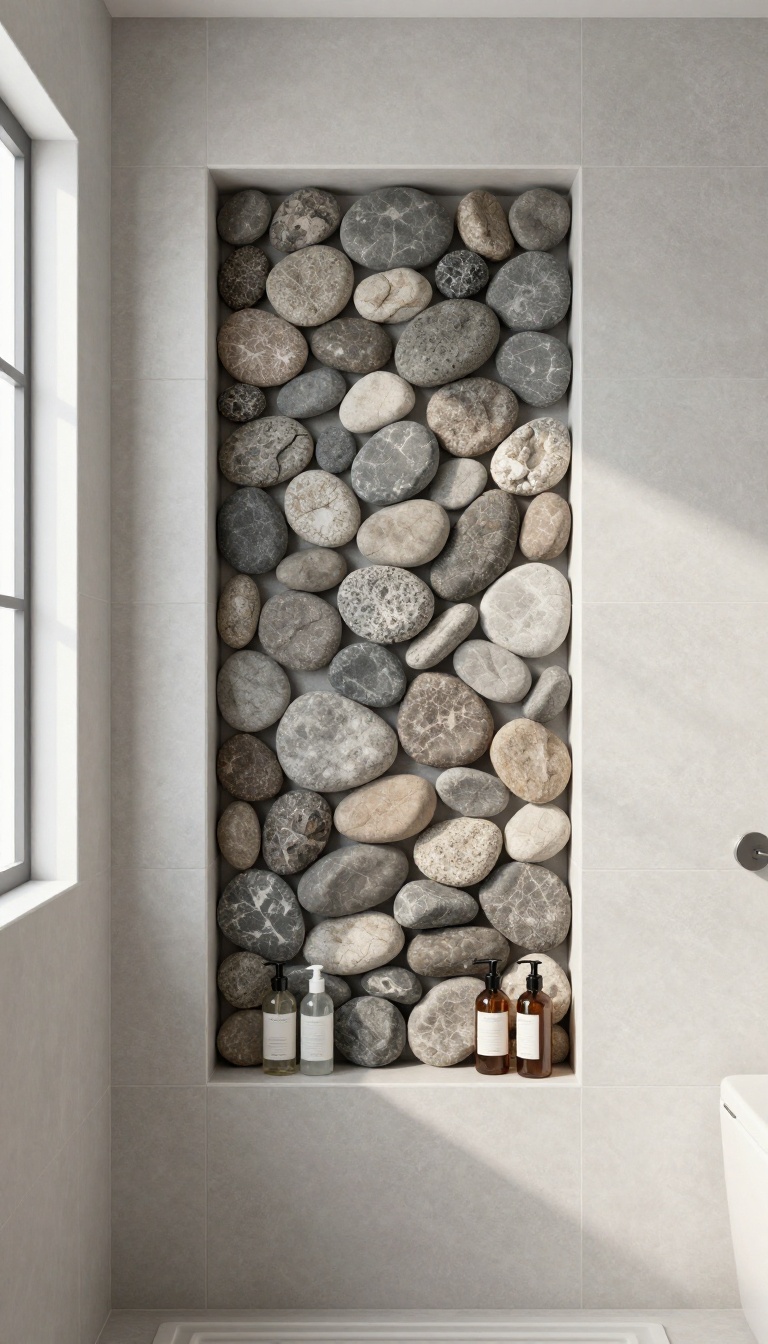
Shower niches are handy for holding shampoo and soap, but they often end up looking like plain boxes cut into the tile. Lining the back of your niche with river rocks changes that completely. It adds a natural, textured backdrop that makes your toiletries stand out and ties the whole shower together.
Plus, it's a small touch that feels intentional without requiring a full redo.
A river rock backsplash inside your niche is a simple upgrade that packs a lot of visual punch. The stones catch the light and add depth, turning a functional spot into a mini feature. It also helps hide water spots and soap scum better than smooth tile, so the niche stays looking cleaner between scrubs.
Why It Works
The contrast between smooth river rocks and the surrounding tile creates a natural focal point. It breaks up large expanses of flat surface and adds a tactile element that feels good when you reach for your products. Plus, the uneven surface helps grip bottles, so they're less likely to slide around.
Installation Tips
You can use river rock tiles that come on mesh sheets, which make installation much easier. Cut the sheets to fit the back of the niche and apply them with thin-set mortar. Make sure the surface is clean and dry before you start.
For a seamless look, use a grout that matches the main tile or go with a contrasting shade to make the rocks pop.
Design Pairings
River rock niches work well with a variety of styles. In a modern shower, they soften the clean lines and add organic texture. In a rustic or spa-like bathroom, they reinforce the natural theme.
Pair them with wood-look tile or neutral tones for a cohesive feel. You can also mix in larger stones or different colors for extra interest.
Maintenance And Care
Sealing the river rocks is essential to protect them from moisture and staining. Use a penetrating sealer designed for natural stone and reapply it every year or so. Cleaning is easy—just wipe with a mild detergent and a soft brush to get into the crevices.
Avoid harsh chemicals that can damage the sealer or the stones.
6. River Rock and Glass Blend
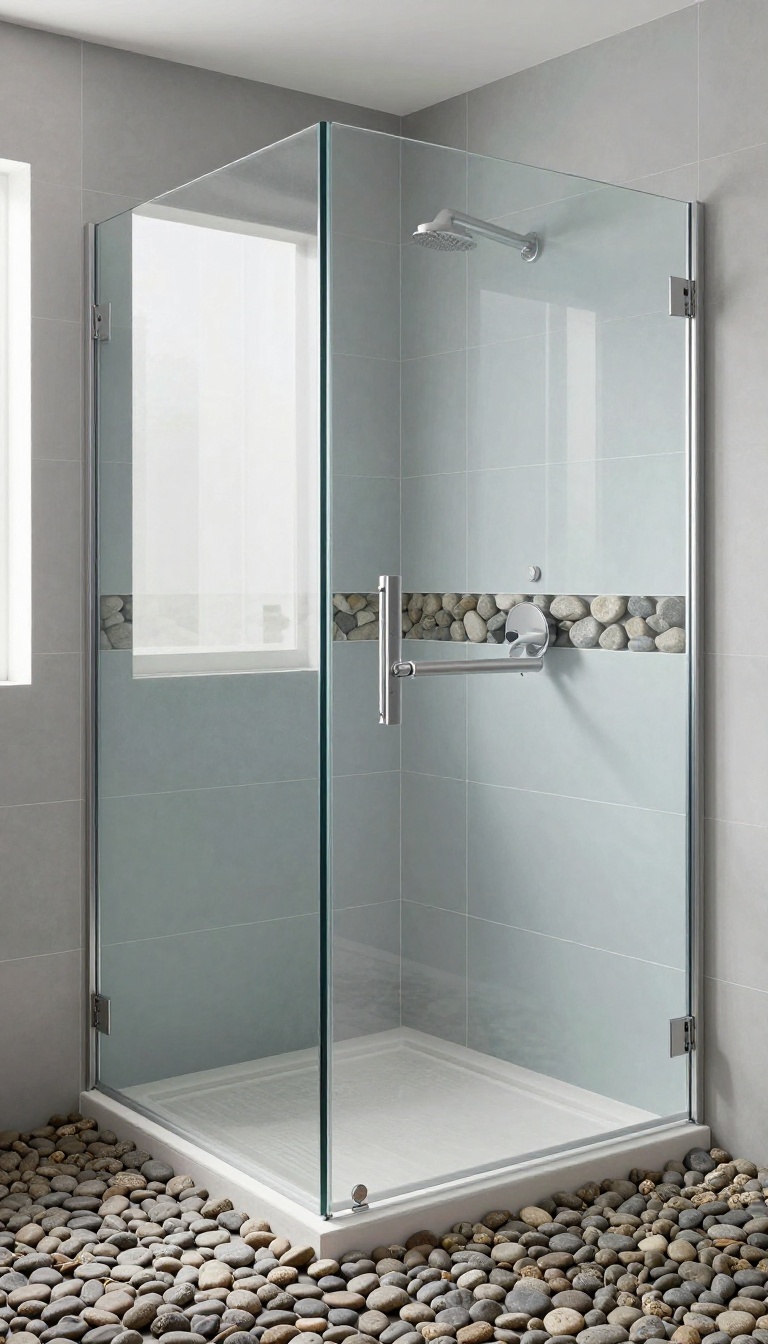
Combining smooth river stones with glossy glass tiles creates a surface that catches light and adds depth. The mix of textures gives your shower a crisp, modern look while still keeping that natural, earthy feel. It’s a smart way to brighten up the space without going full-on spa or too rustic.
The contrast between matte river rock and shiny glass makes both materials stand out. Glass reflects light, making the shower feel larger and more open, while the stones ground the design with organic texture. You can use this blend in several ways, from a full accent wall to a subtle strip behind the fixtures.
The key is balancing the two so neither overpowers the other.
Why Glass Works With River Rock
Glass tiles are non-porous and easy to clean, which balances the grout-heavy look of river rock. The reflective surface bounces light around, making the shower feel brighter and more spacious. Plus, the smooth glass contrasts nicely with the bumpy stones, adding visual interest without being busy.
Placement Ideas For The Blend
Try a river rock floor with a glass tile accent strip along the wall at eye level. Or create a vertical band of glass tiles that weaves through a pebble wall for a modern mosaic effect. Another option: use river rock on the shower floor and glass tiles on the walls, letting the textures complement each other without competing.
Grout And Color Choices
Choose a grout color that ties the two materials together, like a warm gray or taupe. Darker grout hides dirt and makes the stones pop, while lighter grout keeps the space airy. For glass, pick a shade that picks up a tone from the rocks, such as a soft blue or green, to create a cohesive palette.
7. River Rock Threshold Transition
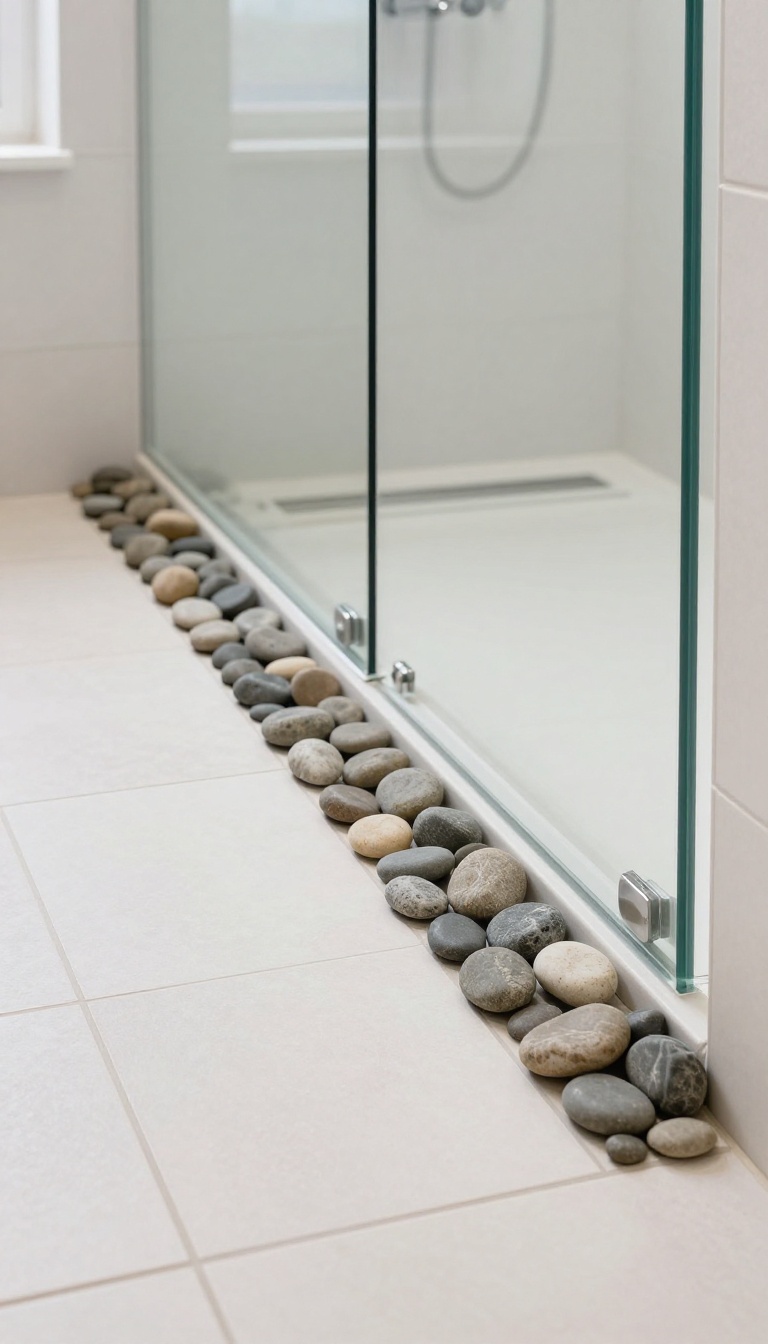
Stepping into a shower shouldn't feel like a hurdle, especially when your bathroom floor and shower base meet at different heights. A river rock threshold bridges that gap smoothly, adding a natural, non-slip surface that feels great underfoot and looks intentional. This small but mighty detail ties your space together while keeping safety front and center.
A threshold transition is more than just a visual bridge—it's a functional piece that prevents trips and slips. River rocks, with their rounded edges and textured tops, create a gentle ramp that's easy to step over, even when wet. Plus, the organic look softens the hard lines between tile and stone, making the whole bathroom feel more cohesive.
Why River Rock Works At The Threshold
The main job of a threshold is to keep water inside the shower while letting you step in and out comfortably. River rock excels here because its natural texture provides grip, even with soapy feet. Unlike a smooth tile edge, the pebbles catch your foot and reduce the chance of slipping.
They also drain quickly, so water doesn't pool at the entrance, which cuts down on mildew and slippery spots.
Design Ideas For Your Threshold
You can go subtle or bold with your threshold. For a seamless look, choose river rocks that match your shower floor or bathroom tile. If you want a bit of contrast, pick a different shade—like dark pebbles against light tile—to create a clear visual boundary.
You can also set the rocks in a metal or wood frame to define the edge, or keep them free-form for a more organic feel. Just make sure the rocks are set in a sturdy base, like mortar, so they stay put for years.
Installation Tips To Keep In Mind
Before you start, measure the width of your shower opening and plan the slope. The threshold should be slightly higher than the bathroom floor to keep water in, but not so high that it becomes a tripping hazard. Use a waterproof membrane underneath and set the rocks in a thick layer of thinset or mortar.
Let everything cure fully before walking on it. If you're not confident in DIY, a pro can handle this in a day—it's a quick upgrade that makes a big difference.
8. River Rock Shower Curb
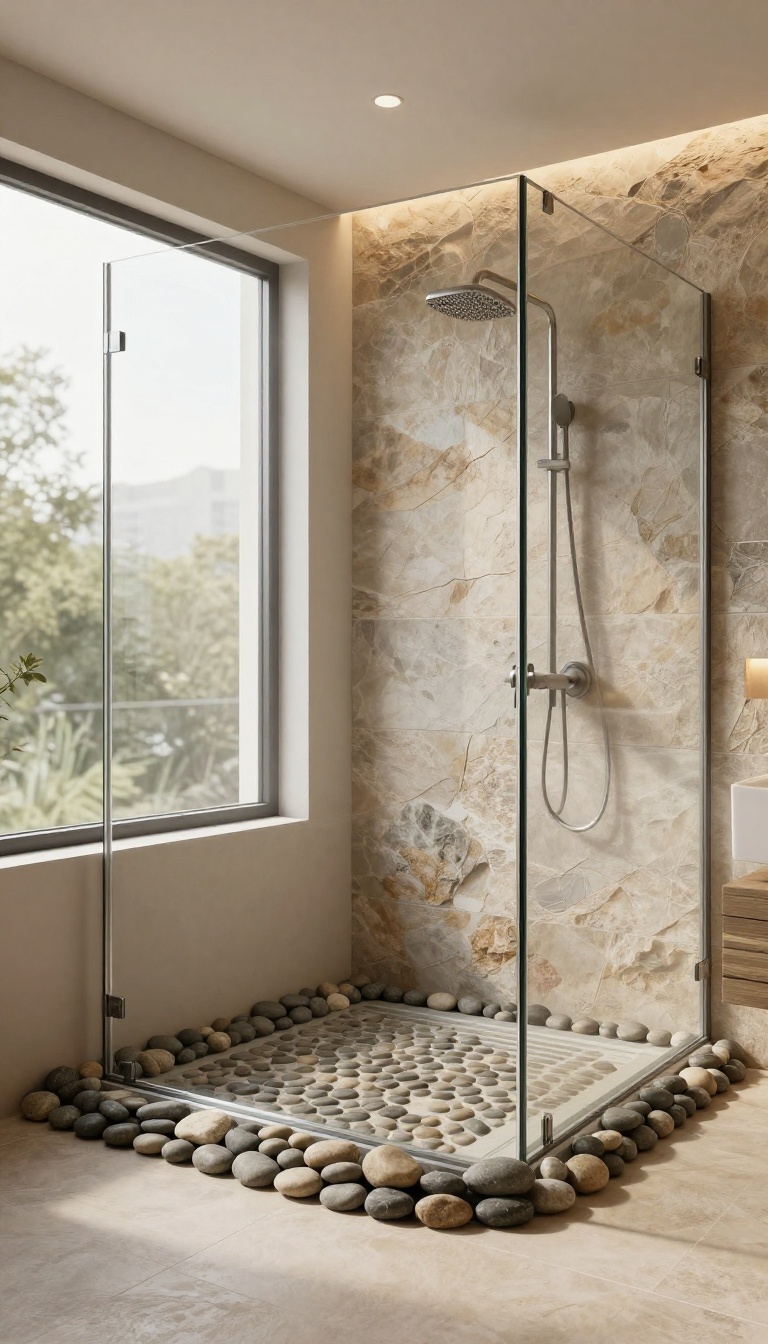
The curb is often the last thing you think about when designing a shower, but it's the first thing you step over. A river rock curb not only ties the whole look together but also solves the annoying problem of water pooling on the edge. Plus, it gives your toes a nice, textured surface to grip as you step in and out.
Covering the shower curb with river rocks creates a seamless transition from the shower floor to the rest of the bathroom. The stones add a natural, organic feel that complements the pebble floor and prevents that slippery, wet ledge that can be a hazard. It's a small detail that makes a big difference in both style and safety.
Why Choose A River Rock Curb
A river rock curb isn't just about looks—it's about function. The textured surface provides extra grip when you're stepping over, especially when wet. It also helps channel water back into the shower, reducing the chance of puddles on the bathroom floor.
And because the stones are set in grout, they're easy to clean and maintain.
How To Install River Rock On A Curb
Start by cleaning and prepping the curb surface. Apply a thin layer of thinset mortar and press the river rocks into place, making sure they're evenly spaced. Let it set, then fill the gaps with grout and wipe off any excess.
Seal the rocks to protect them from moisture and stains. It's a DIY-friendly project that can be done in a weekend.
Design Tips For A Cohesive Look
To make the curb feel intentional, choose river rocks that match the size and color of the ones on your shower floor. You can also extend the same pattern up the sides of the curb for a more integrated look. If you want a subtle contrast, use slightly darker or lighter stones to define the edge without breaking the overall aesthetic.
9. River Rock Wall Niche with Shelf
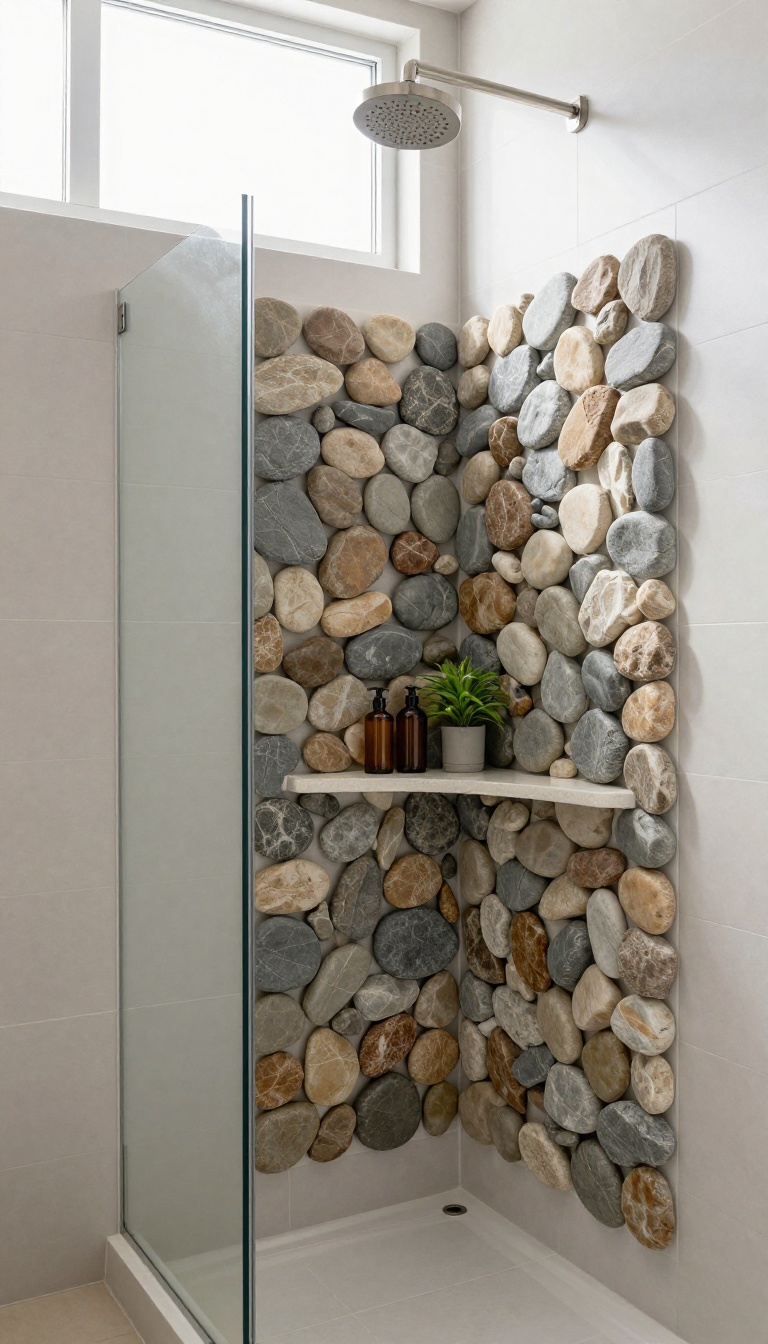
A recessed niche is a practical addition to any shower, but it doesn't have to be plain. Lining the back of the niche with river rock instantly adds texture and a natural focal point, while the shelf keeps your essentials within easy reach.
This idea combines storage with style. The river rock backing creates a visual break from the surrounding tile, and the shelf provides a convenient spot for shampoo bottles or soap. It's a small change that makes a big impact.
Why Add A Shelf?
A shelf inside the niche doubles the storage space, letting you keep bottles off the floor and within arm's reach. It also helps keep the niche organized, so you're not digging around for your shower gel. Plus, a shelf can be made from the same tile or a contrasting material to tie the design together.
Choosing The Right Stones
Opt for river rocks that are smooth and flat, as they're easier to clean and won't trap soap scum. Make sure they're sealed properly to resist moisture and staining. You can choose a mix of gray, tan, and brown tones to complement your tile and fixtures.
Installation Tips
When building the niche, recess it into the wall framing and waterproof it thoroughly before adding the rocks. Use a thin-set mortar to adhere the stones, then grout the gaps. Let it cure completely before sealing the surface.
If you're not comfortable doing it yourself, a pro can handle it in a day or two.
10. River Rock Shower Floor with Teak Wood
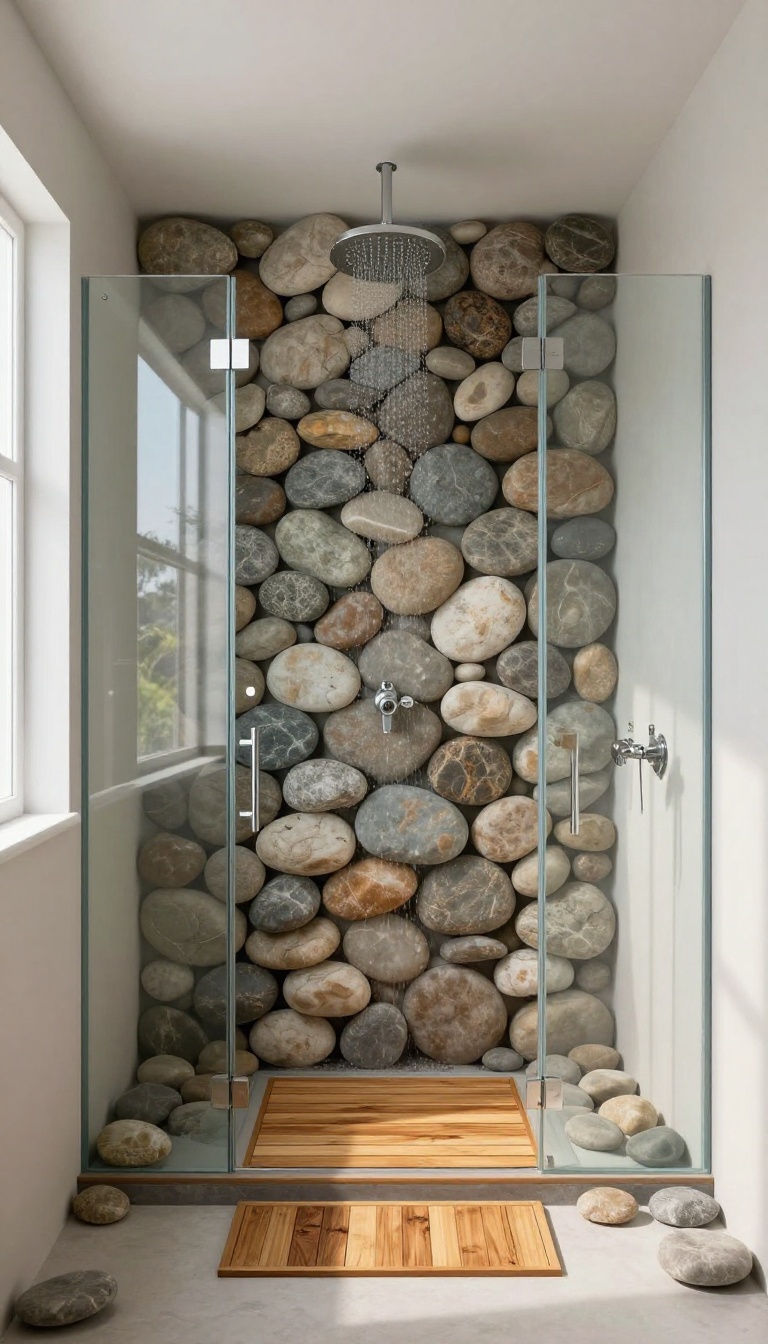
Teak wood and river rock might seem like an odd couple, but they actually work beautifully together. The wood brings warmth and a soft, dry spot to stand on, while the stones add texture and natural drainage. It's a combo that feels both spa-like and grounded, and it's surprisingly easy to maintain.
Mixing river rock with teak wood in the shower floor gives you the best of both worlds: the organic texture of stone and the smooth, warm feel of wood. The teak acts as a natural shower mat, providing a comfortable surface that dries quickly and resists moisture. Meanwhile, the river rock around it handles drainage and adds that earthy, natural vibe.
This pairing is perfect for anyone who wants a shower that feels like a retreat without sacrificing practicality.
Why Teak Works So Well With River Rock
Teak is naturally water-resistant and has a high oil content, which makes it ideal for wet environments. It doesn't warp or rot easily, and it stays cool underfoot even in steamy showers. When paired with river rock, the contrast between the smooth wood and the bumpy stones creates a visually interesting floor that's also comfortable to stand on.
Plus, teak's warm honey color complements the earthy tones of most river rocks, making the whole space feel cohesive and inviting.
How To Lay Out The Combo
One popular approach is to install river rock over the entire shower floor, then place a teak bench or mat on top. This gives you the drainage benefits of the rock while providing a dry, slip-resistant spot to stand. Another option is to create a border of river rock around a central teak platform, which adds structure and defines the shower area.
Whichever layout you choose, make sure the river rock is properly sloped toward the drain so water doesn't pool. The teak can be removable for easy cleaning, or fixed in place with proper waterproofing underneath.
Maintenance Tips For Long-lasting Beauty
Teak is low-maintenance, but it does need some care to keep its color and finish. You can let it gray naturally for a weathered look, or apply a teak sealer to maintain its golden hue. River rock, on the other hand, just needs regular rinsing to prevent soap scum buildup.
A squeegee after each use helps keep both surfaces looking fresh. Once a month, give the teak a quick scrub with a mild soap solution to keep it clean and prevent any mildew. With minimal effort, this combo will look great for years.
11. River Rock Shower Accent Strip
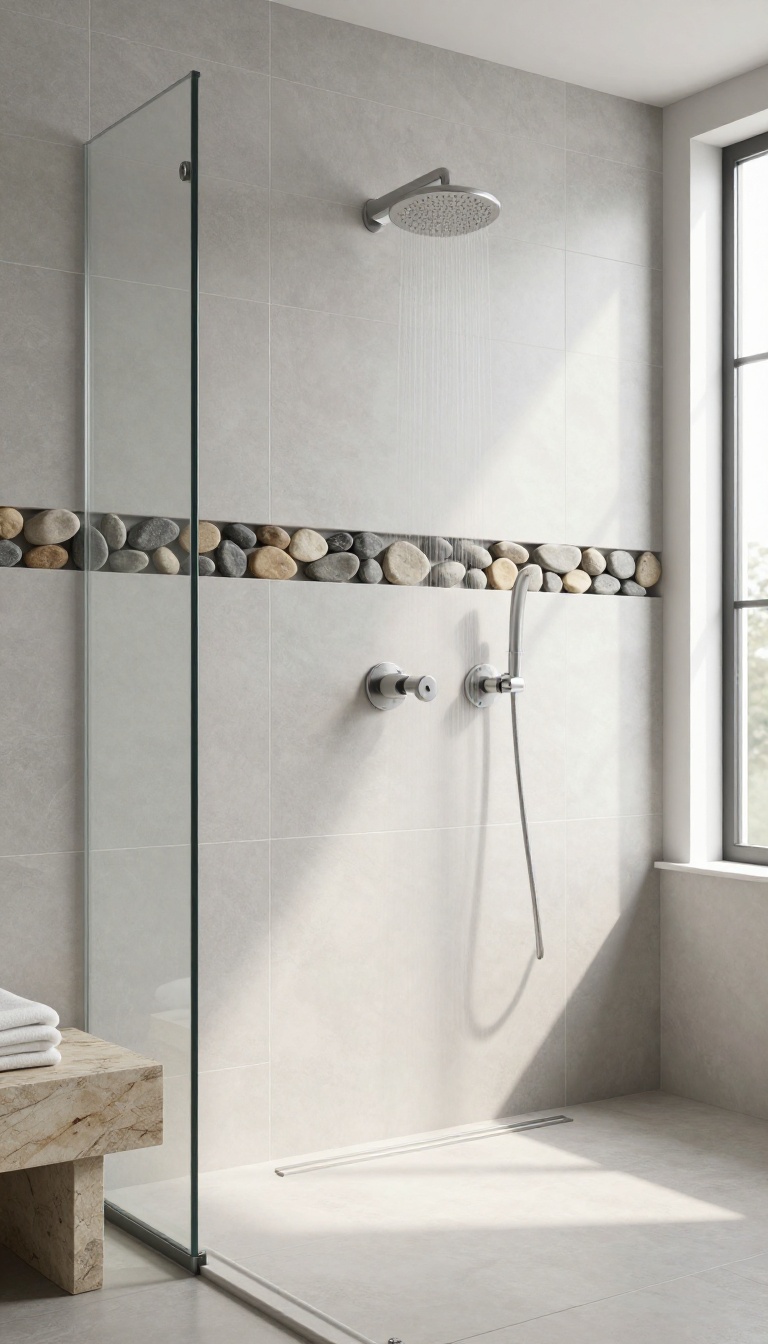
If plain tile walls feel a little flat, a single strip of river rock can change the whole vibe. You don't have to commit to a full rock wall—just a horizontal band across the shower adds texture and breaks up large expanses of tile. It’s a simple design tweak that brings a natural, tactile element without going overboard.
An accent strip works best when it’s placed at eye level or slightly below, so you actually notice it. It can run the full width of the shower or just a section, depending on your style. The contrast between smooth tile and bumpy stones creates a subtle focal point that draws the eye and adds depth.
Placement Tips
Think about where the strip will have the most impact. A common spot is around waist height, but you can also place it higher to catch light or lower near the bench. If you have a niche, you could run the strip right through it for a cohesive look.
Keep it away from corners where it might get overlooked.
Choosing The Right Stones
Pick river rocks that are flat and smooth, not too rounded or bumpy. Flatter stones sit closer to the wall, making cleaning easier and reducing the chance of snagging. Look for stones in shades that complement your tile—grays, tans, or even a mix.
Avoid stones with sharp edges or lots of pits.
Installation And Grout
Install the strip on a waterproof backer board, and use a thin-set mortar that’s suitable for stone. Leave small gaps between stones for grout, and choose a grout color that blends with the rocks or the tile. After the grout dries, seal the stones to protect them from moisture and staining.
This step is key for long-term durability.
FAQ
Are river rocks in the shower hard to clean?
River rocks can be a bit more challenging to clean than smooth tiles, but sealing them properly and using a squeegee after each use helps. A stiff brush and mild cleaner work well for the grout lines.
Do river rock shower floors feel rough on your feet?
Most river rocks are smooth and rounded, so they feel comfortable, almost like a foot massage. Choose smaller, tightly packed stones for a more even surface.
Can I install river rocks myself?
Yes, if you have basic tiling skills. River rock tiles come in mesh-backed sheets, making installation easier. However, for a full shower floor, hiring a pro is often worth it to ensure proper drainage and waterproofing.
How do I prevent mold and mildew on river rocks?
Seal the rocks and grout with a high-quality sealer, and ensure good ventilation in the bathroom. Regularly wipe down the rocks and keep the area dry to prevent buildup.
What type of grout is best for river rock showers?
Use epoxy grout for river rock showers because it’s stain-resistant, durable, and doesn’t need sealing. It also holds up well in wet areas.
Conclusion
River rock showers bring that natural, spa-like feel without sacrificing practicality. Whether you go full pebble flooring or just add a stone accent wall, the key is balancing texture with easy maintenance. Start with one area that feels off—maybe the floor or a niche—and build from there.
Choose rocks with smooth surfaces and seal them well to keep cleaning simple. With the right setup, your shower can look crisp, cohesive, and effortlessly grounded for years.