15 Kitchen Table Wall Decor Ideas for a Warmer Meal Zone
The wall behind your kitchen table is prime real estate. It’s the first thing you see when you sit down for breakfast and the last thing you glance at during dinner. Yet so many of us leave it bare or fill it with random pieces that don’t quite click.
A few thoughtful touches can turn that blank space into a cozy backdrop that makes every meal feel a little more special. The best part?
You don’t need a full renovation or a big budget. These 15 ideas are all about small, weekend-friendly updates that add warmth and personality without overwhelming your space.
1. A Curated Gallery Wall with Personal Photos
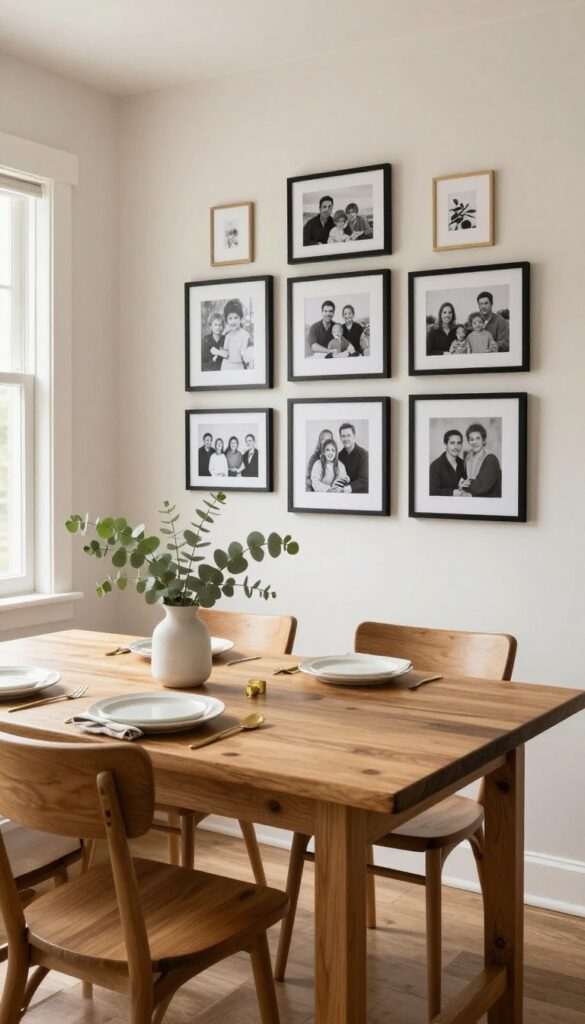
Nothing makes a kitchen table zone feel more like yours than a wall filled with the faces you love. A gallery wall doesn't have to be a huge production—it can come together over a weekend with frames you already own or a quick trip to the store. The key is mixing black-and-white family photos with a few small art prints in matching frames, then letting the arrangement feel loose and organic rather than perfectly symmetrical.
Start by gathering 5 to 7 frames in the same color—black or brass works beautifully—and fill them with a mix of personal photos and simple art prints. Lay the frames out on the floor first to find a layout that feels balanced but not stiff. Once you're happy, transfer the arrangement to the wall using painter's tape as a guide.
The result is a warm, personal focal point that makes dinner feel a little more special without requiring a big budget or a contractor.
Best Frame Colors
- Stick to one consistent frame color to keep the gallery wall cohesive. Black frames give a clean, modern look that works well with any kitchen style. Brass or gold frames add warmth and a touch of elegance, especially in kitchens with wood tones or warm lighting.
- Avoid mixing multiple metal finishes unless you have a very deliberate eclectic style.
Layout Tip
- For a relaxed, organic feel, skip the grid and use a slightly asymmetrical layout. Start with your largest piece slightly off-center, then build outward with smaller frames. Keep about 2 to 3 inches between each frame so the wall doesn't feel crowded.
- Use a level for the first row, then eyeball the rest—perfect symmetry isn't the goal here.
Finishing Touch
Add a small LED picture light above the gallery wall to highlight the photos in the evening. This not only draws the eye but also creates a cozy, intimate glow around the dining area. Choose a warm white bulb (2700K) to keep the light soft and inviting.
2. Oversized Wall Clock with a Natural Finish
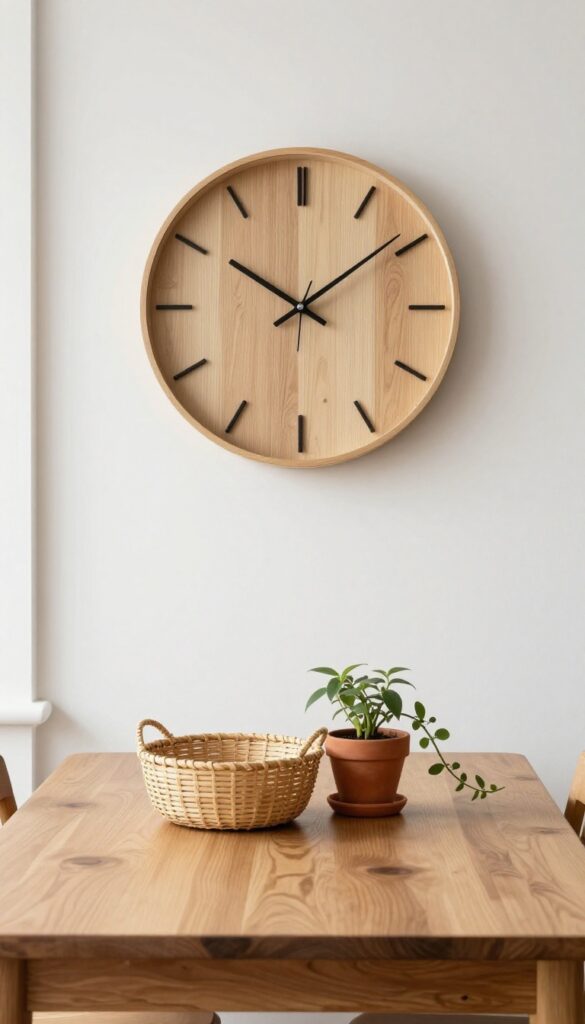
A big wall clock isn't just for telling time—it can be the anchor your kitchen table needs. An oversized clock with a natural wood or rattan finish adds warmth and a sculptural focal point without feeling fussy. It's the kind of piece that makes the whole zone feel intentional and cozy, especially when you keep the rest of the decor simple.
Choose a clock with clean lines and a quiet mechanism so it's both functional and decorative. The natural finish pairs beautifully with warm woods, neutral linens, and greenery. Hang it at eye level or slightly above to draw the eye upward and balance the table's horizontal presence.
Best Colors And Materials
Stick with natural tones like oak, walnut, or rattan for a warm, grounded look. A whitewashed or light wood finish works well in brighter kitchens, while darker woods add contrast against lighter walls. Avoid glossy or overly ornate frames—the goal is understated texture.
Placement And Scale Tip
Hang the clock so its center is about 6 to 12 inches above the tallest point of your table decor (like a vase or candle). For a standard 4-person table, a 24- to 30-inch diameter clock feels substantial without overwhelming the space. In a breakfast nook, a slightly smaller size keeps things cozy.
Finishing Touch
Pair the clock with a simple woven basket or a small trailing plant on the table to echo the natural materials. This creates a cohesive vignette that feels collected rather than staged. A quiet ticking sound (or none at all) keeps the meal zone peaceful.
3. Floating Shelves with Layered Decor
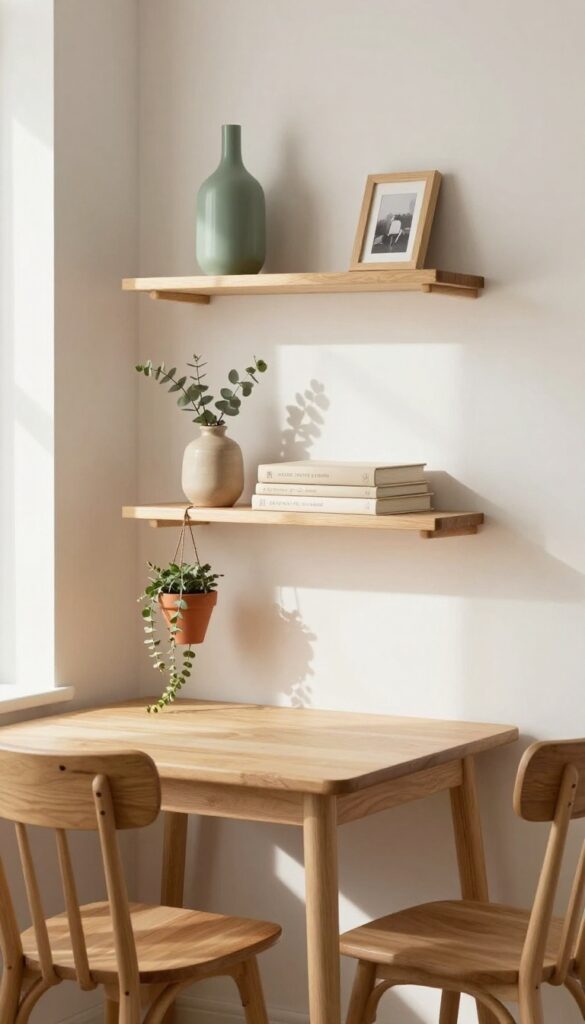
Floating shelves are the ultimate weekend refresh project—simple to install, easy to style, and instantly cozy. By layering a few carefully chosen pieces, you can turn a bare wall into a warm, lived-in focal point without overwhelming the space. The trick is to mix heights, textures, and a restrained palette so the eye moves naturally across the display.
Install two or three narrow shelves at staggered heights to create visual rhythm. Style them with a mix of small plants, ceramic vases, and stackable cookbooks. Keep the color palette neutral to avoid visual clutter.
This setup works beautifully above a small kitchen table or breakfast nook, adding personality without taking up floor space.
Best Colors
Stick to warm whites, soft beiges, and light wood tones for the shelves themselves. For decor items, choose muted greens, terra-cotta, and cream. This keeps the arrangement calm and cohesive, letting the textures do the talking.
Shelf Styling Tip
Vary the heights of your objects: place a tall vase on one shelf, a stack of books on another, and a trailing plant on the top shelf. Add a small framed photo or ceramic bowl for personal touches. Leave some breathing room—negative space is your friend.
Finishing Touch
Tuck a small LED strip light under the bottom shelf to cast a soft glow on the table below. It adds warmth and makes the shelves feel like a built-in feature, especially during evening meals.
4. Single Large Statement Mirror

A round or arched mirror above the kitchen table does double duty: it bounces light around the room and tricks the eye into seeing more space. Leaning it against the wall gives off a relaxed, collected-over-time vibe, while hanging it securely feels more polished and permanent. Either way, it adds a soft, reflective focal point that makes meal zones feel airier and more inviting without adding clutter.
Mirrors are a weekend-refresh dream because they instantly change how a room feels without any construction or paint. A single large mirror above your table acts like an extra window, especially if it catches natural light from nearby windows. Round mirrors soften the hard lines of a rectangular table, while arched ones echo doorway shapes for a classic look.
Lean a floor-length mirror against the wall behind a bench for a casual, layered effect, or hang a framed mirror securely if you have kids or pets. The reflection doubles the visual space, making even a small breakfast nook feel expansive. Stick to simple frames—black, natural wood, or warm brass—to keep the look practical and stylish, not fussy.
Best Placement & Height
Hang the mirror so its center is at eye level when seated—roughly 60 to 65 inches from the floor. If you lean it, angle the top slightly away from the wall so it reflects more of the room. Make sure the mirror is at least two-thirds the width of your table for proper proportion.
Frame Finish & Color Flow
- Match the frame to existing metal or wood tones in your kitchen. Black or dark bronze frames feel modern and grounded. Light wood or whitewashed frames suit farmhouse or Scandinavian kitchens.
- Brass adds warmth and pairs well with warm wood tables. Avoid ornate frames in small spaces—simple profiles keep the look clean.
Safety & Weekend-refresh Tip
For a leaned mirror, use clear rubber bumpers on the bottom corners to prevent slipping. If hanging, use wall anchors rated for the mirror's weight. A weekend refresh idea: swap out your existing wall art for a mirror in one afternoon—no painting, no drilling new holes if you use the same hook placement.
5. Woven Wall Baskets in a Grid Pattern
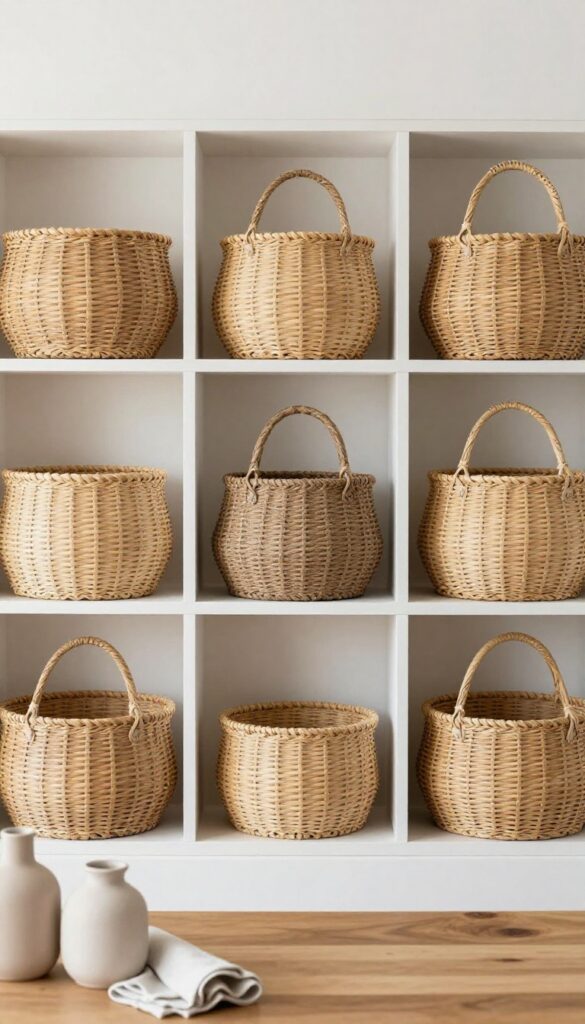
Flat woven baskets bring texture and warmth without adding visual bulk, making them a perfect wall decor choice for a kitchen dining area. Arranged in a neat grid, they create a calm, organized focal point that feels both intentional and relaxed. The natural fibers—seagrass, jute, rattan—add depth and a handcrafted feel that works beautifully in farmhouse or boho spaces.
Plus, this is a weekend-friendly project: gather your baskets, map out the grid on the floor, and hang them in under an hour.
A grid of woven baskets turns a blank wall into a curated display that feels collected over time. The key is to choose baskets with slightly different weaves and tones so the arrangement feels cohesive but not monotonous. Start with a central basket and work outward, spacing each basket evenly—about 2 to 3 inches apart works well.
For a polished look, use lightweight baskets and secure them with adhesive hooks or small nails. This idea also doubles as subtle sound absorption, which is a nice bonus in an open-plan kitchen.
Best Materials And Tones
- Stick with natural fibers like seagrass, jute, rattan, or bamboo. These materials have a matte finish that doesn't compete with other textures in the room. Vary the tones from pale wheat to deep honey to add subtle contrast.
- Avoid baskets with bold patterns or painted finishes—the beauty here is in the organic, neutral palette.
Layout Tip
- A 3×3 grid works for a standard wall, but you can adjust based on your space. For a narrower wall, try a 2×3 or even a 2×2 arrangement. Before hanging, lay the baskets on the floor in the desired pattern to test spacing and balance.
- Use a level and pencil marks to keep the rows straight.
Finishing Touch
Add a single small dried floral bundle or a sprig of eucalyptus tucked into the weave of one or two baskets. This softens the geometric look and ties the wall decor to the kitchen's natural vibe. Keep it minimal—just a hint of greenery to break up the texture.
6. Chalkboard or Whiteboard for Daily Menus
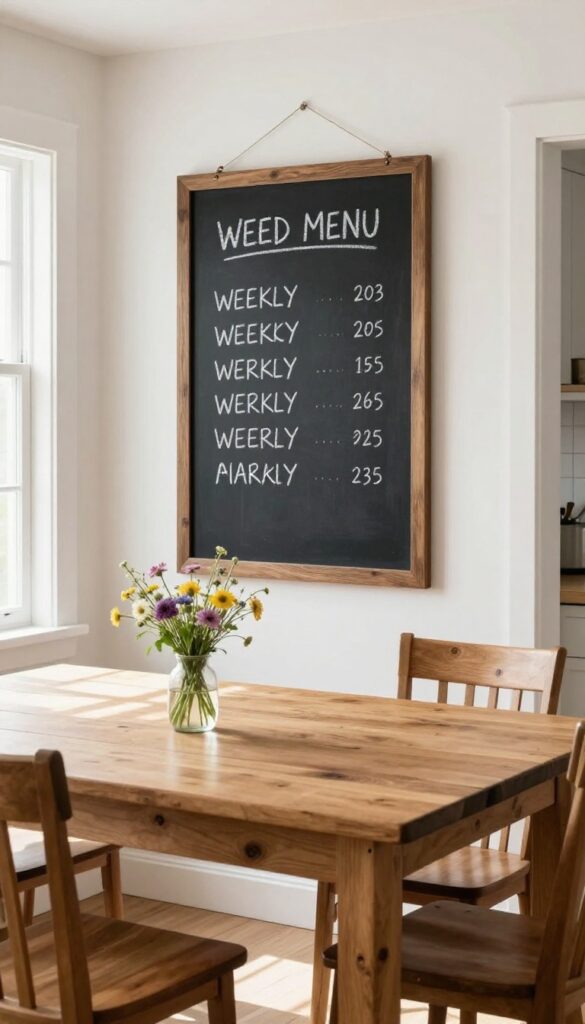
A framed chalkboard or whiteboard above the kitchen table does double duty: it’s a stylish decor piece and a handy spot to jot down the day’s menu, a weekly meal plan, or a fun quote. Choose a slim frame that matches your table or chair finish—black or dark wood for a farmhouse vibe, white or metallic for a modern look. This idea adds a personal, lived-in feel that changes as often as you like, making your meal zone feel both practical and warm.
Placing a chalkboard or whiteboard above your kitchen table turns a blank wall into a functional focal point. It’s perfect for busy families who want to keep meal plans visible, or for anyone who loves a little handwritten charm. The key is keeping it neat—use a quality board that erases cleanly, and frame it to blend with your decor.
You can swap out the message weekly or daily, so it always feels fresh. Plus, it’s a weekend-friendly project: just hang, write, and enjoy.
Best Colors And Frame Styles
- For a cohesive look, match the frame to your table or chairs. A dark walnut frame pairs nicely with warm wood tones, while a sleek white or silver frame suits modern kitchens. If your table is painted, consider a frame in the same color family.
- The board itself can be classic black or a softer gray—both work well with chalk markers for clean, smudge-free writing. Whiteboards come in white or light gray; choose a magnetic version to pin photos or notes.
Layout And Placement Tip
- Hang the board at eye level, centered above the table or slightly offset if you have a long bench. Leave at least 6 inches of space between the top of the board and the table surface to avoid crowding. If your wall is narrow, a vertical orientation saves space.
- For a wider wall, a horizontal board can anchor the whole dining area. Keep a small tray of chalk or markers nearby—mounted on the frame or on a nearby shelf—so you can update it effortlessly.
Finishing Touch For A Lived-in Feel
- Add a small basket of seasonal chalk or a few magnetic clips to hold recipe cards. You can also frame the board with a thin ledge for a mini herb pot or a tiny vase of flowers. This little detail makes the board feel intentional rather than just utilitarian.
- Change the message to match the season—like a cozy fall menu or a bright summer quote—and your kitchen table zone will always feel current and inviting.
7. Vertical Herb Garden in Small Pots
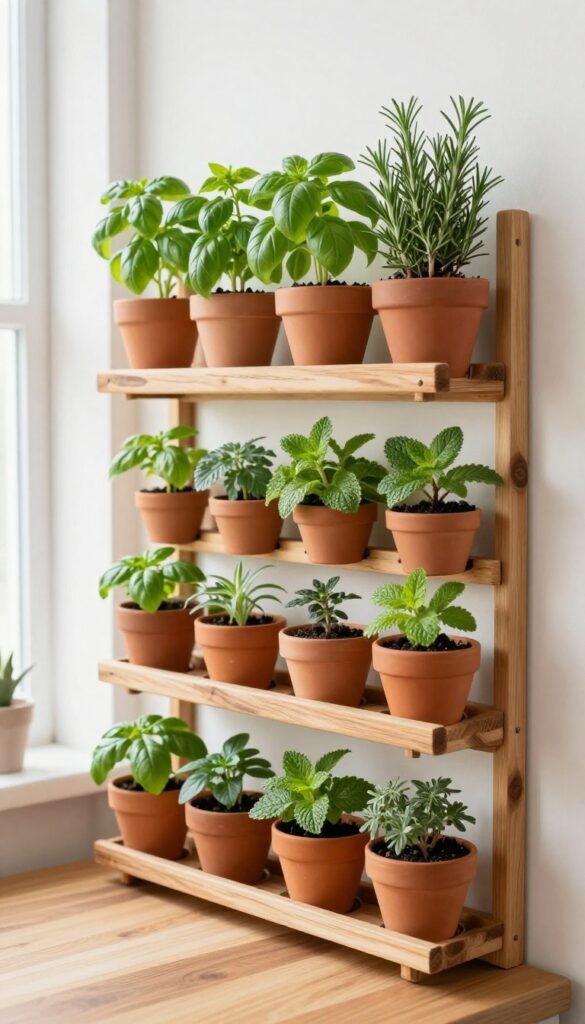
Bringing fresh herbs into your kitchen is one thing, but keeping them within arm's reach while you cook? That's a game changer. A vertical herb garden mounted beside or above the kitchen table turns an empty wall into a living, breathing decor piece.
Small pots of basil, mint, and rosemary add soft greenery and a subtle fragrance that makes the whole zone feel more inviting. The best part? It's a weekend project that instantly upgrades your space without a major renovation.
Mount a few small planters on a wooden board or a metal rail. Fill them with herbs like basil, mint, or rosemary. They'll add greenery and be within arm's reach for cooking.
Best Materials
Go with a reclaimed wood board for a rustic feel or a sleek metal rail for a modern touch. Terracotta pots keep things earthy, while white ceramic pots feel fresh and clean. If your kitchen leans industrial, try black metal planters with a matching rail.
Layout Tip
Arrange the pots in a staggered pattern rather than a straight line. This creates visual interest and gives each plant room to grow. Place the most-used herbs like basil and mint at the center for easy grabbing.
Small-space Fix
Short on wall space? Use a narrow wooden ladder or a hanging shoe organizer repurposed as a vertical planter. Both options keep the herbs visible and accessible without taking up counter or floor space.
8. Macramé Wall Hanging with Neutral Tones
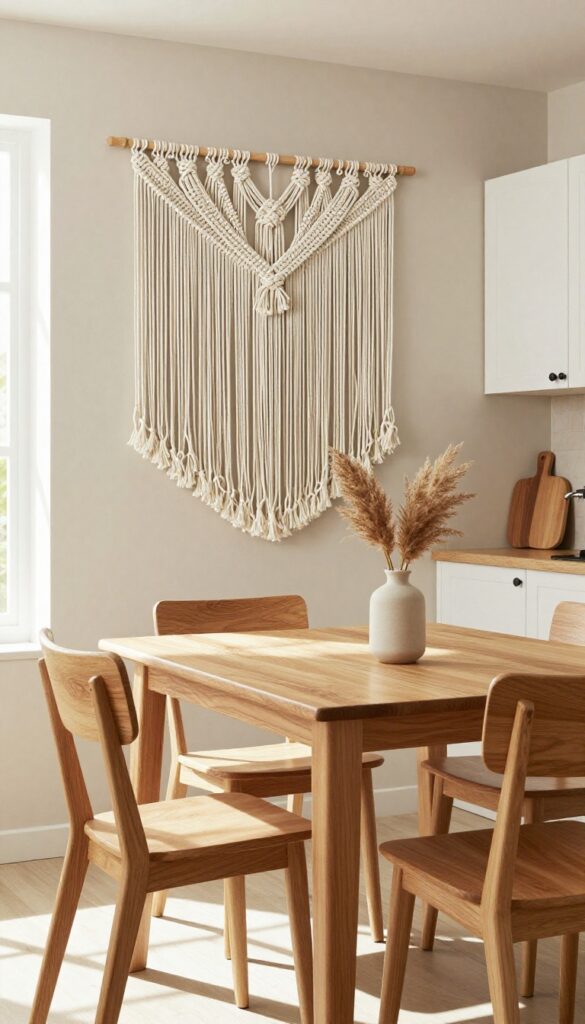
Soft textures and neutral colors can turn a blank wall into a cozy focal point, and macramé does exactly that without overwhelming the space. A cream or beige wall hanging brings boho charm to your kitchen table area, adding warmth and visual interest without taking up any floor space. It’s an easy weekend project to install—just a nail or hook—and the relaxed, slightly off-center placement keeps the look casual and inviting.
A macramé wall hanging is a simple way to introduce texture and a handmade feel to your dining zone. The natural cotton cords in soft, neutral shades blend seamlessly with most kitchen color schemes, from white cabinets to warm wood tones. Because it hangs flat against the wall, it won't interfere with table placement or daily meals.
Choose a piece with simple knots or fringe for a clean look, or go for a more intricate pattern if you want a statement piece. The key is keeping the tones muted so the hanging complements rather than competes with your table setting.
Placement Tip
Hang the macramé slightly off-center above the table—about 6 to 12 inches from the center line. This creates a relaxed, asymmetrical balance that feels modern and unstudied. Make sure the bottom of the hanging sits at least 12 inches above the table surface so it doesn’t interfere with serving dishes or centerpieces.
Color And Texture Pairing
Stick to cream, beige, or light gray tones to keep the airy feel. Pair the macramé with wooden or ceramic tableware to echo the natural vibe. If your kitchen has warm undertones, a slightly warmer beige works best; for cooler kitchens, a soft ivory or grayish cream blends nicely.
Maintenance Note
Macramé can collect dust over time. Give it a gentle shake outdoors every few weeks, or use a handheld vacuum with a brush attachment on low suction. Avoid hanging it near a stove or fryer where grease might settle—keep it at least 3 feet away from cooking surfaces.
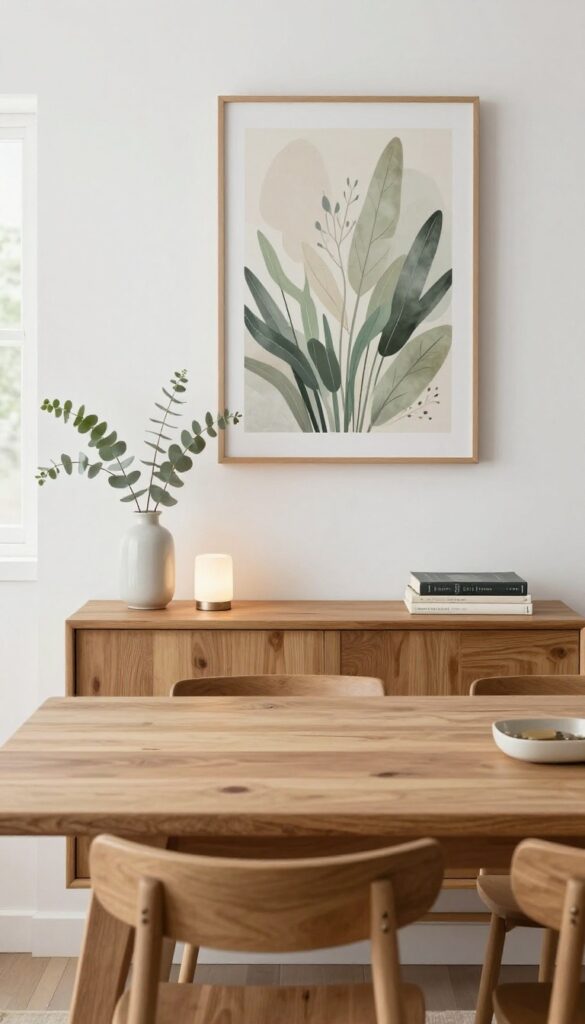
9. Set of Three Framed Botanical Prints
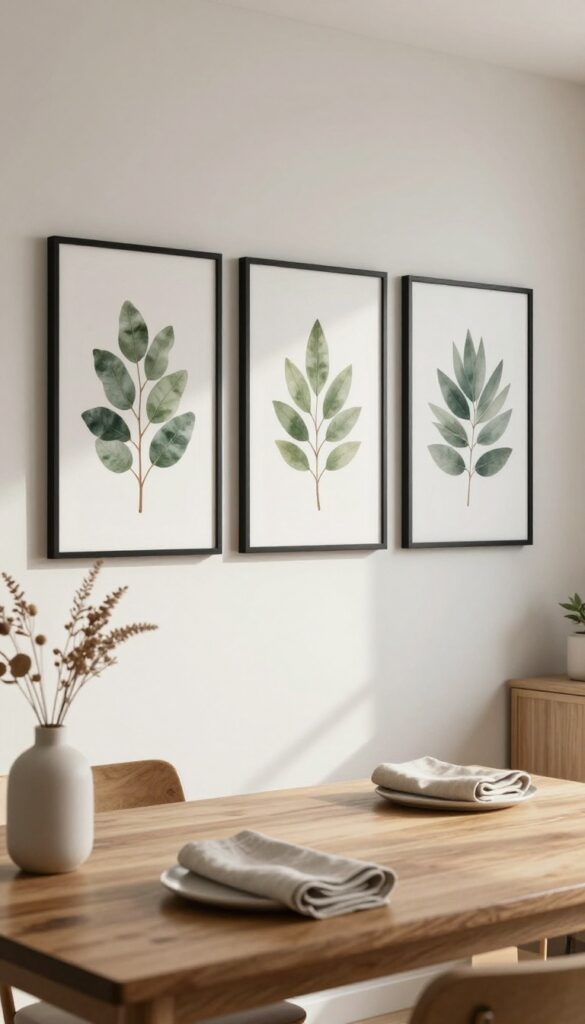
Botanical prints bring a quiet, organic feel to a kitchen table wall without trying too hard. The soft greens and creamy whites blend into almost any color scheme, making this an easy weekend refresh. Grouping three prints in a vertical line draws the eye up, which makes the dining zone feel taller and more intentional.
This idea works because it’s simple to pull together and instantly calming. Pick prints that share a similar muted palette—sage, olive, or eucalyptus greens paired with off-white backgrounds. Frame them in slim wood or matte black frames for a clean, unfussy look.
Hang them evenly spaced along one side of the table wall, about six to eight inches apart. The vertical arrangement creates a subtle anchor without overpowering the table. For a cohesive feel, choose prints with similar botanical subjects, like different leaf varieties or wildflower stems.
This setup works especially well in kitchens where you want a touch of nature but don’t have counter space for live plants. It also pairs nicely with a simple wooden table and neutral linens.
Best Colors
- Stick with muted greens—think sage, olive, or eucalyptus—and soft whites or cream backgrounds. Avoid bright, saturated greens because they can feel too energetic for a relaxed dining zone. If your kitchen leans warm, choose prints with a hint of warm taupe in the background.
- For cooler kitchens, go with prints that have a faint blue undertone in the greens.
Layout Tip
Hang the prints in a vertical line centered over the table or slightly off-center if you have a sideboard or window. Use a level and measure the spacing carefully—six to eight inches between frames keeps the arrangement tight and intentional. If your table is against the wall, hang the lowest print about six inches above the tallest item on the table, like a vase or candle holder.
Budget-Friendly Swap
Skip expensive art and print free botanical illustrations from sites like the Biodiversity Heritage Library or use vintage seed catalog images. Use standard 8×10 or 11×14 frames from a discount store—just make sure they match in style and finish. You can also swap the prints seasonally by printing new images and swapping them into the same frames.
10. Rustic Wooden Sign with a Warm Message
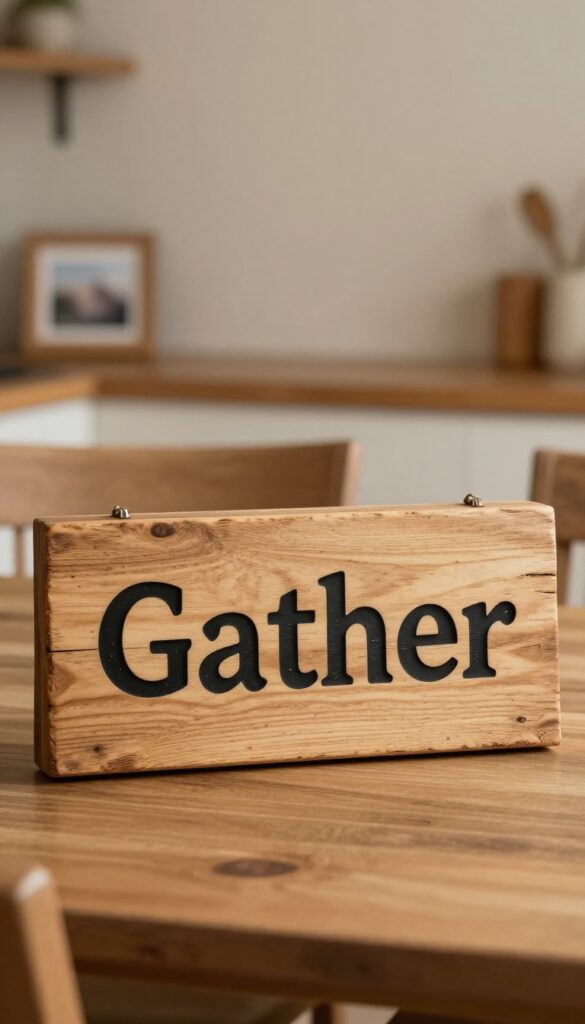
A reclaimed wood sign with a short phrase like “Gather” or “Eat Well” adds rustic charm. Keep the lettering simple and the wood finish natural. It’s an easy way to introduce warmth without overwhelming your table zone.
A wooden sign is a subtle anchor for your kitchen table wall. It doesn’t scream for attention but quietly sets the mood. The natural grain and slightly weathered look bring texture that balances modern or farmhouse styles.
Plus, swapping out the sign seasonally is a quick weekend refresh.
Best Colors And Finishes
Stick with warm wood tones like oak, walnut, or salvaged barn wood. White or cream lettering keeps it soft, while black ink adds contrast. Avoid glossy finishes—matte or satin feels more authentic and less distracting.
Placement And Scale
Hang the sign at eye level, about 6 to 12 inches above the table. For a standard 4-person table, a sign around 24 inches wide works well. If your wall is narrow, go vertical with a taller sign to draw the eye up.
Finishing Touch
Pair the sign with a small shelf or a single framed photo to avoid clutter. Add a warm-toned sconce above for soft lighting that highlights the wood grain. This combo makes the wall feel intentional without being busy.
11. Plate Wall Display with Vintage Finds
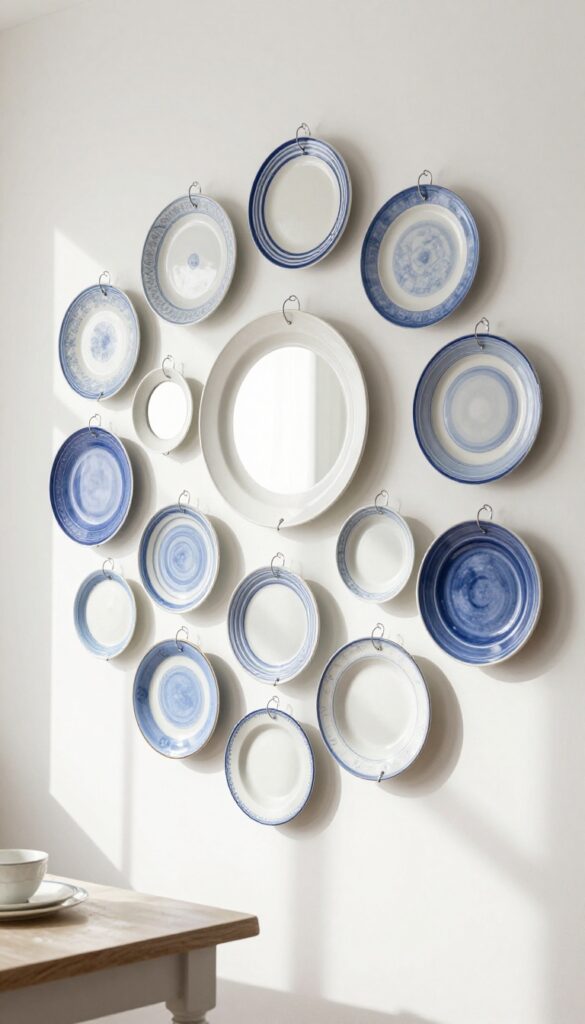
A plate wall display is one of those ideas that feels both personal and intentional without requiring a big investment. By mixing vintage or mismatched plates in a unified color scheme, you create a focal point that draws the eye and adds texture to your kitchen table area. The best part?
You can swap plates out whenever you find a new treasure at a flea market or thrift store, keeping the look fresh and evolving.
Start by selecting plates in a cohesive palette—blues and whites are a classic choice that feels timeless and calming. Arrange them in a circular or organic cluster on the wall above your kitchen table. Use plate hangers (the wire kind that grip the rim) so you can easily change plates without damaging them.
Leave a few inches between each plate to let the wall breathe, and consider mixing in a small mirror or a round wooden sign for added visual interest.
Best Colors
Stick to two or three colors that complement your existing kitchen palette. Blue and white works beautifully with farmhouse or coastal styles, while earthy tones like sage green and cream suit a more rustic look. If your kitchen leans modern, try black and white plates for a graphic, bold statement.
Layout Tip
- Before hammering nails, lay the plates on the floor in your desired arrangement. Snap a photo to reference later. Start with the largest plate in the center and build outward with smaller ones.
- Keep the overall shape organic—think a loose oval or circle—to avoid a stiff, gallery-like feel.
Budget-Friendly Swap
You don't need expensive antique plates. Thrift stores, garage sales, and even discount home stores often have unique plates for a few dollars each. Mix in a couple of new plates from a big-box store if needed—just keep the finish (matte or glossy) similar for cohesion.
12. Slim Console Table with Art Above
A slim console table is one of those pieces that does a lot without taking up much space. It leans against the wall, gives you a surface for a few curated objects, and creates a natural spot for art. The whole setup feels intentional but not fussy, and it instantly warms up the area around your kitchen table.
This is a weekend-friendly project because you probably already have a table or can find one easily. The key is keeping it narrow so it doesn't crowd the room.
Place a narrow console table against the wall behind or beside your kitchen table. Top it with a small lamp for soft glow, a stack of books for height and color, and a simple vase with greenery or dried flowers. Hang a piece of art—a print, a painting, or even a framed fabric swatch—directly above.
The combination creates a mini vignette that frames the table area and makes the whole zone feel more like a designed dining spot. Stick to a cohesive color palette: if your table is wood, choose a console in a similar tone or go for a contrasting white or black. Keep the lamp low so it doesn't block the art, and vary the heights of your objects for visual interest.
This works especially well in open-plan kitchens where the table is visible from other rooms.
Styling The Tabletop
- Aim for three to five items in odd numbers. A lamp on one side, a stack of two or three books in the center, and a small vase on the other side. The books add height and a personal touch, while the lamp brings warmth during evening meals.
- Keep the vase low enough that it doesn't block the art, and choose a neutral or muted color for the lamp shade to avoid visual clutter.
Choosing The Art
- Pick one piece that's large enough to anchor the wall—at least half the width of the console table. A landscape or abstract works well. Frame it in a simple wood or black frame that echoes the table's finish.
- If you're on a budget, a canvas print or a DIY fabric stretched over a frame looks polished. Hang it so the bottom edge is about 6 to 8 inches above the tabletop.
Placement And Scale
- The console should be about the same length as your kitchen table or slightly shorter. Leave at least 18 inches of walking space between the console and the table. If your table is against a wall, the console can go on an adjacent wall to create an L-shaped arrangement.
- This works best in larger kitchens or dining areas where there's enough floor space for the extra piece.
13. Tapestry or Fabric Wall Hanging
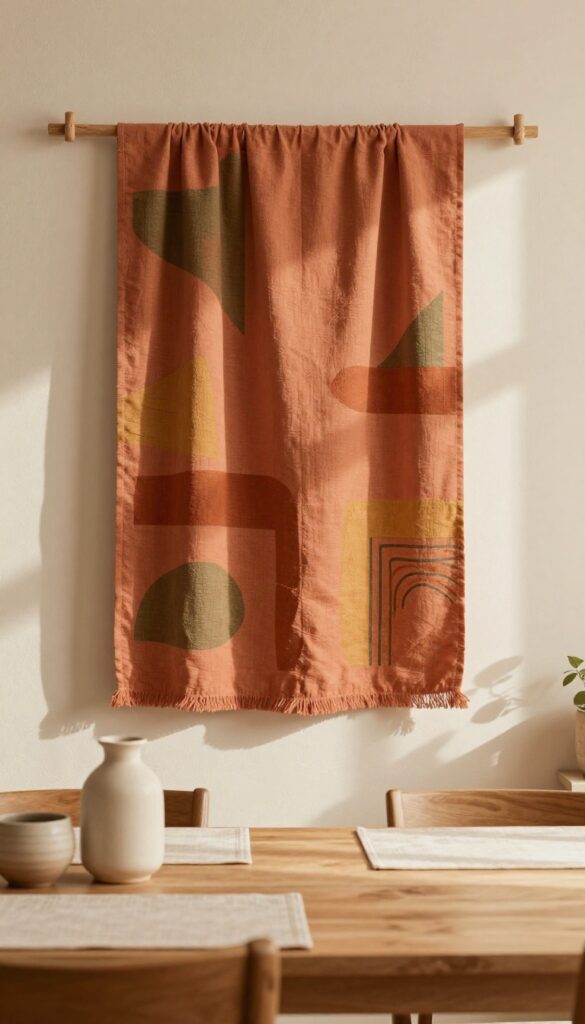
A tapestry or fabric wall hanging brings a soft, artistic touch to your kitchen table area without the permanence of nails or frames. Lightweight and easy to swap out, it’s perfect for renters or anyone who likes to refresh their space seasonally. Choose earthy tones or abstract patterns to add warmth and texture without overwhelming the room.
Drape a woven or printed fabric over a wooden dowel or a simple curtain rod for an instant focal point. The fabric softens hard kitchen surfaces like tile or wood and introduces a layer of coziness. This works especially well in eat-in kitchens or breakfast nooks where you want a relaxed, lived-in feel.
Go for natural fibers like cotton, linen, or wool for a tactile finish that also absorbs sound.
Best Colors And Patterns
Stick with earthy tones—terracotta, olive, mustard, or warm beige—to keep the look grounded. Abstract geometric or botanical prints add visual interest without competing with the table setting. If your kitchen leans neutral, a tapestry with a subtle stripe or diamond pattern can tie the room together.
Hanging And Styling Tips
- Use a wooden dowel or a tension rod that fits inside the fabric’s sleeve or clip rings. Hang it so the bottom sits just above the table surface—about 6 to 12 inches above the tabletop. For a no-nail solution, use removable adhesive hooks on the wall or ceiling.
- Pair with a small pendant light or a single sconce to highlight the fabric’s texture.
Small-space Fix
In a compact kitchen, choose a narrow vertical tapestry that draws the eye upward, making the ceiling feel higher. A lightweight fabric also works well in a corner nook where a bulky frame might feel cramped. Rotate it with the seasons—a linen piece in summer, a thicker wool in winter—for an easy weekend update.
14. Wall-Mounted Wine Rack with Glass Holders
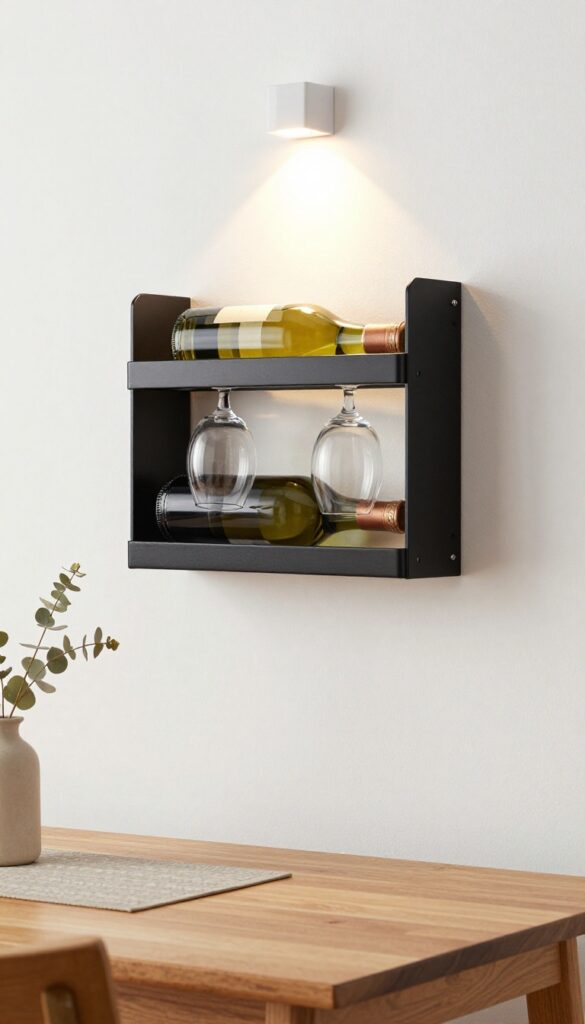
A slim wine rack that holds a few bottles and stemware adds function and style. Install it at eye level so it’s easy to reach during meals. It’s perfect for small spaces that double as dining and entertaining zones.
This idea brings a touch of wine-bar charm to your kitchen table area without taking up precious counter or floor space. The rack keeps bottles organized and glasses upside down, so they stay dust-free. Plus, it turns a blank wall into a conversation starter.
Choose a design that matches your kitchen’s finish—black metal for industrial, wood for rustic, or brass for a hint of glam. Even if you’re not a big wine drinker, use it to display fancy olive oils, vinegar bottles, or even small vases. The key is to keep it curated, not cluttered.
A couple of bottles and matching glasses are all you need for that effortless, weekend-ready look.
Best Materials
Go with metal or wood to complement your existing hardware and furniture. Wrought iron or matte black steel feels modern and sturdy, while reclaimed wood adds warmth. If your kitchen leans traditional, opt for a dark stained wood with bronze accents.
Layout Tip
Install the rack about 12 to 18 inches above the table surface so glasses hang safely above head level but are still within easy reach. Center it over the table or offset it slightly if you have a nearby buffet or bar cart.
Finishing Touch
Add a small LED puck light above the rack to highlight the bottles and glasses. The soft glow creates a cozy evening ambiance and makes the display feel intentional. Use a warm white bulb for a relaxed, dinner-party vibe.
15. DIY Photo Ledges for Easy Rotation

Photo ledges are one of those ideas that look custom but take an afternoon to install. A couple of narrow shelves above your kitchen table give you a dedicated spot to swap out frames, postcards, or small art whenever the mood strikes. The clean lines of the ledges themselves add a subtle architectural detail that keeps the wall from feeling flat, while the rotating display keeps the space feeling fresh without a full redo.
Start with two or three ledges spaced a few inches apart to create a mini gallery that feels intentional but not fussy. Paint them the same color as your trim for a built-in look, or go with a natural wood tone to warm up a white kitchen. The real win is how easy it is to change the vibe—tuck in a new postcard from your last trip, swap a photo for a seasonal print, or lean a small cutting board for texture.
Because the ledges are narrow, they work even in tight spots without overwhelming the table area. Keep the arrangement loose and layered, mixing frame sizes and leaning some pieces against the wall for a relaxed feel.
Best Placement And Height
Hang the ledges so the bottom one sits about 6 to 8 inches above the tallest item on your table—vases, candle holders, or a centerpiece. This leaves enough breathing room so the display feels connected to the table without crowding it. If your ceiling is standard height, two ledges are plenty; three can work if you have a taller wall or want to fill a larger empty area.
Styling For Easy Rotation
- Stick with a mix of frames in similar finishes—black, white, or natural wood—so the overall look stays cohesive even as the contents change. Lean a few pieces and prop others upright. Add a small plant or a ceramic object on one ledge to break up the frames.
- When you want a refresh, just swap out the art and move one or two pieces around. It takes five minutes but feels like a whole new wall.
Budget-friendly Swap Tip
- Skip expensive custom framing and use affordable clip frames or simple mats. Print new art at home or cut pages from a calendar. Postcards from museums or local shops are another easy, cheap way to keep the rotation going without spending much.
- The ledges do the heavy lifting visually, so the art itself can be simple.
FAQ
How high should I hang wall decor above a kitchen table?
Aim for 6 to 12 inches above the tabletop. If you have a low ceiling, go closer to 6 inches. For taller ceilings, 12 inches works well.
The decor should feel connected to the table, not floating away.
What size wall art works best above a kitchen table?
The art should be about two-thirds the width of the table. For a standard 4-foot table, a piece around 32 inches wide is a good fit. If using a gallery wall, map out the arrangement on the floor first to get the scale right.
Can I mix different decor styles on one wall?
Yes, but keep a common thread like color, frame material, or subject matter. For example, mix a modern mirror with rustic baskets if both have warm wood tones. Too many contrasting styles can feel chaotic.
What’s the easiest weekend project for a kitchen table wall?
Installing a floating shelf is one of the quickest updates. You can style it with items you already own, like a small plant and a ceramic dish. It takes about 30 minutes and instantly adds dimension.
How do I keep the wall decor from feeling cluttered?
Stick to a limited color palette and leave some negative space. If you have multiple pieces, arrange them with at least 2 inches of breathing room between each. Less is often more when it comes to wall decor above a dining area.
Conclusion
Updating the wall behind your kitchen table doesn’t have to be a big production. Even one small change—like adding a mirror or swapping out a photo—can shift the whole mood of the room. The goal is to create a backdrop that feels welcoming and personal, not perfect.
Pick one idea that speaks to you and give it a try this weekend. You might be surprised how much a little wall love can warm up your meal zone.